
First published on TechNet on Dec 14, 2014
Hi folks, Lakshman Hariharan and Martin Solis here with a post on how to secure domain controller to domain controller communications using Windows Firewall with Advanced Security (WFAS) Connection Security Rules. Be forewarned that this is a long post, much of it taken up by screenshots.
A common example of an implementation is the securing of communications between domain controllers deployed in the perimeter network (DMZ) and the secure network. Firstly, why do we even need to secure communications between domain controllers using IPsec? One of the most common scenarios is when an organization deploys Read Only Domain Controllers (RODCs) in the DMZ segment of a network. This means that the domain controllers in the DMZ segment have to communicate with other domain controllers in the secure network segment(s), and therein lies our problem (if one were to call it that). Active Directory and DFS replication use a Remote Procedure Call (RPC) and RPC uses dynamic ports in the range of 49152-65535 in up-level (read Windows Server 2008 and above). Which means that to facilitate communications between the two domain controllers separated by firewalls a whole range of ports must be opened between these domain controllers by “swiss-cheesing” or poking metaphoric holes through the firewall.
Some firewalls are RPC aware and can dynamically open the required ports based on the different UUIDs being presented but many are not, and even with RPC aware firewalls many organizations’ network teams are understandably wary of doing so for reasons of network security and the cumbersome nature of maintaining such a setup.
Explanation of the concepts of RPC are beyond the scope of this post. Refer to this post for a good understanding of RPC concepts such as UUIDs, OpNums and such.
This is where using IPsec to encapsulate all communications between the domain controllers comes handy so instead of opening a whole range of ports only two UDP ports for ISAKMP (500 and 501) and one IP protocol for GRE (protocol 47) need to be allowed through the firewall.
Now that we have described why one may want to use IPsec to secure communications between domain controllers let’s move on to discussing the “how”. The rest of the post is intended as a step by step to walk through securing communications between two domain controllers using IPsec and optionally*, if desired encrypt such communications.
Following is the setup used for this demo that includes two domain controllers, one Windows client and one member server. The following table summarizes the roles, IP addresses and operating system running on these machines.
|
Machine Name |
Machine Role |
Operating System |
IP Address |
|
Contoso2012R2DC1 |
Domain Controller |
Windows Server 2012 R2 |
10.0.0.1 |
|
Contoso2102R2DC2 |
Domain Controller |
Windows Server 2012 R2 |
10.0.0.2 |
|
APP1 |
Application Server |
Windows Server 2102 R2 |
10.0.03 |
|
ContosoWin81 |
Windows Client |
Windows 8.1 Enterprise |
10.0.0.4 |
To perform this we will use six big steps sense that are further broken down into detailed individual steps. These six steps are:
1. Create a Group Policy Object
2. Create the Connection Security Rules
3. Create IPsec exclusions for DNS, ICMP and DHCP (optional) traffic since it is better to exclude name resolution, DHCP and ICMP traffic from IPsec.
4. Link the group policy object to the appropriate OU
5. Verify Communications are successfully secured.
6. Optionally encrypt the data being secured.*
Step 1: Create the group policy object
1. Logon to the domain controller and launch Group Policy Management Console (GPMC)
2. Create a new Group Policy Object (GPO) and name it DC to DC IPSec using WFAS
Step 2: Create the Connection Security Rules to Request Inbound and Outbound Security
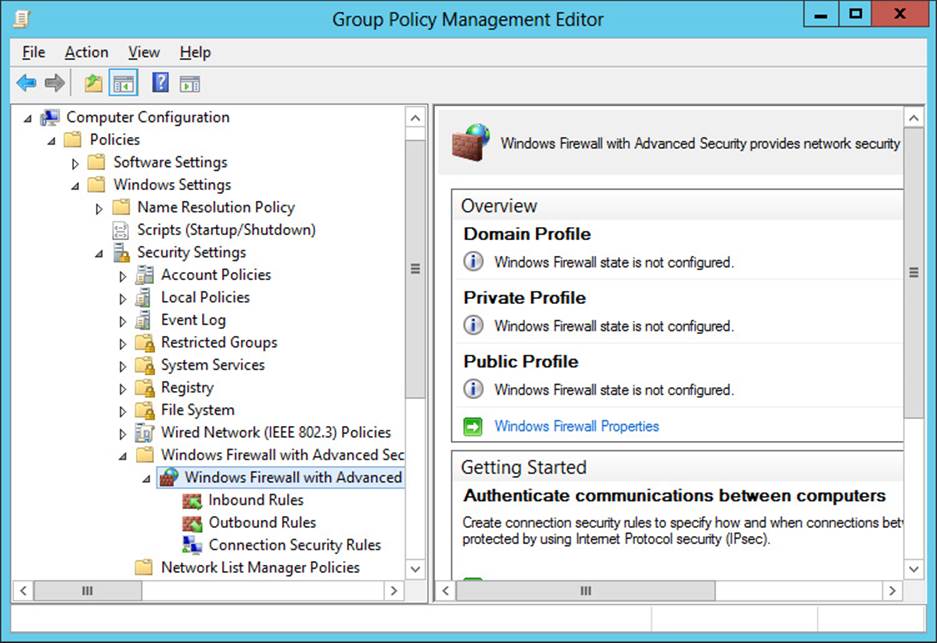
1. Edit the GPO created in previous step by navigating to Computer Configuration –> Policies –> Windows Settings –> Security Settings –> Windows Firewall With Advanced Security
2. Under Windows Firewall with Advanced Security select Connection Security Rules
3. Right click on Connection Security Rules and select New Rule
4. In the Rule Type screen select Server to Server and click Next
5. In the Endpoints screen select These IP Addresses under Which Computers are in Endpoint 1, select These IP Addresses and click Add
6. Under This IP address or subnet enter the IP addresses of the first domain controller and click OK
7. In the Endpoints screen select These IP Addresses under Which Computers are in Endpoint 2, select These IP Addresses and click Add.
8. Under This IP address or subnet enter the IP address of the second domain controller and click OK
Verify the IP addresses entered are accurate and click Next . Note that in any production scenario the Connection Security Rules created will most likely span subnets instead of individual IP addresses as demonstrated in this document. The subnets can be specified instead of actual IP addresses as described in the Examples of the screenshot above.
9. On the Requirements screen select Request authentication for inbound and outbound connections and click Next
10. On the Authentication Method screen select Computer certificate**, select the appropriate Certification Authority and click Next . Note that both endpoints must trust the same Certification Authority.
11. On the Profile screen select Domain, Private and Public and click Next
12. On the Name screen give the Connection Security Rule an appropriate name and click Finish
13. Locate the Connection Security Rule created in the previous steps, right click and click Copy and then Paste to make a copy of the rule, as shown in the following two screenshots.
14. Right click on one of the rules and click Properties and then select the Remote Computers tab
15. Select each of the IP address under Endpoint 1 and Endpoint 2 and click Edit
16. Reverse the IP address ranges or addresses as shown and click Ok, so connections initiated from either endpoint are secured via IPsec
Step 3 Create IPSec Exclusions for, DNS, ICMP and DHCP*** Traffic
1. Open Group Policy Management Console (GPMC), navigate to the policy created in Step 2, right click on it and Click Edit
2. Navigate to Computer Configuration –> Policies –> Windows Settings –> Security Settings –> Windows Firewall With Advanced Security –> Connection Security Rules
3. Right click Connection Security Rules and click New Rule
4. On the Rule Type screen select Custom and click Next
5. On the Endpoints screen select These IP Addresses and enter the IP addresses for Endpoint 1 and Endpoint 2.
6. On the Requirements screen select Do not authenticate and click Next
7. On the Protocols and Ports screen Enter and/or select the following and click Next
Protocol Type: UDP
Endpoint 1 port: Specific Ports
Port number: 53
Endpoint 2 port: All Ports
8. On the Profile screen make sure Domain, Private and Public are selected under When does this rule apply? And click Next
9. On the Name screen type UDP 53 Exclusion for the Name and click Finish
10. Right click on the UDP 53 Exclusion rule created in the previous step and select Copy and then Paste as shown in the following three screenshots.
11. Right click on one of the two UDP 53 Exclusion rules, click on Properties and select the Remote Computers tab
12. Under Endpoint 1 and Endpoint 2 reverse the IP addresses for connections initiated from the other endpoint and click Ok
13. Repeat steps 1 through 9 to create an exemption for port TCP 53
14. Repeat steps 10 through 12 to clone the rule for TCP port 53 connections initiated from the other endpoint.
15. Repeat steps 1 through 9 to create an exclusion for ICMP. While creating the rule choose the following in the Protocols and Ports screen
16. If the domain controllers are running DHCP then create an exclusion for UDP ports 67 as outlined in steps 1 through 9.
Step 4 Link the Group Policy Object to the appropriate Organizational Units (OU)
1. Open Group Policy Management Console (GPMC), right click on the Domain Controllers OU and click Link and Existing GPO…
2. Select the GPO created in Step 2, in our case DC to DC IPSec using WFAS and click OK
3. Force group policy update on the domain controllers by executing the gpudate /force command
Step 5 Verify Communications are secure and successful
1. Capture a network trace when initiating communications between the two domain controllers whose communications have been secured using IPSec. This can be done several different ways. An easy way is to, say open the Event Viewer or the Services console and connect to the other domain controller. Or one could open a file share on the other domain controller from the first one.
2. Open the network trace in Microsoft Message Analyzer or Network Monitor 3.4. The screenshot below is using Network Monitor 3.4
3. Apply a display filter to only display traffic between the two domain controllers. In this case a display filter of ipv4.Address==10.0.0.2 has been applied, as seen in the screenshot below
4. Select any frame in the Frame Summary pane and observe the details in the Frame Details pane
5. Upon further inspecting each frame in the Frame Details pane one will observe that every frame has an additional ESP header indicating that the frame is encapsulated in ESP.
6. Spot check and inspect as many frames as possible to ensure that they contain the ESP header indicating that the data is encapsulated using ESP.
Step 6 (Optional) Encrypt Data Being Secured
1. Using Group Policy Management Console (GPMC), open the Group Policy Object created in the previuos steps and navigate to Computer Configuration –> Windows Settings –> Security Settings –> Windows Firewall with Advanced Security –>
2. Once at Windows Firewall With Advanced Security – LDAP://<Policy GUID>, DC=<domain name>, dc=<domain suffix>, right click on the policy and click on properties.
3. In the Properties window, click on the IPsec Settings tab
4. Click on the Customize button under IPsec defaults. This will bring up the Customize IPsec Defaults window.
5. Under Data Protection (Quick Mode), select Advanced and click on Customize. This will bring up the Customize Data Protection Settings as shown in the second screenshot.
6. Select the Require encryption for all connection security rules that use these settings checkbox.
7. Click OK three times.
Once group policy has refreshed on both domain controllers all communications will now be encrypted. Two screenshots of a network trace of encrypted communications are shown below. Note the frame details pane in the second screenshot where all the data is encrypted instead of only being encapsulated in ESP.
* There are two primary reasons where an organization may choose to secure but not encrypt the communications between domain controllers. The first being that in many organizations network teams may want to be able to still “sniff” the data using network monitoring tools and encryption renders such sniffing impossible. The second reason is performance. The encryption and subsequent decryption of data consumes additional CPU cycles on a server and adds to the load of what is in all likelihood an already busy domain controller.
**Note that the options available for authentication are Computer Certificate, Kerberos or Pre-shared key. We recommend using certificates because using Kerberos means another set of ports (UDP and TCP 88) having to be opened on the firewall(s). Plus using Kerberos for authentication has the potential of a «chicken and egg» scenario where IPsec depends on Kerberos but Kerberos issues could prevent IPsec. As for pre-shared key, because it is inherently insecure we recommend not using it for anything except for, say testing quickly a basic lab setup.
*** The DHCP exclusion is required only if the domain controllers are running DHCP. In this setup there are two domain controllers.
-Lakshman Hariharan and Martin Solis
This guide will walk you through how to open your Windows 10 firewall to allow the L2TP/IPSec protocol. For more about the L2TP/IPsec firewall ports you can read up on this L2TP VPN ports to allow in your firewall technet article.
Are you getting VPN connection errors?

If you are having trouble getting your VPN connection to work, traffic is most likely getting blocked by your local windows 10 firewall or your router. L2TP is a great option for creating a VPN because most operating systems support it automatically, but the downside is that firewalls and networks might block this protocol, and you will need a guide like this to help you allow this VPN traffic.
Before making these changes, you can test wether the firewall is blocking the connection simply by disabling it and then re-trying to connect. If the connection failed with the firewall disabled, then most likely you will need to adjust your router, if you need help with your router leave a message in the comments and we will try to respond. If the connection succeeds after the firewall is disabled, then these steps below will show you how to open the L2TP ports so that you can use VPN with your firewall enabled.
Steps for opening L2TP/IPSec VPN ports on Windows 10 firewall
-
From your Windows desktop locate the Windows taskbar Search Box in the lower left and click in the Search Box.

-
In the Search Box, type ‘Windows Firewall’ and click the top result ‘Windows Firewall with Advanced Security’.
That will locate and launch the settings control panel link called ‘Windows Firewall with Advanced Security’ where we will enter the new L2TP/IPSec ports as a new inbound rule.
-
Click ‘Inbound Rules’.
-
Click ‘New Rule…’.
-
Select ‘Port’ and click ‘Next’.
-
Select ‘UDP’ and Enter ’50, 500, 4500′ in the ‘Specific local ports’ field and click ‘Next’.
-
Select ‘Allow the connection if it is secure’ and click ‘Next’.
-
Leave user fields blank and click ‘Next’.
-
Leave all the checkboxes checked and click ‘Next’.
-
Enter ‘MagnumVPN L2TP Firewall Rule’, or any name you want and click ‘Finish’.
-
All done! You should be able to connect to your VPN without your firewall blocking you. Make sure you have re-enabled your firewall if you turned it off for testing.


Author
Neil Proctor
Neil Proctor is a privacy advocate and the co-founder of Prompt Engineering, a start-up engineering consulting firm based in Arizona. Prior to Prompt Engineering, Neil worked for GoDaddy for 13 years, he is a proven leader in nework security and web development. From GoDaddy’s early days to IPO, Neil lead web application development, information security architecture, and was General Manager for the community division and Business Unit Manager for the marketing applications product suite. His passion for product development with emphasis on application and network security has prompted him to apply his talents creating VPN guides for others and publishing them on MagnumVPN.

If you have Windows Firewall IPsec settings on your computer, these instructions may help.
Approved: Fortect
Speed up your computer’s performance now with this simple download.
The IPsec bypass options for Windows Firewall with Advanced Security are as follows: Primary Data Encryption Algorithm: AES-CBC 128 Primary Protocol: Payload Encapsulation (ESP) Secondary Protocol: Authentication Header (AH) Primary Data Encryption Algorithm: AES-CBC 128
Approved: Fortect
Fortect is the world’s most popular and effective PC repair tool. It is trusted by millions of people to keep their systems running fast, smooth, and error-free. With its simple user interface and powerful scanning engine, Fortect quickly finds and fixes a broad range of Windows problems — from system instability and security issues to memory management and performance bottlenecks.

Use IPsec to meet security requirements or improve the security of your use. Add IP restrictions and TCP / UDP layers to help you with encryption applications that might not otherwise support them
What Is IPsec?
Wikipedia: Internet Protocol Security (IPsec) is a set of protocols for securing Internet Protocol (IP) communications by authenticating and encrypting each IP address in a packet in a session. IPsec also includes protocols for establishing the reason for mutual authentication between the start of the course and the negotiation of cryptographic keys to be used during the session.
Why Meet Ipsec?
- adapt to security requirements, or simply improve the home security of your application.
- This allows you to add additional IP restrictions and TCP / UDP layer encryption for applications that they might not otherwise be able to structure and support.
Conditions
- IP Protocol 50 (ESP) Enabled / Disabled
- IP 1951 (AH) enabled / disabled
- UDP port 500 enabled / disabled
- Maybe TCP / UDP eighty-eight (if you authenticate)
- Maybe UDP 4500 (NAT)
Using Windows Firewall With Advanced Security, The CornellAD Domain Is Connected
Complete allprocedures on one page.
Link Group Policy Object (GPO) Management
Identity provides a policy called CIT-IDM-MachineCertificateAutoEnrollment. This automatically registers the computer type with the OU prior to the included IPsec machine certificate.
- Link a Group Policy Object (GPO) to any organizational unit in which you will be using IPsec.ServerFarm,
all machines must accept this already linked policy - Make sure the policy is being applied on your servers. Run GPUpdate if necessary.
Note. The default Group Policy refresh is 90 minutes.
Connection Create A Security Rule On The Server
- Connect to the server now.
- Open Windows Firewall with Advanced Security.
- Right-click Security and Connectivity Rules, and then click New Rule.
A
- Select And Custom and click Next.
A
- In the Endpoints window, experiment with the following:
- In the Which computers are endpoint 1 display box, enter the IP address or fixed range of the server.
- In the “Which endpoints of the computer 2 penalty” field, enter the IP address of the client (s), or just a range.
- Click Next.
A
- Select Require authentication for inbound and outbound connections, and then click Next.
A
- In the Authentication Method field, select Advanced, then click Configure.
A
- In the first authentication method, stop adding.
A
- In the “Add an Authentication Method First” section, select “Computer Certificate from This Instrument Control Center” and then follow these steps:
- The m systemLabels: (standard)
- Certificate store type: (default)
- Click Browse and select the issuing CA.
- Click OK.
- In the Configure Advanced Authentication Methods section, click OK.
A
- You will be returned to the New Connection Security Rules Authentication Guru: Method window and click Next.
- In the “Which ports and protocols this suggestion applies to” box, select the ports / protocols for all your services (in this example we are using SMB, TCP 445), and then click Next.
Since 1 endpoint is the server, cast the port on only 1 endpoint. Leave site as endpoint 2 for all ports.A
- In the When will this signal be resolved box, select all the check boxes and click Next.
A
- Name your custom rule, then click Finish.

Configure Client Side Security Association
- Log in to the potential client computer.
- Repeat the server-side configuration (steps 3 through 14 above in the procedure for creating a connection security rule) for the client.
(Everything is correct including IP and endpoint ranges and 1 2). - Check the connection to make sure it is still working.
Note. There may be a short pause in your connection when a new SA occurs. - In the Monitoring Windows Firewall section under Security Associations -> Native Mode, you should see an authentication comparison comparing the two machines.
A
- Music Notes in the Security Associations under Mode, the High Speed ESP Encryption is also set to None. This means that there is market authentication to verify the validity of the sender, but usually the data itself is notnot encrypted by IPSEC.
Configure Server Side Firewall Rule
- Log in to the server computer.
- Right-click Inbound Rules and select New Rule.
A<
Speed up your computer’s performance now with this simple download.
A: For IPSec to work through your firewalls, you must hide Windows UDP port 500 and allow IP process numbers 50 and 51 for inbound and outbound firewall filters. UDP port 550 must be open to forward ISAKMP clicks and Internet Security Association (SAA) clicks across firewalls.
Wikipedia: Internet Protocol Security (IPsec) is a protocol used to secure Internet Protocol (IP) communications through the process of authenticating and encrypting every IP packet in a session.
Internet Protocol Security (IPsec) is a set of security protocols used for the confidential transmission of IP blocks over the Internet. Protected IP traffic has two requirements.Explicit IPsec headers, which define the types of cryptographic security applied to an IP packet and provide information on how to decode a secure packet.
Microsoft first introduced IPSec in Windows 2000. When enabled, the driver file called IPSec.sys handles packet inspection and overall IPSec operations. Another file, Oakley.dll, is the IKE component. The IPSEC Services service also needs to be running, although it should be by default. IPSec policies can be created at the command prompt (using different tools and commands between Windows 2000, XP, and 2003) or using the IP Security Policies console. IPSec policies can be created and applied locally, or pushed down using a GPO. A computer can only have one active IPSec policy at one time, stored in HKLM\Software\Policies\Microsoft\Windows\IPSec.
| Note |
Windows Vista will allow IPSec configuration using a new console called Windows Firewall with dvanced Security. |
IPSec Console
The most convenient way to configure IPSec is to use the IP Security Policies console. To use it, open the Microsoft Management Console (Mmc.exe) and choose File ð Add/Remove Snap-in. Click the Add button, choose the IP Security Policy Management snap-in (see Figure 8-3) and click the Add button. Select the correct focus (usually the Local Computer) and then click Finish ð Close ð OK.
Figure 8-3
IPSec policies can also be created in GPOs and Local Computer Policies (under Computer Configuration\Windows Settings\Security Settings\IP Security Policies). This chapter will use the console in most of the examples.
IPSec at the Command Line
IPSec can also be controlled and configured at the command line. Windows 2000 uses the Ipsecpol.exe command (www.microsoft.com/windows2000/techinfo/reskit/tools/existing/ipsecpol-o.asp). Ipsecpol syntax can be a bit intimidating for the casual user. Some examples are provided at http://support.microsoft.com/default.aspx?scid=kb;en-us;813878. The following example syntax would block all outbound connections to any remote computer over UDP port 1434:
ipsecpol -w REG -p "Block UDP 1434 Filter" -r "Block Outbound UDP 1434 Rule" -f 0=*:1434:UDP -n BLOCK
As cryptic as it may seem, Ipsecpol, and other configuration tools like it, allows IPSec policies to be generated quickly when using batch files and scripts. An admin requiring IPSec during a troubleshooting event could send a single batch file to a remote user that, when run, would completely configure and enable IPSec on the remote computer. Windows XP uses Ipseccmd.exe and Windows Server 2003 uses Netsh ipsec.
IPSec Monitor Tools
To use any of the IPSec monitoring tools you need at least a basic understanding of IPSec and its SAs. Windows 2000 computers can use the command-line tool Ipsecmon.exe. Windows XP computers can use the command-line tool Ipseccmd.exe with the show all syntax. Windows Server 2003 and later computers can use the Netsh ipsec static show or Netsh ipsec dynamic show commands. Better yet, Windows XP and later computers can use the IP Security Monitor snap-in GUI console. Any of these tools will show you whether or not an IPSec connection has been made and basic statistics (see Figure 8-4).
Figure 8-4
Detailed IPSec packet traffic can be recorded using many network packet sniffers, including Ethereal (www.ethereal.com) and Microsoft’s own Network Monitor (Windows 2000 and later, and SMS versions). Figure 8-5 shows a small packet trace in Ethereal resulting from a ping test. You can see at the IP layer that the protocol number is hexadecimal 32 (which equates to decimal 50 or ESP). The SPI value for the SA is highlighted. Of course, if ESP encryption is enabled, you will not be able to see any payload data.
Figure 8-5
You can turn on rudimentary Oakley logging that can be enabled for the IPSec troubleshooting professional. When turned on, the Oakley.log file will be stored in %Windir%\Debug. I can be turned on in Windows XP by typing in Ipseccmd set logike, or in Windows Server 2003 by typing in Netsh ipsec dynamic set config ikelogging 1. Windows 2000 requires that a new registry key and value be made. It is HKLM\System\CurrentControlSet\Services\PolicyAgent\Oakley\EnableLogging and is set to 1. A new Oakley.log file is created each time IPSec is started. Previous versions will be saved as Oakley.log.sav.
You can also enable IPSec driver events to be logged to the Event log. To enable, set HKLM\System\CurrentControlSet\Services\IPSEC\DiagnosticMode to 1 and then restart the computer. IPSec driver events are written to the System log once every hour. You can also see IPSec policy changes in the Security log if you enable Audit policy change. IKE events can be recorded by enabling Audit logon events.
Default IPSec Policies
As Figure 8-6 shows, this will reveal three default IPSec policies in environments that have not modified the defaults. The three default polices are example policies that Microsoft created in order to help people create their own. Although they can be used, their settings are heavy-handed, meaning all traffic is treated a certain way. Custom IPSec policies are more flexible, and they are a good place to start learning.
Figure 8-6
Table 8-1 describes the three default policies. All three policies use Kerberos to authenticate to computer peers, involve all IP traffic, and will use ESP encryption if allowed.
Table 8-1
Open table as spreadsheet
|
Default IPSec Policy Name |
Description |
|---|---|
|
Client (Respond Only) |
Will only enable IPSec security if requested to by another end-point |
|
Secure Server (Require Security) |
Requires IPSec security on IP traffic, but allows ICMP traffic to pass without security |
|
Server (Request Security) |
Requests, but doesn’t require, IPSec security on IP traffic, but allows ICMP traffic to pass without security |
You can create as many IPSec polices as you like, but only one can be enabled (or assigned) per computer at any one time. You can assign a policy in the console by right-clicking the policy and choosing Assign. You can also delete, rename, and modify existing policies or create your own by clicking on a blank area in the console and choosing Create IP Security Policy.
Setting Up Windows IPSec
IPSec is a flexible framework. Unfortunately, that flexible framework and its myriad of terms can make IPSec configuration confusing. This section will lead you through the steps to create a very simple IPSec policy for securing web traffic to an internal server. As we go through the process of setting up an IPSec policy, the details might be confusing for a first-time IPSec policy creator. The basic IPSec setup process (see Figure 8-7) is as follows:
-
Only one IPSec policy can be enabled per computer.
-
Each IPSec policy can have multiple rules, each determining how to handle a particular type of traffic (as determined by the associated filter).
-
Each rule can only have one IP filter that defines a particular class of traffic (by IP address, protocol number, or port number).
Figure 8-7
Creating an IPSec Policy
The first step is to open the IP Security Policies console, right-click a blank area in the right-pane, choose Create IP Security Policy, and then click the Next button. When prompted, type in a name and description (see Figure 8-8) for your policy, and then click the Next button.
Figure 8-8
Next, you will be prompted about whether to Activate the default response rule. Enabled by default, the Default Response rule can be deactivated but not deleted. It can be used in any IPSec policy (as can most IPSec rules). The Default Response rule tells the affected computer to respond to any IPSec request by enabling ESP security if it matches the other endpoint request (or authentication if it matches the other endpoint request), and if not does not require security. In most cases, leaving the rule enabled will not causes problems, although in this case, I know we don’t need it, so unselect the checkbox and click the Next button. Keep the Edit properties checkbox selected and click the Finish button.
IPSec Rules
Now you can create or choose one or more IPSec rules. IPSec rules determine how to treat particular types of traffic (as defined by the IPSec filters). You can have one or more IPSec rules active in any single IPSec policy, but every IPSec rule is attached to only one IPSec filter. Click the Add button and then the Next button. The next dialog box will prompt the creator to input tunnel endpoints if necessary. Tunnel endpoints are only needed when the host on which the IPSec policy will be enabled will be a gateway endpoint participating in IPSec tunneling mode. If so, the creator would input the IP address of the other endpoint’s network interface connecting the tunnel. We are setting up a transport mode policy, so just leave This rule does not specify a tunnel endpoint enabled and click the Next button.
Connection Type
When prompted to select the network connection type in the Network Connection dialog box, you can choose All network connections, Local Area Network (LAN), or Remote access. Choose the appropriate option, although in this example, just accept the default of All network connections and click the Next button. Which option you choose is also dependent on whether you will be requiring just a particular type of traffic to be secured, or choosing to filter most traffic (and just to allow particular traffic). The latter case should always be All network connections, whereas the former might be more granular.
Authentication Method
As Figure 8-9 shows, the next decision is asked in the Authentication Method dialog box. In Windows IPSec, you can choose between three methods to authenticate the endpoints to each other:
-
Kerberos authentication
-
Certificate from a certification authority (CA)
-
Pre-shared key
Figure 8-9
IPSec will not work unless the participating nodes can authenticate (i.e., machine authentication) to each other. You can choose up to three authentication methods and place them in order of precedence. If an end node can’t do the first one listed, the others are offered up. The most secure method is the certificate, but it is also the most difficult to set up. First, each participating IPSec endpoint must have a machine certificate signed by a certification authority (CA) designated in the dialog box. Microsoft Certificate Services in Windows Server 2003 fills the bill, although its setup and configuration is beyond the scope of this book. For more information on setting up a CA using Microsoft Certificate Services, read Microsoft’s Windows Server 2003 PKI Certificate Security (ISBN 0735620210). Although the certificate method is the hardest to deploy initially, it is the most secure method. It can be used on the LAN, across domains and forests, and remotely over the Internet.
| Note |
The certificate selected in this step is the CA’s certificate, not the endpoint’s machine certificate. |
The Kerberos authentication option is the easiest to deploy — just enable the selection and let Windows do the rest. In order for the Kerberos method to be used, the participating IPSec endpoint must have a valid computer account in the forest. If the Active Directory forest is a Windows Server 2003 forest, then Kerberos can be used across forests when a forest trust is established. The Kerberos method is the easiest to deploy, but it doesn’t work well across the Internet or outside the trusted forest(s).
The pre-shared key (PSK) is also fairly easy to deploy. Just input an identical PSK (such as a password) on both sides of the IPSec connection and IPSec will do the rest. It works locally, across forests and domains, and over the Internet. Unfortunately, it is also the least secure method. Microsoft recommends only using it to test IPSec. I use PSK when initially setting up new IPSec connections to help rule out other authentication problems. After the PSK link is up, I move the IPSec connection to one of the other two methods.
If you use a PSK, be sure to enter a very long (longer than 15 characters) and complex PSK. Unlike most password treatments, the PSK will be displayed in plaintext in the IPSec policy window, so don’t expect it to remain hidden. If you use PSKs, you should change them frequently. Unfortunately, much of the world uses short, non-complex PSKs that are never changed. This is an IPSec hacker’s dream. As covered below, malicious hackers can capture traffic encrypted with the PSK and brute force it to learn the PSK. Once the PSK is discovered, it is trivial to exploit the rest of the IPSec protections. For this example policy, choose the weaker PSK method and type any short word as a PSK. I’m asking you to use the weakest method so you can see how it is displayed in the policy. Then click the Next button.
IPSec Filters
You can create as many IPSec filters as you like, and they are available for any IPSec policy, but you can only associate one IPSec filter per IPSec rule. Each IPSec filter can have one or more types of traffic (i.e., multiple protocols) associated with it. By default, Windows IPSec has two filters to choose from: All ICMP traffic and All IP traffic (Figure 8-10 shows the two defaults plus one custom filter). Let’s create our own new rule to cover web traffic over TCP port 80. In the IP Filter List dialog box, click the Add button.
Figure 8-10
Type a filter name and description. Filter names are displayed in the IPSec Policy rules list in reverse alphabetical order. Their listed order does not affect the order in which they are applied if multiple rules exist, but you may want to consider the name carefully before entering one if you want a particular filter listing order. In this example, type Web Port 80 Traffic Heading to Internal Web Site and add an appropriate description. Click the Add button and then the Next button. The IP Traffic Source dialog box will then prompt you for the IP address for the traffic you plan to filter (see Figure 8-11).
Figure 8-11
You can choose among the following options:
-
My IP Address
-
Any IP Address
-
A specific DNS name (XP only)
-
A specific IP Address
-
A specific IP Subnet
-
DNS Servers <dynamic>
-
WINS Servers <dynamic>
-
DHCP server <dynamic>
-
Default Gateway <dynamic>
My IP Address is the first network card’s first IP address if there are multiple network cards or multiple IP addresses. Windows 2000 has only the Any IP Address, A specific IP Address, and A specific IP Subnet options. Only XP has A specific DNS name (especially useful when an endpoint has a DHCP-assigned IP address that could change. Only Server 2003 and later have the latter four options. If they are chosen, IPSec will take the current values for those fields and update them if the related IP addresses change.
If the IPSec rule involves traffic headed from the current PC to another endpoint, choose the first option or specify the correct local IP address. If you want to filter traffic headed from another endpoint, choose its IP address or choose Any IP Address. For this example, choose My IP Address. When finished, click the Next button. You will then be prompted to fill in the IP Traffic Destination value in the next dialog box and click the Next button. For this example, choose A specific IP Address and fill in an IP address for a web server host you know that you can enable IIS and IPSec on for testing purposes.
IP Protocol Type
In the IP Protocol Type dialog box, you must indicate the IP protocol number for the involved IP transport layer protocol, or you can choose the Any option to allow the filter to inspect all transport layer protocols. In most cases, the value will be TCP, UDP, or ICMP, but there are many other values you can cycle through. Choose TCP for this example and then click the Next button.
IP Protocol Port
In the next dialog box, you must choose source and destination transport layer protocol numbers (e.g., 25 for SMTP, 53 for DNS, 80 for WWW, 443 for HTTPS, etc.). If most cases, if the current computer is connecting to another host, its source port number will be randomly generated as a number higher than 1023. In order to handle this, you must choose the From any port option. If the current PC is connecting to another computer’s service with a well-known port, choose To this port and fill in the appropriate port number. In this example, type 80 (see Figure 8-12), click the Next button, and then click the Finish button.
Figure 8-12
This will take you back to the IP Filter List dialog box. You can add more IP addresses and protocols to a single IPSec filter. In this example, add port 443. You should have a dialog box that resembles the one shown in Figure 8-13. Click the OK button and then select the new custom IP filter created (see Figure 8-10 again) and click the Next button. Filters can also be mirrored. Because an IPSec SA is a unidirectional entity, two-way communications (like most network traffic requires) needs an IPSec filter that mimics the original rule, only going in the reverse direction. In most cases (not all), enabling mirroring is necessary. Mirroring must often be disabled when setting up IPSec in tunnel mode.
Figure 8-13
In summary, an IPSec IP filter allows network traffic to be intercepted according to the following characteristics:
-
Source IP address
-
Destination IP address
-
Source address IP subnet mask (if a specific IP subnet is chosen)
-
Destination address IP subnet mask (if a specific IP subnet is chosen)
-
Source transport port
-
Destination transport port
-
IP protocol type
Each one of these characteristics can be defined to create one or more IP filters, which are then attached to a Filter Action within an IPSec rule.
Filter Action
Figure 8-14 shows the next dialog box, Filter Action, which contains three default options:
-
Permit
-
Request Security (Optional)
-
Require Security
Figure 8-14
Permit allows the filtered traffic through without requiring IPSec security. Request Security will ask the other endpoint to enable IPSec encryption or authentication, but will still connect if the request is not met. Require Security requires that IPSec ESP encryption be enabled between the two endpoints for that traffic type before the filtered network traffic can be communicated.
You can accept and use one of the default three security methods or create your own and place them in order of precedence. The Request Security (Optional) option (see Figure 8-15) defines four security methods. The first method attempts to use the most secure encryption method currently available in Windows IPSec, 3DES. If the connecting endpoint cannot do 3DES, it will attempt to negotiate DES. Both of these methods have ESP integrity checking with SHA-1 enabled. If encryption can’t be done, AH authentication is attempted, first using the stronger SHA-1, and lastly, MD5 if nothing else works. The Require Security method never attempts to use AH, only ESP encryption and integrity using various combinations of 3DES, DES, SHA-1, and MD5 (from strongest to weakest).
Figure 8-15
You can create your own security method and enable it in the Filter Action dialog box. Whatever security method you choose, the other connecting endpoints must support the same method in order for IPSec protection to be enabled. As Figure 8-16 shows, there are other options as well.
Figure 8-16
The Accept unsecured communications, but always respond using IPSec option tells an IPSec-enabled computer to allow unsecured requests, but to always reply using IPSec. While this would prevent a computer without IPSec from participating as an endpoint, it is a normal option to choose when the other endpoint uses the Default Response rule or Client (Respond Only). The Allow unsecured communications with non IPSec-aware computer option is self-explanatory. Normally this option is only enabled when you want a computer that is IPSec-aware to always enable IPSec when contacted by IPSec-enabled computers but also still be able to initiate connections to computers not capable of IPSec. A good example of this is when you want to use IPSec inside your LAN, but not require it when it is connecting to Internet resources (which are probably not using IPSec). The Session key perfect forward secrecy (PFS) option requires more explanation.
Perfect Forward Secrecy
Perfect Forward Secrecy (PFS) is an IPSec option (discussed in the IPSec RFCs) that attempts to ensure that a compromise of any single IPSec key will not allow access to data protected by other keys. Master key PFS works by ensuring that a new IKA SA secret key is regenerated for each new session. Normally, without PFS, individual SA secret keys are generated from the IKE SA «master» secret key, which means there is a cryptographic link an intruder can follow.
If master key PFS is enabled and an intruder breaks the IKE SA secret key, it doesn’t immediately give them help in cracking the individual SA keys. The attacker would have to attack each SA secret key individually, and even then it would only see the data protected by each SA secret key. One key compromise doesn’t make it easier to compromise another. Without PFS, an attacker could use the information learned by breaking the IKE SA secret key to quickly compromise the SA private keys. Without PFS enabled, the master key is only regenerated when it has already been used to generate a predetermined maximum number of SA secret keys. Microsoft also allows PFS to be set on the SA private keys to further complicate cracking efforts.
Enabling PFS does provide stronger security, although in Windows it is disabled by default because it adds additional computational overhead and security often not needed in normal security environments. An environment with high-security requirements or expecting attacks against its IPSec infrastructure should enable PFS.
In summary, an IPSec rule can contain the following characteristics:
-
Tunnel endpoint (if IPSec tunnel mode is desired)
-
Connection Type (All, LAN, or remote)
-
Authentication Method (Kerberos, Certificate, Pre-Shared Key)
-
Filter List (covered above)
-
Filter Action (Permit, Block, Negotiate Security, or custom)
-
Other IPSec Rule Options
An IPSec policy can have one or more IPSec rules. When multiple rules are in effect, Windows automatically orders them operationally from most specific to least specific. This means that blocking or allowing specific endpoints will take precedence over larger ranges of affected computers. Some IP traffic is never considered or blocked in Windows IPSec.
IPSec Exemptions
By default, Windows makes certain exemptions (packet traffic types that cannot be blocked or controlled by IPSec) when IPSec is turned on. In Windows Server 2003, only IKE traffic, needed for IPSec establishment, is exempted from IPSec filtering. In Windows 2000 and XP, there are many more exemptions (see http://support.microsoft.com/kb/253169):
-
Kerberos authentication
-
IKE
-
Multicast traffic
-
Broadcast traffic
-
RSVP traffic
You can also configure a registry key to control exemptions. HKLM\System\CurrentControlSet\Services\IPSec\NoDefaultExempt can be configured with a value from 0 to 3, as shown in Table 8-2.
Table 8-2
Open table as spreadsheet
|
No Default Exempt Value |
Description |
|---|---|
|
0 |
Default in Windows 2000 and XP. Exempts Kerberos, IKE, Multicasts, Broadcasts, and RSVP. |
|
1 |
Recommended exemption setting by Microsoft. Only exempts Multicast, Broadcast, and RSVP traffic. Requires SP1 or later in Windows 2000. Default setting in Windows 2000 SP4 and Windows XP SP2. |
|
2 |
Only available in Windows Server 2003. Exempts only |
|
3 |
Default in Windows Server 2003. Only IKE exempted. Not available in XP or 2000. |
| Note |
Caution: Although a setting of 3 might be desired for all participating IPSec nodes, requiring all broadcast traffic to have IPSec could cause a lot of problems (e.g., NetBIOS, ARP, etc.). For that reason, Microsoft’s recommendation of putting the setting to 1 is a realistic trade-off setting. In the future, it would be nice for Microsoft to have a setting to only exempt IKE and broadcast traffic, or even better, let the end user define all exemptions. You can also set the NoDefaultExempt value on Windows Server 2003 using Netsh ipsec dynamic set config ipsecexempt value = command. See http://support.microsoft.com/kb/811832/EN-US for more details on exemptions. |
For our current IPSec policy example, choose the Require Security option, and then click the Next and Finish buttons. If done correctly, the IPSec wizard will display the IPSec Rule as configured among multiple tabs (see Figure 8-17). This is the same view you would see if you disabled the Create a IP Security Policy wizard. As shown in Figure 8-17, for this example I added another two authentication protocols beyond the PSK method. I then placed the PSK method lowest down on the list since it has the most risk involved. Click the OK button to save the rule to the IPSec policy.
Figure 8-17
Once saved, you can edit the IPSec policy. You can add, delete, or edit rules/filters attached to the IPSec policy on the Rules tab. As discussed above, rule names are based upon IP filters and are displayed in reverse alphabetic order. The listed order has nothing to do with how they are applied. Rules/filters are applied from most specific to least specific (i.e., broad). On the IPSec policy General tab (see Figure 8-18) you can further define IPSec key characteristics, including whether the IKE SA uses Master key perfect forward secrecy.
Figure 8-18
Once you are sure the IPSec policy meets the required criteria, you need to ensure that the other endpoint has a similar policy with mirrored rules and filters configured. You can manually create the mirrored policy, use one of the IPSec command-line tools and a script to create it, or, in the console, right-click the IP Security Policies on Local Computer option, and choose All Tasks and then Export Policies. The resulting file can then be imported on the other endpoint and the appropriate modifications made.
When both sides have the correct and aligned IPSec policies, you can assign them and test. If you are unsure about its functionality, use the IPSec Monitor console (or a tool) or a network sniffer to validate whether or not IPSec is working as intended. Additional configuration may be needed outside of IPSec in order to get it working. See Microsoft Knowledge Base article 816514 (http://support.microsoft.com/default.aspx?scid=kb;en-us;816514) for more step-by-step IPSec instructions.
Firewall Ports Needed
If a firewall is inline between the two participating IPSec endpoints, the following ports must be opened:
-
UDP port 500 (for IKE traffic)
-
UDP port 4500 (for NAT-T traffic only)
-
IP Protocol 50 and 51
If Windows Firewall is enabled (along with the Application Layer Gateway service) when IPSec is enabled, it will automatically open up these ports. However, most other ports will need to be opened in IPSec for two hosts to communicate. For example, don’t forget to allow DNS (TCP and UDP port 53) for clients needing DNS resolution. Most Windows hosts need NetBIOS naming resolution as well (ports 137 and 445).
Windows Firewall IPSec Bypass
In Windows XP Pro SP2 and Windows Server 2003 SP1, Microsoft has added an interesting Windows Firewall feature. If the GPO setting WindowsFirewall: Allow Authenticated IPsec bypass is enabled (located in a GPO or Local Computer Policy at Computer Configuration\Administrative Templates\Network\Network Connections\Windows Firewall), users and groups protected by IPSec can be allowed to bypass all Windows Firewall filtering. In order for a user or group to be allowed to bypass Windows Firewall filtering, the user or group must be communicating using IPSec secured traffic (i.e., traffic covered by a rule) and be specified in the GPO setting (see Figure 8-19). Unfortunately, the setting is severely hampered by the fact that users or groups can only be specified by a Microsoft Security Descriptor Definition Language (SDDL) string. Prolific author Mark Minasi has an excellent article on SDDL use and syntax at www.minasi.com/showdoc.asp?docname=nws0502.htm.
Figure 8-19
| Note |
Windows Vista has a much-improved interface for IPSec and the Windows Firewall called the Windows Firewall with Advanced Security console. |
Another useful source for viewing information about IPsec policy changes for Windows Firewall with Advanced Security is the operational log found in Event Viewer:
Applications and Services Logs/Microsoft/Windows/Windows Firewall with
Advanced Security/ConnectionSecurity
You can also enable the ConnectionSecurityVerbose operational log if you need more detailed information about IPsec policy events.
Lesson summary
IPsec involves a number of different concepts, mechanisms, and technologies that you should understand before you attempt to implement it in your production environment.
IPsec can provide authentication, data integrity, data encryption, or any combination of the three to protect network traffic.
You can configure IPsec settings on a computer by using the Windows Firewall with Advanced Security snap-in, Group Policy, or Windows PowerShell.
Connection security rules can be of the isolation, authentication exemption, server-to-server, tunnel, or custom type.
You can create and manage connection security rules using the Windows Firewall with Advanced Security snap-in, Group Policy, or Windows PowerShell.
Authenticated bypass allows matching network traffic that has been authenticated as coming from an authorized and trusted user or computer.
You can monitor main mode and quick mode security associations by using the Windows Firewall with Advanced Security snap-in or Windows PowerShell.
Lesson review
Answer the following questions to test your knowledge of the information in this lesson. You can find the answers to these questions and explanations of why each answer choice is correct or incorrect in the “Answers” section at the end of this chapter.
1. Diffie–Hellman Group 14 is an example of what?
A. An IPsec authentication method
B. An IPsec data-integrity algorithm
C. An IPsec data-encryption algorithm
D. An IPsec key-exchange algorithm
2. You want to use IPsec to protect communications between a server and computers on a specific subnet of your network. Which type of connection security rule can you create to do this? (Choose all that apply.)
A. Isolation rule
B. Authentication exemption rule
C. Server-to-server rule
D. Custom rule
3. When creating connection security rules, which authentication option would you typically use in an environment that includes computers unable to use the IPsec authentication methods available with Windows Firewall with Advanced Security?
A. Request Authentication For Inbound And Outbound Connections
B. Require Authentication For Inbound Connections And Request Authentication For Outbound Connections
C. Require Authentication For Inbound And Outbound Connections
D. Do Not Authenticate
Practice exercises
The goal of this section is to provide you with hands-on practice with the following:
Configuring firewall rules
Implementing IPsec
To perform the following exercises, you need at least two domain-joined installations of Windows Server 2012 R2 using the Server With A GUI installation option. For example, one of the servers could be a domain controller in the corp.fabrikam.com domain and the other server could be a member server in the same domain. The servers can be either physical servers or virtual machines. You should be logged on to each server using a user account that is a member of the Domain Admins group. For the purposes of these exercises, the names of the servers are assumed to be HOST4 and HOST7 and their IP addresses are, respectively, 172.16.11.230 and 172.16.11.240. If your servers have different names or IP addresses, you should modify the steps in these exercises accordingly.
Exercise 1: Configuring firewall rules
In this exercise, you create and configure firewall rules and examine what happens when firewall rules conflict with one another.
1. Log on to HOST4 and use Server Manager to install the Web Server (IIS) role on the computer.
2. Use the Local Server page of Server Manager to turn off the IE Enhanced Security Configuration for Administrators.
3. Launch Internet Explorer and verify that you can open the default IIS8 home page of the Default Web Site on the local computer by typing http://localhost into the address bar.
4. Log on to HOST7 and use the Local Server page of Server Manager to turn off the IE Enhanced Security Configuration for Administrators.
5. Launch Internet Explorer and verify that you can open the default IIS8 home page of the Default Web Site on HOST4 by typing http:// followed by the host’s IP address (for example http://172.16.11.230) into the address bar.
6. Open the Windows Firewall with Advanced Security snap-in from the Tools menu of Server Manager, right-click the root node, and select Properties.
7. Configure the settings on the Domain Profile tab so that the default firewall rule for outbound connections is to block traffic. Then click Apply.
8. Delete the browsing history in Internet Explorer, making sure to deselect the Preserve Favorites Website Data option, and then press F5 to attempt to open the site http://172.16.11.230 again.
Question: Why can’t the site be displayed?
Answer: The default rule is applied last when firewall rules are processed. Because the default outbound rule is Block, access to the site is blocked.
9. Change the settings on the Domain Profile tab so that the default firewall rule for outbound connections is to allow traffic. Then click OK.
10. Press F5 in Internet Explorer to verify that you can open the Default Web Site on HOST4.
11. Right-click the Outbound Rules node in the Windows Firewall with Advanced Security snap-in and select New Rule to launch the New Outbound Rule Wizard.
12. On the Rule Type page, select Port.
13. On the Protocols And Ports page, select TCP, select Specific Remote Ports, and type 80 in the text box.
14. On the Action page, leave Block The Connection selected.
15. Accept the default settings on the Profile page.
16. Type Block TCP port 80 on the Name page and click Finish to create the new firewall rule.
17. Delete the browsing history in Internet Explorer, making sure to deselect the Preserve Favorites Website Data option, and then press F5 to attempt to open the Default Web Site on HOST4 again.
Question: Why can’t the site be displayed?
Answer: An explicit outbound port rule blocks the HTTP request from accessing the site on TCP port 80.
18. Select the Inbound Rules node, right-click the rule named Block TCP port 80, and select Disable Rule.
19. Press F5 in Internet Explorer to verify that you can open the Default Web Site on HOST4.
Question: Why is the site now displayed?
Answer: The outbound port rule to block TCP port 80 has been disabled, and the default outbound rule is to allow outgoing traffic.
20. Right-click the Outbound Rules node in the Windows Firewall with Advanced Security snap-in and select New Rule to launch the New Outbound Rule Wizard again.
21. On the Rule Type page, select Program.
22. On the Program page, select TCP, select This Program Path, and browse to select the following executable:
C:\ProgramFiles (x86)\Internet Explorer\iexplore.exe
23. On the Action page, leave Block The Connection selected.
24. Accept the default settings on the Profile page.
25. Type Block Internet Explorer on the Name page and click Finish to create the new firewall rule.
26. Delete the browsing history in Internet Explorer, making sure to deselect the Preserve Favorites Website Data option, and then press F5 to attempt to open the Default Web Site on HOST4.
Question: Why can’t the site be displayed?
Answer: An explicit outbound program rule blocks the HTTP request from accessing the site on TCP port 80.
27. Select the Inbound Rules node, right-click the rule named Block Internet Explorer, and select Disable Rule.
28. Right-click the rule named Block TCP port 80 and select Enable Rule.
29. Delete the browsing history in Internet Explorer, making sure to deselect the Preserve Favorites Website Data option, and then press F5 to attempt to open the Default Web Site on HOST4 again. You should not be able to access the site because of the outbound rule that blocks access to TCP port 80.
30. At this point, you should continue directly to practice exercise 2.
Exercise 2: Implementing IPsec
In this exercise, you create connection security rules to implement IPsec communications between HOST4 and HOST7.
1. Switch to HOST4 and open the Windows Firewall with Advanced Security snap-in.
2. Right-click the Connection Security Rules node beneath the root node and select New Rule to open the New Connection Security Rule Wizard.
3. On the Rule Type page, select Server-To-Server.
4. On the Endpoints page, in the Which Computers Are In Endpoint 1? section, select These IP Addresses. Then click Add, type the IIP address for HOST4, and click OK.
5. On the same page, in the Which Computers Are In Endpoint 2? section, select These IP Addresses. Then click Add, type the IP address for HOST7, and click OK.
6. On the Requirements page, leave Request Authentication For Inbound And Outbound Connections selected.
7. On the Authentication Method page, select Advanced and click Customized to open the Customize Advanced Authentication Methods dialog box.
8. In the First Authentication Methods section, click Add, select Preshared Key (Not Recommended), type mytestkey, and click OK twice. Click Next.
9. Accept the default settings on the Profile page and click Next.
10. Type HOST4 to HOST7 on the Name page and click Finish to create the new connection security rule.
11. Select the Connection Security Rules node under the Monitoring node, and verify that the new connection security rule is active (listed).
12. Open a Windows PowerShell prompt and ping HOST7 to attempt to establish IPsec communications between HOST4 and HOST7.
13. Switch to the Windows Firewall with Advanced Security snap-in and select the Main Mode node under the Connection Security Rules node.
Question: Why hasn’t a main mode SA been established yet between HOST4 and HOST7?
Answer: Connection security rules must be configured on both computers before IPsec communications can be established between them.
14. Switch to HOST7 and open the Windows Firewall with Advanced Security snap-in.
15. Right-click the Connection Security Rules node beneath the root node and select New Rule to open the New Connection Security Rule Wizard.
16. On the Rule Type page, select Server-To-Server.
17. On the Endpoints page, in the Which Computers Are In Endpoint 1? section, select These IP Addresses. Then click Add, type the IP address for HOST7, and click OK.
18. On the same page, in the Which Computers Are In Endpoint 2? section, select These IP Addresses. Then click Add, type the IP address for HOST4, and click OK.
19. On the Requirements page, leave Request Authentication For Inbound And Outbound Connections selected.
20. On the Authentication Method page, select Advanced and click Customized to open the Customize Advanced Authentication Methods dialog box.
21. In the First Authentication Methods section, click Add, select Preshared Key (Not Recommended), type mytestkey, and click OK twice. Click Next.
22. Accept the default settings on the Profile page and then click Next.
23. Type HOST7 to HOST4 on the Name page and click Finish to create the new connection security rule.
24. Select the Connection Security Rules node under the Monitoring node and verify that the new connection security rule is active (listed).
25. Open a Windows PowerShell prompt and ping HOST4 to attempt to establish IPsec communications between HOST7 and HOST4.
26. Switch to the Windows Firewall with Advanced Security snap-in and select the Main Mode node under the Connection Security Rules node. You should see a main mode SA with HOST7’s IP address as the local address and HOST4’s IP address as the remote address.
27. Right-click the main mode SA and select Properties. Click OK after viewing the properties of the SA.
28. Select the Quick Mode node under the Connection Security Rules node. You should see a quick mode SA with 172.16.11.240 as the local address and 172.16.11.230 as the remote address.
29. Right-click the quick mode SA and select Properties. Click OK after viewing the properties of the SA.
30. Launch Internet Explorer and attempt to open the Default Web Site on HOST4. You should see a message saying that the page can’t be displayed. This is because the outbound firewall rule you created earlier to block TCP port 80 is still in effect on HOST7.
31. Select the Outbound Rules node in the Windows Firewall with Advanced Security snap-in.
32. Right-click the rule named Block TCP Port 80 and select Properties to open the properties for the firewall rule.
33. On the General tab, select Allow The Connection If It Is Secure and then click OK.
34. Press F5 in Internet Explorer to verify that you can open the Default Web Site on HOST4.
Suggested practice exercises
The following additional practice exercises are designed to give you more opportunities to practice what you’ve learned and to help you successfully master the lessons presented in this chapter.
Exercise 1 Redo practice exercise 1 using Windows PowerShell commands instead of using the Windows Firewall with Advanced Security snap-in.
Exercise 2 Redo practice exercise 2 using Windows PowerShell commands instead of using the Windows Firewall with Advanced Security snap-in.
Answers
This section contains the answers to the lesson review questions in this chapter.
Lesson 1
1. Correct answers: B and D
A. Incorrect: Windows Firewall with Advanced Security has three firewall profiles, which correspond to the three network location types on the Windows platform. The domain profile is automatically applied to any network connection that Windows identifies as having a network location type of domain. The private profile is automatically applied to any network connection that Windows identifies as having a network location type of private. The public profile is automatically applied to any network connection that Windows identifies as having a network location type of public.
B. Correct: All three profiles can be active at the same time on a computer if Windows detects that there are network connections of each type present.
C. Incorrect: The Inbound Connections setting lets you configure how Windows Firewall with Advanced Security handles incoming traffic. The default option is Block, which blocks all connections that do not have firewall rules that explicitly allow the connection. The other two options are Block All Connections, which blocks all connections regardless of any firewall rules that explicitly allow the connection, and Allow, which allows the connection unless there is a firewall rule that explicitly blocks the connection.
D. Correct: To display the currently active settings for the domain profile on the local computer, you can use the Get-NetFirewallProfile cmdlet with the –PolicyStore ActiveStore parameter. The active store is policy store that contains the currently active policy, which is the sum of all policy stores that apply to the computer. The persistent store is the policy store that contains the persistent policy for the local computer. This policy is not from GPOs and has been created manually or programmatically (during application installation) on the computer.
2. Correct answer: C
A. Incorrect: Rules that explicitly allow some form of traffic have lower, not higher, priority than rules that explicitly block the same form of traffic. Because rule A is a block rule and rule B is an allow rule, rule A has higher priority than rule B.
B. Incorrect: Rules that explicitly allow some form of traffic have lower, not higher, priority than rules that explicitly block the same form of traffic. Because rule A is a block rule and rule B is an allow rule, rule A has higher priority than rule B.
C. Correct: Rules that explicitly block some form of traffic are applied before rules that explicitly allow the same form of traffic. Because rule A is a block rule and rule B is an allow rule, rule A has higher priority and is applied first. The result is that outbound traffic from the svchost.exe process running on the computer is blocked.
D. Incorrect: When firewall rules are processed by Windows Firewall with Advanced Security, as soon as a packet matches a rule the rule is applied and rules processing stops at that point. Because outbound traffic from the svchost.exe process running on the computer matches rule A, rules processing stops at that point and the outbound default rule is not applied to the traffic.
3. Correct answers: A and D
A. Correct: A program rule specifies how traffic associated with a specific program (executable) running on the local computer should be handled.
B. Incorrect: A port rule specifies how traffic associated with a specific TCP or UDP port or port range on the local computer should be handled.
C. Incorrect: A predefined rule specifies how traffic associated with a specific Windows feature or service running on the local computer should be handled.
D. Correct: A custom rule specifies how traffic should be handled based on any of the traffic-filtering criteria supported by Windows Firewall with Advanced Security. These criteria include being able to specify a program (executable) running on the local computer.
Lesson 2
1. Correct answer: D
A. Incorrect: IPsec authentication methods include computer or user (Kerberos V5), computer or user (NTLMv2), computer or user certificate, computer health certificate, and preshared key.
B. Incorrect: IPsec data-integrity algorithms include MD5, SHA-1, SHA-256, SHA-384, AES-GMAC 128, AES-GMAC 192, AES-GMAC 256, AES-GCM 128, AES-GCM 192, and AES-GCM 256.
C. Incorrect: IPsec data-encryption algorithms include DES, 3DES, AES-CBC 128, AES-CBC 192, AES-CBC 256, AES-GCM 128, AES-GCM 192, and AES-GCM 256.
D. Correct: IPsec key-exchange algorithms include, Diffie–Hellman Group 1, Diffie–Hellman Group 2, Diffie–Hellman Group 14, Diffie–Hellman Group 24, Elliptic Curve Diffie–Hellman P-256, and Elliptic Curve Diffie–Hellman P-384.
2. Correct answers: C and D
A. Incorrect: You can use isolation rules to isolate computers from other computers. For example, you can use isolation rules to protect computers that are joined to your domain from computers that are outside your domain.
B. Incorrect: You can use authentication exemption rules to specify computers that should be exempted from being required to authenticate, regardless of any other connection security rules that have been configured. For example, you can use authentication exemption rules to allow access to domain controllers and other infrastructure servers with which the computer needs to communicate before authentication can be performed.
C. Correct: You can use server-to-server rules to protect communications between two computers, two groups of computers, two subnets, or some combination of these, such as between a computer and a subnet. For example, you can use server-to-server rules to protect communications between a database server and a front-end web server.
D. Correct: You can configure custom rules using criteria from other rule types except tunnel rules. This means you can create a custom rule that has the same effect as a server-to-server rule.
3. Correct answer: A
A. Correct: The Request Authentication For Inbound And Outbound Connections option is typically used in low-security environments or those in which computers are unable to use the IPsec authentication methods available with Windows Firewall with Advanced Security. You can also use it for computers in the boundary zone in a server and in a domain isolation scenario.
B. Incorrect: The Require Authentication For Inbound Connections And Request Authentication For Outbound Connections option is typically used in environments where computers are able use the IPsec authentication methods available with Windows Firewall with Advanced Security. You can also use it for computers in the main isolation zone in a server and in a domain isolation scenario.
C. Incorrect: The Require Authentication For Inbound And Outbound Connections option is typically used in environments where network traffic must be controlled and secured. You can also use it for computers in the main isolation zone in a server and in a domain isolation scenario.
D. Incorrect: The Do Not Authenticate option is typically used to create an authentication exemption for connections to computers that do not require IPsec protection.