
Readers help support Windows Report. We may get a commission if you buy through our links.
Read our disclosure page to find out how can you help Windows Report sustain the editorial team. Read more
The registry is a database that stores a lot of important information needed to keep Windows up and running. When the registry gets corrupted, Windows will not function properly.
A corrupted registry can cause many issues, including blue screens of death, problems in installing or running programs, slow performance, and even computer freezing.
What causes a corrupted registry?
The Windows failed to load because the system registry file is missing or corrupt error message is common in all versions of Windows. It happens because of:
- Virus/malware – Viruses and malware are programs designed to damage your computer and steal information from it. That’s why you need a comprehensive antivirus solution.
- Hardware failure – A hardware malfunction can sometimes render some components useless, which may result in serious corruption in your registry.
- Accidental deletion of a crucial file in the registry directory – Such deletions more often occur due to improper use of registry editor applications like Regedit by inexperienced users.
- Improperly uninstalling programs – The improper removal of software from your PC can leave invalid keys behind in Registry, leading to problems such as these. A good uninstaller app should do the trick.
- Corrupt Windows Updates – A corrupt Windows Update may cause issues with the operating system and create problems with your PC’s hardware and software settings.
What can I do if the system registry file is missing or corrupt?
1. Run the CHKDSK command
- Press the Windows key, type cmd on the search bar, and click Run as administrator.

- Type in the following command then press Enter:
chkdsk:/f


2. Run DISM and SFC commands
- Hit the Windows key, type cmd in the search bar, and select Run as administrator.
- Type the following command and press Enter:
DISM.exe /Online /Restorehealth
- Allow for the command to be executed then type in the next one:
sfc /scannow


3. Repair MBR
- Create a bootable Windows 11 USB drive on another PC.
- Open the BIOS Settings by pressing the corresponding key shown on the screen. Usually, there can be any of the F10, F2, F12, F1, or DEL keys and it is different for each manufacturer/BIOS.
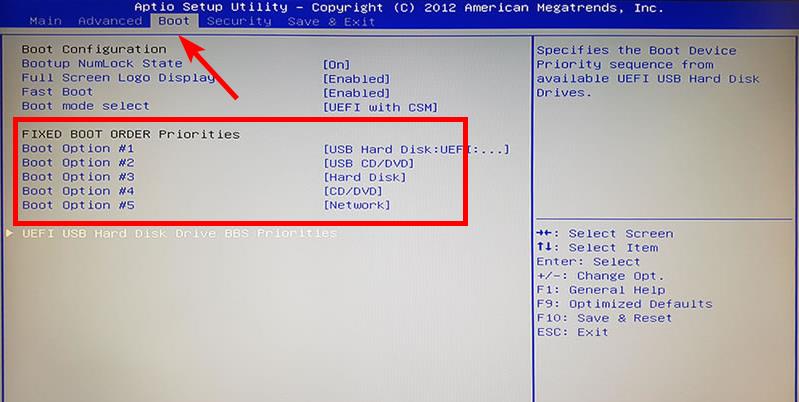
- Now, switch to the Boot tab. Then, under Boot Option Priorities, go to each boot option and press Enter.

- Change the boot order to the HDD or SSD you have the system installed on.
- Connect the USB drive to your PC and try booting from it.
- When the installation window appears, click on Repair your PC.
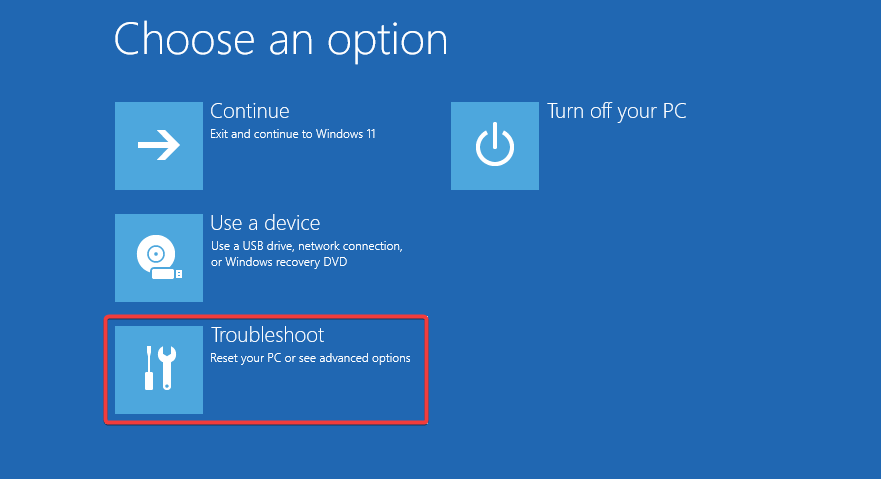
- Next, select Troubleshoot.

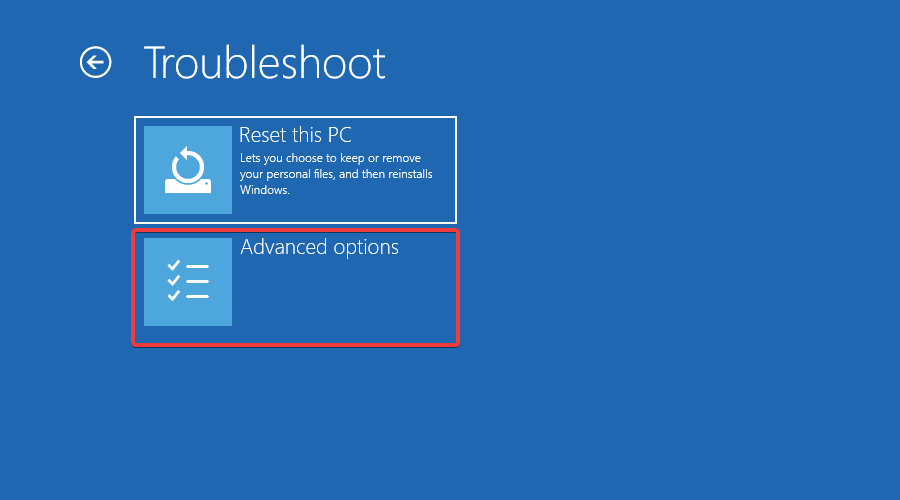
- Click on Advanced options.

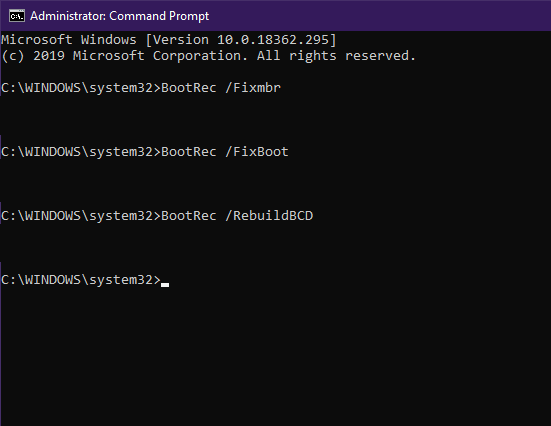
- Launch Command Prompt on the system.

- Type the following commands and press Enter after each:
bootrec /FixMbrbootrec /FixBootbootrec /ScanOsbootrec /RebuildBcd
- Exit, remove the installation drive, and try starting the system normally.

- Microsoft pushes Windows 11, but this project wants you to switch to Linux instead
- Windows 11 Search will soon let you install your favorite apps from Microsoft Store
- Microsoft releases updated HLK and VHLK for Windows 11 24H2 & Server 2025
4. Run Startup Repair
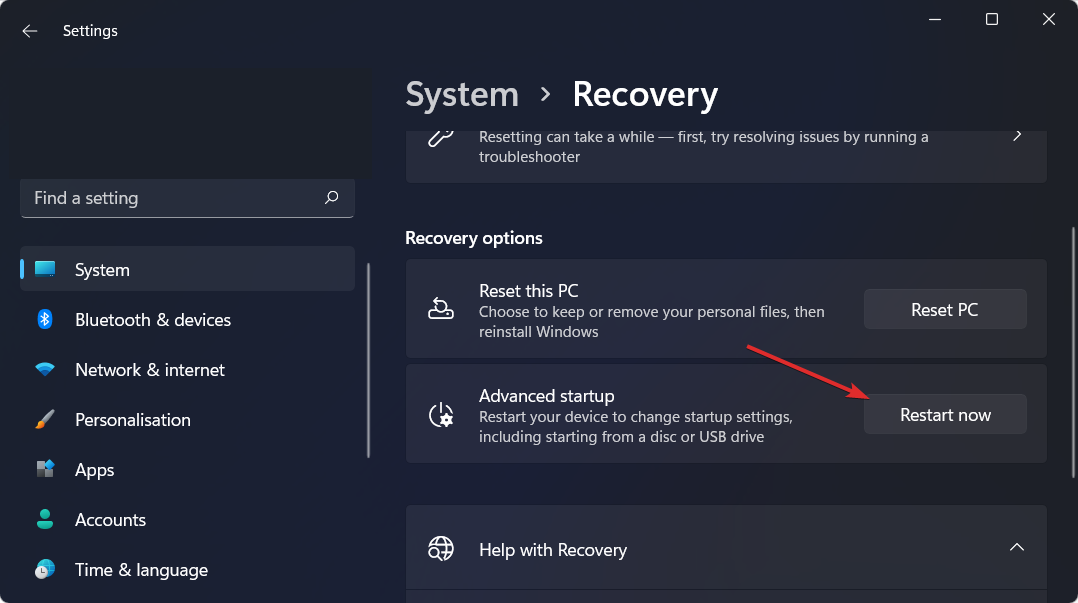
- Hit the Windows key and select Settings.
- Navigate Recovery under the System section.

- Click on the Restart now button next to Advanced startup.

- Select the Troubleshoot option.
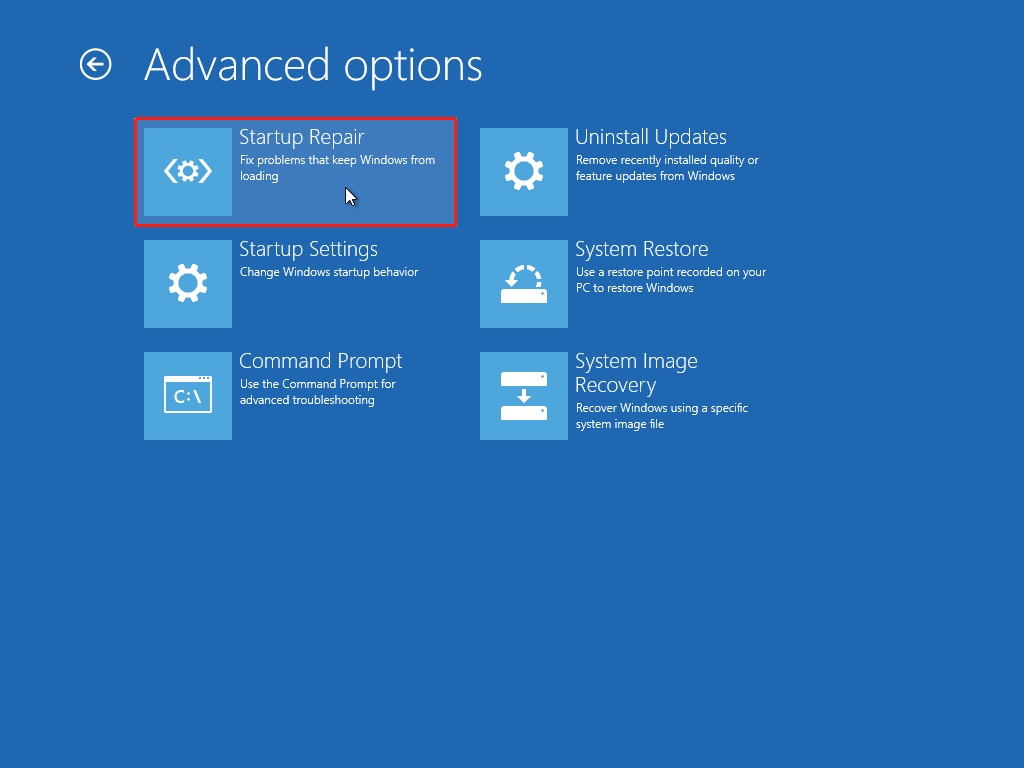
- Now, click on Advanced options.
- Select the Startup Repair option.


Windows 7 users facing the system file is missing or corrupt issue can revert to Windows Last Known Good Configuration setting and see if this gets rid of the issue.
If none of the above work, you might have to perform a clean Windows install and see if this gets rid of the problem. To prevent such issues in the future, the best way to ensure that your registry stays in good health is to only use programs that are intended to modify the registry.
They will make backups automatically before making any changes so that if something goes wrong, your original copy will be safe and you can revert to it easily. You should also clean your registry often to keep your system efficient.
In addition, always keep your antivirus program up-to-date or opt for antiviruses with offline updates. Should you encounter a corrupt registry in Windows 10, we have a comprehensive article to that effect.
Do let us know which solution fixed this issue for you in the comment section below.
Claire Moraa
Windows Software Expert
Claire has a knack for solving problems and improving the quality of life for those around her. She’s driven by rationality, curiosity, and simplicity, and always eager to learn more about Microsoft’s products.
With a background in teaching and reviewing, she breaks down complex topics into easily understandable articles, focusing mostly on Windows 11, errors, and software.
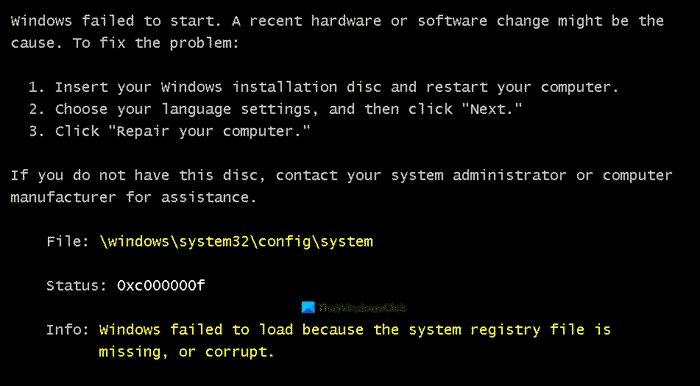
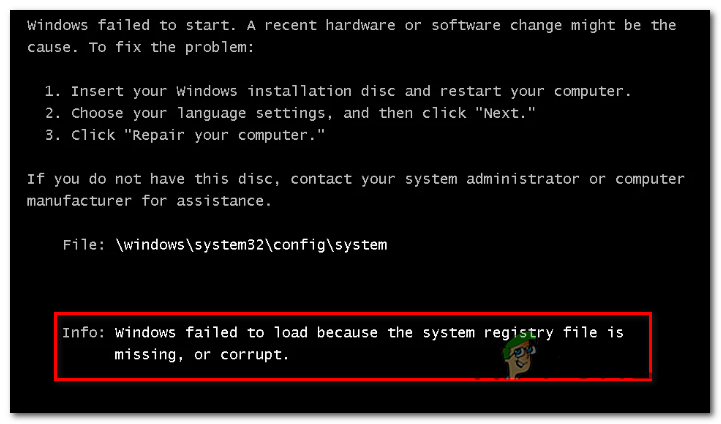
Some Windows may encounter an error where they can not start Windows because an important system file is missing or corrupted. This is the error message you may see:
Windows could not start because the following file is missing or corrupt:
\Windows\System32\config\SYSTEM
Windows failed to load because the system registry file is missing or corrupt.
If you are facing the same error, read the entire article to learn the best possible fixes.
The Windows\System32\config\SYSTEM is missing or corrupt error can occur because of multiple reasons such as missing or corrupted Registry files.
These are the things you can do to fix Windows\System32\config\SYSTEM is missing or corrupt.
- Scan Hard Drive and System files
- Restore Registry Files
- Repair Windows using Installation Media.
Let us talk about them in detail.
Windows failed to load because the system registry file is missing or corrupt
1] Scan Hard Drive and System files

Windows\System32\config\SYSTEM is missing or corrupt error can be because of some bad sectors in your Hard Drive. So, the best option is to try and fix these sectors. You can do that pretty simply by starting the computer with Windows ISO Media.
Now, click Repair your computer > Command Prompt, type the following command, and hit Enter.
chkdsk c: /r
Wait for the process to complete, restart your computer and check if the issue persists.

If it doesn’t work, try running SFC, the System File Checker command. In the Command Prompt, type the following command and hit Enter.
sfc /scannow
Wait for the process to complete, restart your computer and check if the issue persists.
Related: Windows was unable to load the registry.
2] Restore Registry
The problem can be caused by Registry files. If they are missing or corrupted, we need to restore them to fix the issue.
So, launch Command Prompt (as we did in Solution 2) and type the following commands to backup your Registry, in case if something goes wrong.
md tmp

copy c:\windows\system32\config\system c:\windows\tmp\system.bak

copy c:\windows\system32\config\software c:\windows\tmp\software.bak

copy c:\windows\system32\config\sam c:\windows\tmp\sam.bak

copy c:\windows\system32\config\security c:\windows\tmp\security.bak

copy c:\windows\system32\config\default c:\windows\tmp\default.bak
Now, delete the current Registry files.
delete c:\windows\system32\config\system

delete c:\windows\system32\config\software

delete c:\windows\system32\config\sam

delete c:\windows\system32\config\security

delete c:\windows\system32\config\default
Finally, use the following commands to repair Registry files.
copy c:\windows\repair\system c:\windows\system32\config\system

copy c:\windows\repair\software c:\windows\system32\config\software

copy c:\windows\repair\sam c:\windows\system32\config\sam

copy c:\windows\repair\security c:\windows\system32\config\security

copy c:\windows\repair\default c:\windows\system32\config\default
Note: Replace “C” with the Drive letter in which your OS is stored.
Now, close the Command Prompt and reboot your computer to check if the issue persists.
Useful reads:
- Fix Automatic Startup Repair or Reset PC reboot loop
- Windows computer stuck restarting in an endless reboot loop
3] Repair Windows using Installation Media
If Automatic Startup Repair also does not help, then you need to repair Windows using the Installation Media.
Hopefully, we have helped you to fix Windows\System32\config\SYSTEM is missing or corrupt error.
Read Next: How to repair corrupted or damaged Registry in Windows.
How to fix System registry file is missing or corrupt?
Use the SFC (System File Checker) and DISM (Deployment Imaging Service Management) commands to fix a missing or corrupt system registry file. Open Command Prompt as an administrator and run sfc /scannow followed by DISM /Online /Cleanup-Image /RestoreHealth. These tools help identify and repair corrupted system files, including registry issues.
What is 0xc00000e9 System registry file is missing?
The 0xc00000e9 error code signifies a hardware issue or corrupted system file during boot, not specifically indicating a missing system registry file. It often points to unexpected I/O errors, which may surface before the Windows login screen. To resolve this, check the hardware connections and use recovery tools to address file corruption.
-
Home
-
News
- Dropdown Menus Not Working in Windows 11? Fix It!
By Daisy | Follow |
Last Updated
If dropdown menus malfunction in Windows 11 or 10, it can be annoying, causing problems like menus not showing up, vanishing too fast, or appearing in the wrong places. This guide from MiniTool will help you resolve the “dropdown menus not working in Windows 11” issue.
In Windows 11, dropdown menus may freeze or become unresponsive because of corrupt system files, outdated drivers, or software incompatibilities. This problem can disrupt productivity by hindering access to key features.
Fixing the “dropdown menus not working in Windows 11” issue helps regain smooth menu operation and improves overall usability. Now, let’s see how to fix it.
Fix 1: Restart File Explorer
Restarting the File Explorer process should help you resolve the “File Explorer keeps opening up in the foreground on Windows 11 22H2” issue.
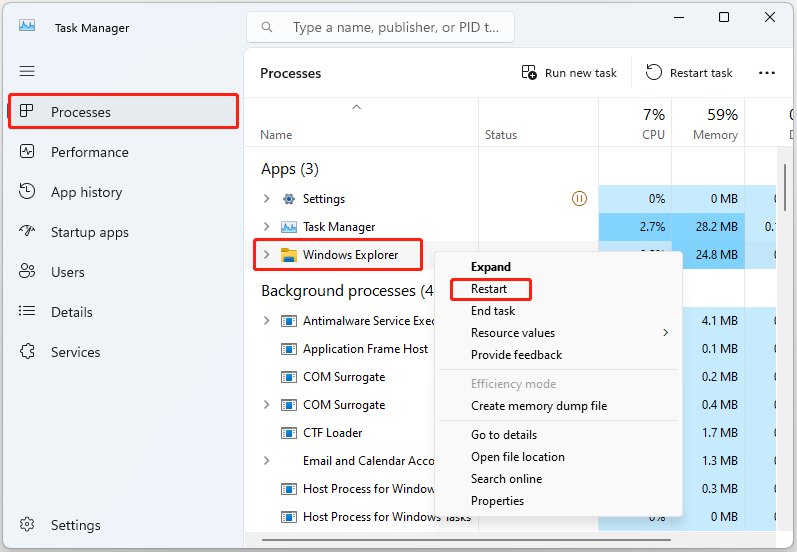
Step 1: Right-click the Start menu to choose Task Manager to open it.
Step 2: Go to the Processes tab. Find Windows Explorer and right-click it to choose Restart.
Fix 2: Run SFC
If you want to fix the “unresponsive or missing dropdown menus in Windows 11” issue, you can try to use the System File Checker (SFC) tool. It is a Windows built-in utility that checks system file integrity. After executing the command, it will check and replace the corrupt system files it finds during the scan.
Step 1: Type cmd in the Search box and choose Run as administrator.
Step 2: Copy and paste the following command into the Command Prompt and press Enter:
sfc /scannow
Fix 3: Update Graphics Drivers
You have to ensure that you are using the latest version of the graphics driver. You will meet the “dropdown menus not working in Windows 11” issue if you have incompatible, corrupt, missing, or outdated drivers. To solve the issue, you need to update the driver.
Step 1: Open the Run box and type devmgmt.msc. Then press Enter to go to Device Manager.
Step 2: Double-click Display adapters to expand it. Then right-click your graphics card driver and choose Update driver.
Step 3: You will be asked how you want to search for drivers in the pop-up window. You should choose Search automatically for updated driver software and then follow the instructions to complete the process.
Then, you can check to see if the issue has been fixed.
Fix 4: Disable AutoSuggest
As an alternative solution, you can adjust the Windows registry to turn off File Explorer’s AutoSuggest feature. This may resolve problems such as stuck dropdown menus, old suggestions appearing, or other related malfunctions.
Step 1: Open the Run box by pressing Windows + R together and type regedit in it.
Step 2: After opening Registry Editor, go to the following path:
HKEY_CURRENT_USER\Software\Microsoft\Windows\CurrentVersion\Explorer
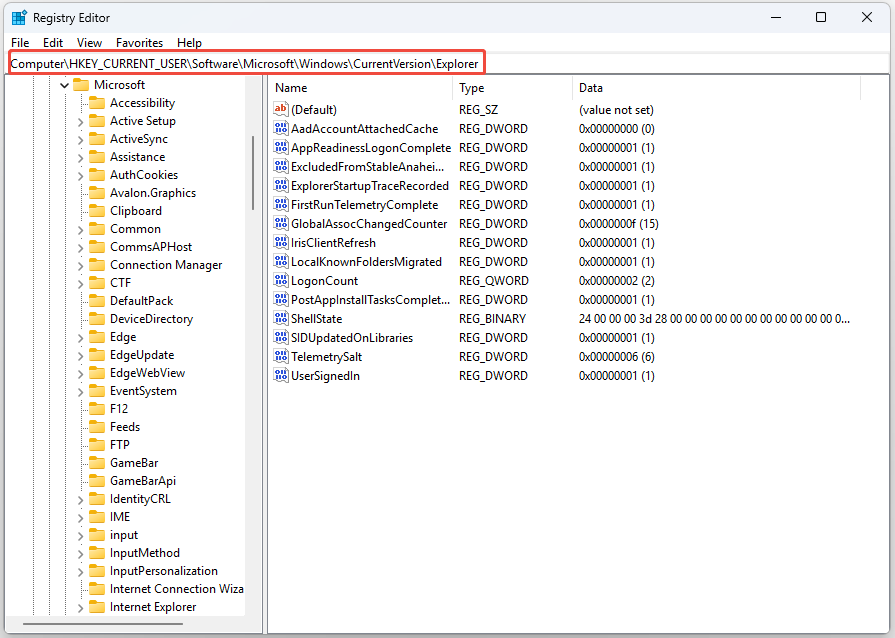
Step 3: Right-click Explorer and select New > Key, and name it AutoComplete.
Step 4: Right-click the right pane, select New > String Value, and name it AutoSuggest.
Step 5: Double-click AutoSuggest and set its value to No.
Fix 5: Reinstall Windows
If none of the above methods work, you may consider reinstalling your operating system. Reinstalling will reformat the hard drive, so it is best to back up the important data before reinstalling. To keep significant data safe, you can use the best backup software – MiniTool ShadowMaker to back up your PC. It supports performing the data backup and recovery, cloning HDD to SSD, etc.
MiniTool ShadowMaker TrialClick to Download100%Clean & Safe
After backing up the important data, you can start to reinstall Windows 11/10.
Final Words
How to fix the “dropdown menus not appearing in Windows 11” issue. Now after reading this post, you know 5 methods to get rid of it. Just choose one based on your actual situation to fix the annoying issue.
About The Author
Position: Columnist
Having been an editor at MiniTool since graduating college as an English major, Daisy specializes in writing about data backups, disk cloning, and file syncing as well as general computer knowledge and issues. In her free time, Daisy enjoys running and going with friends to the amusement park.
The Windows Registry is the configuration database for operating systems and programs. Thus, the system registry files are very important. Once a system registry file is missing or corrupted, your computer may occur a problem. How to fix missing or corrupted registry files? MiniTool will help you.
Windows Registry, also named the registry, is a hierarchical database of low-level settings, options, information, and other values of the software and hardware installed on the operating system. The registry is not a single large file but contains a set of discrete files called hives. Both the device configuration and the user’s preference can be reflected in the file.
Windows Failed to Load: System Registry File Is Missing or Corrupt
The registry contains important configuration information for the operating system. If the system registry file is missing or corrupted, your computer may suffer from serious errors, such as a blue/black screen during the booting procedure. Besides, you may also find your computer has problems installing or running programs, performing poorly, or even freezing in use.
The error message that Windows failed to load because the system registry file is missing or corrupt is common in different Windows systems. Luckily, you can find out the causes and solutions in this passage. Thus, please keep reading.
Causes of Registry Errors
- Virus and malware: Many types of viruses or malware can change the configuration of your registry. They will not only do harm to your computer but also steal your important files away from the computer.
- Hardware failure: Some failure of hardware may lead to the component being useless. Thus, the registry will suffer errors.
- Fragmented registry: The registry can become fragmented especially after you install or upgrade software and services. The fragmented registry may bring you trouble.
- …
How to Recover Files from the Unbootable Computer
MiniTool Power Data Recovery, a free data recovery software, is utilized in recovering lost files in various situations, like OS crash, virus attack, mistaken deletion, and so on. Besides, MiniTool Power Data Recovery can retrieve files from external hard drives, USB flash drives, CD/DVD, memory cards, and other various data storage devices.
Tips:
Creating a bootable disk requires a snap-in WinPE Bootable Builder in MiniTool Power Data Recovery. You can go to this site to find more editions of MiniTool Power Data Recovery and choose one suits you best.
How to Create a MiniTool Power Data Recovery Bootable Drive
Taking creating a bootable USB drive as an example.
Step 1: Download and install MiniTool Power Data Recovery.
MiniTool Power Data Recovery FreeClick to Download100%Clean & Safe
Step 2: Click on the Bootable Media Builder on the top right and follow the instructions to get the full edition of MiniTool Power Data Recovery containing a snap-in WinPE Bootable Builder.
Step 3: Register with your license key by clicking the key icon button.
Step 4: Connect a USB drive to this computer and click the Refresh button to find the drive. The size of this USB drive is suggested to be 4 GB to 64 GB.
Step 4: Click on the Bootable Edition icon to run MiniTool Media Builder.
Step 5: Click on WinPE media with MiniTool plug-in.
Step 6: Choose USB Flash Disk in the following window.
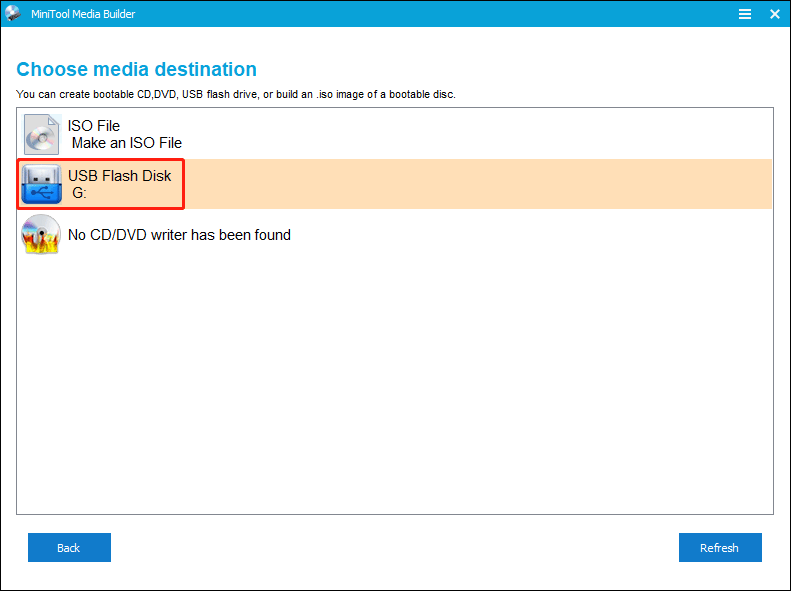
Step 7: Click Yes and wait for the process of creating a bootable media to complete.
Step 8: Click Finish and remove the bootable disk from the current PC.
How to Recover Data with The Bootable Media
Step 1: Plug the created bootable disk into the problematic computer. Connect another USB drive to the computer used to save your files later.
Step 2: Boot this computer into the BIOS menu.
Step 3: Change the boot order, making the computer boot from the created bootable disk.
Step 4: Press F10 to save the change and hit Enter to exit BIOS.
Step 5: Wait for your computer startup and MiniTool Power Data Recovery will open automatically.
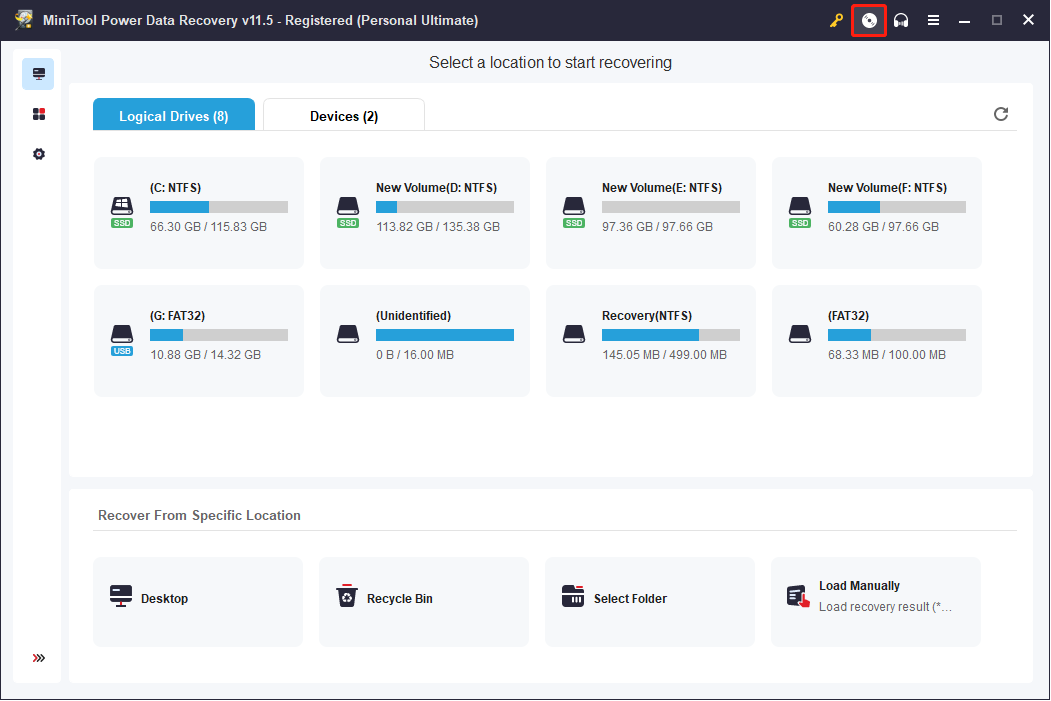
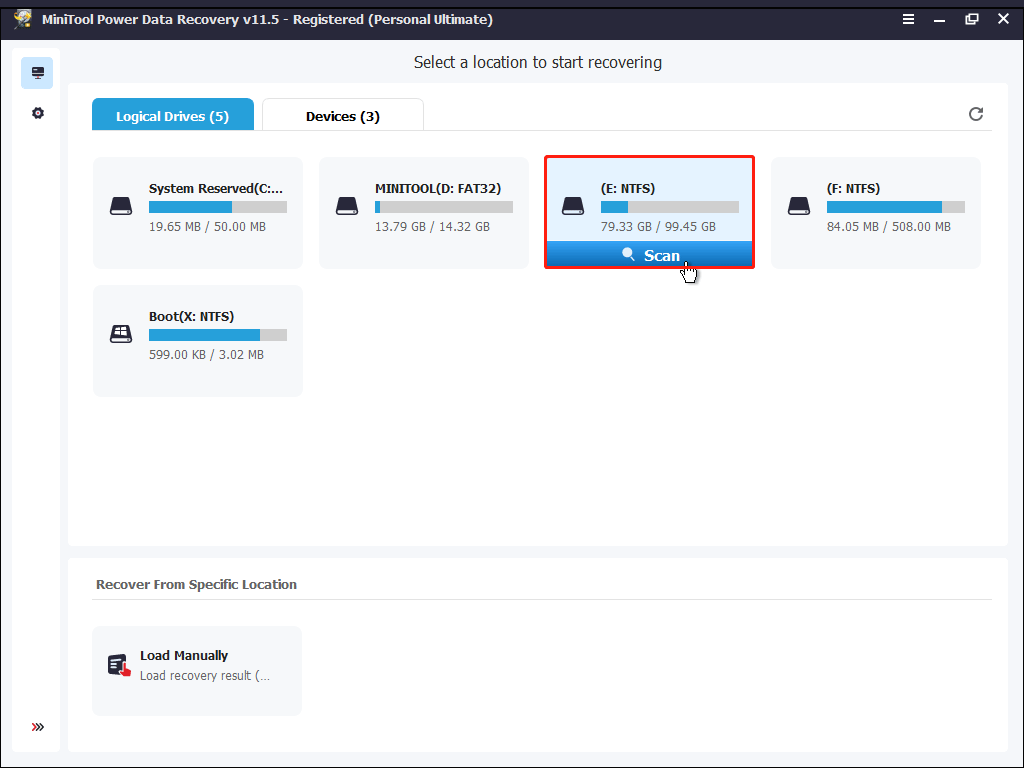
Step 6: Specify a partition that contains files you want to recover and click Scan. You can turn to the Devices tab to scan the whole disk as well.
Step 7: Wait for the scan process to complete. On the result page, you can narrow down the list of files by using functional features like Filter and Type to filter files according to file size, file type, file category, and date modified. Besides, you can click on the Preview button to check the chosen files are what you want.
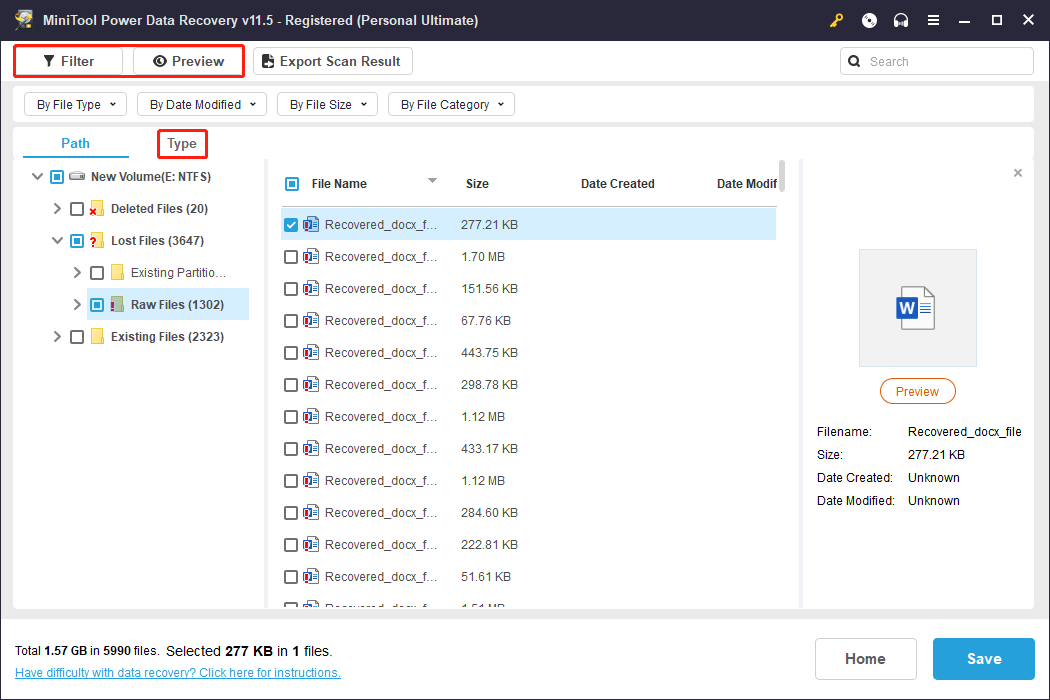
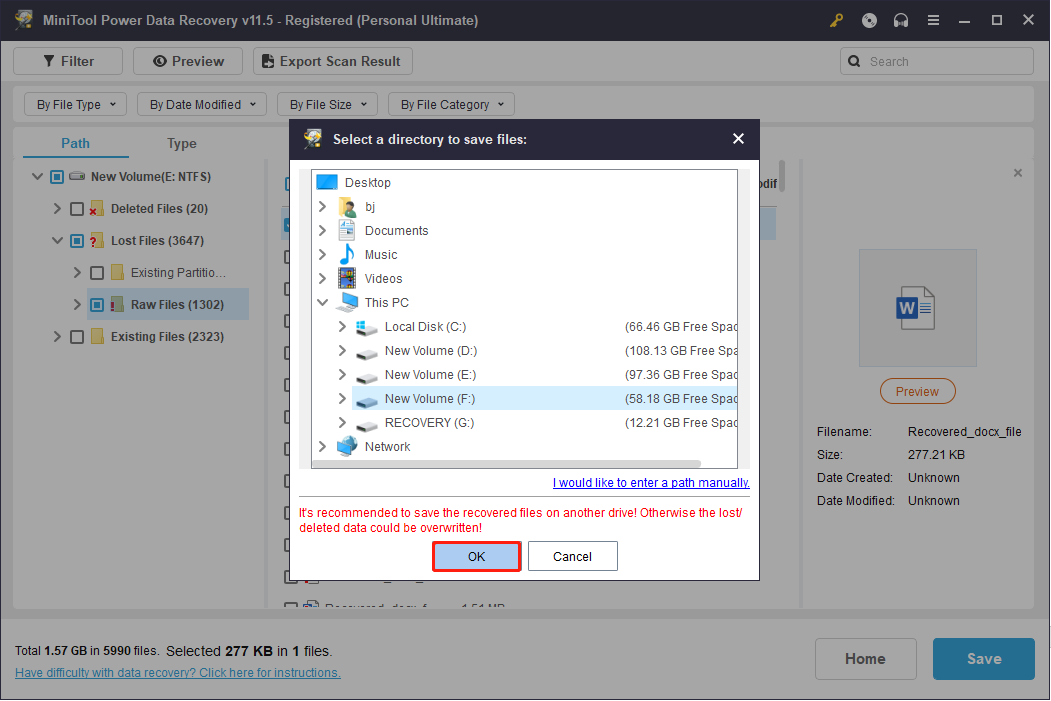
Step 8: Select the files you need and click on the Save button.
Step 9: Choose a proper path to save the files and click OK to confirm.
How to Fix Missing or Corrupted Registry Files in Windows 10
Fix 1: Run SFC and DISM to Repair Corrupted System Files
SFC and DISM commands are helpful in finding and repairing corrupted files in your system. Both of them are used in Command Prompt, a Windows built-in tool. You can run the two commands respectively to find which helps fix the corrupted registry files.
Step 1: Press Win + R to open the Run Window.
Step 2: Type cmd in the text box and press Shift + Ctrl + Enter to run Command Prompt as administrator.
Step 3: Type sfc /scannow and hit Enter.
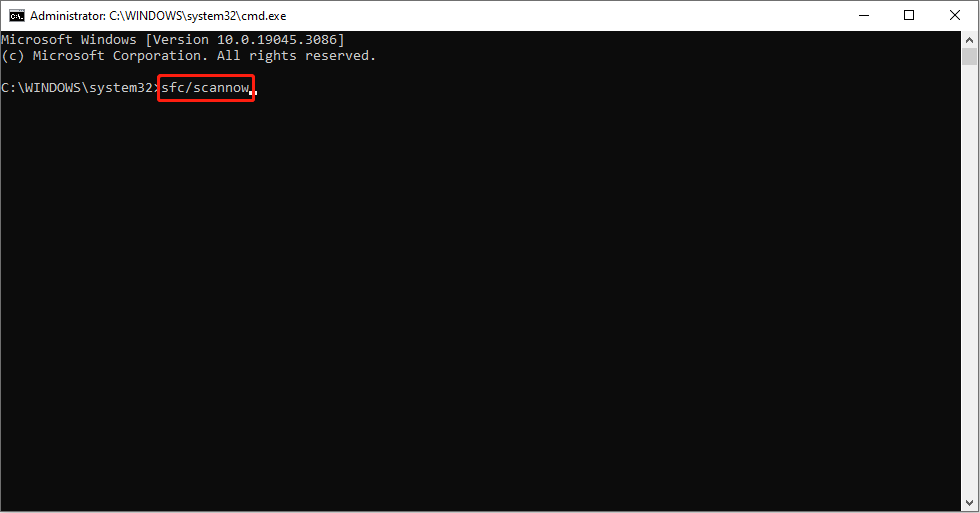
Step 4: Wait for the scan to complete and reboot your computer.
If you find the problem still exists, you can try the DISM command.
Step 1: Press Win + S and type Command Prompt in the search box.
Step 2: Choose Run as administrator on the right panel.
Step 3: Type DISM.exe /Online /Cleanup-Image / RestoreHealth and hit Enter.
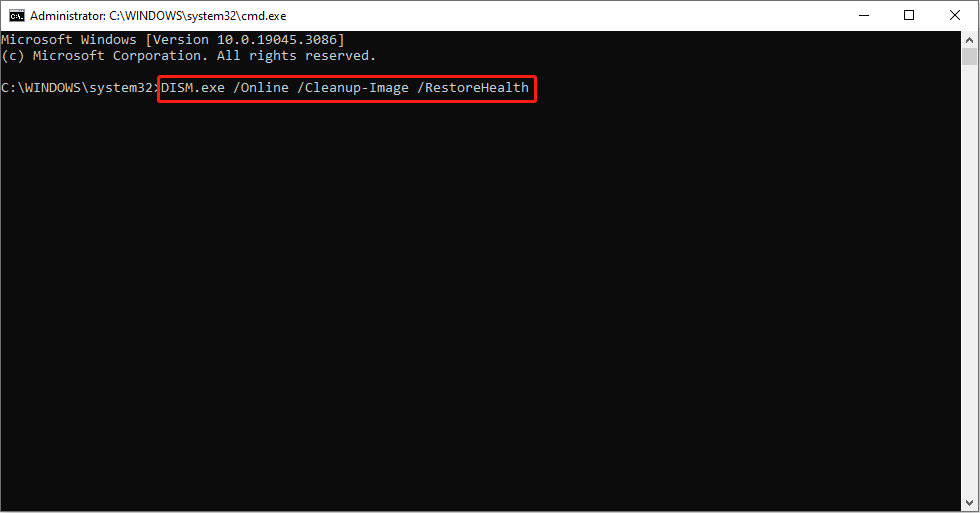
Step 4: Wait until the process ends and reboot the PC. You can log in to check if the problem has been fixed.
Fix 2: Perform Automatic Startup Repair
The Automatic Startup Repair can search and repair Windows errors including registry errors. You can use this method to solve problems.
Step 1: Press Win + I to open the Settings window.
Step 2: Select Update & Security and scroll down to find and choose Recovery.
Step 3: Click on the Restart now button under the Advanced startup section.
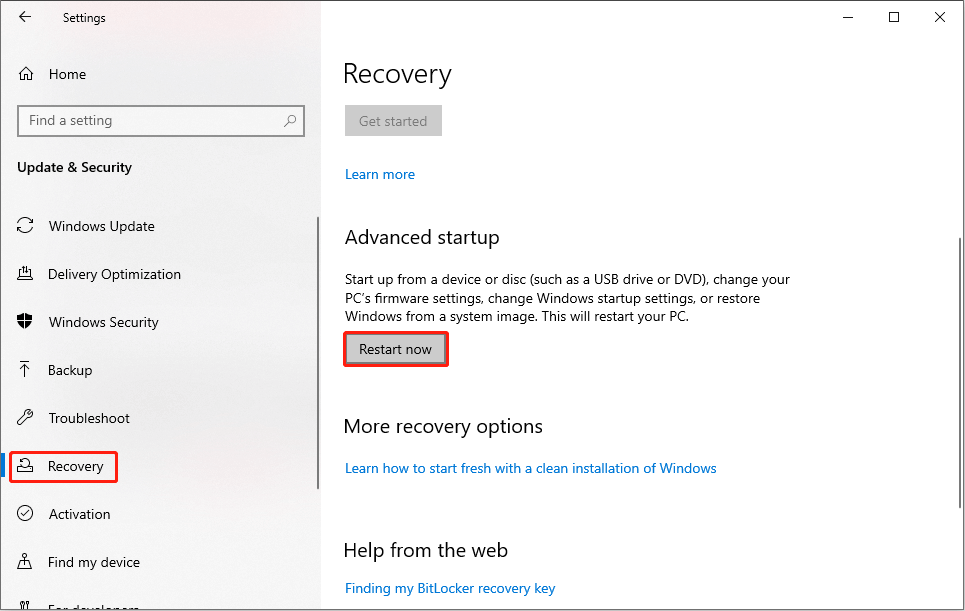
Step 4: After the computer restart, you are able to see the Windows Recovery Environment (WinRE).
Tips:
If your computer can’t boot successfully, you can press and hold the Power button to turn off the computer and press the Power button to turn on it. Repeat these steps two times more and your computer will start up completely. You will enter WinRE as well. Then, you can follow the next steps.
Step 5: Click on Troubleshoot> Advanced options > Startup Repair.
Step 6: In the following window, you need to choose an account to log in and input the password.
Step 7: Click Complete.
Then, your computer will start to diagnose and repair errors. Please wait for a while, then you can check whether the problem is fixed.
Fix 3: Use A Recovery Drive
To fix the problem caused by the system registry file missing or Windows System32 Config System missing, you can use a recovery drive. This might be the best way to resolve the issue. Using this method, you need to find another well-working PC that runs the same operating system as the problematic PC and prepare a USB drive.
Step 1: Connect the USB to the working computer.
Step 2: Press Win + S and type Create a recovery drive in the search box.
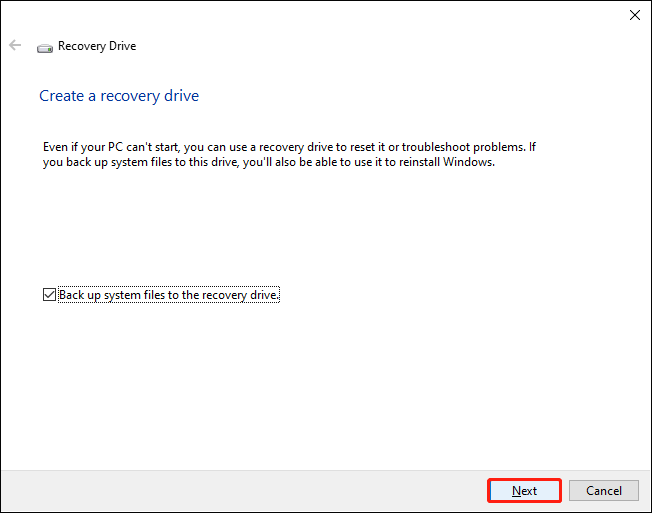
Step 3: Hit Enter to open the Recovery Drive window.
Step 4: Click Next and follow the next instructions to finish creating a recovery drive.
Step 5: Remove the USB drive and plug it into the problematic computer.
Step 6: Boot the computer into the BIOS menu and change its boot sequence to boot from this USB drive.
Step 7: Choose Recover from a drive to make your computer use the version of Windows on your USB drive.
Step 8: You can choose Just remove my files or Fully clean my drive based on your needs.
Step 9: Click Recover to start recovering your PC.
Fix 4: Repair MBR
MBR, standing for Master Boot Record, is responsible for loading the operating system. If the MBR gets corrupted, the computer may fail to start up normally. Follow the next steps to repair MBR.
Method 1: Repair with Installation Media
Step 1: Create a bootable USB installation media and insert it into the problematic computer.
Step 2: Open the computer and boot it into the BIOS menu.
Step 3: Change the boot order to make the computer boot from the USB drive.
Step 4: Select Repair your computer > Troubleshoot > Command Prompt.
Step 5: Type the following commands one by one and hit Enter after each command.
- exe /fixmbr
- exe /fixboot
- exe /scanos
- exe /rebuildbcd
Step 6: Wait for these commands to complete.
Step 7: Remove the USB drive and restart the computer.
Method 2: Rebuild with MiniTool Partition Wizard
MiniTool Partition Wizard can help you rebuild MBR more easily. This is a functional partition management tool. It can format, resize, split, and merge partitions. Besides, you can use it to convert file systems and recover partitions. For more functions, you can download MiniTool Partition Wizard to have a try.
MiniTool Partition Wizard FreeClick to Download100%Clean & Safe
Step 1: Download and install MiniTool Partition Wizard which contained a snap-in WinPE Bootable Builder.
Step 2: Connect a USB drive to a well-performed computer and run the software.
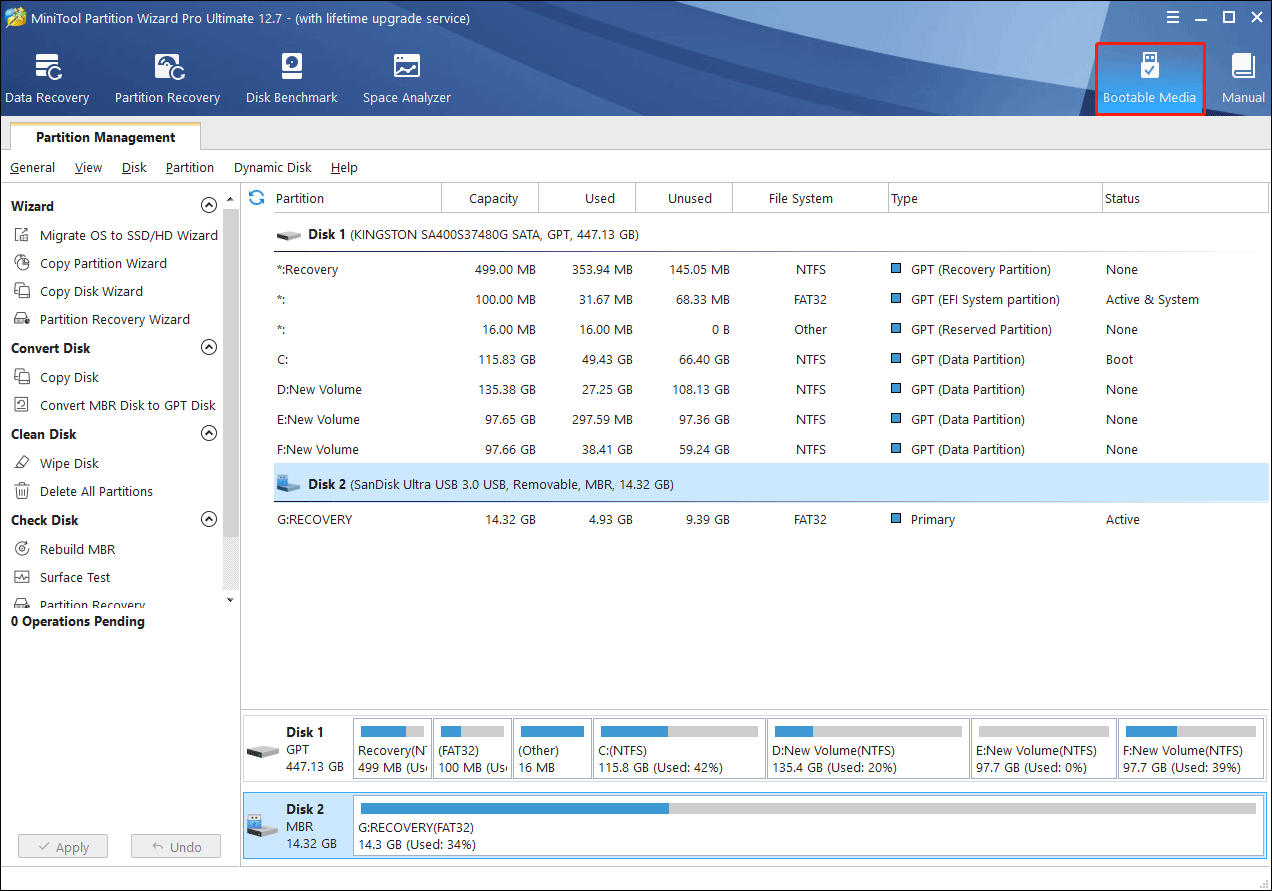
Step 3: Click Bootable Media and follow the instruction to create a bootable disk.
Step 4: Then, plug the created bootable media into the problematic computer and boot the computer into the BIOS menu.
Step 5: Change the boot order to make the computer boot from the created bootable disk.
Step 6: Wait for the computer to restart and MiniTool Partition Wizard will open automatically.
Step 7: Select the internal disk that can’t boot.
Step 8: Choose the Rebuild MBR function from the left pane, then follow the instructions to complete it.
Restart your computer to see whether it can work normally.
Fix 5: Perform System Restore
When you perform system restore, your computer will back to the status of the restore point you choose. It is powerful to solve any Windows problem. But only when you have created a restore point when your computer works normally, you can try this method.
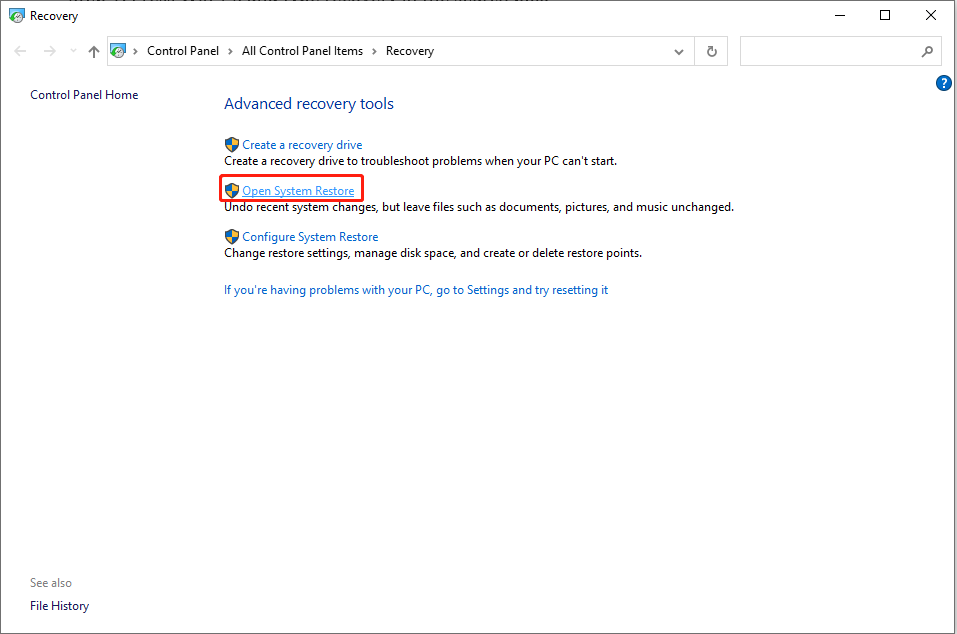
Step 1: Press Win + S and type recovery in the search box.
Step 2: Choose Open System Restore.
Step 3: Choose a restore point in the popup window. Please make sure that the chosen restore point was created before the error occurs and at that time your computer works normally.
Step 4: Click Next.
Step 5: Check the information shown on the window and click Finish to restore the system.
After this, you can check if your computer can work well.
If you want to know more methods to resolve the error caused by the registry file missing, please turn to:
Conclusion
Several practical methods are provided to help you resolve the registry files missing or corrupted error. Hope this post can help you. When you are resolving the problem, take care of your files. If needed, try MiniTool Power Data Recovery to rescue files.
MiniTool Power Data Recovery FreeClick to Download100%Clean & Safe
When facing problems in using this data recovery software, you are heartily welcome to share your questions with us via [email protected].
As it turns out, some users are encountering the ‘System Registry File is Missing’ error during the booting procedure. As a result, they are unable to start their computers conventionally. Most affected users are reporting that the error occurs a few seconds after the final loading screen (of the booting procedure) appears. Although this error is mostly reported to occur on Windows 10, we’ve managed to find a lot of instances of it happening on Windows 7 and Windows 8.1 computers.
What’s causing the ‘System Registry File is Missing’ error on Windows?
We investigated this particular issue by looking at various user reports and by testing out the various repair strategies that are recommended by other users that already managed to threat the symptoms of this issue. As it turns out, several different scenarios might lead to the apparition of this issue. Here’s a list of potential culprits that might be responsible for this problem:
- Wrong startup configuration – If you’ve previously set up a dual boot system, chances are the wrong BCD data is being used during the startup procedure. In this case, you should be able to resolve the issue by booting to the last known good configuration. Several affected users have confirmed that this procedure was effective in their case.
- Corrupted BCD data – Once of the most common causes that will produce this particular error is an underlying booting problem caused by corruption inside the BCD data. If this scenario is applicable, you should be able to fix the problem by using the Bootrec.exe utility to repair the corrupted BCD data.
- System file corruption – As it turns out, system file corruption can also be responsible for the apparition of this startup error. Several affected users that were also encountering this issue have managed to fix it by running a couple of utilities capable of fixing system file corruption (DISM and SFC). In most severe cases, you might need to reset every OS component with a repair install or a clean install procedure.
Method 1: Booting to the last good configuration
If the issue only started occurring recently and you’re looking for a fix that doesn’t involve complicated troubleshooting strategies, you should start by seeing if your computer is capable of completing the startup procedure by using the last good configuration.
Several affected users have reported that they finally managed to bypass the startup System Registry File Is Missing error by forcing the Startup options screen to appear and selecting the Last known good configuration from the list.
Here’s a quick guide on booting from the last good configuration:
- Start your computer and start pressing F8 repeatedly as soon as you see the initial screen to arrive inside the Advanced Boot Options.
- Once you’re inside the Advanced Boot Options screen, select Last Known Good Configuration from the list of available options.

- Wait for the procedure to complete and see if the startup procedure completes without issues.

If the same problem is still occurring, move down to the next potential fix below.
Method 2: Fixing the booting sequence
As it turns out, one of the most common instances that will spawn the ‘System Registry File is Missing’ error during the startup sequence is an underlying booting problem. In these cases, the only effective way of getting to the bottom of the issue is to repair the entire booting sequence by using the Bootrec.exe.
Bootrec.exe is a built-in Windows utility capable of fixing the entire master boot record, the whole booting sequence, and the boot configuration data. Keep in mind that any of these components might be responsible for the current error that you’re dealing with.
Prerequisite: Keep in mind that to perform this installation procedure, you need a valid Windows installation media that is compatible with the operating system that you’re using. If you don’t have that already, you can create one by following the instructions outlined in one of the resources featured below:
- Creating an Installation Media for Windows 7
- Creating an Installation Media for Windows 10
Note: Choose the article that applies to the operating system that you’re using. And in case you don’t have the installation media and no means of obtaining one, you can force the Startup Recovery menu to appear by forcing 3 consecutive startup interruptions (turning off the computer in the middle of the booting sequence).
Once you have the prerequisite, follow the instructions below to run the Bootrec.exe utility to resolve the ‘System Registry File is Missing’ error:
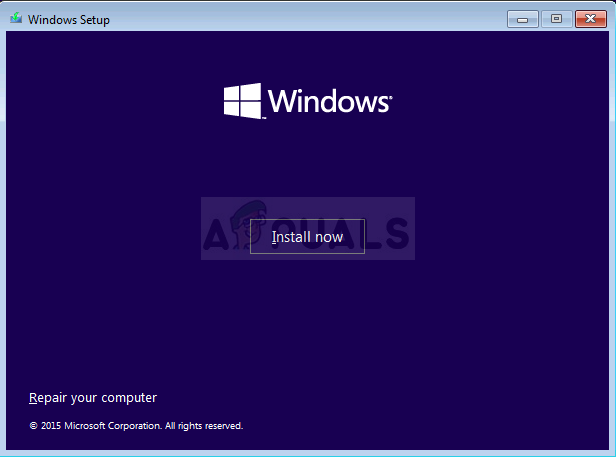
- Start the operation by inserting the installation media before the booting sequence can begin. Next, press any key when prompted to boot from in. Once you see the initial Windows installation window, click on Repair your computer (You can see it either in the bottom right or the bottom left corner, depending on your Windows version).

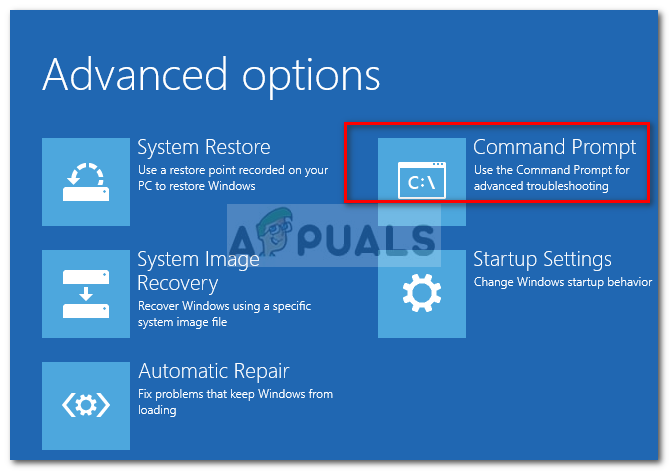
Choose Repair your computer - You should be taken directly to the Advanced Options menu. Once you get there, click on Troubleshoot, then select Command Prompt from the list of available options.

Choosing Command Prompt from Advanced Options - Once you’re inside the elevated Command prompt window, type the following commands inside and press Enter after each command to rebuild the entire Boot Configuration data:
bootrec.exe
bootrec.exe /fixmbr
bootrec.exe /fixboot
bootrec.exe /scanos
bootrec.exe /rebuildbcd
- Once all commands have been processed successfully, all boot configuration data should be repaired. All you need to do now is test the startup procedure to see if it completes without any errors.

If you’re still encountering the same error during the booting procedure, move down to the next method below.
Method 3: Repairing System File Corruption
As it’s been confirmed by several affected, users the ‘System Registry File is Missing’ error can also be triggered by some degree of System File corruption that is interfering with the booting sequence. Keep in mind that under normal circumstances, you should open an elevated Command prompt to run the two utilities.
But since you can’t get past the booting sequence, you will need to perform these scans before the booting sequence completes. To do this, you’ll need to open up an elevated CMD prompt using the Advanced Options menu.
Here’s a quick guide that will guide you through the procedure of running SFC and DISM scans from a CMD opened from inside the Advanced Options menu:
- Start by inserting the installation media and restarting your machine. Before you get to see the first startup screen, start pressing any key to boot from the Windows installation media.

Press any key to boot from installation media - Once you find yourself at the initial Windows screen, click on Repair your computer (bottom-left corner of the screen)
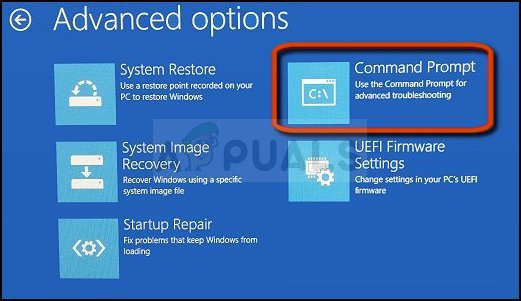
Choosing Repair your computer from Windows Setup - At the next menu, start by selecting the Troubleshooting tab, then click on the Advanced Options. Once you get to that menu, select the Command Prompt options.

Command Prompt in Advanced options - Once you manage to get inside the elevated Command Prompt, type the following command and press Enter to initiate a System File Checker scan:
sfc /scannow
Note: Keep in mind that SFC is using a locally cached copy to replace corrupted files with healthy copies. Interrupting this utility after the initial scan has been started is not recommended since you leave your system exposed to other logical errors. Wait patiently until the procedure is complete.
- Once the SFC scan is complete, restart your computer and re-follow the steps above to return to the elevated CMD screen at the next system startup. After you manage to return to the elevated CMD prompt, type the following commands and press Enter after each one to investigate and fix corruption instances using the DISM utility:
Dism /Online /Cleanup-Image /CheckHealth
Dism /Online /Cleanup-Image /ScanHealth
Dism /Online /Cleanup-Image /RestoreHealth
Note: This utility is highly dependent on the Windows Update component. It uses WU to download healthy copies of the corrupted files that need to be replaced. Because of this fact, make sure that your Internet connection is stable before initiating the DISM scan.
- Once the procedure is complete, restart your computer and see if the issue is resolved at the next system startup.

If the same ‘System Registry File is Missing’ error is still occurring during the startup sequence, move down to the next method below.
Method 4: Performing a repair install
If you’ve followed all the potential fixes above and you’re still encountering the same ‘System Registry File is Missing’ error, chances are you’re dealing with an underlying system file corruption issue that cannot be resolved conventionally.
If this scenario is applicable, the only way of resolving the OS-related issues is to follow a procedure that will reset every Windows component. When it comes to achieving this state, you have two ways forward:
- A clean install
- A repair install (in-place upgrade)
A clean install is a more straightforward option that doesn’t require any prerequisites, but the major downside is that you will experience serious data loss – Personal files, applications, user preferences and any other type of data will be lost unless you back it up in advance.
If you want a more efficient approach, go for the repair install procedure. Although it’s a more tedious procedure and it requires you to have a valid Windows installation media, it will only reset your Windows components. But the major advantage is that you will be able to keep all your files (documents, pictures, music, etc.) applications, games, and even some user preferences.
Kevin Arrows
Kevin Arrows is a highly experienced and knowledgeable technology specialist with over a decade of industry experience. He holds a Microsoft Certified Technology Specialist (MCTS) certification and has a deep passion for staying up-to-date on the latest tech developments. Kevin has written extensively on a wide range of tech-related topics, showcasing his expertise and knowledge in areas such as software development, cybersecurity, and cloud computing. His contributions to the tech field have been widely recognized and respected by his peers, and he is highly regarded for his ability to explain complex technical concepts in a clear and concise manner.