
Многие знают о такой встроенной возможности шифрования дисков и флешек в Windows 11, Windows 10 и предыдущих версиях системы как Bitlocker, доступной в профессиональной и корпоративной редакциях ОС. Меньшему числу известно о другой функции шифрования файлов и папок — Шифрующей файловой системе EFS, которая также встроена в системе.
В этой инструкции о том, как именно работает шифрование EFS, каким образом оно позволяет ограничить доступ к важным файлам и папкам, как восстановить доступ к данным при необходимости и в чем отличия от BitLocker. Также может быть полезным: Шифрование дисков и флешек с помощью Bitlocker в Windows.
Как работает EFS
EFS позволяет легко выполнить шифрование содержимого выбранных папок или отдельные файлы с помощью средств системы таким образом, что они будут доступны только для пользователя и на том компьютере, где выполнялось шифрование.
Другие пользователи на этом же или другом компьютере будут видеть файлы и их имена на накопителе, но не смогут получить доступ к ним (открыть их, прочесть содержимое), независимо от имеющихся прав в системе.
Этот способ менее безопасен чем шифрование Bitlocker, но если единственная задача — не дать пользователям с другими учётными записями на этом же компьютере даже с правами администратора просмотреть содержимое ваших файлов, вполне можно использовать и EFS: это будет удобно и быстро.
Как зашифровать папки и содержащиеся в них файлы с помощью EFS
Прежде чем приступить, отмечу: EFS, так же как и BitLocker, недоступна в Домашней редакциях Windows 11/10, только Pro, Entrprise и некоторые другие версии. Шаги для шифрования папки и её содержимого с помощью шифрующей файловой системы EFS в самом простом варианте будут следующими (доступно только для папок на NTFS дисках и флешках):
- Откройте свойства нужной папки (правый клик мышью — свойства).
- В разделе «Атрибуты» нажмите кнопку «Другие».
- В разделе «Атрибуты сжатия и шифрования» в следующем окне отметьте «Шифровать содержимое для защиты данных» и нажмите «Ок».
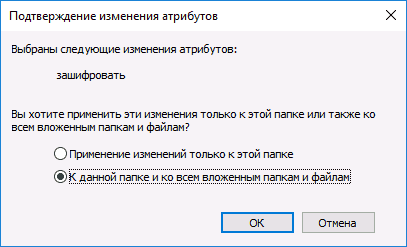
- Нажмите «Ок» в свойствах папки и примените изменения к вложенным файлам и папкам.

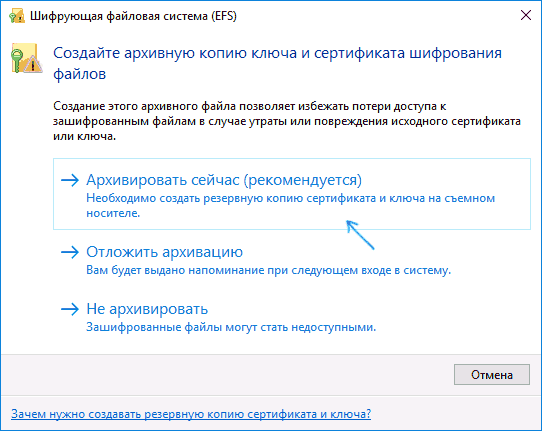
- Сразу после этого появится системное уведомление, где вам предложат выполнить архивацию ключа шифрования. Нажмите по уведомлению.
- Нажмите «Архивировать сейчас» (ключ может потребоваться для восстановления доступа к данным, если вы потеряли свою учетную запись или доступ к этому компьютеру).

- Запустится мастер экспорта сертификатов. Нажмите «Далее» и оставьте параметры по умолчанию. Снова нажмите «Далее».
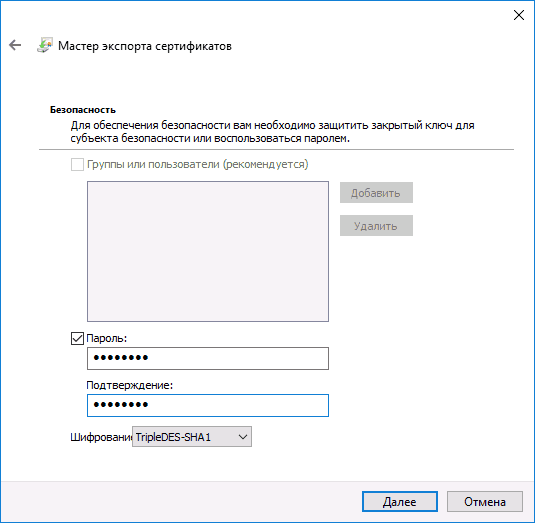
- Задайте пароль для вашего сертификата, содержащего ключи шифрования.

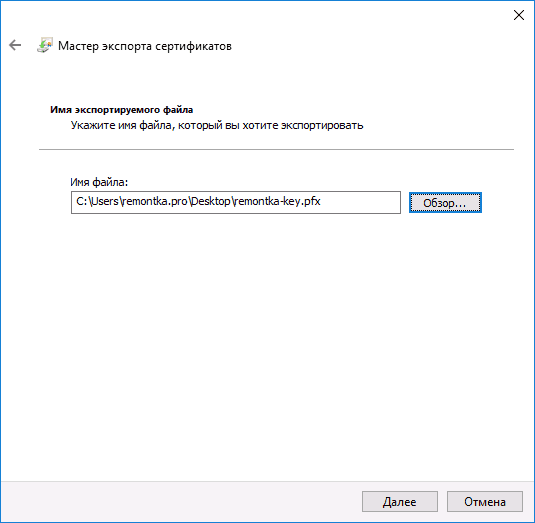
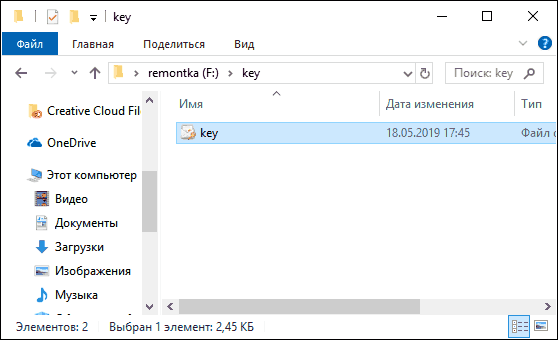
- Укажите место хранения файла и нажмите «Готово». Этот файл пригодится для восстановления доступа к файлам после сбоев ОС или при необходимости иметь возможность открывать зашифрованные EFS файлы на другом компьютере или под другим пользователем (о том, как это сделать — в следующем разделе инструкции).
На этом процесс завершен — сразу после выполнения процедуры, все файлы в указанной вами папке, как уже имеющиеся там, так и создаваемые вновь приобретут на иконке «замок», сообщающий о том, что файлы зашифрованы.

Они будут без проблем открываться в рамках этой учетной записи, но под другими учетными записями и на других компьютерах открыть их не получится, система будет сообщать об отсутствии доступа к файлам. При этом структура папок и файлов и их имена будут видны.
При желании вы можете, наоборот, начать шифрование с создания и сохранения сертификатов (в том числе и на смарт-карте), а уже затем устанавливать отметку «Шифровать содержимое для защиты данных». Для этого, нажмите клавиши Win+R, введите rekeywiz и нажмите Enter.
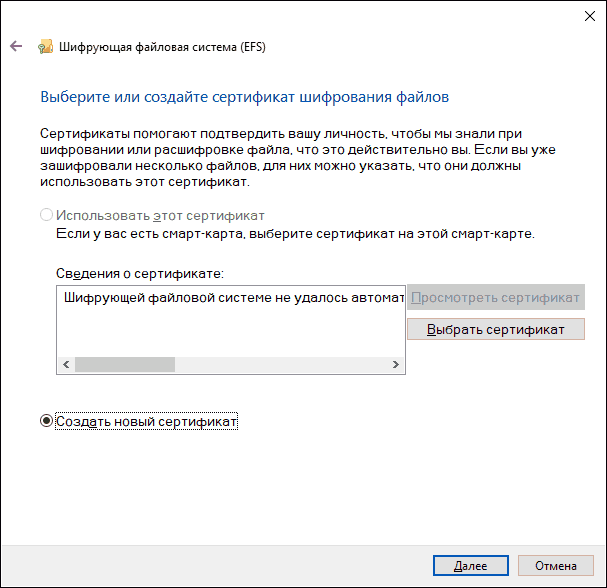
После этого выполните все шаги, которые предложит вам мастер настройки сертификатов шифрования файлов шифрующей файловой системы EFS. Также, при необходимости, с помощью rekeywiz вы можете задать использование другого сертификата для другой папки.
Восстановление доступа к зашифрованным файлам, их открытие на другом компьютере или под другой учетной записью Windows
Если по той или иной причине (например, после переустановки Windows) вы потеряли возможность открыть файлы в зашифрованных EFS папках или вам потребовалась возможность открывать их на другом компьютере или под другим пользователем, сделать это легко:
- На компьютере в той учетной записи, где нужно иметь доступ к зашифрованным файлам, откройте файл сертификата.

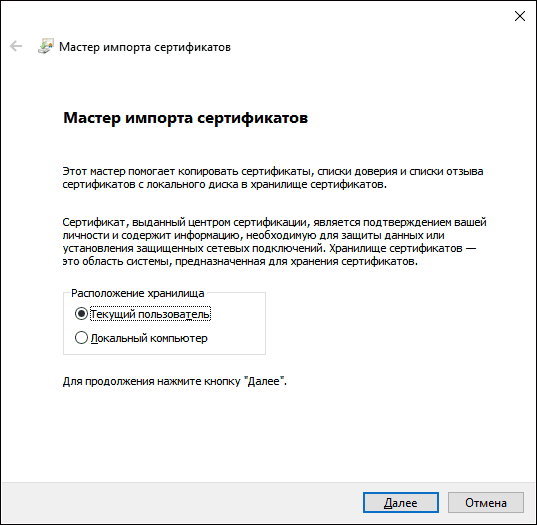
- Автоматически откроется мастер импорта сертификатов. Для базового сценария в нем достаточно использовать параметры по умолчанию.

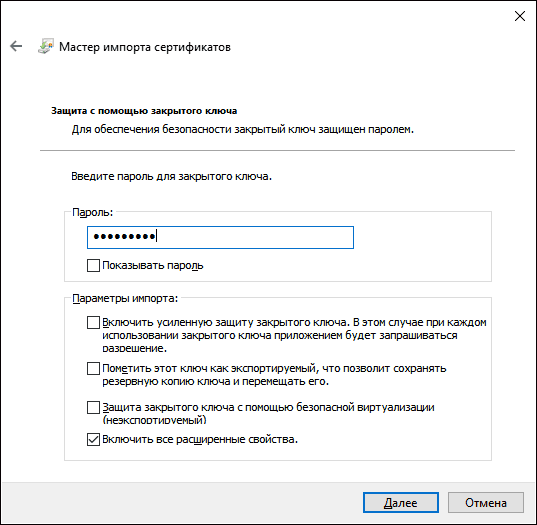
- Единственное, что потребуется — ввести пароль для сертификата.
- После успешного импорта, о чем вы получите уведомление, ранее зашифрованные файлы будут открываться и на этом компьютере под текущим пользователем.
Отличия шифрующей файловой системы EFS и Bitlocker
Основные отличия двух различных встроенных возможностей шифрования в Windows 11 и Windows 10:
- Bitlocker шифрует целые разделы/диски (в том числе системные) или разделы дисков, в то время как EFS применяется к отдельным файлам и папкам. Впрочем, шифрование Bitlocker можно применить и к виртуальному диску (который на компьютере будет храниться как обычный файл).
- Сертификаты шифрования EFS привязываются к конкретной учетной записью Windows и хранятся в системе (также ключ можно экспортировать в виде файла на флешке или записать на смарт-карту).
- Ключи шифрования Bitlocker хранятся либо в аппаратном модуле TPM, либо могут быть сохранены на внешний накопитель. Открытый диск с Bitlocker одинаково доступен всем пользователям системы, более того, если не использовался TPM, такой диск можно легко открыть и на любом другом компьютере или ноутбуке, достаточно будет ввести пароль.
- Шифрование для папок в случае использования EFS нужно включать вручную (файлы внутри будут в дальнейшем шифроваться автоматически). При использовании Bitlocker всё, что попадает на зашифрованный диск шифруется на лету.
С точки зрения безопасности более эффективно использование Bitlocker. Однако, если требуется всего лишь не дать открыть ваши файлы другим пользователям Windows, а вы используете домашнюю редакцию ОС (где нет Bitlocker) — для этого подойдет и EFS.
Некоторые дополнительные сведения об использовании шифрующей файловой системы EFS в Windows:
- Зашифрованные EFS файлы не защищены от удаления: удалить их сможет любой пользователь на любом компьютере.
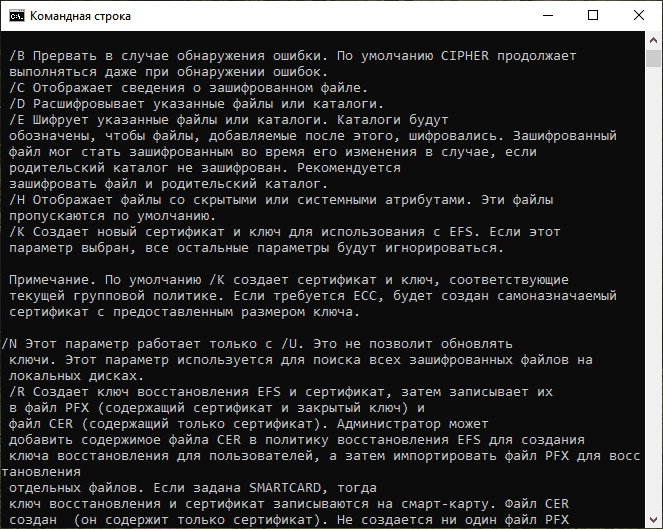
- В системе присутствует утилита командной строки cipher.exe, которая может включать и отключить шифрование EFS для файлов/папок, работать с сертификатами, а также очищать содержимое зашифрованных папок на жестком диске, перезаписывая информацию случайными байтами.

- Если вам требуется удалить сертификаты шифрования EFS с компьютера, сделать это можно следующим образом: зайдите в Панель управления — Свойства браузера. На вкладке «Содержание» нажмите кнопку «Сертификаты». Удалите ненужные сертификаты: в их описании внизу окна в поле «Назначение сертификата» будет указано «Шифрующая файловая система (EFS)».
- В том же разделе управления сертификатами в «Свойствах браузера» можно экспортировать файл сертификата для использования под другим пользователем или на другом компьютере.
Другие материалы сайта на близкую тему: Шифрование файлов, папок, дисков и флешек в VeraCrypt, Как поставить пароль на архив.
Data breaches, unauthorized access, and identity theft are common, encrypting files is no longer optional; it’s essential. If you’re storing confidential documents, financial data, or personal information on your Windows 11 PC, encryption helps ensure your data stays private even if your system falls into the wrong hands.
Here’s how to get started using the best methods available in Windows 11 whether you prefer built-in tools.
Why File Encryption Matters
Encryption transforms readable data into scrambled code that can only be decoded with a key or password. Even if someone gains physical or remote access to your files, they won’t be able to view them without the proper credentials. This is critical for:
- Personal documents like tax files, medical records, or IDs
- Business data, customer information, or trade secrets
- Backups stored on external drives or in the cloud
Built-in Encryption Options in Windows 11
Windows 11 includes native tools to help you protect your files without the need for extra software. Let’s explore them.
Encrypt Files Using EFS (Encrypting File System)
EFS is a file-level encryption feature available in Windows 11 Pro, Enterprise, and Education editions.
How to Use EFS:
- Right-click the file or folder you want to encrypt
- Select Properties
- Click the Advanced button
- Check the box that says “Encrypt contents to secure data”
- Click OK, then Apply

Windows will prompt you to back up your encryption certificate. Doing it immediately means losing access to your files.
Limitations of EFS:
- Only available in certain editions (not in Home)
- Encryption is tied to your user account no password prompts if logged in
Use BitLocker to Encrypt Entire Drives
If you want to go beyond single-file protection, BitLocker lets you encrypt entire drives.
How to Use BitLocker:
- Open Control Panel > System and Security > BitLocker Drive Encryption
- Select the drive you want to encrypt
- Click Turn on BitLocker
- Choose how you want to unlock the drive (password, USB key, etc.)
- Follow the on-screen instructions to complete encryption
BitLocker is also available only in Pro and Enterprise editions. Home users will need alternatives.
If you’re using Windows 11 Home edition, you don’t have access to EFS or BitLocker. But that doesn’t mean you’re out of options.
Use 7-Zip to Encrypt Files with a Password
7-Zip is a free and reliable tool to encrypt files using AES-256 encryption.
Steps:
- Download and install 7-Zip
- Right-click the file/folder > 7-Zip > Add to archive
- Under “Encryption,” set a strong password and choose AES-256
- Click OK
This method creates a password-protected .7z or .zip file, ideal for secure transfers or storage.
VeraCrypt for Advanced Encryption
If you need serious encryption for multiple files or entire volumes, VeraCrypt is a top-rated open-source tool.
Features:
- Create encrypted virtual drives
- Encrypt external USBs
- Military-grade encryption options like AES, Serpent, and Twofish
It’s an excellent solution for professionals and privacy-conscious users alike.
Encryption is effective, but only if used properly. Follow these tips to maximize your file security:
Best Practices for Secure File Encryption
- Use strong, unique passwords for all encrypted files
- Backup your encryption keys and certificates in a safe place
- Don’t store passwords in plain text on your device
- Keep your software, including Windows 11, up to date to avoid vulnerabilities
Update Drivers Before Disabling Risky Services
Before encrypting sensitive files, it’s important to update your drivers to ensure system stability and proper hardware communication. Encryption tools often rely on components like TPM and Secure Boot, which require up-to-date drivers to function correctly.
Outdated or faulty drivers can cause errors during encryption, increase the risk of data corruption, or lead to compatibility issues with encryption software. Updating your drivers first helps ensure the encryption process runs smoothly and securely.
Which is why Fortect is the best third-party PC repair with a built-in driver updater feature. It automatically scans your Windows PC on all drivers and identifies which ones are outdated or corrupted and automatically updates them while optimizing your PC prior to encrypting sensitive files.
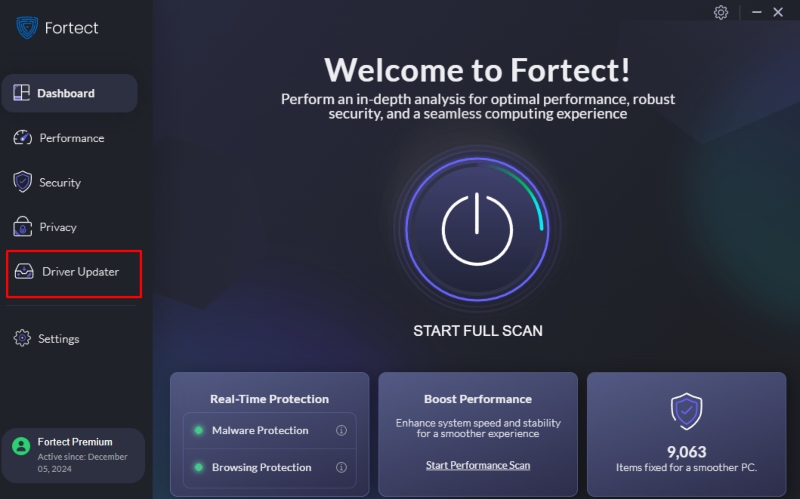
Install Fortect today.
Final Thoughts
Whether you’re a professional storing confidential work documents or a home user securing personal files, file encryption on Windows 11 is a critical step in safeguarding your privacy. From built-in tools like EFS and BitLocker to trusted third-party apps like VeraCrypt and 7-Zip, you have plenty of options to choose from.
Don’t forget to run a full system check with Fortect before encrypting files, ensuring a clean environment and maximum security for your encrypted data.
The Windows Encrypting File System is a security feature that enables users to encrypt the contents of their hard drives. EFS is disabled by default, but you can enable it if you want to encrypt your files.
Windows EFS is a feature that was introduced in Windows Vista and it has been improved in Windows 8 and 10. It allows users to encrypt their files so that unauthorized people cannot access them. Encryption can be done on the entire hard drive or for individual folders.
Here, in this article, we will know more about the Windows Encrypting File System (EFS) and learn how to enable or disable it.
Advantages of Using the Encrypting File System Feature?
The Encrypting File System feature is a built-in Windows 10 function. It provides an easy way to encrypt data on your hard drive so that it cannot be accessed by unauthorized people.
The EFS encrypts files and folders on NTFS volumes. To use EFS, you must be running Windows 2000 or later and have the NTFS file system.
Encrypting your files ensures that no one can access them without the correct encryption key. Even if someone gains access to your computer, they will not be able to read the contents of your files without knowing the encryption key. The benefits of using this feature are that it provides a higher level of security for sensitive data and you can encrypt individual files rather than entire folders.
How Do You Enable or Disable the Windows Encrypting File System (EFS)
1. Enabling or Disabling the EFS Using the Command Prompt
For enabling or disabling the EFS using the Command Prompt, follow the given steps:

Step 1: Open the Command Prompt.
Step 2: Type «fsutil behavior set encryptpolicies 1» and press Enter.
Step 3: Reboot your computer for changes to take effect.
2. Enabling or Disabling the EFS Using the Local Group Policy Editor
Enabling or disabling the Encrypt File System (EFS) using the Local Group Policy Editor is a simple way to protect data from unauthorized access.

The Encrypting File System (EFS) enables you to encrypt files and folders on NTFS volumes. By default, EFS is enabled on all NTFS volumes with at least one user who has a valid EFS certificate.
You can use the Local Group Policy Editor to disable EFS for specific drives, which will prevent users from encrypting new files and folders on those drives.
In order to enable or disable the Encrypting File System, you need to go to Computer Configuration -> Administrative Templates -> System -> Device Security and then select Prevent users from encrypting files in Windows 10 Pro edition.
3. Enabling or Disabling the EFS via the Local Security Policy
In Windows 10, the Encrypting File System (EFS) is disabled by default. The reason for this is that EFS is a feature that encrypts only files and folders on NTFS volumes. That means it cannot be used on FAT32 or other file systems such as exFAT.
If you want to encrypt your data in Windows 10, you can enable EFS by following these steps:
1) Click Start, type «secpol.msc» in the search bar, and select «Create security policy».
2) In the left pane of the Local Security Policy window, click on «File System».
3) In the middle pane of Local Security Policy, check off «Encrypting File System (EFS)».
4) Click the «Apply changes» button and reboot your system.
5) After rebooting, open Computer Management from the Search bar in the Start menu.
6) In Computer Management, expand Operating System containers -> Policies and Settings -> Security Settings ->
4. Enabling or Disabling the EFS Using Services
Some people might not know how to enable or disable EFS using services, because it is not listed in the Settings app. For those who want to know how to do this, you can use the following steps:
1) Press “Windows+R” and type “services.msc” in the dialogue box and press Enter;
2) Find Encrypting File System (EFS), right-click it, and select Properties;
3) Select Disabled from the Startup type drop-down list and click Apply;
4) Click OK to apply changes.
5. Enabling or Disabling the EFS Using the Registry Editor
Encrypting files and folders is a way to protect your data from unauthorized access. But it can be a bothersome process. The Windows 10 EFS feature is designed to encrypt files and folders by default. You can manage this feature by using the Registry Editor, which allows you to enable or disable this encryption feature.
1) Open the Registry Editor by pressing Windows+R key combinations on your keyboard, type «regedit» in the dialog box, and click «OK».
2) Navigate through HKEY_LOCAL_MACHINE\SYSTEM\CurrentControlSet\Control\Filesystem
3) Double-click on any of the following registry keys: EncryptionPolicy, EncryptionType, or UseDefaultEncryption
4) Select a value between 0 and 2.
5) If you want to encrypt files and folders by default, select 1.
6) If you want the encryption feature to be disabled, select 0.
7) Close Registry Editor.
Encrypting or Decrypting Files and Folders With EFS
Encrypting files and folders is a security measure to protect sensitive data from being accessed by unauthorized people.
The EFS is an inbuilt feature of Windows 10, 8, 7, Vista, and XP. The EFS also supports the use of smart cards for encryption keys.
First, you need to open Windows Explorer, select the file or folder you want to encrypt or decrypt and right-click on it. Then select «Properties».
In the Properties window, click on the «Advanced» tab and then click the «Encrypt contents to secure data» button.
If you want to decrypt the file or folder, click on the «Decrypt contents» button instead of «Encrypt contents».
FAQs
What are the benefits of using EFS?
EFS is a powerful tool for content managers. It allows them to upload their content and let the AI assistant optimize it for SEO. It also provides them with insights on the performance of their content in order to help them make better decisions.
What are the risks of using EFS?
Electronic filing systems are a great way to reduce the time spent on paperwork, but they are not without risks. One of the main risks is that it can be hard to find a document when you need it.
It can also be difficult to find documents that have been lost in the system. This is because there is no physical filing system and all documents are stored electronically. The only way to search for these documents is through keywords, which could lead to some confusion for some users.
Another risk of using electronic filing systems is that they may not be as secure as traditional paper files, which means that sensitive information could be more at risk of being leaked or hacked than usual.
Which features does EFS not include?
EFS does not include any features that are not in the scope of the work.
В этой статье мы расскажем о том, как зашифровать файлы и папки стандартными методами Windows 10, а также рассмотрим две утилиты для шифрования: BitLocker и EFS.

Содержание
- Стандартные средства шифрования Windows и их различия
- Шифрование при помощи EFS
- Как использовать ключи шифровальщика?
- Шифрование диска при помощи BitLocker
- Ошибка BitLocker
- Как разблокировать зашифрованный диск?
- Как защитить паролем отдельные папки и файлы?
Операционная система Windows имеет встроенные утилиты, предназначенные для шифрования данных. С их помощью можно защитить данные от третьих лиц и скрыть содержимое от тех, кто не знает пароль.
Стоит отметить, что встроенные шифровальщики Windows имеют достаточно простые алгоритмы работы, поэтому при умении и наличии хакерского ПО такое шифрование можно обойти, но для обычных пользователей данные все равно останутся недоступными, что можно применять, к примеру, для компьютеров, которыми пользуется сразу несколько различных пользователей.
Стандартные средства шифрования Windows и их различия
Windows снабжен встроенными средствами для шифрования данных: BitLocker и EFS.
Данные утилиты позволяют быстро провести шифрование данных и устанавливать собственные пароли на файлы.
Шифровальщик BitLocker является узкоспециализированной программой, предназначенной для шифрования дисков. С её помощью можно защитить данные на всем жестком диске или его разделе, без возможности шифрования отдельных каталогов и файлов.
Утилита EFS – заполняет пробел BitLocker и шифрует как отдельные папки, так и всевозможные файлы. Функционал EFS позволяет простым и быстрым способом сделать данные недоступными для других пользователей.
Шифрование при помощи EFS
Сразу стоит отметить, что домашняя версия ОС Windows не подходит для шифрования данных встроенными средствами, поскольку алгоритмы работы утилиты являются неэффективными при данной версии системы. Помимо этого, пользователю следует обзавестись съемным носителем, где можно хранить специальный ключ, способный расшифровать информацию в случае утери доступа к профилю ОС.
Для начала работы с утилитой EFS следует выбрать необходимые для шифрования данные и поместить их в одну папку.

Теперь необходимо выделить папку и нажать по выделенной области правой кнопкой мыши, где следует выбрать пункт «Свойства» и в открывшемся окне перейти во вкладку «Общие». На вкладке общее кликаем по кнопке «Другие», как показано на скриншоте.

В открывшемся окне выбираем самый нижний пункт «Шифровать содержимое для защиты данных» и нажимаем «Ок».

После нажатия кнопки «Применить» пользователю будет предложено два варианта шифрования. Выбираем один из них, нажимаем «Ок».

Теперь папка станет недоступной для других пользователей, использующих иную учетную запись. Стоит отметить, что текущий пользователь сможет открыть данные в любой момент, поэтому для своего профиля Windows следует придумать надежный пароль.
Как использовать ключи шифровальщика?
После проведенного шифрования система автоматически предупредит о создании специального ключа, при помощи которого можно расшифровать указанную папку в экстренной ситуации.
Как правило, оповещение будет показано в правом нижнем углу, где зачастую находятся настройки громкости.

Нажимаем по оповещению и видим окно с возможными действиями с ключом. Если необходимо создать резервную копию ключа, нажимаем по пункту «Архивировать сейчас».

После этого откроется окно мастера экспорта сертификатов. Нажимаем «Далее» и переходим к окну с установками. Указываем необходимые или оставляем текущие параметры и нажимаем «Далее».

В открывшемся окне указываем метод создания с паролем и устанавливаем собственный пароль.

Следующим шагом будет сохранение ключа на любой внешний накопитель. При создании ключа появляется гарантия того, что необходимую папку можно будет открыть и просмотреть даже в случае утери доступа к своей учетной записи.
Шифрование диска при помощи BitLocker
При необходимости шифрования дисков или съемных накопителей следует воспользоваться встроенной утилитой BitLocker, которая позволит провести шифрование большого объема данных. Чтобы начать работу с BitLocker, необходима максимальная, профессиональная или корпоративная версия Windows.
Для доступа к BitLocker следует нажать ПКМ по кнопке «Пуск», выбрать пункт «Панель управления» и зайти в первый раздел «Система и безопасность».

В открывшемся окне переходим к пункту «Шифрование диска Bitlocker».

Теперь необходимо активировать утилиту напротив системного диска или необходимого тома.

Программа автоматически проведет анализ диска и предложит выбрать способ разблокировки.

Если материнская плата обладает модулем TPM, можно выбрать дополнительные способы разблокировки. Также в утилите доступна возможность защитить диск паролем или создать специальную флешку с ключом, который сможет разблокировать диск при подключении.
Независимо от выбора способа разблокировки, программа BitLocker предоставит специальный ключ для разблокировки диска. Им можно воспользоваться при утере флешки или пароля.
Данный ключ можно распечатать, сохранить в виде документа на съемный носитель или сохранить на сервере Microsoft. Стоит отметить, что этот этап является очень важным, поскольку без экстренного ключа и при утере других средств разблокировки диск останется заблокированным.
После выполнения всех действий утилита предложит выбрать метод шифрования, из которых следует выбрать предпочтительный.

После этого компьютер будет перезагружен, а при новой загрузке в системе будет присутствовать указатель процесса шифрования.
Ошибка BitLocker
В некоторых случаях вместо выбора способа разблокировки может появиться сообщение об ошибке. Это означает, что данный компьютер не оборудован TPM модулем, расположенным на материнской плате. Модуль TPM является специальным микрочипом, в котором могут храниться зашифрованные ключи, используемые при разблокировке дисков.

Если модуль не подключен, существует способ обхода данной ошибки. Для этого следует выполнить следующие шаги:
Шаг 1. Нажимаем ПКМ по кнопке «Пуск», выбираем команду «Выполнить» и в открывшемся окне вводим команду «gpedit.msc».

Шаг 2. В редакторе групповой политики следует перейти по следующему пути: «Локальный компьютер», «Конфигурация компьютера», «Административные шаблоны», «Компоненты Windows», «Шифрование диска BitLocker», «Диски операционной системы».
Зайдя в последний раздел, в окне справа можно увидеть отображение множества пунктов. Среди них необходимо выбрать «Этот параметр политики позволяет настроить требование дополнительной проверки подлинности при запуске».

Шаг 3. В левой части появившегося окна следует выбрать пункт «Включено», а также проверить наличие галочки возле параметра «Разрешить использование BitLocker…». Выполненные действия следует подтвердить кнопкой «Применить».

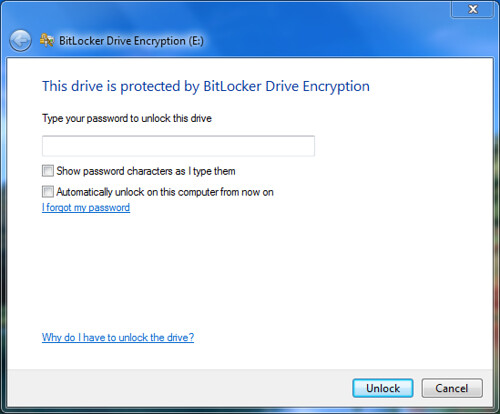
Как разблокировать зашифрованный диск?
Разблокировка зашифрованного диска происходит соответственно с выбранным методом разблокировки. Это может быть специальный пин-код, который необходимо ввести в начале работы, либо подключение флешки-ключа. После разблокировки пользователь может настроить работу BitLocker, изменить пароль или убрать шифрование.
Стоит отметить, что BitLocker – достаточно требовательная утилита, которая тратит ресурсы компьютера во время работы. При включенном шифровальщике дисков производительность системы может падать вплоть до десяти процентов.
Как защитить паролем отдельные папки и файлы?
Функционал шифровальщика данных EFS может показаться слега ограниченным и не очень удобным при использовании в сети, поэтому многие пользователи прибегают к шифрованию данных при помощи встроенного архиватора данных WinRAR. Запаковав файлы в архив, можно добавить к нему пароль, защищающий файлы от просмотра третьими лицами.
Чтобы зашифровать папку или файл, следуйте шагам:
Шаг 1. Выбираем нужную папку или файл и нажимаем по нему правой кнопкой мыши. В открывшемся списке следует выбрать «Добавить в архив».

Шаг 2. В открывшемся окне выбираем пункт «Установить пароль». В следующем окне следует дважды ввести свой пароль и нажать «Ок».

Шаг 3. Финальным этапом будет выбор метода сжатия, имени и других параметров будущего архива с паролем. Данные параметры можно выбирать по своему усмотрению.

Теперь при открытии архива понадобиться вводить пароль.
Часто задаваемые вопросы
BitLocker – это специальная программа, которая занимается шифрованием дисков в операционной системе Windows. Впервые появилась в версии Windows 8.
EFS – это стандартная утилита, которая занимается шифрованием отдельных файлов и папок в Windows. Поддержка EFS начинается с Windows 8 и выше.
Скачайте и установите программу RS Partition Recovery. Она позволит вам вернуть утерянный файл практически в несколько кликов с вероятностью 99.9%
BitLocker занимается шифрованием всего диска, в то время как EFS позволяет шифровать отдельные файлы и папки.
К сожалению вернуть доступ к зашифрованным данным практически нереально. Однако, чтобы предотвратить такую ситуацию, вы можете создать флэшку со специальным ключом, который может расшифровать данные на носителе.
In today’s digital landscape, data security has become a paramount concern for individuals and organizations alike. With increasing cyber threats ranging from data breaches to ransomware, protecting sensitive information is critical. Microsoft Windows operating systems, particularly Windows 10 and Windows 11, offer various built-in security features, one of which is the Encrypting File System (EFS). This article provides a comprehensive overview of EFS, detailing its functionality, usage, benefits, limitations, and practical implementation steps.
What is Encrypting File System (EFS)?
The Encrypting File System (EFS) is a Windows feature that allows users to encrypt individual files and folders on NTFS (New Technology File System) volumes. EFS enhances data confidentiality by using encryption techniques to ensure that sensitive information remains accessible only to authorized users. Introduced in Windows 2000, it has evolved over time to become a critical part of Windows’ security infrastructure in later versions, including Windows 10 and Windows 11.
How EFS Works
EFS uses a combination of symmetric and asymmetric encryption to secure files. When files are encrypted, they are transformed into an unreadable format that can only be reverted back to a readable state with the appropriate encryption keys.
-
User-Private Key: Each user has a unique private encryption key generated when EFS is first used. This key is used for the symmetric encryption of the files.
-
Public Key: When a user encrypts a file, EFS also creates a file encryption key (FEK) that is used to encrypt the file data. The FEK is then itself encrypted with the user’s public key and stored along with the encrypted file.
-
Access Control: Only the user who encrypted the file, or a designated user with the necessary permissions, can decrypt and access the information. This ensures that even if unauthorized users gain access to the file system, they cannot read the encrypted data.
Key Features of EFS
- File and Folder-Level Encryption: EFS allows users to encrypt specific files or folders rather than having to encrypt the entire disk.
- Transparent Encryption: Once files are encrypted, the file access process remains seamless; users can open and work with files as normal without needing to manually decrypt them.
- Integration with User Accounts: EFS is tightly integrated with the Windows user account system, which means that encryption and access privileges are user-specific.
- Backup Key: When a file is encrypted, Windows Prompt users to create a backup of their EFS key to avoid losing access to encrypted files due to key loss.
Requirements for Using EFS
Before leveraging EFS, there are certain prerequisites:
- NTFS File System: EFS is only available on NTFS formatted drives. FAT32 drives do not support EFS.
- Windows Professional/Enterprise Editions: EFS is available on Windows 10/11 Pro, Enterprise, and Education editions but not on the Home version.
- User Account Control (UAC): EFS requires that UAC be enabled.
- Backups: Users are strongly encouraged to back up their encryption keys to avoid losing access to their encrypted files in case of account issues or hardware failures.
Steps to Encrypt Files and Folders Using EFS
To encrypt a file or folder using EFS, follow these steps:
Method 1: Encrypting through File Properties
-
Access the File/Folder: Navigate to the file or folder you wish to encrypt using File Explorer.
-
Open Properties: Right-click on the file or folder and select «Properties.»
-
Advanced Attributes: Click the «Advanced» button in the General tab.
-
Encrypt Contents: Check the box that says «Encrypt contents to secure data.»
-
Apply Changes: Click «OK,» then «Apply.» Windows will prompt you to apply changes to the folder only or to the folder and all its subfolders and files. Choose the appropriate option and confirm.
Method 2: Encrypting Using Command Prompt
Users can also use the command line to encrypt files.
-
Open Command Prompt: Press
Windows + R, typecmd, and hit Enter. -
Navigate: Change the directory to the location of the file using the
cdcommand. -
Encrypt Command: Use the command
cipher /e filenamewhere «filename» is the name of the file you wish to encrypt. -
Verify Encryption: You can check if the file is encrypted by typing
cipherin the command prompt, which will display the status of files in the current directory.
How to Decrypt Files and Folders
Decrypting files and folders is as straightforward as encrypting them:
-
Access Properties: Right-click on the encrypted file or folder and select «Properties.»
-
Advanced Attributes: Select «Advanced.»
-
Remove Encryption: Uncheck the option «Encrypt contents to secure data» and click «OK.»
-
Apply Changes: Confirm whether you want to apply this change to the folder only or to all files within it.
Users can also use the cipher /d filename command in the Command Prompt to decrypt a file.
EFS and Key Management
One of the most crucial aspects of EFS is key management. The encryption keys can be lost for several reasons, including user account deletion, system failure, or corruption of the key store.
Backing Up EFS Keys
To minimize the risk of losing access to encrypted files, it’s essential for users to back up their EFS keys:
-
Open Certificate Manager: Press
Windows + R, typecertmgr.msc, and hit Enter. -
Locate Your Keys: Navigate to the «Personal» folder, and you’ll find your EFS certificate.
-
Export Certificate: Right-click the EFS certificate, select «All Tasks,» then «Export.» Follow the wizard to export the certificate along with its private key.
-
Save Securely: Store the exported certificate in a secure location, ensuring it is protected from unauthorized access.
Restoring EFS Keys
In case an EFS key is lost, there are limited options for recovery. If a backup of the EFS certificate exists, users can simply import the certificate back into the Certificate Manager, which will restore access to previously encrypted files.
Advantages of Using EFS
-
User-Friendly: EFS offers a straightforward way to encrypt files without requiring deep technical know-how.
-
Granular Security: Unlike full disk encryption, EFS allows users to encrypt specific files or folders, making it practical for daily use.
-
Integrated with Windows: EFS is built into the Windows operating system, meaning no third-party software installation is necessary.
-
Seamless Access: Users can interact with encrypted files without worrying about manual decryption processes, maintaining workflow efficiency.
-
Support for Different User Accounts: EFS supports multiple user profiles, thereby allowing different users to have their own encrypted data on the same machine.
Limitations of EFS
While EFS has several advantages, it also has some limitations:
-
Limited to NTFS: EFS is only available on NTFS volumes, meaning users with FAT32 partitions cannot utilize this feature.
-
Windows Only: EFS is exclusive to Windows operating systems, making it unsuitable for cross-platform collaboration.
-
Vulnerability to Malware: If someone gains access to the user account, they can easily access any encrypted files. As such, EFS is not a foolproof security measure against malware or insider threats.
-
Key Management Complexity: Users must manage encryption keys responsibly to avoid losing access to their data, which can be a source of frustration.
-
Incompatibility with Backup Solutions: Some backup solutions may not support encrypted files, leading to challenges in data recovery during a system restore.
EFS vs. BitLocker: Understanding the Differences
Both EFS and BitLocker are encryption technologies available in Windows, but they serve different purposes:
-
EFS: EFS encrypts specific files and folders. It is user-specific and effective for securing certain pieces of information based on user access levels.
-
BitLocker: BitLocker provides full disk encryption, protecting the entire volume on which the operating system and the data reside. It encrypts everything on the disk, providing a higher level of security for physical theft but does not offer file granularity.
Choosing between EFS and BitLocker often depends on the specific security requirements of the user or organization. In scenarios where sensitive files need encryption without altering the entire disk, EFS is preferable. On the other hand, for securing overall system integrity against physical theft, BitLocker offers more robust protection.
Best Practices for Using EFS
To maximize the security and effectiveness of the Encrypting File System, users should adhere to the following best practices:
-
Regularly Back Up EFS Keys: Always back up the encryption keys, and store them securely. This is crucial for avoiding inaccessibility in case of account issues or hardware failures.
-
Use Strong Passwords: Ensure that user accounts are protected with strong passwords. EFS encryption relies on the security of the user account.
-
Keep Your System Updated: Ensure that your Windows operating system is updated to protect against known vulnerabilities that attackers may exploit.
-
Evaluate User Permissions: Regularly check user permissions and access rights, especially in multi-user environments, to prevent unauthorized access.
-
Combine with Other Security Measures: Use EFS in conjunction with other security tools, such as antivirus programs and firewalls, for layered security.
Conclusion
As data breaches and unauthorized access become more prevalent, understanding and utilizing the Encrypting File System (EFS) on Windows 10 and 11 is pivotal for maintaining data confidentiality. EFS offers users a powerful yet accessible tool for securing sensitive files through encryption while allowing seamless interaction with the operating system. By carefully managing EFS keys, following best practices, and understanding its limitations vis-à-vis other security measures like BitLocker, users can effectively safeguard their information in an increasingly complex digital world. As businesses and individuals strive to protect their information, EFS remains an invaluable component of data security strategy within Windows environments.