
-
www.microsoft.com/en-us/download/details.aspx?id=35584
-
thank you i think within 2 or 3 days we can activate office 2013
-
Somebody tried to install this. I tried and the result is:
Windows edition detected is not a VL edition. Microsoft Office 2013 Volume License Pack requires a Windows VL Edition.So, the program is not working on a system with a retail key.
-
System requirements:
Supported operating systems: Windows 7, Windows 8, Windows Server 2008 R2, Windows Server 2012KMS Host: Windows Server 2008 R2, Windows 7 (volume editions), Windows Server 2012, or Windows 8.
Active Directory-Based Activation
Set-up and Configuration: Windows Server 2012, Windows 8 or newer.
Domain controller: Active Directory Domain Services with the Windows Server 2012 schema installed. -
Here is the picture
-
So what the problem?
Change the key, activate Windows, run the above
Installed Office 2010 edition detected is not a VL edition.
This activator are for corporate versions of Office 2010 only!
Intentando conseguir activar nuestro office 2010 nos encontramos usando el parche Nuevo Activador Version 1.3 que nos muestra el error comentado arriba
Solucion pasa por usar otro crack este no nos funciona
Se llama MS Office 2010 Toolkit-2.1.6.rar y funciona a la perfeccion si no ver el mensaje que nos muestra tan bonito.

Entrada relacionada
You missed
На некоторых компьютерах при чистой установке Windows 10 или 11 с загрузочной USB флешки может отсутствовать пункт выбора редакции (версии) ОС для установки.
Кнопка продолжения установки Windows для некоторых редакций может быть неактивна, или установщик может автоматически ставить определенную редакция без возможности выбора. Например, нельзя установить Pro версию Windows, и вместо этого всегда устанавливается Home редакция.
В первую очередь проверьте, что все необходимые редакции присутствуют в WIM (ESD) файле вашего установочного образа Windows. Откройте консоль
PowerShell
и укажите путь к файлу install.esd (подробнее о ESD формате) или install.wim на вашей загрузочной USB флешки с установочным образом Windows:
Get-WindowsImage -ImagePath "e:\sources\install.wim" |select ImageName, ImageIndex
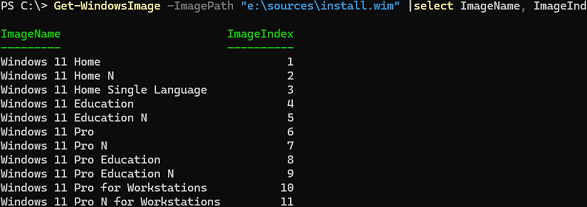
В этом примере в установочном образе доступно несколько редакций, в том числе Pro, Education и Home. Если нужной редакции Windows в списке нет, значит она была удалена из образа.
Другая возможная причина проблемы – наличие вшитого производителем ключа продукта Windows в UEFI.
Технически начиная с Windows 7 это реализовалось за счет хранения в BIOS материнской платы специальной SLIC таблицы (Software Licensing Description Table). В этой таблице зашит сертификат OEM вендора, редакция Windows и ключ активации. Это позволяет выполнить автоматическую (в том числе offline) активацию предустановленной Windows.
На современных компьютерах ключи активации (OEM Embededd Keys) Windows 10/11 прописываются вендором в UEFI.
Это встречается на OEM компьютерах, на которых при покупке предустановлена лицензионная копия Windows с определенной редакции. Установщик Windows проверяет наличие SLIC таблицы или ключа OEM в UEFI (BIOS), определяет зашитую в ней редакцию и автоматически запускает установку именно этой редакции.
Чаще всего такая история возникает с устройствами с предустановленной Домашней редакцией Windows. Чтобы установщик Windows игнорировал вшитую информацию о версии ОС в UEFI/BIOS, нужно создать текстовый файл ei.cfg в каталоге sources на вашей установочной USB флешке с текстом:
[EditionID]
[Channel]
Retail
Теперь при загрузке с такой флешки появится стандартное меню выбора редакции Windows, которую нужно установить. Вшитый в UEFI (BIOS) ключ активации при этом игнорируется.
Если вы хотите, чтоб всегда автоматически устанавливалась Pro редакция Windows, измените файл ei.cfg следующим образом:
[EditionID]
Professional
[Channel]
Retail
Подробнее о доступных параметрах в файле EI.cfg:
- EditionID — идентификатор выпуска (возможные значения Home, Professional, Enterprise, Education)
- Channel — тип канала поставки. Тут может быть указано OEM, Retail или Volume
- VL — используется ли корпоративный канал лицензирования (
1
– если используется корпоративное лицензирование,
0
– если нет)
,
If you cannot choose a different version of Windows to install, then read this guide to solve the problem.
When performing a clean install of Windows 10/11 on a custom-built PC or a new PC without Windows pre-installed, users have the option during installation to install the version they want, according to the Windows license key they have purchased/own (eg Windows Home, Pro, Education, etc.).
However, on pre-installed Windows 10/11 PCs, users are not able to select a different Edition of Windows to install because the «Select the operating system you want to install» window is not displayed at all.
Why is Windows edition not showing during installation?
This is because on pre-installed Windows 10/11 computers the Windows license is stored in the BIOS/UEFI and retrieved from there.

In this tutorial you will learn how to be able to install a different version of Windows than the one that is preinstalled. So, if you unable to choose the desired Windows 10/11 Edition to install, continue reading below.
How to FIX: Unable to select Windows version during Clean Installation of Windows 10/11.
To be able to select the desired edition (Windows 10/11 Home or Windows 10/11 Pro), during a clean installation, apply the following steps.
Step 1. Create a Windows 10/11 USB Installation media.
If you haven’t already done so, go ahead and create a Windows USB installation media, according to the version of Windows you want to install (Windows 10 or Windows 11). For instructions, see this article: How to create a bootable Windows 10/11 USB installation media.
Step 2. Create «ei.cfg» file in «sources» directory.
1. Connect the Windows USB installation media (drive) to another computer.
2. Open Notepad and then copy & paste the following four (4) lines (in bold letters):
[EditionID]
Professional
[Channel]
Retail

3. When done, from the File menu select Save as.
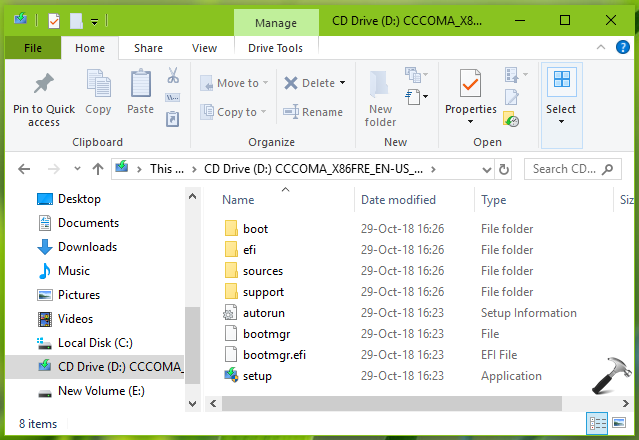
4a. Select the Windows USB installation media (drive) on the left and open the «sources» folder on the right.
4b. In File name field Type «ei.cfg» (exactly as shown, with the quotes) and click Save. *
* Attention: Ensure that you save the ‘ei.cfg’ file inside the «sources» folder on the Windows install disk.

5. Close Notepad and you’re done! Boot from the Windows install disk on the affected PC and you’ll be able to choose the Windows version you desire to install.*
* Note: If you are still unable to select a different version of Windows to install, try the alternatives below:
Solution A. Open the ‘ei.cfg’ with Notepad and just add the following two (2) lines:
[Channel]
Retail

Solution B. Open the ‘ei.cfg’ with Notepad and add the following lines:
[Channel]
_Default
[VL]
0

That’s it! Let me know if this guide has helped you by leaving your comment about your experience. Please like and share this guide to help others.
If this article was useful for you, please consider supporting us by making a donation. Even $1 can a make a huge difference for us in our effort to continue to help others while keeping this site free:
- Author
- Recent Posts
Konstantinos is the founder and administrator of Wintips.org. Since 1995 he works and provides IT support as a computer and network expert to individuals and large companies. He is specialized in solving problems related to Windows or other Microsoft products (Windows Server, Office, Microsoft 365, etc.).
Earlier, we’ve seen how to make clean installation of Windows 10 in our following guide:
How to make clean install of Windows 10
If you’re making clean install, the most important step is to select the edition you want to install. In past, we can download Windows ISO files or setup for specific editions. Hence there was no need to choose Windows edition during clean install.
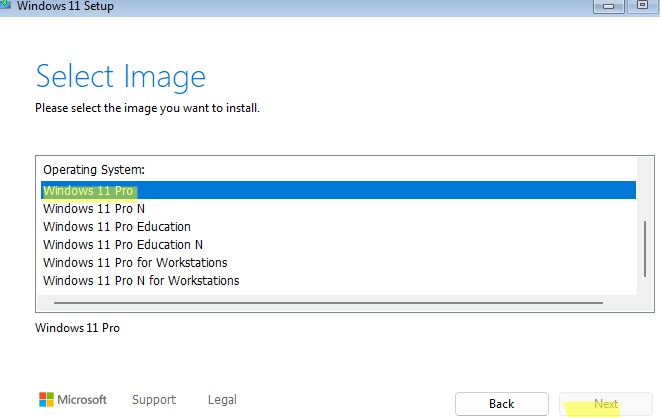
But nowadays Microsoft provides single ISO file containing multiple Windows 10 editions. Hence it is quite important that Windows edition selection screen shown below should appear:
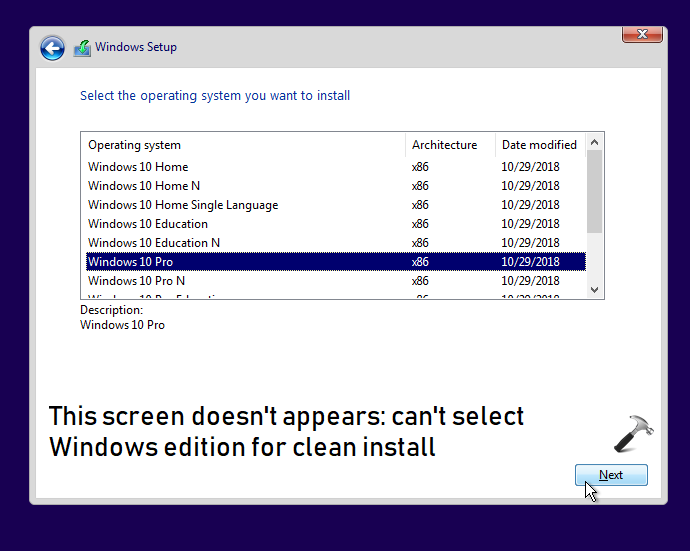
In case if you’ve a machine which came with Windows 10 pre-installed, the above shown screen won’t appear on it, if you’re making clean install of Windows 10 on the machine. This is because the machine has Original Equipment Manufacturer (OEM) license installed, which is tied to the motherboard. This OEM license is usually for single Windows edition (for example, Home edition). Hence when you make clean install, setup use OEM license information and directly install the pre-installed edition and never asks you to select Windows edition.
To allow choosing Windows 10 edition during clean install, you need to perform below mentioned workaround.
FIX: Can’t Select Windows 10 Edition During Clean Installation
1. Go to any working Windows computer and open File Explorer, locate your Windows 10 ISO file and right click on it, select Mount.

2. You should now see DVD/CD drive labelled entry under This PC. This drive actually contains your ISO file in decompressed form.
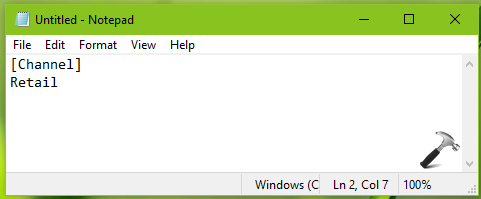
3. Close/minimize File Explorer and Notepad application (run notepad command).
4. In Notepad window, type following:
[Channel]
Retail
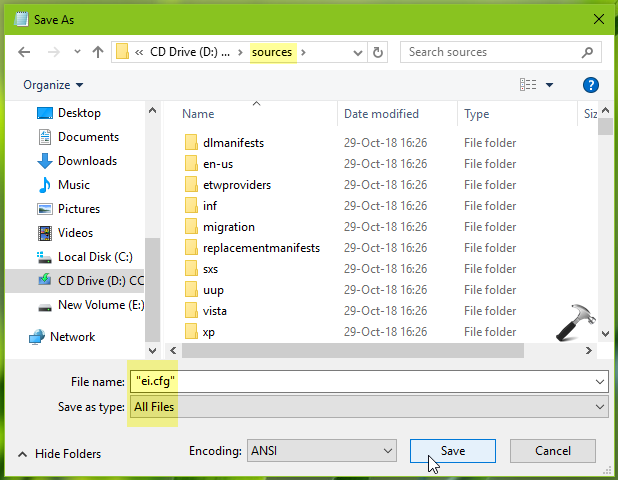
5. Click File > Save As and browse to DVD/CD drive where your Windows 10 ISO file is mounted. Open sources folder and then save Notepad file with "ei.cfg" name. Select All File for Save as type and click Save.
6. You can now directly create a bootable USB with mounted ISO file contents using this guide. Once your bootable USB drive is ready, you can go ahead with clean install. This time you’ll be able to select your desired Windows edition and install it.
Here’s the video illustration for this fix:
Hope this helps!