When adding a DNS zone, there is an option to create secondary zone. A secondary zone is basically a replica of zone from another existing DNS server in the network. The other server which is being replicated is called the Master. Any changes on the Master applies to the secondary zone as well, but not vice versa as we cannot perform changes directly on a secondary zone. In this article we’re going to show you how and why we would Configure Secondary Zone in Windows DNS Server.
Before configure secondary zone in Windows DNS Server, we have to create a new server and install DNS role in it. Then in the next step we will create a secondary zone by referring to a Master server. In this example, we have our server AS-DCO001 as the Master server and AS-DNS001 in which we will create the secondary zone. Both DNS server role installed on Windows Server 2012 R2. The zone name that we will replicate is mustbegeek.com. Below are the step-by-steps:
Using DNS Manager
First, open up DNS Manager in AS-DNS001 (the server where we will create a secondary zone) by going to Server Manager and select Tools > DNS.

In the DNS Manager, expand the server name. You’ll see a few items with icon similar to a folder, including Forward Lookup Zones and Reverse Lookup Zones.
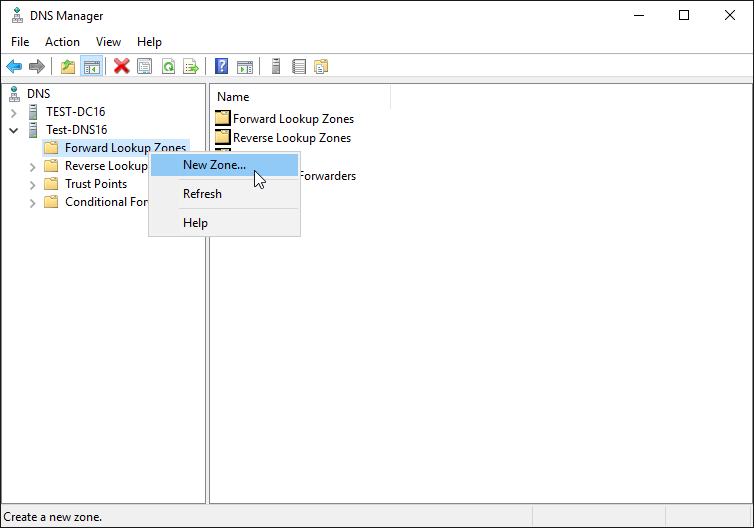
Right click on either Forward Lookup Zones or Reverse Lookup Zones, depending on the types of the zone you would like to replicate. Since the zone mustbegeek.com is a forward lookup zone, we’re going to right click on Forward Lookup Zones and select New Zone.
Click Next button to skip the welcome screen.

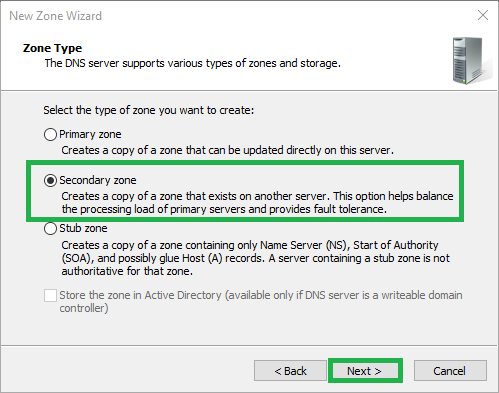
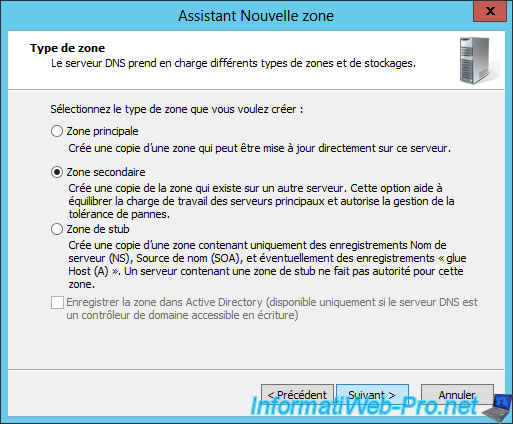
On the zone type selection, choose Secondary Zone and click Next to proceed.

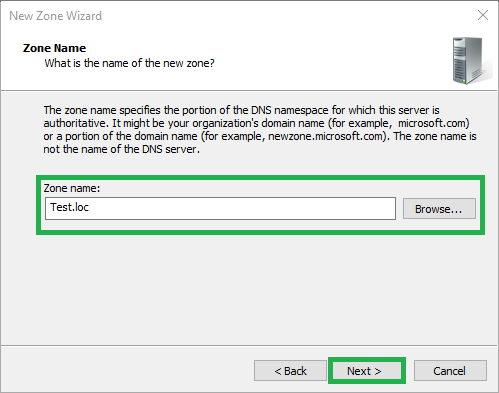
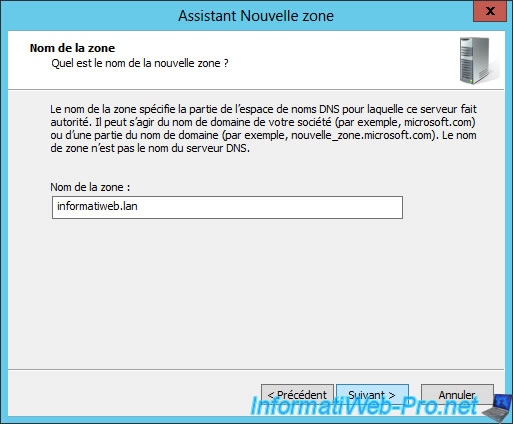
In the zone name field, type in the zone name carefully. In our case it is mustbegeek.com. Click Next to continue to the next screen.

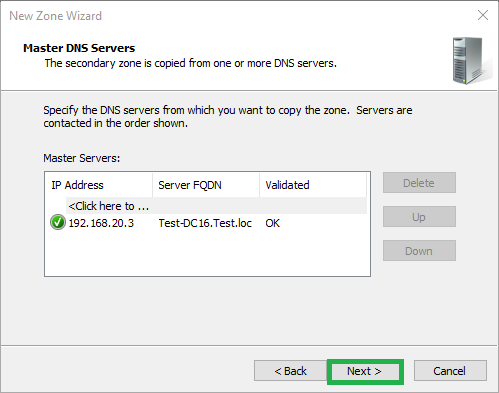
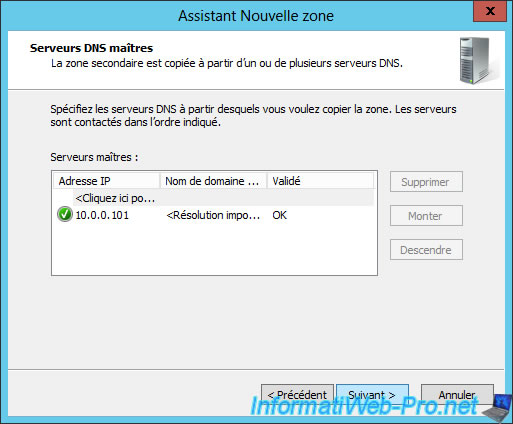
In this section, type in the Master server FQDN or IP address then press Enter on the keyboard. Valid entry will have green checklist icon as shown in the picture below. You can add more than one Master server. To reorder the Master priority use the Up/Down button. In our case we only have one Master server which is AS-DCO001. When you’re done, click Next button to continue.

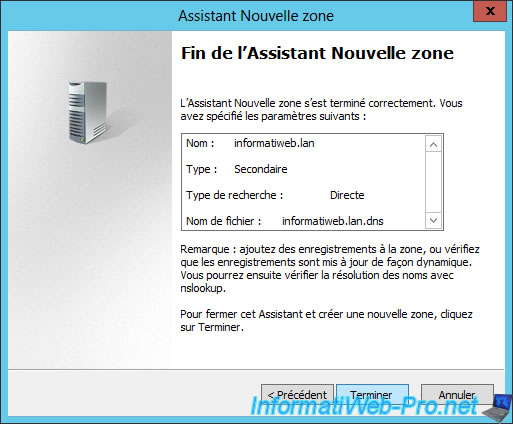
Now in the final screen, review if everything’s good then you can click Finish to complete the process.

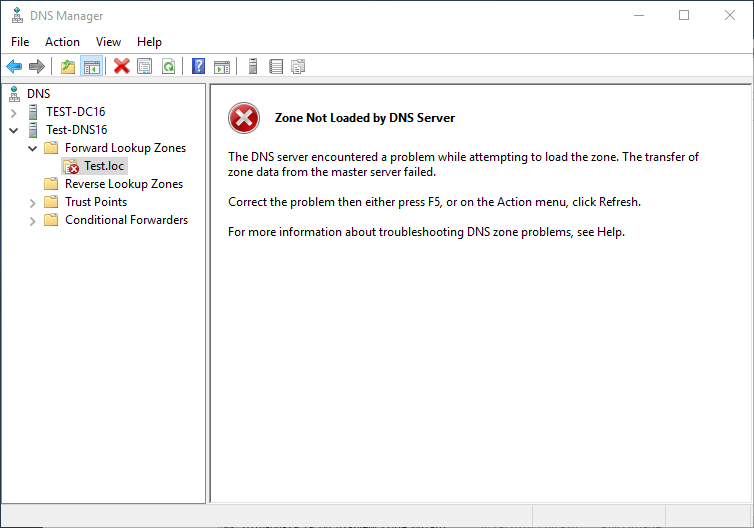
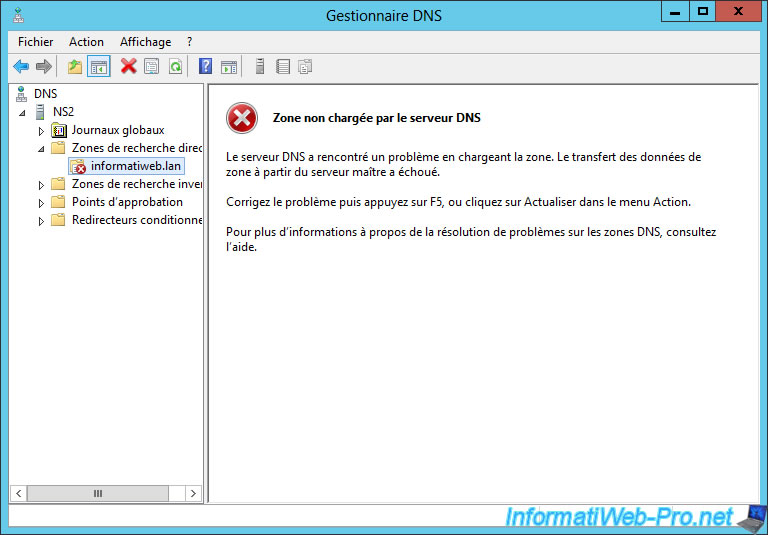
Now if you browse to the secondary zone you just created, you may see this error message:

To avoid this from happening, we have to ensure that the Master has allowed zone transfer to this server. To configure zone transfer, go to the zone Properties in the Master server.
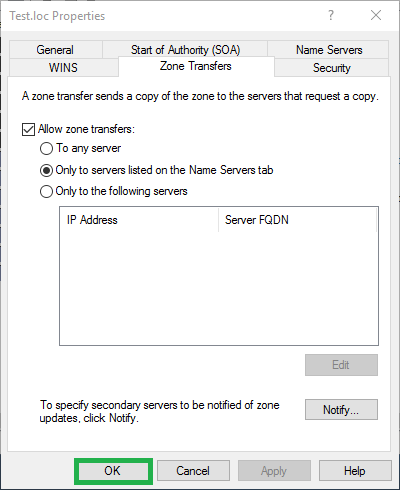
Then on the Zone Transfer tab, tick on the Allow zone transfer options. You can then select either “To any server”, “Only to servers listed on the Name Servers tab”, or “Only to the following servers”. If you choose the second or third option, you may need to specify the server name where secondary zone will be created. In this example, for the sake of simplicity we’re going to use the first option which is allowing any server to replicate the mustbegeek.com zone.

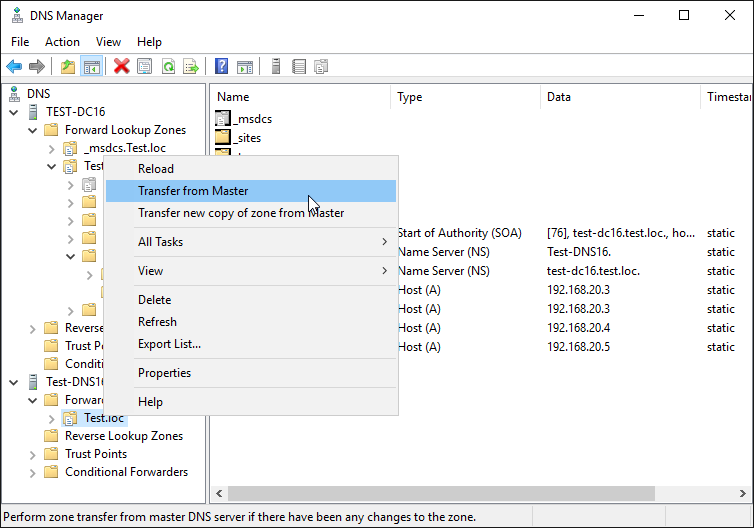
Now go back to AS-DNS001 and refresh the DNS Manager, you should be able to see all records in mustbegeek.com zone. Or, you can expedite the process by right clicking on the secondary zone name and select Transfer from Master.
With this, we have successfully configured a secondary zone.

Using PowerShell
Did you know that you can also perform the above steps by using PowerShell cmdlets? Using PowerShell to configure secondary zone in Windows DNS server is very easy and can save you a lot of time.
Below is the PowerShell command to create DNS secondary zone:
Add-DnsServerSecondaryZone -Name “ZONE_NAME” —ZoneFile “ZONE_FILENAME” -MasterServers “MASTER_IP”
You only need to replace ZONE_NAME with the name of the actual zone, ZONE_FILENAME with the zone file name (usually the same with zone name, just append “.dns” at the end) and MASTER_IP with the Master server IP address.
Additionally, you can also run this command below on the Master server if the zone transfer is not yet configured.
Set-DnsServerPrimaryZone -Name “ZONE_NAME” -SecureSecondaries TRANSFER_LIST
Again, replace ZONE_NAME with the name of the same zone. Also replace TRANSFER_LIST with either one of the values below depending of your needs:
- TransferAnyServer = Allow zone transfer to any server.
- TransferToZoneNameServer = Allow zone transfer only to servers listed as the Name Servers.
- TransferToSecureServers = Allow zone transfer only to servers listed explicitly on the command. Additional keyword “-SecondaryServers” must be included after this command followed by list IP address of the secondary servers.
Below is the command that we use in AS-DNS001 to create the secondary zone:

And below is the command that we use in AS-DCO001 to allow zone transfer:

The result is exactly the same as we previously configure in the GUI. Just remember to run PowerShell as administrator when executing both commands.
Working with Secondary Zone in Windows DNS Server
There are many reasons to configure secondary zone in Windows DNS server. One of the example is to provide redundancy in DNS infrastructure. When you have a DNS server with secondary zone in the network, it can act as the backup when the Master server failed because secondary zone can still run with records stored in its local cache.
The other good reason to use secondary zone is that because you can configure DNS load balance. You can distribute DNS query redirection to the Master and all the secondaries, therefore reducing the workload on each server. This is a very good option if you have a high intensity network.
With all of these benefits, there is no reason why you shouldn’t learn to configure secondary zone in Windows DNS server.
The following two tabs change content below.
- Bio
- Latest Posts
I am IT practitioner in real life with specialization in network and server infrastructure. I have years of experience in design, analysis, operation, and optimization of infrastructure solutions for enterprise-scaled network. You can send me a message on LinkedIn or email to arranda.saputra@outlook.com for further inquiry regarding stuffs that I wrote or opportunity to collaborate in a project.
This is a guide for configuring a secondary zone using DNS Manager. To do this with PowerShell, please see Configure Secondary Zone with PowerShell – Windows Server Core 2016.
How-To
Prerequisites
Before starting, you should have the DNS role installed on the server. To install the DNS role, please see one of the following articles:
Installing the DNS Role with PowerShell -Windows Server Core 2016
Installing the DNS Role using Server Manager – Windows Server 2016
Assumptions
In this guide I am adding a secondary zone to a remote server (Test-DNS16) from the server that has the primary zone (Test-DC16).
1) Open DNS Manager
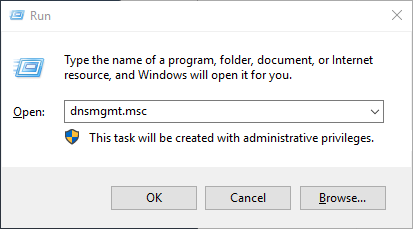
Open the Run box using Win+R, type dnsmgmt.msc, and click OK
2) Connect to the remote server that will have the secondary zone
If you are on the server that is getting the secondary zone, skip this step
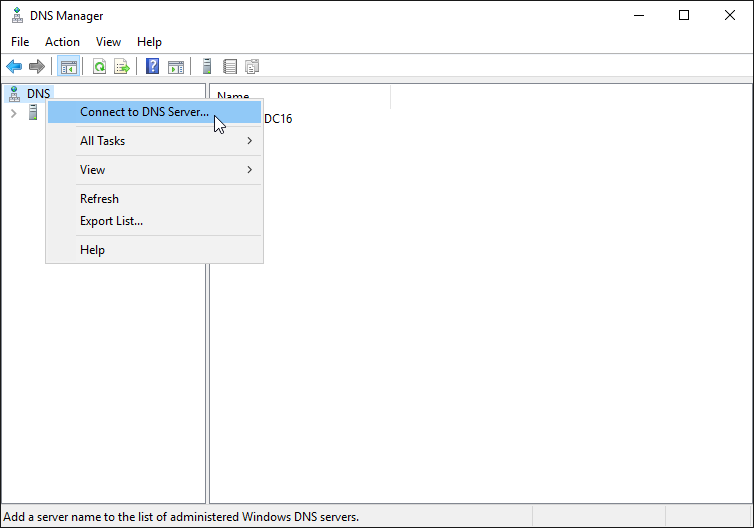
Right click the DNS and select Connect to DNS Server…
Enter the name of the server and click OK
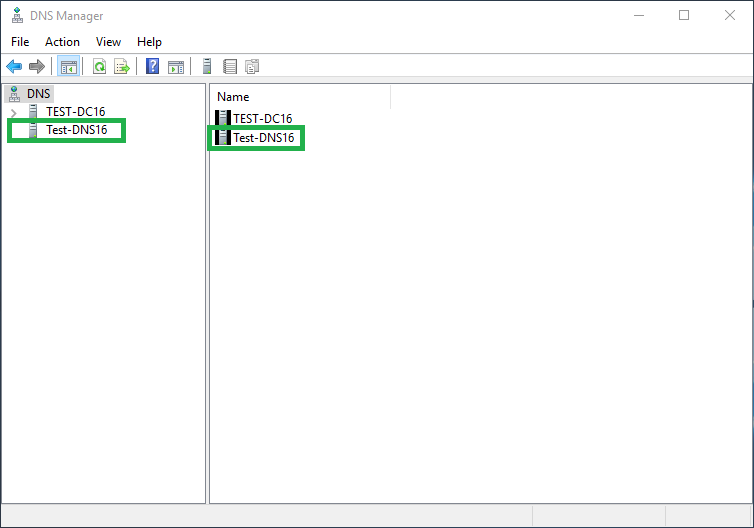
You should now see the other DNS server listed
3) Open the New Zone Wizard
Select the drop-down for the DNS server that will have the secondary zone
Right click Forward Lookup Zones and select New Zone…
4) Click Next

5) Select Secondary zone then click Next
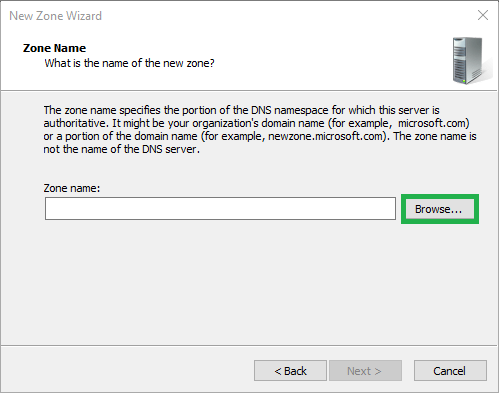
6) Enter the zone name or click Browse
If you know the zone name, type it in and skip step 7
If you do not know the name, click Browse
7) Select the zone
Select the server that contains the primary zone
Select Forward Lookup Zones
Select the zone you want to copy and click OK
 Click Next
 Click Next
The box should now show the zone you selected
Click Next
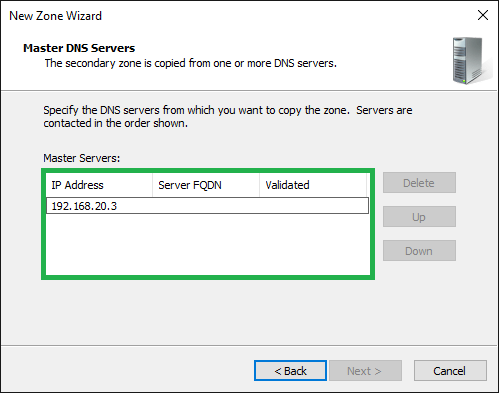
9) Add the master servers
Type in the IP address(es) or FQDN(s) of the server(s) that have the primary zone you are copying
Click Next
10) Click Finish
Click Finish to complete the process and add the secondary zone
You have now successfully added a secondary zone!
If you get the message “Zone Not Loaded by DNS Server”, please see below
Zone Not Loaded by DNS Server
If you see the following message, it is likely because the master server will not send updates to this server. See the directions below to fix this. These directions will allow zone transfers to all your DNS servers.
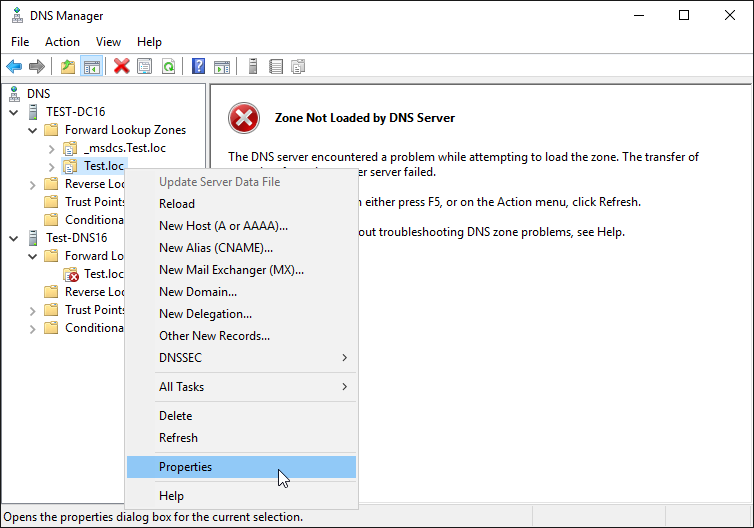
1) Open Properties
Right-click the zone under the master server and select Properties
2) Open the New Name Server Record window
Click the Name Servers tab and click Add
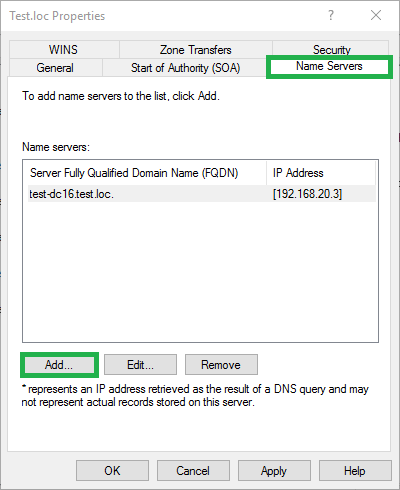
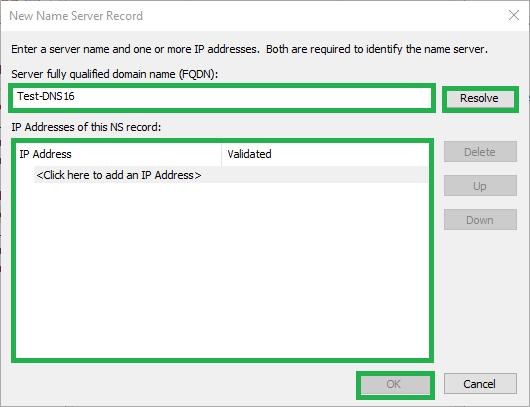
3) Enter the DNS server
Enter the FQDN of the DNS server with the secondary zone and click Resolve
or
Enter the IP address
Click OK
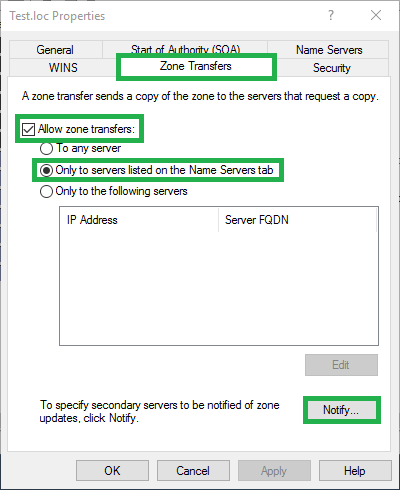
4) Configure the zone transfer settings
Click the Zone Transfers tab
Select the Allow zone transfers check box
Select the Only to servers listed on the Name Servers tab radio button
Click the Notify button
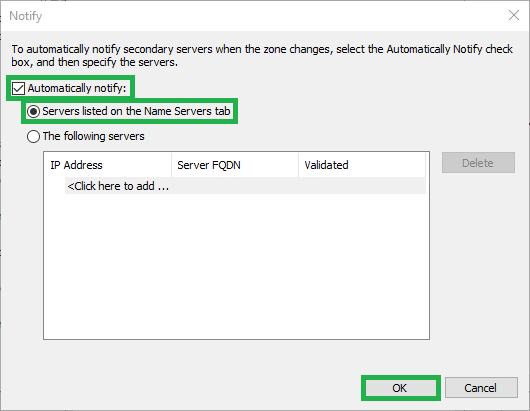
5) Open the New Name Server Record window
Click the Automatically notify check box
Click the Servers listed on the Name Servers tab radio button
Click OK
6) Apply the settings
Click OK
7) Transfer zone from the master
You should now be able to transfer this zone from the master
Right click the zone under the secondary server and select Transfer from Master
It should now show the records from the master server
After installing DNS, of course, you need to configure DNS because it is an important task to make DNS work correctly. DNS stands for Domain Naming System and the goal of DNS is to change name to IP address and and IP address to name like when you open a server or a web page, you enter a name like www.tactig.com, here the DNS server changes the name to the IP and you can visit the web page or get access to server sources. In this article, I show you how to come along to configure DNS Server fully on Windows Server.
Configure DNS Server Fully Step by Step
The DNS configuration is somehow like installing it, means you don’t need to worry or call any administrator to do it because you can do it along by this article, let’s move towards it.
1. When the DNS Server role installed, open the Server Manager window, click on tools tab that the dropdown menu appears and click on the DNS icon to open the DNS. Here I have named my server tactig-dc01.

2. At the first, what we need to do is creating a zone, it is a part of a DNS that the records are restored, for that purpose right click on your computer DNS server name and click on the New zone.

3. Skip the welcome page and on the next page, you’ll see three kinds of zone available.
- Primary zone: is rewritten zone that is not copied from somewhere.
- Secondary zone: is the copy of another zone, when you create a secondary zone you should copy the records from another source.
- Stub zone: is providing information whatever server holds a special zone. We want to create a primary zone, then click on that then hit Next.

4. In the next page, you will be asked about replication method.
- The first option, (To all DNS servers running on domain controller in this forest: <domain name> is used when you want to replicate with the domains and subdomains in the forest but that increases the network traffic.
- The second option, (To all DNS servers running on domain controllers in the domain: <domain name> is used when you want you DNS server replicate with all DNS servers in in your own domain.
- The third option, (To all domain controllers in this domain (for Windows 2000 compatibility): <domain name> is used when you want your server replicate with only domain controllers in your own domain. Select the 2nd option. Hit Next.

5. In the forward or reverse lookup zone page, select Forward lookup zone. The Forward lookup zone translates DNS name to IP address and the 2nd option, Reverse lookup zone translates IP to DNS name, just select Forward lookup zone then hit Next, we will configure the Reverse lookup zone later.

6. Specify a name for the zone then click on the Next button.

7. How do you want your zone contents update mode? The recommended option is Allow only secure updates. This option helps you DNS server not to be affected by spywares and viruses, select the first option and hit Next.

8. After continuing, your primary zone is created, just click on the Finish button to start working it.

Now the zone has created successfully but the DNS configuration is not done fully yet and the secondary zone as mentioned before is copy of another zone. It means you should copy the contents from somewhere else. Now I want to show you how to create a secondary zone. You need one another server, DNS server installed on. I name the new DNS server: tactig-dns02. The new server that we try to use as a second DNS server should be member of the Active Directory Directory Services. You can do that. If not read the articles about in this website.
1. Now we’ll work on tactig-dns02 server, open the DNS Manager tool and right-click on the Forward lookup zone, click on the New zone then skip the welcome page by hitting Next. In the Zone Type page, select the Secondary zone.

2. In the forward or reverse lookup zone page, select the Forward lookup zone option. It changes the DNS names to IP address. Then click on Next button.

3. Specify a name for the zone. Enter name of a zone that you’ve created before as a primary zone. Here you will have copy of the primary zone as a secondary zone.

4. In the Master DNS Servers page, you need to specify the master server. The Master server is the server that you’ve a zone out there and you want to copy its contents in your new secondary zone. Enter the master server’s IP address and the IP will be resolved. If the IP is correct, a green check mark will appear next to the IP address box then click on Next button.

5. When the Secondary zone is created, just click on the Finish button.

6. Now click on the new zone you just created, you’ll see the Red x means no content is present and not working properly as mentioned before you should copy the contents from somewhere else.

7. Go back to tactig-dns01 server, expand the Forward lookup zone mode and right-click on the zone that you want to get a copy from then select Properties.

8. Here select the Name Servers tab and add the server that you’ve installed the secondary zone on, here. When you add the name in the list you can copy the contents. For the purpose click on the Add button.
9. Type the server’s fully qualified domain name (FQDN) in the box as shown and below that box, enter the server’s IP address. When you resolve the server a message appears, don’t be worried because the message tells you that your server is not authoritative for the zone that’s what we know that. We just we want to make a copy of the zone and click on OK button.

10. Now come back to tactig-dns02 server, right-click on the zone you created and select Transfer from Master.

11. Refresh the page clicking on the Refresh button and you’ll see all the records you could see in tactig-dns01 server zone, now the secondary zone is created and configured properly.

Another next important point for the DNS configuration is that you should learn what is Reverse Lookup Zone. The Reverse Lookup Zone do opposite to what Forward Lookup Zone does means It change IP address to DNS name, when you’ve or give an IP address, it gives you the DNS name. For doing this, we need just one DNS server and I’ll use my root DNS server (tactig-dns01).
1. It is created the same as primary and secondary zones so expand the server name and right-click on the Forward Lookup Zone then select New Zone. When the page appears, skip the welcome page and select Primary zone then hit Next, leave the next step as default and hit Next. Here Select IPv4 Reverse Lookup Zone or IPv6 reverse lookup zone then hit Next, we use IPv4 version in our networks so you can choose the one you want to use.

2. At this point, the Network ID is needed for the zone, specify the Network ID then hit Next ( The Network ID is your network’s IP address.

3. Select the Allow only secure dynamic update option and click on Next button then finish the wizard to completely finish the configuration.

4. Run PowerShell as administrator. Type this command: ipconfig /registerdns. Press Enter button.

5. Refresh the Forward Reverse Zone node, you will see that an IP address is added there and you are done!

Conclusion: The DNS configuration is completely done. Yes, this was the basic configuration of DNS and the Advanced configuration of the DNS is more complicated, Practice till the time you feel you’ve already learned the configuration. For any further question leave a comment below.
Today lets go through a bit long step on how to configure DNS Zone transfer.
Before i start with the step by step, let go through some information about DNS Zone Transfer.
DNS zone transfers determine how the DNS infrastructure moves DNS zone information from one server to another. Without zone transfers, the various name servers in your organization maintain disparate copies of zone data.
*_* You also should consider that the zone contains sensitive data, and securing zone transfers is important.
A zone transfer occurs when you replicate the DNS zone that is on one server to another DNS server.
Zone transfers synchronize primary and secondary DNS server zones. This is how DNS builds its resilience on the Internet.
DNS zones must remain updated on primary and secondary servers. Discrepancies in primary and secondary zones can cause service outages and host names that resolve incorrectly.
Reminder : Please practice this step in your isolated network & in your own VM.
Infrastructure Requirement :
- 1 DC SERVER (DC-CLOUD.Windows.ae) ADDS, DNS
- 1 SUB SERVER (SUB-01.Windows.ae) DNS
Let start with my 1st Server which is DC-CLOUD.Windows.ae
1 – Before we start with the DNS Zone transfer, lets add some information in DNS, for this demo, i will add New Host in my DNS. right click domain name (Windows.ae), and then click New Host (A or AAAA).

2 – Next, on the New Host box, i enter Server-Exchange2016 under the Name (this server is my demo Exchange Server), and then key in the server IP address.

3 – It should prompt the host record was successfully created.

4 – Next, right click domain name again to create New mail Exchange (MX) record.

5 – On the New Resource Record box, enter FQDN name for the my mail server (Exchange Server) and click OK.


6 – It should appear in your DNS source list.

7 – Next, still on the DC-CLOUD.Windows.ae Server, in the DNS console, right click Reverse Lookup Zone and click New Zone.
*_* reverse lookup zone resolves an IP address to a domain name, and hosts start of authority (SOA), name server (NS), and pointer (PTR) resource records.

8 – On the New Zone Wizard, click Next.

9 – On the Zone Type, click Primary Zone and click Next to continue.

10 – On the Active Directory Zone Replication Scope, click button no.2 (refer to pic)

11 – Next on the Reverse Lookup Zone Name box, click IPv4 Reverse Lookup Zone and click Next to continue.

12 – Next on the Reverse Lookup Zone Name, type 712.16 and click Next.

13 – On the Dynamic Update box, click Allow only secure dynamic updates (recommended for Active Directory), then click Next.

14 – Next, click Finish.

15 – Now, let continue installing DNS Services on the SUB-01.Windows.ae (Domain Member Server) which is this server will replicate all the DNS information.
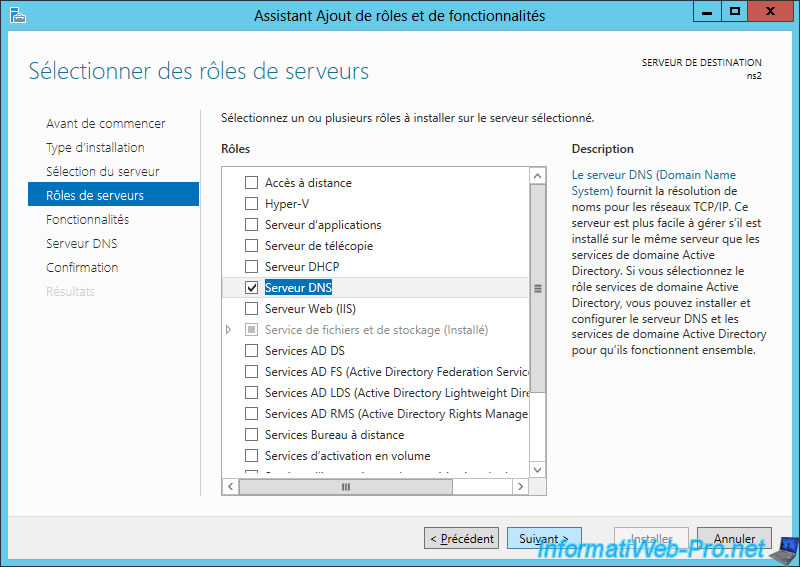
*_* On the SUB-01.Windows.ae server, in the Select server roles list click DNS Server and click Next to proceed.

16 – Then on the Select features page, click Next to proceed.

17 – Then on the DNS Server page, click Next to proceed.

18 – Next, click Install.

19 – Once the DNS installation is completed, click Close.

20 – Next, lets create secondary zone by using Windows PowerShell. Type:
Add-DnsServerSecondaryZone -Name “Windows.ae” -ZoneFile “Windows.ae.dns” -MasterServers 172.16.1.254

21 – Next, return to domain server (DC-CLOUD.Windows.ae), and open PowerShell, type this cmdlet to enable zone transfer.
Set-DnsServerPrimaryZone -Name “Windows.ae” –Notify Notifyservers –notifyservers “172.16.1.240” -SecondaryServers “172.16.1.240” –SecureSecondaries TransferToSecureServers

22 – Next, still on the DC-CLOUD.Windows.ae Domain server, open DNS console to refresh the information then right click domain name (Windows.ae) then click properties.

23 – On the Windows.ae properties box, click Zone Transfer tab and then verify the IP address and server FQDN. then click notify.

24 – Next, on the Notify box, verify that SUB-01 IP Address has been validated and click cancel.

25 – Next, let configure Aging/Scavenging for All our existing Zones, right click Server Name (DC-CLOUD.Windows.ae) and click Set Aging/Scavenging for All Zones.

26 – On the Server Aging/Scavenging Properties, click Scavenge stale resource records box and click OK to proceed.

27 – Next, in the Server Aging/Scavenging Confirmation box, click Apply these settings to the existing Active Directory–integrated zones and then click OK.

28 – Our final step, lets verify that our both Domain Server & member server should replicate the DNS resource record.

that’s all for now.., any Doubts type a commend.. 🙂
Internet and especially the web are based on the DNS system and the very large number of domain names that exist at the moment.
If you have already bought a domain name on the Internet or consulted the whois of a domain, you will have surely noticed that the domain is always managed by at least 2 DNS servers (created by the host where the user bought his domain name).
Since only one DNS server can be authoritative for each zone, it was necessary to find a technique to obtain a certain fault tolerance.
This technique consists in creating at least 2 DNS servers :
- the 1st DNS server will act as the primary DNS server for the desired DNS zone (the domain name) and will therefore be authoritative for this zone.
- your other DNS servers may act as secondary DNS servers for the desired DNS zone (the domain name) if your primary DNS server allows it to retrieve a copy of its DNS zone
Note that Google’s public DNS servers and those created by ISPs are not secondary DNS servers, but only DNS servers that keep information cached when their clients send them DNS queries.
These DNS servers are therefore not authoritative for the relevant DNS zones and don’t contain all the relevant DNS zone information.
- Create a DNS zone on a secondary DNS server
- Allow the transfer of the DNS zone
- Update the DNS zone
To begin, create your primary (primary) DNS server by following our tutorial : Windows Server 2012 / 2012 R2 — Create and configure a DNS server, as well as delegate subdomains
Then, install the «DNS Server» role on your 2nd server.
Open the DNS Manager and create a new forward lookup zone.
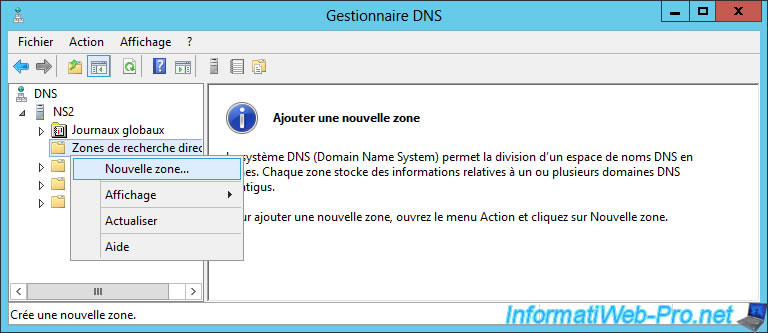
The new zone wizard appears.
Select : Secondary zone.
Specify the name of the zone that you manage on your primary DNS server and that you want to replicate to your secondary DNS server.
Specify the IP address of your master (primary) DNS server where you are currently managing this zone.
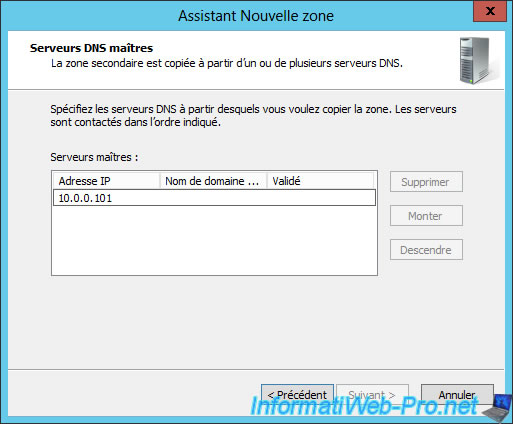
If all goes well, the validation will succeed.
The secondary zone has been created.
After the secondary zone is created, the «Zone Not Loaded by DNS Server» message may be displayed.
In order for the DNS server to obtain a copy of the zone from your primary DNS server, you must first authorize the transfer of the zone to your secondary DNS server.
2. Allow the transfer of the DNS zone
To allow the transfer of the DNS zone from the master (primary) server to the secondary server, go to your primary DNS server and create a new host (A or AAAA).
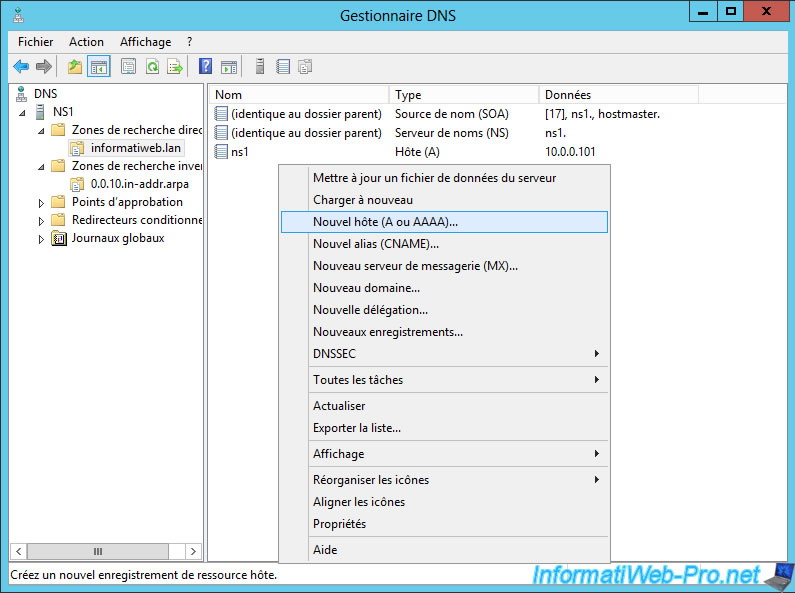
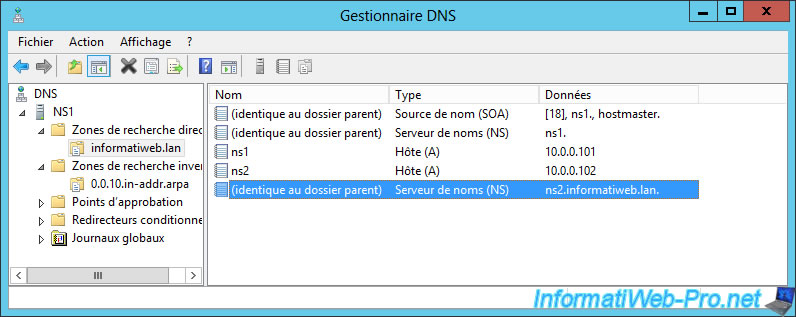
Type «ns2» (which means : name server 2 or DNS server 2 if you prefer).
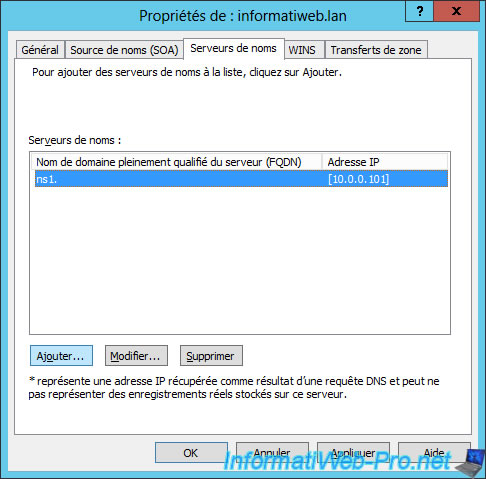
Then, go to the properties of your main DNS zone and add a name server.
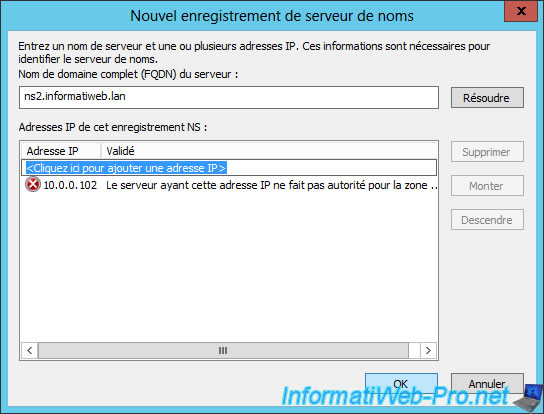
Add the name or IP address of your secondary DNS server and click : Resolve.

The secondary server is obviously not authoritative for this zone.
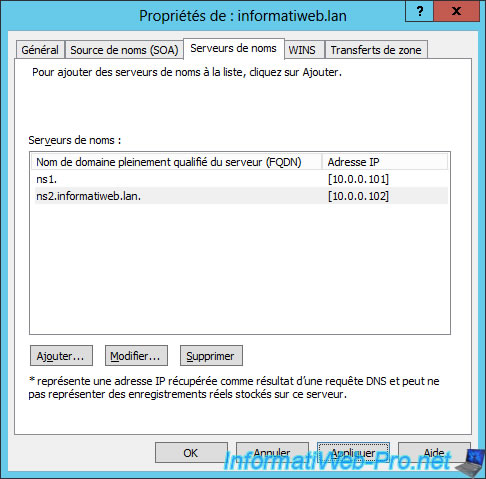
Now, your 2 DNS servers are referenced as name servers for this zone.
Finally, authorize the transfer of the zone to the servers listed in the Name Servers tab.
Note : selecting the «Only to the following servers» option by specifying the IP address of the secondary DNS server would also work.
However, since you must also add the IP address of the secondary server as a name server for the concerned zone, it’s preferable to use the «Only to servers listed on the Name Servers tab» option.
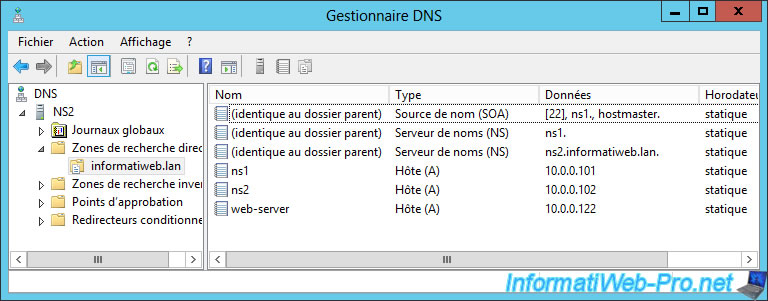
As you can see, our secondary DNS server (ns2) is well referenced as a name server for this zone.
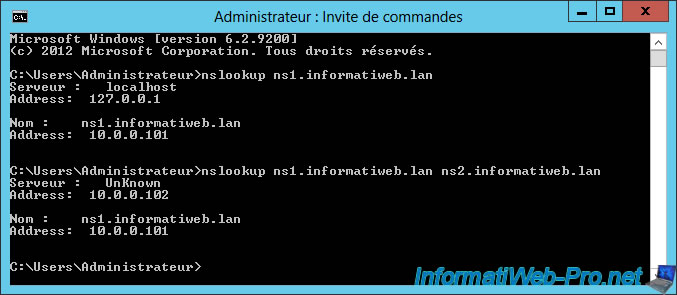
If we try to get the IP address corresponding to the «ns1.informatiweb.lan» domain using the nslookup command on our main DNS server, we get the same IP address from our 2 DNS servers.
3. Update the DNS zone
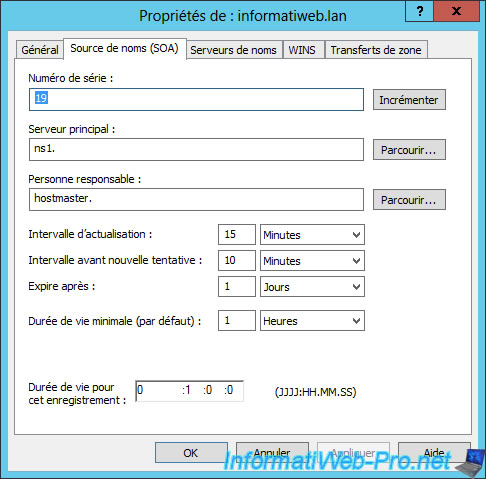
As explained in our previous tutorial, for each change, Windows Server automatically increment the serial number of the zone.
This serial number allows secondary DNS servers to know if the zone has been modified since the last time they received a copy of this DNS zone.
Currently, the serial number of our DNS zone is : 19.
We create a new record on our primary DNS server.
And Windows Server automatically increments the serial number of our DNS zone.

Then, go to your secondary DNS server and right-click «Load again» on your fordward lookup zone to force the update of the zone.
As expected, the new «web-server» record created on the primary DNS server also appears on the secondary DNS server.