
Changes in technology have impacted the way we shop. Thanks to advancements in e-commerce, you can now buy clothing, furniture, and your favorite trinkets online without having to make the trek over to a physical store. And by using the built-in color calibration feature in Windows 11, you can ensure that your online purchases look like what you ordered. Learn how to calibrate the colors on your screen before your next online shopping spree.
What is color calibration, and how does it work?
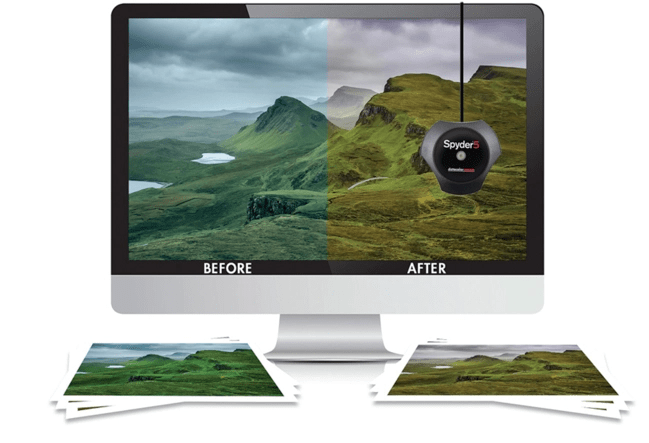
Color calibration, also known as display or monitor calibration, is the process of fixing your screen so it can show colors more accurately. If you ever order an article of clothing online and feel like the color doesn’t quite match what you saw on your screen, it’s likely an issue with how your monitor is calibrated. Photographers and designers also depend on properly calibrated displays so their pictures and designs appear the same on a printed copy. With a calibrated monitor, the colors on your display are consistently aligned with the actual product.
How to calibrate your colors in Windows 11
Calibrating your Windows 11 display is easy, and it can all be done within your device’s settings. Here are some steps on how to change your color settings:
1. Open your control panel
The quickest way to find the calibration tool is by searching for it in your Control Panel. You can access your Control Panel by searching control panel in Windows Settings or through Microsoft Support.
2. Navigate to color management
Once you have opened your Control Panel, search for color management in the search bar at the top of the window. Find the Color Management setting, then click on the Advanced tab to find options for display calibration.
3. Click on the calibrate display button
Select the Calibrate display button near the bottom of the window. You may need to enter your username and password before making any further changes to your device. After you enter your information, Windows will provide you with an explanation on how to change your display settings.
4. Read the instructions on how to adjust your screen
You will be able to click through several options for changing your color settings. Read through Windows instructions and adjust your gamma and brightness levels to what you feel is most accurate. A reference image will be provided for you as a guide. After you are satisfied with your changes, you can click on the Finish button to update your settings.
Calibrating your video quality
To take your color changes a step further, you can calibrate your video display through settings. Using color calibration for your video display can be helpful if you are viewing a video advertisement for the product you are contemplating on buying, or for improving the quality of your videos. Simply navigate to Settings > System > Display > HDR > Display calibration for HDR video > Calibrate to find options for changing your video quality.
By adjusting your display calibration in Windows 11, you can minimize the risk of getting an inaccurate color when you shop online. Upgrade to Windows 11 to get the most up-to-date Windows tools and online shopping features.
Все способы:
- Калибруем цвета монитора в Windows 10
- Способ 1: Использование калибратора
- Способ 2: Стороннее программное обеспечение
- Способ 3: Встроенное в Windows средство
- Вопросы и ответы: 3
Не всегда стандартные настройки передачи цветов дисплея подходят пользователю после подключения самого устройства к компьютеру. Обычно это касается людей, часто взаимодействующих с графикой, которые занимаются, например, рисованием или обработкой фотографий. В таких ситуациях особенно важно настроить корректную передачу цветов. Сегодня мы хотим рассказать о трех методах выполнения поставленной задачи в Windows 10, рассмотрев каждый из них.
Калибруем цвета монитора в Windows 10
Как вы уже знаете, существуют разные методы калибровки цветов монитора. Некоторые из них не приносят вообще никакого результата, поскольку конфигурация осуществляется «на глаз». Касается это специализированных онлайн-сервисов и универсальных изображений, которые, как заявляют их создатели, должны помочь справиться с настройкой. Мы пропустим эти варианты, поскольку они попросту неэффективны, и сразу же перейдем к проверенным способам, начиная с самого эффективного, но дорогого.
Способ 1: Использование калибратора
Калибратор — дорогостоящее оборудование, подключаемое к компьютеру через USB-кабель и имеющее фирменное программное обеспечение. Есть смысл использовать его только тем юзерам, кто профессионально занимается графикой и нуждается в максимально точной настройке цветов. Самый популярный калибратор на рынке — DataColor Spyder5Pro. Через него сначала осуществляются замеры освещения окружающего пространства, а затем происходит подключение к компьютеру и установка самого устройства на дисплей. Ему потребуется от пяти до пятнадцати минут на обработку информации, а после этого уже через программное обеспечение в автоматическом режиме создастся несколько доступных профилей. Каждый пользователь уже выбирает оптимальный для себя вариант, отталкиваясь от увиденного изображения.
Конечно, такое средство далеко не всем по карману, поэтому мы и остановились на нем лишь вкратце. Всем желающим, кого заинтересовал калибратор, настоятельно рекомендуем перед покупкой изучать отзывы профессионалов и инструкцию к прибору. После приобретения прочтите официальную документацию, чтобы узнать, как именно выполнить правильную калибровку, ведь этот алгоритм зависит непосредственно от модели устройства.
Способ 2: Стороннее программное обеспечение
Специальные программы по сути являются усовершенствованной версией стандартного средства операционной системы, однако иногда оказываются более эффективными, поэтому мы решили включить такой софт в формат сегодняшней статьи. Предлагаем прочесть отдельный материал на нашем сайте, который посвящен обзору программ, предназначенных для калибровки монитора. Там вы можете изучить их основные особенности и понять, подходит ли какое-то из представленных решений для используемого монитора.
Подробнее: Программы для калибровки монитора
Способ 3: Встроенное в Windows средство
Выше мы уже упоминали о существовании специального встроенного в Windows средства, которое позволяет создать подходящую для монитора конфигурацию передачи цветов. Сейчас предлагаем более детально остановиться на ней, максимально подробно разобрав сам процесс настройки, чтобы даже у начинающих пользователей не осталось вопросов по этой теме.
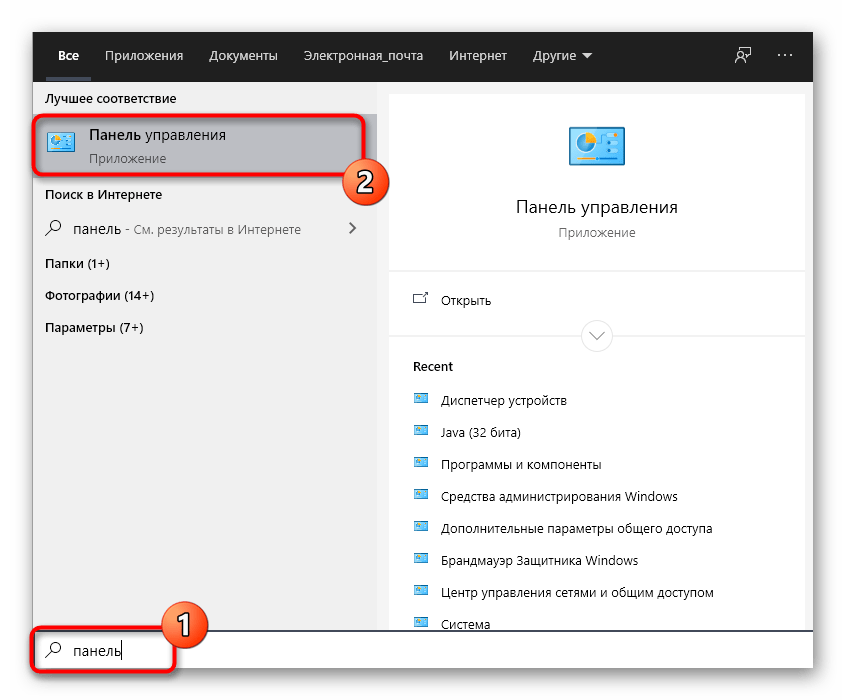
- Для начала потребуется запустить этот инструмент. Откройте «Пуск», через поиск отыщите приложение «Панель управления» и запустите его.
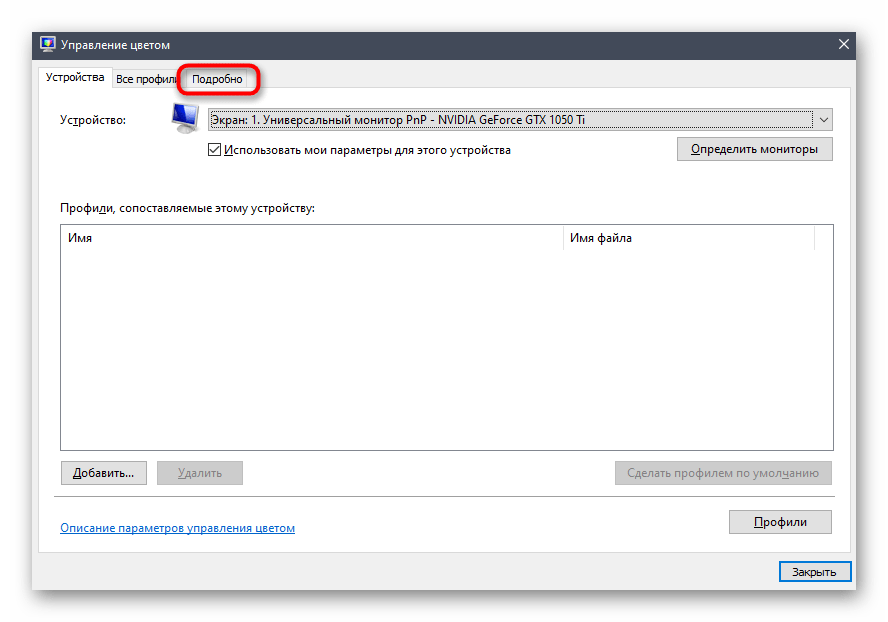
- Переместитесь в раздел «Управление цветом».
- Здесь вас интересует вкладка «Подробно».
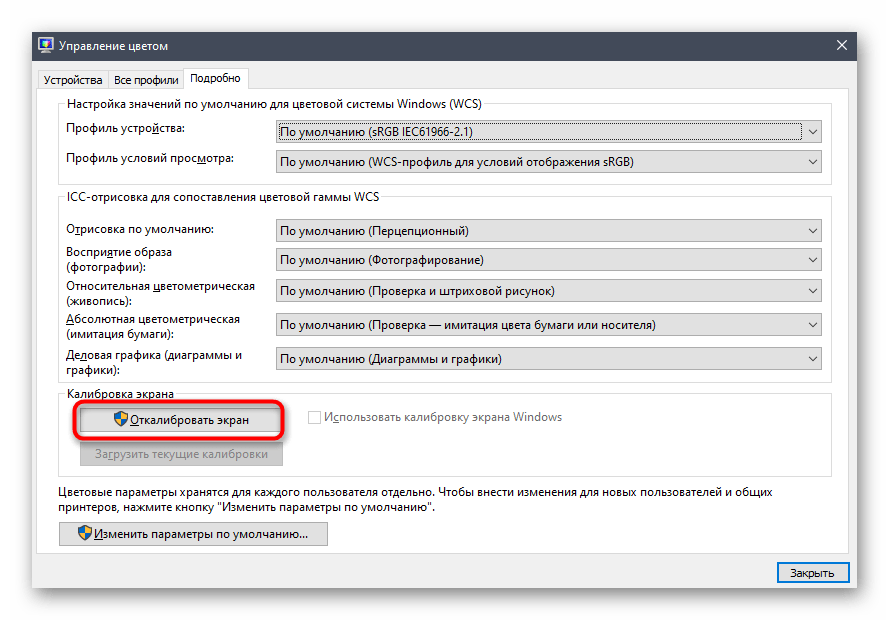
- Оказавшись на ней, щелкните по отведенной кнопке «Откалибровать экран».
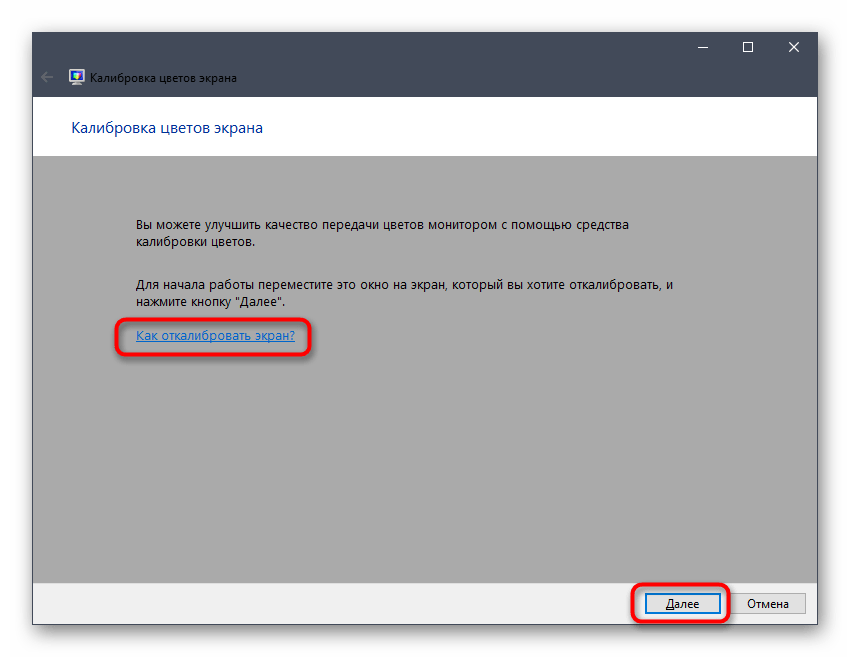
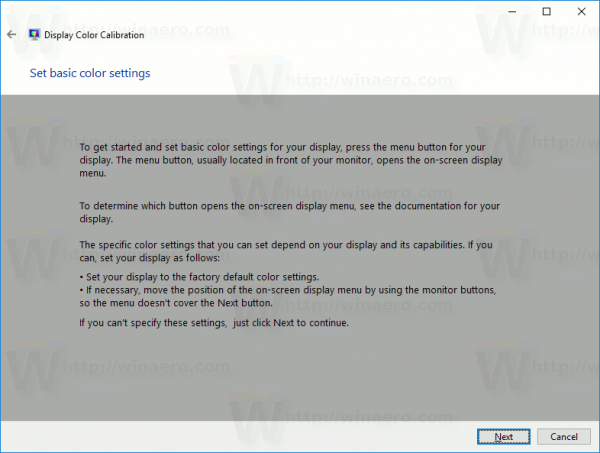
- Отобразится окно Мастера настройки. Здесь Microsoft рекомендуют прочесть собственное руководство по реализации этого редактирования. При готовности приступить нажмите на «Далее».
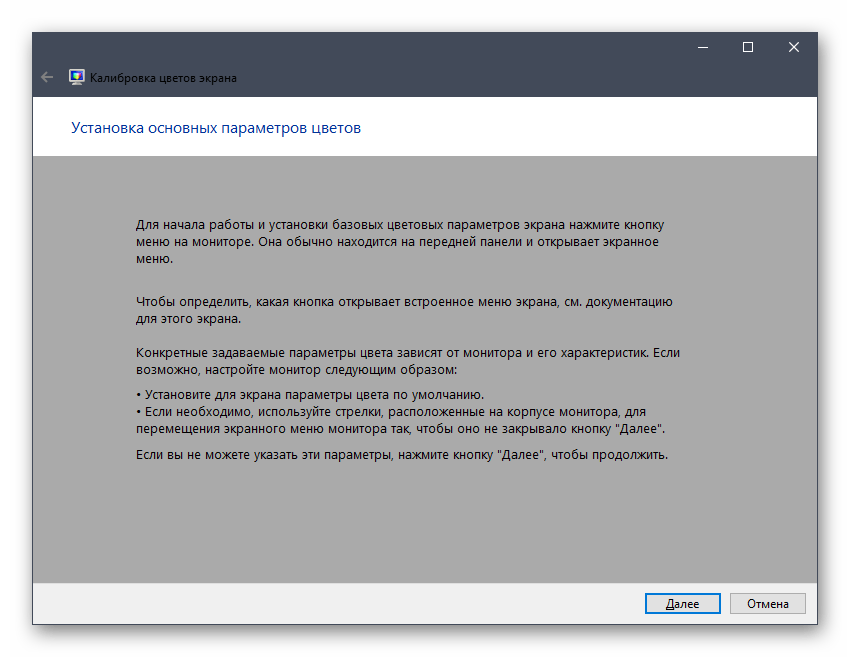
- Изучите первую рекомендацию, которая заключается в установке параметров по умолчанию во встроенном меню настройки монитора. Сделайте это только в том случае, если модель поддерживает такое меню.
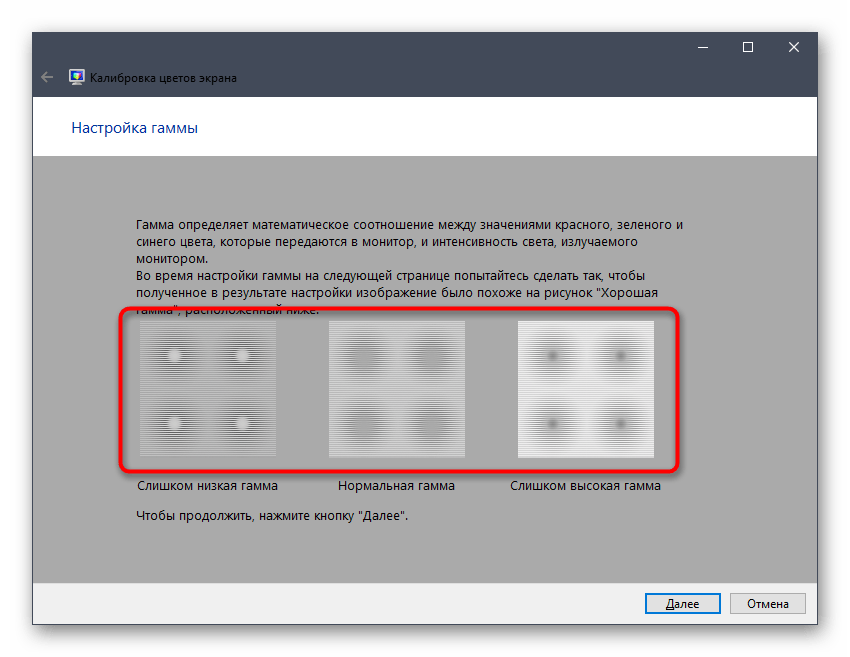
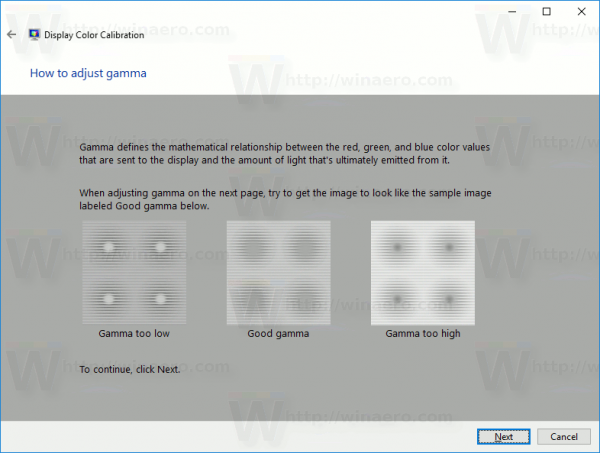
- Первый этап заключается в настройки гаммы. В окне вы видите примеры отображения. По центру находится идеальный вариант, к которому и нужно стремиться. Запомните его вид и переходите далее.
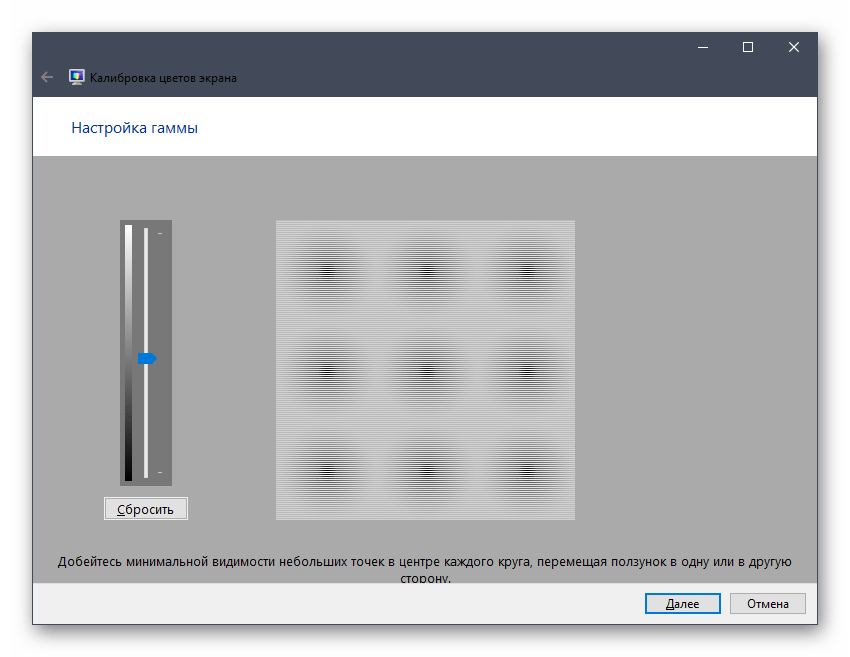
- Регулируйте положение ползунка пока не добьетесь нужного результата.
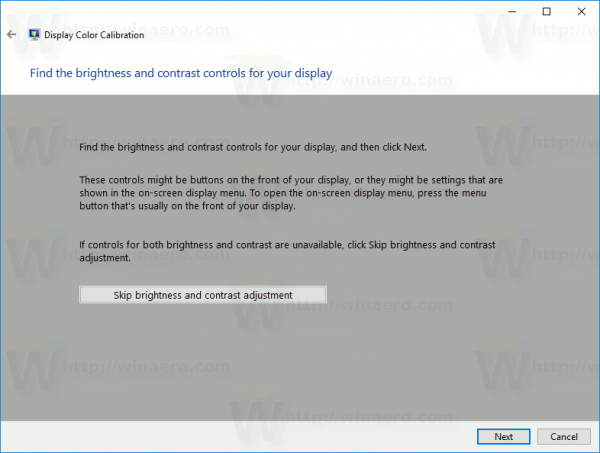
- После этого начинается операция регулировки яркости и контрастности экрана. Заняться этой операцией лучше только тем пользователям, у кого монитор наделен встроенным меню или специально отведенными кнопками, отвечающими за настройку этих параметров. Если это сделать невозможно, придется пропустить данный шаг.
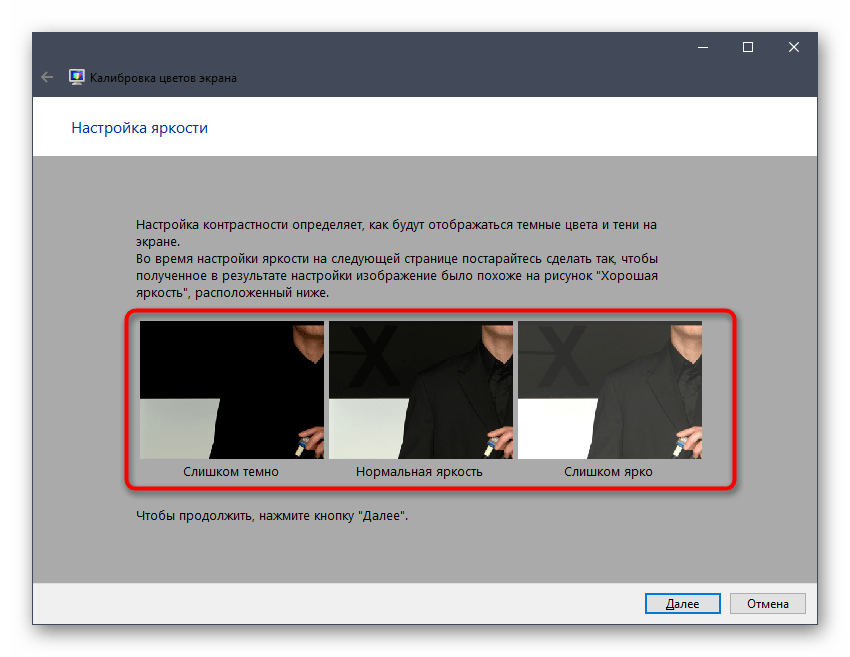
- При настройке яркости так же придется запомнить нормальное отображение картинки.
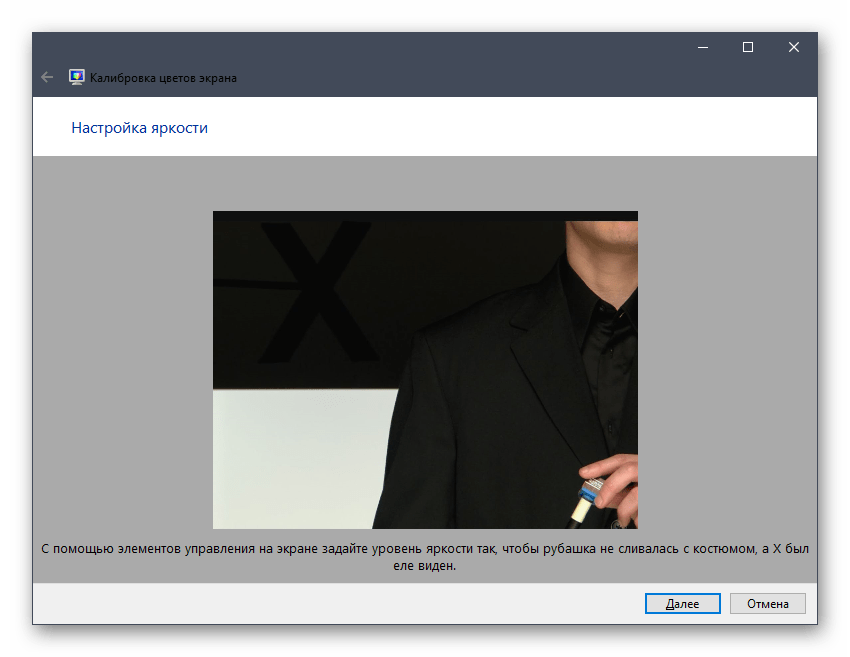
- Затем само изображение отобразится в более крупном формате. Используйте кнопки или встроенное меню для регулировки цвета.
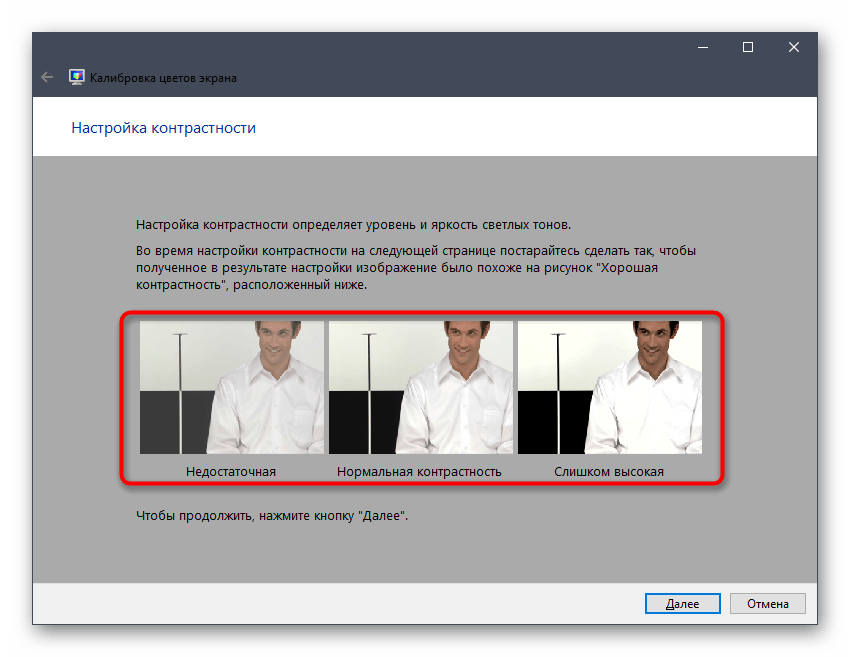
- То же самое предстоит проделать и с контрастностью. Для начала посмотрите на три представленных картинки.
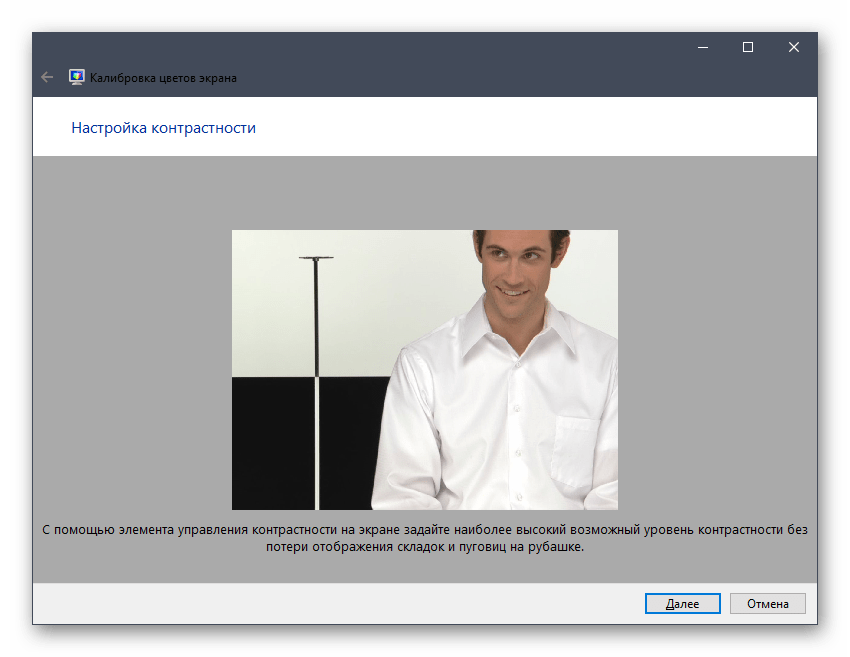
- После этого осуществите регулирование и переходите к следующему этапу только тогда, когда итоговый результат будет вас устраивать.
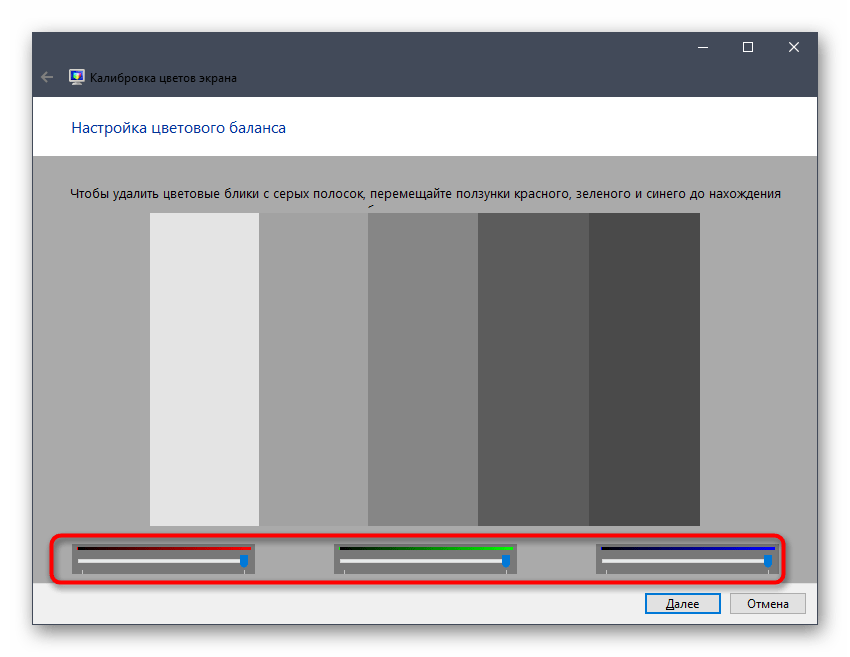
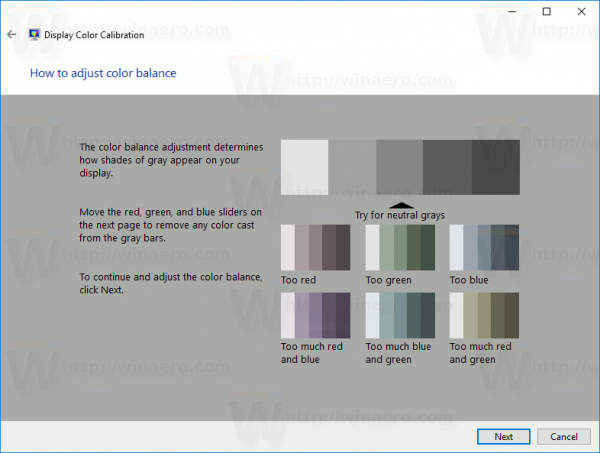
- Ознакомьтесь с инструкцией по конфигурации баланса цветов. Описанные здесь критерии придется применить на следующем шаге, поэтому запомните основные рекомендации.
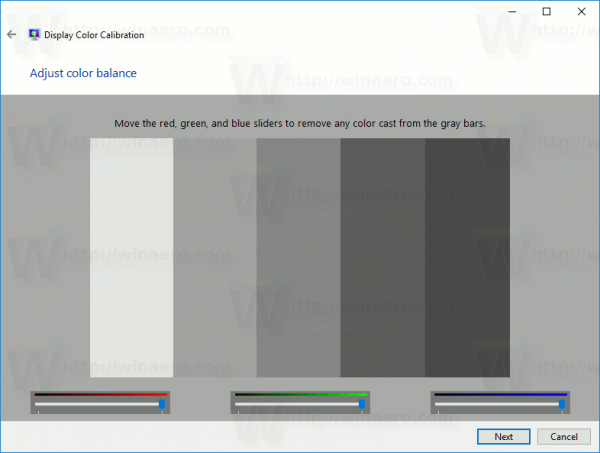
- Регулируйте горизонтальные ползунки для достижения должного эффекта.
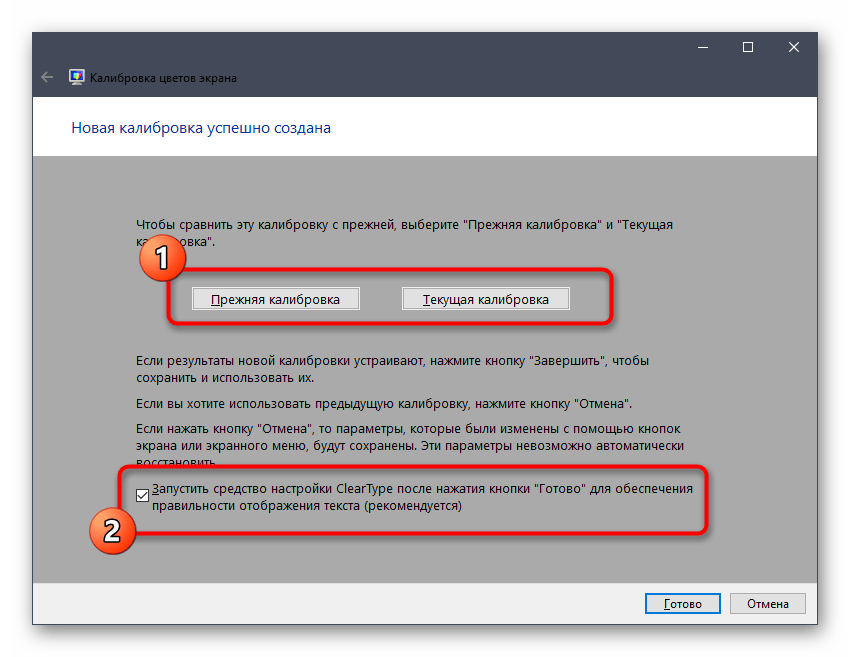
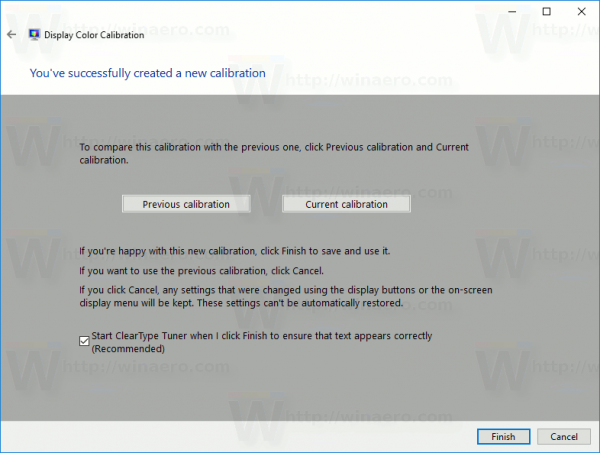
- На этом конфигурация экрана завершена. Вы можете выбрать текущую калибровку или вернуть прежнюю, а также запустить средство ClearType сразу после выхода из данного окна, чтобы поработать и над отображением цветов.


Как видно, ничего сложного в настройке экрана через штатное средство Windows нет. Вам остается лишь внимательно изучать инструкции и не пренебрегать рекомендациями, чтобы в итоге получить желаемый результат отображения цветов.
В рамках этой статьи вы были ознакомлены с тремя вариантами калибровки цветов монитора. Осталось только выбрать оптимальный, чтобы реализовать его и получить максимально корректную передачу изображения на дисплее. Однако это еще не все действия, которые желательно выполнить для обеспечения полного комфорта взаимодействия с монитором.
Наша группа в TelegramПолезные советы и помощь
Calibrating your monitor in Windows 11 is a straightforward process that ensures your screen displays colors accurately. By following a few simple steps, you can adjust the settings to achieve the best visual experience. This involves using built-in tools to fine-tune your display’s brightness, contrast, and color levels. Let’s dive into the step-by-step process!
Calibrating your monitor in Windows 11 will adjust your display settings to produce accurate colors and optimal screen quality. This process involves several steps using the built-in Display Color Calibration tool. Here’s how to do it:
Step 1: Open Display Settings
First, right-click on your desktop and select “Display settings” from the context menu.
This will open the Display settings window where you can adjust your screen resolution, orientation, and other display preferences.
Step 2: Launch Display Color Calibration
Next, scroll down and click on “Advanced display settings,” then select “Color calibration.”
The Display Color Calibration tool will open, guiding you through the process of adjusting your monitor’s colors.
Step 3: Follow the On-Screen Instructions
Click “Next” to begin the calibration process and follow the on-screen instructions.
The tool will prompt you to adjust various settings, such as gamma, brightness, contrast, and color balance. Pay attention to each step to ensure accurate calibration.
Step 4: Adjust Gamma Settings
Adjust the gamma settings using the slider until the dots in the example image are barely visible.
Proper gamma settings ensure that your monitor displays the correct range of light and dark shades.
Step 5: Adjust Brightness and Contrast
Next, use the on-screen images to adjust your monitor’s brightness and contrast settings.
These adjustments help to balance the light and dark areas on your screen, enhancing the overall picture quality.
Step 6: Adjust Color Balance
Finally, adjust the color balance by tweaking the red, green, and blue sliders until the grayscale image looks neutral.
Correcting the color balance ensures that your monitor displays colors accurately, without any color cast.
Step 7: Save and Finish
Once you’re satisfied with the adjustments, click “Finish” to save your new display settings.
Your monitor will now use the calibrated settings, providing more accurate and pleasing visuals.
After you complete the calibration process, your monitor will display colors more accurately and consistently. This is particularly important for tasks that require color precision, such as photo editing or graphic design.
Tips for Calibrating Monitor in Windows 11
- Make sure to calibrate your monitor in a neutral lighting environment to avoid color casts.
- Give your monitor at least 30 minutes to warm up before starting the calibration process.
- Use a calibration tool or hardware device for more precise adjustments.
- Repeat the calibration process periodically to maintain accurate display settings.
- Compare before and after images to ensure your adjustments are effective.
Frequently Asked Questions
What is monitor calibration?
Monitor calibration is the process of adjusting the display settings to ensure accurate color representation and optimal visual quality.
Do I need special tools to calibrate my monitor?
No, Windows 11 includes a built-in Display Color Calibration tool. However, hardware calibration devices can provide more precise adjustments.
How often should I calibrate my monitor?
It’s recommended to recalibrate your monitor every few months or whenever you notice color inaccuracies.
Can I use the same calibration settings for multiple monitors?
No, each monitor may have different characteristics, so it’s best to calibrate each one individually.
What is gamma adjustment?
Gamma adjustment fine-tunes the brightness levels of your monitor to ensure a balanced display of dark and light shades.
Summary
- Right-click on desktop and select “Display settings.”
- Scroll down and click “Advanced display settings,” then “Color calibration.”
- Follow the on-screen instructions.
- Adjust gamma settings.
- Adjust brightness and contrast.
- Adjust color balance.
- Save and finish.
Conclusion
Calibrating your monitor in Windows 11 is essential for anyone who relies on accurate color representation. Whether you’re a graphic designer, photographer, or just someone who enjoys a high-quality visual experience, taking the time to adjust your display settings can make a big difference. By following the steps outlined above, you can ensure that your monitor displays colors as they should be, providing a more enjoyable and accurate viewing experience.
Remember, the environment in which you calibrate your monitor plays a crucial role in achieving the best results. Make sure your room lighting is consistent and neutral. Also, give your monitor some time to warm up before you start the calibration process.
For those looking for more precise adjustments, investing in a hardware calibration tool can be beneficial. These devices can provide more accurate measurements and adjustments than the built-in software tools. However, the built-in Display Color Calibration tool in Windows 11 is a great starting point and can significantly improve your monitor’s display quality.
Now that you know how to calibrate your monitor in Windows 11, why not give it a try? Your screen—and your eyes—will thank you!
Matthew Burleigh has been writing tech tutorials since 2008. His writing has appeared on dozens of different websites and been read over 50 million times.
After receiving his Bachelor’s and Master’s degrees in Computer Science he spent several years working in IT management for small businesses. However, he now works full time writing content online and creating websites.
His main writing topics include iPhones, Microsoft Office, Google Apps, Android, and Photoshop, but he has also written about many other tech topics as well.
Read his full bio here.
Windows 10 comes with the ability to tune up your monitor’s color profile and brightness accurately. There is a special wizard which allows you to calibrate your display. If you would like to improve the appearance of the monitor’s picture and ensure that colors are displayed accurately, here is how to use the wizard.
To calibrate your display, you need to launch the Display Color Calibration wizard. To launch it, you can use the Settings app as follows.
How to Calibrate Display Colors in Windows 10
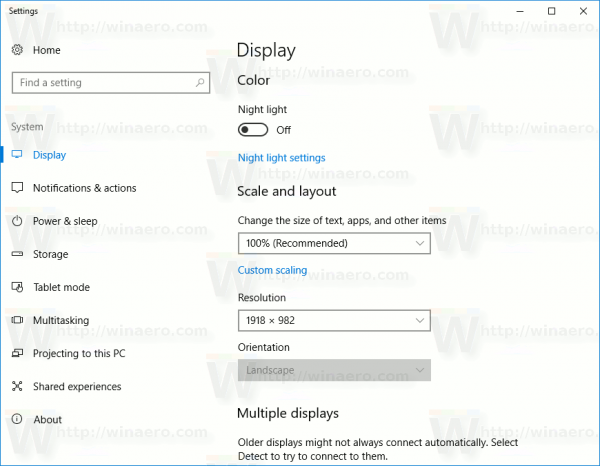
- Open Settings.
- Go to System — Display.

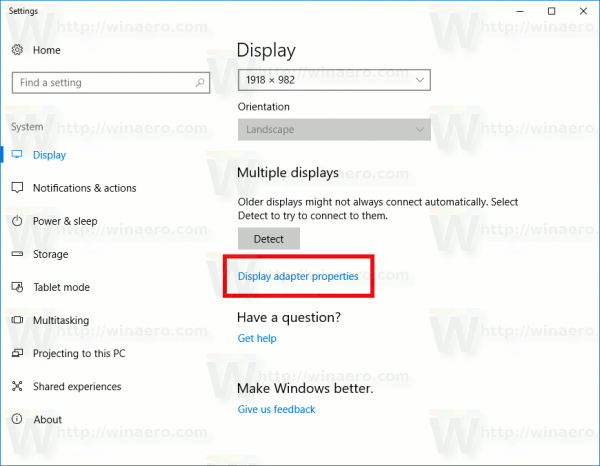
- Scroll down to the link «Display adapter properties».
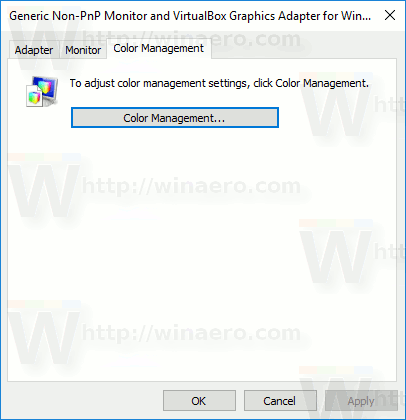
- In the next dialog, go to the Color Management tab.
- There, click the button «Color Management». See the screenshot.

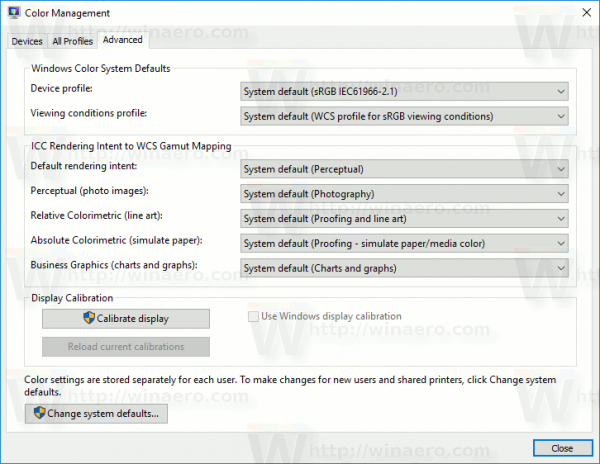
- In Color management, go to the Advanced tab.

- Click the button «Calibrate display«.

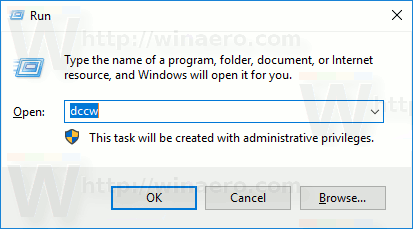
The Display Color Calibration wizard can be started directly with the «dccw» command. Press Win + R shortcut keys on the keyboard and type dccw in the Run box.
You can also create a Display Calibration shortcut in Windows 10.
Here is how the wizard looks:
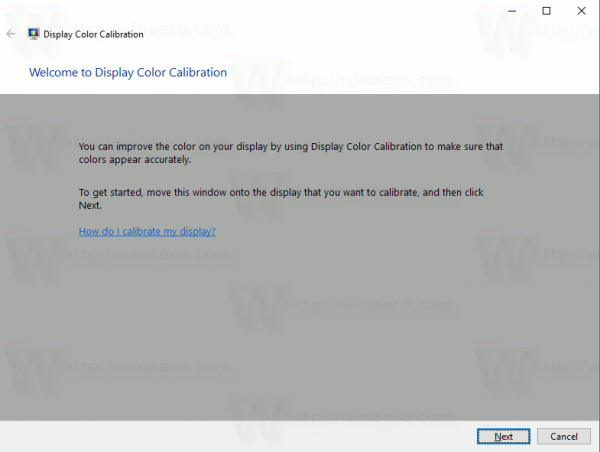
Reset your display to factory defaults (if this function is supported) and then click on Next to proceed.
Review the gamma samples, and click on the Next button to configure the gamma options on the next page.
Here is how the gamma settings page looks like:
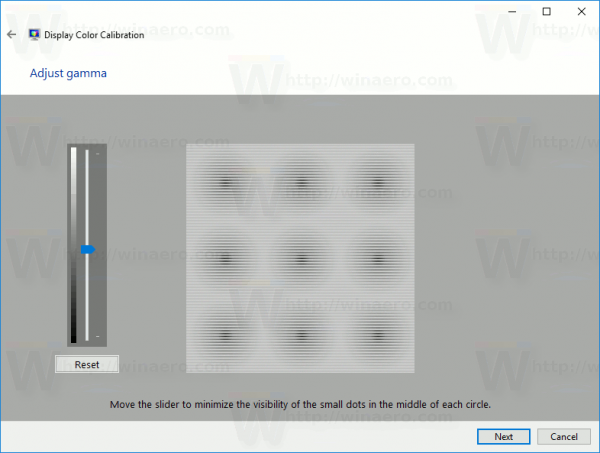
Use the slider control to adjust gamma. You need to minimize the visibility of the small dots in the middle of each circle.
Once done, click on Next again.
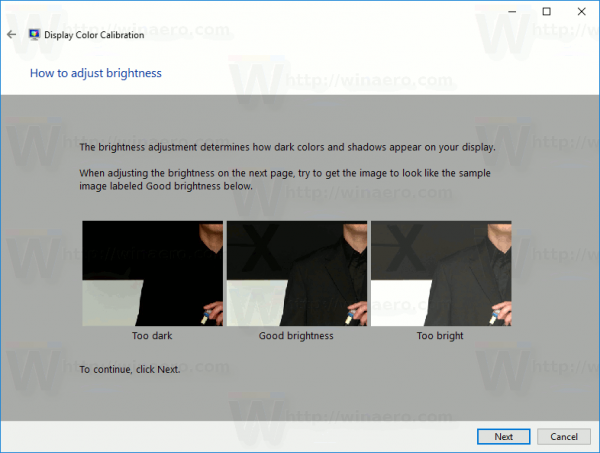
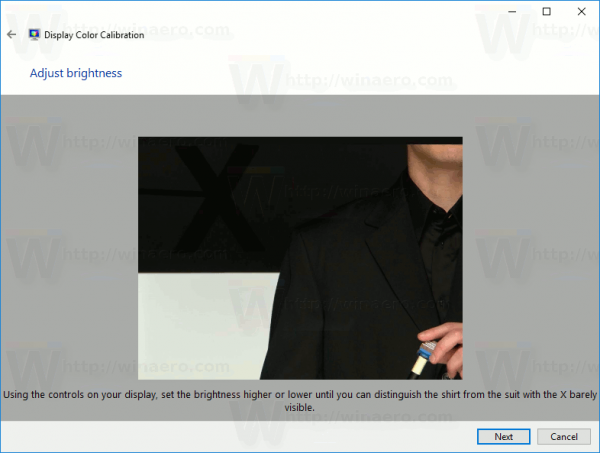
The next page will allow you to perform brightness and contrast adjustment. You can skip them if adjustment is not required, otherwise look at the brightness examples and change the brightness level using the provided picture sample.
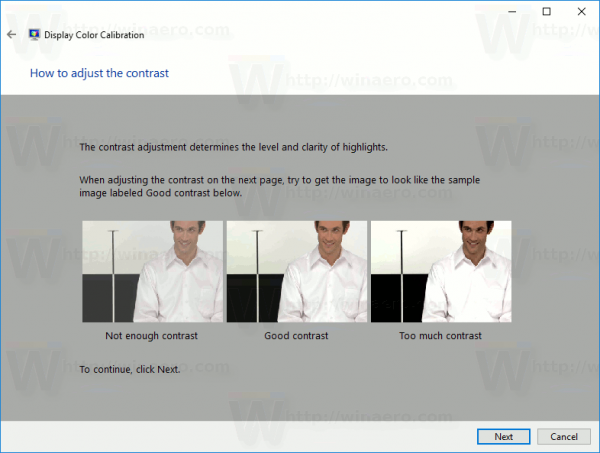
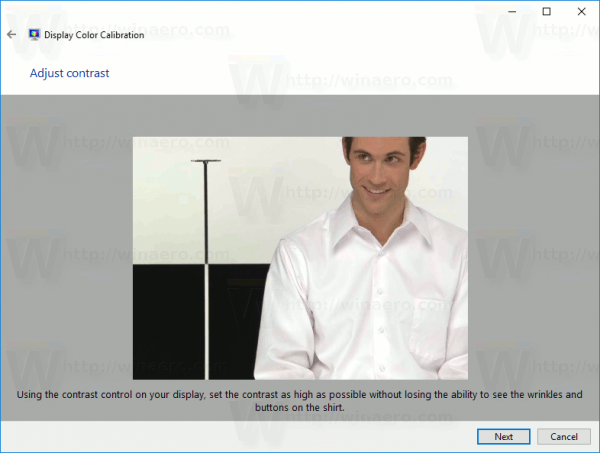
Repeat the same for contrast. Set the contrast as high as possible without losing the ability to see wrinkles and buttons on the shirt.
Now, configure the color balance. Look at the examples and move the red, green, and blue sliders to remove any color cast from the gray bars.
Finally, you can accept the changes you have made using the Finish button, or restore the previous options using the Cancel button. At the final stage, the Display Color Calibration wizard allows you change your ClearType font settings to ensure that text appears correctly. Tick the appropriate option to launch it.
That’s it.
Support us
Winaero greatly relies on your support. You can help the site keep bringing you interesting and useful content and software by using these options:
If you like this article, please share it using the buttons below. It won’t take a lot from you, but it will help us grow. Thanks for your support!
Not many Windows users may be familiar with the concept, but calibrating your screen colors may just improve your experience on the computer.
It may be possible that you have just added a new screen to your PC, or that your old display device has lost its novelty and the colors have kind of faded away. In such cases, you may want to recalibrate your screen often.
If you work with videos and images or play games on your PC, calibrating your monitor would assist you to achieve more natural colors. Not only that, but the colors of the images on your device may be nearly the same as on other devices if you are sharing.
Table of Contents
If all display devices were calibrated the same way, the colors of every item would appear to be the same on each display device. Sadly, each display monitor manufacturer has its own calibration configuration, bringing nonlinearity to the colors across different devices.
Thankfully, Windows 11 includes a free display calibration tool that helps you adjust your gamma, brightness, contrast, and color balance. The preinstalled Display Color Calibration tool allows you to adjust some settings through the tool, while some need to be adjusted through the menu on the display device itself.
Before we begin calibrating our display(s), let us show you 4 ways you can access the Display Color Calibration tool in Windows 11.
How to Open Display Color Calibration in Windows 11
Through Run
You can open the Display Color Calibration tool by typing in a small cmdlet in Run, which will open the tool for you. Type in dccw in Run and hit Enter to launch the tool.
By Search
Another quick way to launch the tool is by searching from it through the Windows Search box. Search for “Calibrate” in the Search box. When Calibrate display color is highlighted, hit Enter on the keyboard.

Through the Control Panel
The calibration tool can also be accessed through the Control Panel. Here is how:
- Open up the Control Panel by typing in control in Run.
- Now select View by to Small icons, and then click Color Management.

- From the Color Management window, switch to the Advanced tab, and then click Calibrate display.


The Display Color Calibration tool will now be launched.
Through Settings App
The tool can also be accessed through the Settings app. Here is how:
- Navigate to the following:
Settings app >> System >> Display >> Advanced Display - Now click Display adapter properties for… under the Display information section.

- From the Properties window, switch to the Color Management tab, and then click Color Management.
- From the Color Management window, switch to the Advanced tab, and then click Calibrate display.


Now that you know how to access the tool, let us now continue to learn how to use it.
How to Calibrate Monitor Display Color in Windows 11
As we mentioned earlier, it is important to calibrate your display colors so that if you share your work with someone, they may see the same colors that you see on yours. It is not necessary that what may seem vibrant on your display device will seem the same way on another device.
Some users believe that calibration may only be needed once the display device is being set up for the first time. However, that is not entirely true. Yes, you should calibrate your monitor when it is being used for the first time. However, the best practice is to recalibrate it every 6 months.
This is because the display devices can lose their color sharpness, changing the output results from the actual colors. Here is how you can (re)calibrate your display device(s) easily (for free) using the built-in Display Color Calibration tool in Windows 11:
- Open the Display Color Calibration tool using any of the methods above.
- The tool will now launch where you can see instructions on each page guiding you on what to do. If multiple displays are connected, drag the tool window onto the screen that you want to calibrate, then click Next.

- You will then be asked to restore your display’s color settings to the default values through its own menu, which can be accessed directly through the button on the display device. What you can do is perform a factory reset to bring it back to the default value. Once done, click Next on the tool.
- The next page tells you what the perfect gamma settings should look like. Gamma is a mathematical combination of the colors red, green, and blue, that ultimately defines the amount of light emitted from your display device. Notice how the gamma images are different from each other. On the next screen, we must achieve the gamma settings manually to match the image in the center (Good gamma). Therefore, take a good, hard look at the center image and then click Next to begin the calibration process.
- On the next screen, adjust the slider on the left so that the small dots in the center of the circles are barely visible. If you think that the gamma settings are ideal to match the center image on the previous screen, click Next.
- You will be asked to adjust the brightness and contrast of your display. These settings are controlled directly through your display device. Therefore, click Next if your device has these settings, otherwise click Skip brightness and contrast adjustment.
- If you click Next in the last step, you will now see a guide to adjust your screen’s brightness to an optimized settings. Notice how the “Good Brightness” image looks. This is what you shall be trying to achieve on the next screen while calibrating your display’s brightness. Click Next to begin.
- On the next screen, you will see an image that will assist you in obtaining an optimized brightness level. Adjust your display device brightness level until you can distinguish the black shirt from the black coat, and then “X” is barely visible. Click Next when done.
- Next you shall adjust the display contrast using the center image. Notice how the wrinkles on the shirt are creating a shadow effect. This is what you will be using to achieve a good contrast. Click Next to begin.
- Now adjust your display device’s contract using its menu. The goal is to set the contrast as high as possible while still being able to see the wrinkles and the buttons on the shirt prominently. Once done, click Next.
- The next phase involves balancing out the red, blue, and green colors on the display device. This will be done using the Display Color Calibration tool, you may now close the display device’s menu. Notice how different combinations of excessive colors change the shade. We must try to achieve neutral grey colors on the next screen by adjusting the sliders for each color. Click Next to begin.
- On the next screen, scale up and down the slider beneath each color to achieve neutral grey shades and try different combinations. Once you are happy with the results, click Next.
- On the next screen, you can compare your previous calibration with the current one (with the new settings) and see the changes. Once you are sure you want to keep the new display color calibration, uncheck the box next to “Start ClearType Tuner when I click Finish to ensure that text appears correctly” and then click Finish.


Closing words
The Display Color Calibration tool has been around for some time now. If you are using Windows 10, you can also use this tool to calibrate your display settings there as well.
Another useful calibration tool in Windows is the ClearType Tuner. This tool helps you calibrate the text by adjusting its font, thickness, height, sharpness, etc. Not only that, you can use this tool for text calibration of each display monitor.
If you have the time, you can access the ClearType Tuner tool by keeping the box checked in step 13 above, or by searching for it through the Search box.