
ImgBurn — отличная программа для записи образов CD/DVD дисков. Создана автором популярного, но закрытого в свое время проекта DVD Decrypter, предназначенного для копирования и снятия защиты с DVD дисков.
Главной особенностью программы является поддержка большого количества приводов различных производителей, поддерживает все последние накопители, включая рекордеры с возможностью изменения параметра booktype / bitsetting (от BenQ, LiteOn, NEC, Plextor, Sony).
Программа может записывать большинство типов образов CD/DVD. ImgBurn имеет ряд настроек, где можно задать ассоциацию с поддерживаемыми расширениями файлов-образов (BIN, GCM, LST, UDI, CDI, FI, MDS, CDR, IMG, NRG, DVD, ISO, PDI), выбрать интерфейс записи (ASPI, ASAPI, SPTI).
Помимо всего перечисленного, в ImgBurn можно проводить верификацию данных на носителях, анализировать качество записи и получать различного рода сведения, как о диске, так и о физической его структуре. Присутствует возможность осуществлять поиск в Интернет и последующую загрузку новых версий прошивок для данного привода. Можно изменять метку ISO-образа, блокировать/разблокировать открытие лотка привода и т.д. Очистка дисков поддерживается как быстрая, так и полная.
Что нового в ImgBurn 2.5.8.0?
- Зажатие клавиши ALT при клике на колонку DLE окна дисков удаляет сортировку.
- Возможность постепенного поиска панели Проводника в окне редактора макета дисков.
- Эффективная скорость подключения (1.1, 2.0, 3.0) для устройств USB.
- Драйверы Pioneer теперь показывают «Kernel Version» около версии релиза.
- Отображение прогресса выполнения действия на панели задач Windows 7+ теперь становится красным при возникновении ошибки при выполнении чтения или записи данных.
- Возможность указания «Platform ID» при создании загрузочного диска.
- Добавлена информация MSF для инструмента просмотра секторов.
- Возможность использования большего буфера I/O (1GB).
- Много других усовершенствований, исправлений и изменений.
This full review introduces the meaning, user instruction, alternative, as well as error solutions for Microsoft Windows Disc Image Burner. Instead, it also indicates a way to directly create a bootable disk relying on the current running system. Read the below content created by MiniTool organization and learn more details.
What Is Windows Disc Image Burner?
Windows Disc Image Burner is an ISO file-burning software that can help you burn any ISO files into an optical disc and install the ISO file on other computers. It is developed by Microsoft and embedded in Windows 11, Windows 10, Windows 8.1, as well as Windows 8 as isoburn.exe.
Microsoft and many other companies usually deliver applications or programs in the form of ISO files such as Windows operating system (OS) and Microsoft Office. This kind of ISO file is an exact copy of a CD/DVD version of the software. The different aspect is that relying on ISO, you can distribute apps directly via the Internet without physical media.
However, sometimes, when there is no network connection, you have to rely on the traditional method to transfer the program file. Also, putting the installation files on a physical disk is a safer way for carriage or storage. Then, you will need to copy the ISO files onto a physical disc like a DVD or CD.
Furthermore, it is invalid to directly copy the ISO file to a DVD/CD. You should make use of a professional tool to “burn” the ISO file onto the target disc and make the disc an installation disc that can directly be used to install the program it contains.
In general, it is very easy to burn an ISO file into a CD/DVD. Just follow the following instructions based on Windows 10 to complete the task.
1. Connect the disc, DVD-R, DVD+R, DVD-RW, DVD+RW, CD-R, or CD-RW to your computer.
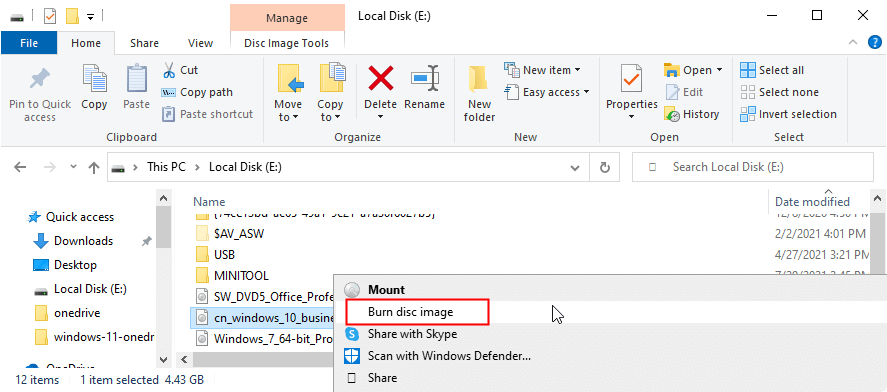
2. Find the .iso file that you want to burn into a disc in Windows File Explorer.
3. Right-click on the ISO file and select Burn disc image. Then, a new small window will pop up.
4. In the new popup, it will automatically select the disc you insert as the target disc burner. If a disc burner is not found, make sure that your burner is installed properly and you have the appropriate permissions to burn a disc.
You can check Verify disc after burning to verify the integrity of the burned disc.
5. Finally, click the Burn button to start the burning process. Then, just wait for the success.
How to Burn ISO to DVD in Windows 11?
The operations for burning an ISO file into a disc in Win11 are the same as those of in Win10 if you still make use of Windows Disc Image Burner. Yet, in my situation, in Windows 11, there is an extra option that allows you to burn ISO files.
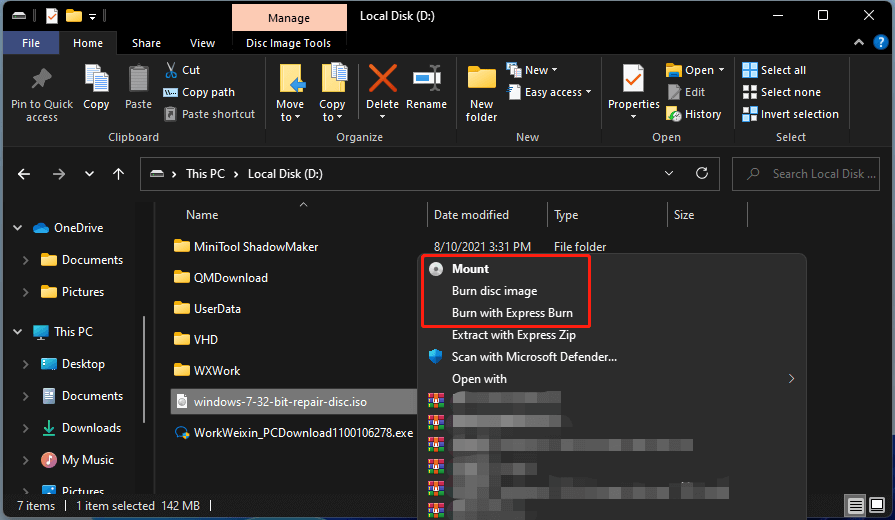
1. When I right-click on the ISO file, there is an option called Burn with Express Burn.
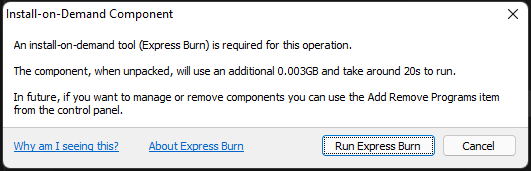
2. I choose the option and it informs me about the install-on-demand component. I click Run Express Burn.
3. Then, it installed Express Burn Disc Bruning and NCH Suite these two items on my computer.
4. Then I go back to right-click on my ISO file and select Burn with Express Burn. The Express Burn app will open itself and the Burn target ISO Disc window will appear.
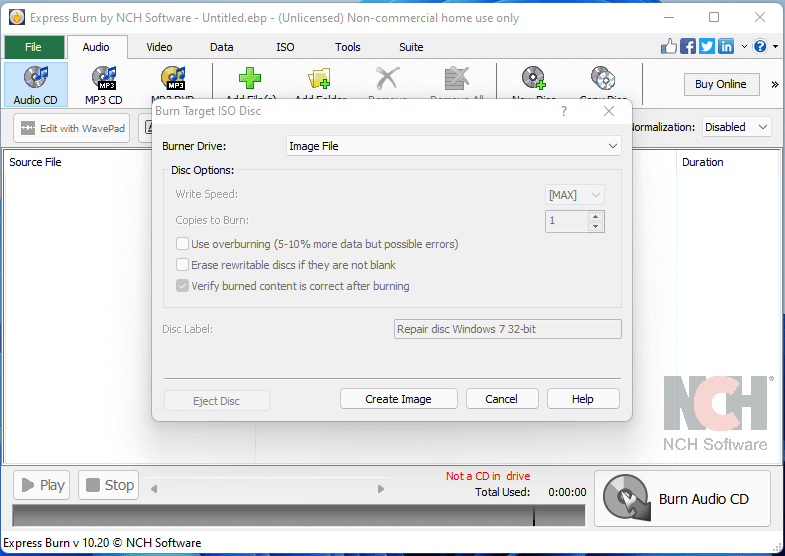
5. Then, just select the target disc and burn your iso file into it.
Besides, I found that after installing the Express Burn, when right-clicking on an ISO file, the only option I get to burn it is Burn with Express Burn and the previous Burn disc image option disappears. Maybe this is why some users can’t find access to Windows Disc Image Burner.
If you can’t reach Windows Image Disc Burner, just check if you have other third-party disc burning app(s) installed on your machine. If yes, just uninstall it and you will get the Burn disc image option back! Yet, you won’t see the Burn with Express Burn option again if you uninstall Express Burn app.
How to Mount an ISO File?
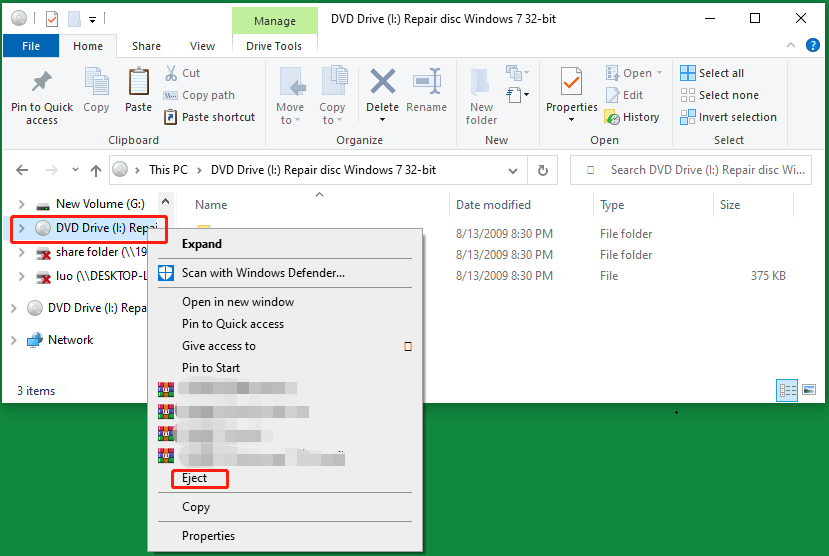
No matter you are running Windows 10 or Windows 11, you can easily mount your ISO files with just one step! Generally, right-click on the target ISO file and select Mount in the drop-down menu. Then, you will see a DVD Drive appear in your Windows Explorer and you can check its contents.
If you want to remove or dismount the DVD Drive from your explorer, just right-click on it in the left panel and choose Eject. Immediately, the drive will disappear. How easy it is!
How to Fix Windows Disc Image Burner Errors?
You may encounter some errors while trying to burn ISO to CD/DVD etc. disc. The following are some examples of error messages.
The disk image didn’t burn successfully because an error occurred. (Error code 0X80004005)
Error 0xC0AA0301: Windows Disc Image Burner has encountered a problem and needs to close. We are sorry for the inconvenience.
The disc image didn’t burn successfully because an error occurred. The write failed because the drive returned error information that could not be recovered.
Yet, you can solve the problem with one of the below methods.
Solutions for windows disc image burner error code 0x80004005
- Disable your antivirus, firewall, etc. temporarily for burning the ISO.
- Uncheck the “Verify disc after burning” option.
- Uninstall other ISO burning program(s).
- Use another ISO burning tool like IMGBurn, Rufus, and UltraISO.
- Update your system.
- The below solutions for error code 0xc0aa0301.
Solutions for Windows Disc Image Burner Error Code 0xc0aa0301
- Update, reinstall, or degrade your disc, chipset, or other hardware drivers.
- Update CD/DVD-ROM drive firmware.
- Delete the registry of HKEY_LOCAL_MACHINE\SYSTEM\CurrentControlSet\Control\Class\{4d36e965-e325-11ce-bfc1-08002be10318}.
- Use another blank and compatible disc.
- Clean boot your computer.
- Disable User Account Control.
Directly Create Bootable Disk with Your Current OS
If you just want to build a bootable media to boot up other crashed machines, you can avoid trouble by directly making a bootable device based on your working system with the help of MiniTool ShadowMaker, which supports Windows XP, Vista, 7, 8, 10, and Windows 11.
MiniTool ShadowMaker TrialClick to Download100%Clean & Safe
1. Download, install, and launch MiniTool ShadowMaker on your computer. Connect a disc or USB flash drive to the machine and make sure there isn’t any important data on the disc or USB for they will be overwritten in the following operations.
2. If it asks for purchase, just click on the Keep Trial option on the upper right.
3. In its main interface, click the Tools option in the top menu bar.
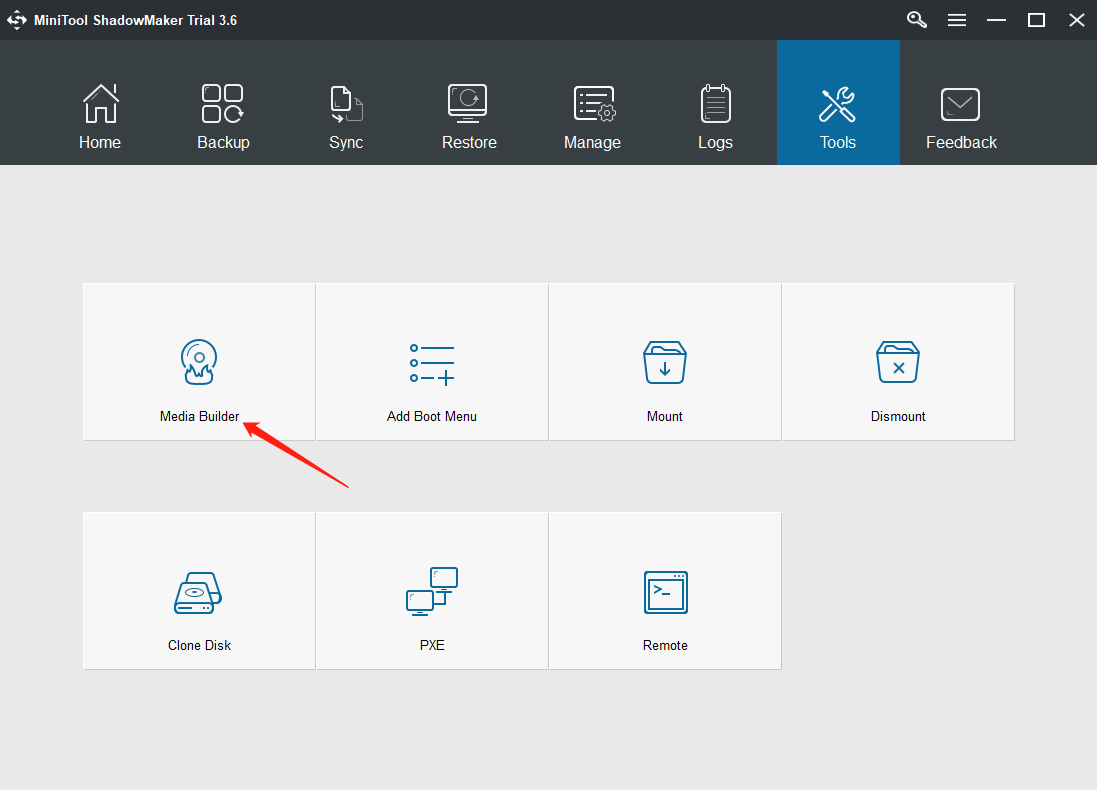
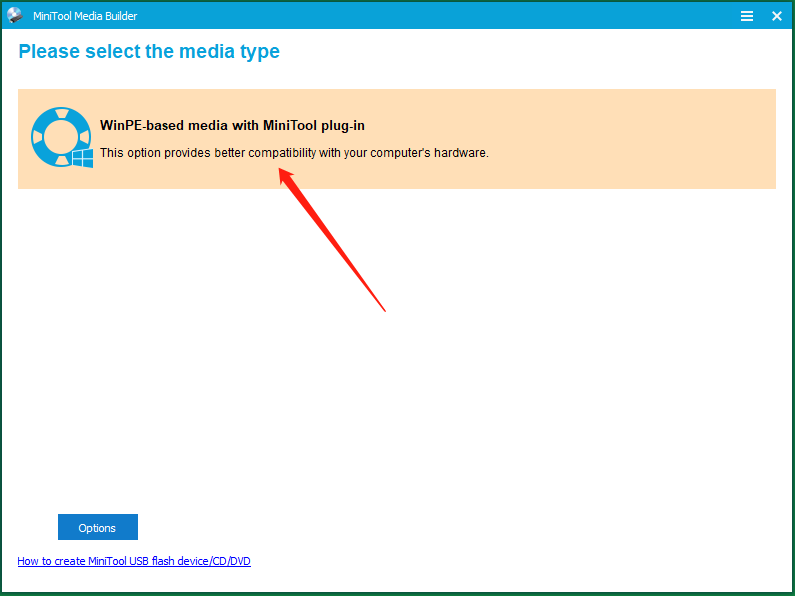
4. In the new popup, select WinPE-based media with MiniTool plug-in.
5. Next, choose what kind of bootable media you’d like to create, CD/DVD, USB, or ISO file.
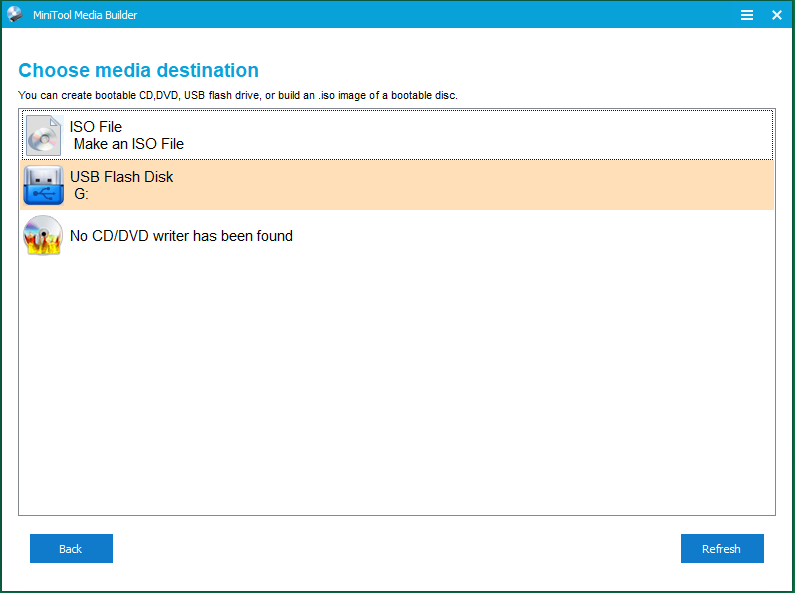
6. If you choose to create physical media, it will warn you about data erase. Just confirm it and start the process.
Besides creating bootable media, MiniTool ShadowMaker can also back up your important files/folders, partitions/volumes, system, or the entire hard disk. Most importantly, many useful features are free of charge!
Download Windows Speedup Tool to fix errors and make PC run faster
Windows 11/10 offers native support for burning .iso images. You can now burn images to disc, without using 3rd party software, as it includes a built-in Windows Disc Image Burner or isoburn.exe.
Can Windows burn ISO to DVD?
Yes! Windows 11/10 has a built-in ISO burner called Windows Disc Image Burner. This tool can help burn an ISO file to a DVD, CD, USB, or BD very easily.
To use the Windows Disc Image Burner to burn an ISO image in Windows:
- Right-click on any .iso image
- Select the option to Burn disc image. Make sure that you have inserted your DVD.
- Clicking on it will open the Windows Disc Image Burner.
- This gives you the option to burn the ISO image to CD or a DVD and to verify the disc after burning it.
- Do check the option to Verify disc after burning.
- Click on Burn.
That’s it!
Fix: A disc burner wasn’t found error.
If you wish, you can also change the burn settings. Right-click on the CD/DVD drive and select Properties and click on Recording tab.

Clicking on Global Settings button will offer you a few more options.
You can also Burn ISO files using Command Prompt.
TIP: These Free ISO Burners for Windows may also interest some of you.
Anand Khanse is the Admin of TheWindowsClub.com, a 10-year Microsoft MVP (2006-16) & a Windows Insider MVP (2016-2022). Please read the entire post & the comments first, create a System Restore Point before making any changes to your system & be careful about any 3rd-party offers while installing freeware.
An ISO file (or an IMG file) is a disk image that stores a disk’s content and structure, whether it’s a CD, DVD, Blu-Ray disc, hard disk drive, or USB flash drive, into a single file. Windows 10 and Windows 11 have a built-in app named Windows Disc Image Burner, which can be used to burn disc images. The app is easy to use and helpful, eliminating the need for third-party apps to complete the task. Here is how to burn ISO files (and other disc images) to Blu-Ray, DVD, or CD in Windows 10 and Windows 11:
TIP: To understand what disc images are and how they work, you should first read: What is a disc image file (ISO, NRG, BIN)?
Windows Disc Image Burner: What is and how to open it
Windows Disc Image Burner is an app that can help you burn disc images for free without installing third-party software. The procedure for opening Windows Disc Image Burner is different in Windows 10 and Windows 11. However, the first step is to have the ISO file you want to burn available on your computer. Then, read the appropriate section depending on the Windows version you’re using.
How to open Windows Disc Image Burner in Windows 10
On your Windows 10 computer, open File Explorer and navigate to the ISO file you want to burn. Select it with a click or tap on its name.
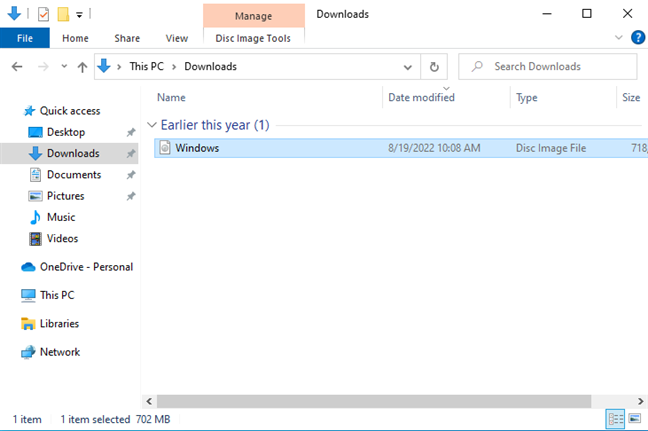
Navigate to the ISO file in File Explorer
Next, click or tap the Disc Image Tools tab on the ribbon and then the Burn button.
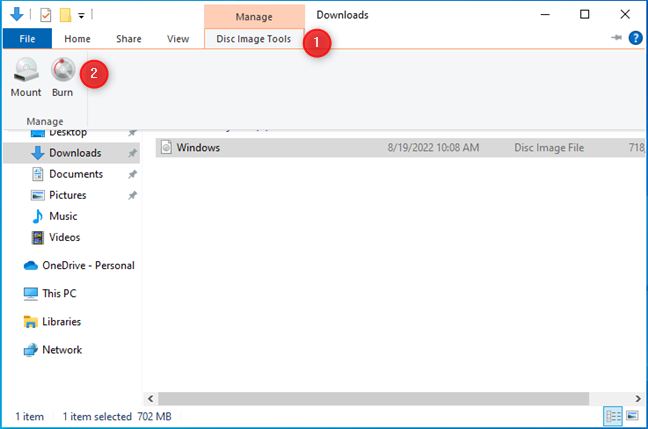
Click Disc Image Tools > Burn
This action opens the Windows Disc Image Burner app.
The Windows Disc Image Burner app
Another way to open it is to right-click (or press and hold) on the ISO file and choose to Burn disc image.
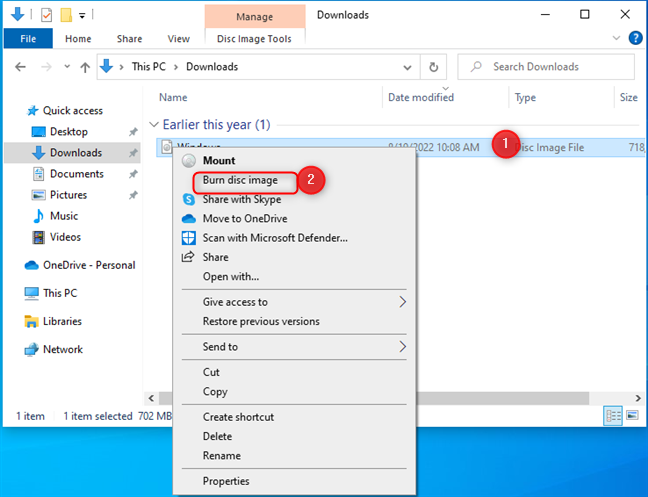
Right-click and choose Burn disc image
Then, skip the next section and follow the instructions for burning a disc image with Windows Disc Image Burner.
How to open Windows Disc Image Burner in Windows 11
In Windows 11, open File Explorer and navigate to the ISO file you want to burn. Select it by clicking or tapping on it.
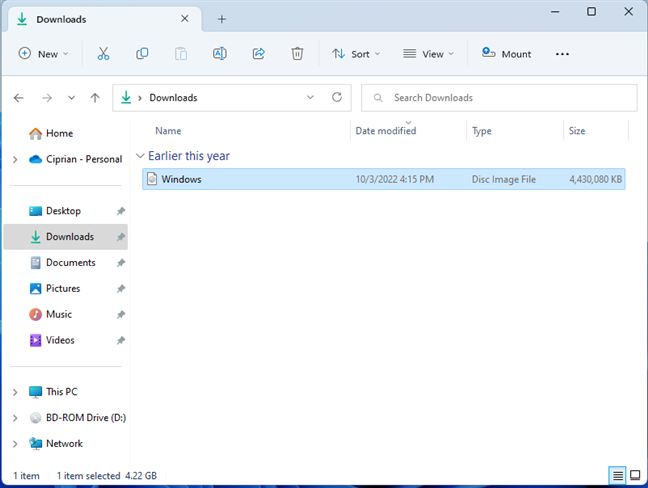
Navigate to the ISO file in File Explorer
In the menu bar at the top, click or tap See more (three dots) and choose Burn in the menu that opens. If the File Explorer window is bigger on your screen, you might see the Burn button directly next to Mount, in the menu bar.
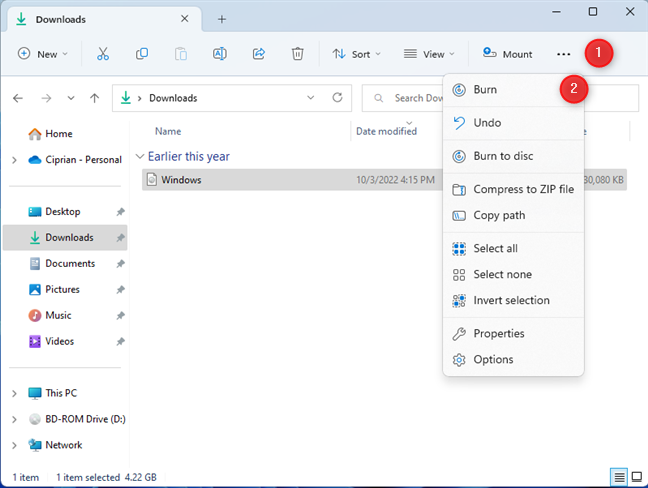
Click or tap See more > Burn
IMPORTANT: Do not choose Burn to disc. This option copies the ISO file to the disc; it doesn’t burn the contents of the ISO file onto the disc. Therefore, the result will be a DVD or Blu-Ray disc with the ISO file from your computer.
The Windows Disc Image Burner app opens, as seen in the screenshot below.
The Windows Disc Image Burner app
Another way of opening Windows Disc Image Burner is to right-click (or press and hold) on the ISO file you want to burn and then choose to Show more options.
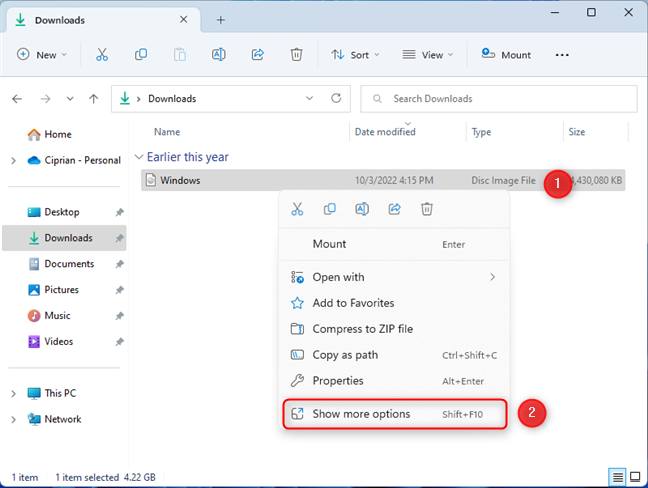
Right-click the ISO file and choose Show more options
The classic right-click menu is shown, where you find the Burn disc image option. Click or tap on it.
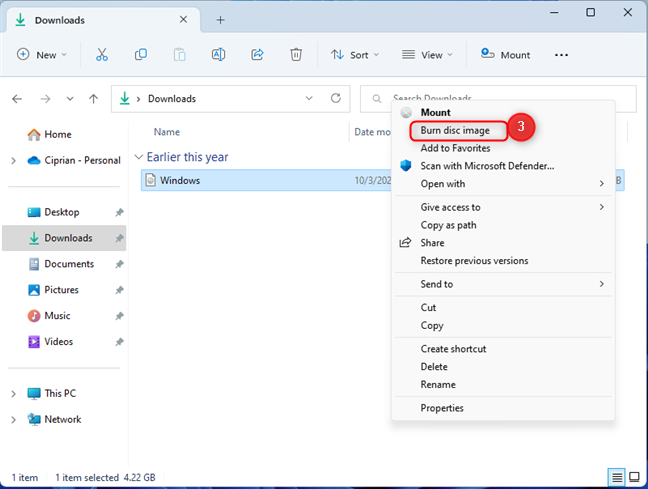
Choose Burn disc image
TIP: If you don’t like the new right-click menu from Windows 11, here’s how to restore the old right-click menu.
Follow the instructions from the next section on how to burn the disc image you’ve selected.
How to burn a disc image (ISO file to Blu-Ray, DVD, or CD) with Windows Disc Image Burner
When you see the Windows Disc Image Burner window, select the drive you want to use for burning the disc in the Disc burner drop-down, and check whether you wish to Verify disc after burning.
This check is useful because it confirms that everything went well, and you can use the Blu-Ray, DVD, or CD you’ve created on other computers and devices. To start the disc-burning process, click or tap Burn.
Select Verify disc after burning and press Burn
The app first burns the disc image to the recordable disc (Blu-Ray, DVD, CD). Then, it finalizes the disc and verifies it (if you’ve selected this option). For each step, you see a progress bar similar to the screenshot below.
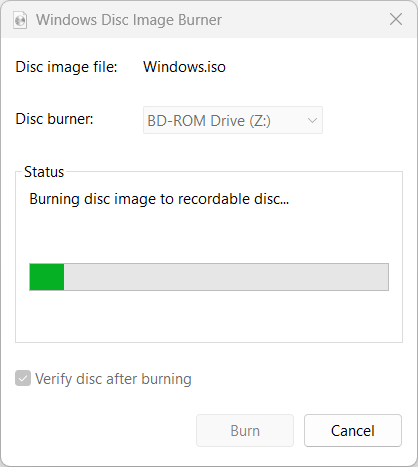
See the progress of the burning process
When everything is done, the Status section lets you know that “The disc image has been successfully burned to disc.” You also see the progress bar reaching its end, similar to the screenshot below. Click or tap Close.
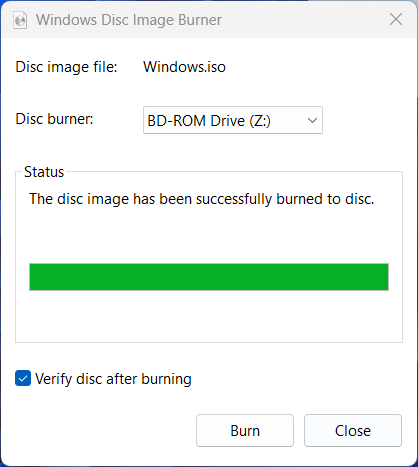
When the disc is done, press Close
Your computer automatically ejects the disc on which you’ve burned the content of the ISO file. Take it out, and close the disc burner.
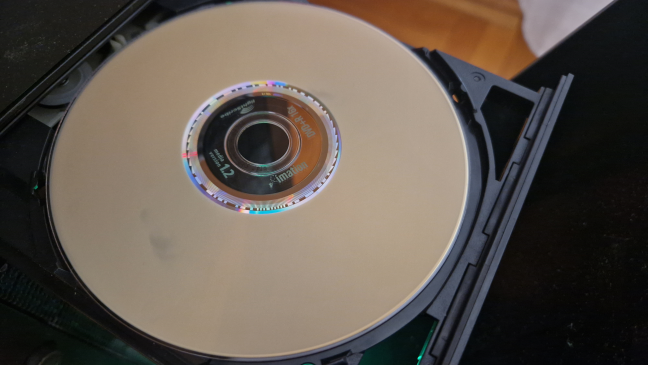
The disc is ejected automatically
BONUS: How to burn a disc image with isoburn (CMD, PowerShell, or Windows Terminal)
If you love the command line, you can use Command Prompt, PowerShell, or Windows Terminal to burn an ISO or IMG disc image file. First, open CMD, start PowerShell or Windows Terminal, depending on your preference.
The command you use for burning disc images is:
isoburn
or
isoburn.exe
If you want to familiarize yourself with its parameters, type it in and press Enter before running it to burn an ISO file to a disc. You should see a Windows Disc Image Burner Usage help message like the one below.
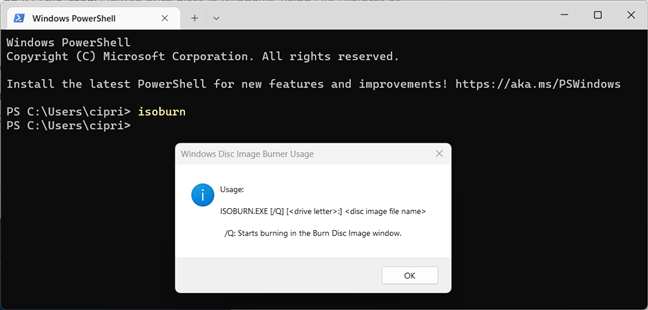
How to use isoburn
You can start the burning process using the following parameters:
isoburn.exe /q [disc burning drive letter] [Path to ISO file]
The command is not case-sensitive, meaning it doesn’t matter whether the path you enter has capital letters. Also, if your computer has only one drive that writes Blu-Ray discs or DVDs, you don’t need to specify the drive letter for the disc-burning drive. Windows knows it already. This letter is mandatory when you have two or more disc-burning drives.
The /q parameter is important because it tells Windows that you want to see the disc-burning window and follow the progress of the whole process. If you don’t use it, you won’t see anything.
Here’s an example of how I used this command to burn an ISO file to a Blu-Ray disc:
isoburn.exe /q G:\Downloads\Windows.iso
“G:\Downloads\Windows.iso” is the path to the ISO file I wanted to be burned on a Blu-Ray disc. I didn’t specify the drive letter for the disc-burning drive.
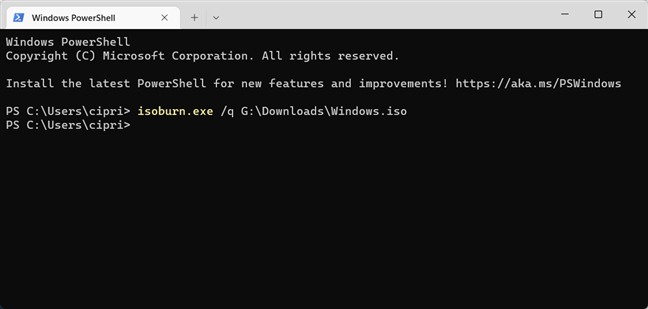
Burning an ISO file with isoburn
After you press Enter, you can watch the Windows Disc Image Burner do its thing automatically. The only downside is that you can’t use this command to verify the disc after the burning process is over. It doesn’t have a parameter for this feature.
Which ISO file did you burn to a disc (Blu-Ray, DVD, etc)?
Most people don’t burn DVDs or Blu-Ray discs anymore. However, some still do, at least occasionally, for very specific reasons. So, before closing this guide, I’m curious to know which ISO (or other image files) you have burned and why. What did it contain, and how are you going to use it? Comment using the options below, and let’s talk.