
Гаджеты в Виндовс 7 являются портативными приложениями, интерфейс которых располагается непосредственно на «Рабочем столе». Они предоставляют пользователям дополнительные возможности, как правило, информационной направленности. Определенный набор гаджетов уже предустановлен в ОС, но при желании юзеры могут его самостоятельно пополнить новыми приложениями. Давайте выясним, как сделать это в указанной версии операционной системе.
Читайте также: Гаджет погоды для Виндовс 7
Инсталляция гаджетов
Ранее Майкрософт предоставлял возможность скачивания новых гаджетов со своего официального сайта. Но к настоящему времени компания отказалась от поддержки этих приложений, обосновывая свое решение заботой о безопасности пользователей, так как в самой технологии гаджетов были найдены бреши, облегчающие действия злоумышленникам. В связи с этим скачивание этих приложений на официальном сайте стало недоступно. Тем не менее многие до сих пор на свой страх и риск могут их устанавливать, загрузив со сторонних веб-ресурсов.
Способ 1: Автоматическая установка
В подавляющем большинстве случаев гаджеты поддерживают автоматическую инсталляцию, процедура которой интуитивно понятна и требует минимальных знаний и действий от пользователя.
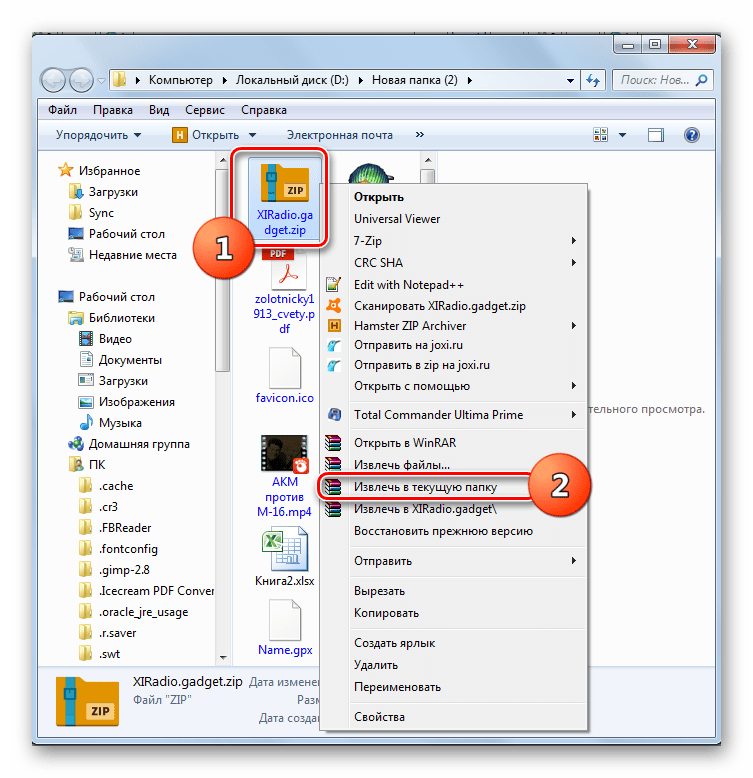
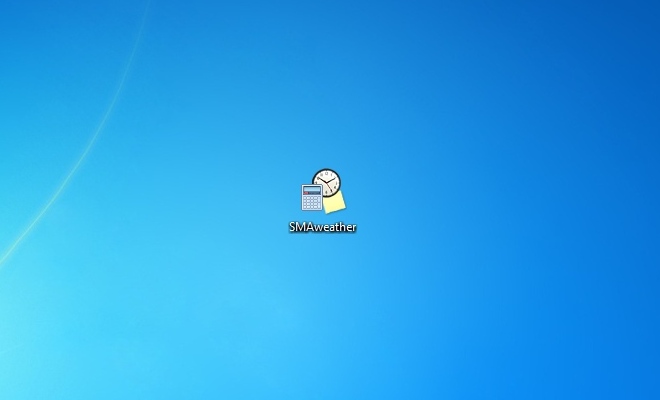
- После скачивания гаджета необходимо его разархивировать, если он располагается в архиве. После того как файл с расширением gadget извлечен, требуется совершить по нему двойной щелчок левой кнопкой мыши.
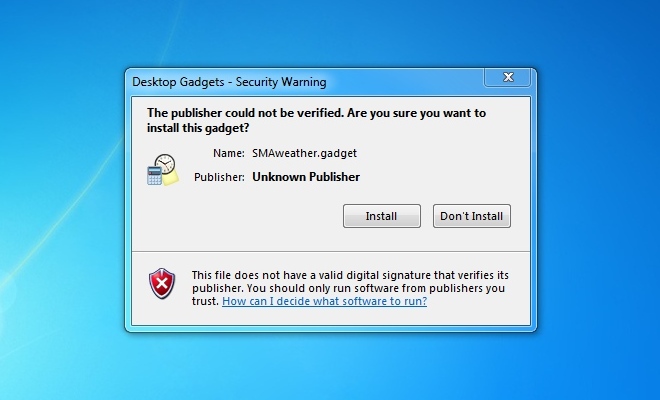
- Откроется окно с предупреждением системы безопасности об установке нового элемента. Тут требуется подтвердить запуск процедуры, нажав «Установить».
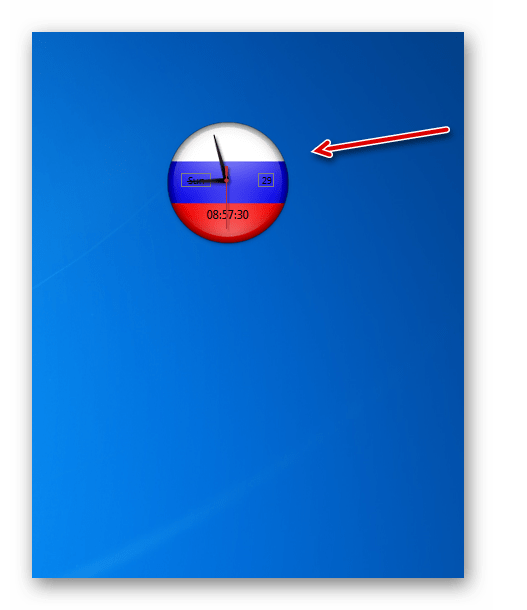
- Далее будет выполнена довольно быстрая процедура установки, после которой интерфейс гаджета отобразится на «Рабочем столе».
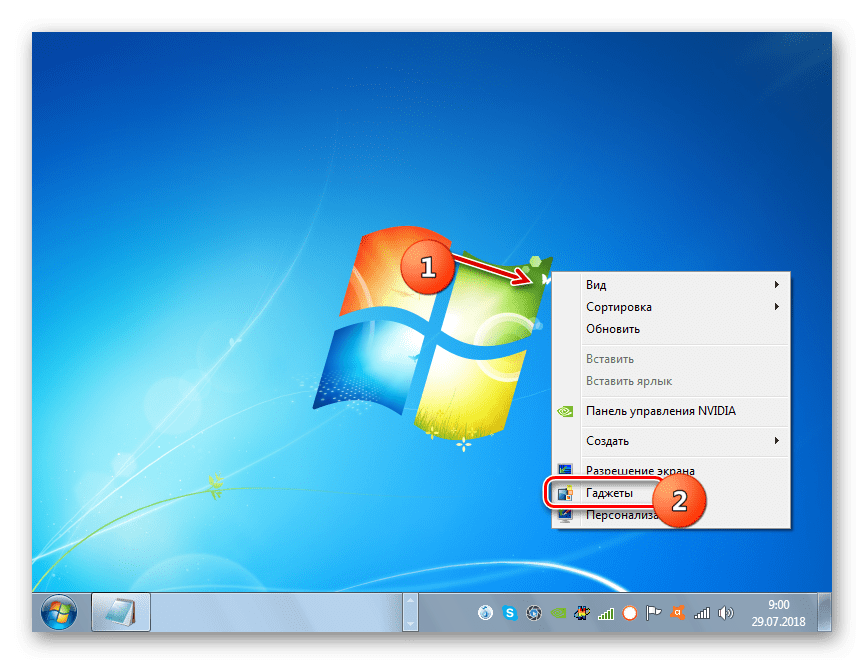
- Если же этого не произошло и вы не видите оболочки установленного приложения, то на «Рабочем столе» щелкните по свободному пространству правой кнопкой мыши (ПКМ) и в открывшемся списке выберите «Гаджеты».
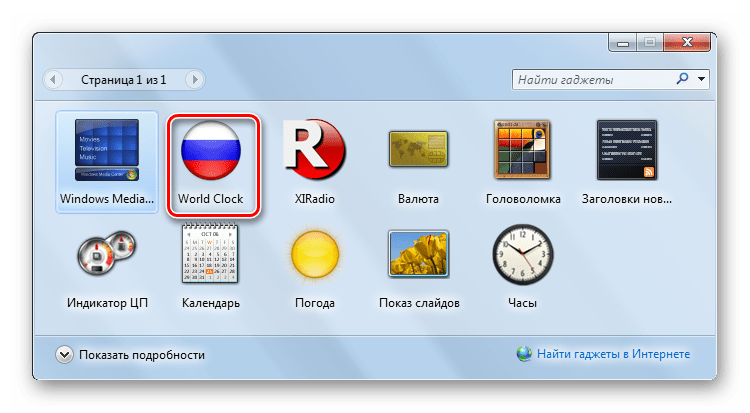
- Откроется окошко управления данного типа приложениями. Найдите в нем тот элемент, который желаете запустить, и щелкните по нему. После этого его интерфейс отобразится на «Рабочем столе» ПК.


Способ 2: Ручная установка
Также гаджеты можно добавить в систему при помощи ручной установки, которая осуществляется путем перемещения файлов в нужный каталог. Этот вариант подойдет в том случае, если после скачивания архива с приложением вы в нем обнаруживаете не один файл с расширением gadget, как было в предыдущем случае, а целый набор элементов. Такая ситуация встречается довольно редко, но все-таки возможна. Таким же способом вы можете перемещать приложения из одного компьютера на другой, если у вас под рукой нет инсталляционного файла.
- Распакуйте загруженный архив, который содержит элементы для установки.
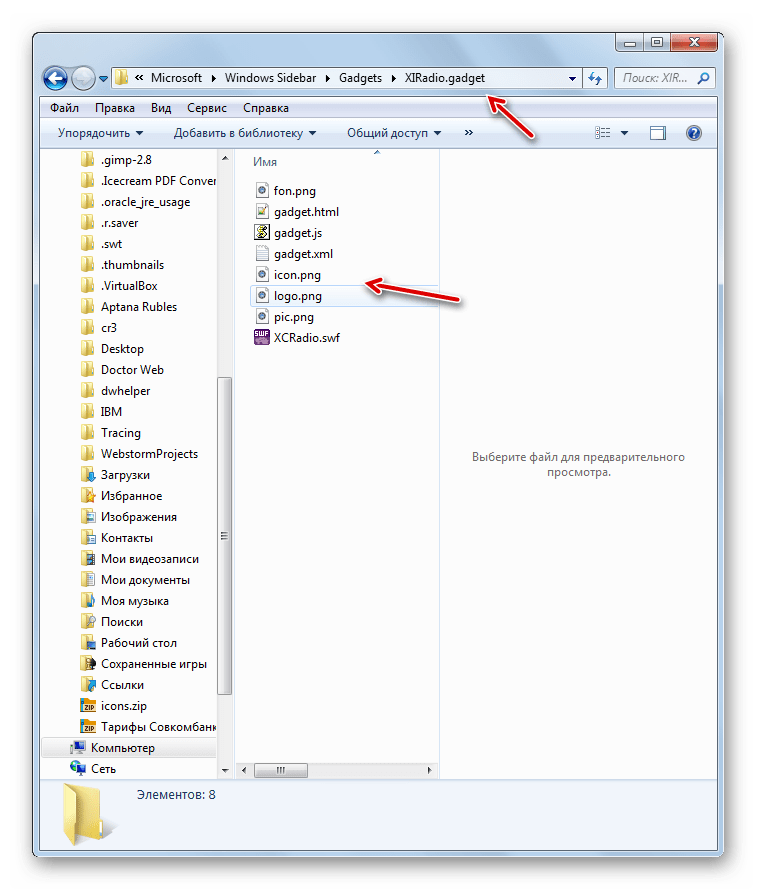
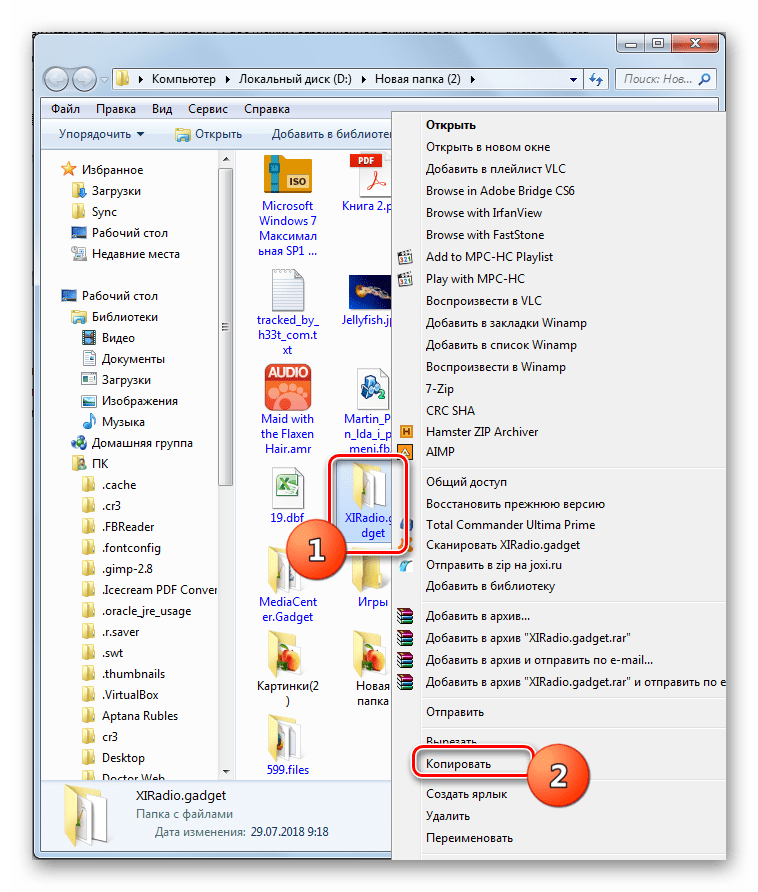
- Откройте «Проводник» в каталоге, где находится распакованная папка. Щелкните по ней ПКМ. В меню выберите «Копировать».
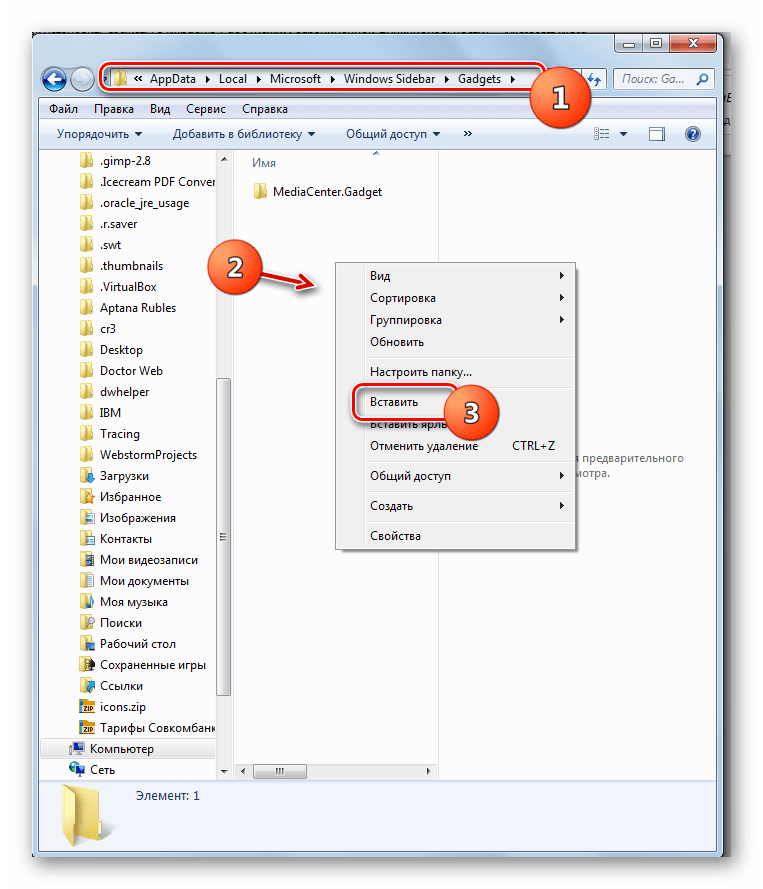
- Перейдите в «Проводнике» по адресу:
С:\Users\Имя_пользователя\AppData\Local\Microsoft\Windows Sidebar\GadgetsВместо «Имя_пользователя» впишите название профиля юзера.
Иногда гаджеты могут располагаться и по другим адресам:
С:\Program Files\Windows Sidebar\Shared Gadgetsили
С:\Program Files\Windows Sidebar\GadgetsНо последние два варианта чаще касаются не сторонних приложений, а предустановленных гаджетов.
Щелкните ПКМ по пустому месту в открывшейся директории и из контекстного меню выберите «Вставить».
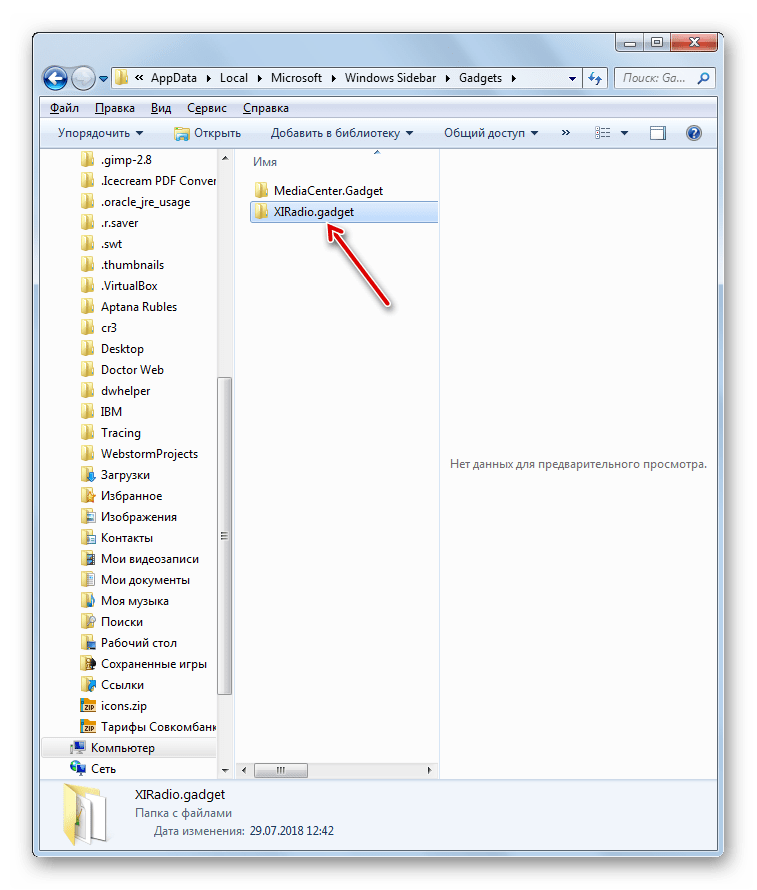
- После процедуры вставки папка с файлами отобразится в нужном расположении.
- Теперь вы можете запустить приложение обычным методом, как было уже указано при описании предыдущего способа.

Существуют два способа установки гаджетов на Виндовс 7. Один из них выполняется автоматически при наличии установочного файла с расширением gadget, а второй – путем ручного переноса файлов приложения, если инсталлятор отсутствует.
Наша группа в TelegramПолезные советы и помощь
New Windows 7 Desktop Gadgets can be installed from Microsoft’s web-based Personalizaton Gallery.
You can get to the Personalization Gallery website one of two ways:
- Through the Control Panel
- Click Start.
- Click Control Panel.
- Click Programs.
- Under Desktop Gadgets, click Get more gadgets online.
- Go straight to the Windows Personalization Gallery site.
Finding Gadgets
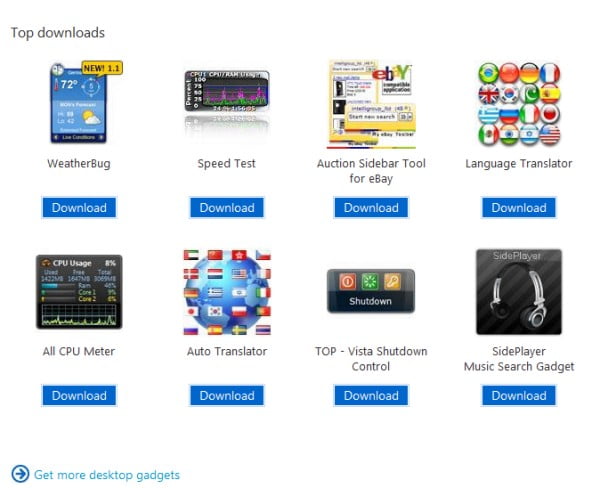
The Desktop gadgets tab of the Personalization Gallery site shows you featured gadgets, top downloaded gadgets and top rated gadgets. There’s a Bing search box at the top of the page, but this form does not actually search for more gadgets.
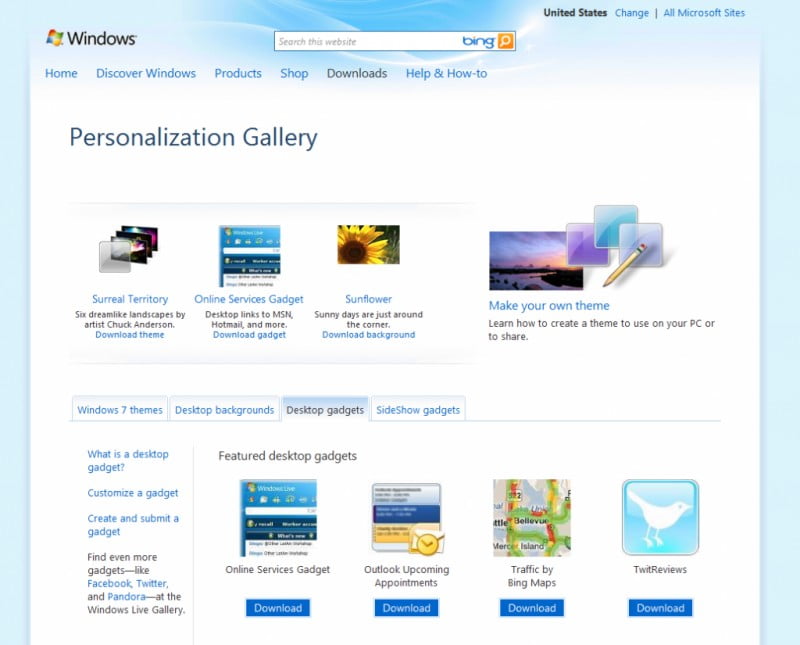
In order to search for gadgets, click the Get more desktop gadgets link within the body of the page.
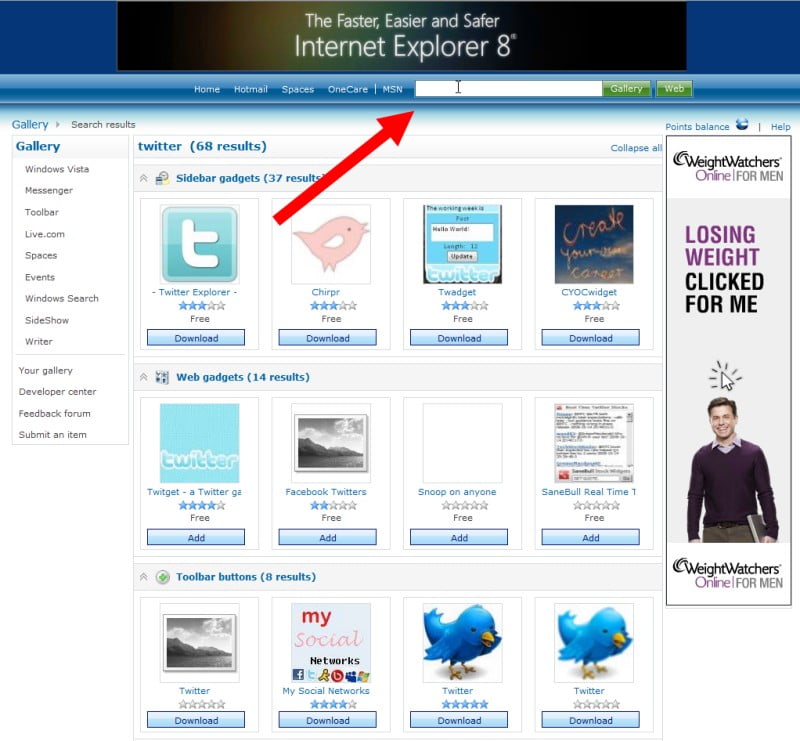
You’ll be taken to the Live Gallery containing Desktop Gadgets, which you can search using the form in the bar across the top of the page.
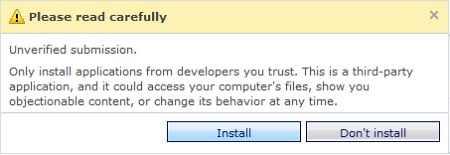
Once you find a gadget you want, click through to its page and click the Download button below the description of the gadget. A pop-over may warn you of the risks associated with installing third party software. If you understand and agree to these risks, click Install. If not, click Don’t Install.
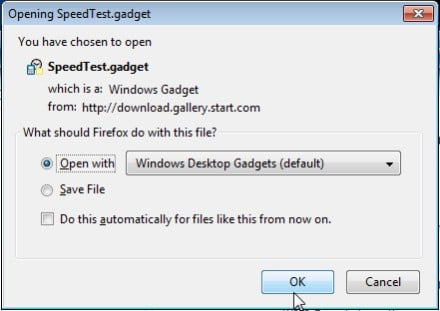
If your browser gives you a choice of whether to Open or Save the file, choose to Open with Windows Desktop Gadgets and click the OK button.
The file will download, Windows Gadget Platform will install the new gadget and it will appear on your desktop.
-
Hello, We are playing duo here. We love to share computing tips & tricks that make digital life SIMPLE.
View all posts
Windows 7 Desktop Gadgets
I’ve been playing with Windows 7 Desktop Gadget technology and I must tell you – I just love it! And I’ll tell you why 
History
The approach of putting web-application right on a desktop was invented by Microsoft in 1994-95 (in Windows Nashville which was intended to be released in 1996) and was a part of Windows Desktop Update for Windows 95 and a core of Windows 98 Active Desktop. You could set an HTML page (plus JS, of course) as your desktop background and it would be run in IE. Microsoft even had a gallery of Active Desktop widgets. So web-widgets-like functionality was around almost twelve years ago. As with many other Microsoft inventions, it was way too ahead of time.
Another technology that played a role in inventing desktop gadgets is HTA – short HTML applications that run in a standalone way. You had to put your scripts (VBScript or JScript) and styles in a single HTML file, add a special description and rename the file extension to .hta. Here’s a sample code:
<html>
    <head>
        <title>HTA Test</title>
        <HTA:APPLICATION ID="objTest" APPLICATIONNAME="HTA Test" SCROLL="yes" SINGLEINSTANCE="yes">
        <SCRIPT type="text/javascript">
            //some javascript code
        </SCRIPT>
    </head>
    <body>
        <!-- some html -->
    </body>
</html>
You could access all ActiveX objects that your system provided – Scripting FileSystemObject, UserAccounts, WMI etc. – basically everything that was supported in WSH and Script Runtime. If you were using classic ASP on the server, you could switch to writing HTAs with zero effort – language and all the objects would be the same. While any web-development IDEs could be used, there even was a special IDE for building HTAs – HTAEDIT.
So Microsoft had two nice technologies that weren’t actively used – Active Desktop as a way to integrate web-application with desktop and HTA as a core for writing standalone client-side web applications. Both technologies combined both to create Microsoft Desktop Gadgets — small standalone client-side web applications that run as dockable widgets on your desktop – pure HTML,CSS and JS packed with manifest file in an archive.
Usage
If you double-click on this archive, gadget will get installed and can be moved to any place of your desktop. IE8 core is used to run them, so you get full support for CSS2.1, great level of javascript and other IE8 goodness.
The gadgets concept was introduced In Windows Vista – but gadgets had to be positioned inside a special sidebar area – which is not very flexible. In Windows 7 you can put your gadgets wherever you want them to be.
Here’s a screenshot how gadgets look like on my desktop:
Gadgets are especially useful when you have a widescreen monitor or two monitors configuration so that you’ve got much horizontal space, but even if you’ve got a normal monitor as gadgets can be freely positioned, you will find them useful.
I use Twitter, weather (standard), network traffic and cpu meter gadgets.
Awesome technology! I’m planning to build couple of my own gadgets and will definitely prepare a blog post on this
Update: It looks like Windows Mobile 6.5 will have support for similar gadgets
functionality!
Exploring Windows Desktop Gadgets
First of all, let’s get our hands dirty and create a simple gadget.
Creating a simple gadget
One of the things that was always bothering me was checking comments to my blog entries. There’re usually two ways to check for new comments on your blog – either by subscribing to comments RSS feed or by going to admin web-interface of the blog and checking for comments there. I don’t like first option because I’m subscribed to more than a hundred feeds in my Outlook so I only read them at the weekends when I’ve got enough free time. And I don’t particularly fancy logging to my blog every three-four hours to check for new
comments. So Windows 7 Desktop Gadget with my blog comments feed would perfectly suit my needs.
Although this might not sound as a killer app to you, but it does its job and also perfectly shows how simple it is to build a gadget.
First of all, as I’ve already said, Windows 7 Gadget is nothing more than just a HTML page with Javascript and CSS. So I use the same approach as if I had to parse my blog comments on a website – a simple HTML, a bit of CSS and a bit of AJAX. So gadget building comes down to building a client-side web-app and packing it.
Creating a web-app
I created a simple page with a pretty straight-forward javascript. If you take a look at window.onload js code, you’ll see the following:
window.setInterval( function(){ getRSS(url); }, 5*60*1000);
meaning that every five minutes getRSS function is called.
This is the “main loop” of our program. As our gadget is a desktop program written in javascript and since Javascript blocks UI when being executed, setInterval/setTimeout is the only one way to set the “main loop”.
That’s how the javascript in this web-app works:
-
getRSS function creates XMLHTTPRequest object and sends HTTP GET request to a href=»http://sharovatov.wordpress.com/comments/feed/»>http://sharovatov.wordpress.com/comments/feed/.
-
wordpress responds with XML file containing last ten comments from my blog
-
parseRSS function parses the XML and passes the resulting object to displayRSS which just dumps it to document.body
It takes 15-20 minutes to write such a tiny piece of code. So now we’ve got a small web-application which is a very basic version of RSS reader.
As you may notice, the script doesn’t work on sharovatov.ru. Cross-domain security restrictions is a reason for that – the script is located on one domain (sharovatov.ru) and it tries to request data from another domain (sharovatov.wordpress.com). However, if you save main.html page and rss.js file to your machine, run main.html from
IE8 and confirm JS execution, you will see the comments feed displayed.
As we’re done with functionality, it’s time to convert our small client-side web-app to a gadget.
Converting to a gadget
All we need to do now is to add a special manifest file. It’s just an XML file with your gadget description. Here’s mine.
That’s all. Now we pack these three files into a zip archive and rename its extension to .gadget. Here’s a link to what I came up with. Save it as test.gadget and double-click on it. If you then confirm gadget installation prompt, it will appear on the screen and the feed is downloaded and displayed.
That’s the basics of creating a gadget, if you feel interested, read MSDN or follow my posts – I will
keep on writing about gadgets and in the next post I’ll show what my comments reader gadget will look like eventually
This is the screenshot of a 20-minutes job:
Every five minutes the gadget is updated so I can clearly see whose comment is the last one and reply if needed. Very handy
Exploring Windows Desktop Gadgets #2 — security and limitations
First of all, let me repeat that gadget is a client-side web-application running in chromeless mode on your desktop. It’s similar to HTA but provides a whole new set of functionality and also has some restrictions compared to HTA.
Gadgets security model
IE has always been the de-facto-standard platform for building powerful applications that require access to file system, Cryptographic Service Provider, WMI and other OS functionality. This functionality is achieved by using ActiveX controls.
But ActiveX can’t run without a user permission! So by default javascript in a web-applications has quite strong security limitations. This security model can only be weaken by users choice — by allowing ActiveX controls to run or by adding a website to a trusted zone.
But as gadgets are installed by user, so it’s his choice to run them, all functionality that MSHTML can provide is enabled (*). MSDN says:
The MSHTML runtime is configured with the set of permissions given to HTAs or the Local Machine Zone security configuration.
This rises a very important point – don’t install gadgets from non trusted sources. Or if you do, please inspect the code before you install the gadget. As Gadget runs under current user account, it won’t be able to delete system32 directory or do any other critical damage to the system. But it will surely succeed in deleting your documents or photos.
And of course, as any other Microsoft technology, Gadgets can be fully controlled by Group Policy.
For more information on Gadgets security please read this and this MSDN article.
Gadgets limitations
The main limitation to me is that **there’re no modal dialogs. **No alerts, no window.confirm, nothing. So if you want to do a quick debug, you have to dump data to the document itself or use a script debugger.
Exploring Windows Desktop Gadgets #3 — settings storage
This is the third post in Exploring Windows Desktop Gadgets series and it will be devoted to improving our comments feed reader gadget by adding settings storage functionality.
Settings storage theory
Any desktop program has its own settings storage (ini files, xml files, etc.) or uses a global OS storage (registry).
But in web-applications everything’s different – part of the functionality is provided by client (browser) and another part — by the server. Although it’s dead easy to store data on the server, on the client-side you can’t get access neither to file system nor to registry. (You actually can in IE, but this will require ActiveX scripting and therefore will ask user for an explicit permission.)
Until very recent DOM Storage specification draft, in most browsers you could only use cookies for storing some data on client side. However, IE5 introduced support for true client-side only storage – DOM Storage predecessor — userData. So it took almost eight years for the whole browsers industry to define and support similar client-side storage approach. And right at the time as DOM Storage is being drafted by W3C, it gets support in IE8.
The reason I’m telling you about DOM Storage in IE8 is that I have a strong feeling that this DOM Storage is used by Gadgets Platform to allow storing settings data for each gadget.
Settings storage practice
Settings dialog is a modal window which opens on top of your gadget. As it’s modal, the only way you can close it is to press OK or CANCEL button in its UI. Similarly to the gadget itself, settings dialog is a HTML page displayed by MSHTML.
As it would be useful to have comments feed URL and refresh frequency configurable, this is what I’ll add to my gadget:
In the settings dialog only area outlined in red is actually a HTML file, title and OK/CANCEL buttons are provided by Gadgets Platform:
To add the settings dialog to our gadget we’ll have to create a HTML file, let’s call it “settings.html”. To save comments feed URL and refresh frequency, we only need two fields and couple of labels.
This is what I came up with.
If you look at the JS code, you’ll see that it does two things:
-
calls System.Gadget.Settings.read function to retrieve data from the Gadget settings storage
-
defines a handler for System.Gadget.onSettingsClosing event
There’s a complete reference of Gadget platform events and properties on MSDN, but for our simple case it’s enough to say that System.Gadget.Settings.read reads object from the storage by its name, System.Gadget.Settings.write writes object to the storage with its name and System.Gadget.onSettingsClosing event fires when the settings dialog is closing. Settings store is separate for each gadget so don’t be afraid that your settings names can be accessed from other gadgets.
So in the window.onload handler of settings.html I try to get the data from the storage and set inputs values accordingly, and when the gadget is closing, I check if OK was pressed (e.closeAction == e.Action.commit) and if so, save inputs values into the storage. Dead easy.
Now we have to attach settings.html page to our gadget. This is done by adding the following javascript code to main.html file:
System.Gadget.settingsUI = "settings.html";
Now our Gadget will show this button in the control area:
And if you click on it, you’ll see your settings.html page rendered in a nice UI:
So now we have a settings dialog that reads and writes data from the Gadget settings store.
What we also need to do is to make our main.html read comments feed URL and refresh frequency from settings store as well. If you look at this javascript, you’ll see how it’s changed from the previous version. Basically, I just
did the following:
-
rss.js now doens’t have blog comments feed URL and refresh frequency hardcoded, instead, it reads these values from settings store:
window.onload = function(){ //read data from storage var data = getDataFromStorage(); if ("" != data.url && "" != data.frequency && /^(\d*)(\.?)(\d*)$/.match(data.frequency)) startLoop(data); else document.body.innerHTML = "<b>Please make sure you"+ "configured everything properly</b>"; }; -
**System.Gadget.onSettingsClosed **event handler is used to restart main loop with new settings:
System.Gadget.onSettingsClosed = function(){ var data = getDataFromStorage(); startLoop(data); }; -
And startLoop function has been rewritten to allow only one main loop (but that’s pretty irrelevant to Gadgets platform):
 var startLoop = function(data){
     //clear existing interval (if present)
     if ("undefined" != typeof arguments.callee.intervalHandler)
         window.clearInterval(arguments.callee.intervalHandler);
     //retrieve feed again
     getRSS(data.url);
     //set new main loop
     arguments.callee.intervalHandler = window.setInterval(
         function(){ getRSS(data.url); }, data.frequency * 1000
     );
 };
And here we go – gadget’s ready
Save it as rss-comments.gadget to your computer and install it – you will be able to set comments feed URL (so you can start using it to watch comments on your own blog) and refresh frequency in seconds.
In the next posts of this series I will cover flyouts, make the gadget look really slick with UI enhancements Gadget platform provides, show how debugging gadgets can be really effective and dive into more details of the Gadgets platform. Stay tuned for more interesting stuff!
Best Windows 7 gadgets
Found the best blog with windows 7 gadgets – http://blog.orbmu2k.de/
I installed Memory usage gadget, updated version of CPU Usage, Network traffic, Volume control and Top 5 processes gadgets. Really great!
I also downloaded all Windows 7 themes from http://windows.microsoft.com/en-US/Windows7/Personalize page – they are just awesome
Now the right side of my 2nd monitor looks like that:
![gadgets-screenshot2[1]](http://sharovatov.files.wordpress.com/2009/05/gadgetsscreenshot21_thumb.jpg?w=444&h=1025 "gadgets-screenshot2[1]")
Pomodoro Windows 7 gadget
I was really inspired by http://tomatoi.st/ web service which provides an easy to use web interface for Pomodoro time management technique.
But unfortunately, tomatoi.st is down due to overload too often, so I spent 20 minutes and prepared a simple Windows 7 pomodoro gadget. It does just what’s needed – showing timers:
Click on “Work” button to start 25 minutes work interval, “short br” – to get 5 minutes short break timeout, “long br” for a 15 minutes long break.
It’s dead easy to download and install – just click here.
Or you can inspect the code if you want to – gadget is just a zip file with html, css and js inside.
Ah, and I have to warn you – when a period of time is over, it starts playing Alert.wav every second until you set a new period.
For more information about Windows 7 gadgets you read the following posts on my blog:
-
introduction to the gadgets platform
-
Exploring Windows Desktop Gadgets
-
Exploring Windows Desktop Gadgets #2 – security and limitations
-
Exploring Windows Desktop Gadgets #3 – settings storage
-
Exploring Windows Desktop Gadgets #4 – flyouts
Or read MSDN.
P.S. this gadget doesn’t have any settings or flyout or anything else – it’s very simple.
Gadgets Flyouts
As it’s practical to have small gadgets which don’t take much of screen space, it’s not possible to display much information on them. That’s why Gadget Platform provides a way to add a flyout object to your gadget.
Flyout theory
In theory, flyout is supposed to present additional or detailed information about anything you choose.
The great example of flyout use case is standard Windows 7 Stocks gadget – it shows basic stocks rates information in the main window and the if you click on the stock rate you’re interested, MSN Money chart for this stock rate is shown in a flyout. Here’s how it looks:

Flyout is a separate HTML page which you attach to your gadget similarly to settings window – by specifying the following:
System.Gadget.Flyout.file = 'flyout.html';
Another difference from settings dialog is that settings dialog is only accessible by clicking on a options button:
and flyout is shown/hidden programmatically by setting its show property to true/false:
//show flyout
System.Gadget.Flyout.show = true;
When you set show to true, flyout html will be rendered and its window will be automatically positioned depending on the content size and gadget’s position.
Flyout provides two events — System.Gadget.Flyout.onShow which is fired when the flyout is shown and System.Gadget.Flyout.onHide which is fired when the flyout is closed.
To set flyout content to something meaningful, you have to get access to flyout’s document from your gadget main window javascript. This is achieved by using System.Gadget.Flyout.document property – but the call to it will throw an exception if flyout is hidden, so make sure you either check System.Gadget.Flyout.show property for true or wrap the code which uses System.Gadget.Flyout.document in try-catch block.
Note that you can also access main gadget page from the flyout by using System.Gadget.document property which is always available.
Enough theory, let’s modify our Gadget to show only comments titles on the main page and render a flyout with comment’s content when title is clicked.
Practice
So here’s what I did:
-
created flyout.html file
-
referenced it as
System.Gadget.Flyout.file = 'flyout.html';in rss.js -
modified displayRSS function to store current comment object in paragraph’s expando property
-
added toggleFlyout function to the rss.js file which passes the comment object from the **
<p>**’s expando property toSystem.Gadget.Flyout.documentand displays the flyout
The resulting files and the compressed gadget are here.
In the next posts I’ll show what styling options we’ve got in Gadgets Platform, will proceed talking about gadgets security and talk about advanced javascript techniques that can be used in gadgets.
Pomodoro Windows 7 gadget
I was really inspired by http://tomatoi.st/ web service which provides an easy to use web interface for Pomodoro time management technique.
But unfortunately, tomatoi.st is down due to overload too often, so I spent 20 minutes and prepared a simple Windows 7 pomodoro gadget. It does just what’s needed – showing timers:
Click on “Work” button to start 25 minutes work interval, “short br” – to get 5 minutes short break timeout, “long br” for a 15 minutes long break.
It’s dead easy to download and install – just click here.
Or you can inspect the code if you want to – gadget is just a zip file with html, css and js inside.
Ah, and I have to warn you – when a period of time is over, it starts playing Alert.wav every second until you set a new period.
For more information about Windows 7 gadgets you read the following posts on my blog:
-
introduction to the gadgets platform
-
Exploring Windows Desktop Gadgets
-
Exploring Windows Desktop Gadgets #2 – security and limitations
-
Exploring Windows Desktop Gadgets #3 – settings storage
-
Exploring Windows Desktop Gadgets #4 – flyouts
Or read MSDN.
P.S. this gadget doesn’t have any settings or flyout or anything else – it’s very simple.
Windows 7 gadgets can do wonders for any user since they are very convenient and there are multitudes out there that have different functions. These gadgets are small applications that run in the background and can act as calendars, clocks, battery indicators, system monitoring instruments, etc. Installing these wonderful applications take no time and can be done quite easily. Just follow the steps below.
1. Selecting a Windows 7 Gadget There are numerous gadgets on the internet for Windows 7 and all you have to do is make a simple search to find lists of different kinds of gadgets. One such list can be found at our website. A vast collection of Windows 7 gadgets can be seen here and you just have to select the one that suits your needs.
2. Downloading the Windows 7 Gadget After you have made your selection all you have to do is click on the gadget to download its file data. Wait for the file to finish downloading
3. Scan the file If you have an antivirus program scan the file first. You can never be too careful when it comes to stuff you download from the internet. Also, try downloading the gadget from a safe-looking website. You can usually tell if it is a good website if the gadget has reviews or comments below it.
4. Execute the downloaded file. Once the file has finished downloading just double-click it and wait for it to execute. If you are presented with security warning that says «Publisher could not be verified» all you have to do is click on the Install button. This happens often because many Windows 7 gadgets are created by third party developers and they are presumed as security concerns since they do not meet Microsoft’s identity verification requirements. Now worries though because this doesn’t mean that the gadget file is an immediate danger. Just remember the previous step wherein you scan the file with your antivirus program.
5. Adjust and configure the settings of the gadget When the gadget is installing there may be some options that you need to change. These are usually given as choices so just choose the ones that will best suit your needs. Once you have configured these settings, the gadget will continue installing and when it has finished you can then enjoy the features of your selected Windows 7 gadget!
Now that we’ve finished talking about installing Windows 7 gadgets, let’s now move on to uninstalling them. Funny enough, removing these gadgets are easier than installing. It only takes a few steps that are all listed below.
1. Simply go to your desktop and make a right-click.
2. Select Gadgets and a window will open showing all of your gadgets.
3. Again, right-click the gadget that you wish to delete from your computer.
4. A message will then appear on the screen asking for confirmation on whether to continue deleting the gadget or not. If you wish to continue just do so and if you want to cancel just select the cancelling option.
This is the easiest way of deleting a sidebar gadget but of course there are times when the gadget cannot be deleted simply form the gadgets interface. When this happens you may then have to remove its file folder by doing the following steps.
1. Open your Start menu and select Control Panel.
2. Once you are there, select Programs.
3. You will then see the selection for Programs and Features and underneath it select Uninstall a Program.
4. A window will open showing the different programs installed within your computer. Find the program of the gadget you want uninstalled.
5. Right-click on the program and select Uninstall.
6. A confirmation message may appear asking if you want to continue uninstalling the gadget, just select the option for it to continue and the gadget will be finally uninstalled.
Last note, there are gadgets out there that are incredibly stubborn since they have been installed specifically for a certain user of the computer. You will have to locate its folder by following these steps:
1. Open your My Computer window.
2. Type in the top part of the window C:\Users\username\AppData\Local\Microsoft\Windows Sidebar\Gadgets. The username part is the name of the profile you use to log into your computer.

3. From there select the folder of your gadget and within it is an Uninstall file which you just have to click on for it to proceed. Again, a confirmation message may appear asking if you will continue with it so just select the option for the removal of the gadget to continue.
From Wikipedia, the free encyclopedia
|
Screenshot of Windows Sidebar, showing the analog clock, picture slideshow, and current weather of Redmond, WA |
|
| Developer(s) | Microsoft |
|---|---|
| Operating system | Windows XP SP2 or later |
| Included with |
|
| Predecessor | Active Desktop |
| Successor | Live Tiles in Windows 8 |
| Type | Desktop widget engine |
Windows Desktop Gadgets (called Windows Sidebar in Windows Vista) is a discontinued widget engine for Microsoft Gadgets. Desktop Gadgets have been replaced by Windows 10 Taskbar Widgets. It was introduced with Windows Vista, in which it features a sidebar anchored to the side of the desktop. Its widgets can perform various tasks, such as displaying the time and date. In Windows Vista, the widgets are restricted to a sidebar but in Windows 7, they can be freely moved anywhere on the desktop.
Windows Desktop Gadgets was discontinued in Windows 8. The Windows 8 Live Tiles can perform a similar function, but they are only visible when the Start menu is visible. They run in a more restrictive environment, making them less risky, but also less useful for some purposes, like system monitoring.
Windows Sidebar originated in a Microsoft Research project called Sideshow (not to be confused with Windows SideShow). It was developed in the summer of 2000, and was used internally at Microsoft.[1] It included a clock, traffic reports, and IM integration.
Windows Sidebar appeared in build 3683 of Windows Longhorn circa September 2002 and was originally intended to replace the notification area and Quick Launch toolbar in Windows, but these plans were scrapped after the development reset in mid-2004.[2] Windows Sidebar was rebuilt and began to appear in Windows Vista builds in the second half of 2005. Some reviewers and Macintosh enthusiasts have pointed out the Sidebar’s similarities in form and function to Konfabulator (later Yahoo! Widget Engine), which appeared several years previously, and the Dashboard widget engine first included with Apple Inc.’s Mac OS X v10.4, which had been released a few months earlier.
In Windows 7, Windows Sidebar was renamed Windows Desktop Gadgets, and the sidebar itself was not included in Windows 7.
Windows Desktop Gadgets was included in all beta releases of Windows 8 but did not make it to the final release. Instead, on 10 July 2012 (which is in the intervening time between the last beta of Windows 8 and its final release), Microsoft issued security advisory to disable Sidebar and Desktop Gadgets on Windows Vista and 7 because of a security vulnerability that could allow remote code execution.[3]
Windows Desktop Gadgets is a feature of Windows Vista and Windows 7 (excluding the Windows Server family of the operating system). It hosts mini-applications or «gadgets» which are a combination of scripts and HTML code. Their use cases include displaying system time, downloading and displaying RSS feeds, or controlling other software such as Windows Media Player. In Windows Vista, gadgets can run «docked» in the sidebar. In Windows 7, they can «float» anywhere on the desktop. It is also possible to run multiple instances of a gadget simultaneously. Windows Sidebar also works on Windows XP.[4]
Windows Vista ships with eleven gadgets: Calendar, Clock, Contacts, CPU Meter, Currency Conversion, Feed Headlines, Notes, Picture Puzzle, Slide Show, Stocks, and Weather. Several other gadgets available during the beta such as App Launcher, Feed Viewer, Number Puzzle, Recycle Bin and Egg Timer never made it to the final release. Windows 7 adds a Media Center gadget and removes the Contacts, Notes and Stocks gadgets.
Originally, Microsoft provided a link to a web site called Windows Live Gallery where additional Sidebar gadgets that have been created by third-party developers could be downloaded. The site was officially retired on October 1, 2011.[5][6]
- Microsoft Gadgets
- Windows SideShow for Device Gadgets
- Desk accessory
- ^ «A Brief History of Windows Desktop Gadgets». Microsoft. September 15, 2005. Archived from the original on 2007-06-21. Retrieved 2007-06-03.
- ^ Thurrott, Paul (2002-11-13). ««Longhorn» Alpha Preview». Windows SuperSite. Retrieved 2008-08-18.
- ^ Microsoft Security Advisory (2719662): Vulnerabilities in Gadgets Could Allow Remote Code Execution. Technet.microsoft.com. Retrieved on 2013-07-21.
- ^ «Windows Sidebar». Microsoft Corporation. Retrieved 2008-09-18.
- ^ Looking for gadgets?
- ^ «Desktop Gadgets». Microsoft. Archived from the original on 2013-03-27. Retrieved 2013-04-23.
- Gralla, Preston (2007). «2: Hacking the Interface: by John Moscarillo». Big Book of Windows Hacks. O’Reilly Media. ISBN 978-0-596-55913-7.
- Shaktov, Mickey; Kohlenberg, Toby (14 July 2012). «We have you by the gadgets: A Security Analysis of the Microsoft Windows Sidebar Gadget Platform» (PDF). Black Hat. UBM.
- Gadget Corner — official Windows Sidebar and Microsoft Gadgets team blog
- Windows Sidebar Reference on MSDN