

INTRODUCTION
Windows Deployment Services (WDS)
Windows Deployment Services (WDS) allows to install Windows operating systems to a PXE-enabled clients without a physical media using network. You can automate Windows installation process including the necessary softwares and drivers to more than one computer to reduce time waste.
Preboot eXecution Environment (PXE)
In computing, the Preboot eXecution Environment (PXE), most often pronounced as pixie) specification describes a standardized client-server environment that boots a software assembly, retrieved from a network, on PXE-enabled clients. – WIKI
Image types
WDS supports four image types
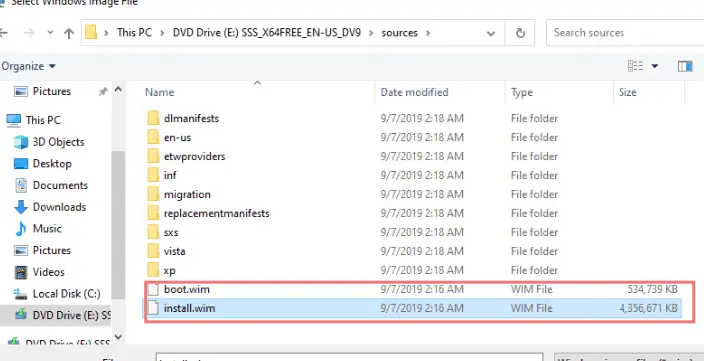
- Install Image: It is the actual operating system. It is found in the operating system media\sources\install.wim.
(refer this youtube video tutorial to make install.wim https://www.youtube.com/watch?v=vyQ-b7mueLY)
- Boot Image: It is Windows PE image. You can find it the operating system media\sources\boot.wim.
- Discover Image: This image is used by WDS clients which don’t support PXE boot. You create the image using boot.wim image from media file and Windows Assessment Tool Kit (ADK) to create a discover image.
- Capture Image: This image is custom install image. You capture the image from a template computer using Sysprep, and deploy the image on client computes.
AT least two types of images are needed to be added in Windows Deployment Services in this tutorial
- install.wim (actual Windows installation files)
- boot.wim (used to boot client machines)
you can download Windows 10 installation with Windows Imaging Format (WIM) files namely install.wim and boot.wim from Microsoft website
LINK: https://www.microsoft.com/en-us/evalcenter/evaluate-windows-10-enterprise
Capture image is also created later in this tutorial to install Windows 10 with softwares
More tips
- Windows Deployment Services (WDS) can be either standalone or integrated with active directory
- DNS and DHCP servers should be configured since the client PC rely on them
- Windows firewall should be disabled in the WDS server
- To install windows, the client PC should be booted using network service boot
- WDS supports images namely Windows Vista, Windows 7, Windows 8, Windows 10, Windows Server 2008, Windows Server 2012 and Windows Server 2016
TUTORIAL
The tutorial is divided into 3 steps
- Install Windows Deployment Services
- Configure Windows Deployment Services
- Prepare and add images (install.wim and boot.wim)
login to Windows Server 2019 (in this case the Active Directory is already configured and WDS will be installed in the same server. If you need, you can install WDS as a standalone server separately which is recommended)
01 Install Windows Deployment Services

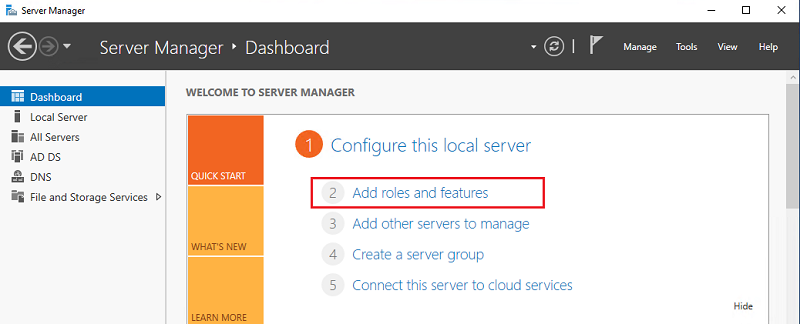
Click ‘Add roles and features’ in the ‘Server Manager’

Click ‘Next’ to proceed from ‘Before you begin’ window

Select ‘Role based or feature based’ as the installation type

Select the server from the server pool where WDS is going to be installed

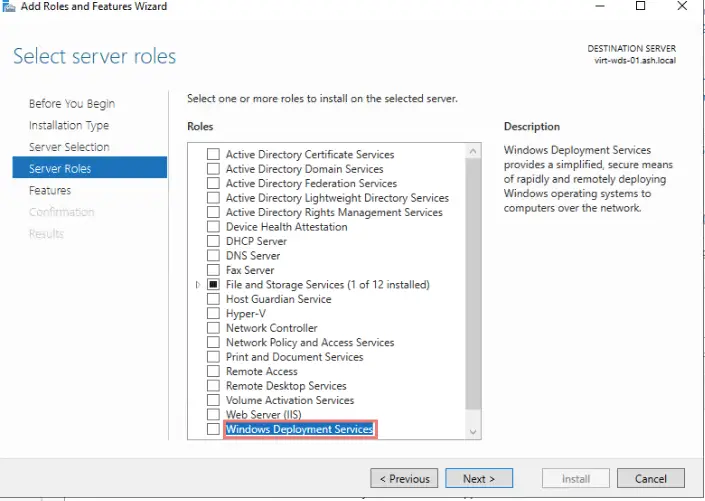
Select ‘Windows Deployment Services’ as the server role

Click ‘Next’

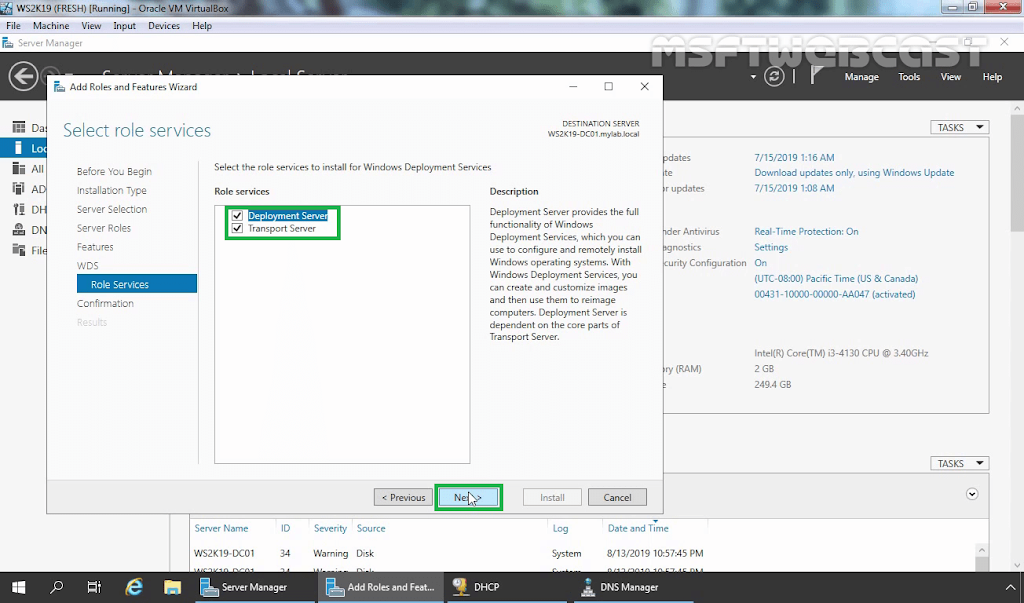
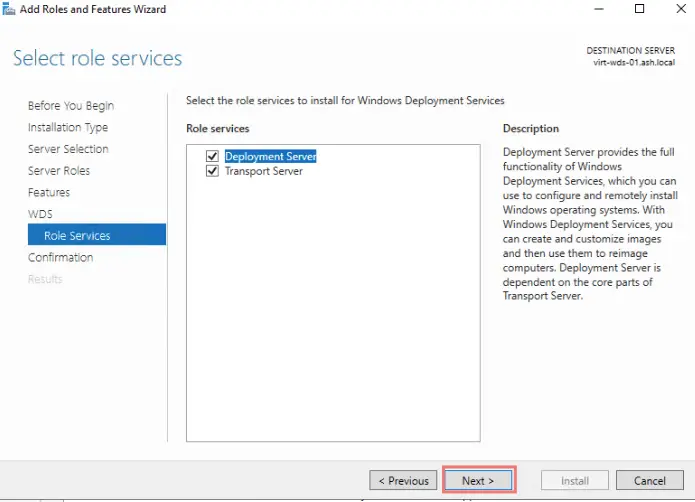
Select both of the role services namely ‘Deployment Server’ and ‘Transport Server’ (this option is selected by default)

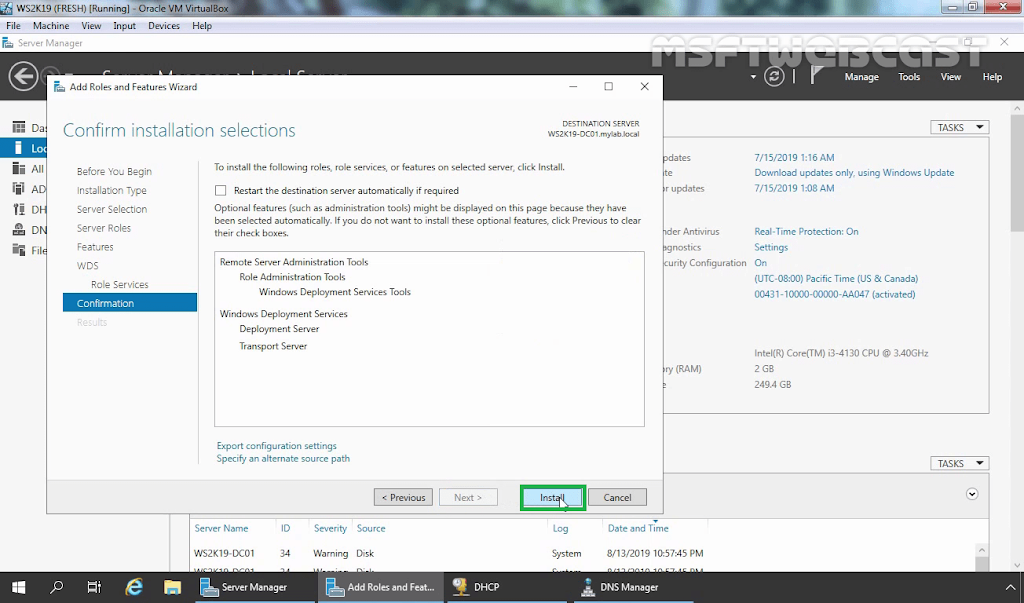
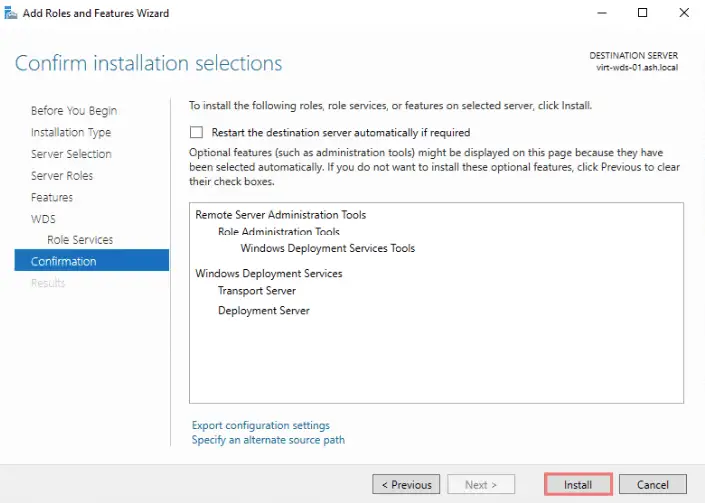
Confirm the installation selection and click ‘Install’

02 Configure Windows Deployment Services
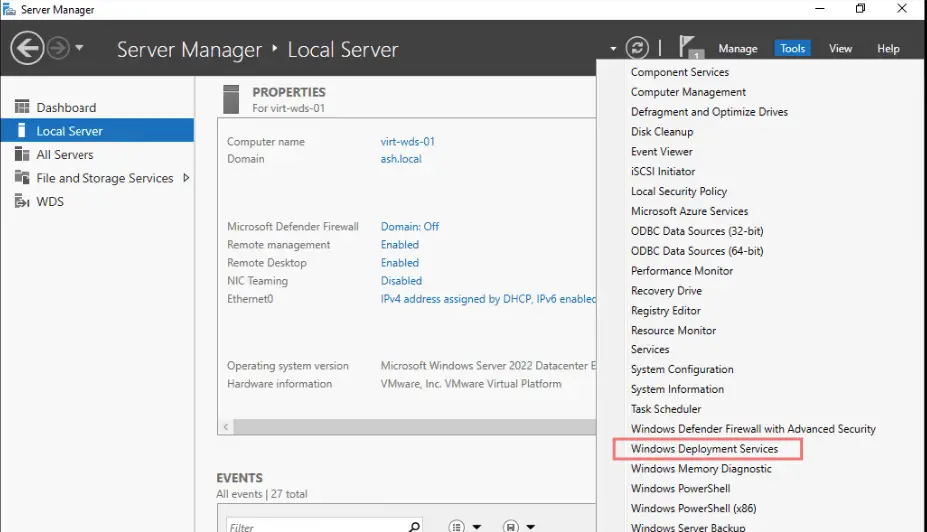
Select ‘Windows Deployment Services’ from the ‘Server Manager’

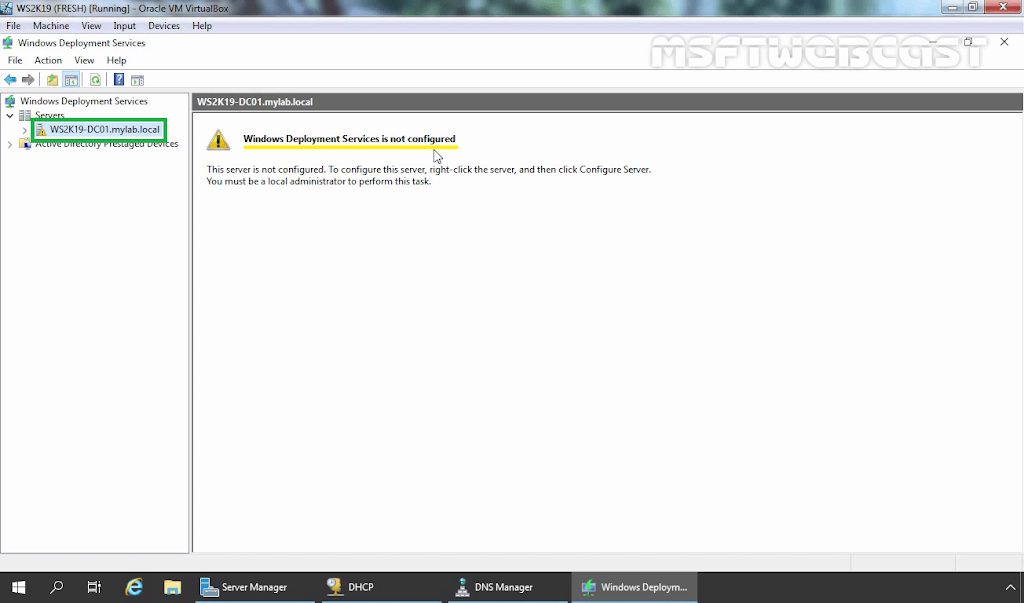
Notice that WDS is not configured yet and needs to be properly configured

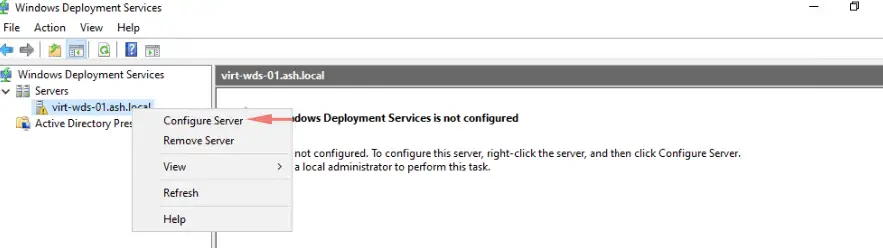
Right click on the server and select ‘Configure Server’

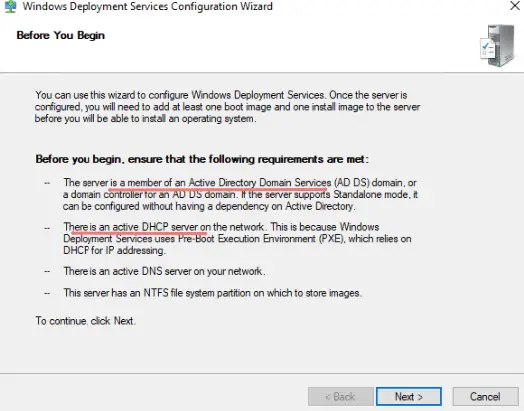
Read the prerequisites carefully which will be needed to troubleshoot in future

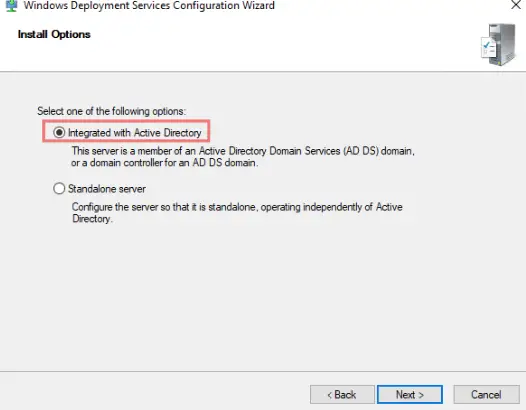
Next Window gives two options to install WDS (‘Integrated with active directory’ is chosen for this scenario. If you needed WDS can be installed as a standalone server)

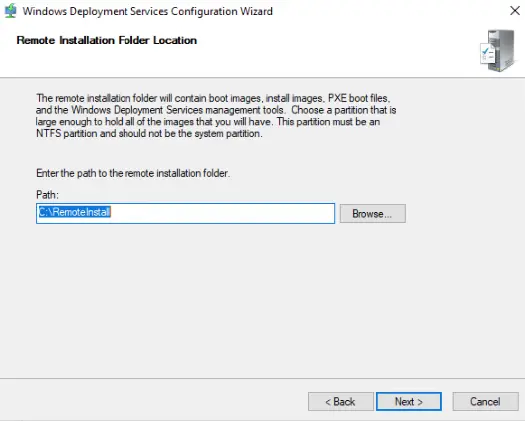
Browse to choose the remote installation folder

Local (D:) drive is chosen here and formatted and NTFS file system is chosen as it is a requirement

A meaningful name is given for the destination folder

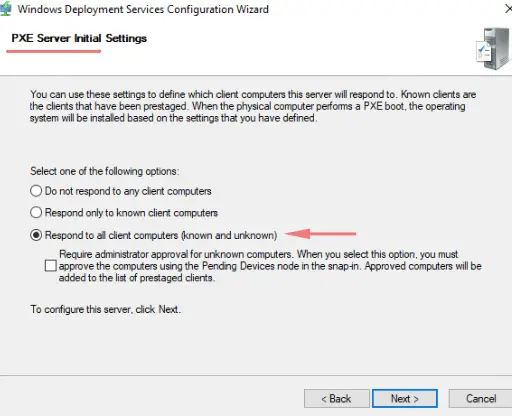
‘Respond to all client computers (known and unknow)’ is selected out of the three options given

If you need you can add images to the server right after finishing the configuration

03 Prepare and add images (install.wim and boot.wim)
Firstly, make sure that WDS is running. If not right click on the server and select ”All tasks’ and start the service (In this case the service is already running)

Go to local Disk drive D:/techremoteinstall which was configured earlier

Right click on the folder and select properties to share the folder in network so client PCs have the access

Check the inside of the folder

Boot the Windows 10 ISO image
Download link: https://www.microsoft.com/en-us/evalcenter/evaluate-windows-10-enterprise

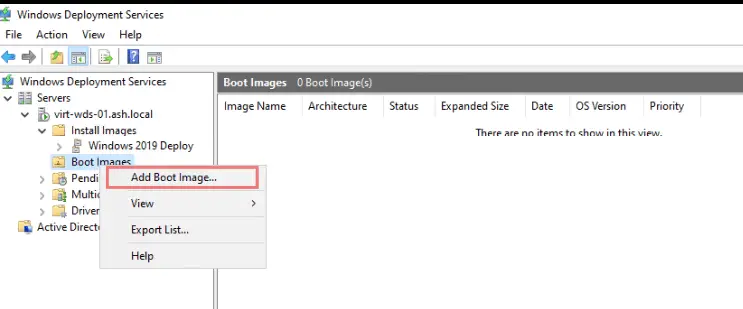
Right click on ‘Boot images’ and select ‘Add Boot Image’

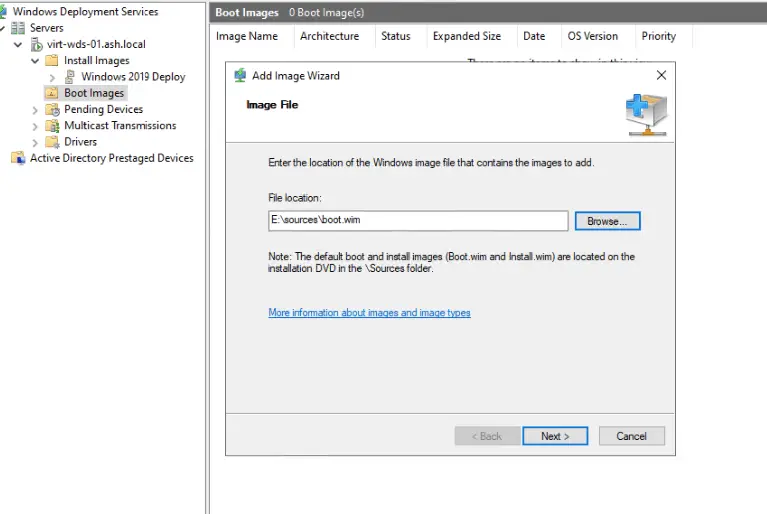
Select ‘Browse’ to go to location of the image

Select Windows 10

Open ‘sources’ folder

Select ‘boot.wim’ file

Click ‘Next’ to proceed

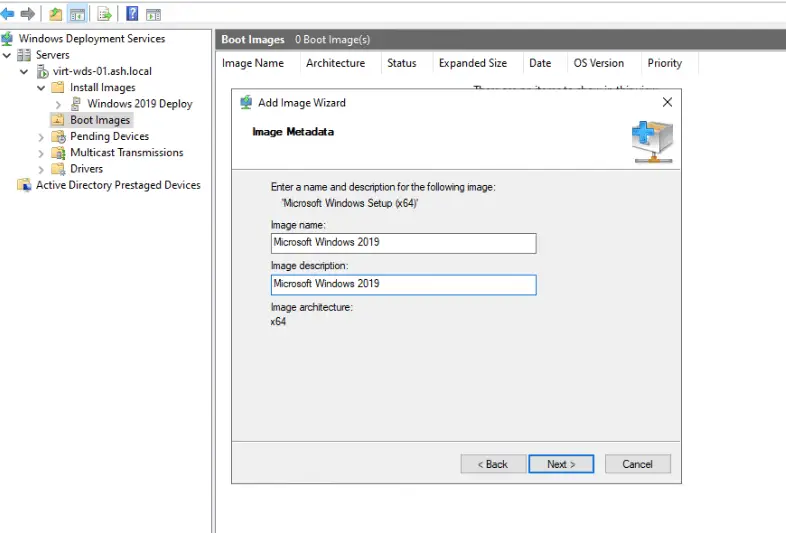
Provide an appropriate ‘image name’ and ‘image description’

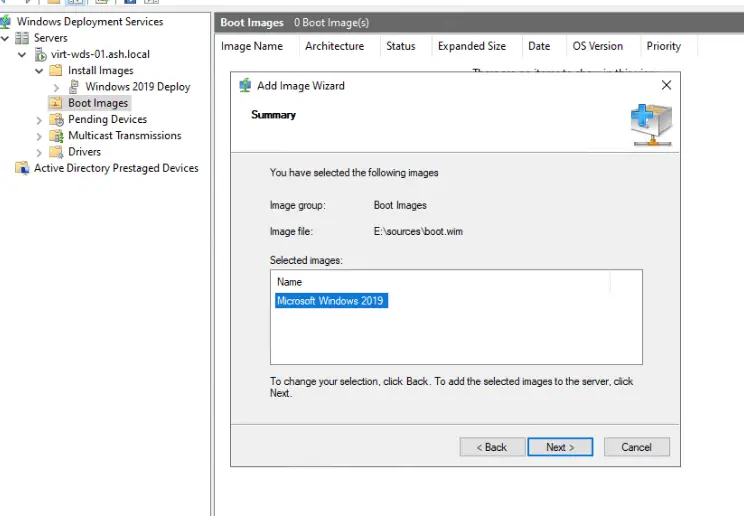
Review the ‘Summary’ and click ‘Next’

Click ‘Finish’ to exit from the ‘Add Image Wizard’

Select the Boot Images to find the added Windows 10 boot image

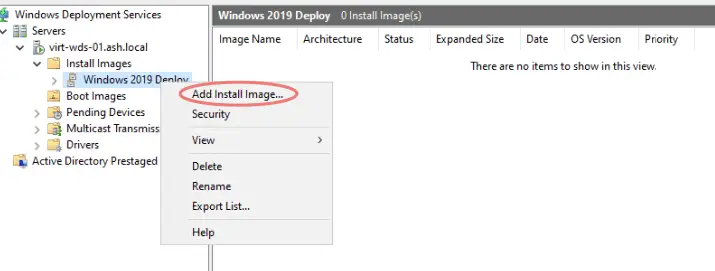
In the next step, right click on the ‘Install Images’ and select ‘Add Install Image’

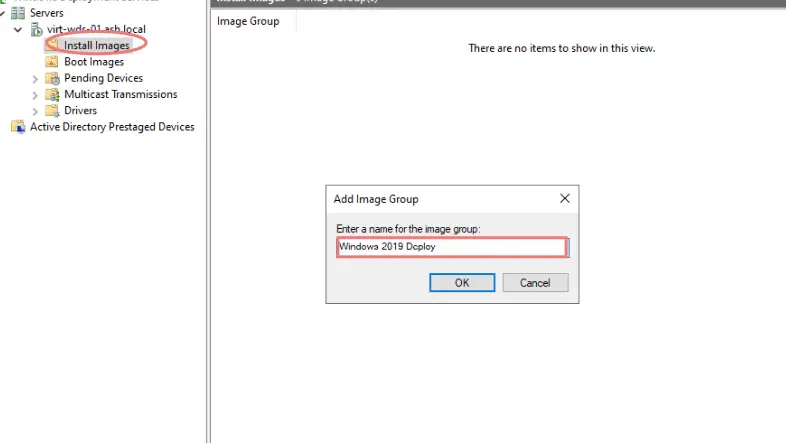
In this step an option is given to create an image group

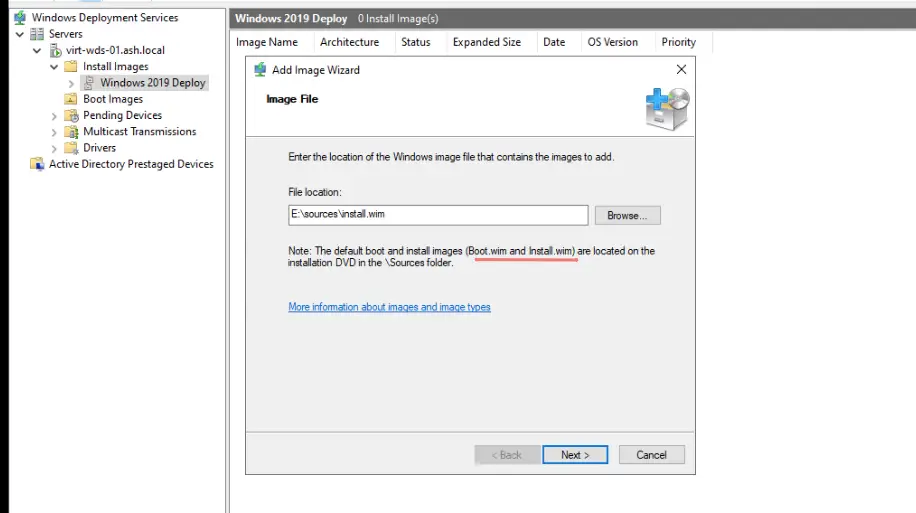
Browse to find the install.wim

Go to Windows 10 installation files and find install.wim

After providing the file location click ‘Next’ to proceed

Select the version of the Windows 10 (In this downloaded ISO there is only one version. If you are given multiple options you can select the required versions)

Review the summary and click ‘Next’ to proceed

Wait till the image (install.wim) is added to the server

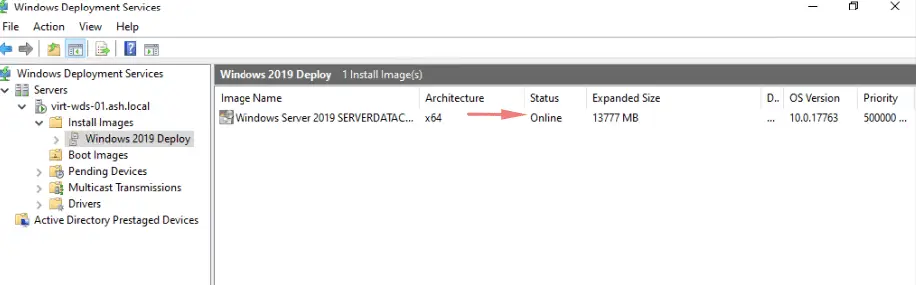
Check ‘Install Images’ to see the added windows 10 ‘install.wim’ file

In this article, we’ll learn the steps to install Windows Deployment Services on Windows Server 2019.
What is Windows Deployment Services?
WDS (Windows Deployment Services) is a server role that allows you to deploy an operating system to other computers over a network using PXE boot. You can install a Windows operating system on a PXE-capable client without the need for physical media such as CD/DVD.
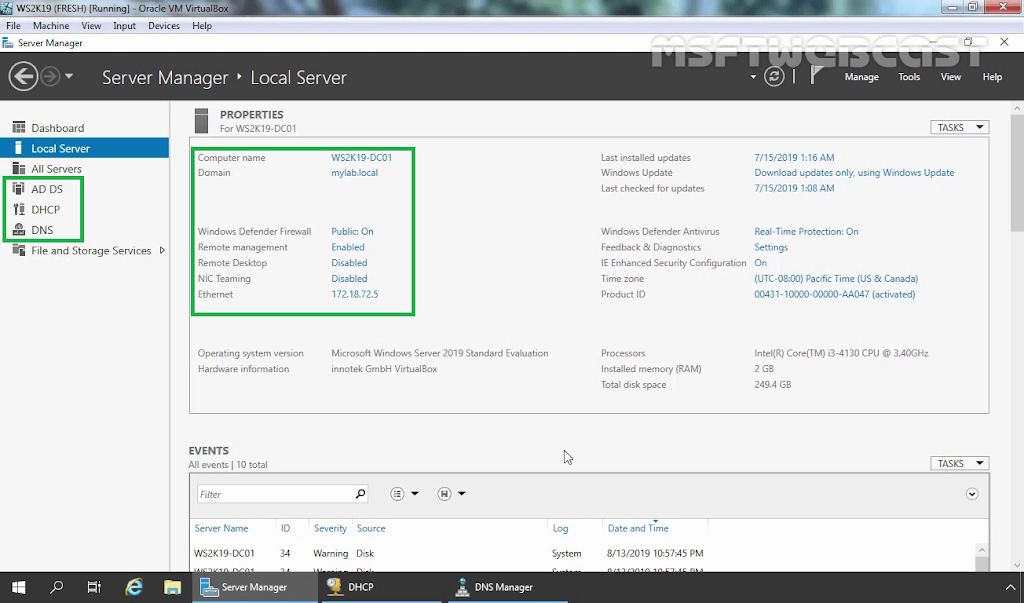
We want to install the WDS server role on our domain controller name ws2k19-dc01.mylab.local. We have already installed and configured DHCP and DNS server role on the domain controller as well.
Second part of this article: How to Configure WDS server role on Windows Server 2019
1. Open Server Manager Console.
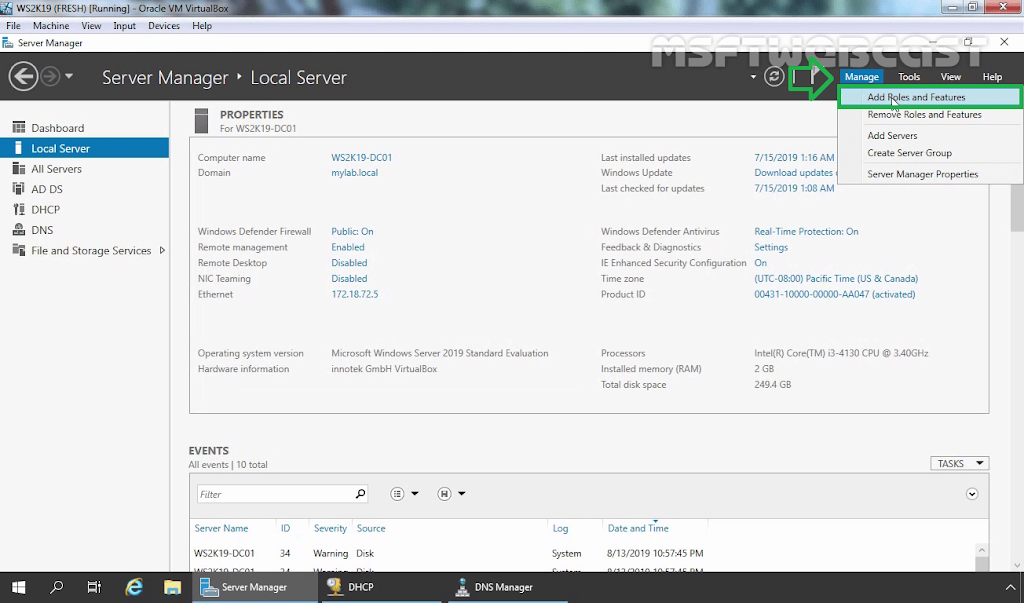
2. In the Server Manager console, click on manage and select Add roles and features.
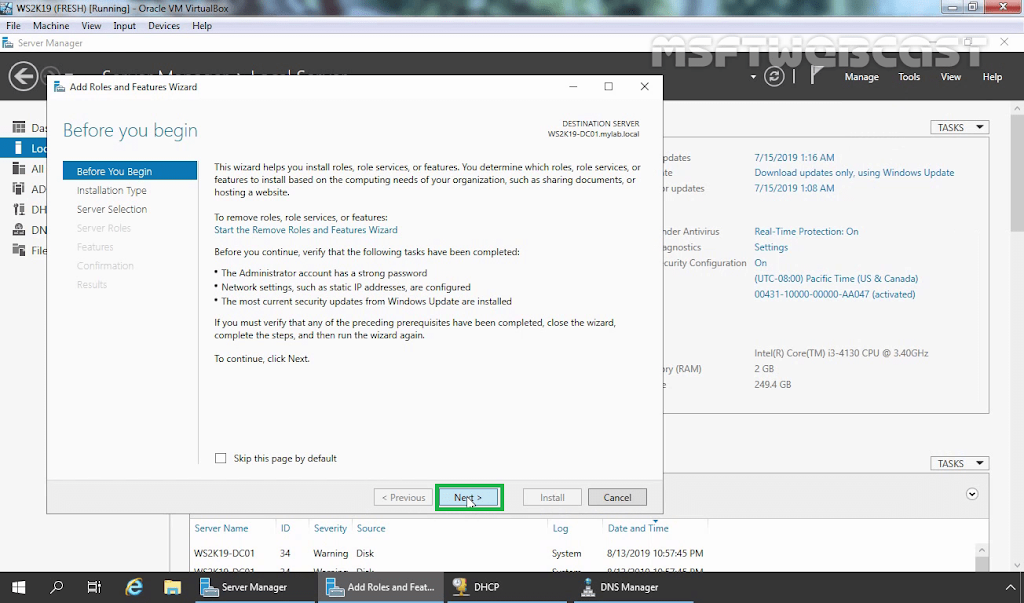
3. On before you begin screen, click Next.
4. On the Select installation type page, make sure you choose Role-based or feature-based installation. Click Next.

5. On the Select destination server page, choose the local server (ws2k19-dc01.mylab.local). Click Next.

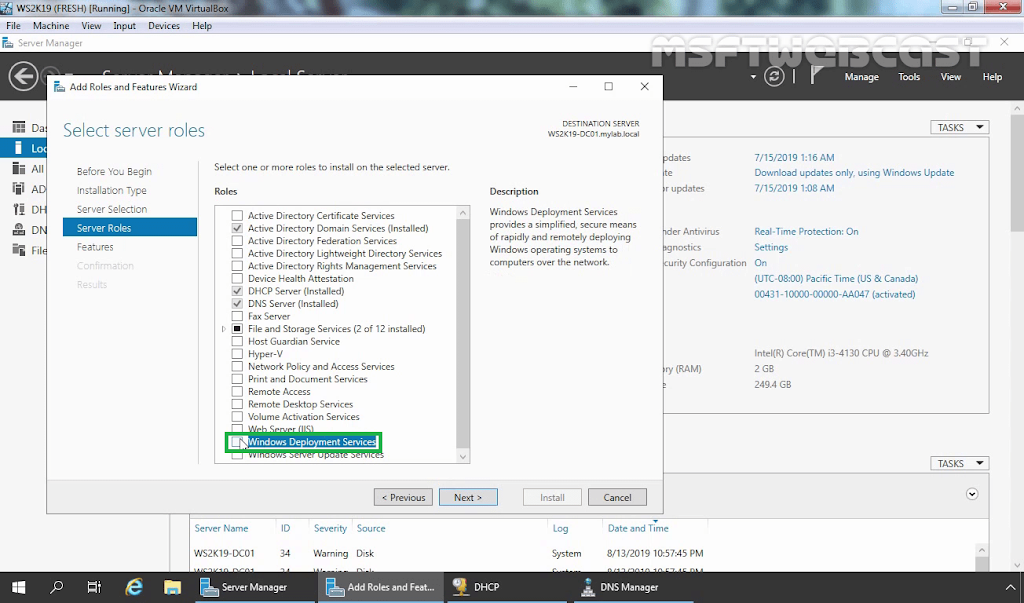
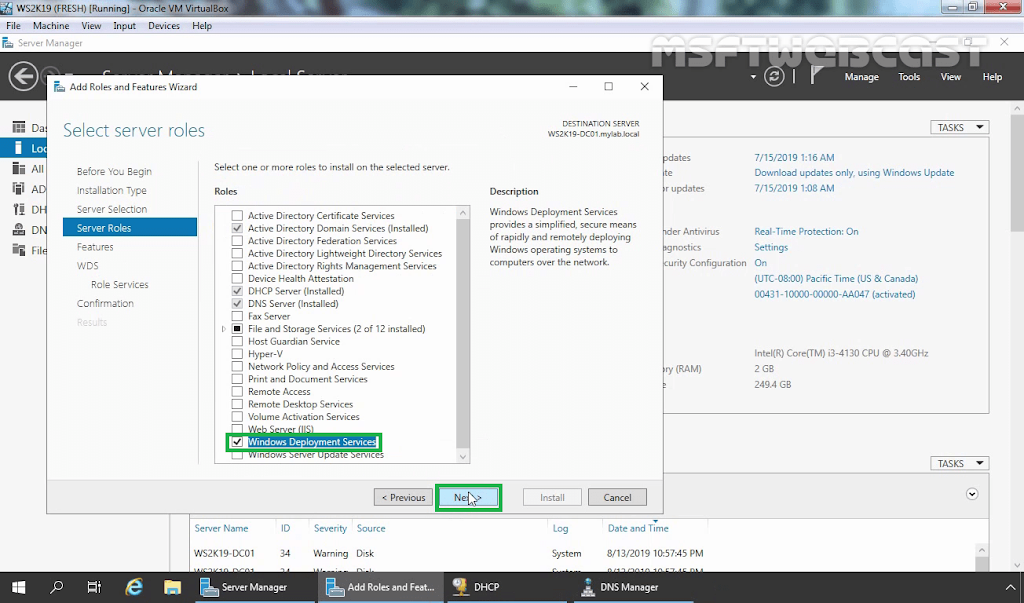
6. On the Select server roles page, select Windows Deployment Services.
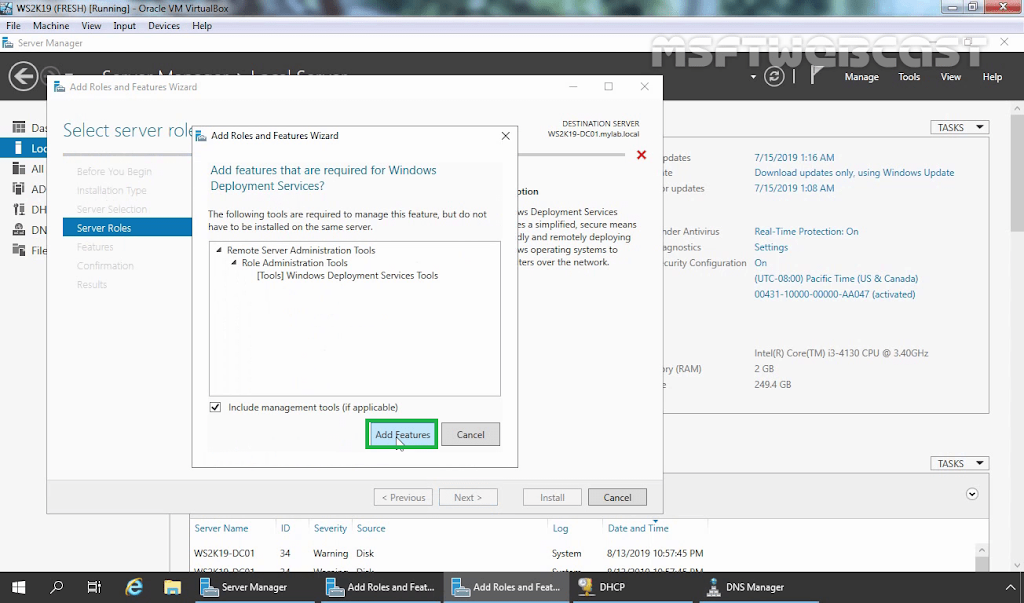
7. When the Add Roles and Features Wizard window appears, click Add Features.
8. Click Next to continue.
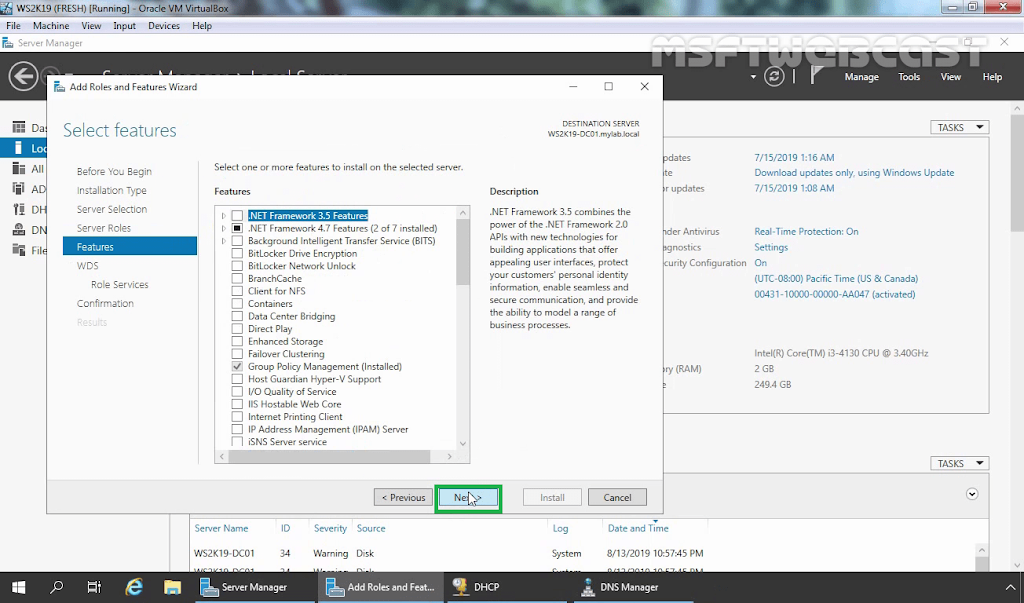
9. On the Select features page, click Next.
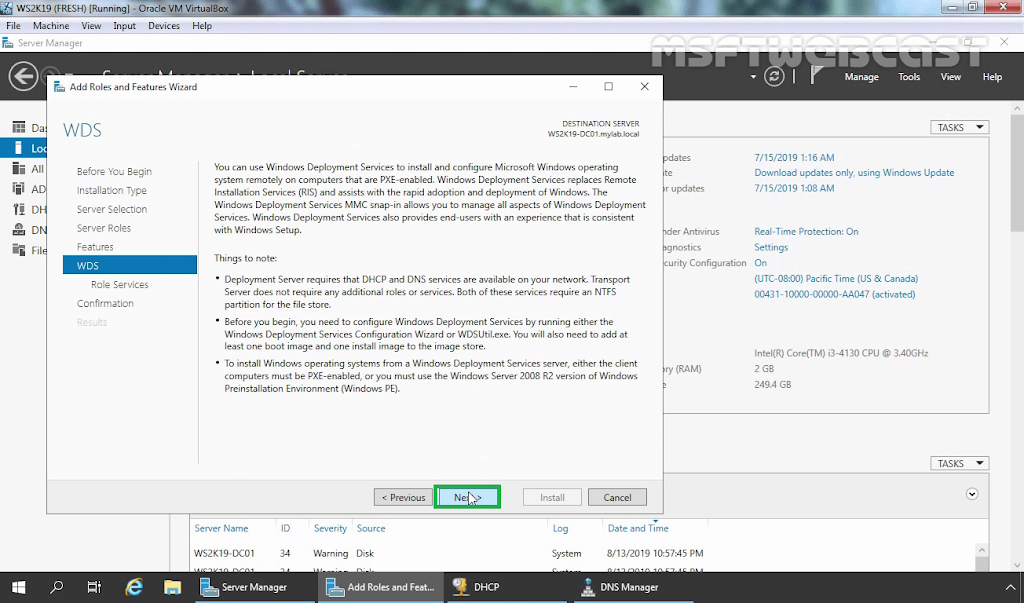
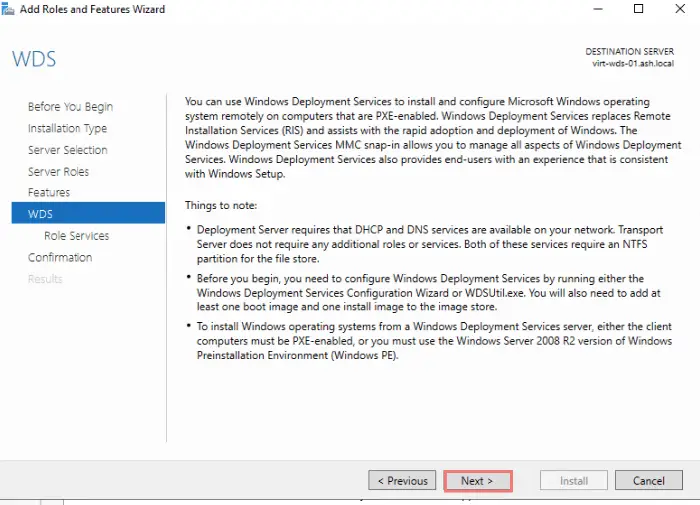
10. On the Windows Deployment Services page, click Next.
11. On the Select roles services page, check both the Deployment Server and Transport Server. Click Next.
12. On the Confirm installation selections page, click Install. Wait for the installation to complete.
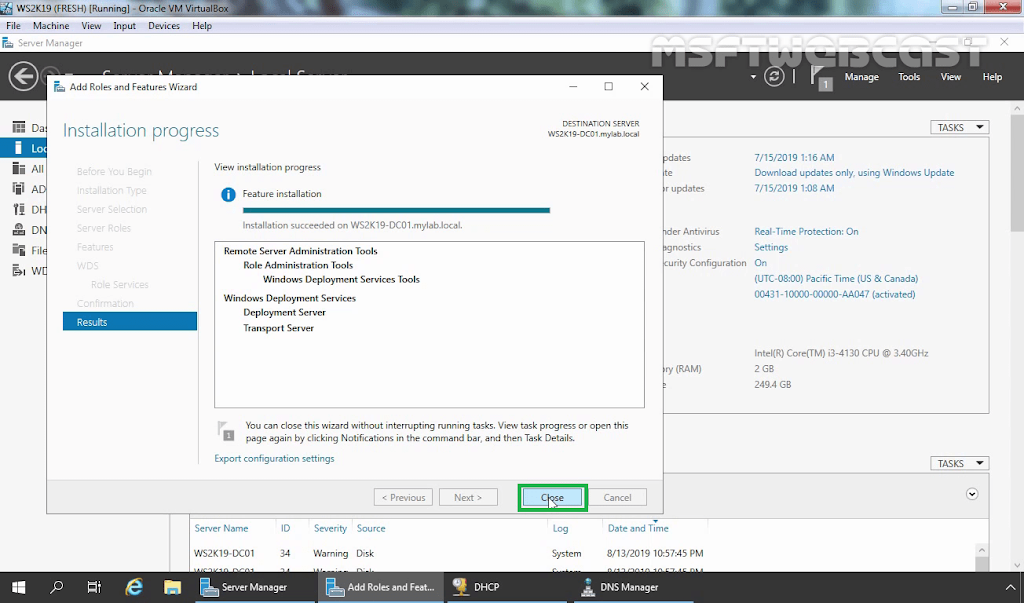
13. Once the installation of WDS complete successful, click Close.
Verify the WDS installation:
Open the WDS management console to verify if Windows Deployment Services was installed or not.
14. In the Server Manager console, click on tools and select Windows Deployment Services.

15. Expand servers and click on server name. Here you will find yellow exclamation mark on server name that represent that we need to configure this server before we can use WDS service.
That confirms we have successfully installed Windows Deployment Services on Windows Server 2019. Make sure to check the next part in which we will cover the steps on how to configure a WDS server.
Post Views: 5,866
Introduction
Windows Deployment Services is a server role that gives administrators the ability to deploy Windows operating systems remotely. WDS can be used for network-based installations to set up new computers so administrators do not have to directly install each operating system (OS).
I will provide step by step to install Windows Deployment Services with screenshots below.
Go to Hyper-V Manager, select the install Server-DC
Next Add roles and features
Click Next
Click Next
Click Next
Click Add Features
Next select the check box Windows Deployment Services and click Next
Click Next
Click Next
Select the check box Roles service. Click Next
Click Install
Next go to Server Manager Tools to select Windows Deployment Services
Next Right Click Configure Server
Click Next
Next Select the Install Options Click Next
Next Create the Installion Folder Location Click Next
Next PEX Server Initial Settings Click Next
Select the Install Images Right Click Add Image Group
Next Create the Image Group Name Click Next
Select the Image File following step. Click Next
Next Select Images Click Next
Next Click Next
Next Click Finish
Next Select Boot Image
Next Right Click Add Boot Image following step. Click Next
Click Next
Click Next
Next Finish
Windows Deployment Services Must importent DHCP Service following step
Refer the Article
Next Select the Connect the Bootable Client VM go to Settings
Select the Firmware change the Boot order in Network Adapter Click Ok
Next Start Bootable Client Vm
Successfully Windows Deployment Services Run Client Bootable VM
Conclusion
This article taught us how to set up Windows Deployment Services . If you have any questions, please contact me.
Thanks.
WDS offers a simple method to deploy and boot systems on the network that have no installed operating system on it ( also known as PXE boot ). In this blog, we will boot and install a Windows 2019 server image from a Microsoft Windows Deployment Services (WDS) Server.
I’ve downloaded and mounted a Windows Server 2019 ISO Image on the WDS server. The two files we need in this are the boot.wim (used to boot client machines) and the install.vim (the actual Windows installation file).
Under Roles and Features choose Windows Deployment Services
Click Add Features in the popup window then click Next.
Click Next to Continue
On the WDS tab, Select the role services box, and click Next.
Click Install.
Launch Windows Deployment Services
Right-click and then click Configure Server.
Verify if all prerequisites are met.
Choose the Integrated with Active Directory option and then click Next.
We will just accept the default location as C:\RemoteInstall and then click Next.
Under Settings, we will choose to respond to all PXE requests from all client computers for now.
Choose to add images to the server and Click Finish.
Adding Install Images
In order to boot an OS from the network, we will need an Install Image which is the actual Windows installation file. The Install Image is located on the Windows install media under \sources\install.wim.
Right-click on the Install Images and choose Add Install Image Group
Choose to add an Install Image
Select ‘install.wim’ file from the ISO disk
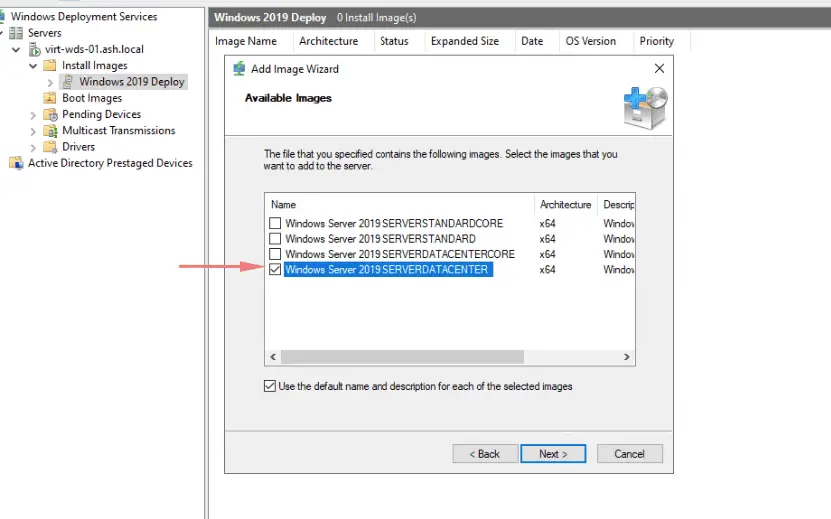
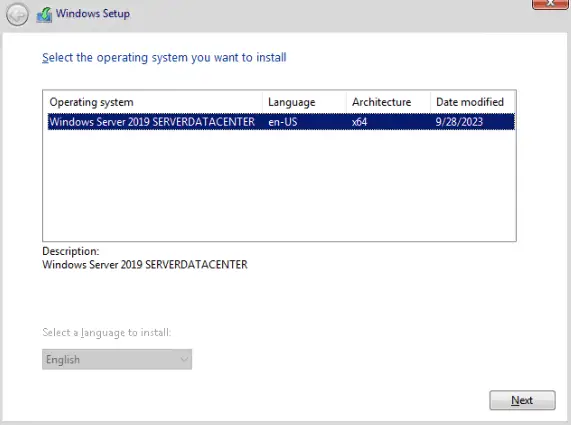
Our ISO detects, four versions of Windows 2019, we will just pick the datacenter version.
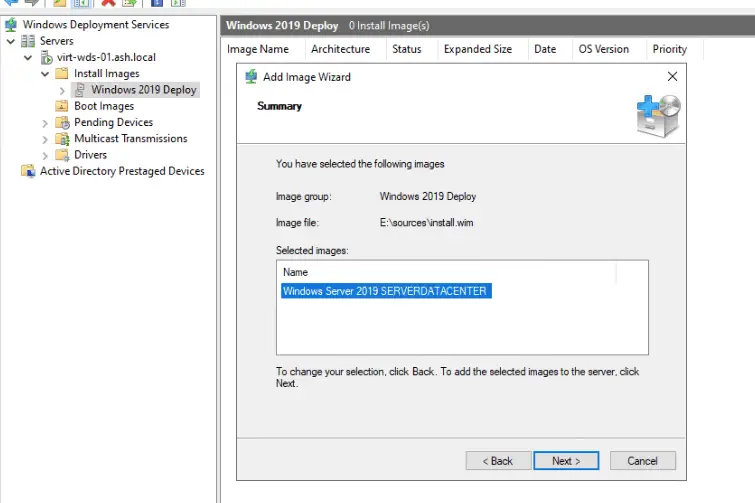
Review the summary and click Next to proceed
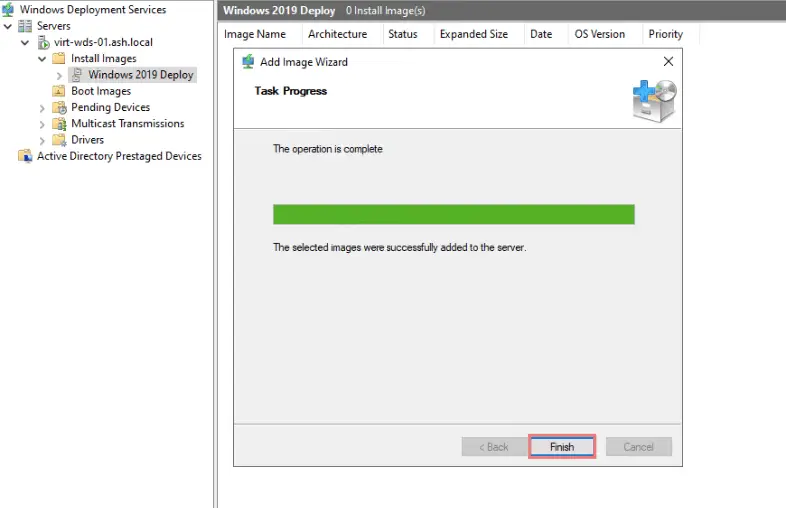
Wait till the image is added to the PXE server
We can now see under Install Images our Windows 2019 ‘install.wim’ file
Adding Boot Images
In order to boot from the network, we will need a boot Image. The boot Image is located on the Windows install media under \sources\boot.wim.
Select ‘boot.wim’ file from the ISO disk
Give a name for our Boot Image and a description if required.
Review the Summary and click Next
Click Finish
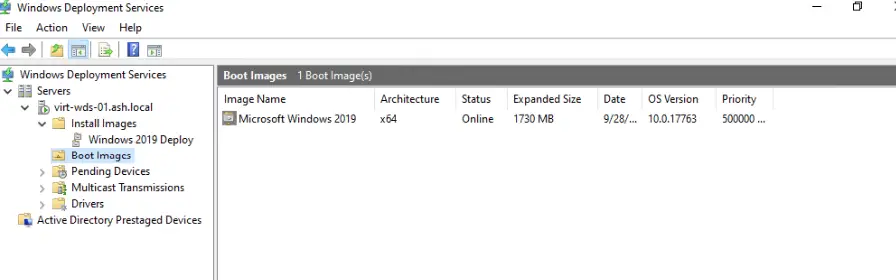
Select the Boot Images to see the 2019 image added.
Add Drivers to WDS
A common error when deploying WDS is WdsClient: An Error Occurred While Obtaining IP Address From the DHCP Server. This is linked to network drivers on the VM and can be resolved by injecting drivers into our image.
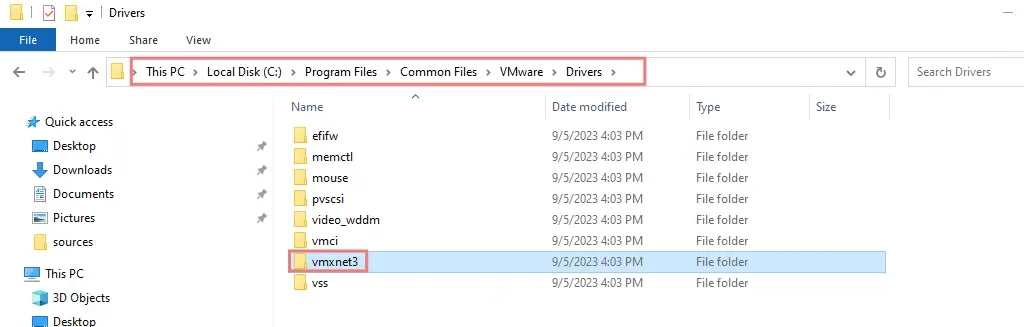
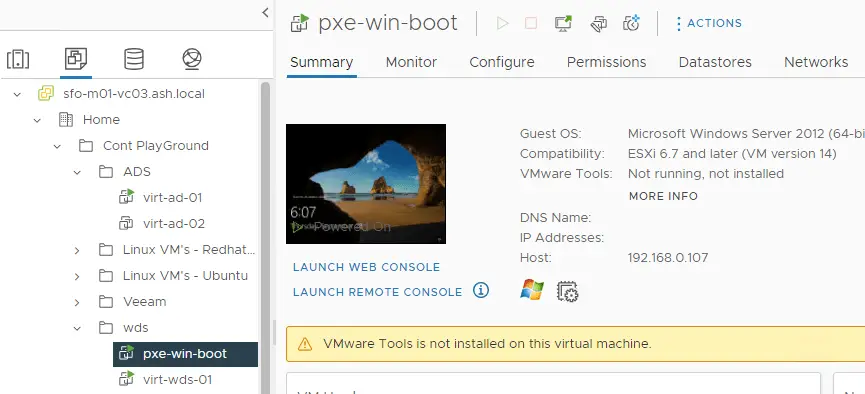
If you wish to boot the VMware VM which has a VMNet3 driver, this driver will need to be added to the image.
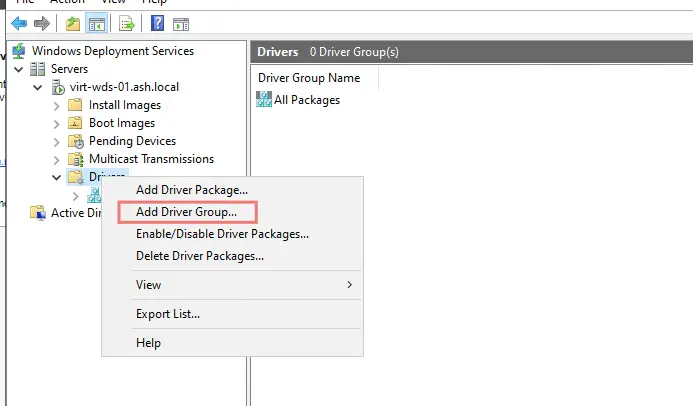
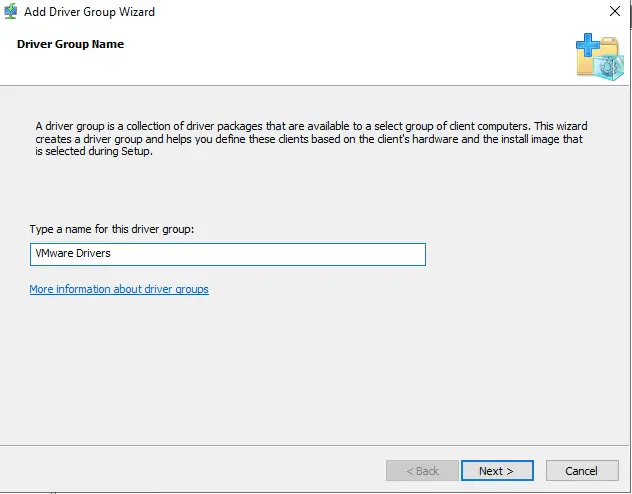
Go to the Drivers Menu and choose to add a Driver Group. A driver group is just an empty container or a collection group for a set of drivers.
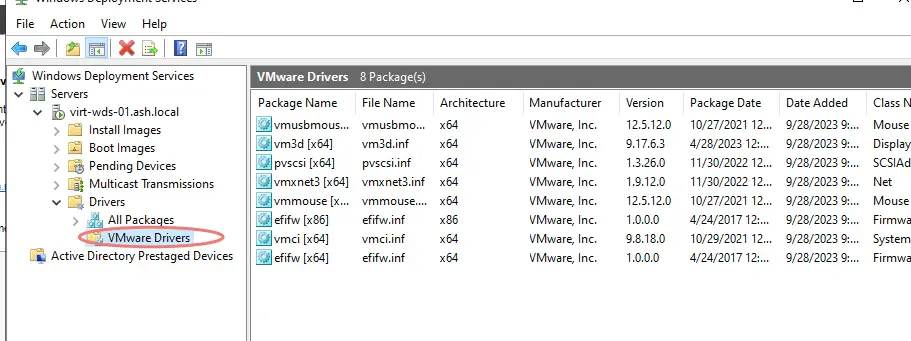
We will name it as VMware Drivers
Click Next to Continue
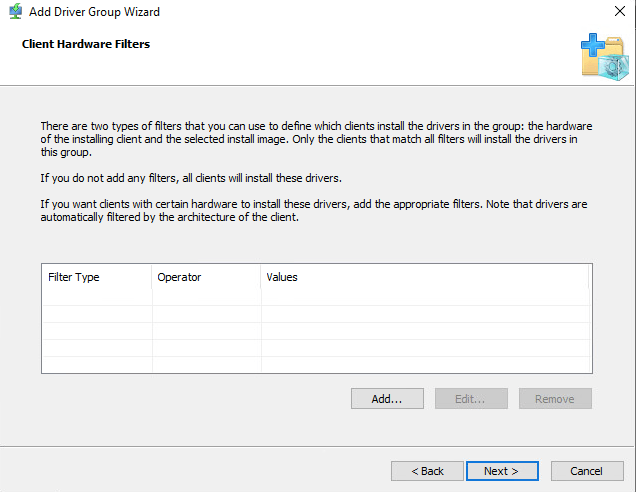
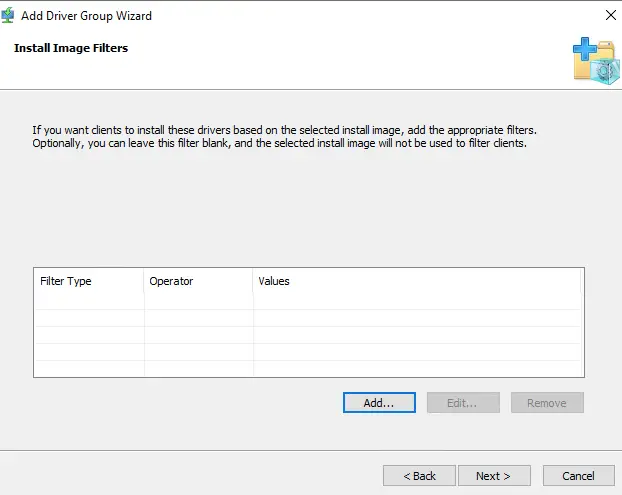
Click Next to Continue
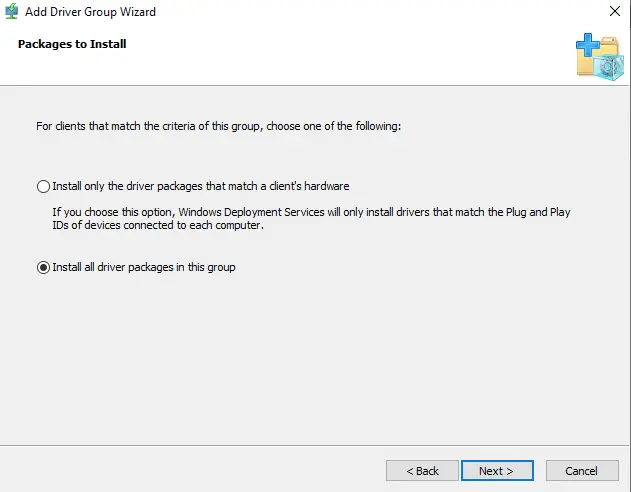
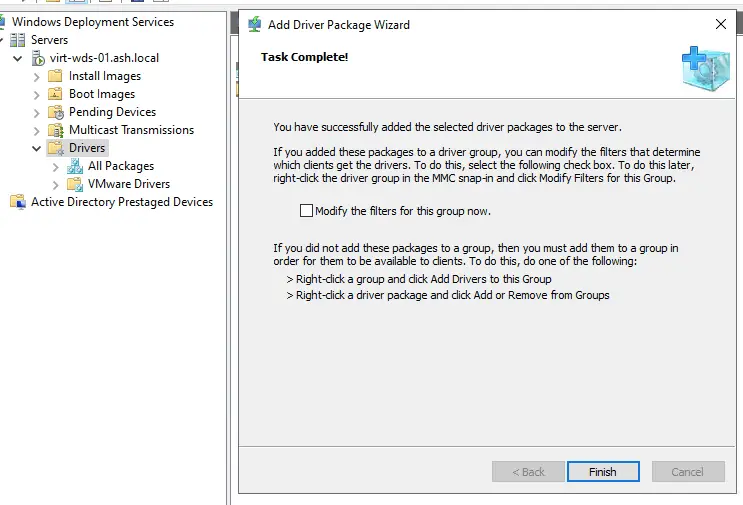
Choose the option to install driver packages to this group
Click Finish to Continue
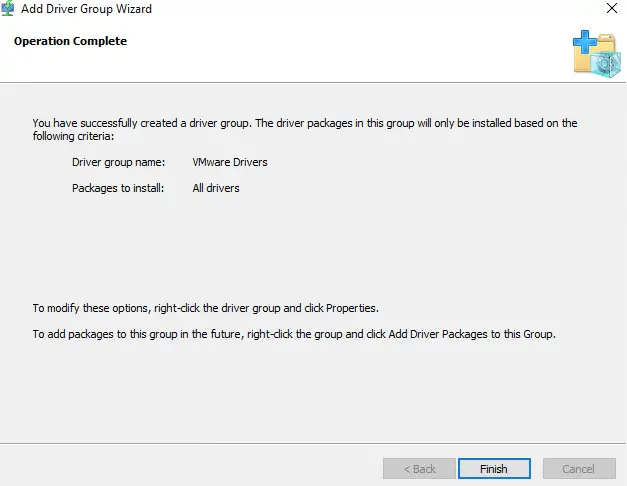
Our empty container is now created and we will attach our network drivers to it.

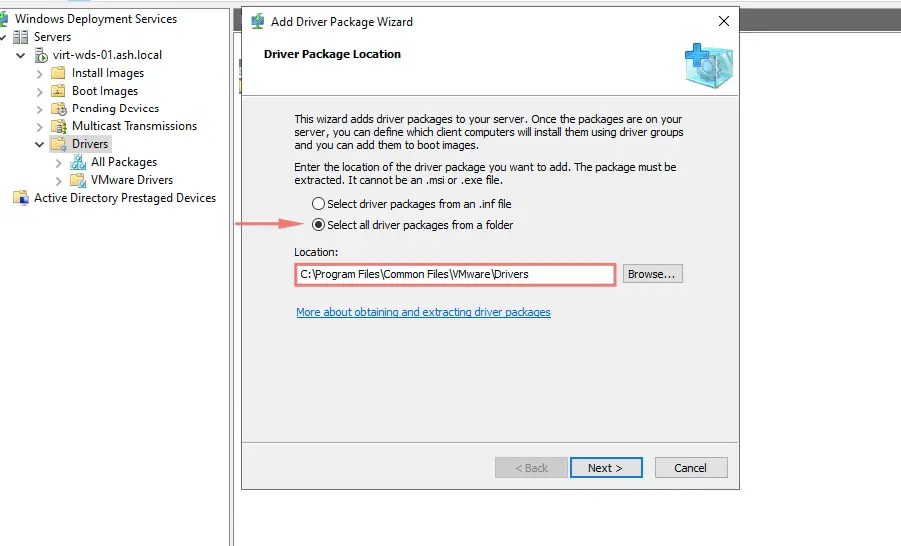
Under Drivers > Select the option to add a driver package and specify the path where we downloaded our network card drivers. Click Next to Continue
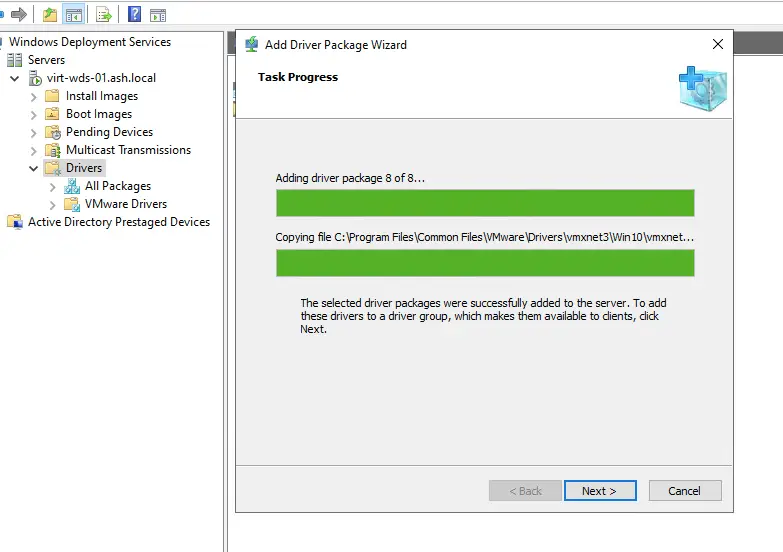
The drivers are added to our WDS server config.
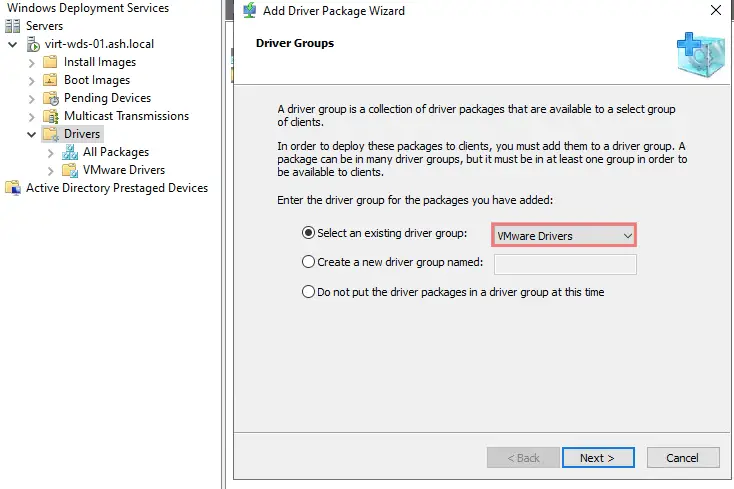
Choose the container to move the drivers to and click Next to Continue
Click Next to continue
Validate everything and click Next to continue
Our NIC Drivers are now added to the VMware container.
Under Boot Images, right click on our Windows 2019 Image to add driver packages to the image
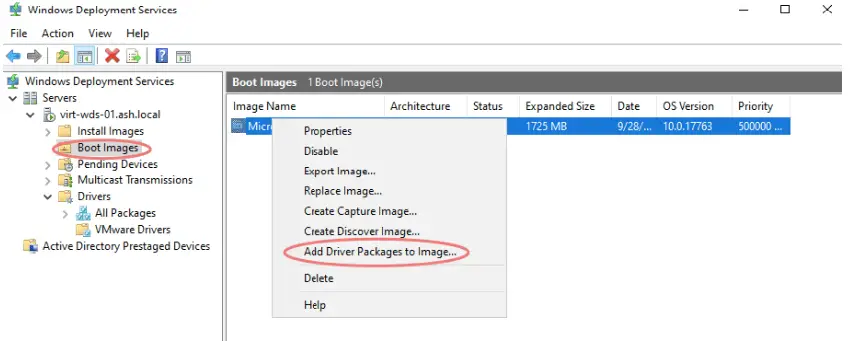
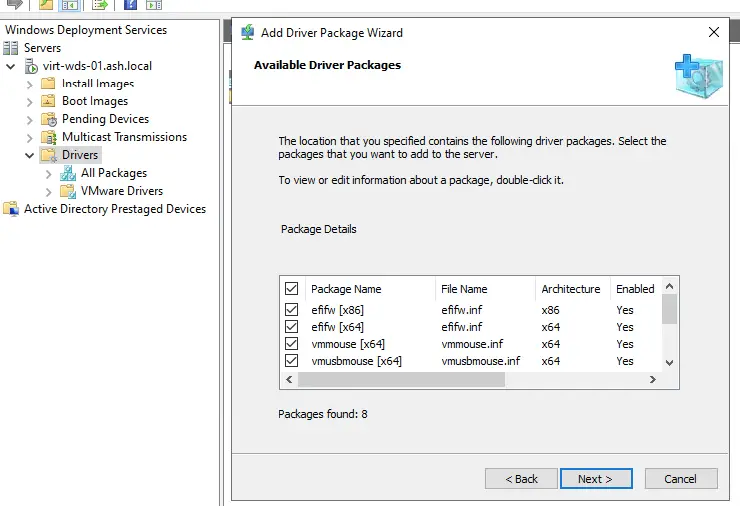
Select Add driver package, and click the Search for packages button.
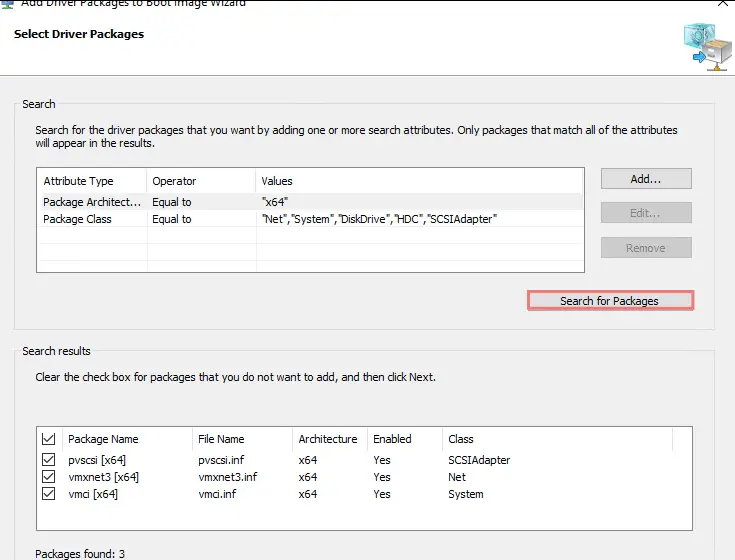
The drivers you just added to our wds config will now appear in the search results
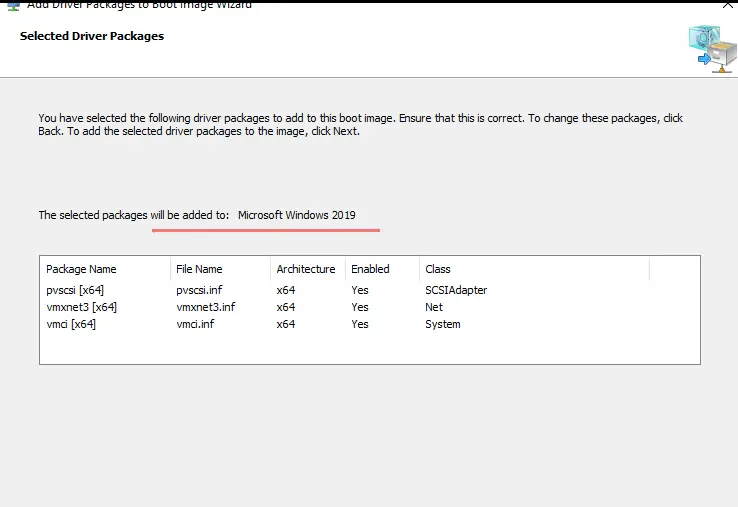
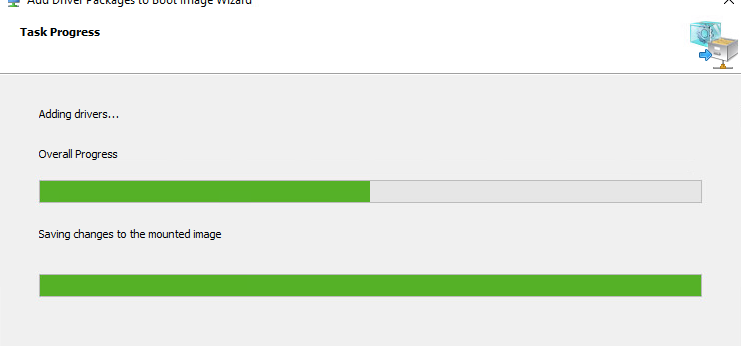
WDS will open the image, inject the drivers and close the image
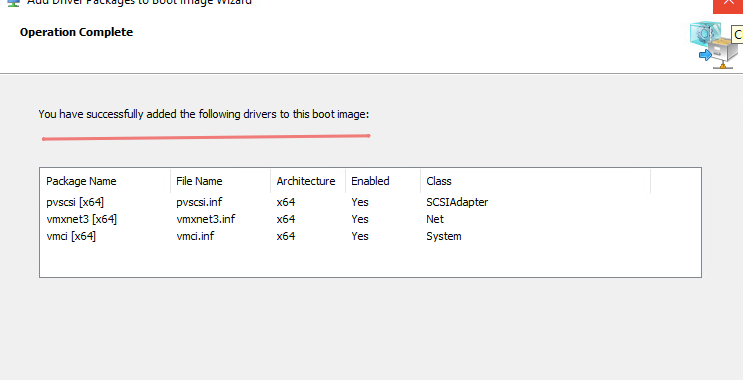
Review and click Finish
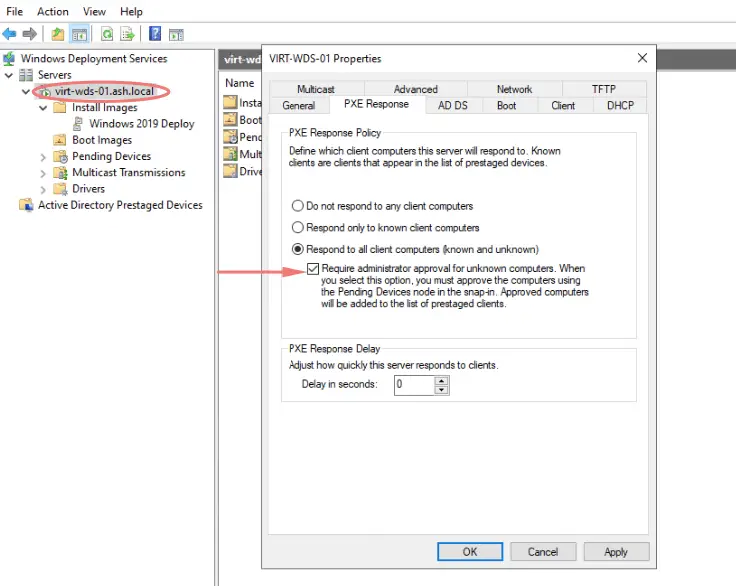
Approve WDS Requests
Under properties, we could also choose to approve the WDS deployments as in when new requests come in to deploy a VM.
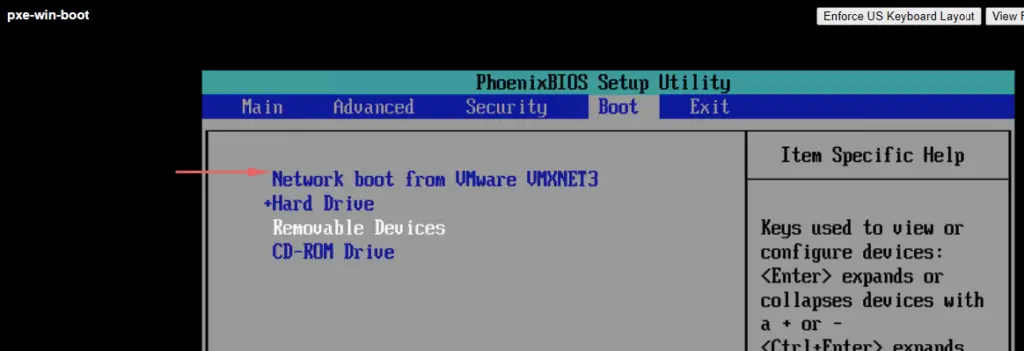
Booting over LAN
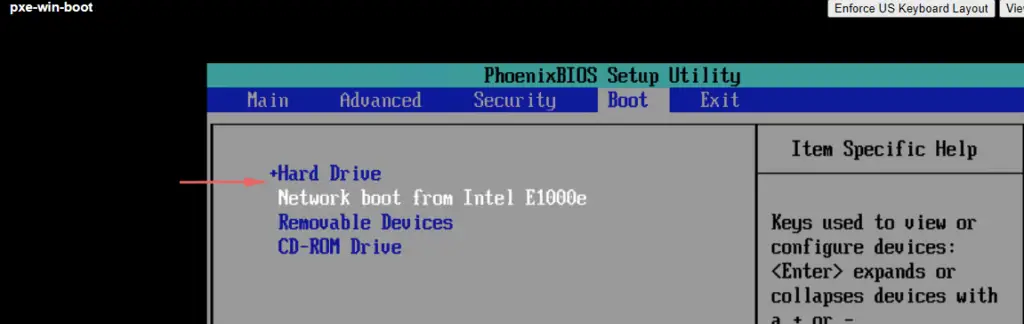
To perform a PXE boot, on the shell VM we will go to BIOS setting and change the first boot to Network Boot.
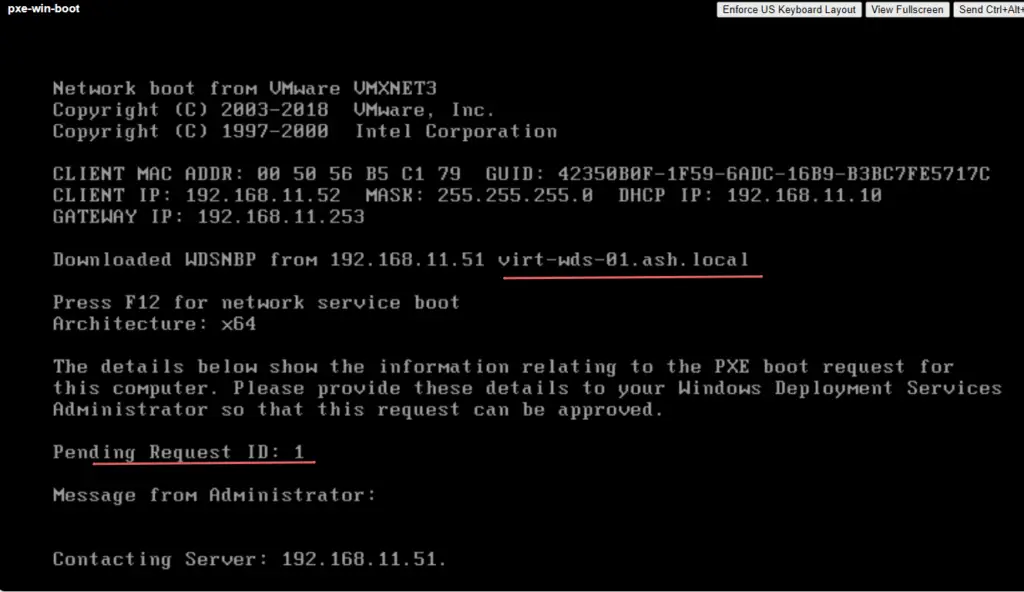
On boot, we should see now our new VM is loading files from the WDS server over the network.
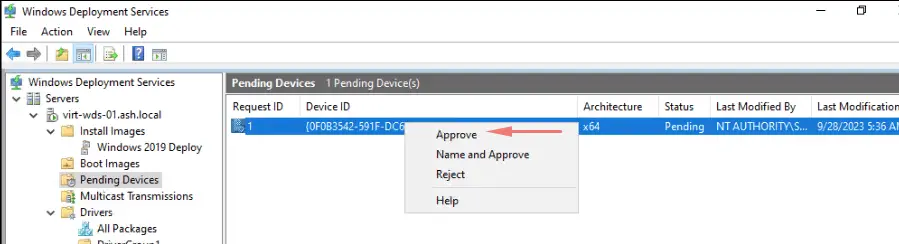
On the WDS Server, under Pending Devices, right-click the pending request, and then click Approve
Once it’s approved, we can see the boot.wim file being transferred across

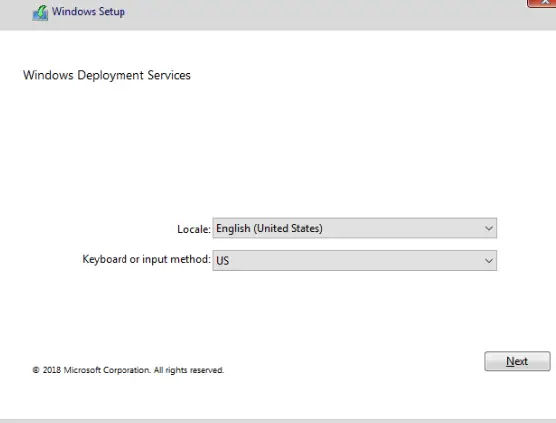
WDS Windows Setup box will appear and we can proceed by clicking Next.
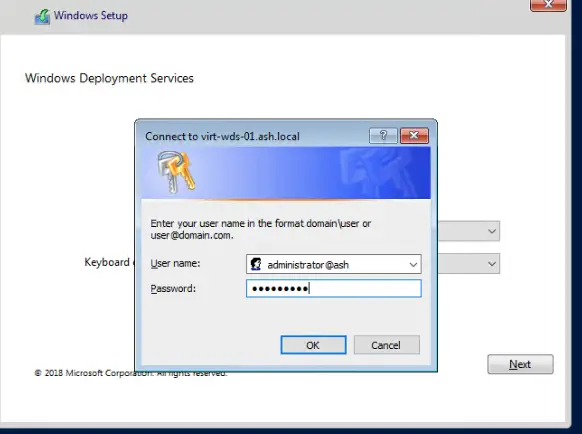
Type a User Name and Password to establish a connection with the WDS server
Next, on the Select the operating system you want to install, choose the Windows 2019 image.
Choose the disk to deploy it to.

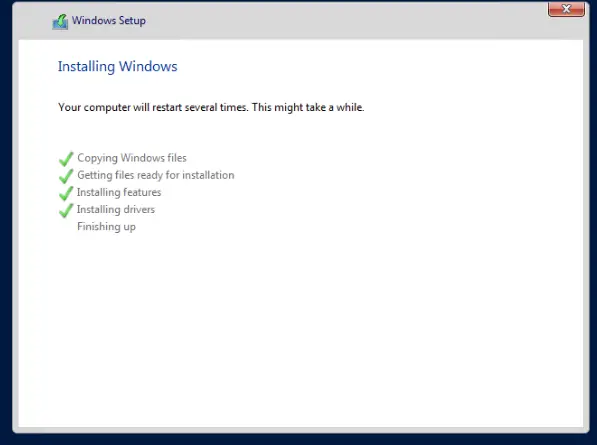
Wait for the deployment to complete
Once it’s installed, change the boot order to a Hard drive.
Our VMs is now booted up from our local hard disk.
(Visited 56 times, 1 visits today)
If you would like to deploy OS to the New rack Server or PC but they have no DVD (virtual DVD), WDS (Windows Deployment Services) server is your good friend, you can easy to deployment via network (PXE).
Today, I am going to show you step by step to install and configure WDS server. you don’t need a new hardware for it, you can build WDS server as a VM of exiting Windows 10 laptop or Server.
- Assumed the host machine (it can be a Windows 10 laptop) is connecting to Corporate Network, so the WDS VM and testing VM will get the IP address from DHCP server. if it’s at your lab or pilot environment, you need to build your own DHCP server.
- Login to WDS2019 Server via local Administrator (WDS server can be a domain member server or WORKGROUP server)
-
Use ping command to make sure the VM (WDS2019) can ping outside network.

-
On the Server Manager page, select Manage, click Add Roles and Features.
-
On the Before you begin page, click Next.
-
On the Select installation type page, select Role-based or feature-based installation, click Next.
-
On the Select destination server page, click Next.
-
On the Select server roles page, select Windows Deployment Services.
-
On the Add features that are required for Windows Deployment Services page, click Add Features.
-
On the Select server roles page, click Next.
-
On the Select features page, click Next.
-
On the WDS page, click Next.
-
On the Select role services page, click Next.
-
On the Confirm installation selections page, select Restart the destination server automatically if required, click Yes on the Add Roles and Feature wizard warning message, and then click Install.
-
On the Installation progress page, click Close.
-
On the Server Manager, select Tools, click Windows Deployment Services.
-
On the Windows Deployment Services page, expand Servers, right-click the WDS2019 server and then select Configure Server.
-
On the Before You Begin page, click Next.
-
On the Install Options page, select Standalone server, click Next.
-
On the Remote Installation Folder Location page, click Next. (You also can select the folder is not the same as system volume).
-
On the System Volume Warning message, click Yes.
-
On the PXE Server Initial Settings page, select Response to all client computers (known and unknown), click Next.
-
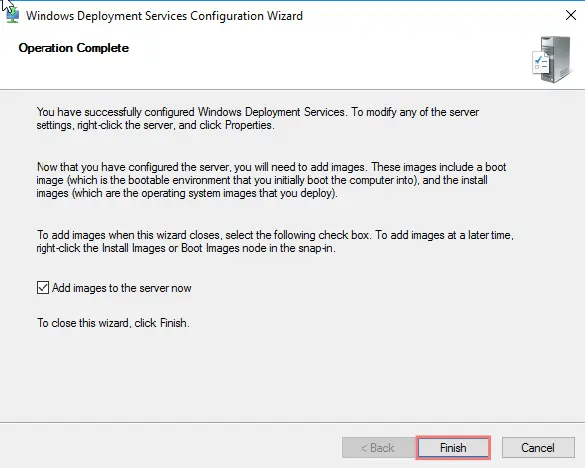
On the Operation Complete page, unselect Add images to the server now, click Finish.
-
Creating a new folder at WDS2019 server and copy boot.wim and install.wim of D:\sources to this folder. (D drive is mounting Windows Server 2019 ISO image).
-
On the Windows Deployment Services page, expend WDS2019 and right click Boot Images, click Add Boot Image.
-
On the Image file page, click Browse at File location.
-
Select boot.wim file, click Open.
-
On Image File page, click Next.
-
On the Image Metadata page, type Image name and description for the Boot Image, click Next.
-
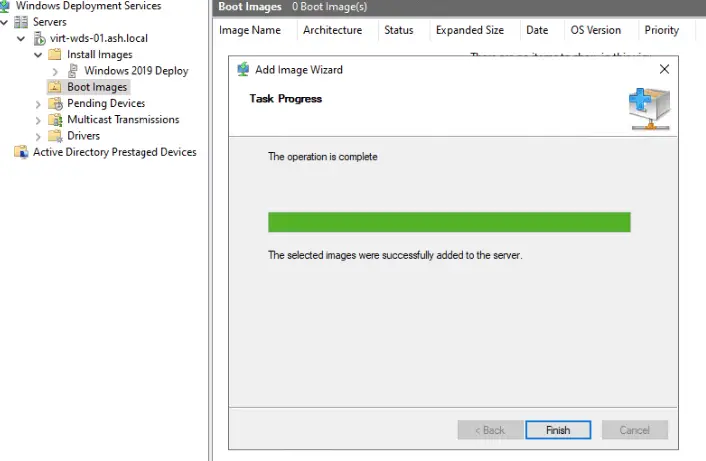
Click Next on the Summary page.
-
On the Task Progress page, make sure the operation is complete without issues, click Finish.
-
On the Windows Deployment Services page, expend WDS2019 server, right-click Install Images, click Add Install Image.
-
On the Image Group, type image group name, click Next.
-
On the Image File page, click Browse from File location.
-
Select install.wim file and click Open.
-
On the Image File page, click Next.
-
On the Available Images, select Windows Server 2019 SERVERSTANDARD and Windows Server 2019 SERVERDATACEBTER, click Next.
-
On the Summary page, click Next.
-
On the Task Progress page, make sure the operation is complete without issues, click Finish.
- Now, we can try to deploy windows server 2019 via PXE to another VM and test WDS functions.
-
On the Hyper-V Manager page, on the Actions pane, click New and select Virtual Machine.
-
On the Before You Begin page, click Next.
-
On the Specify Name and Location page, type Name and select location for the test Virtual Machine, click Next.
-
On the Specify Generation page, select Generation 2, click Next.
-
On the Assign Memory page, assign 4GB for Startup memory, click Next.
-
On the Configure Networking page, select External Network at Connection, click Next.
-
On the Connect Virtual Hard Disk page, click Next.
-
On the Installation Options page, select Installation an operating system from a network-based installation server, click Next.
-
On the Completing the New Virtual Machine Wizard page, click Finish.
-
On the Hyper-V Manager page, right-click Test virtual machine and select Connect.
-
On the Test Virtual Machine console, click Start.
-
Press Enter for the network boot service.
-
It will start loading boot image file from WDS Server.
-
After loading image file completed, on the Locate and Keyboard page, click Next.
-
Type local administrator and password to connect to WDS2019 server.
-
Select the Operating system you would like to install, click Next.
- You can follow previously steps to install windows server 2019 for the test virtual machine.


Hope you enjoy this post.
Cary Sun
Twitter: @SifuSun