Duplicate files slow down our computers. Sometimes, we can delete them one by one manually if they are located in the same folder. The problem is that most duplicate files created by the computer or by ourselves are scattered in different locations, which makes it difficult for us to find them. This article will show you different ways on how to delete duplicate files in Windows 11, automatically or manually.
- Does Windows 11 have a built-in duplicate file remover?
- What is the best app that finds all duplicate files in Windows 11?
- How to find duplicate files in Windows 11 free using File Explorer?
- How to delete duplicate files in a folder in Windows 11 using PowerShell?
Does Windows 11 itself have a built-in duplicate file remover?
It’s no. Because Windows 11 doesn’t have a built-in tool for this purpose. So, if you want to easily remove all duplicate files in your system, you can find a third-party application that is helpful. There many tools that can help users find duplicate files. Not all apps will meet your needs for accuracy and efficiency. You can do some search and study to find the one that can be the best for you. And, Windows 11 has some features that may help you manage duplicates, but its process can be a little bit time-consuming maybe. Read on to learn how to clean up duplicates with these methods.
What is the best app that finds all duplicate files in Windows 11?
Duplicate files on computer including duplicate photos, videos, audios, documents, archives, etc. Cisdem Duplicate Finder is the best app that can find all types of duplicate files in Windows 11. It identifies exact duplicate files based on the file content, regardless of their file names. You can scan a singer folder on your computer for duplicates. It also allows you to scan duplicates across multiple computer folders, or the entire hard drive.
To delete duplicate files in Windows 11 using this professional duplicate file remover:
1. Download and install Cisdem Duplicate Finder on your PC.
Free Download Windows 11/10/8/7
2. Open it. To scan specific folders for duplicates, click the plus icon on the main window and select the folders you want to scan. Click Open.
You can also select all drives on your Windows 11 to search for all duplicate files.
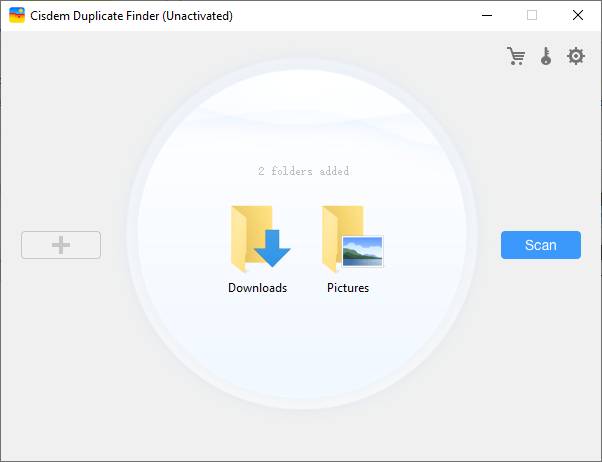
3. Click Scan.
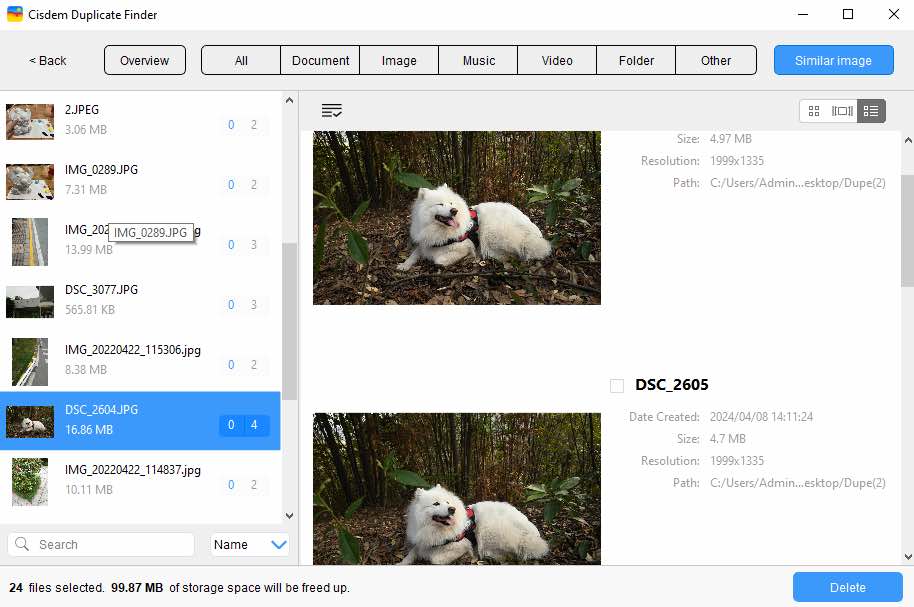
4. It’ll show you search results soon and categorize the found duplicates by file types. You can compare the duplicates side by side, and view their details such as file names, file size, location, resolution, and more.

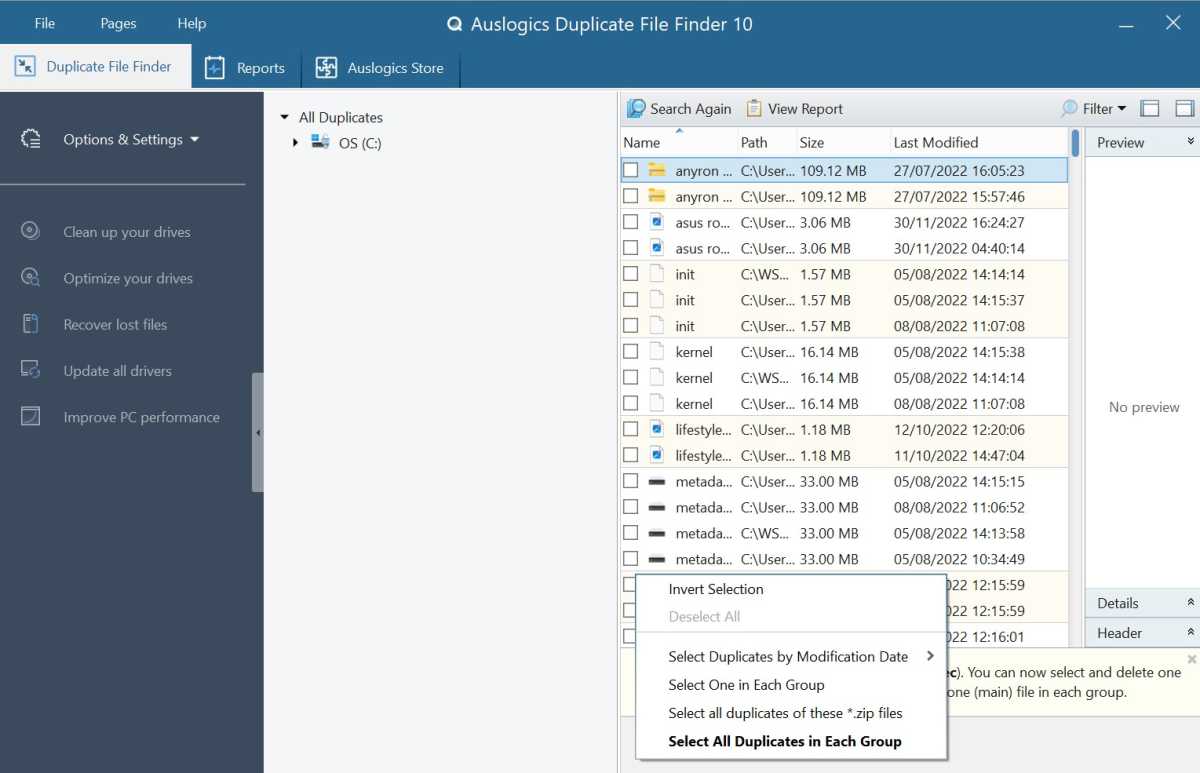
5. It automatically marks all but one file from each group of duplicates for remover. Also, you can choose a desired selection rule to help you mass select files to remove, such as “Select Oldest”.
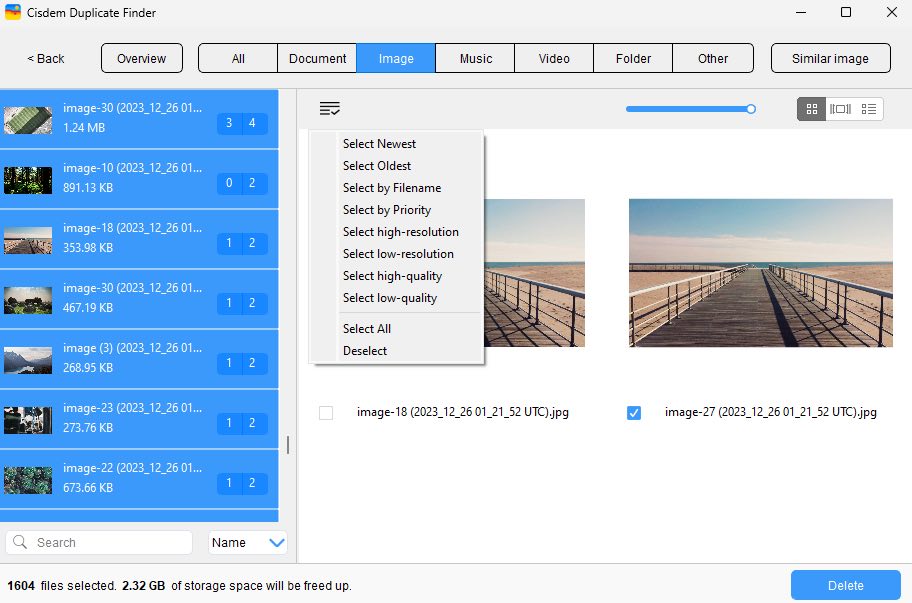
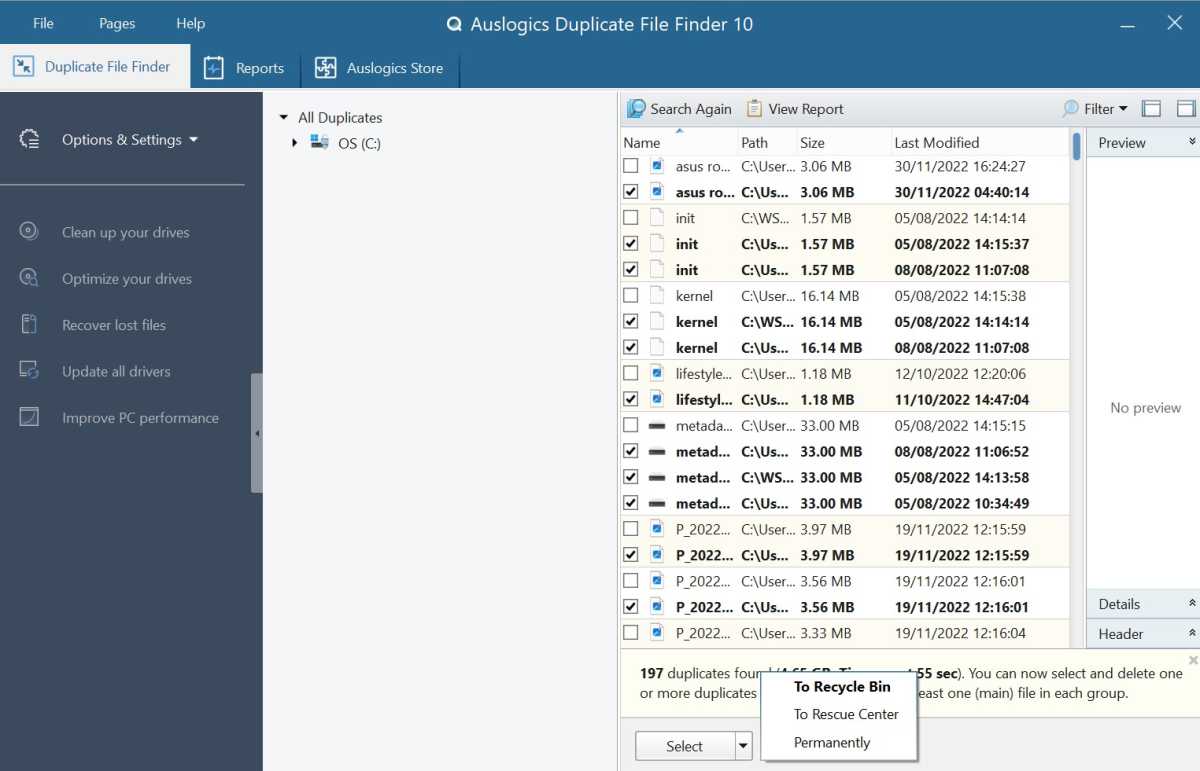
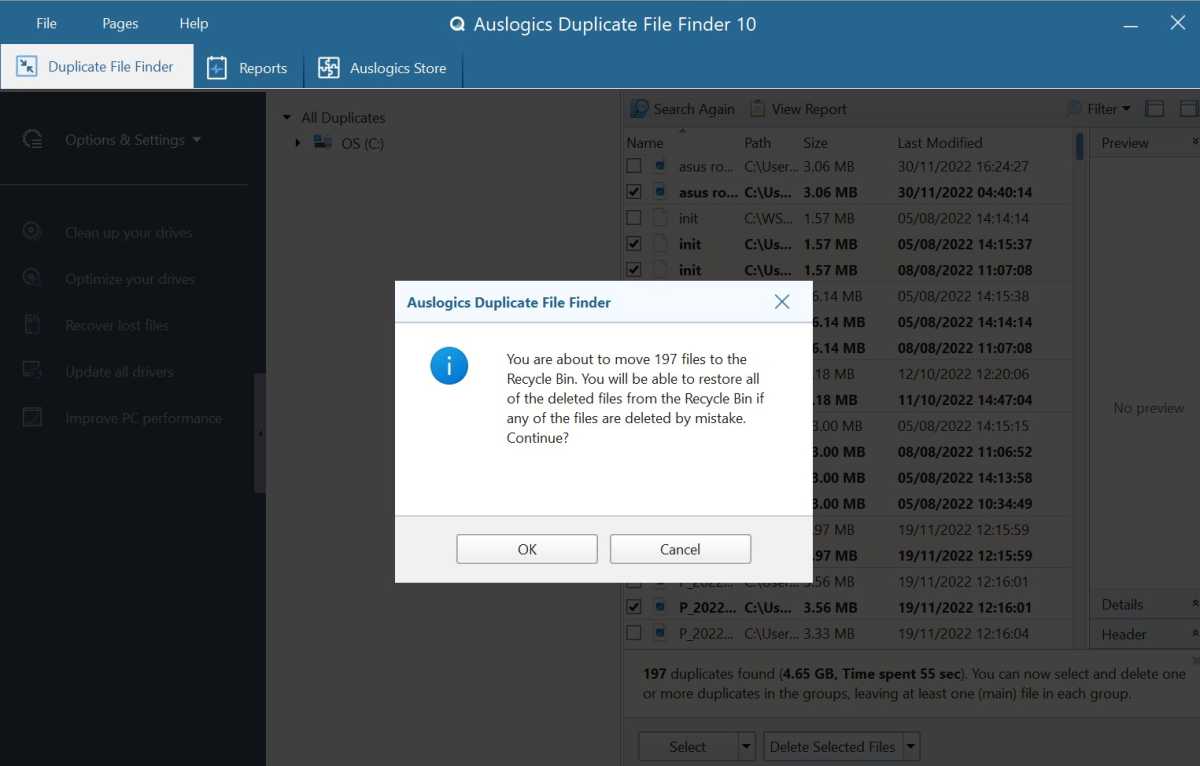
6. After checking the marked duplicate files, click Delete.
The deleted files will be moved to the Recycle Bin in Windows 11 by default. You can also go to the Settings of this duplicate file remover and set up other remove method: Remove permanently or Move to a certain folder.
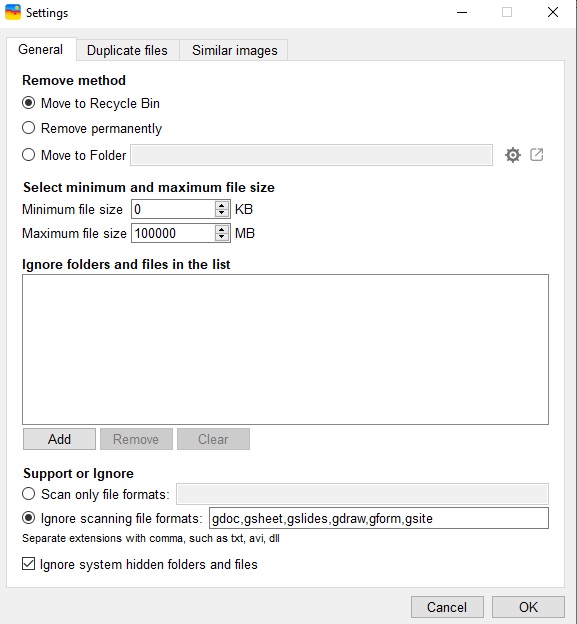
Tip 1: To prevent users from deleting important files (such as system files or files in backup folders), Cisdem Duplicate Finder provides an ignore list that allows you to exclude certain folders and files from scanning. You can also let this tool ignore system hidden folders and files, certain file formats, set minimum and maximum file size to scan.
Tip 2: Duplicate photos can take up a significant amount of storage space on computer. Some of them are unnecessary near-duplicate images, such as different versions of the same image. Luckily, except for exact duplicates, this duplicate file remover for Windows 11 also helps find near-duplicate photos.
How to find duplicate files in Windows 11 free using File Explorer?
If you think that you don’t want to use a third-party application that to help you find duplicate files in your Windows 11, you may can try this method. As you may know, File Explorer is an application that is in Windows that can help users access files on their computer. And with it, you can search for files based on your needs, such as files that share a same name or similar name. And it also lets you to sort files in the order you need.
However, this method cannot delete all duplicate files in Windows 11. It is more suitable for those who need to search for duplicate files in a certain folder and the number of files is not large. The process may be a bit time-consuming compared to Method 1.
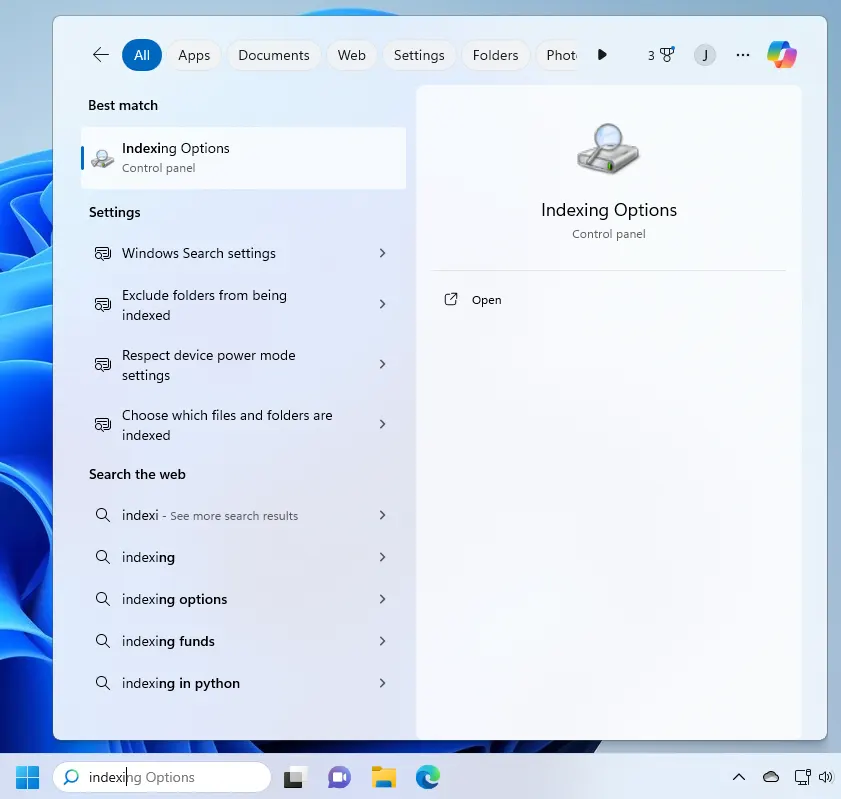
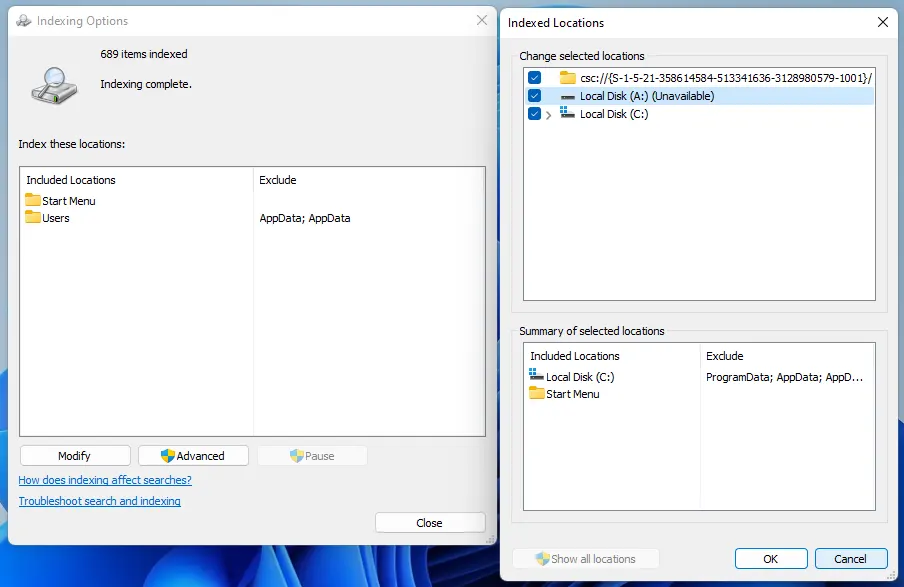
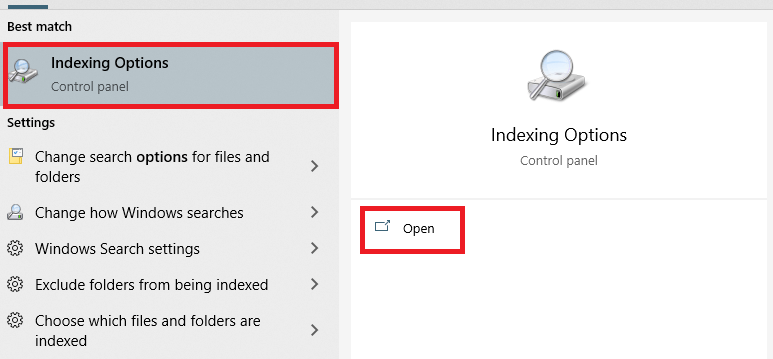
1. Type indexing options on the Windows search bar. Open the Indexing Options app.
2. Click the Modify button in the bottom left corner.
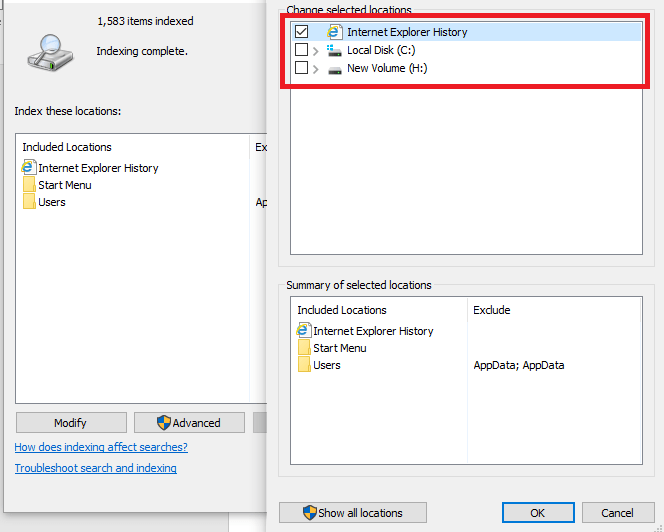
3. On the next window, click Show all locations.
4. Check the all boxes under Change selected locations. Click OK.
5. Press Windows + E keys on your keyboard to open the File Explorer.
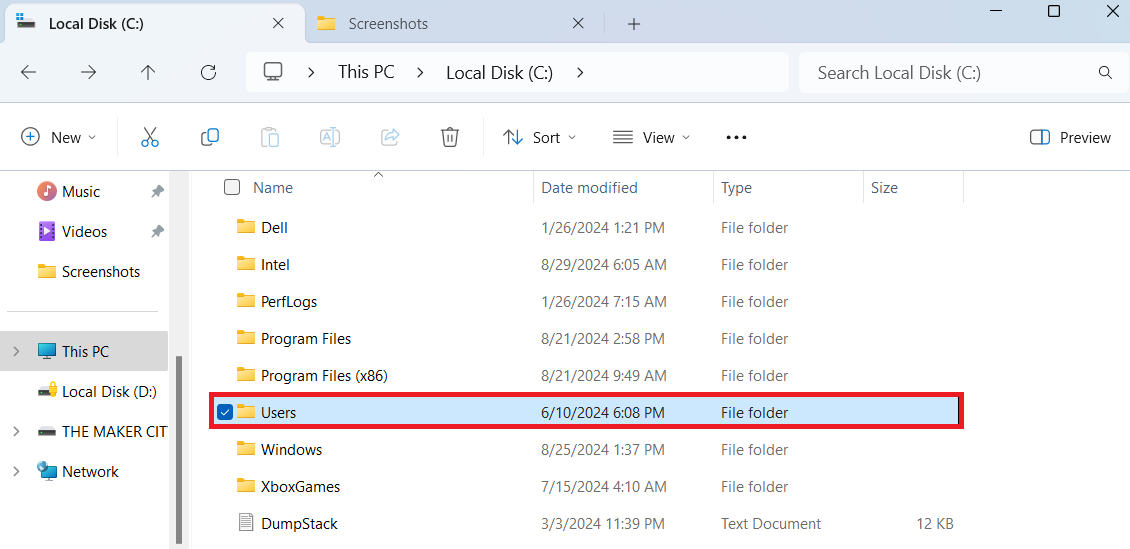
6. Open the Users folder by going to This PC > Local Disk (C:) > Users.
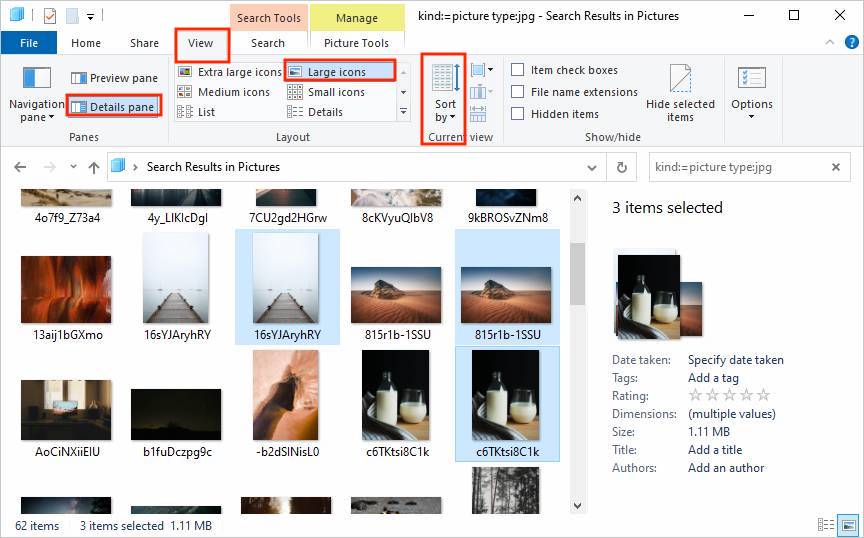
7. Click the View tab at the top of the window. Select Preview pane.
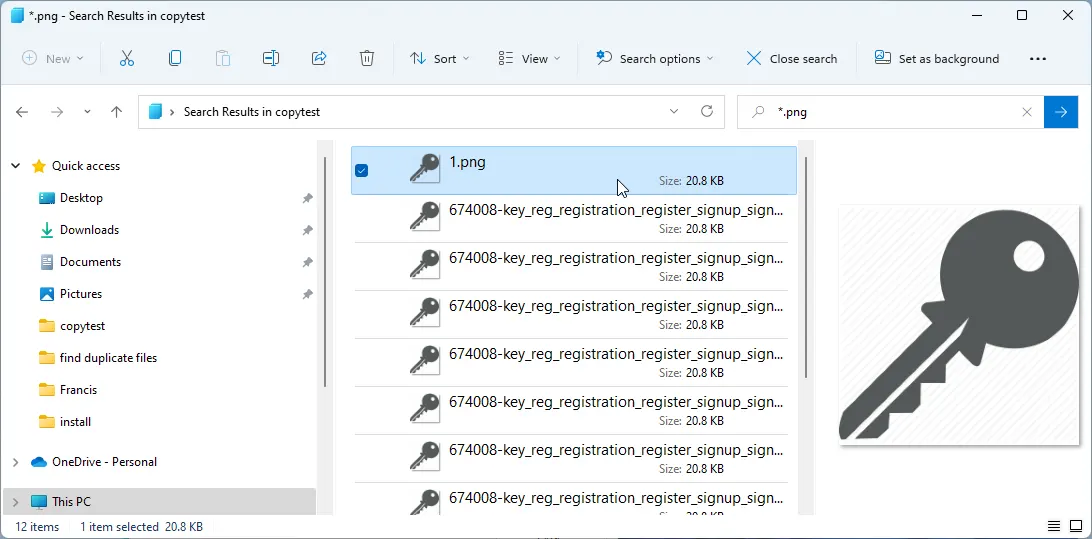
8. In the Layout section, select Details. If you want to search for duplicate images in Windows 11, select Large icons.
9. Expand the Sort by option. Select Size and Ascending.
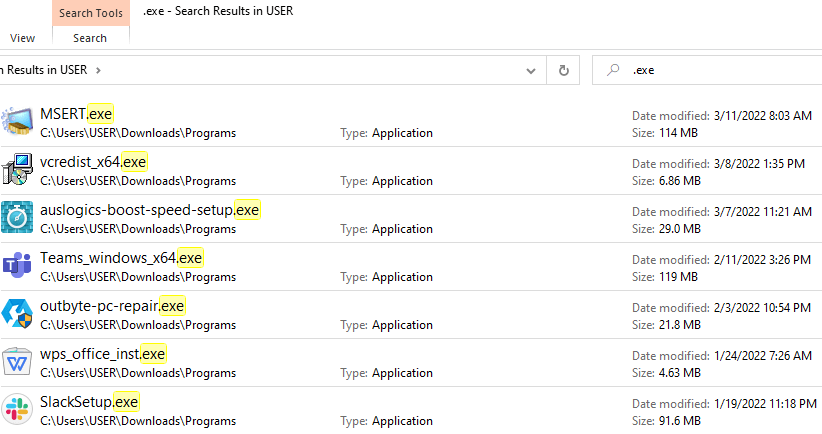
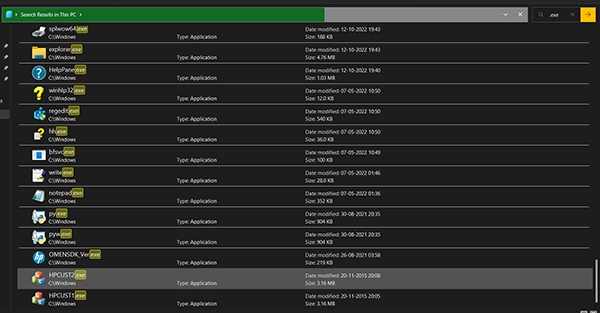
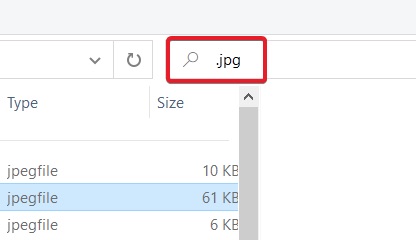
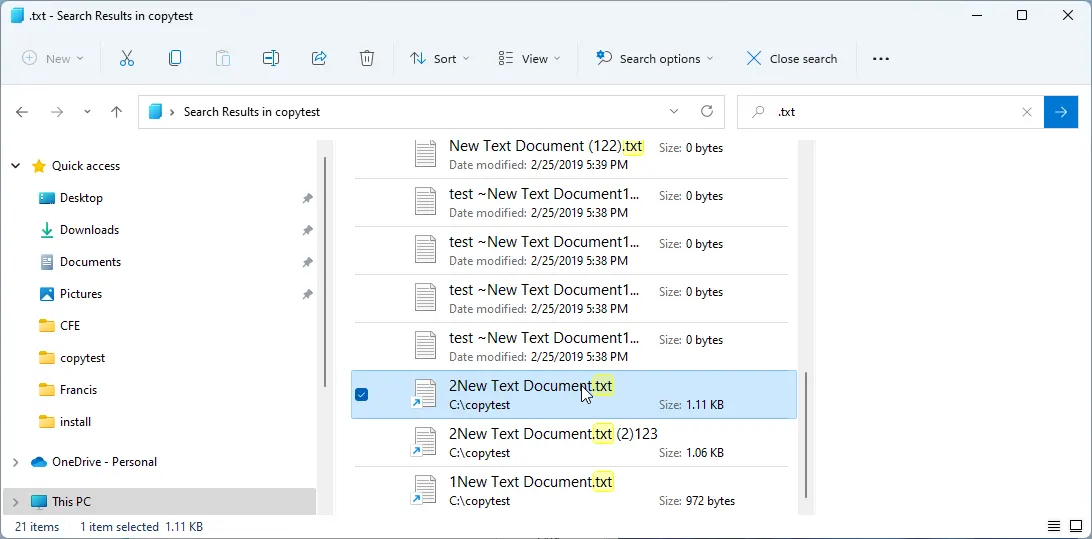
10. Go to the search bar in the upper right corner of the window and type in the extension of the file you want to find, such as jpeg, mp3, doc, exe, etc.
11. Now you can manually identify duplicate files on your Windows PC and remove them one by one. Pay attention to the files that have the same file size or have «Copy» in the file name. Control-select the unwanted files. Right-click on them and choose Delete.
The deleted duplicates will be moved to the Recycle Bin too.
How to delete duplicate files in a folder in Windows 11 using PowerShell?
This method is for tech-savvy users only. PowerShell is a program from Microsoft. It is used to automate tasks and simplify configurations in the Windows ecosystem. It can also be used to search for duplicate files by calculating the hash value of the files.
I have successfully used this tool to find all duplicate files in the Document folder on my Windows 11. But I would not use it to find duplicate files in some important folders. It does not allow users to preview files before deleting.
1. Type PowerShell on the Windows search bar. Open it.
2. Type cd followed by the folder location where you want to find duplicate files. For example,
cd C:\Users\Administrator\Documents
3. Hit Enter.
4. Paste the command below, which is for calculating the hash of the files.
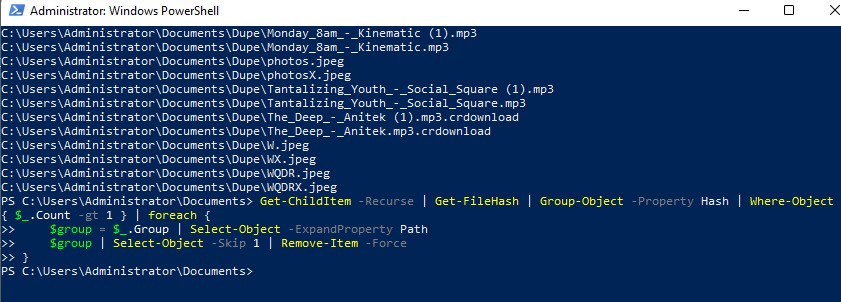
Get-ChildItem -Recurse | Get-FileHash | Group-Object -Property Hash | Where-Object { $_.Count -gt 1 } | Select-Object -ExpandProperty Group | Select-Object -ExpandProperty Path

5. Hit Enter.
6. Then it will list all exact duplicate files with the same hash value in this folder. You can open these files in File Explorer according to the file location and delete them one by one manually after previewing. Alternatively, use the following command to automatically delete all duplicate files.
Get-ChildItem -Recurse | Get-FileHash | Group-Object -Property Hash | Where-Object { $_.Count -gt 1 } | foreach {
$group = $_.Group | Select-Object -ExpandProperty Path
$group | Select-Object -Skip 1 | Remove-Item -Force
}
Conclusion
Deleting duplicate files frees up local storage space for new files and makes it easier for you to find certain files. This article describes how to delete duplicate files in Windows 11 with different methods. Method 1 is suitable for most users. Whether you are a computer novice or a professional user. Both method 2 and method 3 allow you to remove duplicate files for free.
List of the best free methods to find duplicate files on your Windows PC. Follow this detailed guide to easily find and delete repeating files and organize your disk space.
- What Are Duplicate Files?
- Find Duplicate Files Using a Free App
- Remove Duplicate Files Using File Explorer
- Delete Duplicate Files Using Windows Powershell
What Are Duplicate Files?
Duplicate files are exact copies of each other that you may encounter within your file system. These duplicates can accumulate over time due to various reasons, such as copying files, downloading multiple copies of the same file, or unintentional duplication. Duplicate files can exist in various formats, including documents, images, videos, music files, and more.
While duplicate files may seem harmless at first glance, they can pose several problems for you as a computer user. Firstly, they consume valuable disk space, leading to inefficient storage usage. This can be particularly problematic if you have limited storage capacity, as it reduces the available space for storing new files and applications. Additionally, duplicate files can clutter your file system, making it difficult for you to locate and manage important files.
Moreover, duplicate files can contribute to performance issues on your computer. When the disk space becomes fragmented with duplicate files, it can slow down file access times and overall system performance. This is especially true for large duplicate files, such as videos or high-resolution images, which can significantly impact system resources when accessed or manipulated.
Overall, duplicate files are redundant and unnecessary copies of data that can clutter your file system, waste disk space, and degrade system performance. Identifying and removing duplicate files is essential for optimizing storage space and maintaining a well-organized and efficient file system.
Find Duplicate Files Using a Free App
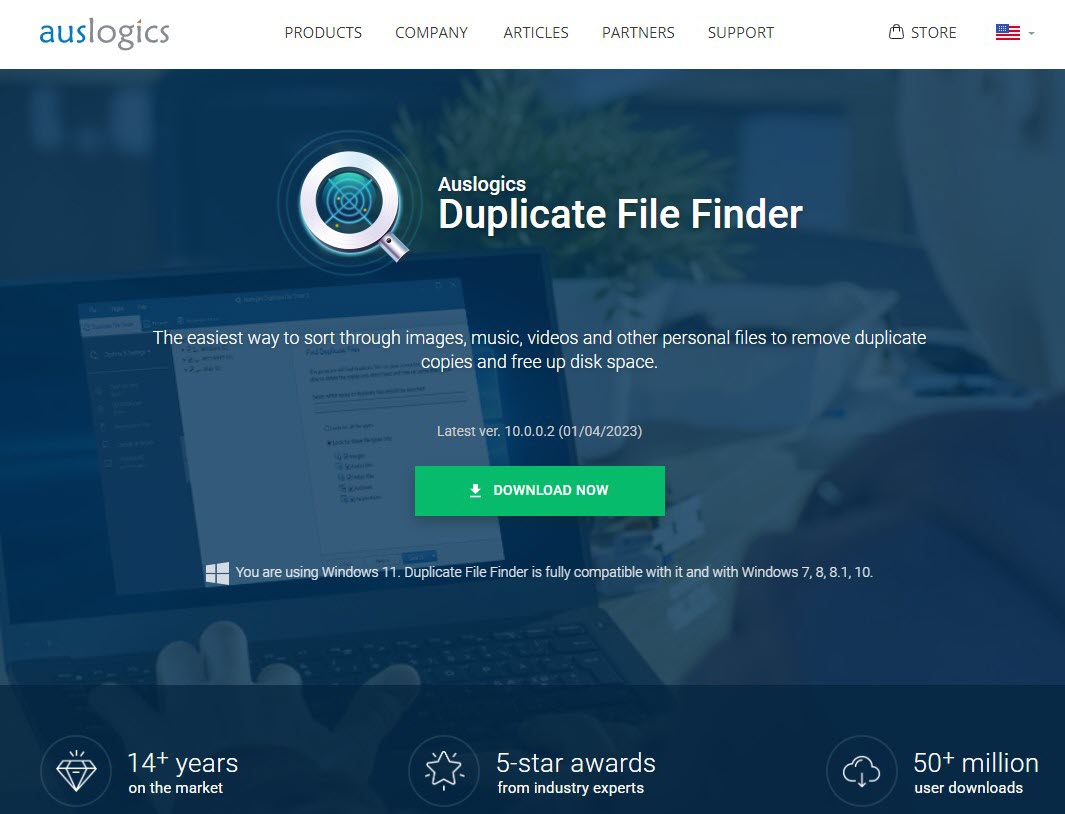
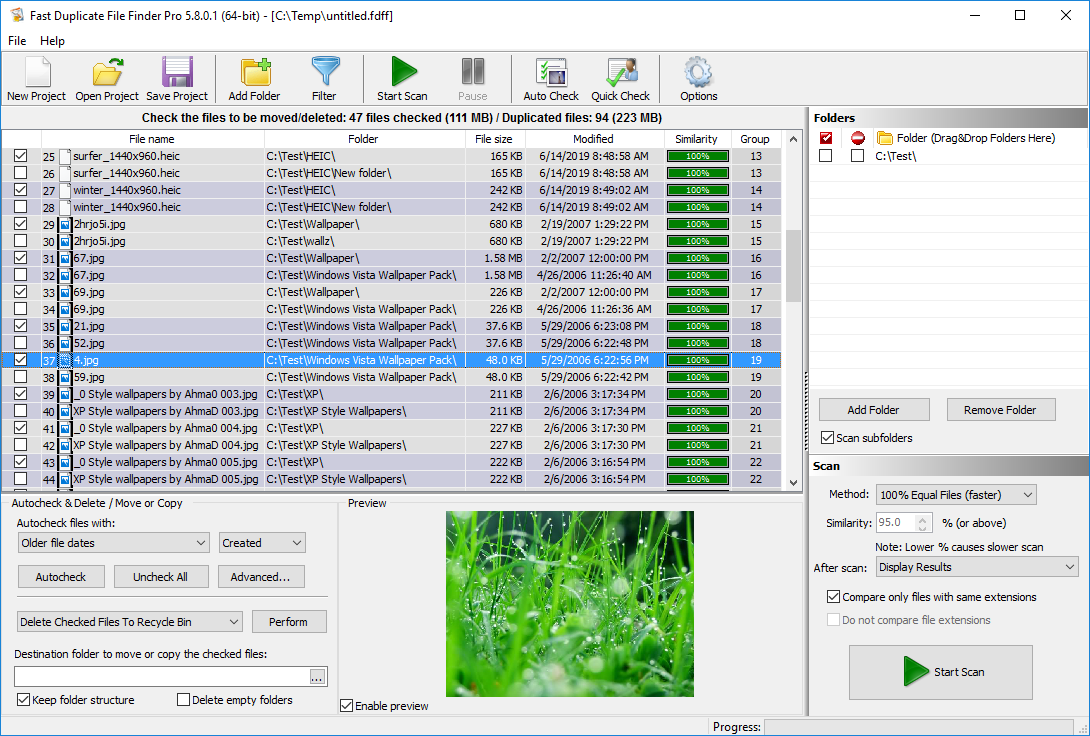
The easiest way to find duplicates is by using the free Duplicate File Finder app. It was chosen as the best duplicate file finder and provides many features, fast performance, and accurate results. Choosing a reliable duplicate finder is extremely important as many similar tools use CRC or MD5 checksums to identify duplicates. That may produce incorrect results and lead to loss of data. In contrast, FDFF is a reputable tool that you can trust as it is 20 years on the market. It uses an optimized byte-to-byte comparison that guarantees correct results. In addition to finding duplicate files, it can also find similar files and find similar file names.
Find Duplicate Files
Duplicate Finder Benefits
Comprehensive Features: FDFF offers an array of features to streamline duplicate file removal. Advanced search algorithms and customizable scan settings ensure efficient identification and elimination. Its intuitive user interface simplifies navigation through options and settings.
Fast Performance: FDFF lives up to its name with lightning-fast performance. Scan your entire file system in minutes. Reclaim valuable disk space and improve system performance. Say goodbye to wasted time waiting for scans to complete. The multi-threaded scan feature of this tool allows it to compare duplicates simultaneously. That significantly speeds up the process. Its exceptional speed ensures that the only limiting factor is the performance of your storage.
Accurate Results: Unlike tools relying on CRC or MD5 checksums, FDFF employs advanced byte-to-byte analysis for precise identification. This duplicate finder stands out from others by accurately comparing files and ensuring that the listed files are genuine duplicates.
Reliability: With over 20 years of market experience, FDFF has earned a reputation for trustworthiness. Its longevity underscores its reliability and effectiveness. Whether you’re a novice or a seasoned IT professional, FDFF provides reliability and performance.
Versatile Functionality: Beyond duplicate file detection, FDFF offers additional features like finding similar files and identifying files with similar names. Seamlessly manage a variety of file management tasks with ease and efficiency. From cleaning up your music library to organizing photos, FDFF has the tools to get the job done swiftly and effectively.
Internal Preview: FDFF’s internal preview feature allows direct file previewing within the application. Quickly assess duplicate file contents and make decisions without opening external programs. Simplify decision-making, save time, and optimize file organization and disk space with FDFF’s internal preview feature.
Duplicate Finder Verdict
Overall, Fast Duplicate File Finder offers the easiest and most effective way to find and remove duplicate files from your Windows PC. With its comprehensive features, fast performance, and accurate results, FDFF is the ultimate solution for optimizing your file system and reclaiming valuable disk space.
Download the free Duplicate File Finder
Remove Duplicate Files Using File Explorer
Follow these steps to find and remove duplicate files on Windows:
- Click the Start menu and enter Indexing Options in the search. Then click Indexing Options.

Indexing Options
- Click Modify, and then select Show all locations. A pop-up will appear to ask for your login details. Make sure that you are using an administrator account when doing any modification using this setting.

Index All Files
- Check all boxes in the Change Selected Locations list and close the window.
- Open the Windows File Explorer and navigate to the folder or drive where you want to find duplicate files.

Find Duplicate Files in Windows Explorer
- In the upper-right corner type the file types that you want to search for:
IMAGES .heic, .jpg, .bmp, .png, .gif VIDEOS .mkv, .avi, .wmv, .mov, .mp4, .3gp MUSIC .mp3, .aiff, .wav, .wma, .ogg WORD Documents .doc, .docx MICROSOFT POWERPOINT .ppt, .pptx EXCEL Spreadsheets .xls, .xlsx, .csv PDF FILES .pdf TEXT FILES .txt, .csv, .nfo, .xml EXECUTABLE PROGRAMS .exe, .com - Sort the search results by Name:
- On the toolbar click Sort and choose Name
- Click Sort again then Group By and choose Name
- Review the listed duplicate files. You should pay attention to the Date modified and also the Size properties. The newer and larger files are supposed to be the latest revisions of your files. You can also see the contents of some files like images in the Preview panel.
Find and Delete Duplicate Images
- Mark the files that you do not need and click DELETE to remove the duplicates.
Finding Duplicates in File Explorer Conclusion
In conclusion, when you follow these steps to remove duplicate files using File Explorer, you’ll find it’s a viable option. Unfortunately, it does require some manual effort. You’ll need to adjust indexing options, navigate through folders, and individually review files to identify duplicates.
This process can be time-consuming, especially if you have a large number of files to sort through. Additionally, relying solely on File Explorer may not provide the efficiency and flexibility you need for effective duplicate file management.
That’s where tools like Fast Duplicate File Finder come in. FDFF automates the process, quickly scanning for duplicate files and allowing you to customize your search criteria. It marks duplicates for deletion, saving you time and effort. Best of all, FDFF is free to use, making it a cost-effective solution for managing your file system and reclaiming storage space on your Windows PC.
While File Explorer can help you identify and remove duplicate files, you may find FDFF to be a more convenient and efficient option for comprehensive duplicate file management.
Delete Duplicate Files Using Windows PowerShell
PowerShell is an advanced alternative to the Windows command line. It is installed by default on newer Windows versions and you can use it directly. If you are using an older Windows like Windows 7 you can download and install PowerShell from the Microsoft website. Please bear in mind that PowerShell is a powerful scripting console.
If you do not feel comfortable working with scripts or you are not familiar with consoles then you should better use the previous methods to find and remove duplicate files. The console is a powerful tool, but if you are not familiar with it, you may end up accidentally deleting important data.
Find Duplicate Files With the Same Content
Follow these steps to find duplicate files with the same content in PowerShell:
- Click on the Windows button and type PowerShell and click on the app to start it.
- In the PowerShell console type:
cd c:\your_folderto navigate to the folder in which you want to find duplicate files. You should replace the drive and the folder name in the CD command with the ones that you want to scan.
Get-ChildItem -Recurse -File `What this code does is to find and group all files with equal file sizes. Then it removes the groups that have only one file. Next, it generates the MD5 hash of all the files and groups them together by hash. Finally, it removes the groups with less than two items.
| Group-Object -Property Length `
| ?{ $_.Count -gt 1 } `
| %{ $_.Group } `
| Get-FileHash `
| Group-Object -Property Hash `
| ?{ $_.Count -gt 1 } `
| %{ $_.Group } - Review the results and delete the duplicates
Find Duplicate Files With the Same Names
Follow these steps to find files with the same names in PowerShell:
- Run PowerShell by clicking on the Start menu and typing PowerShell in the search.
- Use the CD command to go to the folder that you want to scan for duplicates. In the console type:
CD DRIVE:\folder - To find duplicate files with the same names type the following code in the console:
gci -Recurse -file | Group-Object name | Where-Object { $_.Count -gt 1 } | select -ExpandProperty group | %{ $_.fullname }What it does is to group all files with the same names together. Then it removes the groups that contain less than two files. - Review the listed files and delete the ones that you do not need.
In conclusion, using Windows PowerShell to delete duplicate files offers a powerful alternative for those comfortable working with scripts and consoles. While it provides advanced functionality for identifying and removing duplicates based on file content or name, it’s essential to exercise caution. PowerShell commands can have significant consequences, especially if you’re not familiar with scripting or console operations. If you’re uncertain or prefer a more user-friendly approach, it may be best to stick with other methods for managing duplicate files. Always review the results carefully before deleting any files to avoid unintentional data loss.
Conclusion
In summary, we have explored multiple free methods to help you efficiently find and remove duplicate files on your Windows PC. Whether you opt for using File Explorer, PowerShell, or a dedicated app like Fast Duplicate File Finder, each approach has its merits and considerations.
Using File Explorer provides a manual yet viable option for locating duplicate files. However, it requires adjusting indexing options, navigating through folders, and individually reviewing files, which can be time-consuming and labor-intensive. While this method may suffice for some users, it may lack the efficiency and flexibility needed for comprehensive duplicate file management.
On the other hand, PowerShell offers an advanced alternative for those comfortable with scripts and consoles. It allows for precise identification and removal of duplicate files based on content or name. However, PowerShell commands can be complex and have significant consequences if not used correctly, making it less suitable for novice users or those unfamiliar with scripting.
In contrast, tools like Fast Duplicate File Finder automate the process, swiftly scanning for duplicates and marking them for deletion. With its comprehensive features, fast performance, and accurate results, FDFF stands out as the ultimate solution for optimizing your file system and reclaiming valuable disk space. Best of all, it’s free to use, making it a cost-effective option for managing duplicate files on your Windows PC.
While each method has its advantages, choosing the right approach depends on your comfort level with technology, the size of your file collection, and your specific requirements. By following this detailed guide and considering your options carefully, you can effectively organize your disk space and ensure a clutter-free file system on your Windows PC.
Table of contents
- A Few Reasons Why It Is Useful to Remove Duplicate Files
- How to Find Duplicate Files and Photos and Delete Them on Windows 11/10
- Method 1: Use third-party software to remove duplicate files
- Method 2: Use Windows File Explorer to find and delete duplicates
- Method 3: Use the Windows Photos app to find duplicate photos
- How to Delete Duplicate Files and Photos: Explained
- FAQ
If your storage space is getting full, one of the ways to declutter your system is to remove duplicates. I’ll show you the best way to find duplicate files and photos and delete them safely. Keep reading… Duplicate files and photos do nothing but take up space, slow down your computer, and make it harder to find the originals when you need them. While a few extra files may seem harmless—especially on a 500GB or 1TB hard drive—they can pile up over time. I take a lot of screenshots as a tech writer, and I used to ignore them too. But eventually, those seemingly small 500KB images, along with other large files, turned organizing my PC into a chore. If you’re in the same boat, don’t worry—I’m not here to judge. Instead, I’ll show you how to easily find and delete duplicate files (including photos) so you can free up space and keep your system clutter-free. Let’s begin.
A Few Reasons Why It Is Useful to Remove Duplicate Files
Below are some common reasons why you need to clean your workspace from duplicates:
- Save your storage space. Too many duplicate files take up a lot of space on your hard drive. The more you ignore them, the more your system gets littered with them.
- Improve your PC performance. Cluttered storage tends to slow down PCs.
- Reduce clutter and stay organized. Deleting duplicates makes it easy to find any document and photo and organize them. And this can save you time.
If you want to take control of your storage space, make it easy to manage your files, and overall improve your computer performance , carefully go through the next section. I’ll show you ways to achieve these advantages.
How to Find Duplicate Files and Photos and Delete Them on Windows 11/10
In this section, I’ll walk you through ways to find duplicates and remove them, starting from the easiest to the more techy method:
Method 1: Use third-party software to remove duplicate files
There are several tools available to help you easily find duplicate files and photos on Windows 11 and 10 almost instantly, like Auslogics BoostSpeed , CCleaner Duplicate Finder , Duplicate Cleaner , and dupeGuru . To make a comprehensive decision about which tool to choose, we have listed some crucial points to consider.
| Feature | Auslogics BoostSpeed | CCleaner Duplicate Finder | Duplicate Cleaner | dupeGuru |
|---|---|---|---|---|
| Accuracy of detection |
|
|
|
|
| Ease of use |
|
|
|
|
| Speed |
|
|
|
|
| Photo-specific features |
|
|
|
|
| Additional features |
|
|
|
|
| Pricing |
|
|
|
|
| Pros |
|
|
|
|
| Cons |
|
|
|
|
Key takeaways & recommendations:✅ Best for general use:Auslogics BoostSpeed (offers duplicate removal + PC optimization). ✅ Best free option:dupeGuru (open-source, works on Windows, Mac, and Linux). ✅ Best for advanced users:Duplicate Cleaner (highly customizable, deep scanning).
✅ Best for quick & simple use:CCleaner Duplicate Finder (easy one-click scanning). As an example of how to find and delete duplicate files and photos, we will use Auslogics BoostSpeed. This tool is not just a duplicate file finder but also a comprehensive system optimization solution that combines powerful cleaning features with ease of use.
You can also delete other stuff taking up space on your computer, such as temporary Windows and internet files, Windows Update files, system files, and more.
Here’s how to delete duplicates in Windows 11 and 10 using Auslogics BoostSpeed:
- Go to the official website to download and install the software .
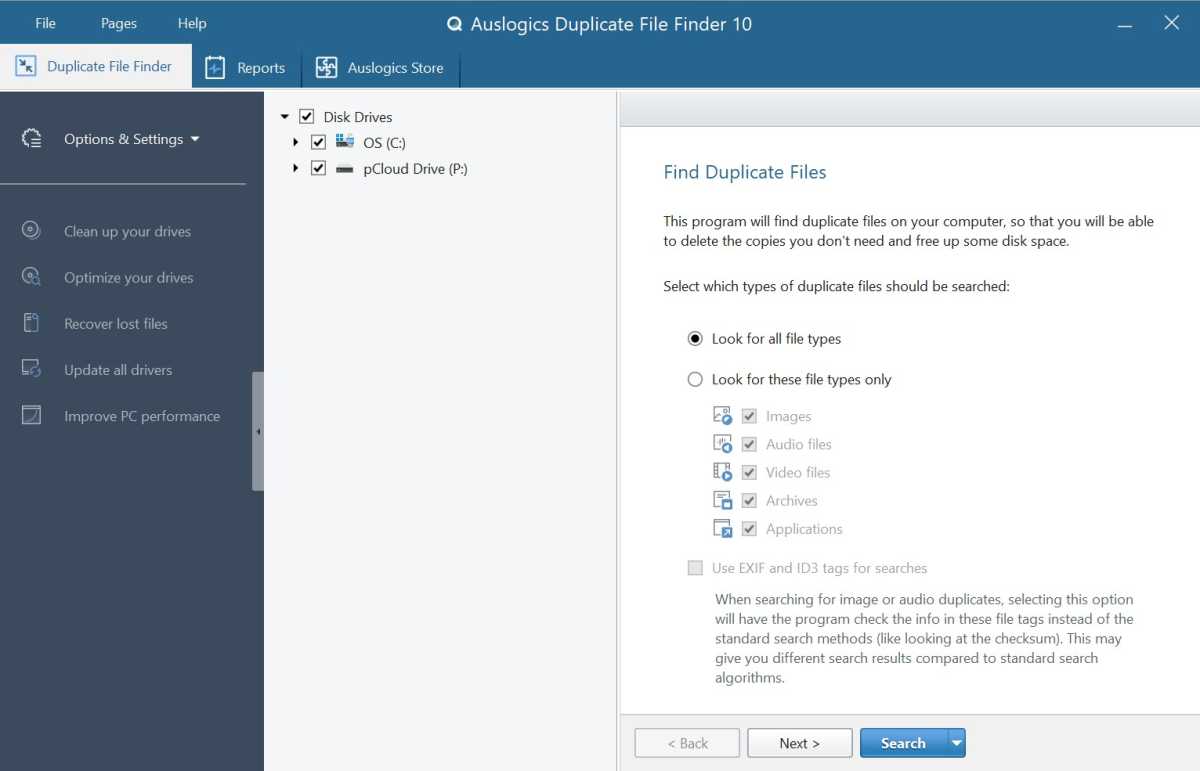
- Run the program and click Duplicate File Finder on the toolbar.
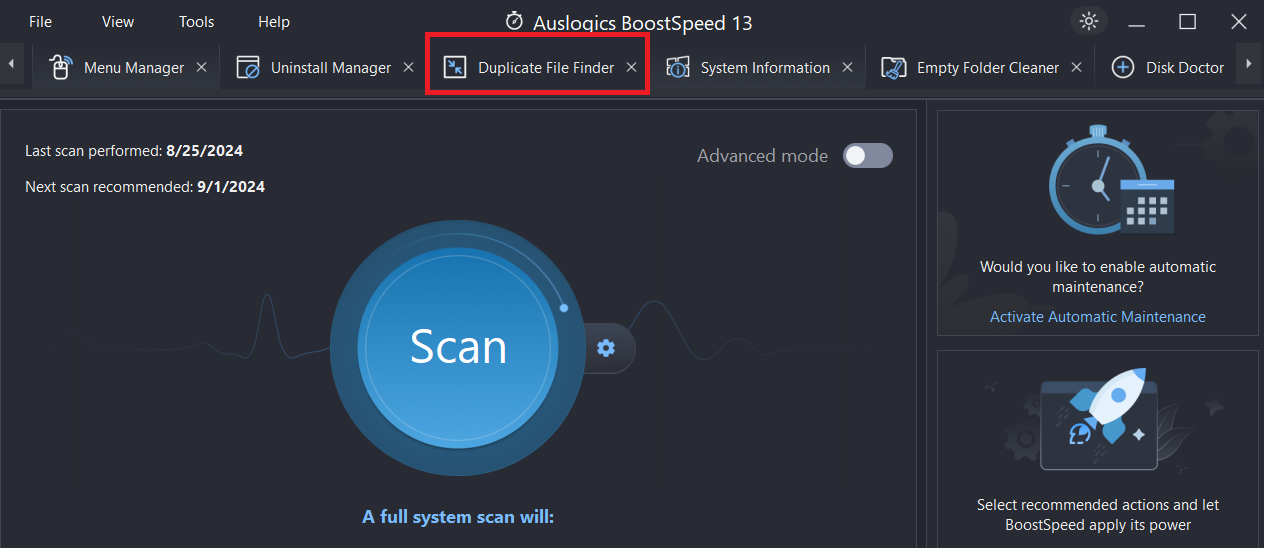
- If you can’t find the bar, click on All Tools and select Duplicate File Finder.
When the window opens, choose the drive you want to scan (if you have multiple drives) and select the files you want to search for. It can be videos, audio, images, etc. After that, click Next .
When you tick the Use EXIF and ID3 tags for searches option, BoostSpeed will be able to find duplicate photos and audio files even if you’ve renamed them, based on the EXIF and ID3 data. So, you will get a different result.
EXIF (Exchangeable Image File Format) tags are metadata embedded in image files and include details like the date and time a photo was taken. ID3 tags are metadata in audio files and may have information like title, artist, or album name. So, this option only works when searching for images and audio files.

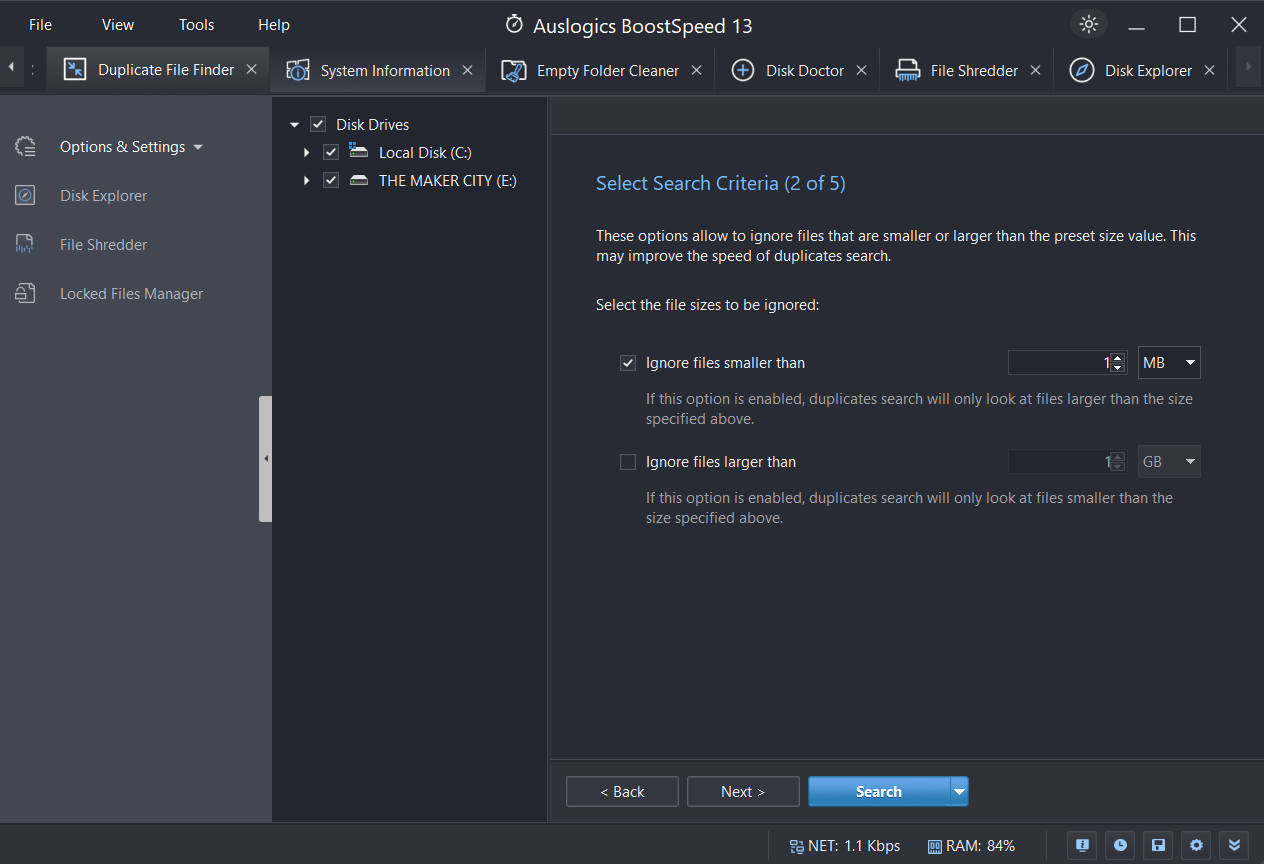
- In the next step, you can choose the file sizes you want to ignore in megabytes, gigabytes, and kilobytes. When you’re done, select Next .
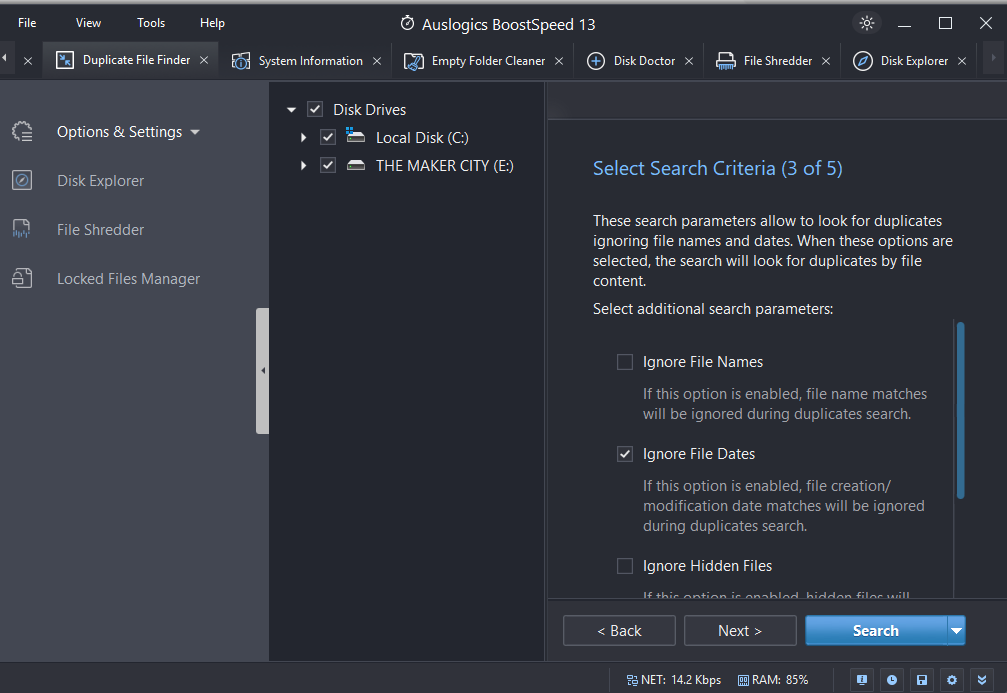
- You have the option to ignore file names, file dates, and even hidden files. When you check the Do not search in subfolders box, the search will only focus on the folders but not the folders within them. Click Next .
- Here, you get to narrow down your search to get the most accurate results. If you’re searching for a specific file but you don’t remember the name, but only part of it, you can enter it here. Choose Next after that.

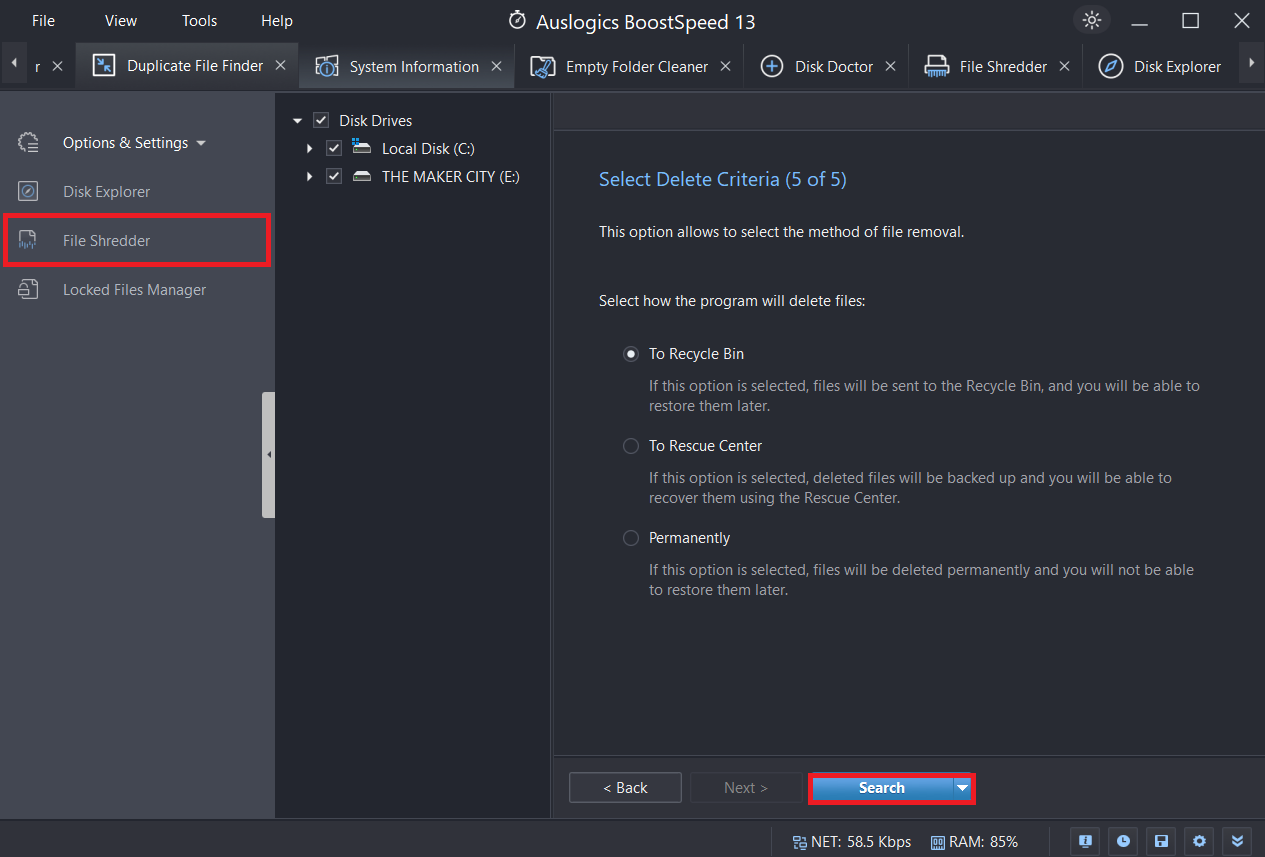
- Finally, you can decide how BoostSpeed should discard the duplicates. You can choose to delete it permanently or send it to the Recycle Bin. However, if you select To Rescue Center , it’ll back up the deleted files to recover them at a later date.
- Click Search to start the scan and wait as the software does its magic.
Note
That said, if you want to permanently delete files, especially those that contain sensitive information, you can use File Shredder . You’ll find it on the left side under Options & Settings .
PRO TIP
If you don’t want to go through all these five steps, just click on Search, and BoostSpeed will use the default settings to search for duplicates. After the scan, you’ll get the results and decide which ones to delete. Auslogics BoostSpeed is more than just a tool for removing duplicate photos and files.
It also helps you delete other clutter from your PC, including temporary files, old Windows update files, and leftover data from uninstalled programs and apps. Additionally, it can defragment your drives and clean the registry. Overall, you get a fully optimized PC, ready for a longer lifespan.
Method 2: Use Windows File Explorer to find and delete duplicates
You can use the built-in File Explorer to sort your files and photos, find duplicates, and delete them from your Windows PC. Here is how: Step 1: Enable indexing for faster search
- Press the
Windows logo key + Skeyboard combination to open the search bar. - Type in indexing options . Then click Open in the right-side menu.
- Click on the Modify button.
- When a new window opens, select Show all locations .
- Go to the Change selected locations section and select every checkbox. Then click on the OK button.
Step 2: Sort files by name to identify duplicates
- Open File Explorer (
Win + E) and select This PC on the left menu pane.
- Then, go to Local Disk (C:) and open the Users folder.
- Open the View tab at the top of the window and select Preview pane .
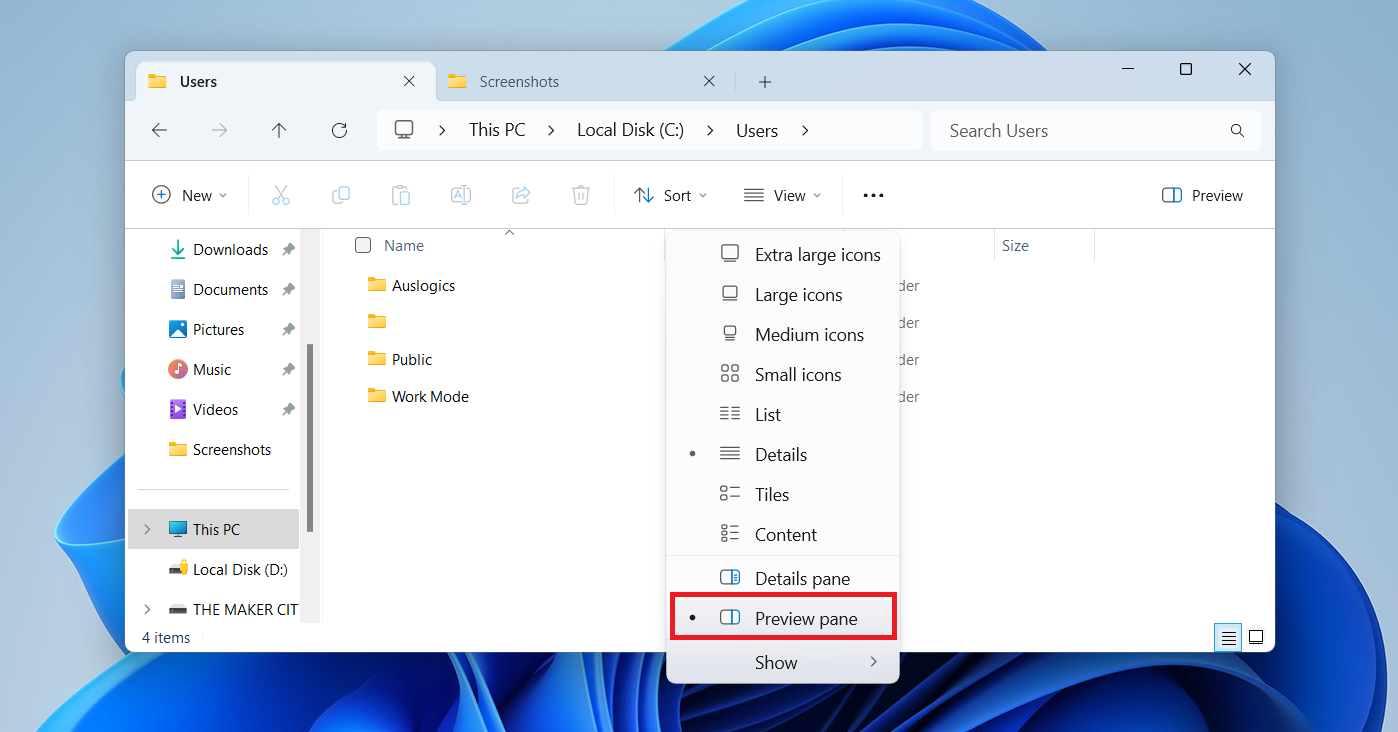
- In the Layout section, choose Details to display file details.