
The virus and threat protection page of the Windows Security app is designed to help you safeguard your device against various threats such as viruses, malware, and ransomware. The page provides access to several features and settings to ensure comprehensive protection, and it’s divided in the following sections:
-
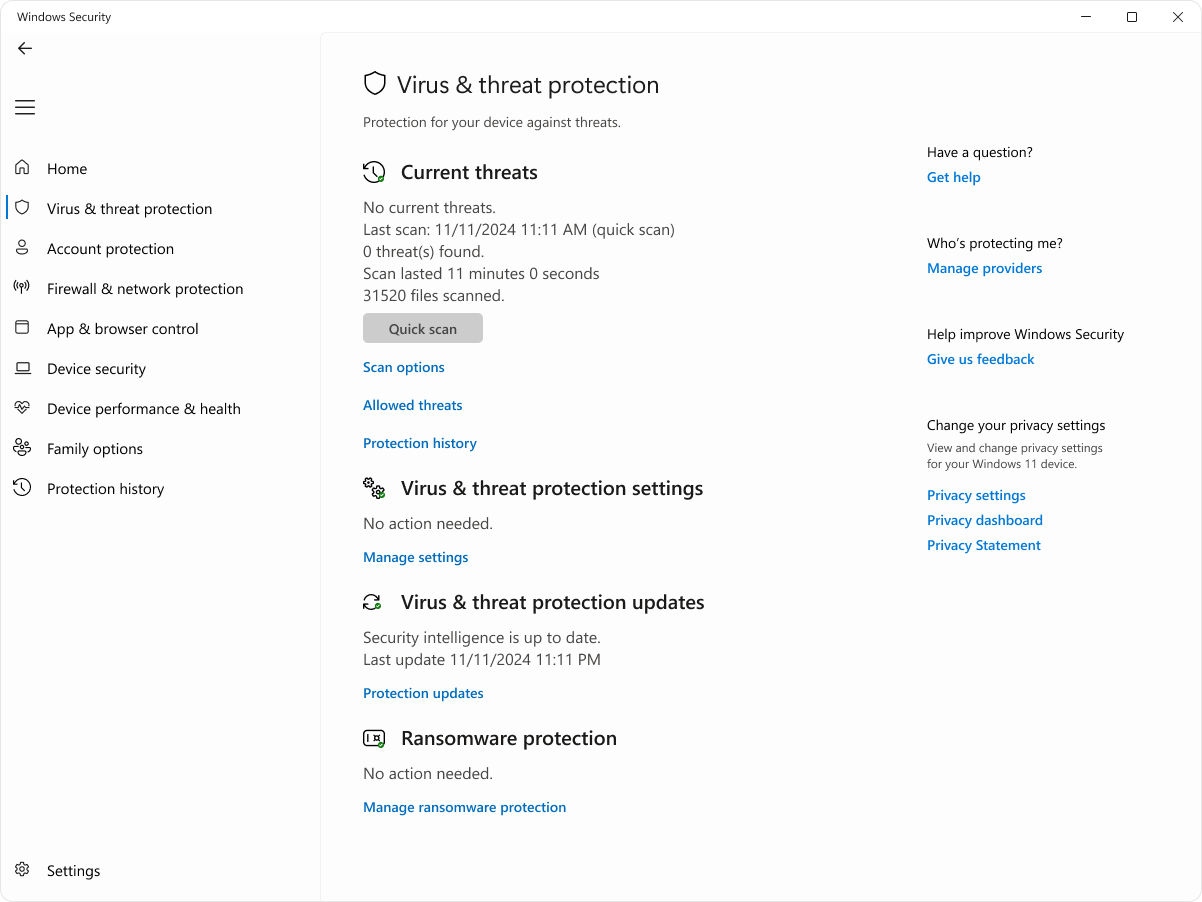
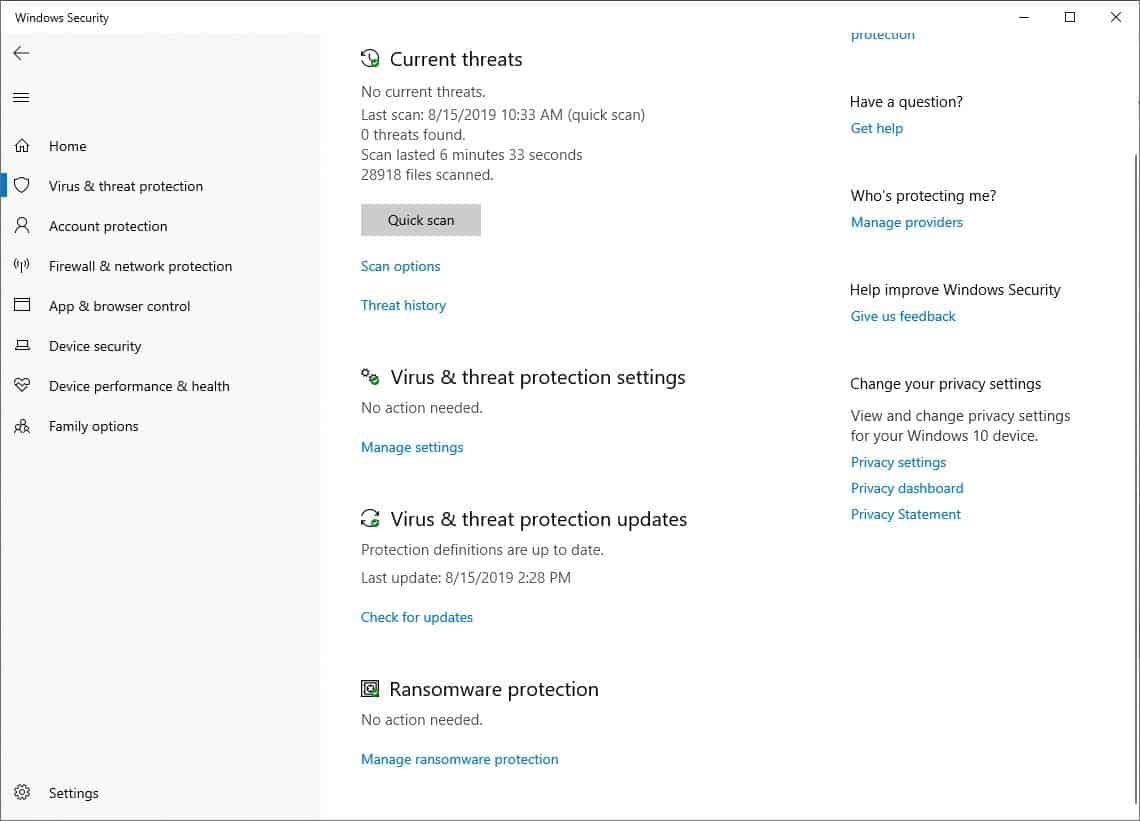
Current threats: This section displays any threats currently found on your device, the last time a scan was run, how long it took, and how many files were scanned. You can also start a new quick scan or choose from other scan options for a more extensive or custom scan
-
Virus & threat protection settings: In this section you can manage settings for Microsoft Defender Antivirus and third-party antivirus products
-
Virus & threat protection updates: This section is dedicated to ensuring that your device is protected with the latest security intelligence updates
-
Ransomware protection: In this section you can configure Controlled folder access, which prevents unknown apps from changing files in protected folders. It also offers options to configure OneDrive to help you recover from a ransomware attack
In the Windows Security app on your PC, select Virus & threat protection, or use the following shortcut:
Virus & threat protection
Current threats
Under Current threats you can:
-
See any threats currently found on your device
-
See the last time a scan was run on your device, how long it took, and how many files were scanned
-
Start a new quick scan or go open Scan options to run a more extensive or custom scan
-
See threats that have been quarantined before they can affect you and anything identified as a threat that you have allowed to run on your device
Even though Windows Security is turned on and scans your device automatically, you can perform an additional scan whenever you want.
-
Quick scan: This option is useful when you don’t want to spend the time running a full scan on all your files and folders. If Windows Security recommends that you run one of the other types of scans, you’ll be notified when the quick scan is done
Start a quick scan
-
Full scan: Scans every file and program on your device
Start a full scan
-
Custom scan: Scans only files and folders that you select
Start a custom scan
-
Microsoft Defender Antivirus (offline scan): Uses the latest definitions to scan your device for the latest threats. This happens after a restart, without loading Windows, so any persistent malware has a more difficult time hiding or defending itself. Run it when you are concerned that your device has been exposed to malware or a virus, or if you want to scan your device without being connected to the Internet. This will restart your device, so be sure to save files you may have open. Microsoft Defender Offline will load and perform a quick scan of your PC in the Windows Recovery Environment. When the scan completes, your PC automatically restarts
Start an offline scan
Note: To see the results of the offline scan, open the Windows Security app on your Windows device and select Protection history.
To see the results of the offline scan, open the Windows Security app on your Windows device and select Protection history
The Allowed threats page shows a list of items that Windows Security has identified as threats, but that you have chosen to allow. Windows Security won’t take any actions against threats you’ve allowed.
If you have accidentally allowed a threat and want to remove it, select it from the list, then select the Don’t allow button. The threat will be removed from the list and Windows Security will once again act on it the next time it sees this threat.
Virus & threat protection settings
Use Virus & threat protection settings when you want to customize your level of protection, send sample files to Microsoft, exclude trusted files and folders from repeated scanning, or temporarily turn off your protection.
In the Windows Security app on your PC, select Virus & threat protection > Manage settings or use the following shortcut:
Virus & threat protection settings
Real-time protection is a feature in the Windows Security app that continuously monitors your device for potential threats such as viruses, malware, and spyware. This feature ensures that your device is actively protected by scanning files and programs as they are accessed or executed. If any suspicious activity is detected, real-time protection will alert you and take appropriate action to prevent the threat from causing harm.
You can use the Real-time protection setting to turn it off temporarily; however, real-time protection will turn back on automatically after a short while to resume protecting your device. While real-time protection is off, files you open or download won’t be scanned for threats. Keep in mind that if you do, your device might be vulnerable to threats and that scheduled scans will continue to run. However, files that are downloaded or installed won’t be scanned until the next scheduled scan.
You can turn Real-time protection On or Off using the toggle button.
Notes:
-
If you just want to exclude a single file or folder from antivirus scanning, you can do that by adding an exclusion. This is safer than turning the entire antivirus protection off
-
If you install a compatible non-Microsoft antivirus program Microsoft Defender antivirus will automatically turn itself off
-
If tamper protection is turned on, you’ll need to turn it off before you can turn Real-time protection off
Note: Dev Drive protection is not available on Windows 10.
Dev Drive Protection provides a secure and isolated space for developers to store and work on their code, ensuring that their development environment is protected from potential threats and vulnerabilities.
Dev Drive Protection includes a performance mode that scans the Dev Drive asynchronously. This means that security scans are deferred until after the file operation has completed, rather than being performed synchronously while the file operation is being processed. This asynchronous scanning mode provides a balance between threat protection and performance, ensuring that developers can work efficiently without experiencing significant delays due to security scans.
-
You can turn Dev Drive protection On or Off using the toggle button
-
Select See volumes to review the list of volumes that have Dev Drive protection enabled
To learn more, see Protect Dev Drive using performance mode.
This setting allows Microsoft Defender to get constantly updated improvements from Microsoft while you’re connected to the internet. This will result in more accurately identifying, stopping, and fixing threats.
If you’re connected to the cloud with cloud-delivered protection, you can have Defender automatically send suspicious files to Microsoft to check them for potential threats. Microsoft will notify you if you need to send additional files, and alert you if a requested file contains personal information so you can decide whether or not you want to send that file or not.
If you’re concerned about a file and want to make sure it was submitted for evaluation you can select Submit a sample manually to send us any file you want.
Tamper protection is a feature that helps prevent malicious apps from changing important Microsoft Defender Antivirus settings. This includes settings such as real-time protection and cloud-delivered protection. By ensuring these settings remain unchanged, tamper protection helps maintain the integrity of your device’s security configuration and prevents malicious apps from disabling critical security features.
If tamper protection is turned on and you’re an administrator on your device, you can still change these settings in the Windows Security app. However, other apps can’t change these settings.
You can turn tamper protection On or Off using the toggle button.
Note: Tamper protection doesn’t affect how third-party antivirus apps work or how they register with Windows Security.
Use the Controlled folder access setting to manage which folders untrusted apps can make changes to. You can also add additional apps to the trusted list so they can make changes in those folders. This is a powerful tool to make your files safer from ransomware.
When you turn on Controlled folder access, many of the folders you use most often are protected by default. This means that content in any of these folders cannot be accessed or changed by any unknown or untrusted apps. If you add additional folders, they become protected as well.
Learn more about using Controlled folder access
By default, Microsoft Defender Antivirus runs in the background, scanning files and processes that you open or download looking for malware.
There might be instances when you have a particular file or process that you don’t want scanned in real-time. When that occurs, you can add an exclusion for that file, file type, folder or process.
Caution: Adding an exclusion to Windows Security means that Microsoft Defender Antivirus will no longer check those types of files for threats, which could leave your device and data vulnerable. Make sure you really want to do this before you proceed.
Exclusions only apply to real-time scanning with Microsoft Defender Antivirus. Any scheduled scans with Microsoft Defender Antivirus, or third-party antimalware products, might still scan these files or processes.
To add an exclusion
-
Select Add or remove exclusions
-
Choose one of the four options depending upon the type of exclusion you’re trying to add:
-
File: Excludes a specific file
-
Folder: Excludes a specific folder (and all of the files within that folder)
-
File type: Excludes all files of a specified type, such as .docx, or .pdf
-
Process: Adding an exclusion for a process means that any file opened by that process will be excluded from real-time scanning. These files will still be scanned by any on-demand or scheduled scans, unless a file or folder exclusion has also been created that exempts them
Tip: It’s recommended that you use the full path and file name to exclude a specific process. This makes it less likely that malware could use the same filename as a trusted and excluded process and evade detection.
To remove an exclusion
Caution: Excluding a file or process from antivirus scanning can make your device or data more vulnerable. Be certain you want to do this before you proceed.
-
Select Add or remove exclusions
-
Select the exclusion that you want to remove and select Remove
Using wildcards or environment variables
You can use a wildcard «*» to substitute for any number of characters.
-
In file type exclusions: If you use an asterisk in the file extension it acts as a wildcard for any number of characters. «*st» will exclude .test, .past, .invest, and any other file types where the extension ends in a st
-
In process exclusions:
-
C:\MyProcess\* will exclude files opened by all processes, located in C:\MyProcess, or any subfolders of C:\MyProcess
-
test.* will exclude files opened by all processes named test, regardless of the file extension
-
You can use environment variables in your process exclusions as well. For example:
-
%ALLUSERSPROFILE%\CustomLogFiles\test.exe
This will exclude any files opened by C:\ProgramData\CustomLogFiles\test.exe. For a complete list of Windows environment variables see: Recognized Environment Variables.
Virus & threat protection updates
Security intelligence (sometimes referred to as definitions) are files that contain information about the latest threats that could infect your device. Windows Security uses security intelligence every time a scan is run.
Windows automatically downloads the latest security intelligence as part of Windows Update, but you can also manually check for it.
In the Windows Security app on your PC, select Virus & threat protection> Protection updates > Check for updates or use the following shortcut:
Check for updates
Ransomware protection
The Ransomware protection page in Windows Security has settings for both protecting against ransomware, and recovering if you happen to get attacked.
In the Windows Security app on your PC, select Virus & threat protection> Manage ransomware protection or use the following shortcut:
Manage ransomware protection
Controlled folder access is designed to protect your valuable data from malicious apps and threats, such as ransomware. This feature works by checking apps against a list of known, trusted apps and blocking unauthorized or unsafe apps from accessing or changing files in protected folders.
When Controlled folder access is enabled, it helps safeguard your data by:
-
Blocking unauthorized changes: Only trusted apps are allowed to make changes to files in protected folders. If an app is determined to be malicious or suspicious, it will be blocked from making any changes
-
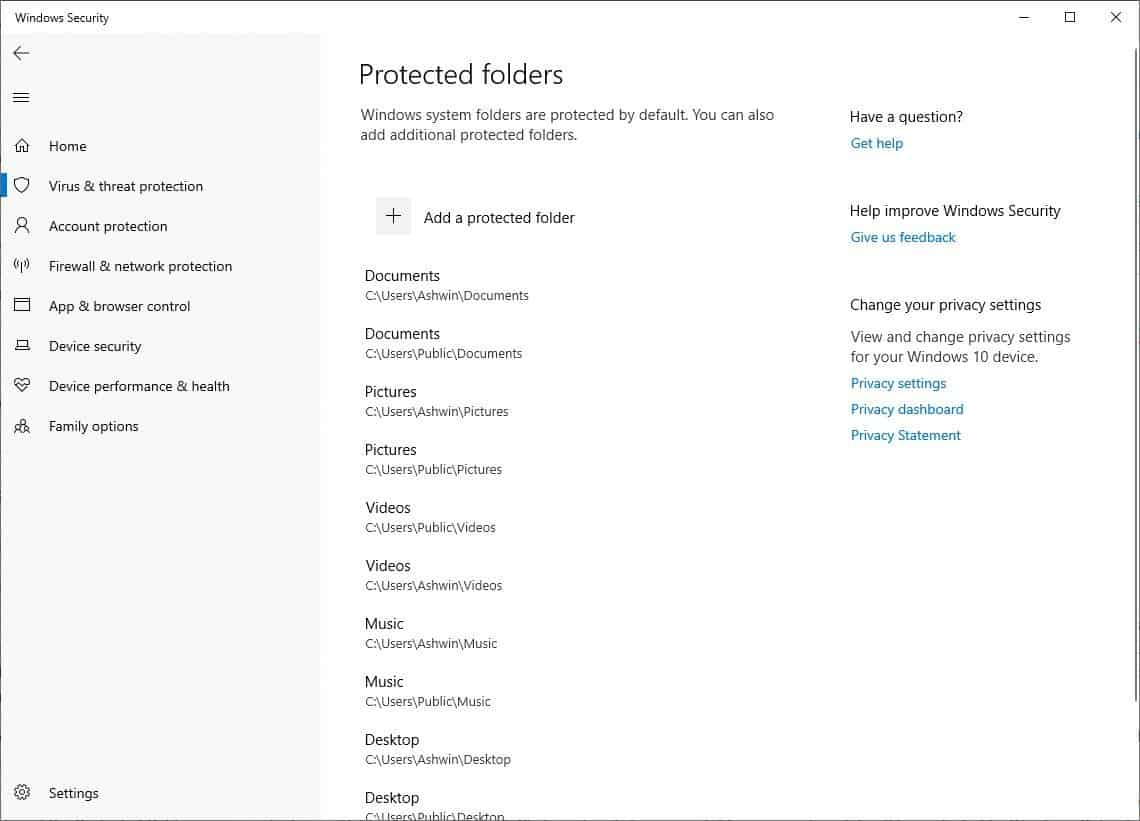
Protecting important folders: By default, Controlled Folder Access protects common folders such as Documents, Pictures, Videos, Music, and Desktop. You can also add additional folders to be protected
-
Providing notifications: If an app is blocked from making changes, you will receive a notification, allowing you to take appropriate action
To add or remove protected folders, select Protected folders or use the following shortcut:
Protected folders
To add or remove an app through Controlled folder access, select Allow an app through Controlled folder access or use the following shortcut:
Allow an app through Controlled folder access
Caution: Be thoughtful about which apps you add. Any added apps will be able to access the files in the protected folders and if that app gets compromised the data in those folders could be at risk.
If you receive the message App is blocked when you try to use a familiar app, you can unblock using the following steps:
-
Take note of the path of the blocked app
-
Select the message, and then select Add an allowed app
-
Browse for the program to which you want to allow access
Note: If you try to save a file to a folder and the folder is blocked, that means the app you’re using is blocked from saving to that location. If that happens, save the file to another location on your device. Then use the previous steps to unblock the app, and you’ll be able to save the files to your desired location.
For more details about controlled folder access see Protect important folders with controlled folder access.
The Ransomware Data Recovery section is designed to help you recover your files in case of a ransomware attack. It provides several key functionalities to ensure that your data remains safe and can be restored if it gets encrypted or blocked by ransomware.
The Ransomware Data Recovery section is integrated with Microsoft OneDrive. This allows you to back up your important files to OneDrive, ensuring that you have a secure copy of your data that can be restored in case of a ransomware attack. If your files are affected by ransomware, the Windows Security app will guide you through the process of restoring your files from OneDrive. This helps you quickly recover your data without having to pay the ransom.
You will receive notifications and alerts if ransomware is detected or if there are any issues with your OneDrive backup. This ensures that you are always aware of the status of your data protection.
Download Windows Speedup Tool to fix errors and make PC run faster
To protect your system from Ransomware, Microsoft has introduced Ransomware Protection in Windows Defender. In this post, we will learn how to enable and configure Ransomware Protection, Controlled folder access, and Protected folders in Windows 11/10.

Ransomware is a type of malware that locks your files, data, or the PC itself and extorts money from you in order to provide access. This is a new way for malware writers to ‘collect funds’ for their illegitimate activities on the web.
To enable Ransomware protection in Windows Security or Microsoft Defender:
- Open Windows Defender
- Select Virus and threat protection
- Click on Manage ransomware protection
- Turn ON Controlled folder access
- Add the folders you want to protect.
Let us see the procedure in detail.
Launch Windows Security by right-clicking on its system tray icon

Click on View security dashboard
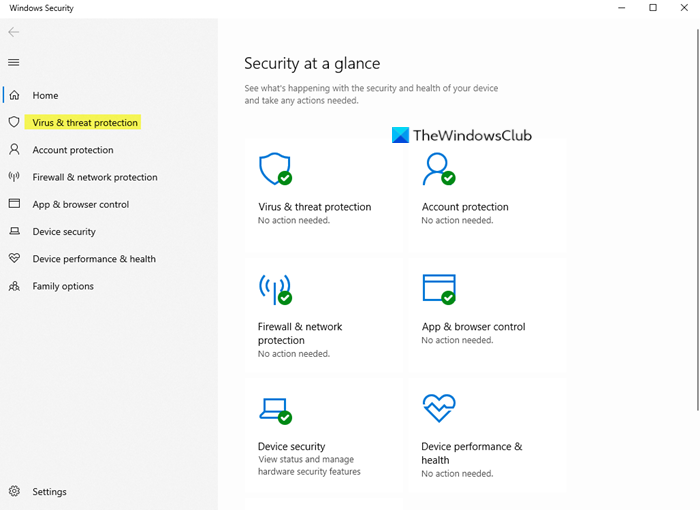
From the left side, select Virus and threat protection.
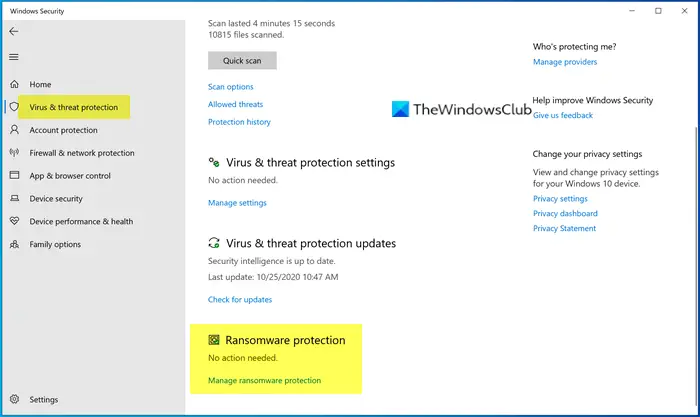
Under Ransomware protection, click on Manage ransomware protection.
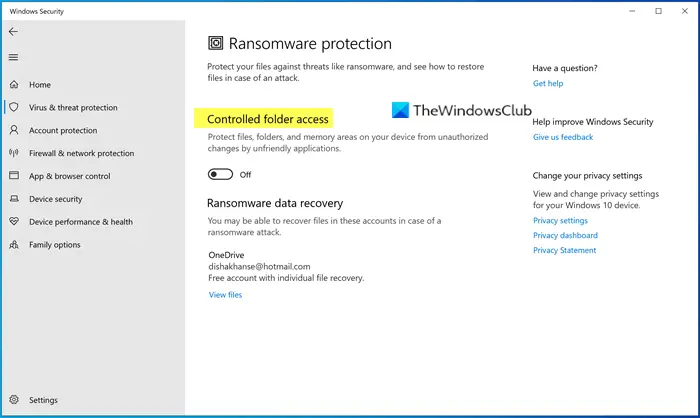
Turn ON Controlled folder access. This feature protects files, folders, and memory areas on your system from unauthorized changes by malware.
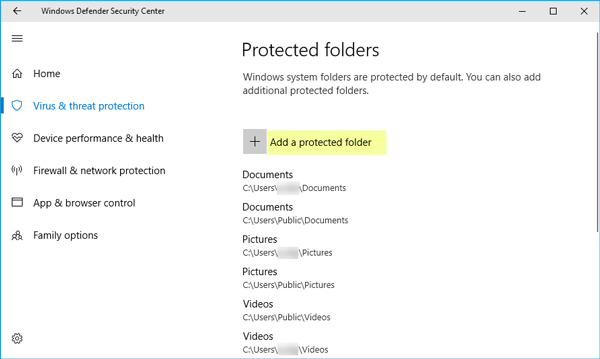
Then you will find two more options – Protected folders and Allow an app through Controlled folder access. Click on “Protected folders” to manage the folders that are being protected right now. You may not be able to remove any folder from the list, but you can certainly add more folders by clicking on the Add a protected folder button.
If you have enabled Controlled folder access on a folder and if any unauthorized app or process tries to access it and change its contents, the attempt will be stopped, and you will see the Unauthorized changes blocked notification in the bottom right corner of your screen.
The only reason ransomware is created is because the malware writers see it as an easy way to make money. Vulnerabilities such as unpatched software, outdated operating systems, or people’s ignorance are beneficial for such people with malicious and criminal intentions. Hence, taking preventive steps to protect yourself against Ransomware attacks is the best way.
Related reads:
- How to enable and use Controlled Folder Access
- How to allow Apps through Controlled Folder Access
- How to configure Controlled Folder Access using Group Policy & PowerShell
While Windows Defender offers this protection, you could instead, make use of some good free anti-ransomware software. While there are some ransomware decryptor tools available, it is advisable that you take the problem of ransomware attacks seriously. It not only endangers your data, but it can also breach your privacy to such an extent that it can harm your reputation.
How do I enable ransomware protection in Windows Defender?
To enable Ransomware Protection in Windows Defender, open Windows Security, go to Virus & threat protection, and click on Manage ransomware protection from the Ransomware protection option. You can enable enable or disable Ransomware.
Does Windows Defender detect ransomware?
If the Ransomware Protection option is turned on, Windows Defender will detect ransomware and take the necessary measures to resolve the issue. In order to enable or configure it, follow the instructions mentioned earlier.
Also Read: Add Controlled Folder Access commands to Context Menu.
Anand Khanse is the Admin of TheWindowsClub.com, a 10-year Microsoft MVP (2006-16) & a Windows Insider MVP (2016-2022). Please read the entire post & the comments first, create a System Restore Point before making any changes to your system & be careful about any 3rd-party offers while installing freeware.
Windows 10 is pretty cautious about security and lets you Enable Windows Defender Ransomware Protection. There are a number of antimalware software that claims to provide safeguard against the ransoms demanding threats and attacks. But the built-in tool has an edge over all those as it provides a shield staying on Windows 10 very easily.
What is a ransomware?
Ransomware is a more dangerous and stubborn form of Virus. Unlike normal infections, the ransomware threat causes you to pay money to repair the damage it does. Its function is based on its ability to nastily lock your files and then asking for ransoms if you wish to get them back. Being a victim of a ransomware disaster leaves you with two choices, firstly restore the stuff by paying out, secondly, get a software engine to remove the virus. These options, however, do not guarantee the permanent removal of the virus; hence the problems just take on a toll on your system and peace of mind.
The ransomware uses the encryption method to lock the data into a system. Regardless any other virus attack, the ransomware works in a way where the victim is properly informed and provided with instructions on how to recover. The mode through which payment is demanded is generally virtual in order to hide the identity of the cyber criminal.
How to Enable Windows Defender Ransomware Protection in Windows 10
Thankfully, the Windows 10 developers have already realized the bullying threat of a ransomware virus. If you have an updated version, you can enable windows defender ransomware protection in Windows 10. This feature is called the Controlled folder access which is introduced in the Falls Creator Update of Windows 10. Under this, the changes in apps are monitored. It sends you a notification as soon as a blacklisted app tries to make changes to a file or folder. Here’s how you can enable this feature:
Turn on Controlled folder access
Step-1: Simply open the Settings (Win+I) on your system and navigate Update & Security.
Step-2: Click on Windows Security (also known as Windows Defender). Select Virus & threat protection here in the right side panel.
Step-3: Go downward furthermore press Ransomware protection.
Step-6: On the next page, toggle the Controlled folder access to on, turning it blue. After you get a User account prompt, click Yes to enable the protection completely.
Step-7: Press the Protected folders link to see the list of System folders that are under safeguard.
Step-8: Click on the Add a protected folder icon which you wish to be saved from a ransomware virus.
Step-9: Choose an item and click Select Folder.
Note: You can add folders to the default list of the system folders, but you cannot remove that are already present such as documents, pictures or system folders.
Step-10: Click on Back icon on the top right corner to go back to the Ransomware protection again.
Step-11: Select Allow an app through controlled folder access.
Step-12: Click on Add an allowed app to include an application for protection.
Step-13: In the dialog box, select a file (having either .exe or .com extension) and press Open. Select Yes on UAC popup.
This way, you can manually choose folders and application simultaneously for Windows Defender Ransomware Protection in Windows 10.
Though this is the safe and secure way of enabling windows defender ransomware protection, there are some unknown disadvantages that come with this method. For instance, you will get a number of notifications when you run certain apps like Kindle or your webcam after applying the method. This is because certain apps run directly from system’s AppData directory source. Hence they automatically appear under the controlled folder access as a system file. These applications will need notifications to be allowed every now and again you start them.
As this is the part of the newest update of Windows 10, this feature might simply get unbalanced in the next update we get.
Alternatively, one can use another method which provides a much easier way to protect ransomware. One such software is the PowerShell which lets you enable controlled access in an easier way.
How to Enable Windows Defender Ransomware Protection in Windows 10 via cmdlet on PowerShell
Press Win+X and select Windows PowerShell from the list of options.
Click on Yes on the User account control prompt locking the screen.
To Enable Windows Defender Ransomware Protection in Windows 10 you can copy paste the syntax and press Enter –
Set-MpPreference -EnableControlledFolderAccess Enabled
To add folders to the list of protected app, use the cmdlet:
Add-MpPreference -ControlledFolderAccessProtectedFolders “<the folder to be protected>”
Under the ‘<>’ area, you can write the address of the folder you wish to add.
Conclusion
The ransomware virus seems to be quite treacherous simply by just knowing its function. For anyone, money is important and should not be invested in handling a hazard that could have been prevented. Windows 10 has given users an easy way to stay out of danger with controlled access.
Though the methods might not be for the tech-savvies, gaining knowledge about it and knowing how to use it can certainly save bucks in the process. The method to Enable Windows Defender Ransomware Protection in Windows 10 might is quite easy and worth learning.
In our increasingly digital world, the threat posed by ransomware attacks has become a major concern for individuals and organizations alike. Ransomware can cripple systems and cause devastating financial and data losses. Fortunately, Microsoft’s Windows Defender, which is integrated into the Windows operating system, offers a robust set of tools and features designed to help protect your system from ransomware. This article will provide an in-depth guide on enabling and configuring ransomware protection in Windows Defender, along with best practices to enhance your overall security.
Understanding Ransomware
Ransomware is a type of malicious software that encrypts a victim’s files, thereby locking them out of their data until a ransom is paid to the attacker. Common methods of distribution include phishing emails, malicious websites, and software vulnerabilities. The impact of a ransomware attack can be significant, leading to financial losses, reputational damage, and the potential loss of valuable data. Given this landscape, it becomes imperative to adopt preventative measures.
Windows Defender: An Overview
Windows Defender, now known as Microsoft Defender Antivirus (MDAV), is Microsoft’s integrated antivirus solution in Windows 10 and Windows 11. It provides real-time protection against malware and threats, including ransomware, using various features to ensure system security. One such feature includes the capability of implementing ransomware protection settings that can help mitigate the risk of an attack.
How Ransomware Protection Works in Windows Defender
Windows Defender incorporates a feature known as Controlled Folder Access, which is part of the broader ransomware protection system. Controlled Folder Access helps keep your important files safe from unauthorized changes by ransomware and other unwanted applications. When this feature is enabled, only allowed apps can access protected folders, thereby preventing potentially harmful software from making changes to your critical files.
Step-by-Step Guide to Enable and Configure Ransomware Protection
Step 1: Access Windows Security Settings
-
Open Windows Security:
- Click on the Start Menu and type Windows Security.
- Select the Windows Security app from the list.
-
Navigate to Virus & Threat Protection:
- In the Windows Security interface, click on «Virus & threat protection.»
Step 2: Check for Updates
Before enabling ransomware protection, ensure that your Windows Defender is up-to-date to provide the best protection against the latest threats.
- Update the Antivirus:
- In the «Virus & threat protection» section, click on «Check for updates.»
- Install any available updates to ensure your system has the latest definitions and features.
Step 3: Enable Ransomware Protection
-
Locate Ransomware Protection Settings:
- In the «Virus & threat protection» section, scroll down to find the «Ransomware protection» heading.
-
Turn on Controlled Folder Access:
- Click on «Manage ransomware protection.»
- Toggle the switch for «Controlled folder access» to On.
Step 4: Configure Controlled Folder Access
After enabling Controlled Folder Access, you can configure it to suit your needs. The configuration drives better protection by restricting which applications can access your important files.
-
Add Protected Folders:
- Under the Controlled folder access settings, you will find the option to add folders that you want to protect.
- Click on «Add a protected folder» and select the folder(s) you want to keep safe from unauthorized changes. Common choices may include Documents, Pictures, and other sensitive directories.
-
Allow Apps through Controlled Folder Access:
- Under the same settings, you can also add applications that you trust and want to allow access to your protected folders. Click on «Allow an app through Controlled folder access.»
- Click the «Add an allowed app» button.
- You can choose an app from the list or browse to locate it on your system.
Step 5: Review Your Settings
After configuring the necessary settings, it’s essential to review your configuration to ensure everything is in place and working as intended:
- Revisit the «Virus & threat protection» section.
- Confirm that Controlled Folder Access is on and that your chosen folders and apps are correctly listed.
Best Practices to Enhance Ransomware Protection
While Windows Defender provides robust ransomware protection features, supplementing them with best security practices can significantly boost your defenses.
Regular Backups
Always maintain regular backups of your data. Use an external hard drive or cloud storage solutions to keep a copy of important files. In case you fall victim to ransomware, having backups ensures you can restore your data without paying the ransom.
- Use built-in tools like File History or third-party applications for automated backups.
- Ensure that your backup is not accessible from your main network to avoid ransomware from potentially encrypting backup files.
Keep Your Software Updated
Keeping your operating system and all applications updated may help reduce vulnerabilities that ransomware could exploit.
- Enable automatic updates in Windows and ensure applications are updated frequently.
- Implement security patches as they become available.
Utilize Additional Security Software
Consider using additional security tools alongside Windows Defender for layered protection:
- Web filters: Use web-filtering software to block access to known malicious sites.
- Network firewalls: Ensure that your router and devices employ network-level firewalls for additional safeguards.
Educate Yourself and Your Team
If you are in a workplace setting, make sure that all team members are trained on recognizing phishing attempts and suspicious links.
- Conduct regular training sessions on cybersecurity awareness.
- Share resources that provide information about the latest ransomware trends.
Monitor Your System
Use Windows Defender’s built-in monitoring and reporting tools to stay informed about potential security threats and decide on actions needed to enhance your security.
- Regularly check the Windows Security dashboard for alerts or security recommendations.
- Review reports on detected threats and follow the suggested actions to mitigate risks.
What to Do If You Fall Victim to Ransomware
Should the unfortunate situation arise where your system is attacked by ransomware, take immediate action:
-
Disconnect from the Internet: This limits the ransomware’s ability to communicate with the attacker’s server.
-
Isolate the Infected Device: Remove any connected devices (like USB sticks) to prevent the spread of the infection.
-
Do Not Pay the Ransom: Paying does not guarantee the recovery of your files. Instead, it supports the crime, potentially making you a target again.
-
Contact Law Enforcement: Report the attack to appropriate authorities. This can help authorities in tracking down cybercriminals.
-
Recover Files via Backup: If you have backups, use them to restore your systems and files after a thorough security check.
-
Reinstall Your Operating System: If you cannot recover your data, wiping and reinstalling the OS may be the only option to ensure full security.
Conclusion
Ransomware is a growing threat that necessitates constant vigilance and proactive measures to protect personal and organizational data. Microsoft Defender provides effective tools to configure ransomware protection, particularly through Controlled Folder Access, to secure your files against unauthorized changes from malicious software. By following the steps outlined, you can enable and configure Windows Defender to provide robust protection against ransomware threats.
Combining these protections with regular data backups, software updates, education, monitoring, and a firm response plan can empower you to defend against the ever-evolving landscape of cyber threats effectively. In a world where security is paramount, Microsoft Defender can be a valuable ally on the road towards a more secure digital experience.
Windows Defender has been gaining a foothold steadily for the past few years. But there is one flaw in the antivirus that ships with Windows 10.
The option for Ransomware Protection is disabled by default even though it is available as a native option since the release of Windows 10 version 1709.
Initially I was bemused by this, but then I thought it is possible that Windows Defender could identify a legitimate application as a threat and block it, which is not something the user would want.
Quite a few third-party anti-ransomware programs exist and they do suffer from false positive issues as well. Check out our reviews of AppCheck AntiRansomware, Acronis Ransomware Protection, TrendMicro Ransombuster, or our overview of Anti-Ransomware software for Windows to get started.

For those unaware, ransomware is one the deadliest form of malware. It silently encrypts your data (pictures, videos, documents are commonly targeted), thus preventing you from accessing them.
It may even lock the bootloader when you reboot/turn off the computer. The malware displays a screen demanding a ransom from the user which usually involves a crypto-currency payment address that you have to send money to.
There is no guarantee that a payment will provide the unlock key required to regain access to files that the ransomware encrypted while it ran on the system. Ransomware attacks are often accompanied by a timer to add another pressure layer to the ransomware demand. Affected users are asked to pay the amount in time as they won’t be able to decrypt their files anymore once the timer runs out.
Decryption tools are available for some ransomware types but these are released after an outbreak usually and not available right from the get-go.
Many companies, hospitals, and users fell victim to ransomware already. You may have heard of the ruckus caused world-wide by the WannaCry ransomware back in 2017, and that is just one example of ransomware causing havoc worldwide.
Besides being very cautious when using the computer, there are only a few options to protect against ransomware attacks. Two of the most effective are backups and security software that protects against ransomware.
How to enable Ransomware Protection in Windows Defender
1. Open the Windows Security Dashboard by double-clicking on the Defender taskbar icon (or use the Settings app and select Update & Security > Windows Security).
2. Click on Virus & Threat Protection.
3. Scroll down to Ransomware Protection.
4. Click on Manage Ransomware Protection (click Okay on the UAC pop-up if it is displayed).

5. On the next page, you will find a toggle for Controlled Folder Access. Enable the option. That’s it.
Most antivirus programs use behavioral scanning to prevent zero-day attacks (new or unidentified malware). In other words, they monitor your computer’s services, applications, anything in the background, for suspicious activity. For example, when an otherwise harmless file tries to gain access to your documents folder to execute a script that encrypt the files in it, Windows Defender will stop the malware to protect your data. It’s a sort of intrusion prevention or anti-exploit method.
By default, the Ransomware Protection only covers specific folders. To view the ones that are secured, click on the Protected Folders option. It’s just the User folders like Documents, Pictures, Videos, Music, Desktop, Favorites by default.
Tip: Add blocked programs to Controlled Folder Access’ whitelist
So, what happens if a ransomware targets files in other folders? The files are affected unless the ransomware is quarantined before it starts to encrypt files on the device. Fortunately, there is a way to secure them.
There is an option on the top of the Protected Folders screen, which says «Add a protected folder». Click on it and choose any folder you want and it will be protected by Windows Defender. The folders can be on any partition or hard drive: they will be secured by the feature.
This method is not completely fool-proof but it’s better than nothing. You might want to backup your data to an external drive regularly as well. Don’t forget to checkout ConfigureDefender for more control.
Usually we ask you to share what programs you use. This time, I want to ask you something else. Have you ever seen a computer affected by ransomware? How was it dealt with?
Summary
Article Name
How to enable Ransomware Protection in Windows Defender and add custom folders to it
Description
How to enable Ransomware Protection in Windows Defender? And how can you add more folders to be secured by this option?
Author
Ashwin
Publisher
Ghacks Technology News
Logo
Advertisement