При обнаружении вирусов или потенциально нежелательного с точки зрения встроенного антивируса Microsoft Defender файлов, он помещает их в карантин: из своего прежнего расположения такие файлы пропадают, а их запуск не удается.
В этой инструкции подробно о том, где находится карантин Microsoft Defender в Windows 11 и Windows 10 и о способах восстановить файлы из карантина. Также может пригодиться: Что делать, если Windows сама удаляет файлы.
- Карантин Microsoft Defender и восстановление файлов
- Журнал защиты
- Командная строка
Карантин Microsoft Defender и восстановление файлов из него
При добавлении файлов в карантин они не просто «запираются» в специальной папке антивируса Microsoft Defender, но и изменяются таким образом, что вручную их извлечь из папки и выполнить запуск не получится, даже вернув расширение исполняемого файла.
Место хранения файлов карантина:
C:\ProgramData\Microsoft\Windows Defender\Quarantine
но для их восстановления потребуется использовать либо графический интерфейс в окне «Безопасность Windows» либо командную строку.
Восстановление из карантина в журнале защиты «Безопасность Windows»
Безопасность Windows — быстрый и простой способ восстановить файлы из карантина:
- Откройте окно «Безопасность Windows» с помощью значка в области уведомлений, поиска в панели задач Windows, либо в приложении «Параметры».
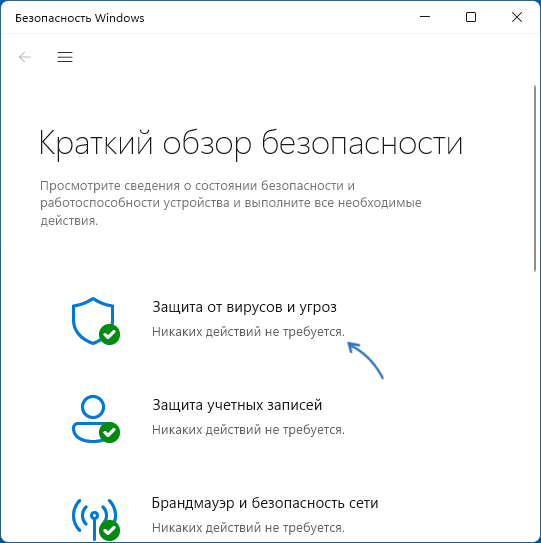
- Откройте пункт «Защита от вирусов и угроз».

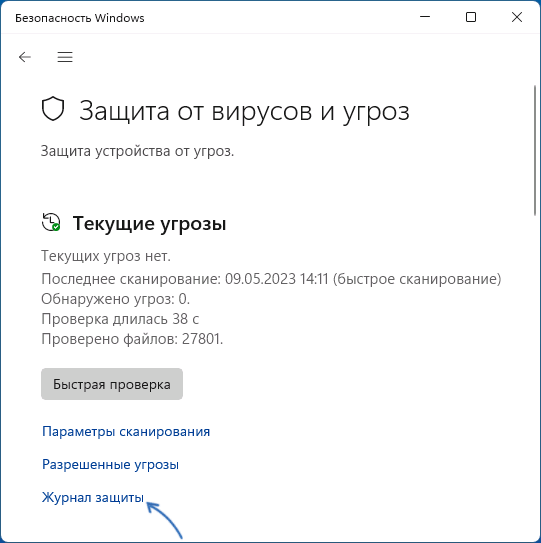
- Нажмите по пункту «Журнал защиты».
- В списке угроз нажмите по угрозе, которую нужно восстановить: раскроются сведения о ней, включая информацию о том, что именно было обнаружено в файле и путь к файлу, который был помещен в карантин.
- Нажмите по кнопке «Действия» и выберите пункт «Восстановить».

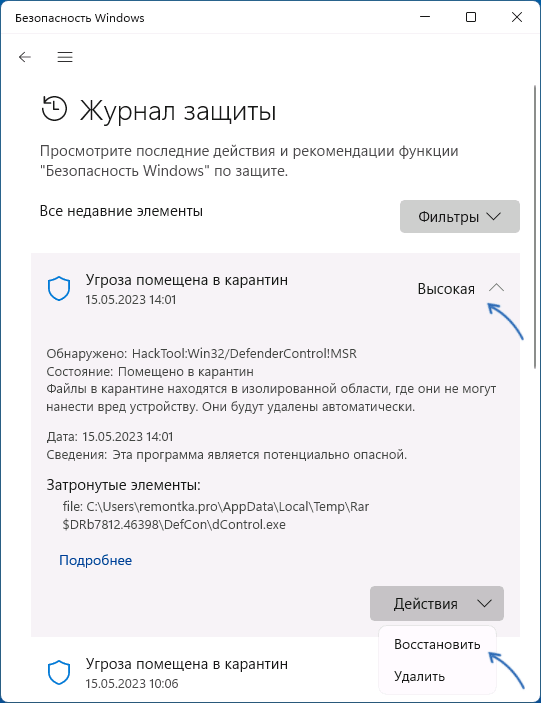
В результате указанного действия файл будет восстановлен в своё прежнее расположение, а его запуск разрешен. Однако учитывайте, что некоторые восстановленные файлы после этого всё равно могут не запуститься, а для запуска потребуется добавить всю папку с программой в исключения Microsoft Defender.
Как восстановить файлы из карантина в командной строке
Существует ещё одна возможность восстановления файлов, помещенных в карантин Microsoft Defender — командная строка. Шаги будут следующими:
- Запустите командную строку от имени администратора (как это сделать) и по порядку введите следующие две команды
cd "C:\Program Files\Windows Defender"
MpCmdRun.exe -restore -listall
- Это отобразит список файлов, помещенных в карантин. Для восстановления конкретного файла можно использовать команду:
MpCmdRun.exe -restore -filepath "путь_к_файлу"
Путь можно скопировать, выделив его мышью в командной строке и нажав правой кнопкой мыши по нему (он автоматически будет скопирован), а вставить — аналогично нажав правой кнопкой мыши в месте расположения курсора.

- Еще одна команда для восстановления файла с указанной угрозой (ThreatName):
MpCmdRun.exe -restore -name "имя_угрозы"

Учитывайте, что файлы хранятся в карантине не бессрочно и через некоторое время (сведений о периоде времени не нашел) удаляются встроенным антивирусом полностью.
Способ 1: Раздел безопасности
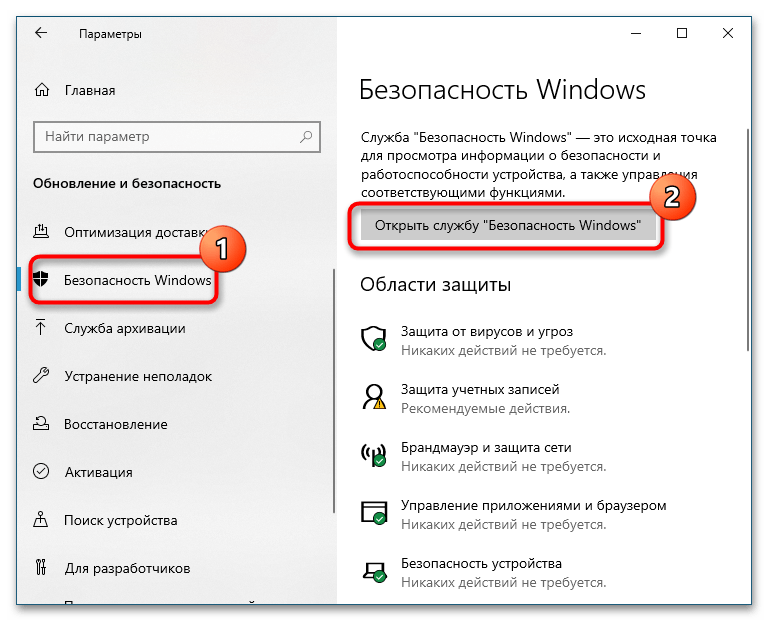
Если целью открытия карантина в Windows 10 является не только просмотр, но и восстановление перемещенных в него файлов, воспользуйтесь приложением «Параметры».
- Откройте приложение «Параметры» и перейдите в раздел «Обновление и безопасность» → «Безопасность Windows» и нажмите кнопку «Открыть службу «Безопасность Windows»». В старых версиях системы опция кнопка имеет название «Открыть «Центр безопасности Защитника Windows»».
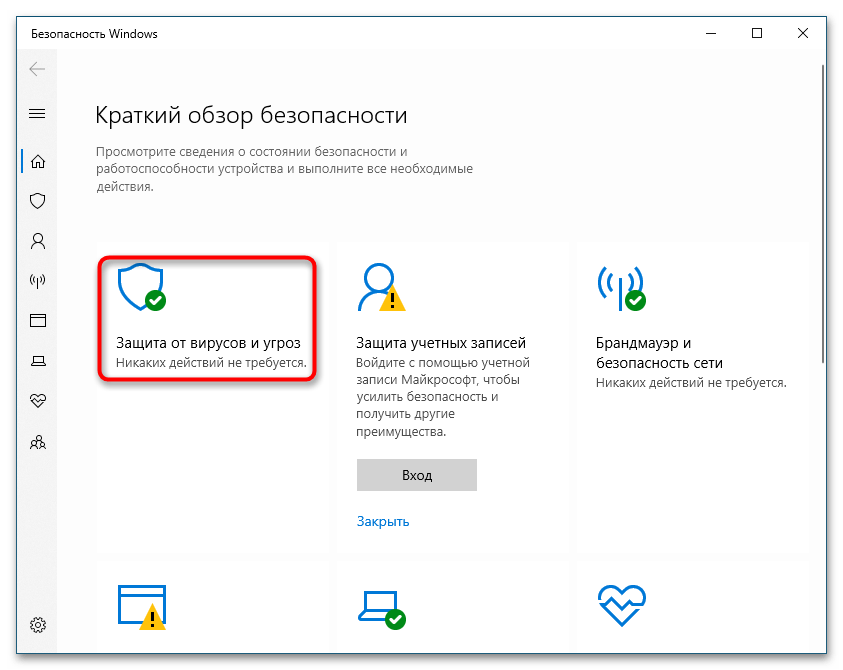
- Кликните по плитке «Защита от вирусов и угроз» или выберите одноименную опцию в меню слева.
- В следующем окне нажмите ссылку «Журнал защиты» или «Журнал угроз».
- Откроется страница со списком обнаруженных угроз, отфильтруйте их, выбрав в выпадающем меню «Фильтры» пункт «Элементы в карантине».
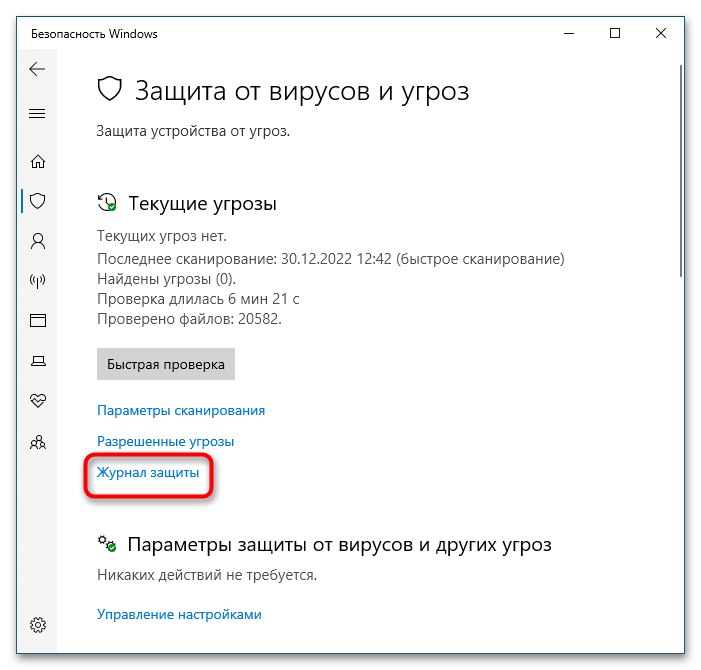
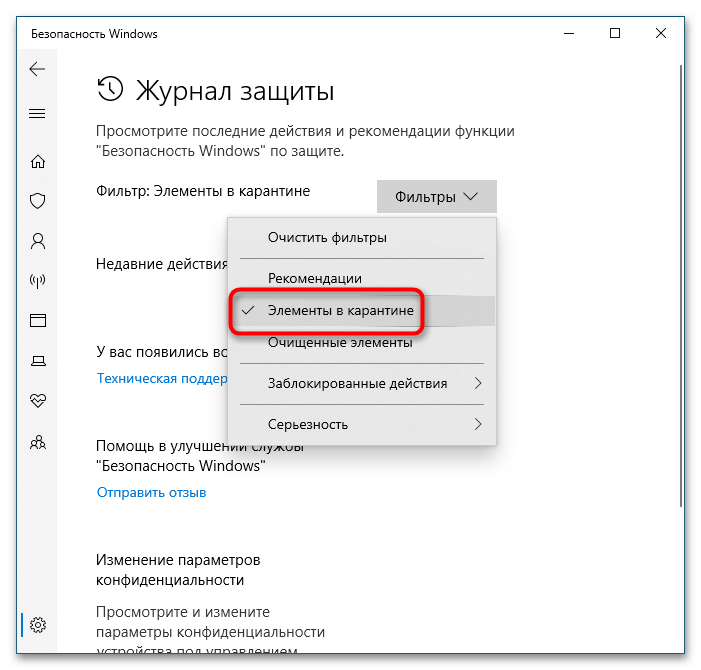
Если нужно получить подробные сведения об угрозе, кликните по записи мышкой.
Способ 2: Переход в «Проводнике»
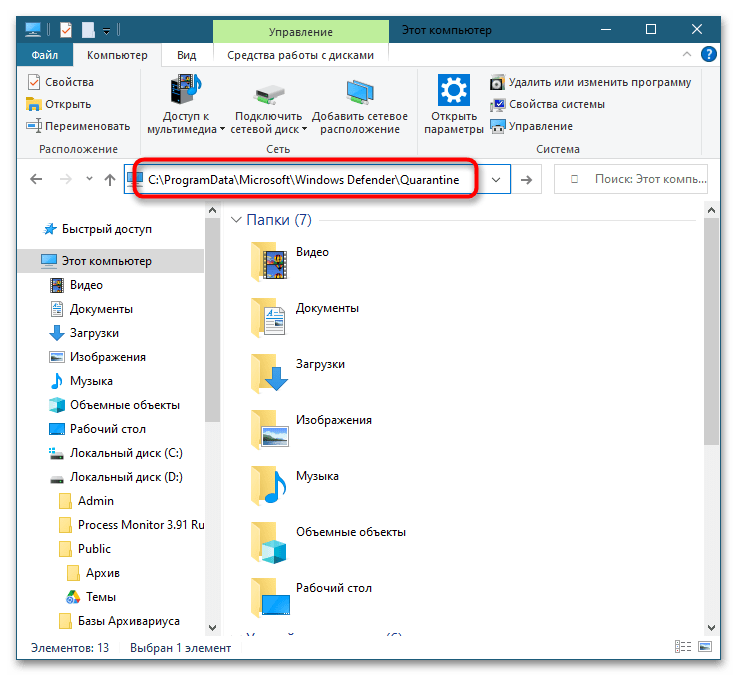
Если возникла необходимость открыть физическое расположение перемещенных в карантин файлов, воспользуйтесь штатным «Проводником».
- Вставьте в адресную строку «Проводника» путь
C:\ProgramData\Microsoft\Windows Defender\Quarantineи нажмите клавишу ввода. - Подтвердите открытие системной скрытой папки нажатием кнопки «Продолжить».
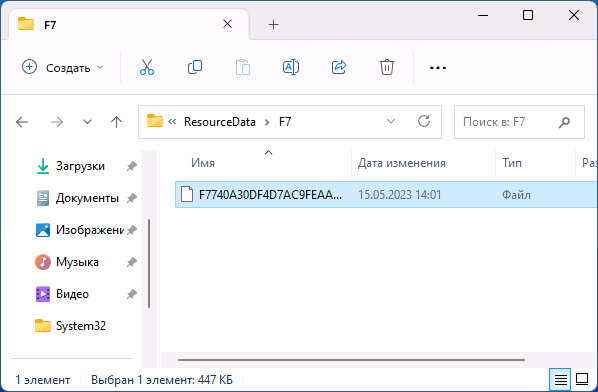
- Перемещенные «Защитником» угрозы располагаются во вложенных папках «ResourceData» и «Resources».
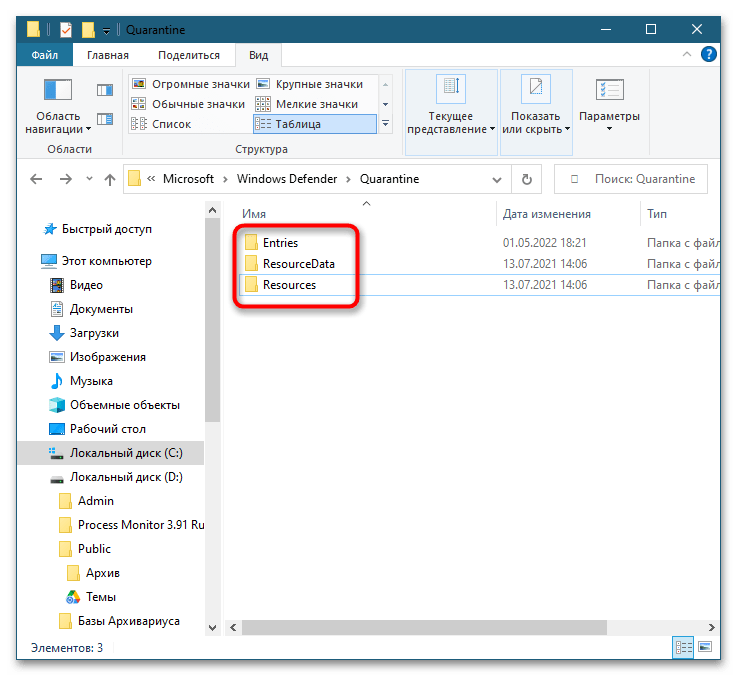
Все опасные файлы хранятся в указанных каталогах в переименованном виде и непосредственного интереса для рядового пользователя не представляют.
Наша группа в TelegramПолезные советы и помощь
Have you ever had the frustrating experience of having Windows Defender (Windows Security) quarantine a file that you actually needed? It can be a real headache, especially if you don’t know how to restore it.
Fortunately, the process is relatively straightforward, and in this article, we’ll walk you through everything you need to know to restore quarantined files in Windows Defender. From why files get quarantined in the first place to the step-by-step process of restoring them, you will be armed with all the information you need to get your files back where they belong.
Table of Contents
What is Microsoft Defender (Windows Security)
Microsoft Defender is a safety tool for protecting your computer from all sorts of digital nasties. It is like a digital bodyguard for your PC.
It is a built-in anti-malware tool that comes with the Windows operating system. It uses advanced technology to detect and remove threats in real-time, so you can browse the web and download files without worrying about viruses or malware.
Alongside scanning for malicious software, Microsoft Defender monitors your system for any suspicious activity that could indicate a potential threat. It also blocks malicious websites before they can cause any damage to your system.
But that’s not all! Microsoft Defender also includes a range of other features to keep your computer secure, including a firewall to protect your network from hackers, parental controls to keep your kids safe online, and even ransomware protection to safeguard your files from being held hostage.
The best part is that Microsoft Defender updates automatically, so you can be sure you are always protected against the latest threats.
What are Quarantined Files and What Happened to Them
Quarantined files are identified by your computer’s security software, i.e. Microsoft Defender, as potentially harmful to your system. When a file is quarantined, it is moved to a secure location on your computer that can’t cause any harm.
Quarantine is like a holding area where the file is kept away and isolated from the rest of your system to prevent it from doing any damage. Think of it like a “time-out” for a misbehaving file. Microsoft Defender can prevent it from running and potentially damaging your system or stealing your personal information by isolating it in quarantine.
When the file is isolated and put into quarantine, it is automatically removed from the original directory. Therefore, you may no longer be able to see it.
This gives you time to figure out whether the file is actually malicious or not. If you determine that the file is safe, you can release it from quarantine and put it back where it belongs. But if the file is harmful, you can safely delete it from quarantine without risking your computer.
Which Files are Quarantined by Windows Security
Quarantined files can include all sorts of things, such as viruses, malware, spyware, and other types of malicious software. Here are the common files that Windows Security usually quarantines.
- Viruses – Malicious programs that can replicate themselves and spread from one computer to another. They can cause harm to your system, steal personal information, or cause other types of damage.
- Malware – This is a general term that refers to any software designed to harm your computer, steal your data, or cause other types of damage. Malware can come in many different forms, including viruses, spyware, adware, and more.
- Trojan Horses – Programs that appear harmless but contain hidden pieces of code that cause harm to your computer. They may allow attackers to gain unauthorized access to your system or steal personal information.
- Rootkits – Stealthy types of malware that can hide their presence on your system and give attackers remote access to your computer.
- Ransomware – A type of malware that encrypts your files and demands payment in exchange for the decryption key.
- Potentially Unwanted Programs (PUPs) – Programs that are installed on your computer without your knowledge or consent. These are responsible for slowing down your system, displaying unwanted ads, or collecting personal information.
- Suspicious Files – The files that may have characteristics of malware, such as a suspicious file name or behavior, but are not classified as a specific type of threat. This includes all files and drivers authorized vendors and manufacturers do not digitally sign.
Where are Quarantined Files Stored in Windows Defender
The default location for virus storage in Windows Security is C:\ProgramData\Microsoft\Windows Defender\Quarantine. However, it is best to use the Windows Security interface to handle them instead of directly accessing this location because it is more dependable.
Note: The “ProgramData” folder is hidden by default. Learn how to show hidden folders or access the directory directly by typing in the path in the navigation bar in File Explorer.
Now that we understand what quarantine files are and why they are removed, let us move on to restoring them (if needed).
How to Restore Windows Defender Quarantined Files
As we mentioned before, some files and software are quarantined simply because they are not signed by an identified authority, but contain no virus or malware. Such files can be safely restored without putting your PC in harm’s way. There are two methods to restore quarantined files.
Restore Quarantined Items using Windows Security
The easiest and most convenient method to restore quarantined files is from the Windows Security app itself. Here is how:
-
Navigate to the following:
-
In Windows 11:
Settings app >> Privacy & security >> Windows Security >> Virus & threat protecton
-
In Windows 10:
Settings app >> Update & Security >> Windows Security >> Virus & threat protection
-
-
Click “Protection history” under Current threats.

Open Protection history in Windows Security Here, you will see a list of quarantined files along with their vulnerability intensity.
-
Click on the item that you want to restore to expand it.
List of quarantined files -
Click the “Allow” drop-down menu and then click “Allow.”

Allow the quarantined file to run -
If prompted with a UAC, click “Yes.”


The file will now be removed from quarantine and restored to its original location.
Restore Quarantined Items from Command Prompt
Another method to restore quarantined files is from the Command Prompt.
-
Launch an elevated Command prompt.
-
Run the following cmdlet to change the directory to where the Windows Security is located:
cd “%ProgramFiles%\Windows Defender”
Change directory to Windows Defender location -
Now run the following cmdlet to list all the quarantined files:
MpCmdRun.exe -restore -listall
List all quarantined files in Command Prompt You will now have the names of all the quarantined files along with the timestamp of when were quarantined. Note down the name of the file that you want to restore.
-
Now use the following command to restore a quarantined file while replacing “[FileName]”.
MpCmdRun.exe -restore -name "[Filename]"
Restore quarantined items using Command Prompt


The named file will now be restored to its original directory and allowed to run on your PC.
Final Verdict
This article lists two methods to restore quarantined items on Windows 10 and 11. However, Windows Security is incapable of differentiating between actual harmful threats and the files that are safe to run but only signed by an unauthorized entity. Therefore, it is up to you, the end user, to allow and restore only the safe files on your PC.
If you accidentally restore a malicious file, the chances are, that your computer is going to get infected when you run it. That is why caution is advised when you use the methods given above to restore quarantined files and items.
Frequently Asked Questions (FAQs)
Is It Safe To Run Quarantined Files?
Files in quarantine are safe to run as long as they are not harmful. Oftentimes, Microsoft Defender detects normal files are infected and move them to the quarantine folder. Make sure to check all the quarantine files before you restore any for a safe run.
Restoring Quarantined Files by Microsoft Defender Antivirus
Almost every Windows user relies on Microsoft Windows Defender to keep their system safe from malicious items. However, the antivirus program fails to determine whether a certain file is harmful or not and quarantines it. Fortunately, following the straightforward methods shared above, you can find and recover the quarantined files easily.
📁 Curious about where Windows keeps those suspicious files locked away? The quarantine folder is the secure vault where Windows Defender stores files it deems potentially harmful. In this article, we’ll explore where to find the quarantine folder in Windows 10 and Windows 11, as well as within Windows Defender itself.
When Windows Defender detects a threat, it moves the file into the quarantine folder—a safe space where the file is isolated and prevented from harming your system. This folder is intentionally hidden and protected to maintain security and prevent accidental tampering.
📂 Location of the Quarantine Folder
In Windows 10 & Windows 11
For most users, the quarantine folder isn’t accessed directly. However, the physical location on disk is typically found here:
C:\ProgramData\Microsoft\Windows Defender\Quarantine
There may also be a related folder named QuarantineStore in the same directory. Remember, ProgramData is a hidden folder by default, so you might need to enable viewing hidden files in File Explorer.
In Windows Defender (via Windows Security App)
Windows Defender doesn’t require you to manually navigate to the quarantine folder. Instead, you can manage quarantined files through the Windows Security interface:
- Open Windows Security: Click on the shield icon in your taskbar or search for “Windows Security” in the Start menu.
- Navigate to Virus & Threat Protection: Click on the Virus & threat protection tile.
- View Protection History: Under the Current threats section, click Protection history to see a list of quarantined items.
This interface allows you to review, restore, or permanently delete quarantined files without having to directly access the folder on disk.
📊 Quick Comparison Table
| Access Method | Location/Interface | Ease of Use |
|---|---|---|
| File Explorer (Disk Location) | C:\ProgramData\Microsoft\Windows Defender\Quarantine (and possibly QuarantineStore) |
Requires enabling hidden files |
| Windows Security App | Via Virus & threat protection > Protection history | Very User-Friendly |
⚠️ Important Considerations
- Hidden by Design: The quarantine folder is hidden to protect system integrity. Modifying its contents directly is not recommended.
- Security First: Always use the Windows Security app to manage quarantined items. This helps prevent accidental exposure to malicious files.
- Backup Your Settings: If you’re making changes to your security settings, ensure you have backups and understand the implications of restoring a quarantined file.
🎯 Final Thoughts
While the physical quarantine folder exists deep within your Windows file system, managing quarantined threats is best done through the Windows Security app. This provides a safe, user-friendly way to review and handle files that have been isolated by Windows Defender. Understanding where and how these files are stored can give you greater confidence in managing your system’s security.
Stay secure, and happy computing!
Привет админ! Скажите пожалуйста, где находится Карантин Защитника Windows?
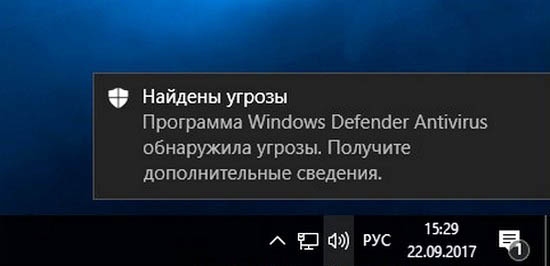
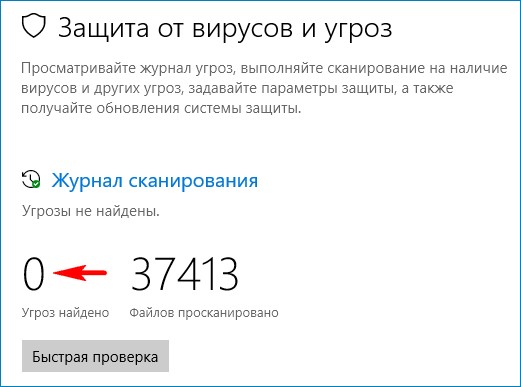
Спокойно работал в Windows 10 и вдруг в трее стали выходить сообщения Защитника — «Программа Windows Defender Antivirus обнаружила угрозы. Получите дополнительные сведения», жму на них
и открывается «Журнал сканирования», в котором написано — «Угрозы не найдены».
Мне бы очень хотелось узнать, в каких именно папках моей операционной системы находились вредоносные программы. Может антивирус ошибочно удалил нормальные файлы? Насколько я знаю, такая информация должна находится в карантине. Как найти его в настройках защитника?
Карантин Защитника Windows
Привет друзья! Так повелось, что у любой антивирусной программы обязательно должен быть карантин, из которого при необходимости можно восстановить заражённый вирусом файл. А как же иначе? Вдруг файл был удалён антивирусником по ошибке. Обычно карантин недалеко спрятан в настройках любого антивируса, но в случае с Защитником Windows случай особый, так как он встроен в операционную систему.
Недавно я оказался в такой же ситуации, как и наш читатель. На компьютере клиента встроенный антивирус от Майкрософт периодически находил и обезвреживал вредоносные файлы, а затем просил перезагрузку, после которой всё повторялось. Было понятно, что Windows Defender не мог справится с задачей и до конца удалить размножающийся на компьютере вирус. Лишь только открыв Карантин, мы нашли информацию о местонахождении вируса и до конца удалили его уже в безопасном режиме.
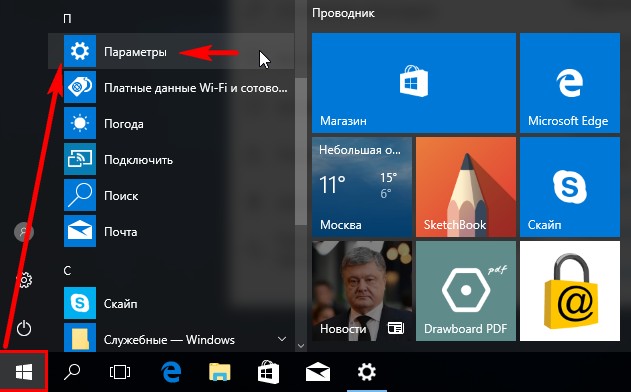
Открываем «Параметры»
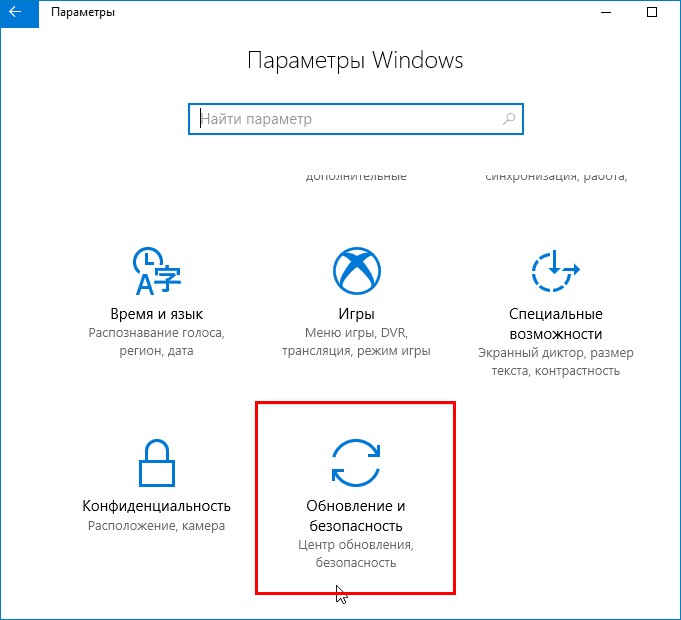
«Обновление и безопасность»
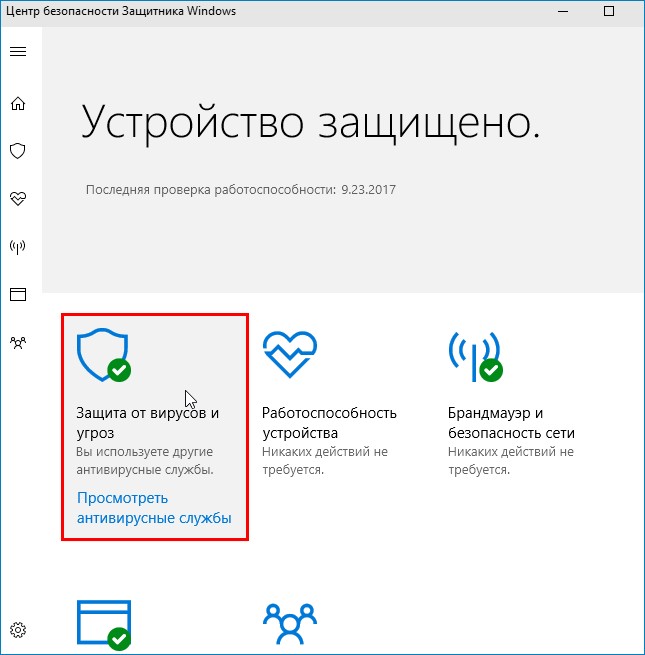
«Защитник Windows» —> «Открыть Центр безопасности Windows Defender»

«Защита от вирусов и угроз».
«Журнал сканирования»
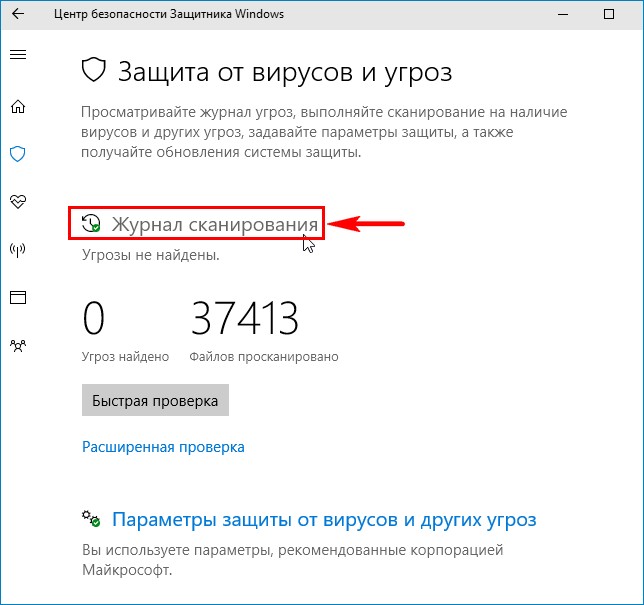
В данном окне и спрятался Карантин Защитника Windows. Управлять его настройками очень просто.
Нажмите «Удалить всё» и все угрозы удалятся. Если хотите узнать подробности, связанные с той или иной вредоносной программой, выделите её левой кнопкой мыши.
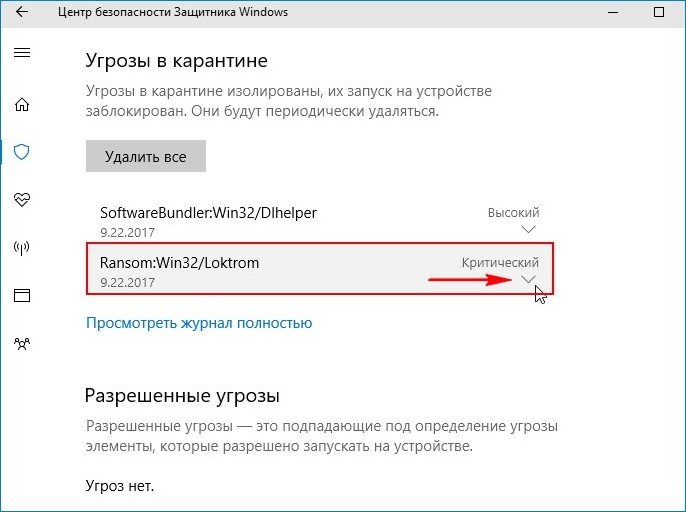
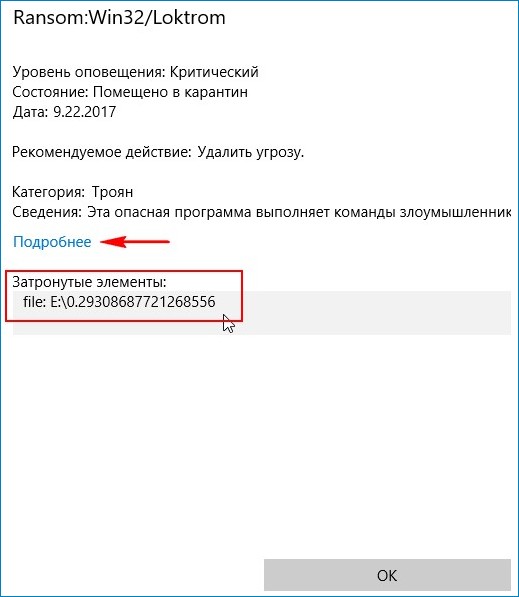
В выпадающем меню можно восстановить заражённый файл или удалить, а также узнать связанные с ним подробности. Нажмите на кнопку «Показать подробности».
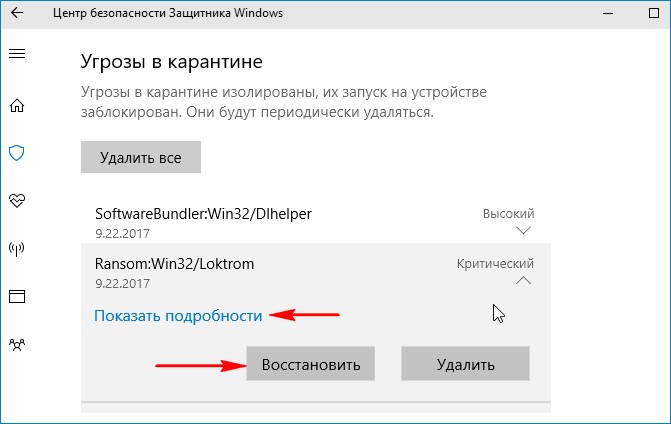
Опасная троянская программа находилась нашей флешке (буква диска E:).
Для просмотра всех нейтрализованных угроз, в предыдущем окне жмите на кнопку «Посмотреть журнал полностью».
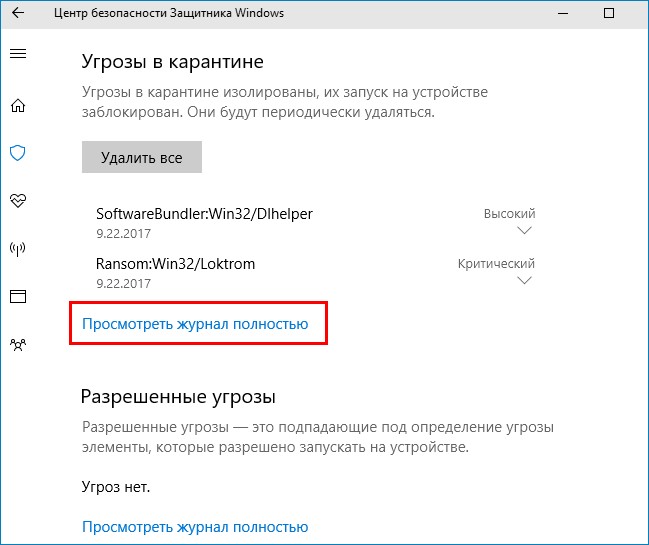
Откроется «Полный журнал» с информацией о всех нейтрализованных антивирусом объектах.
Выделите интересующую вредоносную программу левой кнопкой мыши.
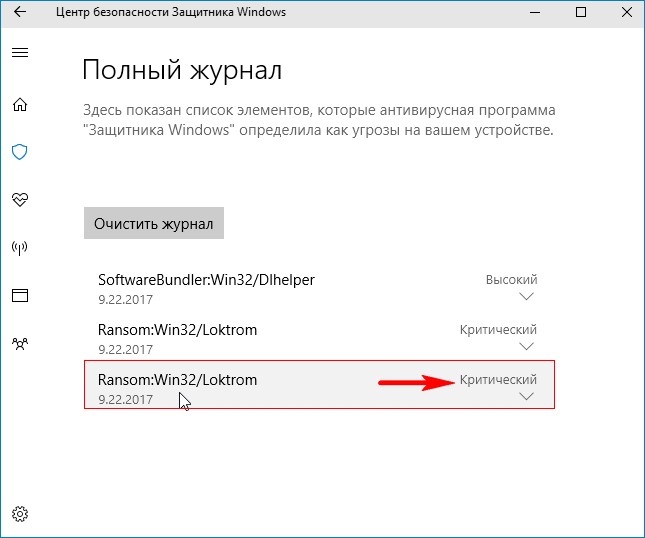
«Показать подробности»

В нашем случае опасная троянская программа находилась в папке «Автозагрузка» для всех пользователей, которая находится по адресу:
C:\ProgramData\Microsoft\Windows\Start Menu\Programs\StartUp
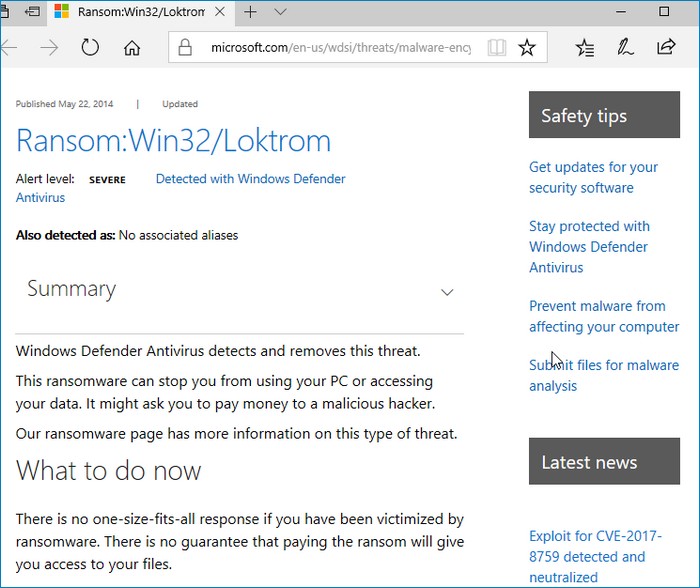
Если нажать «Подробнее»,
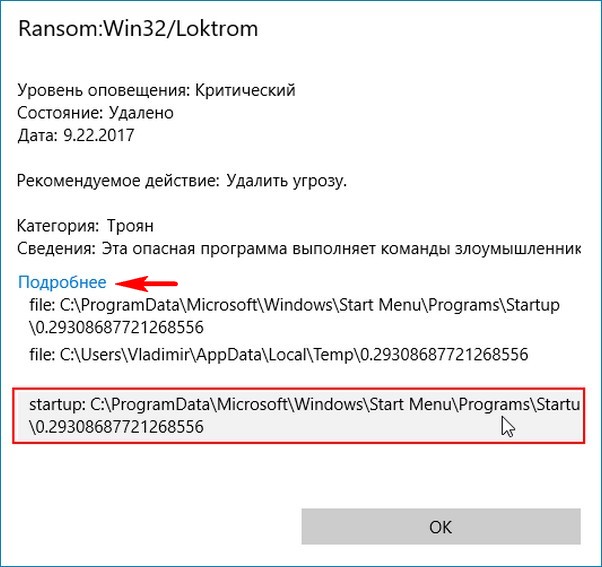
то откроется браузер Microsoft Edge с точным описанием данного вируса.