
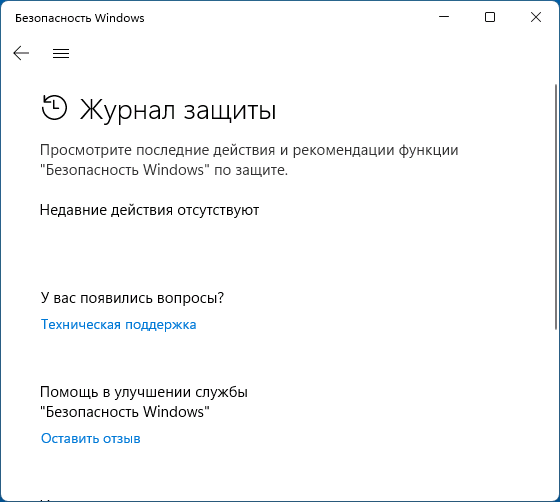
The Protection History page in the Windows Security app is where you can go to view actions that Microsoft Defender Antivirus has taken on your behalf, Potentially Unwanted Apps that have been removed, or key services that are turned off.
Note: Protection History only retains events for two weeks, after which they’ll disappear from this page.
Events are shown as a series of cards in the protection history. If a card needs your attention you will see one of two colored badges on the card’s icon.
-
Red — This is a serious item that requires immediate attention.
-
Yellow — This item is not urgent, but should be checked when you can.
By clicking the card you can expand it and get more details. Here are a few of the most common entries you may see.
Important: You’ll need to have admin privileges on this device in order to see the details of threats in Protection History.
Malware alerts
If Microsoft Defender Antivirus detects a piece of malware it will be recorded in Protection History.
Threat found — action needed
This indicates that Microsoft Defender Antivirus has detected a possible threat and needs you to make a decision on how to handle it. Selecting the Actions dropdown at the bottom right corner will let you Quarantine the threat, rendering it harmless, or if you’re confident that this item has been falsely identified as a threat you can choose to Allow on device.
Caution: If you’re not sure if the item is safe or not it’s best to choose Quarantine. Choosing Allow on device will let the file proceed and if it was in fact a threat, your data. personal information, or device may now be at risk.
If you choose Allow and later want to undo that action go to the Allowed threats page and you can remove it from the allowed list.
Threat quarantined
This indicates that the threat has been blocked and quarantined. It has not yet been removed, but should not pose a risk to your data or device at present. There are two actions you can take:
-
Remove — This removes the threat from your device.
-
Restore — This puts the file back on your device where Defender will once again detect it as a threat and create a new Threat found — action needed item in Protection History. You’ll need to go into there and select Allow on device if you’re confident this idem is safe.
Threat blocked
This indicates that Defender has blocked and removed a threat on your device. There’s no action necessary on your part, though you might want to consider how the threat reached your machine so you can reduce the risk of that occurring again. Common ways a threat might arrive include as an unsafe attachment in email, downloaded from an unsafe web site, or via an infected USB storage device.
If you believe this to be a «false positive» and that the file is safe you can select Actions and then choose Allow. This threat has already been removed, so Allow only applies to the next time we see this file. You’ll need to redownload the file if you want to use it.
Remediation incomplete
This indicates that Microsoft Defender Antivirus took steps to fix a threat but was unable to successfully finish that cleaning. Select the card to expand it and see what additional steps you need to take.
Potentially unwanted apps (PUA)
Potentially unwanted applications are a category of software that can cause your machine to run slowly, display unexpected ads, or at worst, install other software which may be more harmful or annoying. It doesn’t sink to the level of malware but it still does things that you’d probably prefer it not do.
If you want to confirm that PUA blocking is turned on for your device see Protect your PC from potentially unwanted applications.
This app has been blocked
Microsoft Defender SmartScreen has the ability to block potentially unwanted apps before they’re installed and if that happens you’ll see a blocked event in the Protection History.
If you believe the block was a mistake and you want to allow the file to run you can select Actions, then Allow. At that point you’ll need to redownload the file in order to use it.
If you choose Allow and later want to undo that action go to the Allowed threats page and you can remove it from the allowed list.
An important service is off
Protection history can also notify you if an important service, such as SmartScreen for Microsoft Edge, is turned off. Select the card for that alert, and under Actions you can turn that feature on.
See also
Best practices for protection from viruses
How malware can infect your device
Need more help?
Want more options?
Explore subscription benefits, browse training courses, learn how to secure your device, and more.
Опция очистки журнала защиты в интерфейсе Microsoft Defender (Защитник Windows) отсутствует, однако иногда может возникнуть необходимость удалить из него обнаруженные угрозы: сделать это возможно.
В этой инструкции подробно о том, как очистить журнал защиты Windows 11 и Windows 10, а также дополнительная полезная информация в контексте рассматриваемой темы.
Очистка журнала защиты путем удаления файлов журнала

Файлы, хранящие информацию, отображающуюся в журнале защиты в окне «Безопасность Windows» находятся в папке
C:\ProgramData\Microsoft\Windows Defender\Scans\History\Service
Однако, попытка простого удаления этих файлов в Проводнике с большой вероятностью не удастся: вы увидите сообщение о том, что «Вам отказано в доступе к этой папке» при переходе к ней вручную или о том, что не удается найти указанную папку.
Я не рекомендую изменять владельца и права доступа к папкам Microsoft Defender, вместо этого используйте следующие шаги:
- Загрузите компьютер в безопасном режиме: для этого можно нажать клавиши Win+R, ввести msconfig, затем на вкладке «Загрузка» включить «Безопасный режим», применить настройки и перезагрузить компьютер. Есть и другие способы загрузки в безопасном режиме.

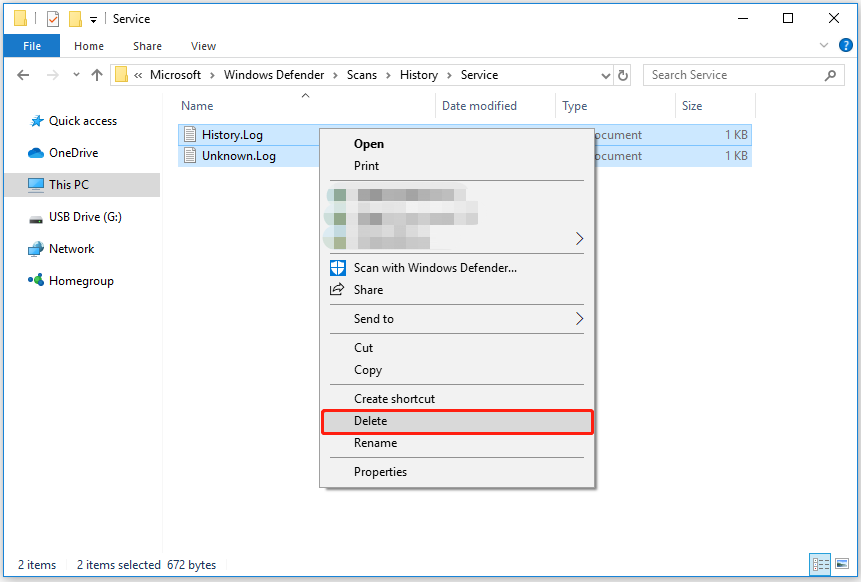
- После загрузки в безопасном режиме перейдите к папке
C:\ProgramData\Microsoft\Windows Defender\Scans\History\Service
сделать это можно вручную (но учитывать, что папка ProgramData скрытая), либо скопировать путь, вставить в адресную строку проводника и нажать Enter.
- Удалите всё содержимое этой папки. В некоторых случаях один из файлов не удаляется — обычно это не влияет на результат очистки журнала.

- Ещё один способ удаления: в командной строке, запущенной от имени администратора, введите команду
del "%ProgramData%\Microsoft\Windows Defender\Scans\History" /s /f /q
- Отключите загрузку в безопасном режиме (так же в msconfig) и перезагрузите компьютер, журнал защиты будет очищен:


Ещё один вариант выполнить то же самое, если внутри Windows выполнить действие не удается — загрузиться загрузочной флешки WinPE и удалить содержимое указанной папки на диске.
Просмотр событий Windows
Несмотря на то, что журнал защиты в окне «Безопасность Windows» будет очищен способом, рассмотренным выше, увидеть обнаружения можно также в «Просмотре событий» Windows. Вы можете удалить эти сведения и там:
- Нажмите клавиши Win+R на клавиатуре, введите eventvwr.msc и нажмите Enter.
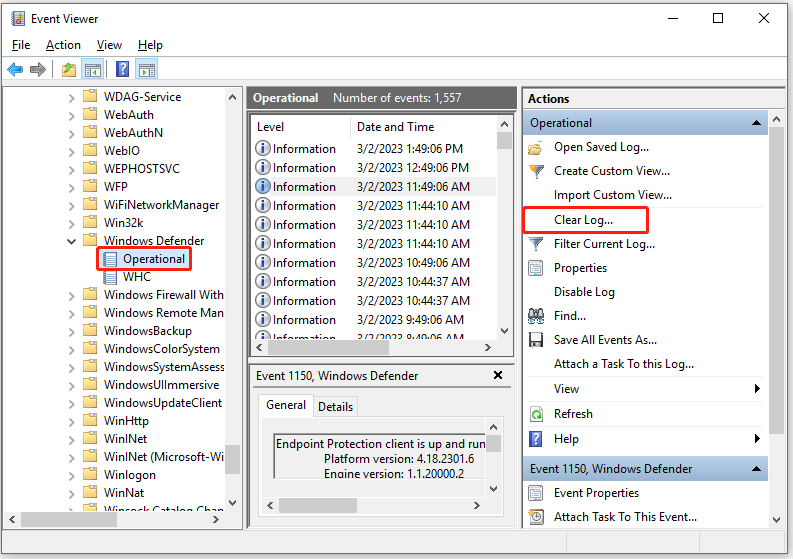
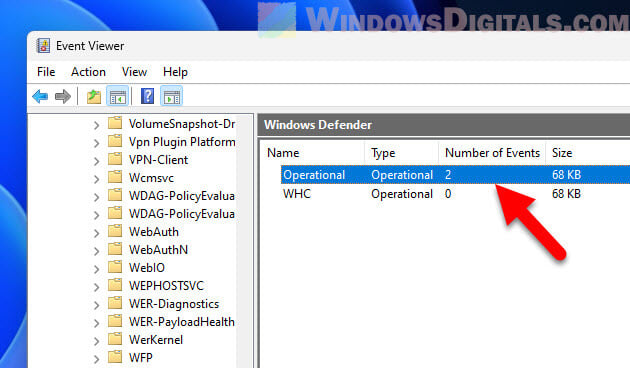
- В просмотре событий перейдите к разделу Журналы Windows — Журналы приложений и служб — Microsoft — Windows — Windows Defender, раскройте этот раздел.
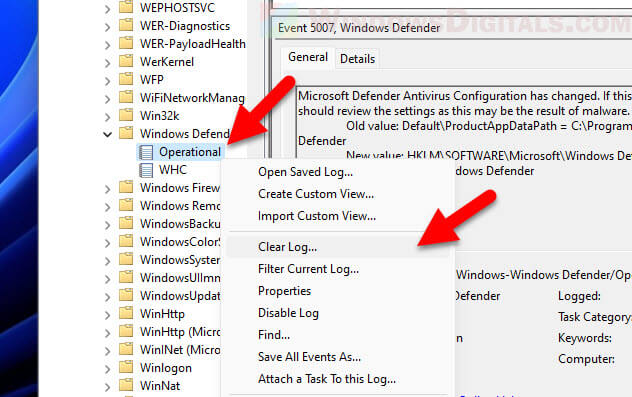
- Нажмите правой кнопкой мыши по журналу «Operational» и выберите пункт «Очистить журнал».

- Подтвердите очистку журнала.

Автоматическая очистка журнала
При необходимости вы можете настроить время, по прошествии которого записи в журнале защиты будут удаляться автоматически.
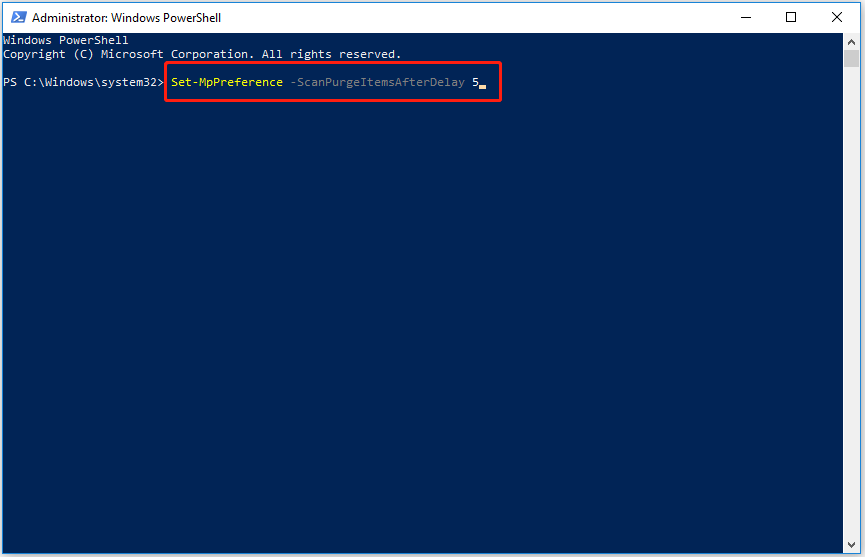
Сделать это можно в PowerShell (Терминале Windows), достаточно запустить его от имени администратора и ввести команду (в примере — удаление события из журнала производится через 1 сутки)
Set-MpPreference -ScanPurgeItemsAfterDelay 1

Второй вариант, который подходит только для редакций Windows Pro и Enterprise — редактор локальной групповой политики:
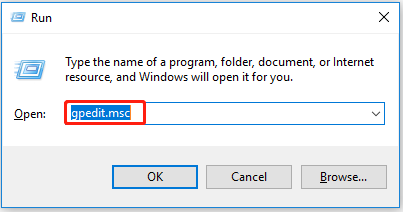
- Нажмите клавиши Win+R на клавиатуре, введите gpedit.msc и нажмите Enter.
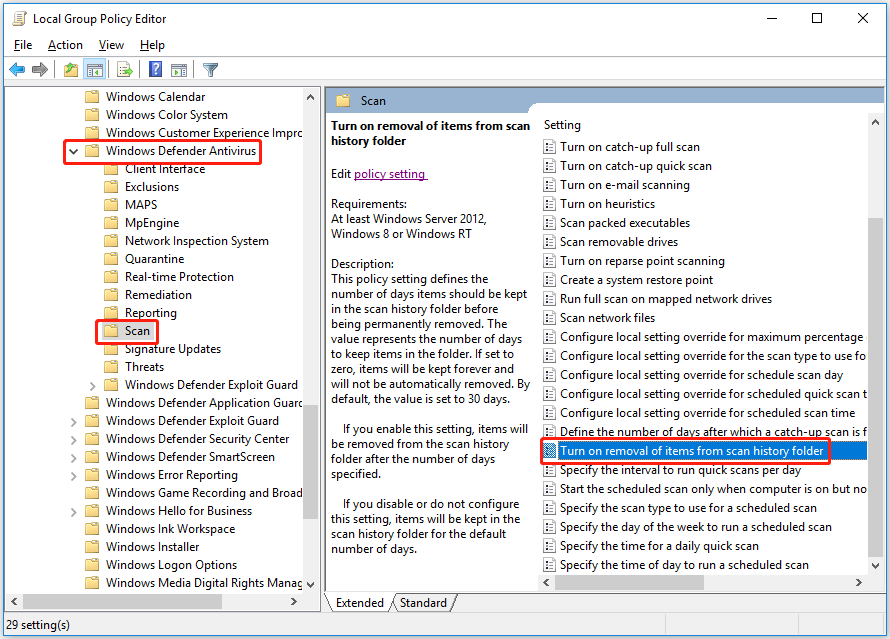
- Перейдите к разделу Конфигурация компьютера — Административные шаблоны — Компоненты Windows — Антивирусная программа Microsoft Defender — Проверка.
- В правой панели редактора дважды нажмите по политике «Включить удаление элементов из папки журнала проверок».

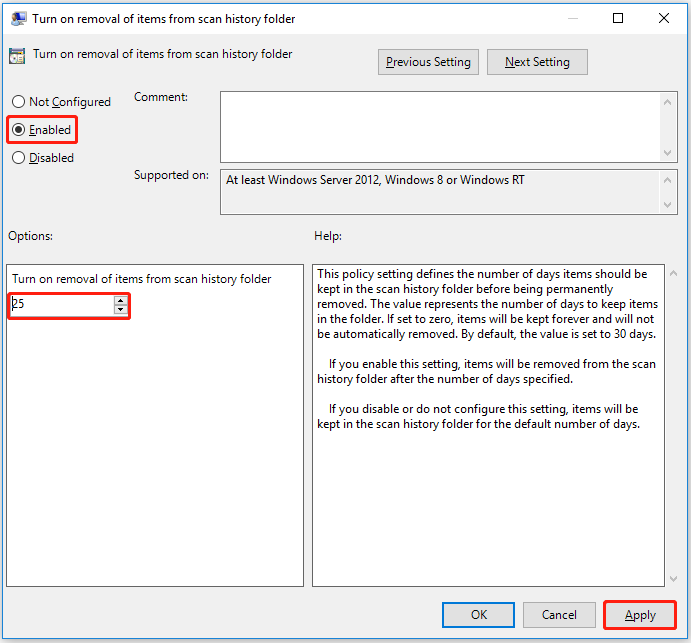
- Установите для неё значение «Включено», а затем — значение в днях (0 — хранятся бессрочно, по умолчанию — 30). Примените настройки.


Надеюсь, информация была полезной. Если же у вас остались вопросы, касающиеся рассмотренной темы, вы можете задать их в комментариях ниже: возможно, мне удастся вам помочь.
Download Windows Speedup Tool to fix errors and make PC run faster
The Protection History page shows detections by Windows Defender and provides detailed and easier-to-understand information about threats and available actions. It now includes Controlled Folder Access blocks, along with any blocks that were made through the organizational configuration of Attack Surface Reduction Rules. In this post, we will show you how to manually clear protection history in Windows Defender on Windows 11/10.
If you use the Windows Defender Offline scanning tool, any detections it makes will now also show in this history. Additionally, you will see any pending recommendations (red or yellow states from throughout the app) in the history list.

This specifies the number of days for which items are stored in the scan log folder. After this time, Windows Defender deletes the items. If you specify a null value, Windows Defender will not remove items. If you do not specify a value, Windows Defender will remove items from the default scan log folder, that is, 30 days.
However, if you want to clear the protection history manually, you can do so in any of the three following ways;
- Using Set-MpPreference PowerShell cmdlet
- Delete Windows Defender Service folder from the local drive
- Using Event Viewer
Let’s take a look at the steps involved in relation to each of the listed methods.
1] Using Set-MpPreference PowerShell cmdlet
The Set-MpPreference cmdlet configures preferences for Windows Defender scans and updates. You can modify exclusion file name extensions, paths, or processes, and specify the default action for high, moderate, and low threat levels.
You can specify a different delay period (in days) by running the cmdlet below in PowerShell admin mode (press Win+X and then tap A on the keyboard):
Set-MpPreference -ScanPurgeItemsAfterDelay 1
The specified number 1 is the number of days after which the protection history log and items in the log folder will be cleared.
2] Delete Windows Defender Service folder from the local drive
To manually clear the protection history, this method requires you to delete the Service folder under the Windows Defender folder on the local drive.
Here’s how:
- Press Windows key + R to invoke the Run dialog.
- In the Run dialog, copy and paste the path below and hit Enter (if prompted, click Continue).
C:\ProgramData\Microsoft\Windows Defender\Scans\History
- Now, right-click the Service folder in that location and select Delete.
You can exit File Explorer.
- Next, open Windows Security > Virus & threat protection > Manage settings.
- Toggle the button to Off then to On again for Real-Time protection and Cloud-delivered protection.
3] Using Event Viewer
To manually clear the Windows Defender protection history using the Event Viewer (eventvwr), do the following:
- Press Windows key + R to invoke the Run dialog.
- In the Run dialog, type eventvwr and hit Enter to open Event Viewer.
- Under the Event Viewer (Local) section on the left-hand side of the pane, expand the Applications and Services logs option.
- Under this, expand the Microsoft option.
- Click on Windows to open the list of all its files on the middle pane.
- On the middle pane, scroll down to find Windows Defender from the list of files.
- Right-click Windows Defender, and click on Open.
- From the two options in the middle pane, right-click on Operational, and click Open to view all the past logs.
- Now, under Windows Defender folder on the left pane, right-click on Operational.
- Click on Clear Log… on the menu.
- Select Clear or Save and Clear based on your requirement to clear the protection history.
The above listed are the three ways to clear Windows Defender protection history in Windows manually.
Can’t delete Microsoft Defender Protection history
If you can’t delete Microsoft Defender Protection history using any one of the mentioned methods, open an elevated command prompt, copy-paste the following command – del “%ProgramData%\Microsoft\Windows Defender\Scans\History” /s /f /q – and hit Enter.
Where can I find Windows Defender history?
To view your Windows Defender Protection History, open Windows Security, and select the Protection History icon on its Home tab. There you will see the Windows Defender history.
Related: You can also change the Time to Clear Windows Security Protection History.
Why is Windows Defender Protection History empty?
If Windows Defender Protection History is not showing, empty, or missing, you need to reset Windows Security. Open Windows Settings > Installed apps > Apps and locate Windows Security. Select Advanced options and click on the Reset button.
Read: How to view Advanced Threat Protection (ATP) Reports in Windows
How to delete Windows Defender’s MPCache Files in Windows 11?
In the C:\ProgramData\Microsoft\Windows Defender\Scans folder, you may see some MPCache files. These are Windows Defender cache files and you can delete them manually from this folder location or use Disk Cleanup Tool to delete them.
Obinna has completed B.Tech in Information & Communication Technology. He has worked as a System Support Engineer, primarily on User Endpoint Administration, as well as a Technical Analyst, primarily on Server/System Administration. He also has experience as a Network and Communications Officer. He has been a Windows Insider MVP (2020) and currently owns and runs a Computer Clinic.
-
Home
-
News
- How to Clear Protection History in Windows 10/11
By Shirley | Follow |
Last Updated
Have you ever noticed the Windows Defender protection history? Do you have any idea how to clear protection history in Windows 10/11? This post from MiniTool provides you with several reliable ways to achieve this goal.
What Is Windows Defender Protection History
Windows Defender is antivirus software built into your PC that protects your computer from viruses, malware threats, and attacks. Information such as actions taken by Microsoft Defender Antivirus on your behalf, potentially unwanted applications that have been removed, or critical services that have been shut down are stored on the Protection History page.
Windows Defender keeps its protection history for 30 days by default. You can clear them before this date to improve computer performance by using the following ways.
How to Clear Protection History in Windows 11/10
Way 1. Using File Explorer (Manually)
Windows Defender stores protection history logs as accessing files on your computer. So, you can manually clear protection history through File Explorer.
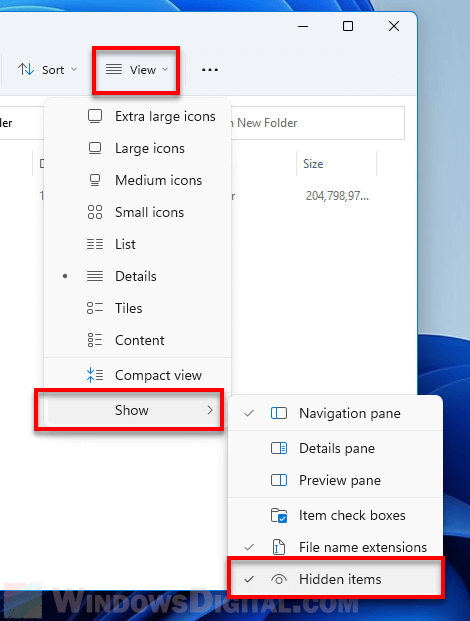
Step 1. Press Windows + E key combinations to open File Explorer. Then move on to the View tab and check the checkbox next to Hidden items.
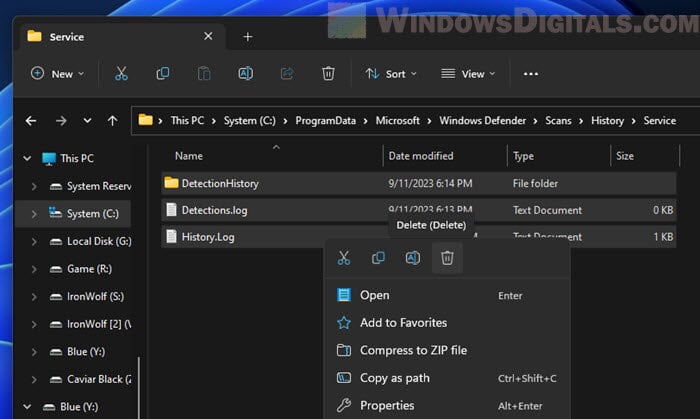
Step 2. Type C:\ProgramData\Microsoft\Windows Defender\Scans\History\Service in the address bar and press Enter. Or you can navigate to this location layer by layer.
Step 3. Select all files and right-click to choose Delete.
Way 2. Using Event Viewer (Manually)
Windows Event Viewer displays a log of application and system messages, including errors, information messages, and warnings. If you do not know how to clear protection history, you can use it by referring to the following steps.
Step 1. Type Event Viewer in the Windows search box and click it from the best match result.
Step 2. Expand Applications and Services Logs by clicking the inverted triangle button next to it. Then expand Microsoft > Windows. And then scroll down to expand Windows Defender.
Step 3. Click on Operational and choose Clear log from the right panel.
Step 4. In the pop-up window, click Clear or Save and Clear to clear the log.
Way 3. Using Windows PowerShell (Automatically)
Windows PowerShell is a command-line tool that is commonly used to automate system administration. Here you can set it to automatically clear Windows Defender protection history.
Step 1. Type Windows PowerShell in the Windows search box and right-click it to select Run as administrator.
Step 2. In the pop-up window, select Yes to allow this app to change your computer.
Step 3. Type this command: Set-MpPreference -ScanPurgeItemsAfterDelay N and press Enter (N refers to the days after which you want the protection history to be automatically cleared).
For example, if you want the protection history to be automatically cleared after 5 days, you need to type this command line: Set-MpPreference -ScanPurgeItemsAfterDelay 5.
Way 4. Using Local Group Policy Editor (Automatically)
Local Group Policy Editor is a Microsoft Management Console (MMC) snap-in. You can configure and modify group policy settings through this tool. Also, it can help you clear protection history automatically.
Step 1. Press Windows + R keyboard shortcuts to open Run.
Step 2. Type gpedit.msc in the input box and press Enter.
Step 3. Expand the following folders one by one: Computer Configuration > Administrative Templates > Windows Components > Windows Defender Antivirus.
Step 4. Under the Windows Defender Antivirus section, select Scan.
Step 5. On the right panel, double-click Turn on removal of items from scan history folder.
Step 6. Select Enabled in the new window. Then set up the number of days that items should remain in the scan history folder before being permanently deleted, and click Apply.
Now, all operations have been done, and you won’t need to clear protection history manually. The system will automatically clear Windows Defender protection history according to the number of days you set.
Tips:
Tip: Sometimes your files may be deleted by Windows Defender. In this case, what if you want to recover them? Here professional data recovery software – MiniTool Power Data Recovery is recommended to you. You can use this easy-to-use tool to get your deleted files back for free (No more than 1GB of data). For detailed steps, you can refer to this post: Windows Defender Deleted Files, How to Get Back Easily.
MiniTool Power Data Recovery FreeClick to Download100%Clean & Safe
Bottom Line
In a word, this article talks about how to clear protection history in Windows 10/11. You can choose your favorite way to clear it for the best computer performance. For more information about Windows Defender, welcome to visit MiniTool News Center.
About The Author
Position: Columnist
Shirley graduated from English major and is currently an editor of MiniTool Team. She likes browsing and writing IT-related articles, and is committed to becoming a professional IT problem solver. The topic of her articles are generally about data recovery, data backup, and computer disk management, as well as other IT issues. In spare time, she likes watching movies, hiking and fishing.
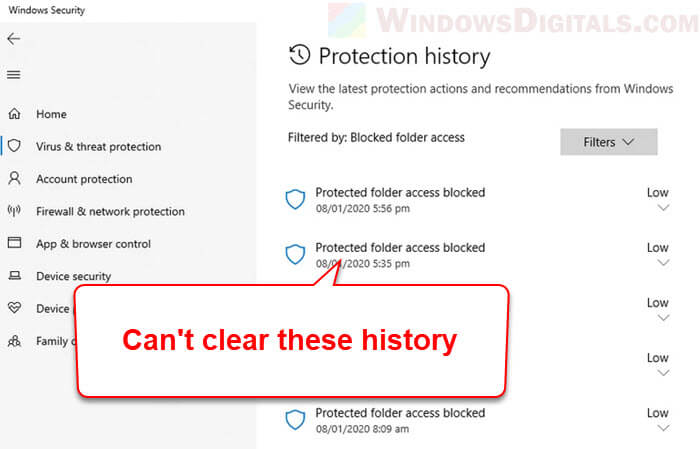
If you have come across a section in the Windows 11 or Windows 10 Settings called “Protection history“, it is just a record of scanned files and activities done by Microsoft Defender, the built-in Windows’ antivirus solution. When you’re thinking about clearing the protection history, you might run into some issues, like the option being not clickable or that it just doesn’t respond. In this guide, we’ll talk about this problem and how you can fix it in order to successfully clear the protection history.
Also see: How to Clear Timeline Activity History in Windows 10 or 11
Clear Windows Defender protection history using File Explorer
The Windows Defender protection history is normally kept in a specific folder on your PC. To delete it, you need to go to this folder and remove its contents. Follow the steps below to do so.
Step 1: Show hidden files and folders in File Explorer
Some system files, like the Windows Defender protection history files, are hidden to prevent you from accidentally deleting them. But in order to delete them, you need to make them visible first.
- Open File Explorer by pressing the Windows key + E or clicking the File Explorer icon on your taskbar.
- Click on the “View” tab at the top of the File Explorer window. It’s next to the “File” tab.
- In the “Show” area of the ribbon, there’s a checkbox for “Hidden items.” Click this box to show hidden files and folders.

Learn more: How to Unhide a File or Folder in Windows 11
Step 2: Delete Protection History files from the “Service” directory
Now that you can see hidden files, you can now delete the files related to the Windows Defender protection history:
- Open File Explorer again if it’s not already open.
- Go to the directory below either by copying and pasting it into File Explorer’s address bar or by browsing through the folders:
C:\ProgramData\Microsoft\Windows Defender\Scans\History\Service
- In the “Service” folder, you’ll find files related to Windows Defender’s protection history. Select all these files. You can press Ctrl + A to select all quickly.
- After selecting, right-click on the files and choose “Delete” from the context menu.

- If a confirmation prompt appears, click “Yes” to delete the files.
- Close File Explorer after deleting the files.
Related resource: How to Reinstall Windows Defender in Windows 11
Clear Windows Defender protection history using Event Viewer
If you find it tough to clear the Windows Defender protection history using File Explorer or if you prefer another method, try Event Viewer.
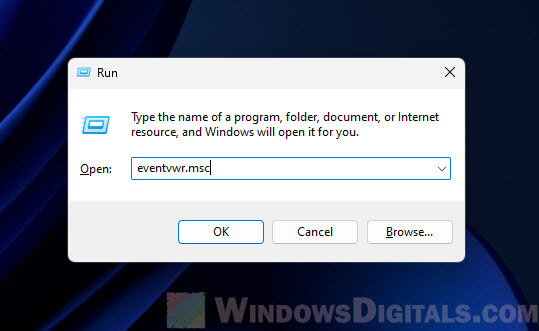
- Open the Run dialog by pressing Windows key + R.
- Type “eventvwr.msc” and click “OK” to open Event Viewer.

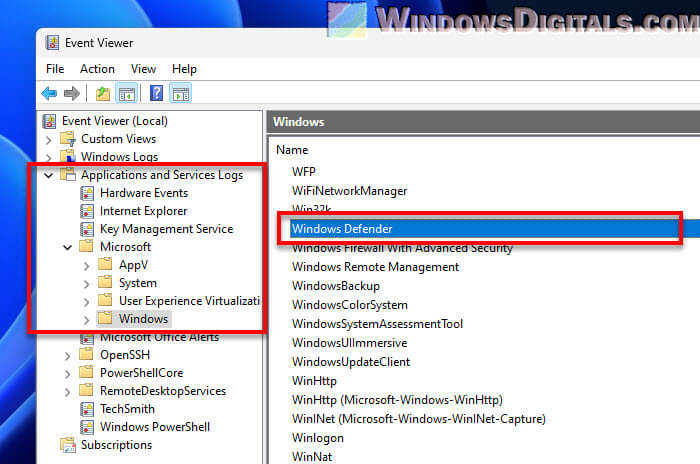
- In Event Viewer, click on the “Applications and Services Logs” folder to expand it.
- Click on the “Microsoft” folder to see more options.
- Find and click on the “Windows” folder under “Microsoft.”
- Double-click on the “Windows Defender” folder. You’ll see different folders for Windows components.

- In the right pane, find “Operational” under Windows Defender logs. Double-click it.

- To clear the history, right-click on “Operational” on the left pane and select “Clear Log…” from the context menu.

- When a dialog box pops up asking if you want to clear the log, click “Clear.”
This will remove all the Windows Defender protection history logs. The next time you check the Windows Defender Protection History section, it should show nothing or only the new things that has happened after you clearing it.