
Защитник Windows – это антивирус, который предустановлен практически во всех современных версиях операционных систем Windows. Это один из самых удобных способов защиты вашего компьютера от вредоносных программ и вирусных атак. Тем не менее в последнее время поступает много сообщений и жалоб о том, что пользователи не могут включить свой Защитник Windows.
Что препятствует включению Защитника Windows?
После получения многочисленных отчетов от пользователей, проблема была исследована — причины возникновения ошибки перечислены ниже.
- Поврежденные драйверы/ошибка реестра. Возможно, повреждены важные драйверы или записи реестра, из-за которых возникает эта ошибка. Иногда определенные вредоносные программы или вирусы внедряются на компьютер вместе с приложением и отключают Защитника Windows через реестр.
- Групповая политика. В некоторых случаях групповая политика может быть настроена на отключение Защитника Windows. Настройка могла произойти автоматически или вручную.
- Стороннее приложение или служба. Возможно, что сторонняя служба или приложение могут создавать помехи для важных элементов Защитника Windows и препятствует его правильной работе.
- Отключить AntiSpyware. Имя параметра реестра, которое внедряется в реестр компьютера и препятствует запуску Защитника Windows. Реестр контролирует все функции и службы внутри компьютера. Если Защитник Windows был отключен каким-либо вредоносным программным обеспечением или вирусом через реестр, он не включится, пока значение не будет очищено.
- Обновления. Если компьютер не был обновлен до последней версии, предоставленной Microsoft, он может быть уязвим к определенным вирусам, которые Защитник не может остановить.
Теперь, когда у вас есть общее представление о природе возникновения проблемы, давайте двигаться к ее решению. Убедитесь, что реализуете их в том порядке, в котором они предоставляются, чтобы избежать возникновения любых конфликтов.
Решение 1. SFC
Сканирование SFC проверяет весь компьютер на наличие отсутствующих/поврежденных драйверов и файлов реестра. После проверки Windows автоматически предложит заменить их. На этом этапе будем инициировать сканирование SFC.
- Нажмите одновременно кнопку «Windows» + «X».
- Выберите «Командная строка (администратор)» или «Powershell (администратор)» из списка.
Примечание. Если вы используете версию Windows 10 «Creators update», то вместо параметра командной строки вы увидите параметр Powershell.
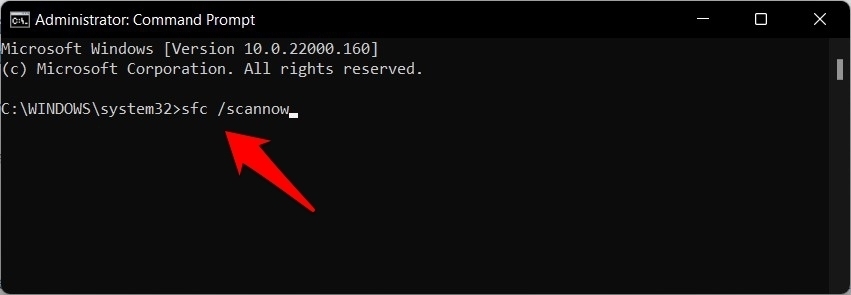
- Внутри PowerShell введите «sfc / scannow» и нажмите «Enter».
- Подождите, пока процесс сканирования будет завершен.
- Перезагрузите компьютер и проверьте, сохраняется ли проблема.
Решение 2. Включение через групповую политику
Если Защитник Windows был отключен с помощью групповой политики, то вы сможете его включить только самостоятельно. Рассмотрим включение Защитника Windows из групповой политики. Для этого:
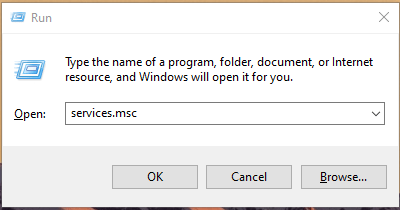
- Нажмите одновременно кнопки «Windows» + «R».
- Введите «gpedit.msc» в командной строке и нажмите «enter».
- Под заголовком «Конфигурация компьютера» дважды щелкните «Административные шаблоны».
- Дважды щелкните «Компоненты Windows», а затем дважды щелкните «Антивирусная программа Защитника Windows».
- На правой панели дважды щелкните параметр «Отключить антивирус Защитника Windows».
- Нажмите «Отключить» и выберите «Применить».
- Закройте окно, и перезагрузите компьютер.
Проверьте, сохраняется ли проблема.
Решение 3. Включение службы Защитника Windows
Возможно, что служба Защитника Windows настроена на запуск вручную. Нужно включить службу Защитника Windows из меню «Службы». Для этого:
- Нажмите одновременно кнопки «Windows» + «R».
- Введите «services.msc» и нажмите «Enter».
- Прокрутите вниз и дважды щелкните «Антивирусная программа Защитника Windows».
- Нажмите «Тип запуска» и выберите «Автоматический» вариант.
- Нажмите кнопку «Запустить», а затем «Применить».
Закройте окно и проверьте, сохраняется ли проблема.
Решение 4. Проверка обновлений
В некоторых случаях Защитник Windows может начать работать некорректно при отсутствии каких-то обновлений. Нужно проверить и установить новые обновления Windows.
- Нажмите одновременно клавиши «Windows» + «I».
- Нажмите «Обновления и безопасность».
- Выберите «Центр обновления Windows» на левой панели и нажмите «Проверить наличие обновлений».
- Подождите, пока обновления будут загружены и установлены.
- Перезагрузите компьютер, чтобы изменения вступили в силу.
Проверьте, сохраняется ли проблема.
Решение 5. Изменение значения AntiSpyware в реестре
Вполне возможно, что определенное вредоносное ПО или вирус установили в реестре скрипт, который мешает работе Защитника Windows. Нужно отключить это значение.
- Нажмите одновременно кнопки «Windows» + «R», чтобы открыть окно «Выполнить».
- Введите «regedit» и нажмите «Enter».
- Дважды щелкните на «HKEY_LOCAL_MACHINE», а затем на «SOFTWARE».
- Откройте «Policies», а затем «Microsoft».
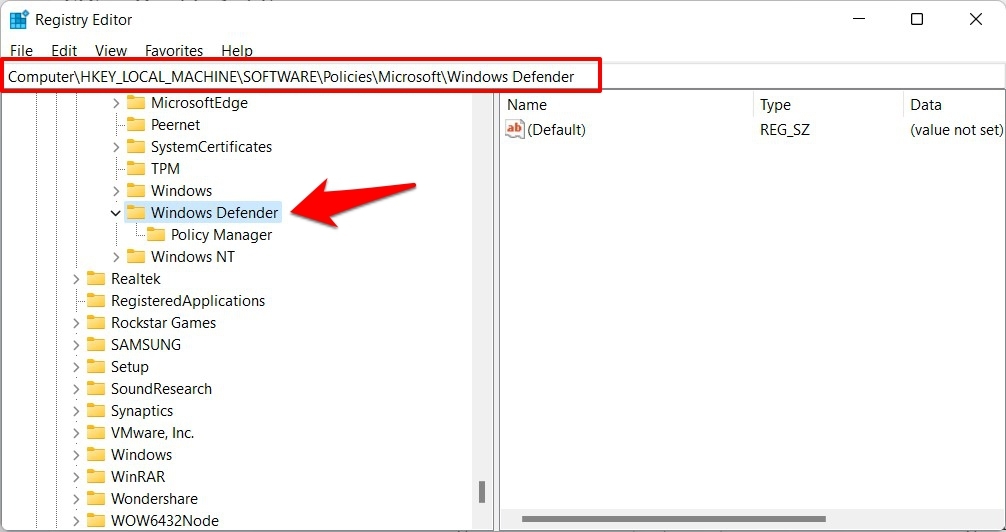
- Дважды щелкните на «Windows Defender» и на правой панели дважды нажмите значение «Disable AntiSpyware».
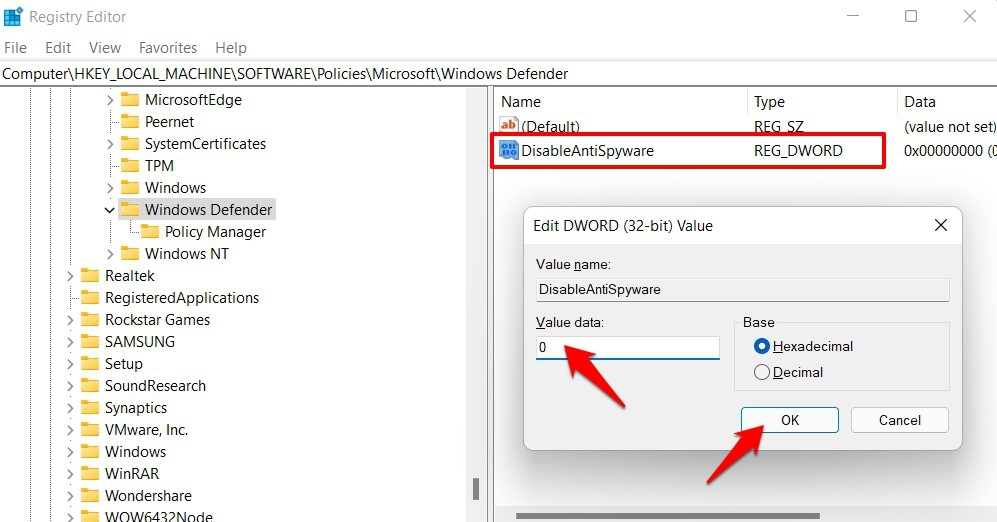
- Измените, значение на «0» и нажмите «Применить».
- Закройте окно, и перезагрузите компьютер.
Проверьте, сохраняется ли проблема.
Решение 6. Чистая загрузка
В редких случаях некоторые сторонние приложения или службы могут препятствовать включению Защитника Windows. Нужно инициировать чистую загрузку, которая предотвратит запуск любого из этих приложений.
- Войдите на компьютер с учетной записью администратора.
- Нажмите «Windows» + «R», чтобы открыть окно запуска.
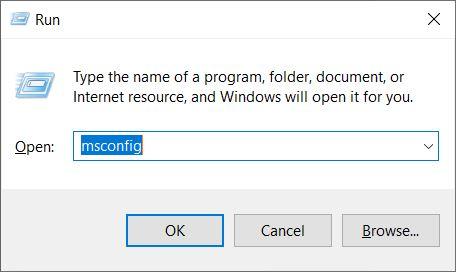
- Введите команду «msconfig» и нажмите Enter.
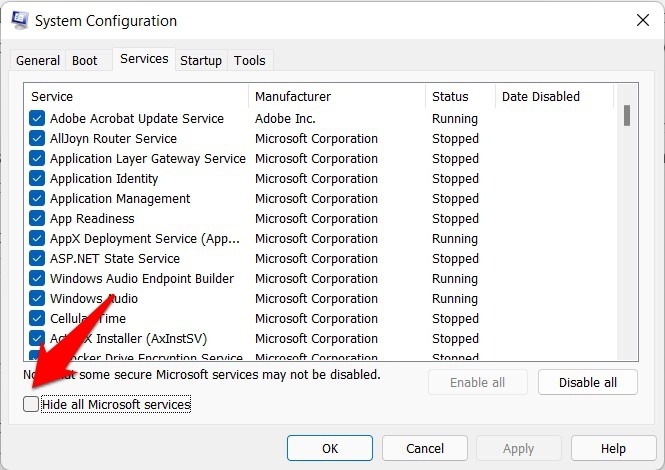
- Нажмите на «Службы» и снимите флажок «Скрыть все службы Microsoft».
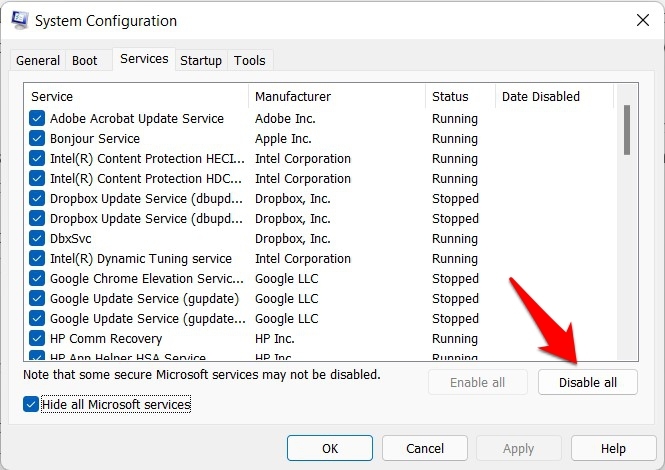
- Нажмите «Отключить все», а затем «ОК».
- Нажмите на вкладку «Автозагрузка» и выберите «Открыть диспетчер задач».
- Нажмите на кнопку «Автозагрузка» в диспетчере задач.
- Нажмите на любое приложение в списке, в котором написано «Включено» и выберите опцию «Отключить».
- Повторите этот процесс для всех приложений в списке и перезагрузите компьютер.
Теперь ваш компьютер загружен в состоянии «Чистой загрузки».
Проверьте, решена ли проблема.
Если проблема больше не наблюдается, начните включать службы поочередно и запомните ту, при включении которой проблема возвращается. Удалите службу или оставьте ее отключенной.
Внимание! Windows 11 — относительно свежая версия операционной системы от Microsoft, поэтому с течением времени некоторые элементы графического оформления и наименования определенных пунктов меню могут изменяться. Но приведенные в статье методы все равно будут оставаться актуальными.
Способ 1: Обновление системы
Ошибка при открытии Windows Defender наблюдается только в ранних сборках операционной системы, поэтому перед применением серьезных мер следует проверить наличие обновлений и при необходимости выполнить их установку. Делается это стандартными средствами через меню параметров:
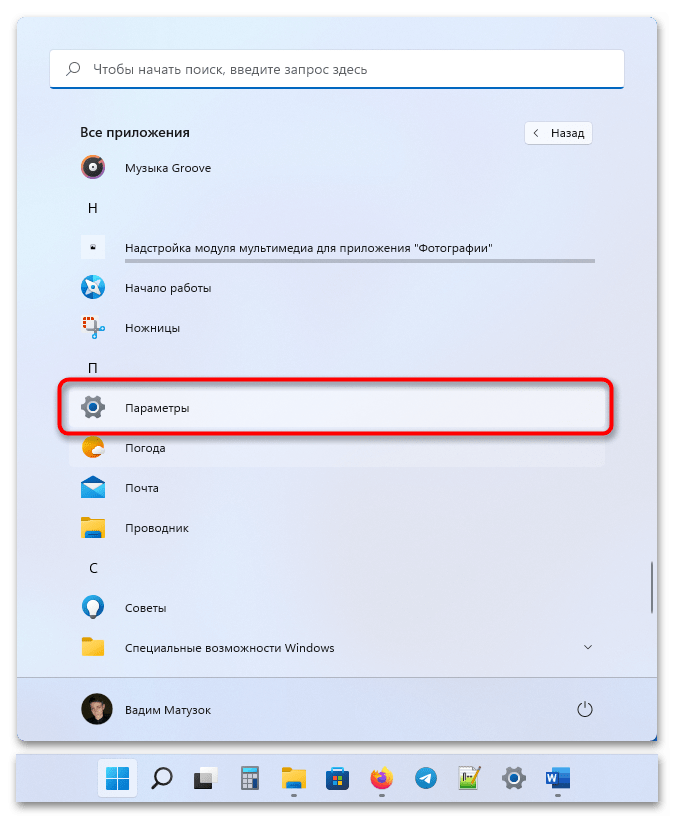
- Раскройте меню «Пуск», кликнув по соответствующей иконке на панели задач или нажав клавишу Win на клавиатуре. После появления соответствующего элемента интерфейса перейдите в раздел «Все приложения».
- Пролистайте список установленных на компьютере программ до буквы «П» и запустите «Параметры».
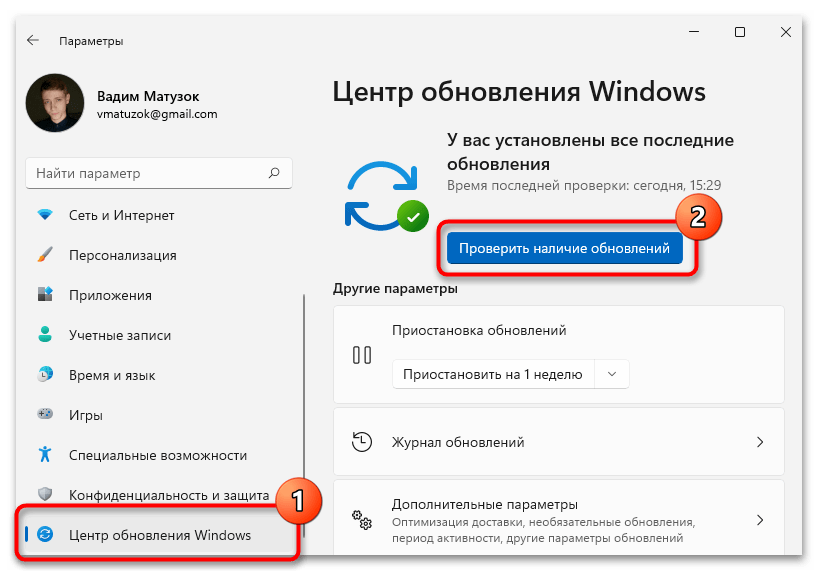
- В появившемся окне на боковой панели слева перейдите в раздел «Центр обновления Windows» и при наличии кнопки «Проверить наличие обновлений» нажмите по ней.
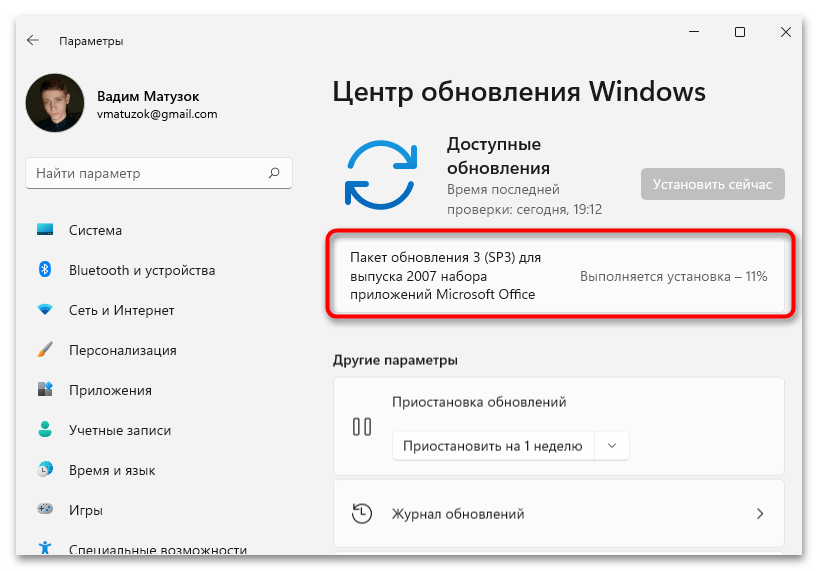
- Если новая версия операционной системы есть, то процесс загрузки и установки произойдет автоматически. Ход выполнения этой операции будет отображаться в этом же меню.
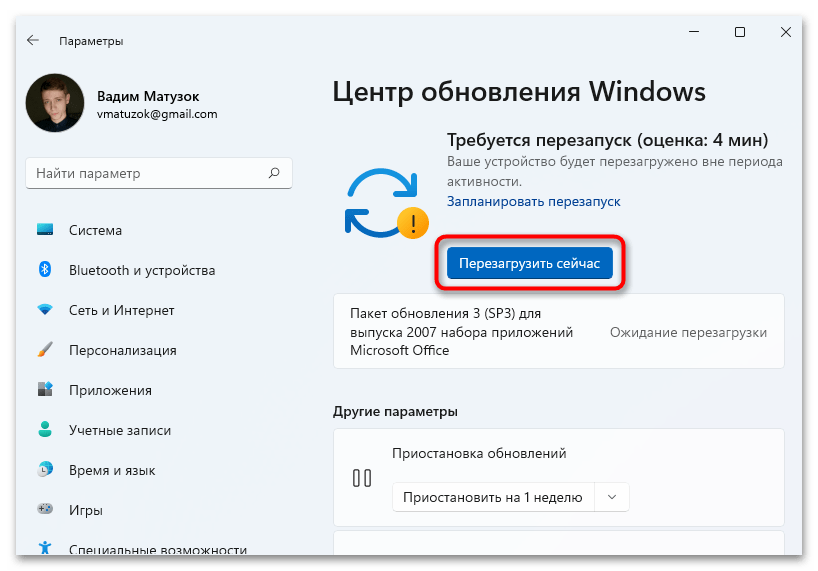
- При необходимости следует перезапустить компьютер. Об этом будет свидетельствовать появление соответствующей кнопки. Нажмите по ней.

Читайте также: Как обновить операционную систему Windows 10 / 8 / 7 / XP
На корректную работу «Защитника Windows» может влиять отсутствие дополнительных обновлений, их тоже потребуется проверить:
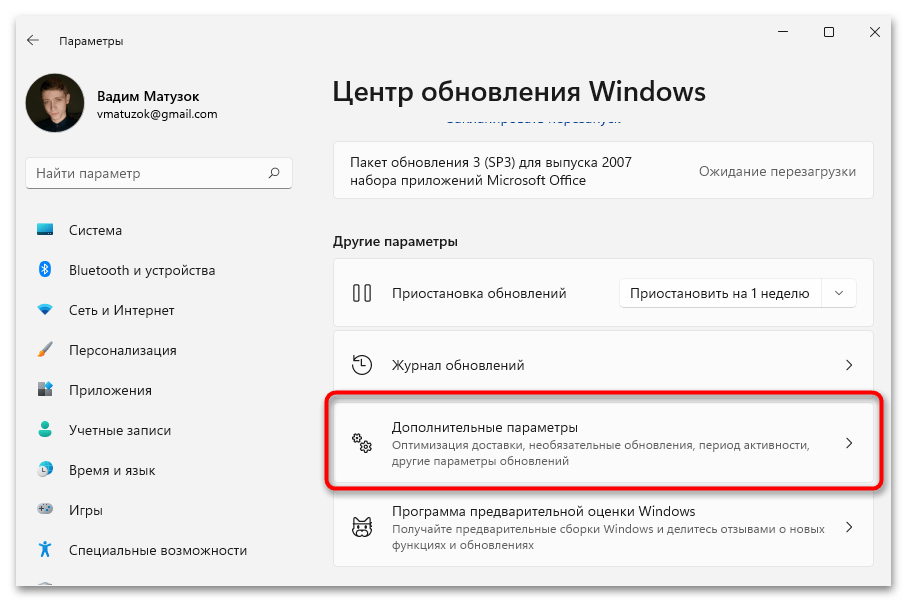
- В разделе «Центр обновления Windows» перейдите в меню «Дополнительные параметры».
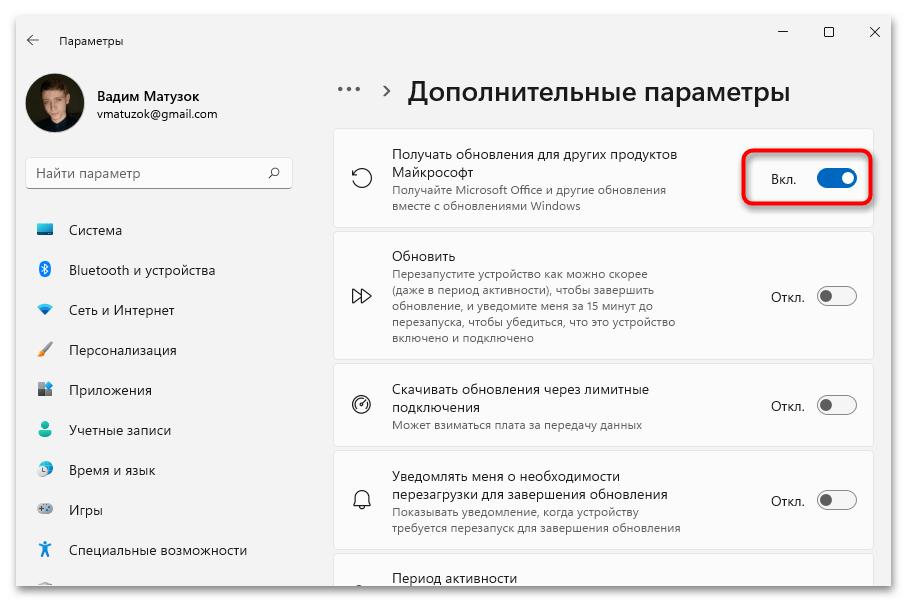
- Включите опцию «Получать обновления для других продуктов Майкрософт», переведя переключатель в активное положение.
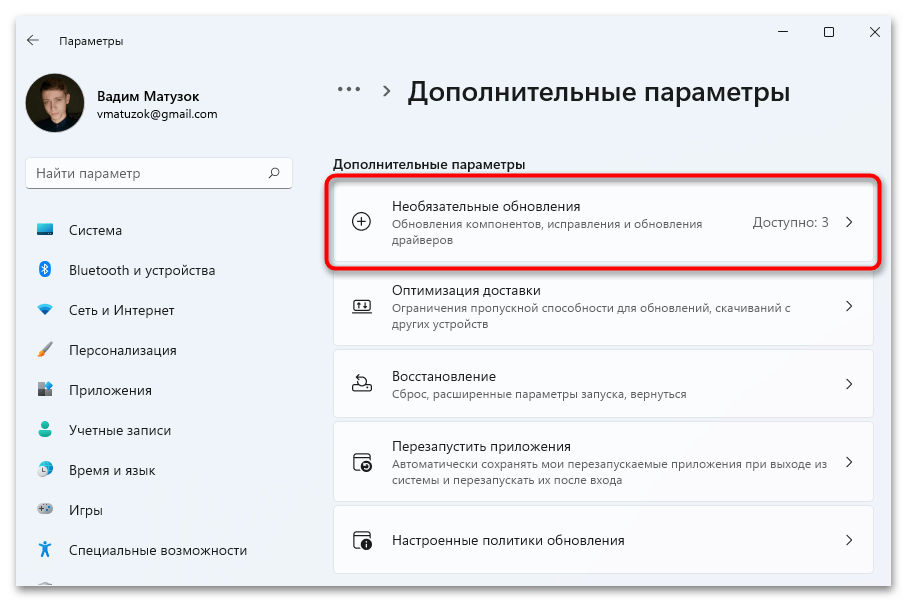
- Спуститесь ниже до блока «Дополнительные параметры» и зайдите в раздел «Необязательные обновления».
- Откройте выпадающие списки всех категорий (при их наличии) и установите отметки у каждого пакета. После этого запустите процесс обновления, кликнув по кнопке «Скачать и установить».
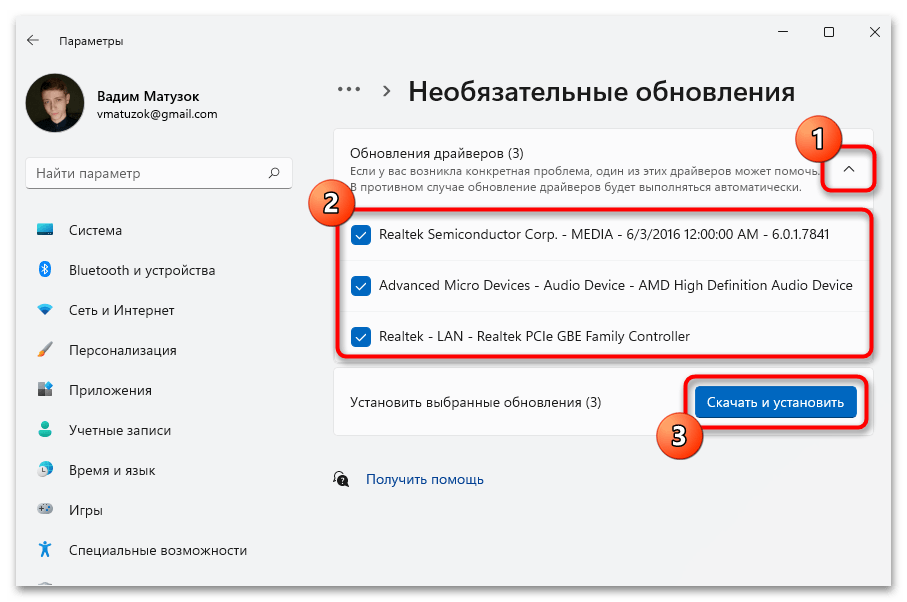
Останется дождаться завершения процедуры инсталляции всех новых апдейтов, после чего выполнить перезапуск компьютера.
Читайте также: Как включить или отключить Windows Defender
Способ 2: Сброс параметров «Защитника Windows»
Если после обновления и перезагрузки системы проблема со службой Windows Defender не устранилась, потребуется выполнить сброс параметров. Делается это посредством ввода специальной команды в окне консоли:
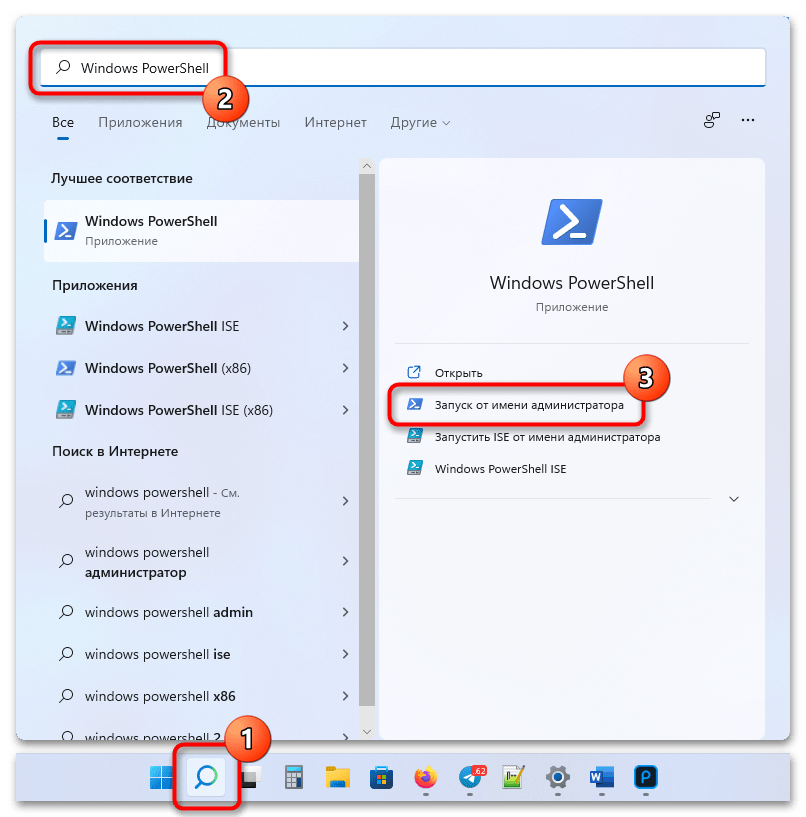
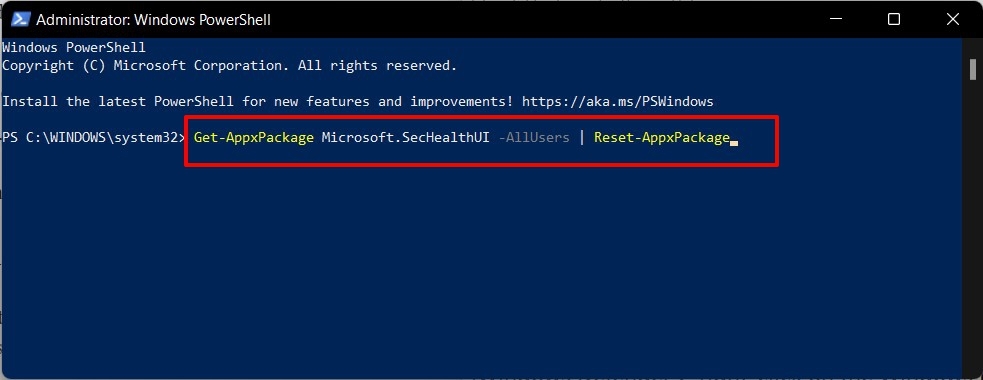
- Раскройте меню поиска, кликнув по соответствующей иконке на панели задач. Введите в поле запрос «Windows PowerShell», после чего нажмите по пункту «Запуск от имени администратора».
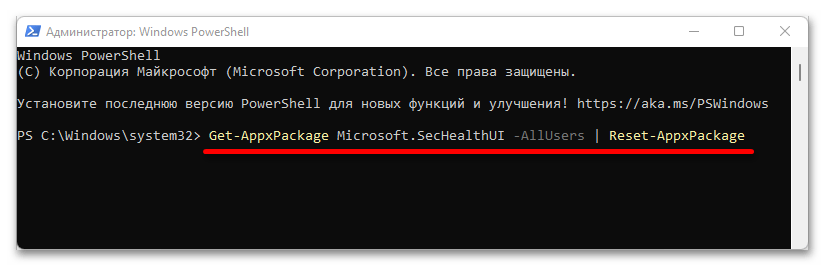
- В окно открывшейся консоли введите следующую команду и нажмите клавишу Enter для выполнения:
Get-AppxPackage Microsoft.SecHealthUI -AllUsers | Reset-AppxPackage - Дождитесь завершения перезапуска службы защиты, после чего попробуйте повторно открыть Windows Defender.
Читайте также: Как полностью удалить «Защитник Windows»
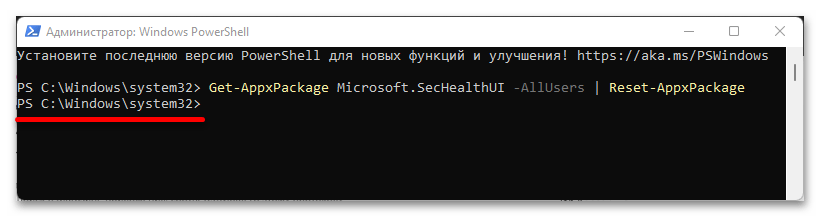
Обратите внимание! При выполнении введенной команды никакой текст в консоли не отображается. Процедура будет выполнена, когда появится новое предложение для ввода.
Наша группа в TelegramПолезные советы и помощь
,
In this article, you’ll learn what might be preventing Windows Defender from starting, and then we’ll show you step-by-step how to fix the problem: Windows Defender Security not working.
Windows Defender (aka ‘Windows Security’), the built-in antivirus software in Windows 10/11, is crucial for protecting your computer from malware and other online threats. However, there are several factors that can prevent Windows Defender to not start, leaving your system vulnerable.
What can cause Windows security not working problem?
- Conflicting third-party antivirus software: Installing another antivirus program may affect the operation of Windows Defender. In some cases, even if you have uninstalled third-party antivirus programs, the remaining registry entries may still cause Windows Defender to not start.
- Corrupted system files: Damaged or missing system files can disrupt Windows Defender’s functionality.
- Registry or Group Policy modifications: Incorrect registry or group policy changes made by the user or by a malicious program can disable Windows Defender.
How to FIX: Windows Defender Security won’t open on Windows 11/10.
If the Windows Security (aka «Windows Defender») does not start in Windows 10/11, follow these steps in order to fix the problem.
- Uninstall Third-Party Antivirus.
- Scan for Malware and Viruses.
- Perform a Clean Boot.
- Start or Restart the Security Center service.
- Repair Windows System Files.
- Reset Windows Defender from PowerShell.
- Enable Windows Defender in Registry.
- Enable Windows Defender in Group Policy.
- Repair Windows 10/11.
Method 1. Uninstall Third-Party Antivirus.
One of the main reasons that Windows Defender Security cannot start is an installed third-party antivirus program. So, if you have installed a third-party security program, uninstall it, restart your PC and check if the problem remain. *
* Note: Even if you haven’t installed a security software yourself, your computer may have it pre-installed. To see if this is happening:
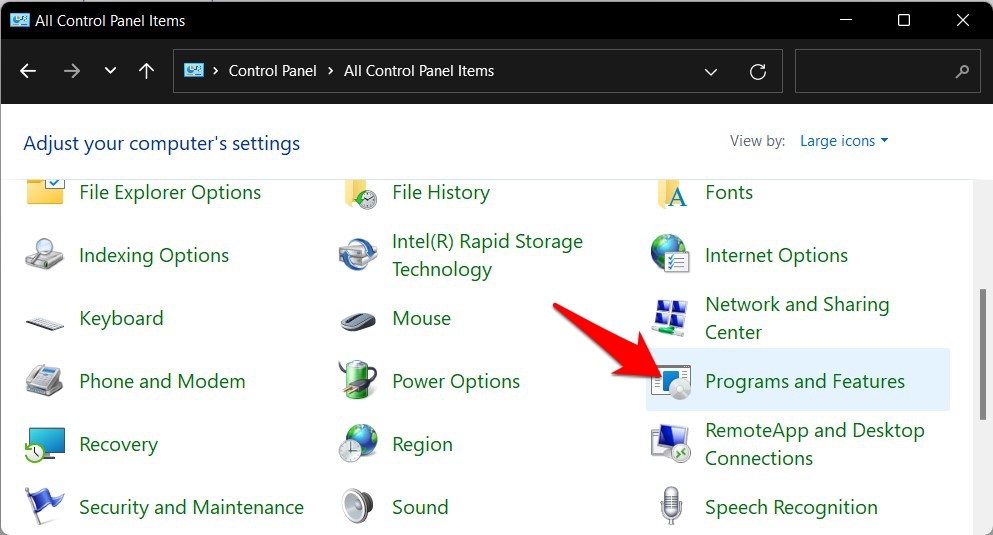
1. Type «control panel» in the search and then open the Control Panel app and go to Programs > Uninstall a program.
2. Next, look for any installed third-party antivirus and if there is one, select it and click Uninstall.
3. When uninstall is completed, restart your PC and check if the problem remain. *
* Important: Restart your computer even if you haven’t uninstalled any programs. Sometimes Windows Defender-related services may be stuck and not working, but restarting the computer can force them to work properly.

Method 2. Scan for Malware/Viruses.
Before proceeding further, ensure that your computer is clean from viruses and malware. To accomplish this task you can use this Malware Scan and Removal Guide to check and remove viruses or/and malicious programs that may be running on your computer.
After scanning and cleaning your computer for malware, check if the problem persists. If not, you’re done here, otherwise continue to the next step.
Method 3. Perform a Clean Boot.
Sometimes, other applications running in the background can conflict with Windows Defender and prevent it from running. To find out if this is causing the Windows Defender startup problem, start your computer with all third-party services disabled by doing a clean boot using these steps:
Step 1. Disable Startup programs.
1. Press CTRL + SHIFT + ESC to open Task Manager.
2. In the Startup tab, disable (one by-one) all the third-party programs running at Windows Startup. Then reboot your PC.

3. After rebooting, check if the problem remains and if so, proceed to Step-2. If not, reopen the Task Manager and enable one by one the disabled programs and reboot until you find the culprit.
Step 2. Disable Third-Party Services.
1. Press the Windows + R keys to open the ‘Run’ command box.
2. Type msconfig and press Enter to open the System Configuration utility.

3. At Services tab, check the Hide all Microsoft services checkbox.

4. Then press the Disable all button, to disable all non Windows services that start with Windows. When done, click OK and restart your PC.

5. Check if Windows Defender works now. If yes, open ‘msconfig’ again and enable one by one the disabled services and reboot until you find the culprit. If the problem persists, select the the ‘General’ tab, choose Normal Startup, reboot your PC and continue to next method.

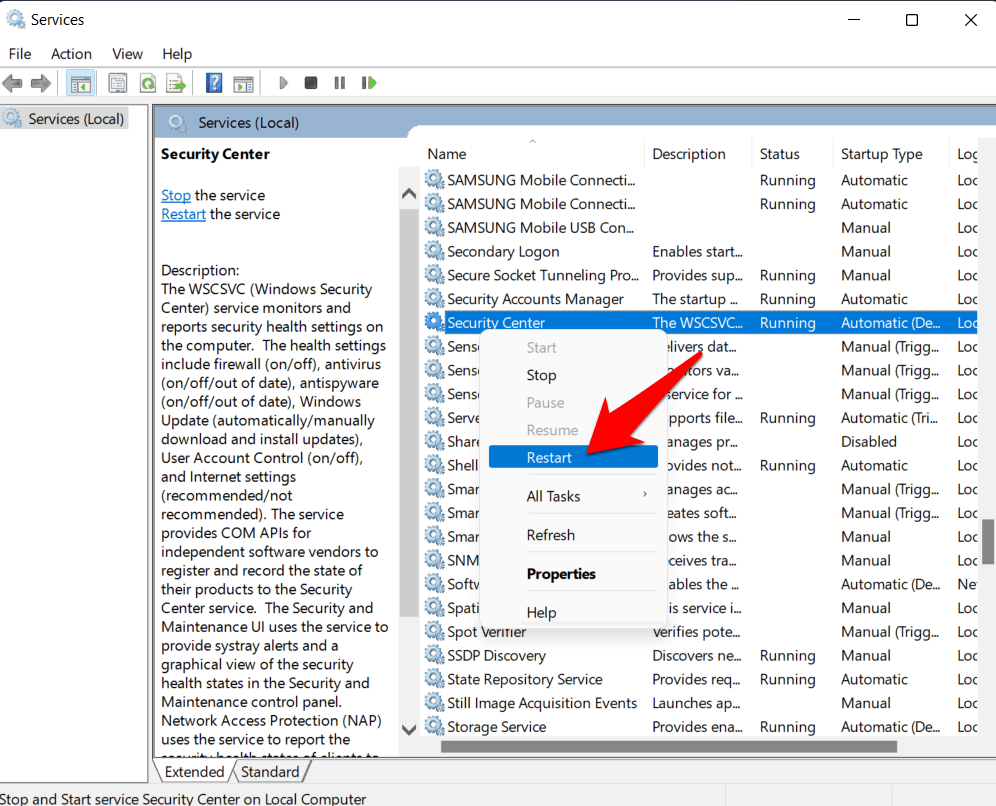
Method 4. Start or Restart the ‘Security Center’ service.
To ensure Windows Defender works well, «Security Center» Service should be running.
1. Press the Windows + R keys to open the ‘Run’ command box.
2. Type services.msc and press Enter to open the Services control panel.

3. Find the Security Center service and check if it running. According the result do the following:
- If «Security Center» service is not running, right-click on it and click Start to start the service.*
- If «Security Center» service is running, right-click on it and click Restart.*
* Note: If the «Start» & «Restart» options are inactive (greyed out), skip to next method.

Method 5. Repair Windows System Files.
Repairing Windows system files is a common but important step in solving Windows 10/11 problems like the one mentioned here.
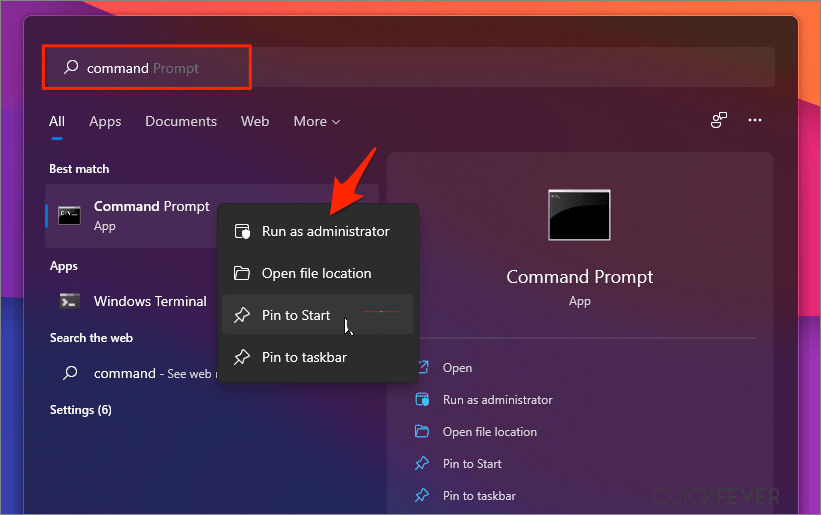
1. Open Command Prompt as Administrator. To do that, type «cmd» or «command prompt» in the search and then click Run as administrator in Command Prompt result.

2. At the command prompt window, copy-paste the following command & press Enter:
- Dism.exe /Online /Cleanup-Image /Restorehealth

3. Be patient until DISM repairs component store. When the DISM operation is completed, copy-paste the command below and press Enter:
- SFC /SCANNOW

4. When SFC scan is completed, restart your computer and check if the problem is fixed.
Method 6. Fix Windows Defender Not Starting using PowerShell.
1. In Windows Search, type PowerShell and select Run as Administrator to open PowerShell as an Administrator.

2. In PowerShell window, copy and paste the following command and then press Enter.*
- Get-AppxPackage Microsoft.SecHealthUI -AllUsers | Reset-AppxPackage

* Note: If after giving the above command, you receive the error «package not found» or something similar, give this command instead:
- Get-AppXPackage -AllUsers | Foreach {Add-AppxPackage -DisableDevelopmentMode -Register “$($_.InstallLocation)\AppXManifest.xml”}

3. After command execution, close PowerShell, reboot your PC and try again to open Windows Defender.
Method 7. FIX Windows Defender Not Working in Registry.
1. Press the Windows + R keys to open the Run dialog box.
2. Type «regedit» and press Enter to open the Registry Editor.

2. In Registry, navigate to this location:
- HKEY_LOCAL_MACHINE\SOFTWARE\Policies\Microsoft\Windows Defender
3. At the right pane double-click to open the DisableAntiSpyware REG_DWORD value.*
* Note: If the «DisableAntiSpyware» value doesn’t exist, skip to next step or do the following:
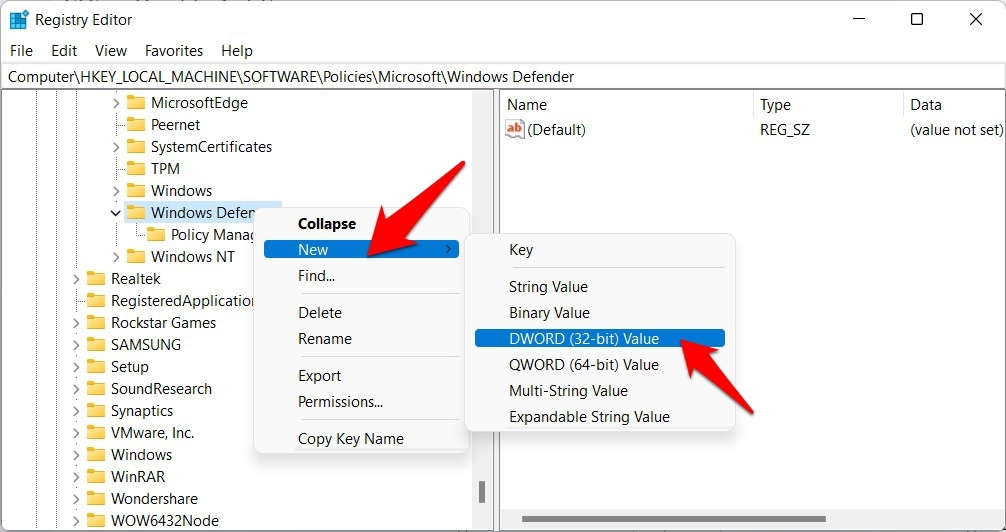
- Right-click on empty space, and choose New > DWORD (32-bit) Value.
- Rename the «New Value #1» to «DisableAntiSpyware« and press Enter.
- Continue to next step.

3. Set the Value data to 0 to enable Windows Defender and then press OK.

4. Close the Registry Editor and reboot your PC.
Method 8. Enable Windows Defender in Group Policy.
Sometimes, Windows Defender is disabled because of a group policy that disables it, either set by the user or by malware. *
* Note: This method applies only to Windows 10/11 Professional Editions.
1. Press Windows + R keys to open the Run dialog.
2. Type gpedit.msc and press OK.

2. In the Local Group Policy Editor, navigate to:
- Computer Configuration > Administrative Templates > Windows Components > Microsoft Defender Antivirus.
3a. Double-click to open the Turn off Windows Defender Antivirus policy in the right pane.

4. In the window that appears, choose Not Configured or Disabled and then click Apply and OK.

5. Close the Group Policy Editor and restart your PC.
Method 9. Repair Windows with an In-place Upgrade.
If, after following the methods above, you’re still having problems, your last option is to repair Windows with an in-place upgrade. To do this, use the instructions in one of these tutorials, depending on your version of Windows.
- How to Repair Windows 10 with an In-Place Upgrade.
- How to Repair Windows 11 with an In-Place Upgrade.
That’s it! Which method worked for you?
Let me know if this guide has helped you by leaving your comment about your experience. Please like and share this guide to help others.
If this article was useful for you, please consider supporting us by making a donation. Even $1 can a make a huge difference for us in our effort to continue to help others while keeping this site free:
- Author
- Recent Posts
Konstantinos is the founder and administrator of Wintips.org. Since 1995 he works and provides IT support as a computer and network expert to individuals and large companies. He is specialized in solving problems related to Windows or other Microsoft products (Windows Server, Office, Microsoft 365, etc.).
Windows Security Not Working or Causing Issues on your Windows 11 Computer? Here are the Best Methods to Fix Windows Defender Not Working in Windows 11.
In this guide, we will show you various methods to fix Microsoft Defender not working in Windows 11. While there is a plethora of third-party antivirus software that we could choose from, however, it’s the one from Microsoft that users are generally inclined towards.
Its efficient deep and quick scanning features coupled with its non-intrusive nature makes it the go-to choice for Windows users. But in spite of all the goodies installed, it tends to occasionally go through a few issues every now and then.
In this regard, one of the most concerning ones is when the Defender isn’t functioning along the expected lines. This straightaway translates to the fact that you wouldn’t be able to scan any internal or external drivers on your PC, thereby nullifying its most important functionality.
While this issue is no doubt quite infuriating, fortunately, there do exist a few workarounds that are known to fix Defender not working in Windows 11. And this guide shall make you aware of just that. So without further ado, let’s check them out.
Best Fixes for Windows Security Defender Not Working
Do note that there’s no universal fix as such. You will have to try out each of the below-mentioned workarounds and see which one works best in your favor. So keeping that in mind, let’s get started.
FIX 1: Restart Security Center Service
The Security Center service is responsible for keeping a tab on the Defender’s security settings. So if there’s an issue with this service, then the Defender wouldn’t be able to work along the expected lines. Therefore you should consider disabling and then re-enabling Security Center, which could be done as follows:
- Use the Windows+R shortcut keys to bring up the Run dialog box.
- Then type in the below command to open the Service menu
services.msc

- Now scroll to the Security Center Service, right-click on it, and select Restart.

- Finally, restart your PC and then verify if the issue of Defender not working in Windows 11 has been fixed or not.
FIX 2: Disable Other Antivirus Softwares
If you have any third-party antivirus or firewall installed, then it might conflict with the Defender’s proper functionality. So in that case, it’s better to temporarily disable that third-party antivirus from your PC. Moreover, if doing so does end up fixing the Defender not working in Windows 11, then you could proceed ahead and permanently delete the third-party antivirus from your PC. Here’s how:
- Head over to the Start menu, search Control Panel, and open it.
- Then go to the Programs and Features section.

- Now scroll to the Antivirus app, select it, and hit the Uninstall button.
- Once the app has been removed, restart your PC and see if the underlying issue has been rectified or not.
FIX 3: Use SFC Command
If the Windows system file gets corrupted, then it could create unwanted roadblocks for its apps and services. In such cases, you could make use of the System File Checker Utility Tool. It will scan for all the corrupt system files and replace them with their working counterpart from the cached memory. So let’s put it to test right away:
- Head over to the Start Menu, search CMD, and launch Command Prompt as an administrator.

- Then copy-paste the below command and hit Enter:
sfc /scannow

- The scanning process will now begin and could take a couple of minutes.
Once the scanning is complete, it is recommended to restart your PC for the changes to take place. When it boots up, verify if the Defender not working in Windows 11 has been fixed or not.
FIX 4: Disable Third-Party Services
All the third-party apps have their service files running in the background. However, if these files aren’t working along the expected lines, then not only will they affect their associated apps, but their rippling effect could be felt by some of the system apps as well, including Windows Defender.
To verify if that is the case or not, you should access Defender inside an environment where all the third-party services are disabled. If it works out for you, then re-enable one service at a time, until you are able to identify the culprit. Then consider keeping that service-disabled for good. Here’s how all of this could be carried out.
- Bring up the Run dialog box via Windows+R shortcut keys.
- Then type in the below command and hit Enter to open the System Configuration menu.
msconfig

- Now go to the Services tab and checkmark Hide all Microsoft services.

- After that, click on the Disable All button. Doing so shall disable all the non-Microsoft-related services.
- Once that is done, check if it manages to fix the issue of Defender not working in Windows 11.
If it has been rectified, then tick mark one service at a time to re-enable it. Do so until the Defender issue re-appears. When that happens, check out the last service that you had enabled and then disable it. If you wish to take a more aggressive route, then you could also consider uninstalling that service’s linked app from your PC.
FIX 5: Disable Anti-Spyware
In some instances, the Defender’s AntiSpyware configuration might prevent the former from executing its normal functions. To rectify this issue, you should disable the AntiSpyware by tweaking its Registry value. Here’s how:
- To begin with, launch Registry Editor from the Start menu.
- Then copy-paste the below location in its address bar:
Computer\HKEY_LOCAL_MACHINE\SOFTWARE\Policies\Microsoft\Windows Defender

- Now right-click on the Windows Defender folder, select New > DWORD (32-bit) value.
- Name this file as DisableAntiSpyware. Then double-click to open it and type in 0 under the Value Data field.

- Finally, click OK to save this file and then restart your PC.
Check if the Defender not working in Windows 11 issue has been fixed or not. If the problem still persists, then delete this DisableAntiSpyware registry file and proceed ahead with our next fix.
FIX 6: Reset Windows Defender
If none of the aforementioned methods managed to work out for you, then you should consider resetting Windows Defender back to its factory default settings. This will take it back to its initial state, similar to how you had first used it just after installing or upgrading to Windows 11.
- So head over to the Start menu and open Powershell as an administrator.
- Then type in the below command and hit Enter. It shall reset the Windows Defender:
Get-AppxPackage Microsoft.SecHealthUI -AllUsers | Reset-AppxPackage

- Once the command has been successfully executed, restart your PC. Once it boots up, the issue should be rectified.
FIX 7. Reset Windows Security App
Using one of these methods, you can restore the Windows Security app if it doesn’t open, crashes, or doesn’t function properly.
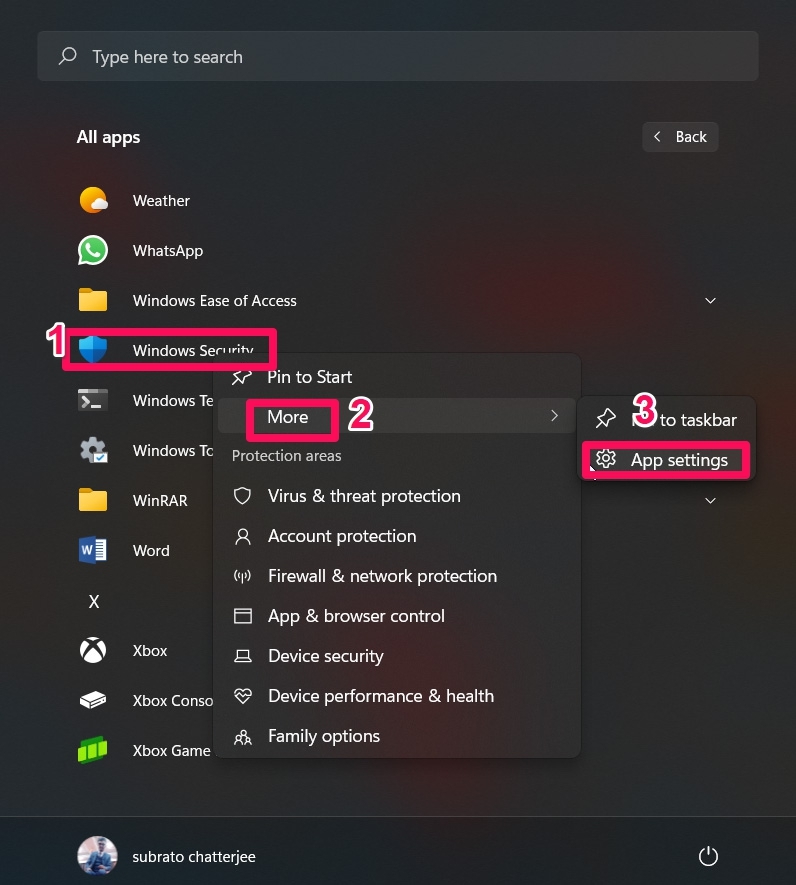
- Click on the Start button.
- Browse to where the Windows Security shortcut is located and right-click on it.
- Select More > App Settings.

- Windows Security’s Advanced options will open. Go to the Reset section.
- Choose Reset, then confirm that action.


Conclusion
So with this, we round off the guide on how you could fix Defender not working in Windows 11. We have shared six different methods for the same. Do let us know in the comments section which one spelled out success for you.
If you’ve any thoughts on How to Fix Windows 11 Defender Security Not Working?, then feel free to drop in below comment box. Also, please subscribe to our DigitBin YouTube channel for videos tutorials. Cheers!
Microsoft’s Windows Defender ensures your PC is safe from various threats. If this tool stops working, your machine becomes vulnerable to many types of viruses and malware. Here’s how to resolve problems with Defender.
One common reason Defender stops working is that you’re using a third-party antivirus program. Other causes include corrupt system files, an obsolete Windows version, and more. We’ll walk you through the steps to get Defender working on your computer.
Note: Generally, using more than one full antivirus app isn’t a good idea (and most won’t work right if you try). However, you can use some antimalware apps (such as Malwarebytes) along with Windows Defender to shore up your defenses.

We assume you’ve already tried the basic solutions—like retrying a scan with Defender and restarting your PC—and are still having problems. The following methods should help you resolve your issue.
1. Update the Windows Operating System
A bug in your system can cause Windows Defender not to turn on or work as intended. One way to fix most Microsoft-acknowledged bugs is by updating your Windows system.
When you update, your system receives bug fixes, which help resolve various issues with your computer. Sometimes, you also get new features when you install a Windows update.
- Launch Settings by pressing Windows + I.
- Select Update & Security in Settings.
- Choose Windows Update on the left.
- Select Check for updates on the right.

- Install the available updates.
- Restart your PC.
2. Reset Windows Security
When Windows Defender doesn’t work or misbehaves, resetting the Windows Security app should be your first troubleshooting step. This helps because Defender is part of Windows Security and bringing the app back to factory values resolves many minor issues.
Resetting the app will clear the app’s saved data.
- Open Start, search for Windows Security, select the down-arrow icon on the right, and choose App settings.
- Scroll down the page and select Reset.

- Choose Reset in the prompt.

- Restart your PC by launching Start, selecting the Power icon, and choosing Restart.
- Open Windows Security and enable or run Windows Defender.
3. Uninstall the Third-Party Antivirus Program
Windows Defender turns off when a third-party antivirus is running on your PC. You can try removing your installed antivirus tool to see if that fixes Defender’s issues.
Remove a Third-Party Antivirus Program
You remove an antivirus tool like how you do other Windows apps.
- Open Settings by pressing Windows + I.
- Select Apps in Settings.
- Choose your antivirus on the list.
- Select Uninstall.

- Choose Uninstall in the prompt.
- Reboot your PC.
When your PC turns on, launch Windows Security and see if Defender is working. If the issue persists, try cleaning up your antivirus’ leftover files to fix the problem.
Delete a Third-Party Antivirus’ Leftover Files
Microsoft has published a list of cleanup tools that you can use to remove an antivirus program from your PC completely. These tools dig deeper into your system’s directories, find the files associated with your antivirus, and delete those files.
Use the appropriate tool from the list on your PC and get rid of your antivirus tool’s leftover files. When you’re done, reboot your PC.
4. Restart the Security Center Service
Windows uses various services to keep your PC’s functions running. One of these is a Security Center service, which is related to the Windows Defender tool. You can try turning off and turning on this service to resolve your problem.
- Open Run by pressing Windows + R.
- Type the following and press Enter: services.msc
- Find Security Center in the service list on the right.

- Right-click Security Center and choose Restart.
5. Turn On Windows Defender From Registry or Group Policy Editor
If you have trouble enabling Windows Defender from the Windows Security app, try the alternative methods like Windows Registry and Local Group Policy Editor to activate the tool.
Use the Windows Registry method if you’re running the Windows Home edition. If you’re on the Pro or Enterprise edition, use the Local Group Policy Editor method.
Activate Windows Defender From Windows Registry
- Press Windows + R to open Run, type the following in the Run box, and press Enter: regedit
- Select Yes in the User Account Control prompt.
- Head to the following path in Registry Editor:
HKEY_LOCAL_MACHINESOFTWAREPoliciesMicrosoftWindows Defender - Access the DisableAntiSpyware entry on the right. If you don’t see this entry, create it by right-clicking anywhere blank and choosing New > DWORD (32-bit) Value.

- Enter 0 in the Value data field and select OK.

- Close Registry Editor.
Windows Defender is now enabled on your PC.
Turn On Windows Defender From Local Group Policy Editor
- Open Run by pressing Windows + R, type the following in Run, and press Enter: gpedit.msc
- Navigate to the following path in Local Group Policy Editor:
Computer Configuration > Administrative Templates > Windows Components > Microsoft Defender Antivirus - Open the Turn off Microsoft Defender Antivirus entry on the right.

- Select Disabled and choose Apply followed by OK at the bottom.

- Close Local Group Policy Editor.
Windows Defender is now activated.
6. Perform a Clean Boot on Your Windows PC
One possible reason Windows Defender isn’t working is that your other installed apps are causing interference with the tool. You can verify that by clean booting your system, which only loads the essential system files to turn on your PC.
If you can enable and use Defender when you’ve clean booted your PC, one or more of your installed apps are the culprit. In this case, manually verify your app list and remove the apps that you believe are suspicious.
7. Fix Windows’ Corrupt System Files
When Windows system files become corrupt, you experience unexpected issues on your machine, including Defender not working. Luckily, Windows includes a tool that you can use to find and fix all the faulty system files on your computer.
- Right-click Start and choose Command Prompt (Admin).
- Select Yes in the User Account Control prompt.
- Type the following in Command Prompt and press Enter: DISM.exe /Online /Cleanup-image /Restorehealth

- Wait for the command to finish executing.
- Next, run the following command: sfc /scannow

- Wait for the command to find and fix problematic files.
Fix the Broken Windows Defender Tool on Your Computer
It’s essential to keep Windows Defender running as the tool ensures the safety of your data. However, sometimes, the tool experiences hiccups and doesn’t work as expected. In such a situation, you can follow the above methods to eliminate the error.
Once you’ve fixed the issue, you can run a full scan to ensure no threats are sitting on your computer.
Related Posts
- How to Fix a “This file does not have an app associated with it” Error on Windows
- How to Fix an Update Error 0x800705b4 on Windows
- How to Resolve “A JavaScript error occured in the main process” Error on Windows
- How to Fix the Network Discovery Is Turned Off Error on Windows
- How to Change Folder Icons in Windows