
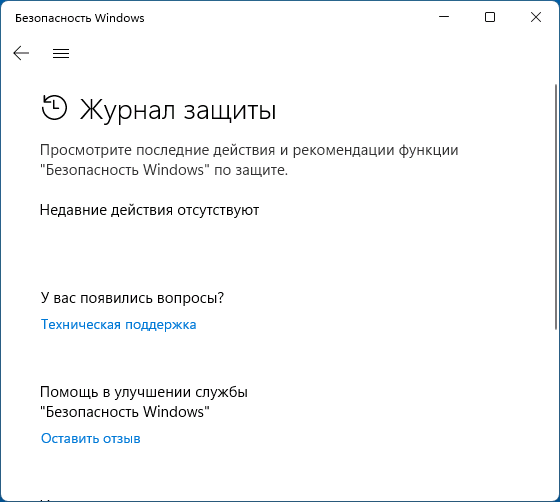
Опция очистки журнала защиты в интерфейсе Microsoft Defender (Защитник Windows) отсутствует, однако иногда может возникнуть необходимость удалить из него обнаруженные угрозы: сделать это возможно.
В этой инструкции подробно о том, как очистить журнал защиты Windows 11 и Windows 10, а также дополнительная полезная информация в контексте рассматриваемой темы.
Очистка журнала защиты путем удаления файлов журнала

Файлы, хранящие информацию, отображающуюся в журнале защиты в окне «Безопасность Windows» находятся в папке
C:\ProgramData\Microsoft\Windows Defender\Scans\History\Service
Однако, попытка простого удаления этих файлов в Проводнике с большой вероятностью не удастся: вы увидите сообщение о том, что «Вам отказано в доступе к этой папке» при переходе к ней вручную или о том, что не удается найти указанную папку.
Я не рекомендую изменять владельца и права доступа к папкам Microsoft Defender, вместо этого используйте следующие шаги:
- Загрузите компьютер в безопасном режиме: для этого можно нажать клавиши Win+R, ввести msconfig, затем на вкладке «Загрузка» включить «Безопасный режим», применить настройки и перезагрузить компьютер. Есть и другие способы загрузки в безопасном режиме.

- После загрузки в безопасном режиме перейдите к папке
C:\ProgramData\Microsoft\Windows Defender\Scans\History\Service
сделать это можно вручную (но учитывать, что папка ProgramData скрытая), либо скопировать путь, вставить в адресную строку проводника и нажать Enter.
- Удалите всё содержимое этой папки. В некоторых случаях один из файлов не удаляется — обычно это не влияет на результат очистки журнала.

- Ещё один способ удаления: в командной строке, запущенной от имени администратора, введите команду
del "%ProgramData%\Microsoft\Windows Defender\Scans\History" /s /f /q
- Отключите загрузку в безопасном режиме (так же в msconfig) и перезагрузите компьютер, журнал защиты будет очищен:


Ещё один вариант выполнить то же самое, если внутри Windows выполнить действие не удается — загрузиться загрузочной флешки WinPE и удалить содержимое указанной папки на диске.
Просмотр событий Windows
Несмотря на то, что журнал защиты в окне «Безопасность Windows» будет очищен способом, рассмотренным выше, увидеть обнаружения можно также в «Просмотре событий» Windows. Вы можете удалить эти сведения и там:
- Нажмите клавиши Win+R на клавиатуре, введите eventvwr.msc и нажмите Enter.
- В просмотре событий перейдите к разделу Журналы Windows — Журналы приложений и служб — Microsoft — Windows — Windows Defender, раскройте этот раздел.
- Нажмите правой кнопкой мыши по журналу «Operational» и выберите пункт «Очистить журнал».

- Подтвердите очистку журнала.

Автоматическая очистка журнала
При необходимости вы можете настроить время, по прошествии которого записи в журнале защиты будут удаляться автоматически.
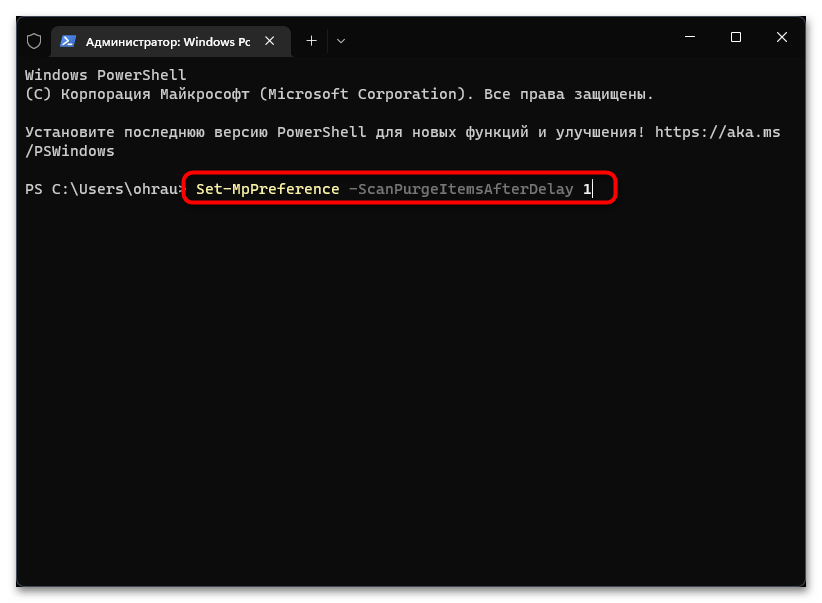
Сделать это можно в PowerShell (Терминале Windows), достаточно запустить его от имени администратора и ввести команду (в примере — удаление события из журнала производится через 1 сутки)
Set-MpPreference -ScanPurgeItemsAfterDelay 1

Второй вариант, который подходит только для редакций Windows Pro и Enterprise — редактор локальной групповой политики:
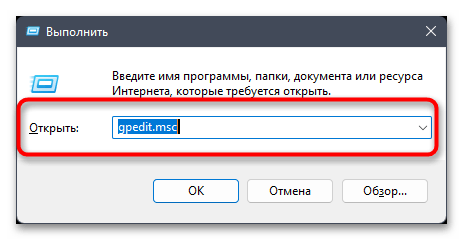
- Нажмите клавиши Win+R на клавиатуре, введите gpedit.msc и нажмите Enter.
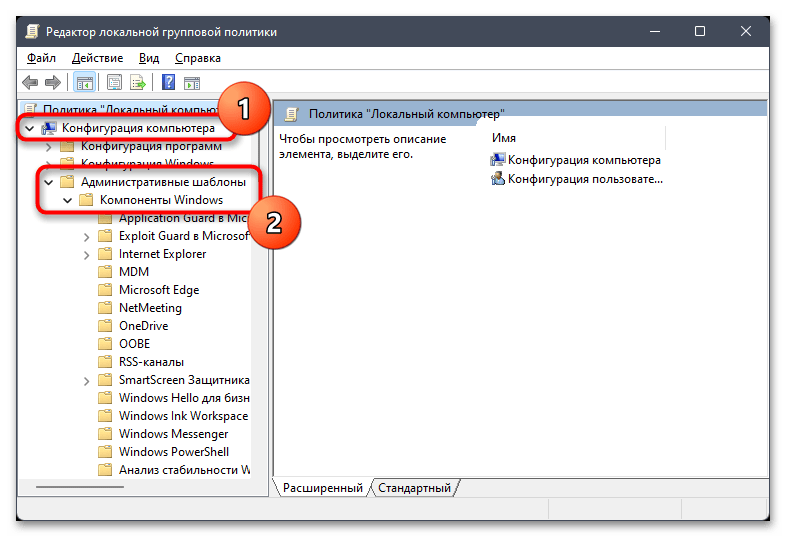
- Перейдите к разделу Конфигурация компьютера — Административные шаблоны — Компоненты Windows — Антивирусная программа Microsoft Defender — Проверка.
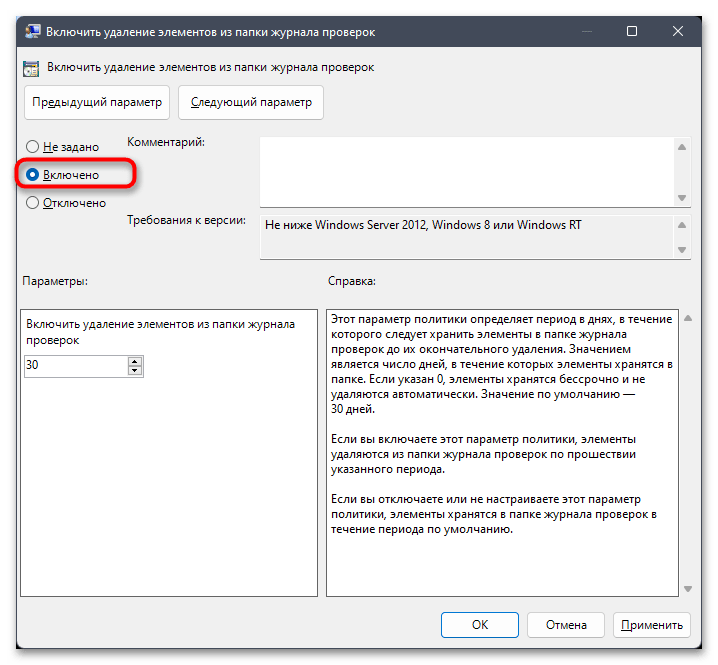
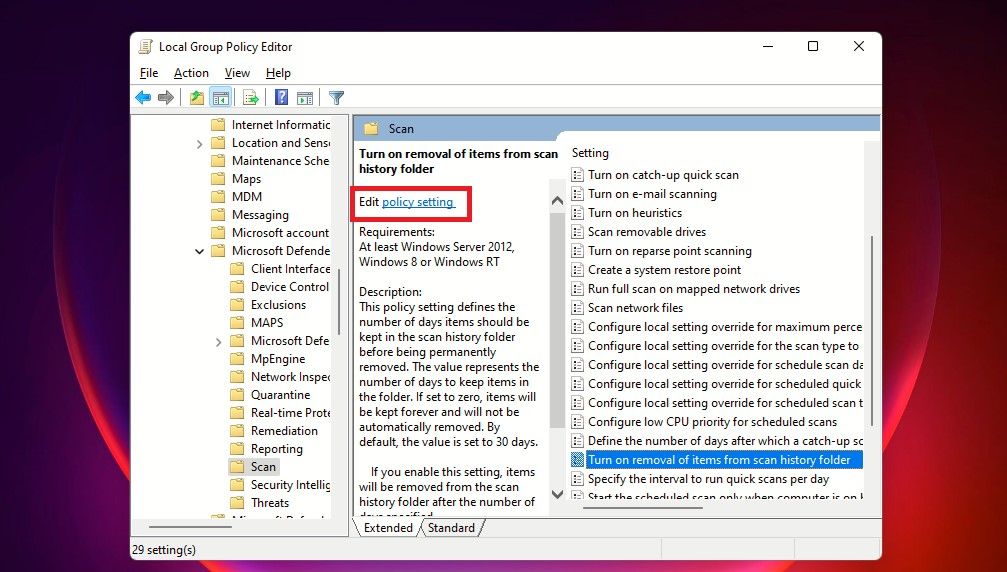
- В правой панели редактора дважды нажмите по политике «Включить удаление элементов из папки журнала проверок».

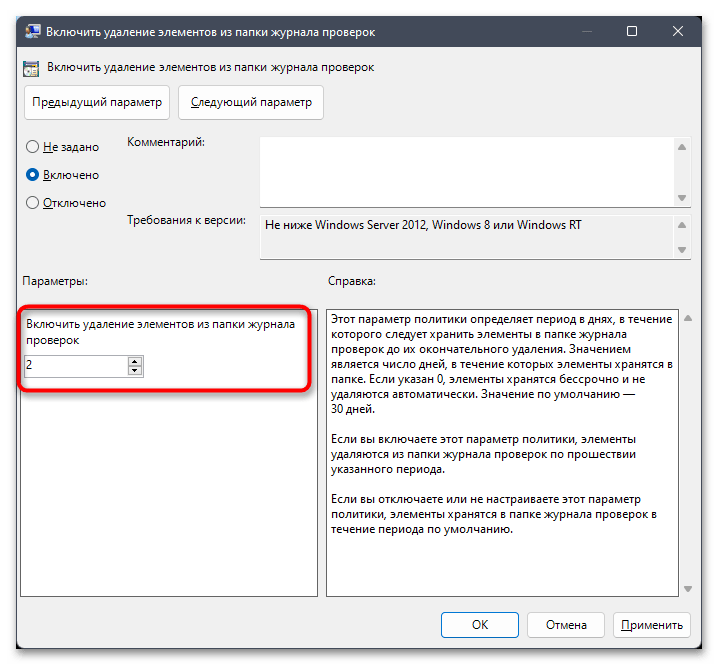
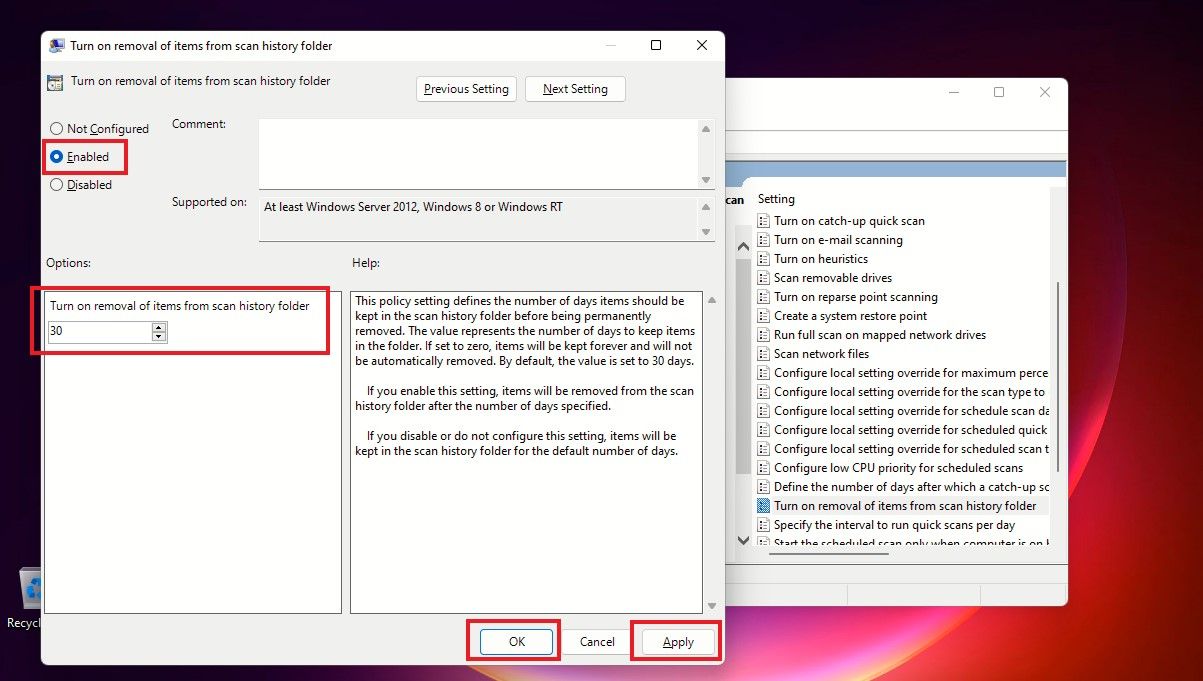
- Установите для неё значение «Включено», а затем — значение в днях (0 — хранятся бессрочно, по умолчанию — 30). Примените настройки.


Надеюсь, информация была полезной. Если же у вас остались вопросы, касающиеся рассмотренной темы, вы можете задать их в комментариях ниже: возможно, мне удастся вам помочь.
Все способы:
- Способ 1: Ручное удаление файлов истории
- Способ 2: Очистка журнала событий
- Способ 3: Использование консольной утилиты
- Способ 4: Настройка локальной групповой политики
- Способ 5: Удаление временных файлов
- Просмотр текущего состояния журнала защиты
- Вопросы и ответы: 3
Способ 1: Ручное удаление файлов истории
Самый надежный метод очистки журнала защиты в Windows 11 — ручное удаление файлов истории. Для этого понадобится сначала показать скрытые файлы и папки, затем перейти по нужному расположению и выполнить удаление. Весь процесс не займет много времени, а его принцип показан в следующей инструкции.
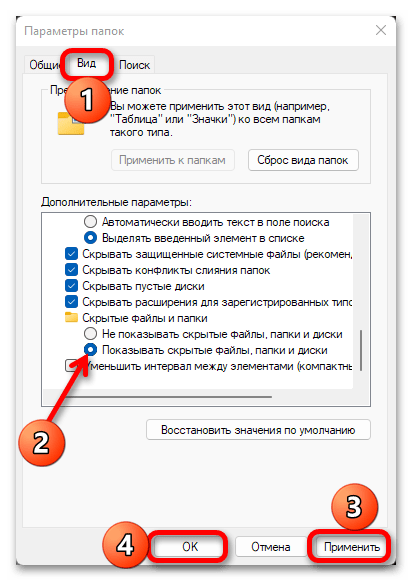
- Как вы уже знаете из предыдущего абзаца, сначала понадобится настроить отображение скрытых файлов. Осуществляется это через окно «Параметры папок», о чем можете прочитать в другой статье на нашем сайте, перейдя по следующей ссылке.
Подробнее: Отображение скрытых файлов и папок в ОС Windows 11
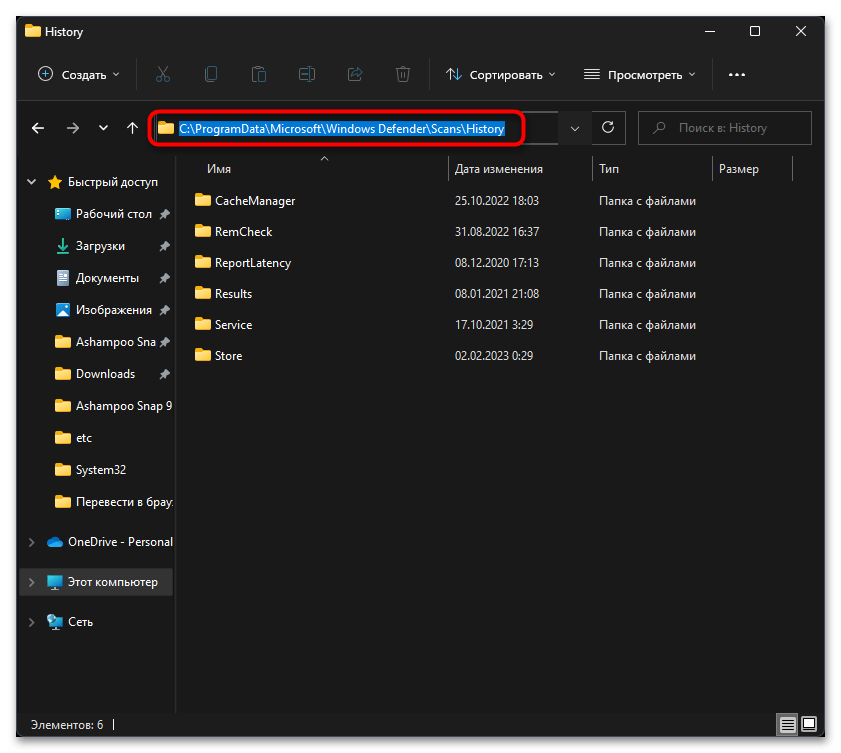
- Следующее необходимое действие — переход по пути расположения файлов журнала защиты. Откройте «Проводник» и самостоятельно перейдите в
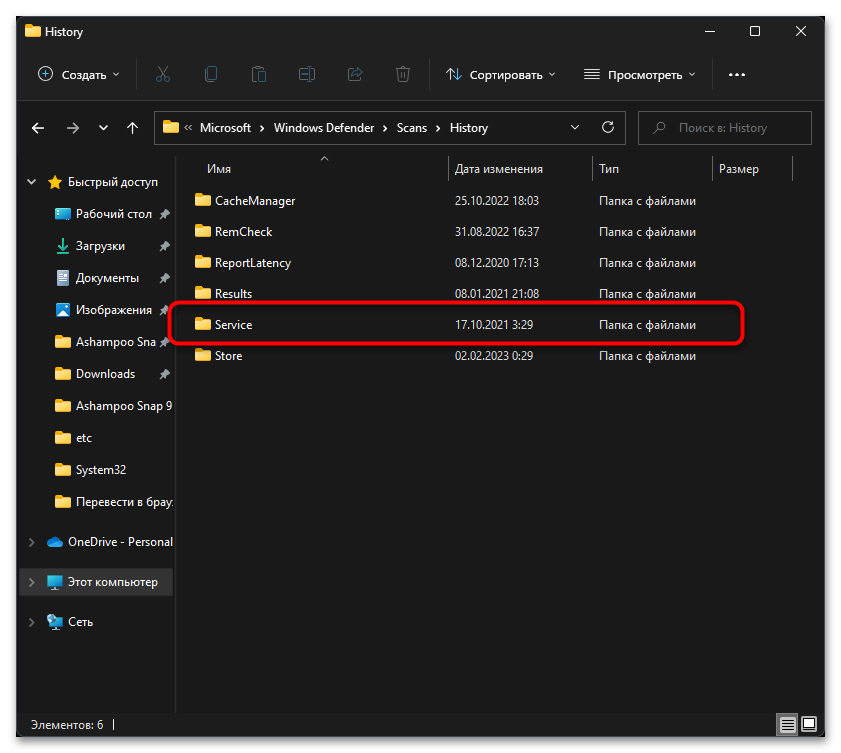
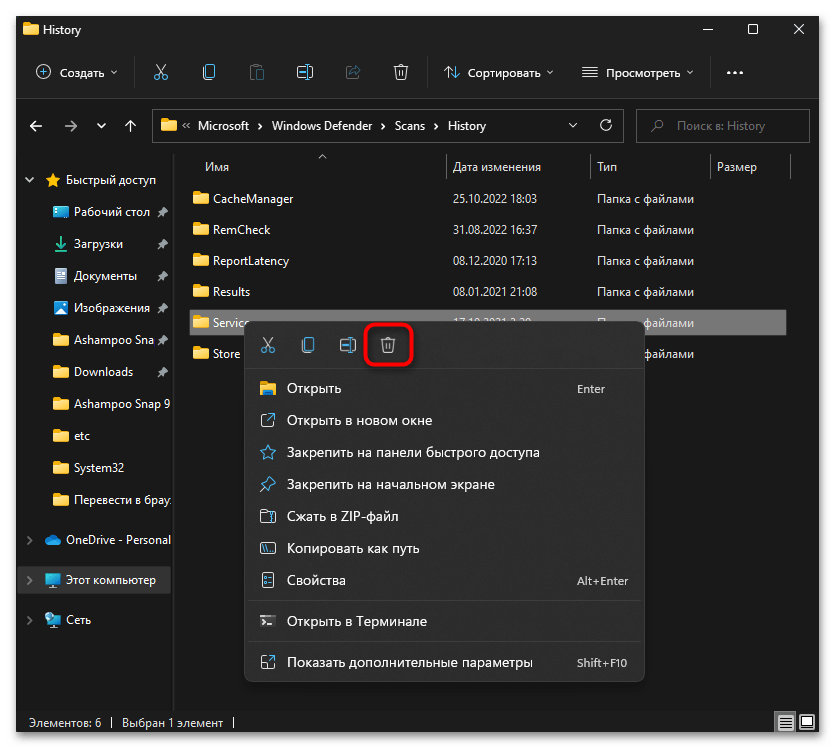
C:\ProgramData\Microsoft\Windows Defender\Scans\History, чтобы попасть в конечный каталог. - В папке вам необходимо отыскать директорию с названием «Service».
- Щелкните по ней правой кнопкой мыши и из появившегося контекстного меню выберите действие «Удалить», кликнув по значку с изображением корзины. Подтвердите очистку файлов и, желательно, перезагрузите компьютер, чтобы затем перейти и посмотреть, был ли удален журнал защиты.
Способ 2: Очистка журнала событий
Каждое действие, выполненное стандартной антивирусной защитой в Windows 11, записывается в журнал, чтобы пользователь всегда знал, что изменилось в операционной системе. Записи из этого журнала загружаются и в окно с историей защиты, поэтому удаление приведет к очистке списка. Вам понадобится лишь найти соответствующий журнал, чтобы выполнить требуемое действие.
- Для этого откройте «Пуск», отыщите приложение «Просмотр событий» и запустите его.
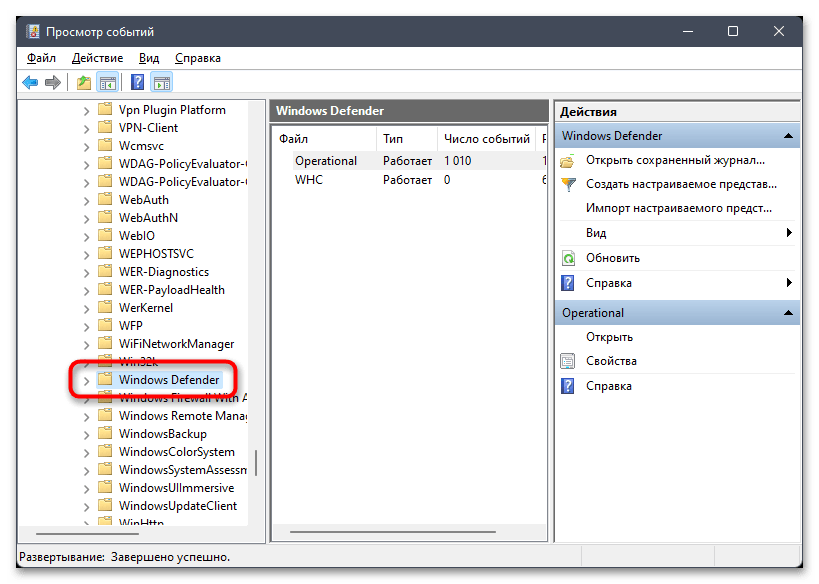
- Откройте каталог «Журналы приложений и служб», далее разверните «Microsoft» и выберите директорию «Windows».
- В ней найдите папку «Windows Defender» и тоже откройте ее для просмотра существующих файлов.
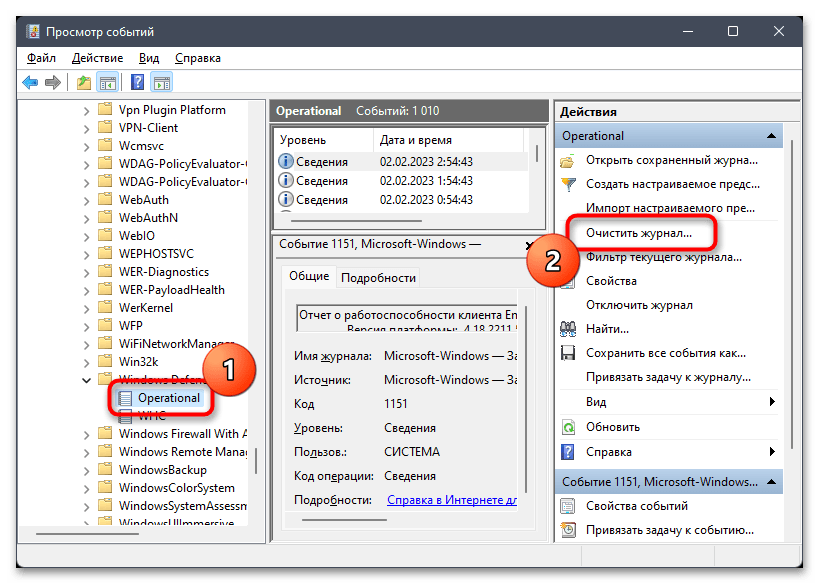
- Левой кнопкой мыши выделите файл с названием «Operational», чтобы на панели справа появился список действий. Щелкните по «Очистить журнал…».
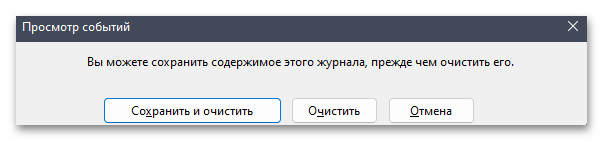
- В появившемся предупреждении вы можете выбрать вариант с сохранением содержимого в виде файла или нажать «Очистить», чтобы сразу запустить удаление.
- Спустя секунду посмотрите на количество записей в «Operational». Если теперь этот журнал пустой, значит, очистка выполнена успешно.


Способ 3: Использование консольной утилиты
Еще один доступный метод, позволяющий удалить журнал защиты в Windows 11, подразумевает использование консольной команды, которая по запросу очистит все связанные файлы. От вас требуется только запустить само действие, после чего все остальные шаги выполнятся в автоматическом режиме.
- Щелкните правой кнопкой мыши по «Пуску» и из появившегося меню выберите пункт «Терминал Windows (Администратор)».
- Введите команду
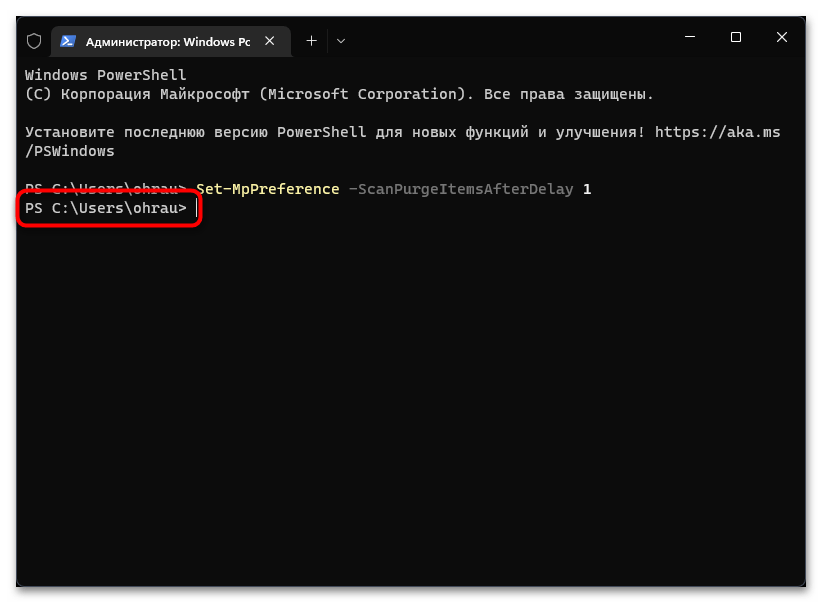
Set-MpPreference -ScanPurgeItemsAfterDelay 1и нажмите Enter для ее применения. Вместо «1» можете указать любое число, поскольку это определяет задержку, с которой будет выполнена команда в секундах. - Через мгновение на экране должна появиться просто новая строка ввода. Это означает, что действие выполнено успешно и журнал защиты очищен.
Способ 4: Настройка локальной групповой политики
Настройка локальной групповой политики не позволит во мгновение очистить журнал защиты, однако она пригодится на будущее, поскольку позволяет задать таймер, по истечении которого журнал будет удален автоматически. Это очень хорошая настройка для тех пользователей, кто заинтересован в постоянном удалении записей стандартного антивируса в Windows 11. Однако стоит учитывать, что «Редактор локальной групповой политики» доступен исключительно в Windows 11 Pro и Enterprise.
- Откройте утилиту «Выполнить», используя для этого стандартное сочетание клавиш Win + R. Введите команду
gpedit.mscи нажмите Enter для ее активации. - Разверните раздел «Конфигурация компьютера», выберите каталог «Административные шаблоны» и «Компоненты Windows».
- Перейдите в директорию «Антивирусная программа Microsoft Defender» и выделите левой кнопкой мыши конечную папку с названием «Проверка».
- Теперь в блоке справа остается найти политику «Включить удаление элементов из папки журнала проверок». Щелкните по строке дважды левой кнопкой мыши.
- Установите значение для политики «Включено».
- Измените таймер удаление элементов из папки журнала, где число означает количество дней, спустя которое будет производиться автоматическая очистка. После применения изменений понадобится перезагрузка компьютера, чтобы они вступили в силу.


Способ 5: Удаление временных файлов
Файлы журнала защиты относятся ко временным, поэтому их удаление можно инициировать самостоятельно через встроенное средство очистки. Понадобится только зайти в меню управления памятью, задать соответствующие опции и запустить процесс удаления.
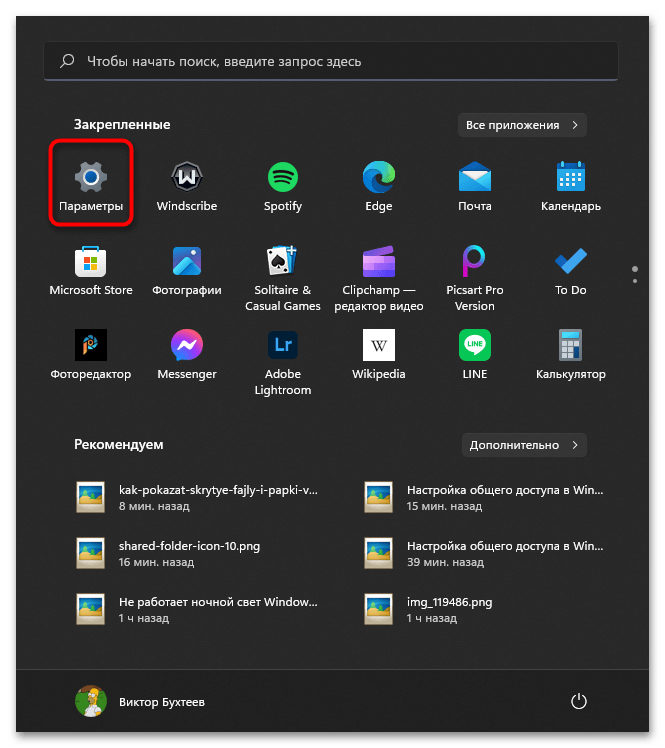
- Откройте «Пуск» и нажмите по значку с изображением шестеренки для перехода в «Параметры».
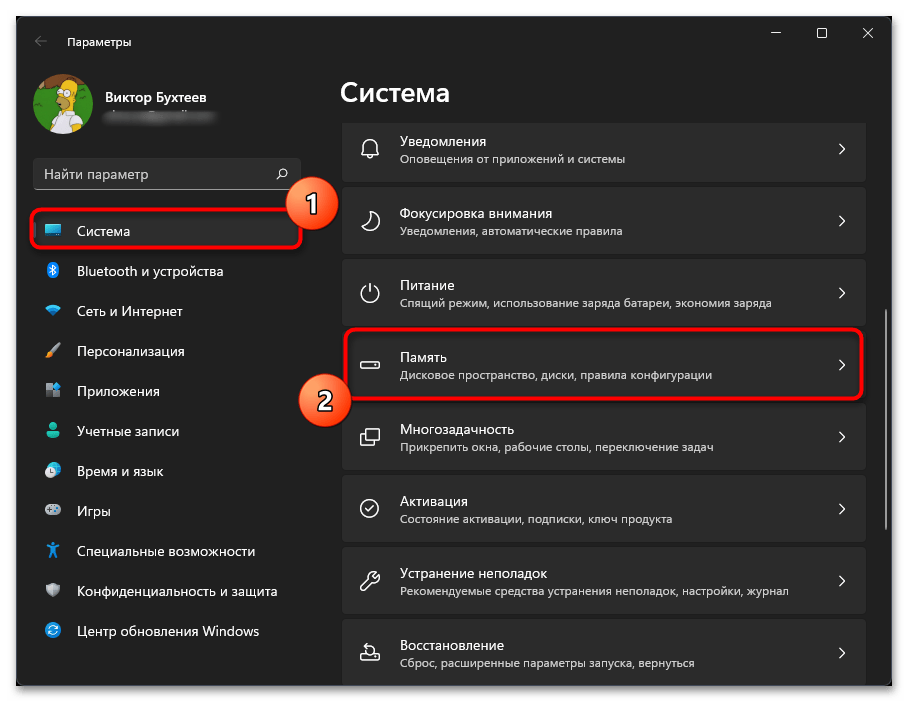
- На панели слева выберите раздел «Система» и откройте категорию «Память».
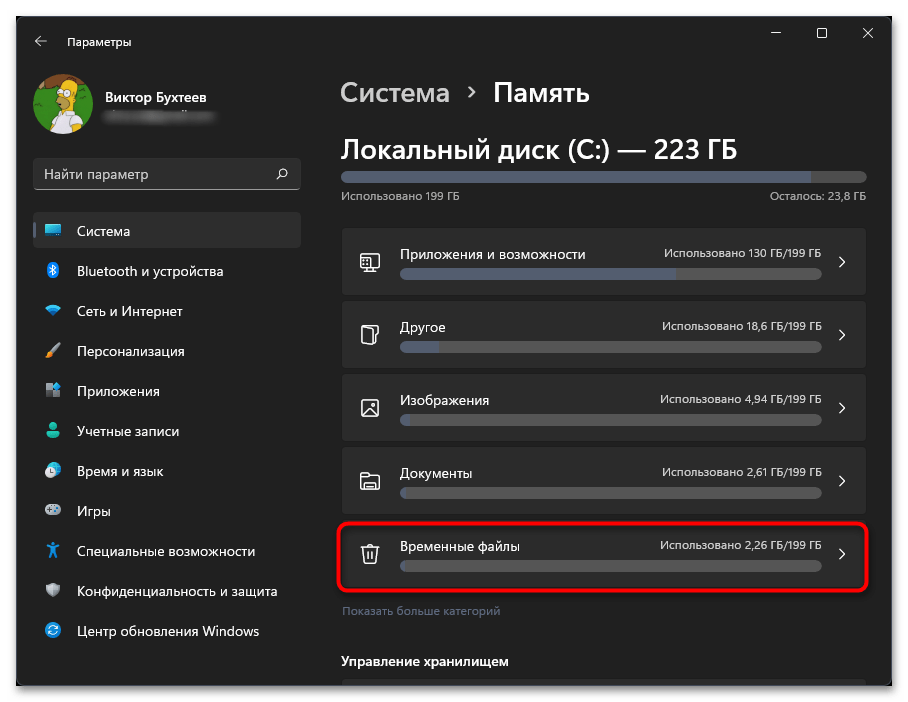
- Дождитесь завершения анализа хранилища, после чего нажмите левой кнопкой мыши по шкале «Временные файлы».
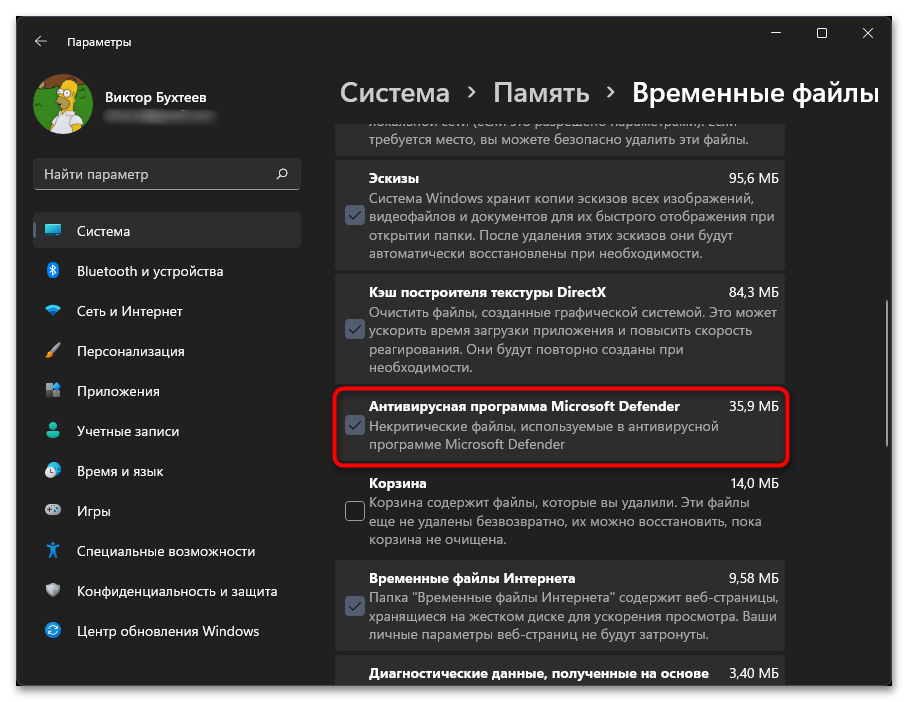
- Опуститесь по списку с выделенными типами временных файлов, найдите «Антивирусная программа Microsoft Defender» и обязательно выделите галочкой этот тип временных файлов.
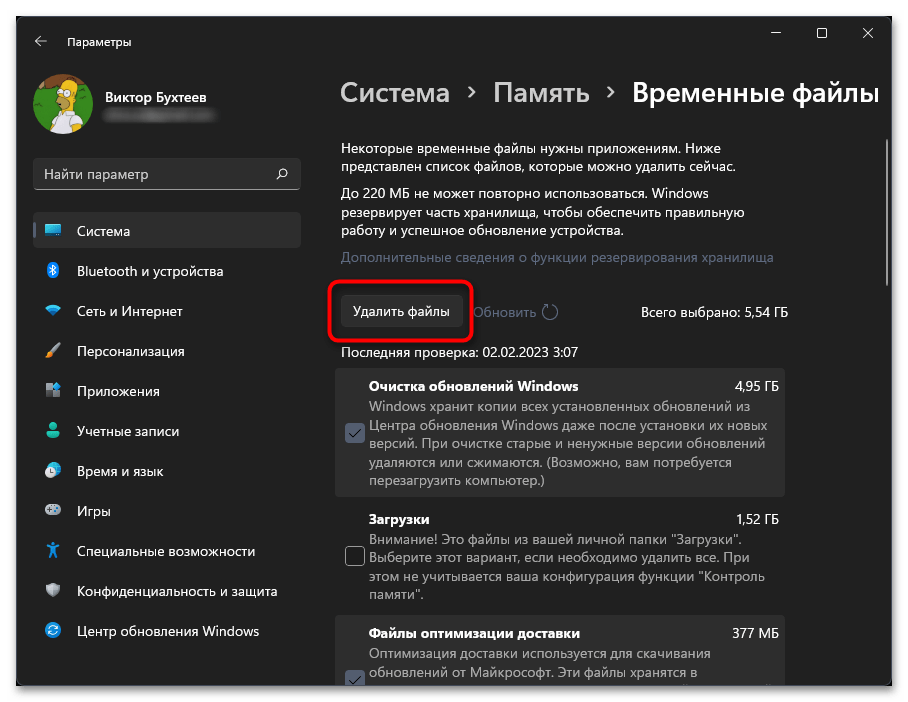
- Далее нажмите «Удалить файлы» и дождитесь завершения очистки.
Просмотр текущего состояния журнала защиты
Завершим статью небольшой инструкцией о том, как проверить текущие записи в журнале защиты, чтобы вы могли оценить эффективность каждого из выполненных ранее методов. Для этого потребуется обратиться к системному разделу Windows 11, связанному со стандартным антивирусным средством.
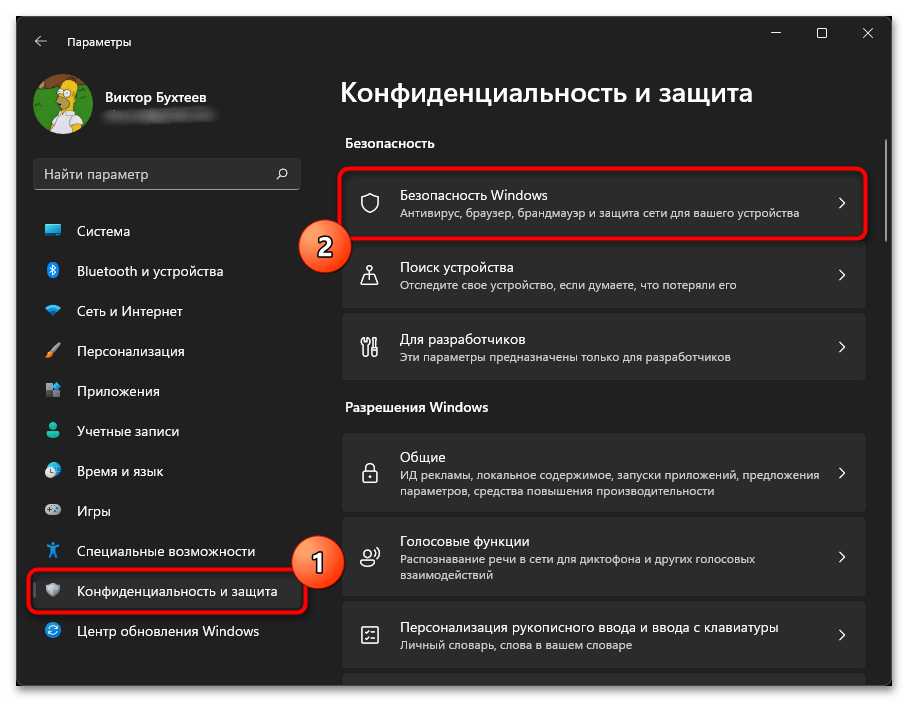
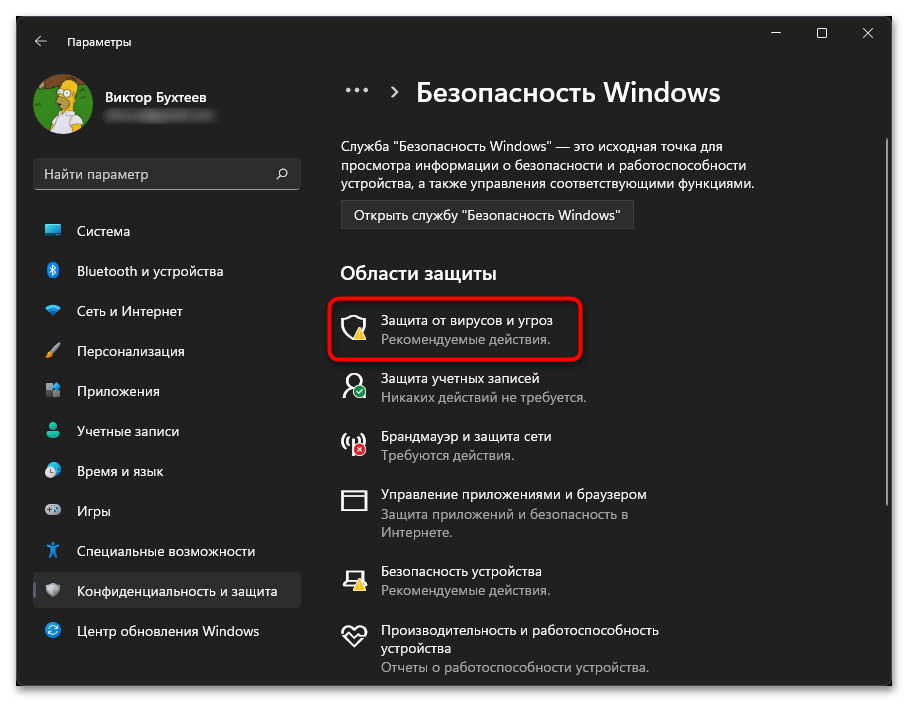
- В «Параметрах» выберите раздел «Конфиденциальность и защита», затем перейдите в «Безопасность Windows».
- В блоке «Области защиты» кликните левой кнопкой мыши по «Защита от вирусов и угроз».
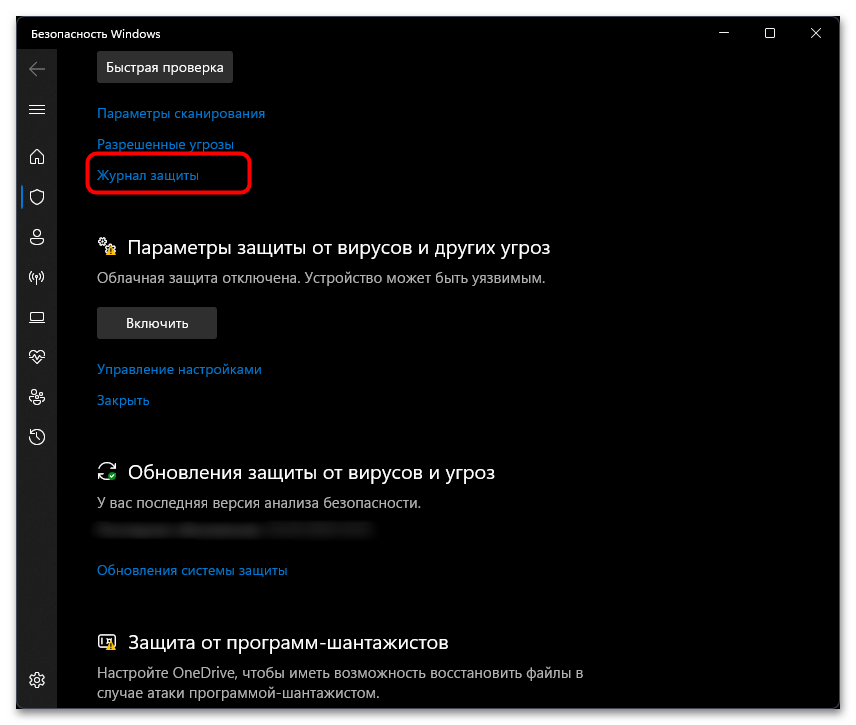
- Нажмите по синей ссылке «Журнал защиты».
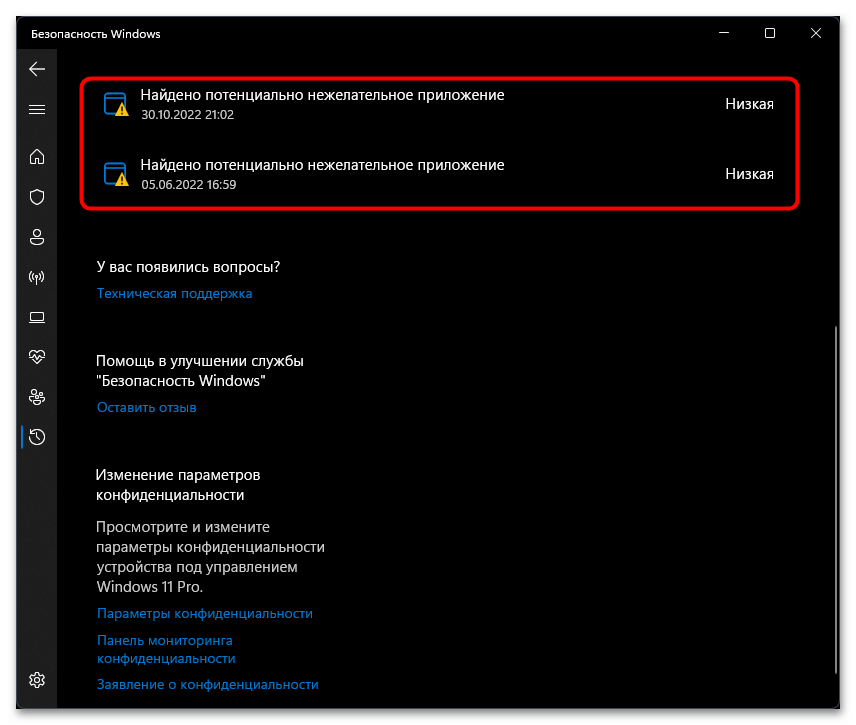
- Теперь можете просмотреть, есть ли в журнале записи и от какой даты. Если они все еще сохраняются, попробуйте другой метод очистки, поскольку каждый из них имеет свою эффективность.
Наша группа в TelegramПолезные советы и помощь
Download Windows Speedup Tool to fix errors and make PC run faster
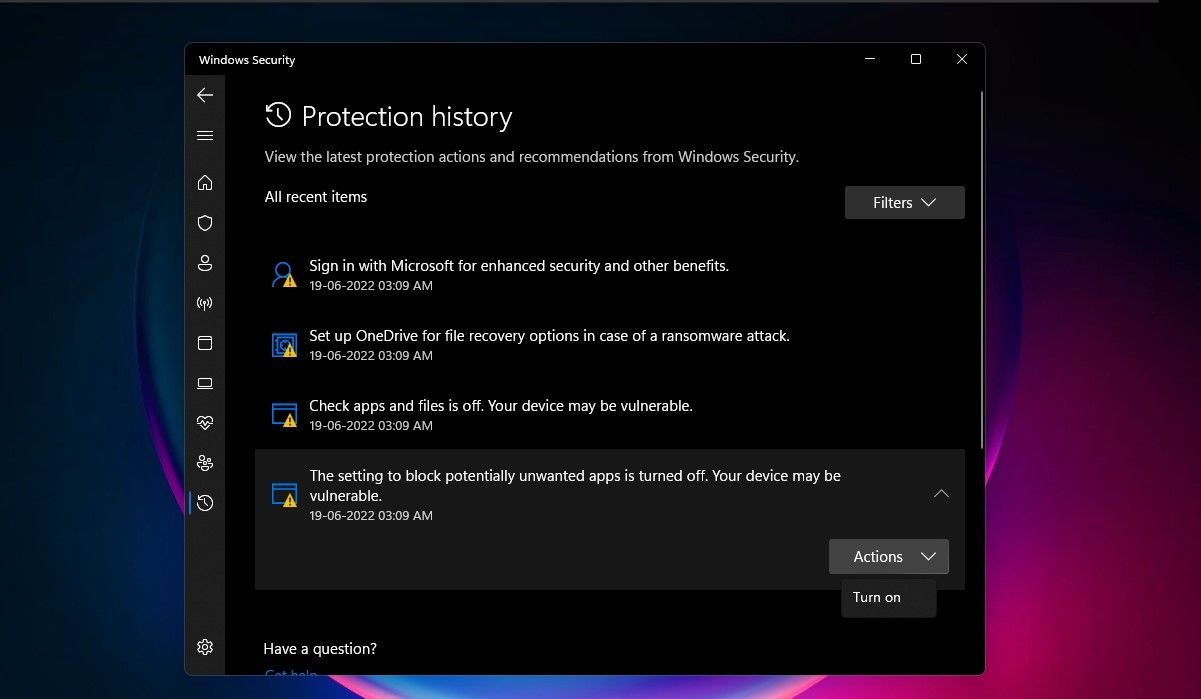
The Protection History page shows detections by Windows Defender and provides detailed and easier-to-understand information about threats and available actions. It now includes Controlled Folder Access blocks, along with any blocks that were made through the organizational configuration of Attack Surface Reduction Rules. In this post, we will show you how to manually clear protection history in Windows Defender on Windows 11/10.
If you use the Windows Defender Offline scanning tool, any detections it makes will now also show in this history. Additionally, you will see any pending recommendations (red or yellow states from throughout the app) in the history list.

This specifies the number of days for which items are stored in the scan log folder. After this time, Windows Defender deletes the items. If you specify a null value, Windows Defender will not remove items. If you do not specify a value, Windows Defender will remove items from the default scan log folder, that is, 30 days.
However, if you want to clear the protection history manually, you can do so in any of the three following ways;
- Using Set-MpPreference PowerShell cmdlet
- Delete Windows Defender Service folder from the local drive
- Using Event Viewer
Let’s take a look at the steps involved in relation to each of the listed methods.
1] Using Set-MpPreference PowerShell cmdlet
The Set-MpPreference cmdlet configures preferences for Windows Defender scans and updates. You can modify exclusion file name extensions, paths, or processes, and specify the default action for high, moderate, and low threat levels.
You can specify a different delay period (in days) by running the cmdlet below in PowerShell admin mode (press Win+X and then tap A on the keyboard):
Set-MpPreference -ScanPurgeItemsAfterDelay 1
The specified number 1 is the number of days after which the protection history log and items in the log folder will be cleared.
2] Delete Windows Defender Service folder from the local drive
To manually clear the protection history, this method requires you to delete the Service folder under the Windows Defender folder on the local drive.
Here’s how:
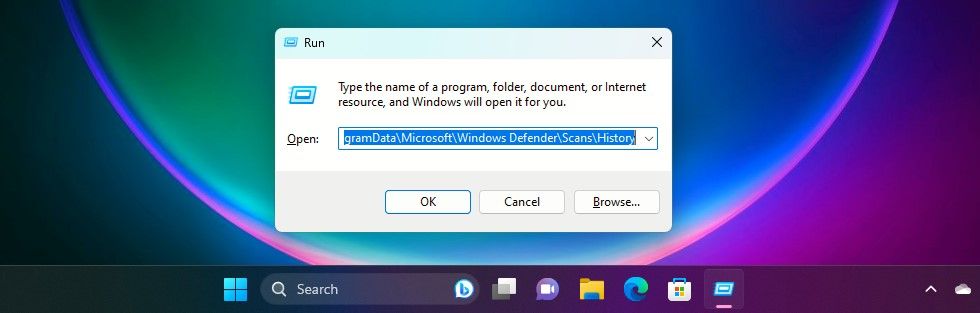
- Press Windows key + R to invoke the Run dialog.
- In the Run dialog, copy and paste the path below and hit Enter (if prompted, click Continue).
C:\ProgramData\Microsoft\Windows Defender\Scans\History
- Now, right-click the Service folder in that location and select Delete.
You can exit File Explorer.
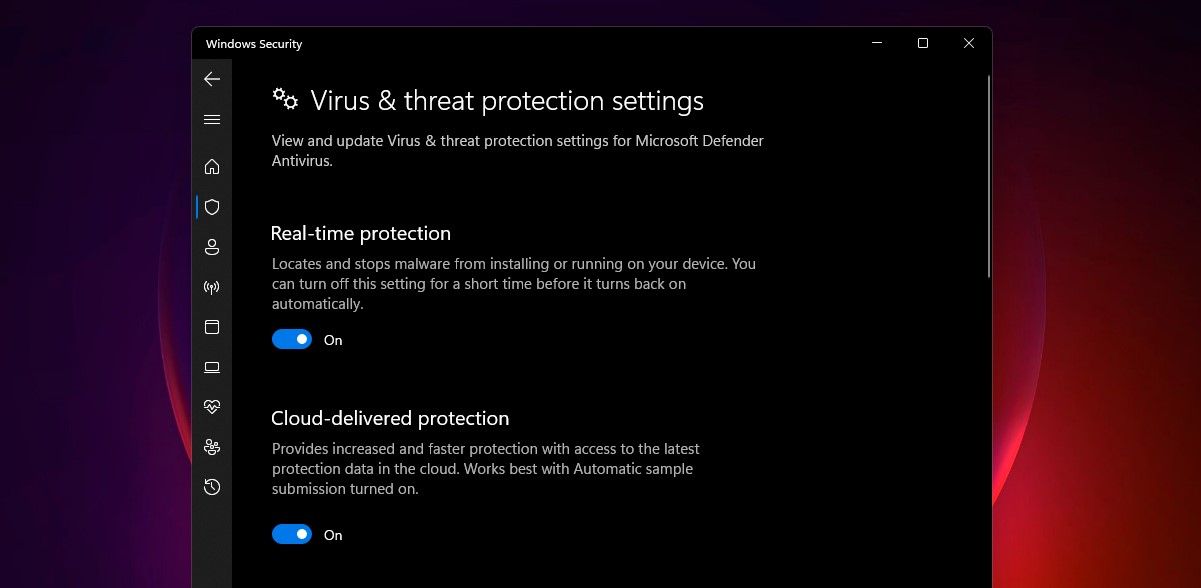
- Next, open Windows Security > Virus & threat protection > Manage settings.
- Toggle the button to Off then to On again for Real-Time protection and Cloud-delivered protection.
3] Using Event Viewer
To manually clear the Windows Defender protection history using the Event Viewer (eventvwr), do the following:
- Press Windows key + R to invoke the Run dialog.
- In the Run dialog, type eventvwr and hit Enter to open Event Viewer.
- Under the Event Viewer (Local) section on the left-hand side of the pane, expand the Applications and Services logs option.
- Under this, expand the Microsoft option.
- Click on Windows to open the list of all its files on the middle pane.
- On the middle pane, scroll down to find Windows Defender from the list of files.
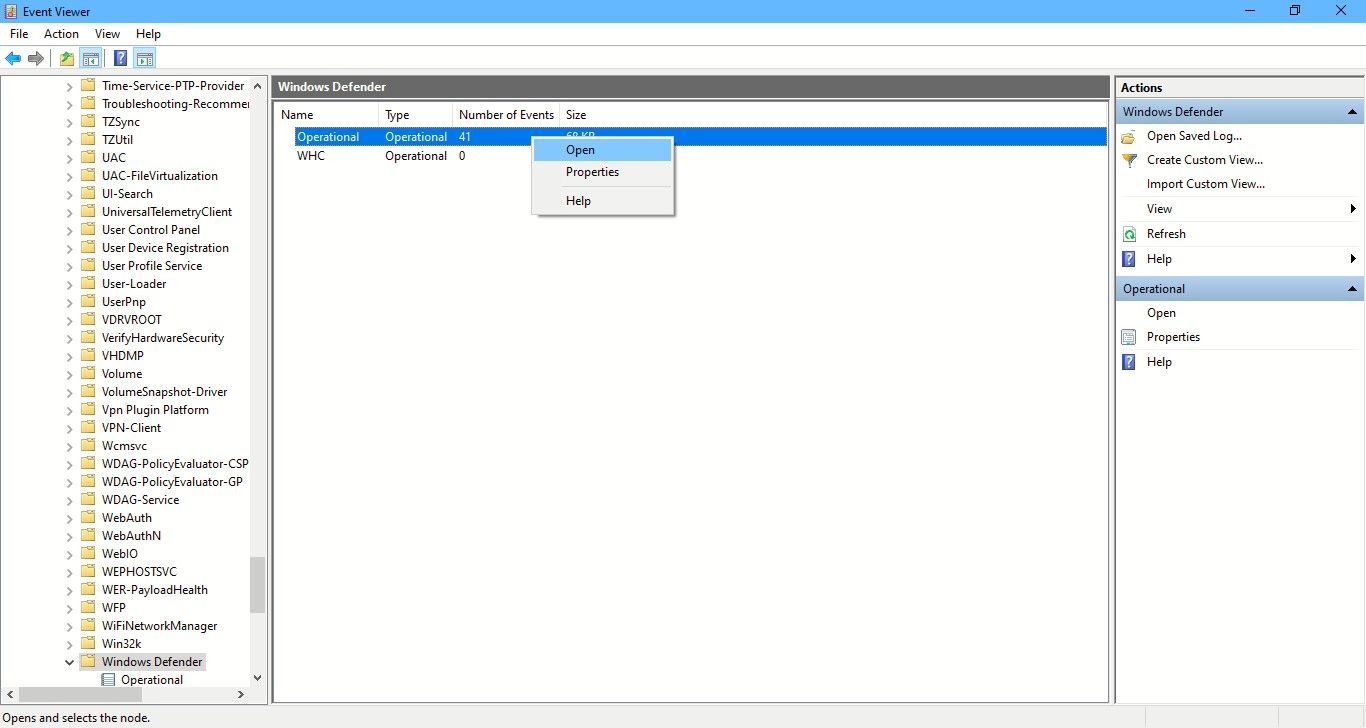
- Right-click Windows Defender, and click on Open.
- From the two options in the middle pane, right-click on Operational, and click Open to view all the past logs.
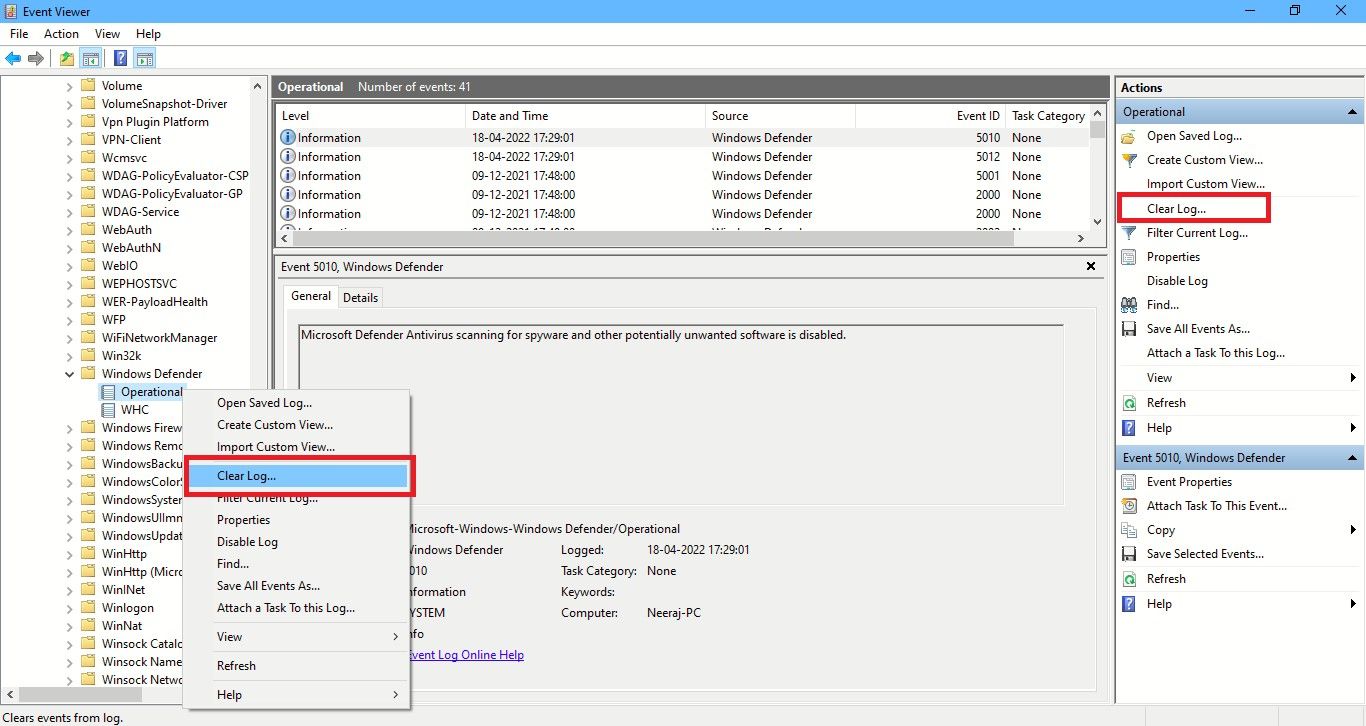
- Now, under Windows Defender folder on the left pane, right-click on Operational.
- Click on Clear Log… on the menu.
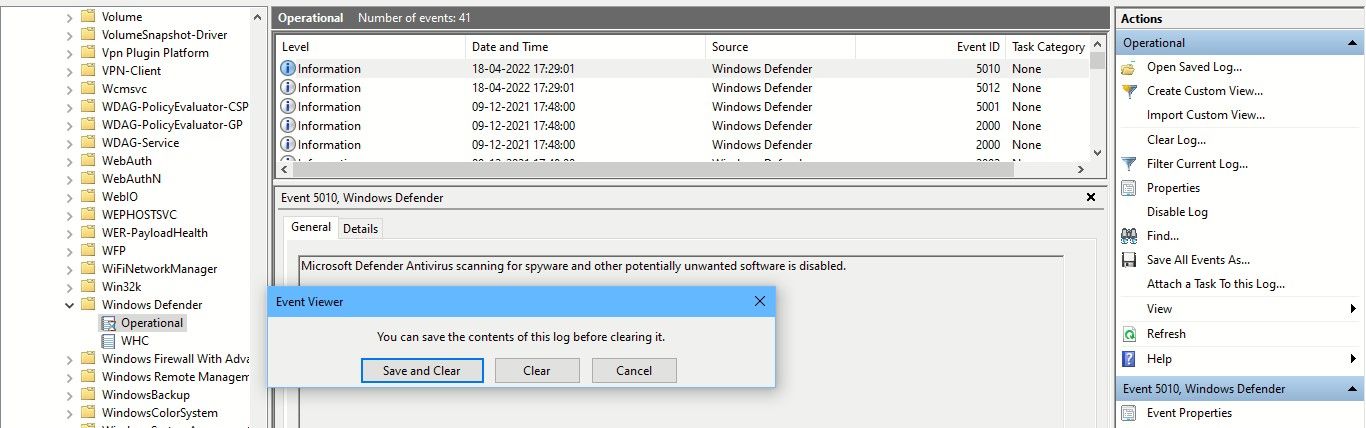
- Select Clear or Save and Clear based on your requirement to clear the protection history.
The above listed are the three ways to clear Windows Defender protection history in Windows manually.
Can’t delete Microsoft Defender Protection history
If you can’t delete Microsoft Defender Protection history using any one of the mentioned methods, open an elevated command prompt, copy-paste the following command – del “%ProgramData%\Microsoft\Windows Defender\Scans\History” /s /f /q – and hit Enter.
Where can I find Windows Defender history?
To view your Windows Defender Protection History, open Windows Security, and select the Protection History icon on its Home tab. There you will see the Windows Defender history.
Related: You can also change the Time to Clear Windows Security Protection History.
Why is Windows Defender Protection History empty?
If Windows Defender Protection History is not showing, empty, or missing, you need to reset Windows Security. Open Windows Settings > Installed apps > Apps and locate Windows Security. Select Advanced options and click on the Reset button.
Read: How to view Advanced Threat Protection (ATP) Reports in Windows
How to delete Windows Defender’s MPCache Files in Windows 11?
In the C:\ProgramData\Microsoft\Windows Defender\Scans folder, you may see some MPCache files. These are Windows Defender cache files and you can delete them manually from this folder location or use Disk Cleanup Tool to delete them.
Obinna has completed B.Tech in Information & Communication Technology. He has worked as a System Support Engineer, primarily on User Endpoint Administration, as well as a Technical Analyst, primarily on Server/System Administration. He also has experience as a Network and Communications Officer. He has been a Windows Insider MVP (2020) and currently owns and runs a Computer Clinic.
Key Takeaways
- The easiest way to clear Windows Defender Protection history is by using File Explorer.
- You may also clear the Windows Defender Protection history from the Group Policy Editor or Event Viewer.
Method 1: Using File Explorer
Like many applications, Windows Defender stores the Protection History log on your computer as an accessible file. The quickest and easiest way to access and delete the Protection History log on Windows 11 is by using File Explorer. Here’s how to do that:
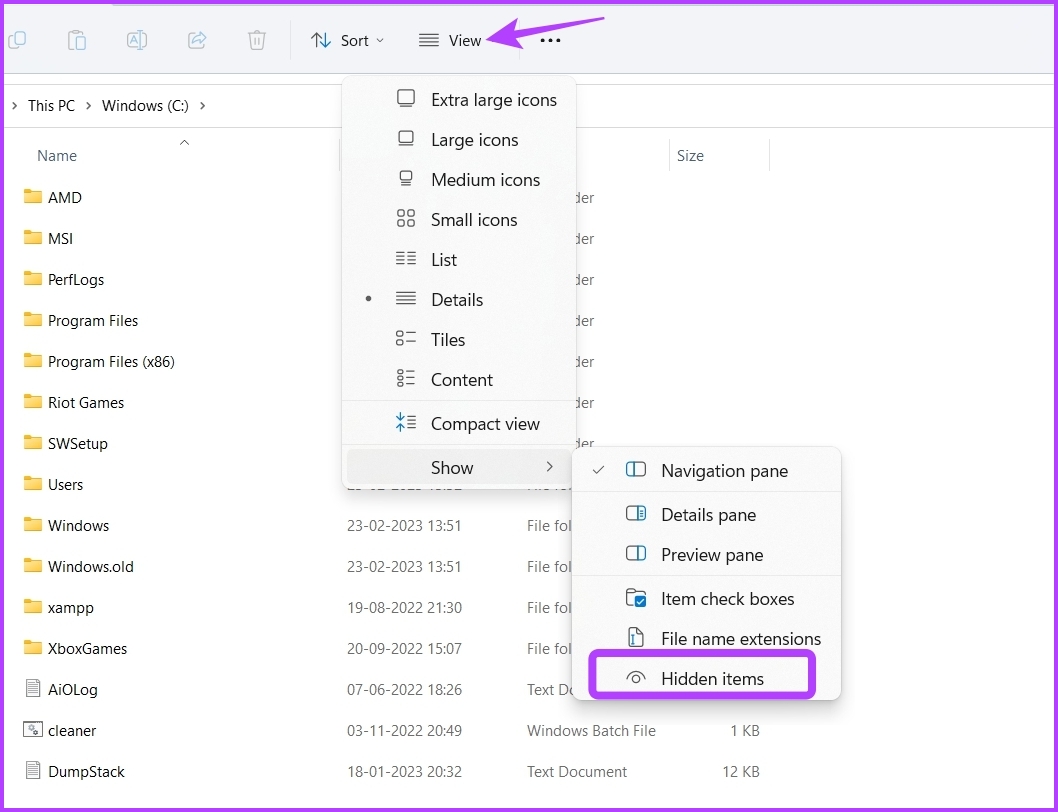
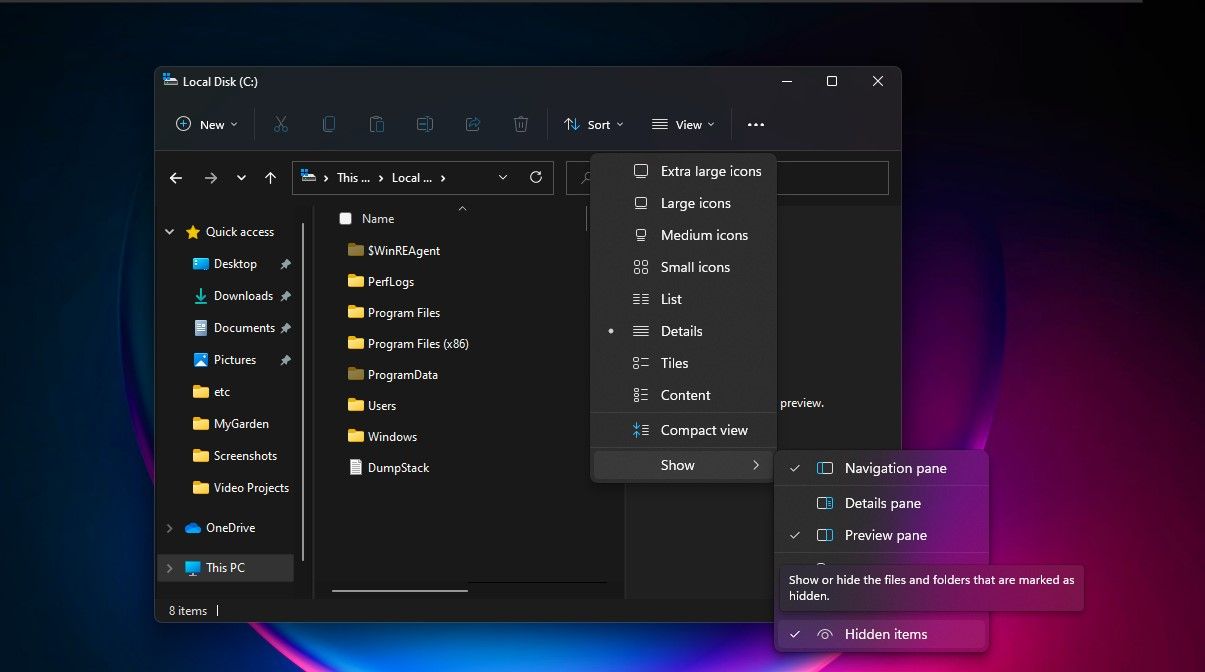
Step 1: Press the Windows + E key to open File Explorer. Click the Windows OS drive, which is generally C for most users.
Step 2: Click the View option at the top > select Show from the context menu > choose Hidden items from the submenu.
Step 3: Next, navigate to the following location or copy-paste it in the address bar of File Explorer:
C:\ProgramData\Microsoft\Windows Defender\Scans\History
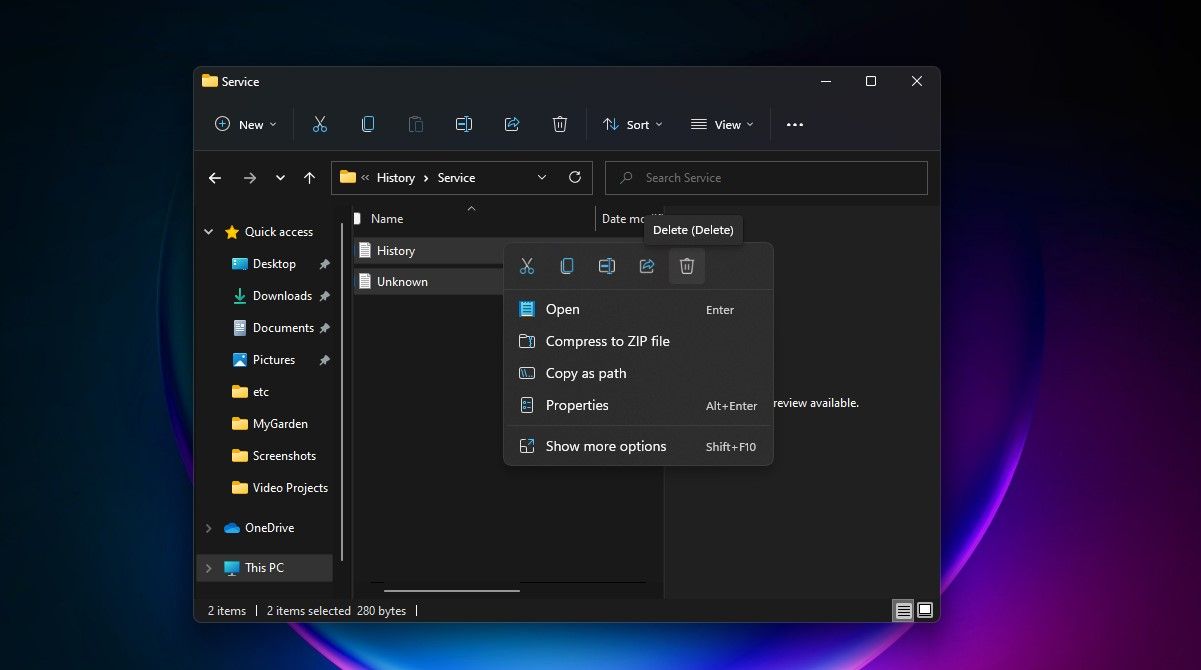
Step 4: Click the Service folder.
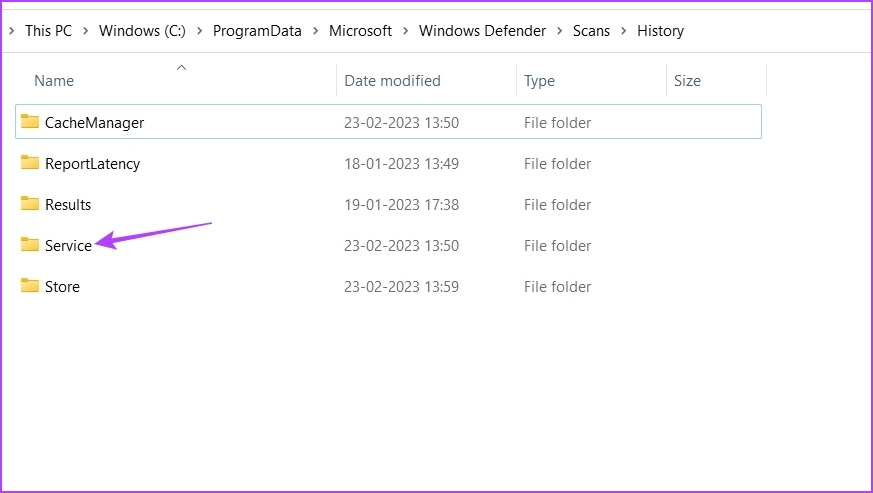
Step 5: Press the Control + A keys to select everything > press the Shift + Delete keys to permanently remove all the history files.

If this is the first time you’ve removed Windows Defender’s Protection History from your computer, you’ll gain some storage space.
Method 2: Using the Group Policy Editor
The Group Policy Editor is a Windows utility to manage and edit important Windows policies. However, the Group Policy Editor is unavailable in the Windows 11 Home Edition. If you’re using the edition on your computer, skip this solution.
Step 1: Press the Windows + R keys to open the Run dialog box.
Step 2: Type gpedit.msc in the search bar and click OK.

Step 3: In the Group Policy Editor, navigate to the following location in the left sidebar:
Computer Configuration > Administrative Templates > Windows Components > Microsoft Defender Antivirus > Scan

Step 4: In the right pane, double-click on the Turn on removal of items from scan history folder.
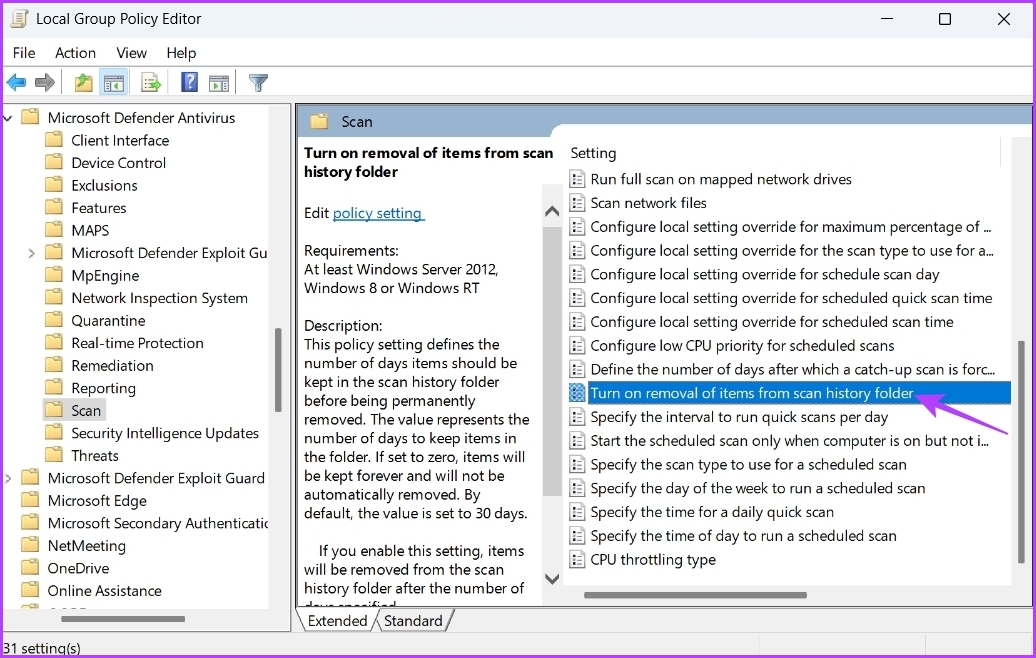
Step 5: Choose Enabled. Also, assign several days, after which the history gets cleared automatically. By default, it’s set to 30 days.

Step 6: Click Apply > OK.
Method 3: Using Event Viewer
Windows stores a log of messages from the system, including features like errors, warnings, information, and other messages in Event Viewer. So, another quick way to clear Windows Defender Protection History is through the Event Viewer. Here’s how:
Step 1: Press the Windows key to open the Start Menu > type Event Viewer in the search bar > choose Open from the right pane.
Step 2: Click the drop-down arrow before Applications and Services logs in the left sidebar.

Step 3: Click the drop-down arrow next to the Microsoft folder in the left sidebar.
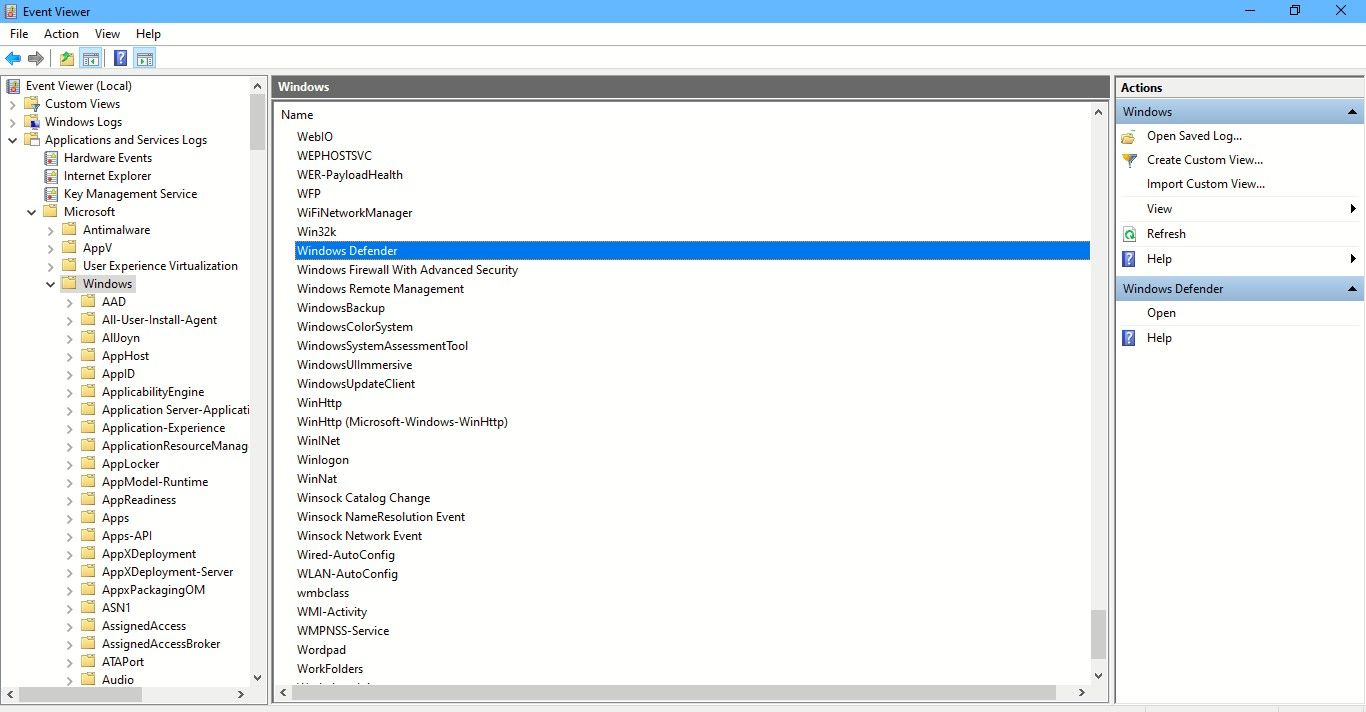
Step 4: Now, click the drop-down arrow before the Windows folder in the left sidebar.
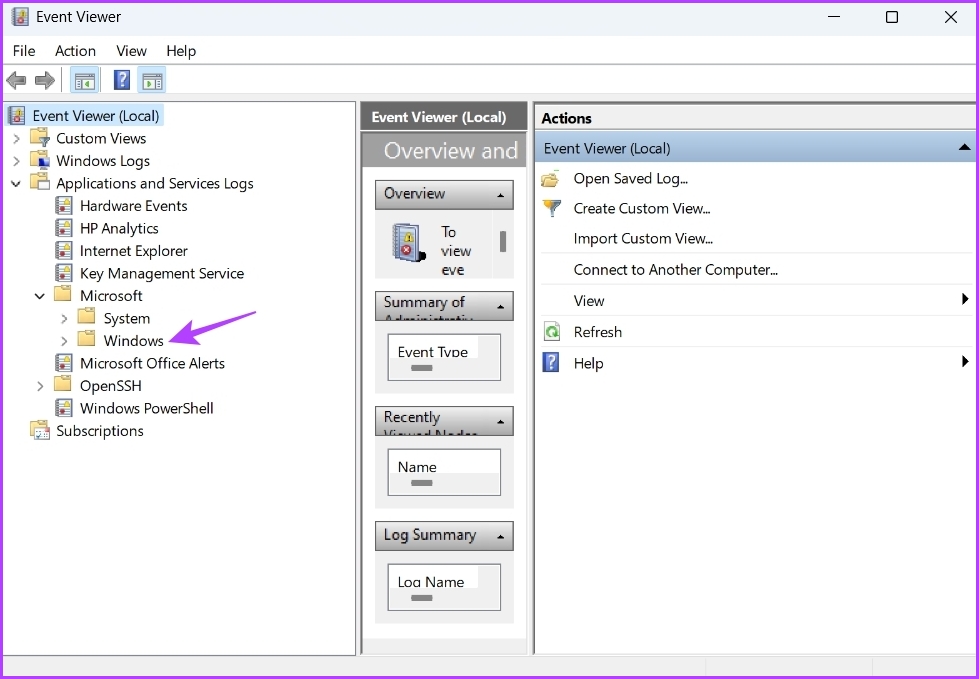
Step 5: Double-click on the Windows Defender folder from the left sidebar.

Step 6: Right-click on the Operational log > choose Clear log from the context menu.

Step 7: Choose Save and Clear in the confirmation box.

Windows PowerShell is a command-line tool to manage programs, solve system issues, and much more. You can also use it to clear the Windows Defender Protection History log on Windows 11. Here’s how:
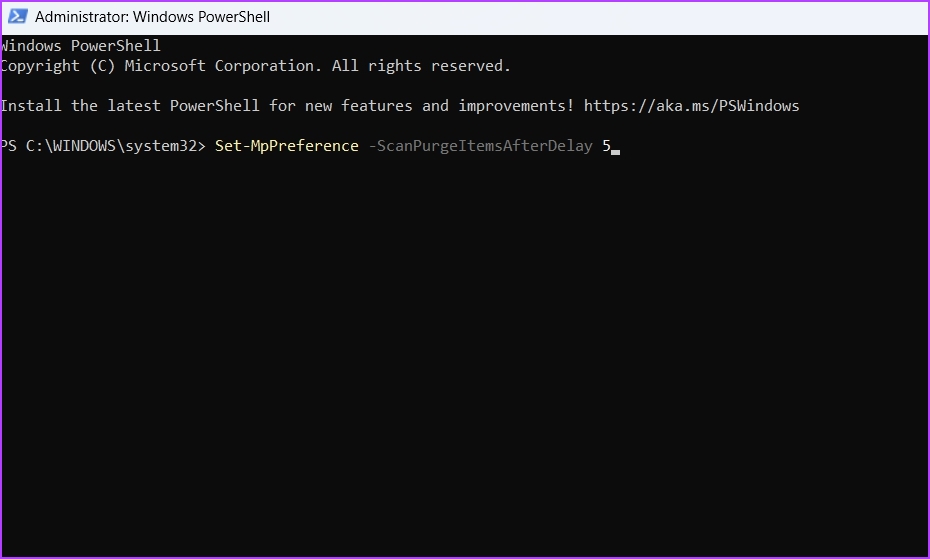
Step 1: Open the Start Menu > type Windows PowerShell in the search bar > choose Run as administrator.

Step 2: Type the following command in the elevated PowerShell window and press Enter. Ensure to replace Days in the command with the number of days after which you want the Protection History log to be cleared automatically. For example, we’ve chosen 5 days.
Set-MpPreference -ScanPurgeItemsAfterDelay Days
Was this helpful?
Thanks for your feedback!
The article above may contain affiliate links which help support Guiding Tech. The content remains unbiased and authentic and will never affect our editorial integrity.
Sign in to your MUO account
Windows Defender is Microsoft’s antivirus built into your Windows PC to protect you from viruses, malware threats, and attacks. It maintains a record of its scans and actions in its Protection History folder.
Though Protection History gets deleted after some time, you might want to have more control to clear it by yourself. So let’s see how you can clear Protection History in four ways.
What Is the Microsoft Defender Protection History? Why Should You Clear It?
One of the best antivirus for your PC, Windows Defender keeps getting better with some powerful upgrades. The detections made by Windows Defender appear on the Protection History page—which means you can view actions that Microsoft Defender Antivirus has taken on your behalf. These would be scans done to identify and block malware and other threats. And also the recommendations (highlighted in red or yellow) for actions you should take.
You also have access to all this information in a clear and easily understandable form, including Potentially Unwanted Apps that have been removed, or key services that have been turned off. The Protection History will also show the detections that appear while performing a Windows Defender Offline scan.
Though Windows Defender keeps the history of its detections for 30 days, you can clear it before that time if you need to—for example, when a lot of scan logs have accumulated. Clearing the Protection History would help you make space on your PC and keep Defender running smoothly. Remember, you must be signed in as an administrator to clear the protection history so do check if you have administrative rights.
Now let’s see four easy ways to clear Protection History in Windows 10 and 11.
1. How to Clear the Microsoft Defender’s Protection History Folder
You can manually clear the Protection History by deleting the contents of the Service folder in the Windows Defender folder using File Explorer. Here’s how:
- Press Windows + R keys to bring up the Run box.
-
Copy and paste the path below and click on OK or hit enter: C:\ProgramData\Microsoft\Windows Defender\Scans\History

-
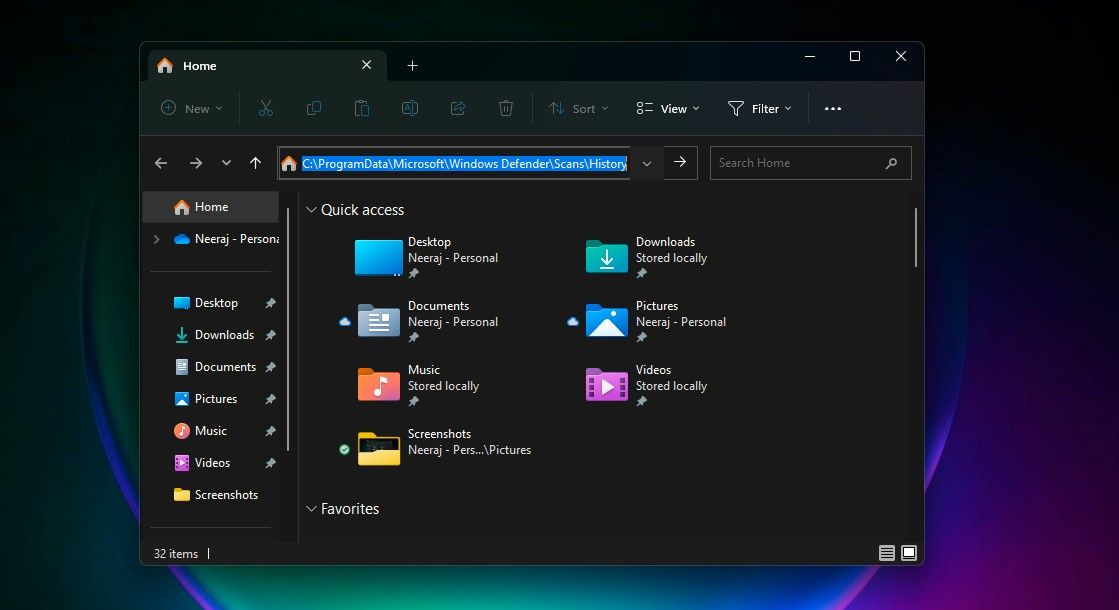
You can also paste the C:\ProgramData\Microsoft\Windows Defender\Scans\History path in the File Explorer navigation bar and then hit enter.

Alternatively, you can navigate to the Defender Protection History folder using the above path in File Explorer. If you don’t see the ProgramData folder when you open the Local Drive, select View and then tick the box next to Hidden items.

-
Open the Service folder and select all the files inside it. Right-click and select Delete to clear all the files. Then exit File Explorer.

- Next, search for Windows Security and open it.
-
Under Virus & threat protection click on Manage settings.

- Finally, toggle the button to Off and then to On again, for Real-Time protection and Cloud-delivered protection.
2. How to Clear the Microsoft Defender Protection History Using the Event Viewer
You can also manually clear the Defender Protection History via the Event Viewer—a useful app to analyze the event logs on your device. Here’s how:
- First, do a Windows search for Event Viewer and click on the app result under Best match to open Event Viewer.
- Under the Event Viewer (Local) on the left pane, expand the Applications and Services Logs.
- Under Applications and Services Logs, click on the down arrow next to the Microsoft folder.
- Click on Windows in the left pane to open the list of Windows files on the middle pane.
-
Scroll down through the list of files on the middle pane to find Windows Defender.

- Double-click on Windows Defender.
-
Then right-click on Operational and select Open to view all the past logs.

-
Now you can right-click on Operational in the left pane and choose Clear Log. Or click on Clear Log on the right pane under Actions.

-
Select Clear to clear the protection history. If you wish to save the protection history logs for future reference before clearing them, select Save and Clear.

3. How to Clear the Microsoft Defender Protection History via PowerShell
What if you want the Protection History to clear automatically after a specific number of days? You can also use a PowerShell command to do that. Let’s see how to do this:
- Type PowerShell in the search bar. Right-click on Windows PowerShell under Best match and select Run as administrator. Or choose Run as administrator on the right search pane.
- Click Yes on the UAC prompt that appears.
- The Administrator: PowerShell window will open up. Type or copy and paste the following command and then hit enter:
Set-MpPreference -ScanPurgeItemsAfterDelay 7

The number 7 at the end of the command is the number of days after which the protection history logs will be cleared. Just change that number to specify when you want the protection history to be cleared. And it will be cleared automatically.
4. How to Clear the Microsoft Defender Protection History Using the Group Policy Editor
If you have a PC with Windows 10 Pro, Windows 11 Pro, or a higher version, you can also use the Group Policy Editor to clear the Defender Protection History automatically. Though there are solutions to access the Group Policy Editor on Windows Home too. But let’s see how to clear Protection History via Group Policy Editor in Windows Pro and higher versions:
- Press Win + R keys to open the Run box. Type gpedit.msc to open the Local Group Policy Editor. Or just type gpedit in the search bar and click on Edit Group Policy under Best match to open it.
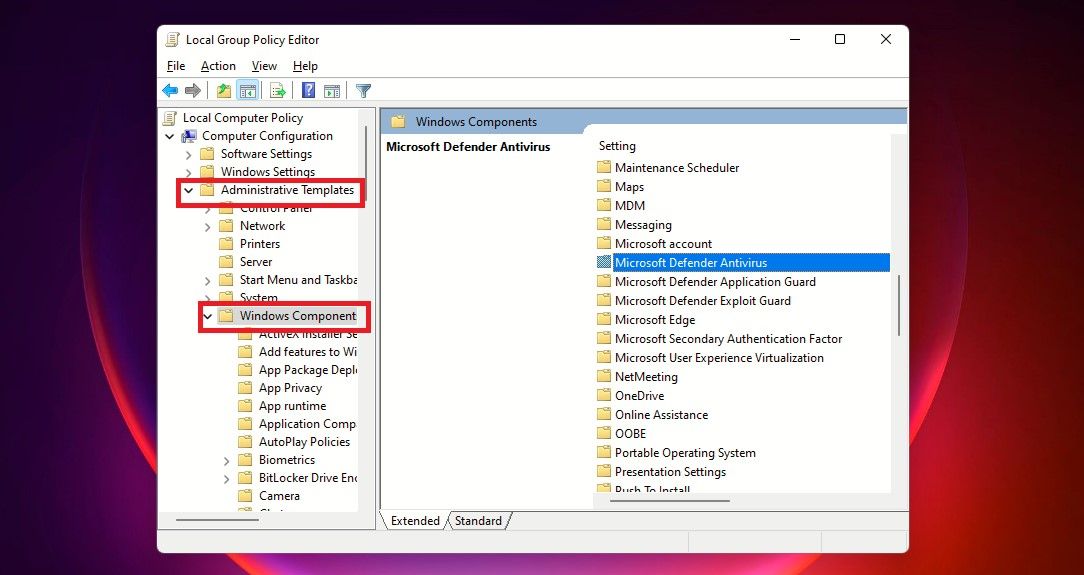
- In the Local Group Policy Editor, on the left pane under Computer Configuration, expand Administrative Templates by clicking on the down arrow next to it.
- Inside the Administrative Templates folder, click on Windows Components and the list of its components would come up on the middle pane of the Group Policy Editor.
-
Then scroll down to find Windows Defender Antivirus and double-click on it.

- In the list of Windows Defender items, double-click on the Scan folder.
-
In the right pane, double-click on Turn on removal of items from scan history folder. Or click Edit policy setting in the middle pane. This policy setting defines the number of days items should be kept in the scan history folder before being permanently removed.

-
Next, select Edit policy setting to open the policy window. It would be showing Not Configured by default. To set the number of days, toggle on the button next to Enabled. The default number of days, which is 30, would then be set. If you set the number of days to zero, items will be kept forever and will not be automatically removed. So just change the days to whenever you want the items to be removed. Finally, click Apply and then OK.

Now, you won’t need to manually clear Protection History every time—the items in the scan history folder would be deleted automatically after the days you’ve specified.
Clear the Microsoft Defender Protection History Whenever You Want
If you ever want to clear Defender Protection History, you know how easy it is to do it through any of the four ways discussed above. If you would want to refer to the Protection History logs later, you can use the Save and Clear option while clearing Protection History using Event Viewer.