
Automatic Sample Submission is a feature in Microsoft Defender (previously known as Windows Defender) that allows the antivirus software to automatically send samples of suspicious files to Microsoft for analysis. This helps to improve the overall effectiveness of the antivirus software by allowing Microsoft to identify and respond to emerging threats more quickly.
When a suspicious file is detected by Microsoft Defender, the software may automatically send a copy of the file to Microsoft for analysis. The sample is analyzed by Microsoft’s threat intelligence experts and used to improve the overall detection capabilities of Microsoft Defender.
It’s important to note that Microsoft takes privacy seriously, and the data sent to Microsoft for analysis is used solely for the purpose of improving the effectiveness of the antivirus software. Users have the option to turn off automatic sample submission if they prefer not to send samples to Microsoft.
Stop Automatic Sample Submission by Microsoft Defender
There are 3 different methods to stop automatic sample submission by Microsoft defender:
-
Using Windows Security App
-
Using Registry Editor
-
Using Local Group Policy Editor
Method 1: Using Windows Security App
To stop automatic sample submission by Microsoft Defender, you can follow these steps:
STEP 1: Open the Start menu and type «Windows Security» to open the Windows Security app.
STEP 2: Click on the «Virus & threat protection» icon in the left-hand menu.
STEP 3: Scroll down to the «Virus & threat protection settings» section and click on «Manage settings.»
STEP 4: Scroll down to the «Automatic sample submission» section and toggle the switch to the off position.
STEP 5: If prompted, click «Yes» to confirm the action.
Method 2: Using Registry Editor
If you prefer to use the registry editor to stop automatic sample submission by Microsoft Defender, you can follow these steps:
STEP 1: Press the Windows key + R on your keyboard to open the Run dialog box.
STEP 2: Type «regedit.exe» and press Enter to open the registry editor.
STEP 3: Navigate to the following path:
HKEY_LOCAL_MACHINE\SOFTWARE\Microsoft\Windows Defender
STEP 4: If you don’t have the registry key, then you can create it.
To do so,
Right-click on the Windows Defender in the left pane, and select New => DWORD (32-bit value). Then, type DisableAntivirus and click OK. The registry key is created.
Follow the above steps to make DisableAntiSpyware and ServiceStartStates registry keys.
STEP 5: Now, double-click on the DisableAntivirus registry key.
STEP 6: A prompt box will appear.
Set the value to 1 and then click OK.
STEP 7: Close the registry editor and restart your computer for the changes to take effect.
Method 3: Using Local Group Policy Editor
STEP 1: Press the Windows key + R on your keyboard to open the Run dialog box.
STEP 2: Type «gpedit.msc» and press Enter to open the local group policy editor.
STEP 3: Navigate to the following path:
Computer Configuration > Administrative Templates > Windows Components > Microsoft Defender Antivirus
STEP 4: In the right panel. you will see the «Turn off Microsoft Defender Antivirus» setting. Double-click on this setting
STEP 5: A prompt box will appear.
Select the «Enabled» option.
STEP 6: In the «Options» section, select the «Send all data» option and then select the «Never send» option.
STEP 7: Click «Apply» and then click «OK» to save the changes.
That’s It!

This tutorial will show you how to enable or disable automatic sample submission for Microsoft Defender Antivirus in Windows 11.
Microsoft Defender Antivirus is an antivirus software that is included in Windows 11 and can help protect your device from viruses, malware, and other threats.
Cloud-delivered protection and automatic sample submission work together with Microsoft Defender Antivirus to help protect against new and emerging threats.
If a suspicious or malicious file is detected, a sample is sent to the cloud service for analysis while Microsoft Defender Antivirus blocks the file. As soon as a determination is made, which happens quickly, the file is either released or blocked by Microsoft Defender Antivirus.
In the event Microsoft Defender Antivirus cannot make a clear determination, file metadata is sent to the cloud protection service. Often within milliseconds, the cloud protection service can determine based on the metadata as to whether the file is malicious or not a threat.
After examining the metadata, if Microsoft Defender Antivirus cloud protection cannot reach a conclusive verdict, it can request a sample of the file for further inspection. This request honors the settings configuration for sample submission:
- Send safe samples automatically (default)
- Safe samples are samples considered to not commonly contain PII data like: .bat, .scr, .dll, .exe.
- If file is likely to contain PII, the user will get a request to allow file sample submission.
- This option is the default on Windows, macOS, and Linux.
- Always Prompt
- If configured, the user will always be prompted for consent before file submission
- This setting isn’t available in macOS cloud protection
- Send all samples automatically
- If configured, all samples will be sent automatically
- If you would like sample submission to include macros embedded in Word docs, you must choose «Send all samples automatically»
- This setting isn’t available on macOS cloud protection
- Do not send
- Prevents «block at first sight» based on file sample analysis
- «Do not send» is the equivalent to the «Disabled» setting in macOS policy
- Metadata is sent for detections even when sample submission is disabled
You must be signed in as an administrator to turn on/off or enable/disable automatic sample submission for Microsoft Defender Antivirus.
Contents
- Option One: Turn On or Off Automatic Sample Submission for Microsoft Defender Antivirus in Windows Security
- Option Two: Turn On or Off Automatic Sample Submission for Microsoft Defender Antivirus using Command
- Option Three: Enable or Disable Automatic Sample Submission for Microsoft Defender Antivirus in Local Group Policy Editor
- Option Four: Enable or Disable Automatic Sample Submission for Microsoft Defender Antivirus using REG file
OPTION ONE
Turn On or Off Automatic Sample Submission for Microsoft Defender Antivirus in Windows Security
1 Open Windows Security.
2 Click/tap on Virus & threat protection. (see screenshot below)

3 Click/tap on the Manage settings link under Virus & threat protection settings. (see screenshot below)

4 Turn On (default) or Off Automatic sample submission for what you want. (see screenshots below)

5 If prompted by UAC, click/tap on Yes to approve.
6 You can now close Windows Security if you like.
OPTION TWO
Turn On or Off Automatic Sample Submission for Microsoft Defender Antivirus using Command

Set-MpPreference (Defender)
The Set-MpPreference cmdlet configures preferences for Windows Defender scans and updates.
learn.microsoft.com
1 Open Windows Terminal (Admin), and select either Windows PowerShell or Command Prompt.
2 Copy and paste the command below you want to use into Windows Terminal (Admin), and press Enter.
(Always prompt — Automatic sample submission — ON)
PowerShell Set-MpPreference -SubmitSamplesConsent AlwaysPrompt
OR
(Default — Send safe samples automatically — Automatic sample submission — ON)
PowerShell Set-MpPreference -SubmitSamplesConsent SendSafeSamples
OR
(Never send — Automatic sample submission — OFF)
PowerShell Set-MpPreference -SubmitSamplesConsent NeverSend
OR
(Send all samples automatically — Automatic sample submission — ON)
PowerShell Set-MpPreference -SubmitSamplesConsent SendAllSamples
3 You can now close Windows Terminal (Admin) if you like.
OPTION THREE
Enable or Disable Automatic Sample Submission for Microsoft Defender Antivirus in Local Group Policy Editor
The Local Group Policy Editor is only available in the Windows 11 Pro, Enterprise, and Education editions.
All editions can use Option Four for the same policy.
1 Open the Local Group Policy Editor (gpedit.msc).
2 Navigate to the policy location below in the left pane of the Local Group Policy Editor. (see screenshot below)
Computer Configuration>Administrative Templates>Windows Components>Microsoft Defender Antivirus>MAPS

3 In the right pane of MAPS in the Local Group Policy Editor, double click/tap on the Send file samples when further analysis is required policy to edit it. (see screenshot above)
4 Do step 5 (enable — Always prompt), step 6 (enable — Send safe samples automatically), step 7 (enable — Send all samples automatically), step 8 (disable — Never send), or step 9 (default) below for what you would like to do.
5 Force Automatic sample submission to «Always prompt»
This will disable and prevent using Option One and Option Two.
A) Select (dot) Enabled. (see screenshot below step 8)
B) Select Always prompt in the Send file samples when further analysis is required drop menu under Options.
C) Click/tap on OK, and go to step 10 below.
6 Force Automatic sample submission to «Send safe samples automatically»
This will disable and prevent using Option One and Option Two.
A) Select (dot) Enabled. (see screenshot below step 8)
B) Select Send safe samples automatically in the Send file samples when further analysis is required drop menu under Options.
C) Click/tap on OK, and go to step 10 below.
7 Force Automatic sample submission to «Send all samples automatically»
This will disable and prevent using Option One and Option Two.
A) Select (dot) Enabled. (see screenshot below step 8)
B) Select Send all samples automatically in the Send file samples when further analysis is required drop menu under Options.
C) Click/tap on OK, and go to step 10 below.
8 Disable and Force Automatic sample submission to «Never send»
This will disable and prevent using Option One and Option Two.
A) Select (dot) Enabled. (see screenshot below step 8)
B) Select Never send in the Send file samples when further analysis is required drop menu under Options.
C) Click/tap on OK, and go to step 10 below.

9 Default — Automatic sample submission
This is the default setting to allow using Option One and Option Two.
A) Select (dot) Not Configured. (see screenshot below)
B) Click/tap on OK, and go to step 10 below.
10 You can now close the Local Group Policy Editor if you like.
OPTION FOUR
Enable or Disable Automatic Sample Submission for Microsoft Defender Antivirus using REG file
1 Do step 2 (enable — Always prompt), step 3 (enable — Send safe samples automatically), step 4 (enable — Send all samples automatically), step 5 (disable — Never send), or step 6 (default) below for what you would like to do.
2. Force Automatic sample submission to «Always prompt»
This will disable and prevent using Option One and Option Two.
A) Click/tap on the Download button below to download the file below, and go to step 7 below.
Always_prompt_automatic_sample_submission.reg
(Contents of REG file for reference)
Code:
Windows Registry Editor Version 5.00

[HKEY_LOCAL_MACHINE\SOFTWARE\Policies\Microsoft\Windows Defender\Spynet]
"SubmitSamplesConsent"=dword:00000000
3. Force Automatic sample submission to «Send safe samples automatically»
This will disable and prevent using Option One and Option Two.
A) Click/tap on the Download button below to download the file below, and go to step 7 below.
Send_safe_samples_automatic_sample_submission.reg
(Contents of REG file for reference)
Code:
Windows Registry Editor Version 5.00

[HKEY_LOCAL_MACHINE\SOFTWARE\Policies\Microsoft\Windows Defender\Spynet]
"SubmitSamplesConsent"=dword:00000001
4. Force Automatic sample submission to «Send all samples automatically»
This will disable and prevent using Option One and Option Two.
A) Click/tap on the Download button below to download the file below, and go to step 7 below.
Send_all_samples_automatic_sample_submission.reg
(Contents of REG file for reference)
Code:
Windows Registry Editor Version 5.00

[HKEY_LOCAL_MACHINE\SOFTWARE\Policies\Microsoft\Windows Defender\Spynet]
"SubmitSamplesConsent"=dword:00000003
5. Disable and Force Automatic sample submission to «Never send»
This will disable and prevent using Option One and Option Two.
A) Click/tap on the Download button below to download the file below, and go to step 7 below.
Never_send_(disable)_automatic_sample_submission.reg
(Contents of REG file for reference)
Code:
Windows Registry Editor Version 5.00

[HKEY_LOCAL_MACHINE\SOFTWARE\Policies\Microsoft\Windows Defender\Spynet]
"SubmitSamplesConsent"=dword:00000002
6. Default — Automatic sample submission
This is the default setting to allow using Option One and Option Two.
A) Click/tap on the Download button below to download the file below, and go to step 7 below.
Default_enable_automatic_sample_submission.reg
(Contents of REG file for reference)
Code:
Windows Registry Editor Version 5.00

[HKEY_LOCAL_MACHINE\SOFTWARE\Policies\Microsoft\Windows Defender\Spynet]
"SubmitSamplesConsent"=-
7 Save the .reg file to your desktop.
8 Double click/tap on the downloaded .reg file to merge it.
9 When prompted, click/tap on Run, Yes (UAC), Yes, and OK to approve the merge.
10 You can now delete the downloaded .reg file if you like.
That’s it,
Shawn Brink
Related Tutorials
- Enable or Disable Real-time Protection for Microsoft Defender Antivirus in Windows 11
- Enable or Disable Cloud-delivered Protection for Microsoft Defender Antivirus in Windows 11
- Enable or Disable Controlled Folder Access for Microsoft Defender Antivirus in Windows 11
If you see a yellow triangle appearing on your screen, it simply means that there is a warning notification from your Windows security app.
Windows 10‘s built-in reliable antivirus, Windows Defender, has a lot of cool and helpful features. One of them is it constantly searches for threats on your computer, something we expect from any formidable anti-virus software.
However, not only that, Windows Defender also automatically submits the threat reports to the Microsoft which might make some privacy-sensitive users to cringe.
The Automatic Sample Submissions will send suspicious files to the developer for analysis. These sample submissions are meant to help developers to study the threats and find ways to fix them and protect your computer.
While it sounds helpful, some of these files may include users’ private details. If you feel uncomfortable sharing these data, you can easily disable the sample submission.
How to Disable Automatic Sample Submission in Windows Defender

Via Windows Security App
- Launch the Windows Security App. You can also click Start and type Windows Security App on the search box.
- Next, click Virus & threat protection.
- Under Virus & threat protection settings, click Manage settings.
- Look for Cloud-delivered protection.
- Toggle the button to Off to disable protection.
- Look for Automatic sample submission.
- Toggle the button to Off to disable the feature. You can always enable it by toggling to On.
- Restart your computer.
Via Registry Editor
- Press Windows key + R to launch Run dialog box.
- Type regedit and click Enter.
- Navigate to this path: HKEY_LOCAL_MACHINE\SOFTWARE\Policies\Microsoft\Windows Defender
- Look for the Windows Defender key. Create a new key.
- Rename the new key to Spynet.
- On the right side, create a new DWORD SubmitSamplesConsent.
- Set the value to 2.
- Next, create a new DWORD SpynetReporting.
- Set the value to 0.
Now, you have the option to turn your automatic sample submission and cloud-delivered protection on or off. Keep in mind that after turning both features off, you will receive a notification that your device may be vulnerable to threats.
Did the methods above help you? Let us know in the comments below.
Windows Dispatch is a website supported by its readers & community. Some pages may contain affiliate links which may allow us to earn a little money when you buy through them.
Aileen G. M.
A technology writer with a degree in Business Administration majoring in Marketing. Aileen loves creating helpful but simple guides for troubleshooting and fixing complex issues on today’s gadgets and services.
Время на прочтение3 мин
Количество просмотров32K

На Хабре неоднократно обсуждалось, что сторонние антивирусы — источник дополнительной угрозы. Они внедряются в ОС на уровне ядра и увеличивают поверхность атаки за счёт собственных уязвимостей. Некоторые специалисты говорят, что сторонние антивирусы лучше удалить. Хотя в некоторых случаях их использование всё-таки имеет смысл.
Но есть и хорошая новость. В состав ОС Windows входит стандартный антивирус Windows Defender. Это простая и добротная программа. Но для максимальной эффективности желательно её укрепить специальными настройками, которые по умолчанию отключены.
Windows Defender (известен также как Microsoft Defender и Защитник Windows) — простой, но качественный антивирус, встроенный в последние версии Windows. Там есть средства для контроля приложений, встроенный брэндмауэр (файрвол) и средства для защиты в реальном времени.
Настройки управления Windows Defender отличаются от GUI коммерческих антивирусов. Здесь множество опций. Хотя все они подробно описаны в документации, добраться до них не так легко.
По умолчанию Defender устанавливается со стандартными параметрами, которые не оптимальны. Небольшие изменения конфигурации позволяют значительно улучшить защиту домашних ПК.
Ряд ключевых настроек Windows Defender изменяется через локальную групповую политику. Их можно менять двумя способами:
- через редактор локальной групповой политики (Local Group Policy Editor,
gpedit.msc), который по умолчанию доступен только в версиях Windows Pro/Enterprise; - через консоль PowerShell.
В принципе, второй вариант проще и быстрее, хотя кому-то ближе по душе GUI. Ниже используются оба варианта.
Интервал обновления вирусных сигнатур
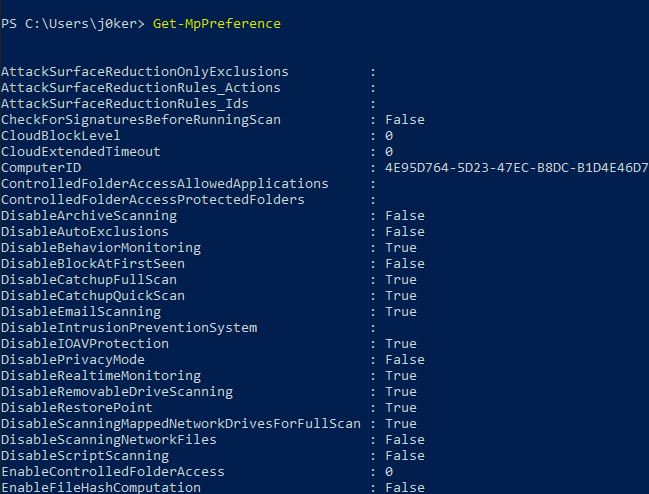
Запускаем PowerShell от имени администратора и набираем Get-MpPreference, чтобы посмотреть текущую конфигурацию Защитника:
Устанавливаем интервал обновления сигнатур на 1 час:
Set-MpPreference -SignatureUpdateInterval 1Есть смысл также проверять новые сигнатуры перед каждым сканированием:
Set-MpPreference -CheckForSignaturesBeforeRunningScan 1
Другие параметры Set-MpPreference, которые можно изменить из консоли, указаны в документации.
Аналогичные настройки есть в редакторе локальной групповой политики. Если у вас версия Windows ниже Pro/Enterprise, то нужно сначала активировать редактор. Вот скрипт для Windows 10 и скрипт для Windows 11.
После активации редактора запускаем его:
gpedit.mscТам несложно найти все те же настройки, которые указаны в консоли.
Включить MAPS
Microsoft Advanced Protection Service (MAPS) — улучшенная защита в реальном времени с подключением нескольких облачных функций и некоторых передовых технологий. Это бесплатная экспериментальная функция, которая выключена по умолчанию.
Подключение в консоли через Set-MpPreference по примеру выше:
CloudBlockLevel: уровень блокировки, рекомендуется5 - High blocking level, хотя можно и более высокий.CloudExtendedTimeout: таймаут, рекомендуется установить на 50 секунд.MAPSReporting, отправка отчётов в Microsoft: 0 — отключена, 2 — расширенные отчёты (Advanced Membership), 1 — только базовые данные (Basic Membership).SubmitSamplesConsent: отправка образцов в Microsoft: 0 — всегда спрашивать, 1 — автоматически отправлять безопасные образцы, 2 — никогда не отправлять, 3 — отправлять все образцы автоматически.
Включение MAPS в редакторе групповой политики:
Конфигурация компьютера → Административные шаблоны → Компоненты Windows → Антивирусная программа Microsoft Defender (Windows Defender) → MAPS
Здесь выбираем «Присоединиться к Microsoft MAPS» и уровень: базовый или расширенный (на скриншоте внизу).

В справке написано, что означают уровни участия.
Далее включаем опцию «Блокировка при первом появлении». Эта функция обеспечивает проверку устройств в реальном времени с помощью службы MAPS, прежде чем разрешить выполнение определённого содержимого или доступ к нему.

Также активируем функцию «Настроить локальное переопределение для отправки отчётов в Microsoft MAPS».
Переходим к следующему разделу с настройками MpEngine.
Конфигурация компьютера → Административные шаблоны → Компоненты Windows → Антивирусная программа Microsoft Defender (Windows Defender) → MpEngine
Опция «Выберите уровень защиты в облаке» (на КДПВ) — можно установить высокий или сверхвысокий уровень защиты, а ещё лучше уровень с нулевой терпимостью.
Опция «Настройте расширенную проверку в облаке» — это время, на которое антивирус может заблокировать подозрительный файл, чтобы проверить его в облаке. Рекомендуется таймаут 50.

Эти опции сильно укрепляют антивирусную защиту Windows Defender.
Примечание. Любое последующее обновление Windows Defender может отменить сделанные изменения и вернуть настройки по умолчанию. Поэтому лучше периодически проверять их.
Подробнее о сертификатах подписи кода на сайте GlobalSign

Операционные системы Windows поставляются со встроенным ПО для защиты от вирусов, шифровальщиков и эксплойтов. Также оно выполняет функции брандмауэра и родительского контроля. Технически все выполнено в виде всего одной утилиты под названием «Центр безопасности Защитника Windows».
Назначение Защитника Windows
Приложение обновляется по схеме, схожей с антивирусными программами, и не требует установки в систему, как это часто бывает с продуктами сторонних разработчиков. Большую часть времени его интерфейс скрыт от пользователя – нет всем надоевших значков в трее, защита работает прозрачно и автоматически блокирует потенциальные угрозы.
Особенности Защитника:
- Обновление программы происходит через «Центр обновления Windows».
- Эвристический анализ осуществляется с подключением к облачному серверу Microsoft.
- Возможен ручной запуск проверки накопителей или отдельных файлов.
Чтобы открыть программу, достаточно в поиске Windows (комбинация клавиш <Win+S>) ввести фразу «защитник». И уже в процессе ввода система покажет ярлык нужного приложения, которое запускается для ручного управления настройками. Брандмауэр и антивирус «по умолчанию» имеют отдельные интерфейсы, хотя возможен быстрый переход между ними через левое меню.
Комьюнити теперь в Телеграм
Подпишитесь и будьте в курсе последних IT-новостей
Подписаться
Настройка компонента «Защита от вирусов и угроз»
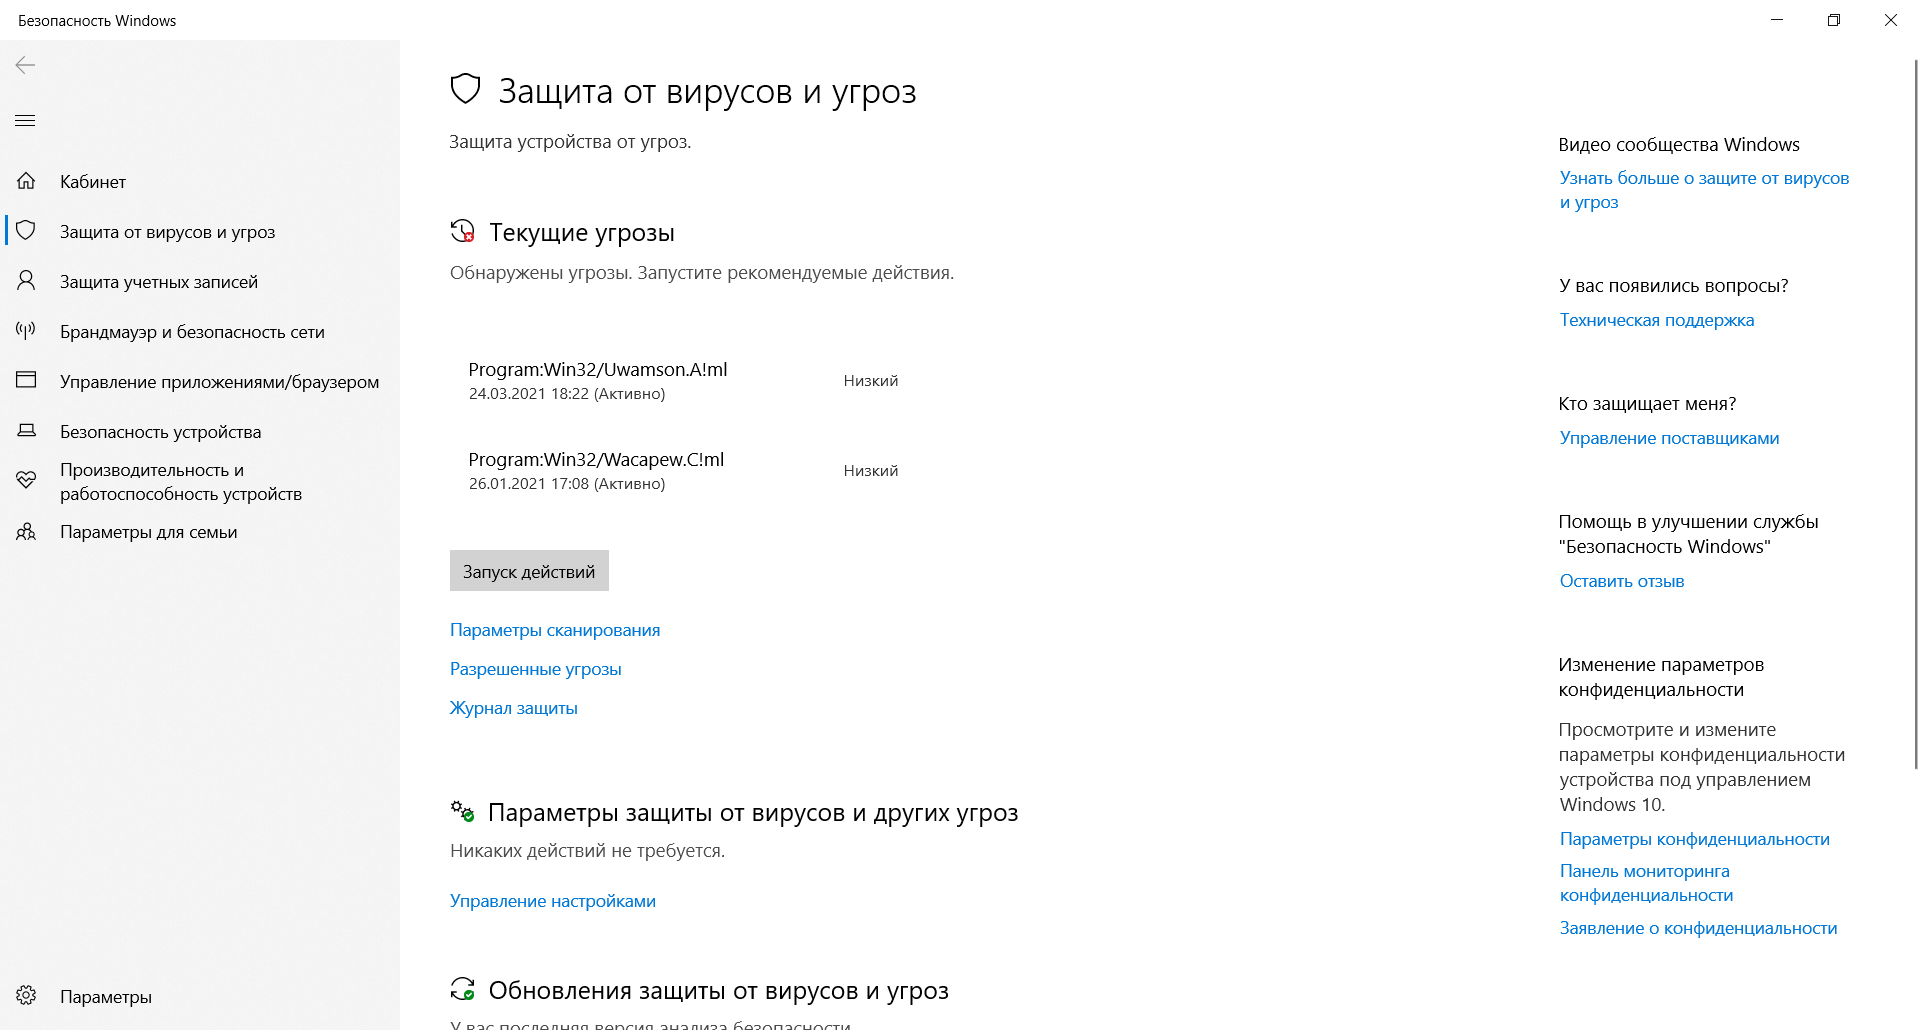
При инсталляции операционной системы Windows все типы защиты подключаются автоматически, и в большинстве случаев настройки остаются в значении «по умолчанию» на весь период службы ПК. При необходимости есть возможность временно отключить антивирусный модуль или изменить параметры проверки файлов, а также подключить контролируемый доступ к папкам.
Последовательность действий:
- Открыть окно «Защита от вирусов и угроз» через поиск Windows.
- Выбрать пункт «Управление настройками» в разделе «Параметры защиты от вирусов и других угроз».
- Отключить нужные функции или перейти в окно для настройки соответствующих функций вроде параметров уведомлений или добавления исключений.
Изменения принимаются автоматически и не требуют перезагрузки компьютера. Важно понимать, что при заражении компьютерным вирусом в период, когда антивирус неактивен, он останется на компьютере до тех пор, пока повторно включенный модуль не «наткнется» на него, например, при запуске инфицированной программы.
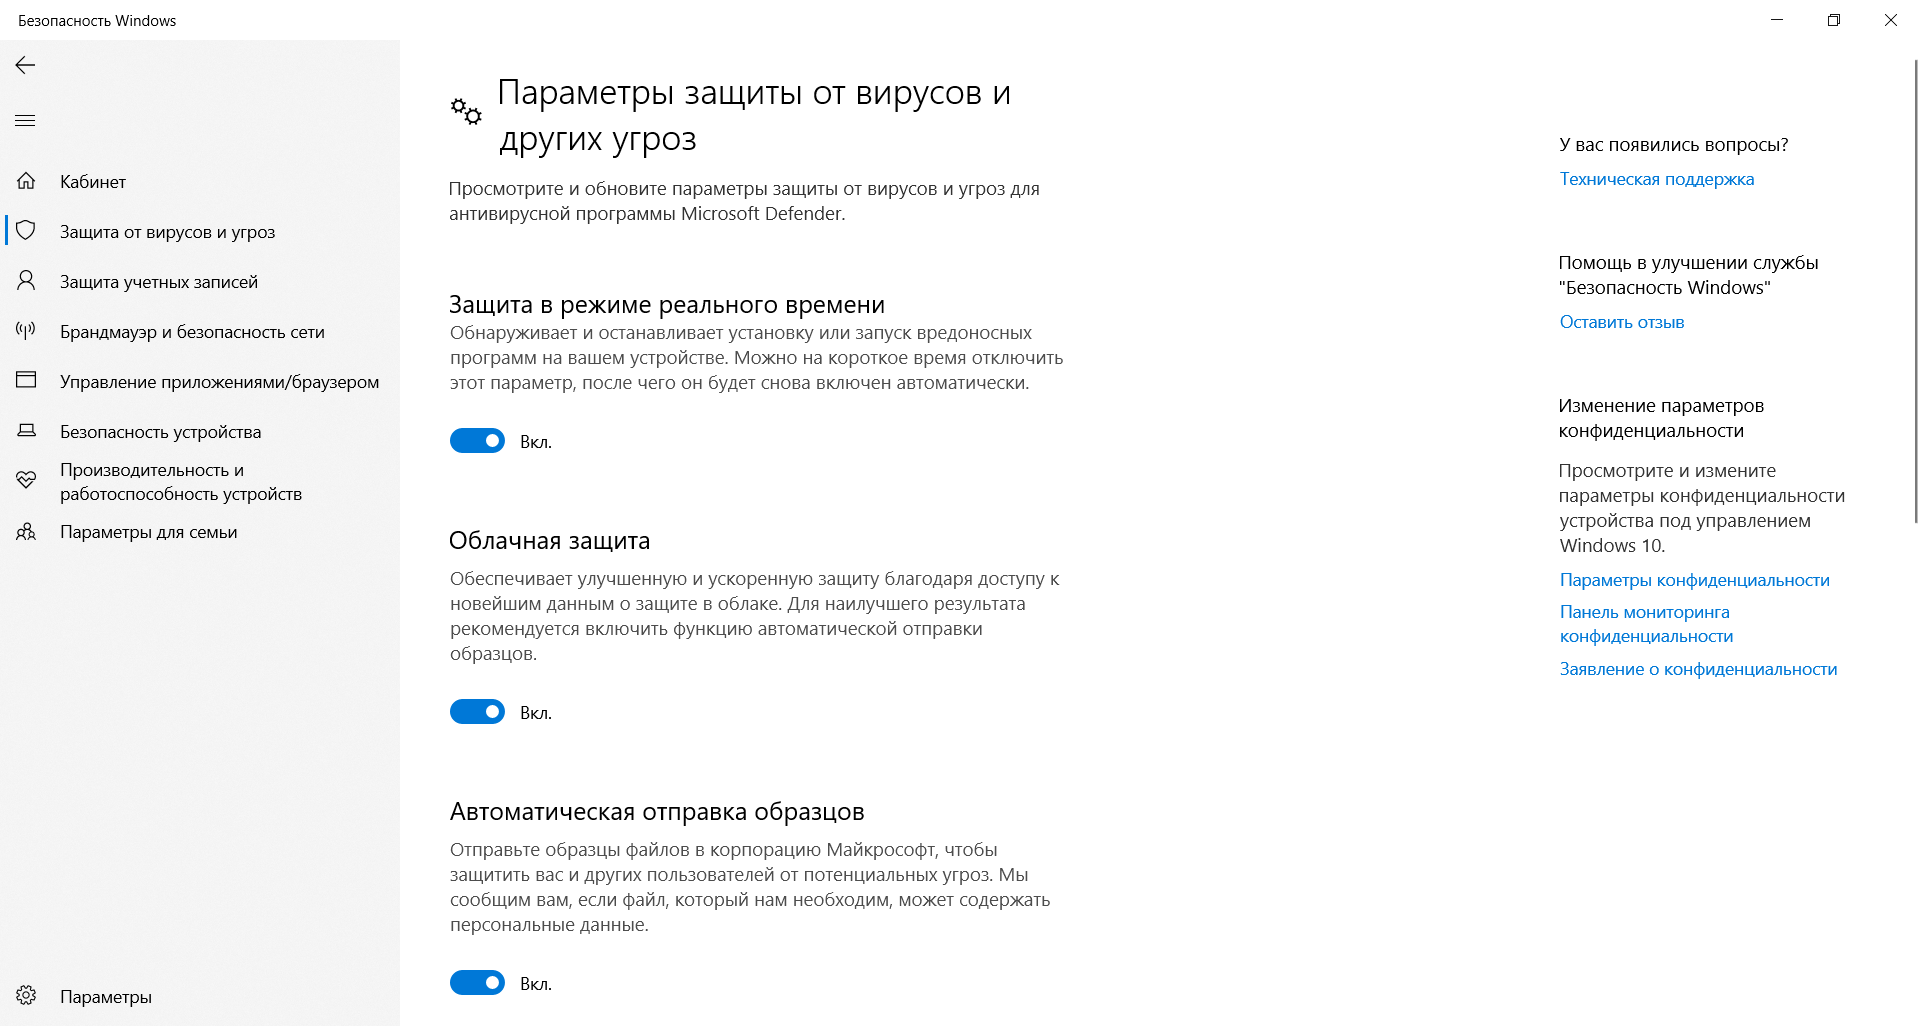
Небольшие пояснения по основным настройкам:
- Защита в режиме реального времени. Сканирование всех типов файлов, открываемых при использовании компьютера.
- Облачная защита. Система подключается к удаленному серверу для снижения нагрузки на локальное «железо».
- Автоматическая отправка образцов. Передает подозрительные файлы службе поддержки Microsoft для изучения и выработки наилучшей защиты от новых угроз.
Встроенный антивирус неплохо «соседствует» с продуктами сторонних разработчиков. Иногда стороннее ПО при инсталляции автоматически отключает интегрированные функции, если их параллельная работа будет нестабильной. В большинстве случаев от пользователя не требуется ничего изменять вручную, инсталляторы сторонних антивирусов все выполняют самостоятельно.
История сканирования и угрозы, перенесенные в карантин
При обнаружении (хотя бы потенциально) опасного файла операционная система перемещает его в отдельный каталог (карантин). Там он огражден от случайного запуска, поэтому компьютер не заразится, даже если в код действительно проник вирус. Хранится такой архив в течение трех месяцев, после чего удаляется, минуя корзину.
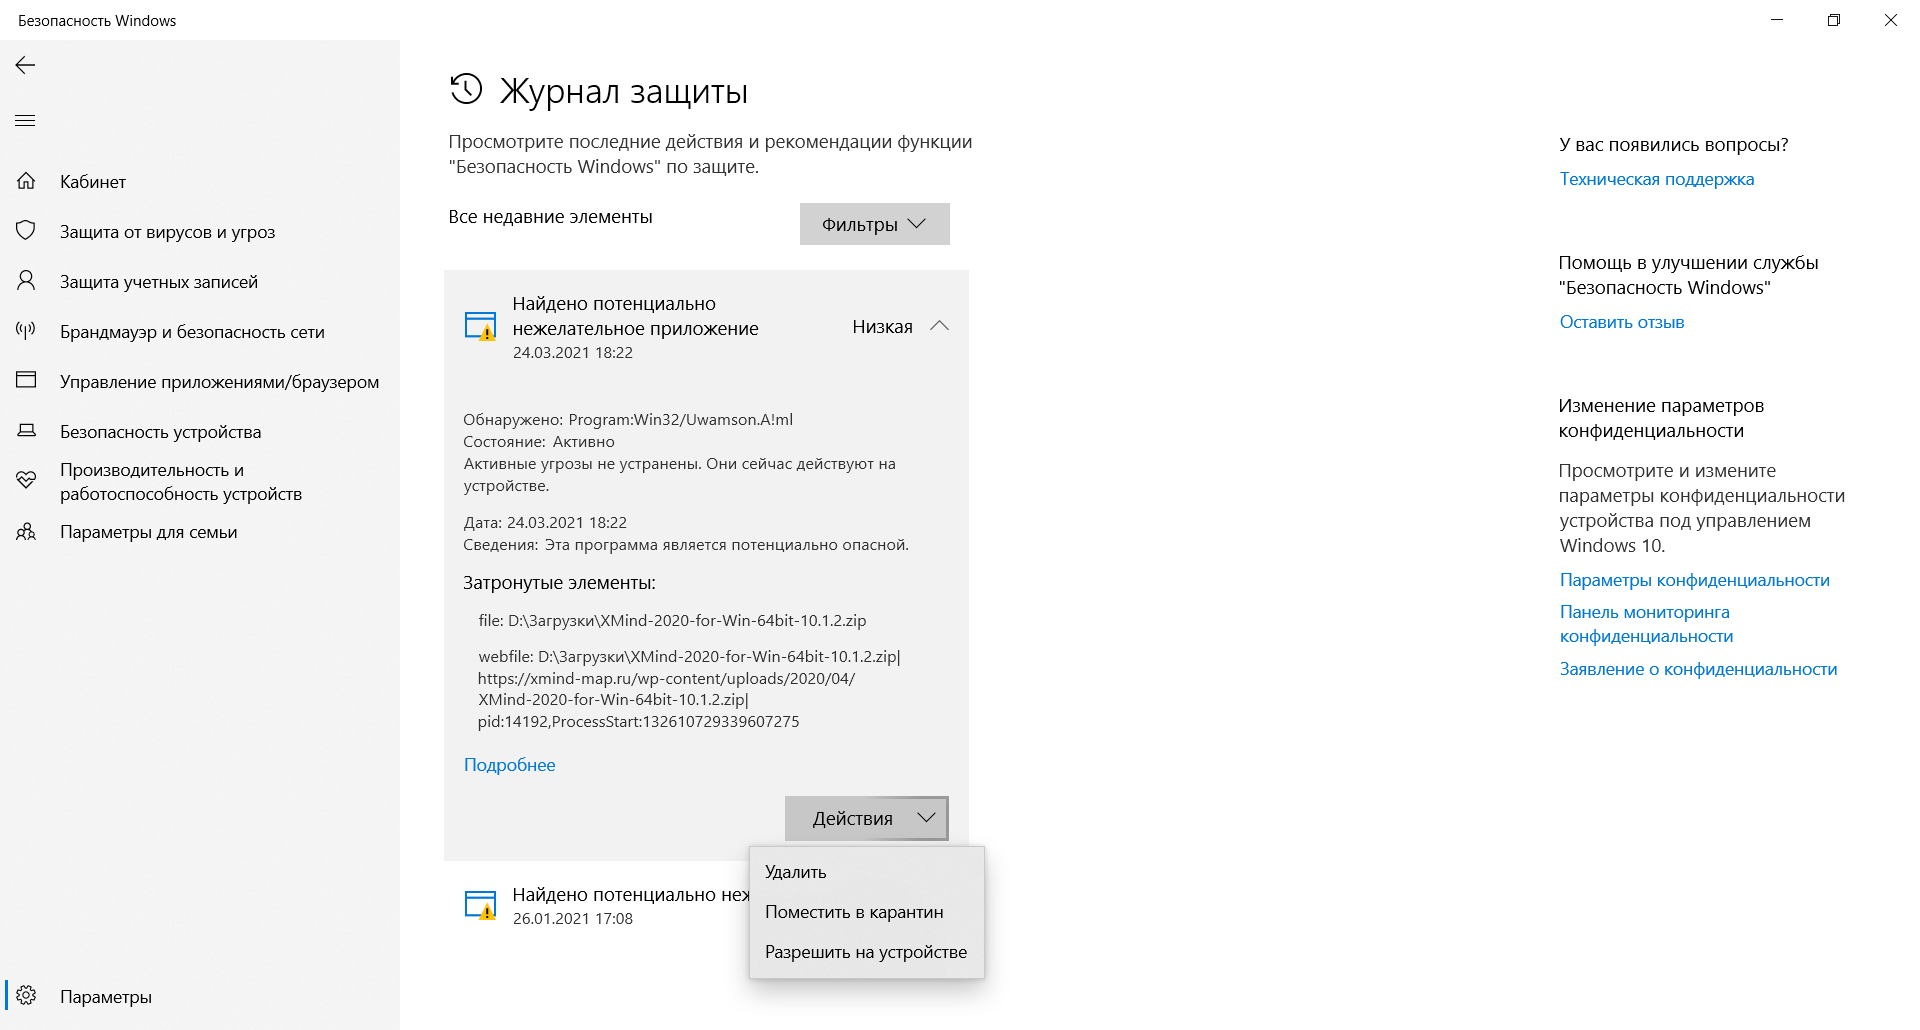
Последовательность действий при открытии журнала:
- Запустить модуль «Защита от вирусов и угроз».
- Выбрать пункт «Журнал защиты» и кликнуть по нему.
- Просмотреть список угроз и указать действие для каждой.
Возможно ручное удаление, перенос в «карантин», если этого еще не было сделано, и отключение контроля конкретного файла. Последнее часто необходимо, если запускается программа, взятая из сети, например, игра с торрента. Предлагаемые действия обычно выбираются сразу, при обнаружении угрозы.
Брандмауэр и безопасности сети
Брандмауэр представляет собой отдельный модуль, предназначенный для защиты от хакерских атак вроде несанкционированного удаленного подключения к компьютеру. Модуль раздельно работает по каждому соединению – проводному и Wi-Fi. В интерфейсе так же, как и в антивирусном блоке, есть возможность временного отключения функций.
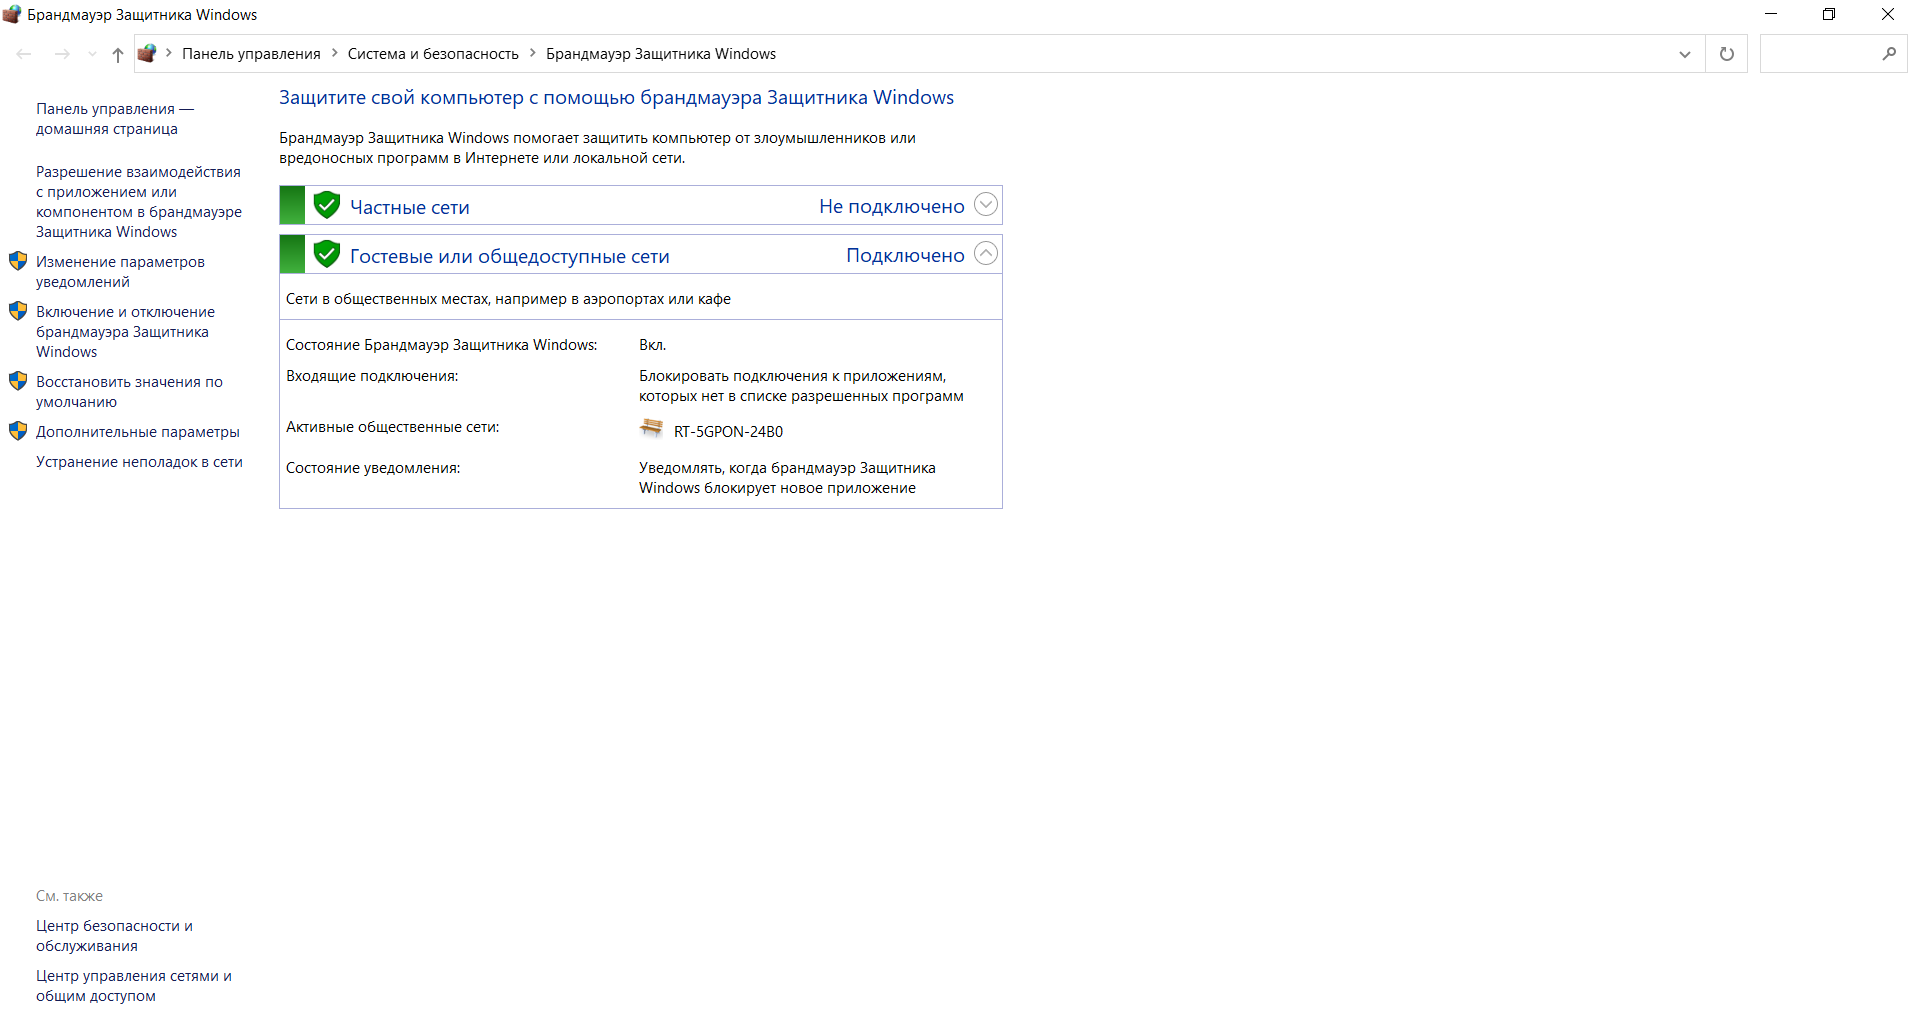
Последовательность управления:
- Открыть окно «Брандмауэр Защитника Windows» через поиск.
- Перейти в раздел «Включение и отключение брандмауэра Защитника Windows».
- Выбрать желаемый режим работы защитного приложения по каждой сети отдельно.
Именно в этом окне настраивается перечень программ, которым разрешено выходить в интернет. Выполняется изменение параметров в пункте меню «Разрешение взаимодействия с приложением или компонентом в брандмауэре Защитника Windows». Владельцу компьютера рекомендуется периодически просматривать список и удалять незнакомые пункты.
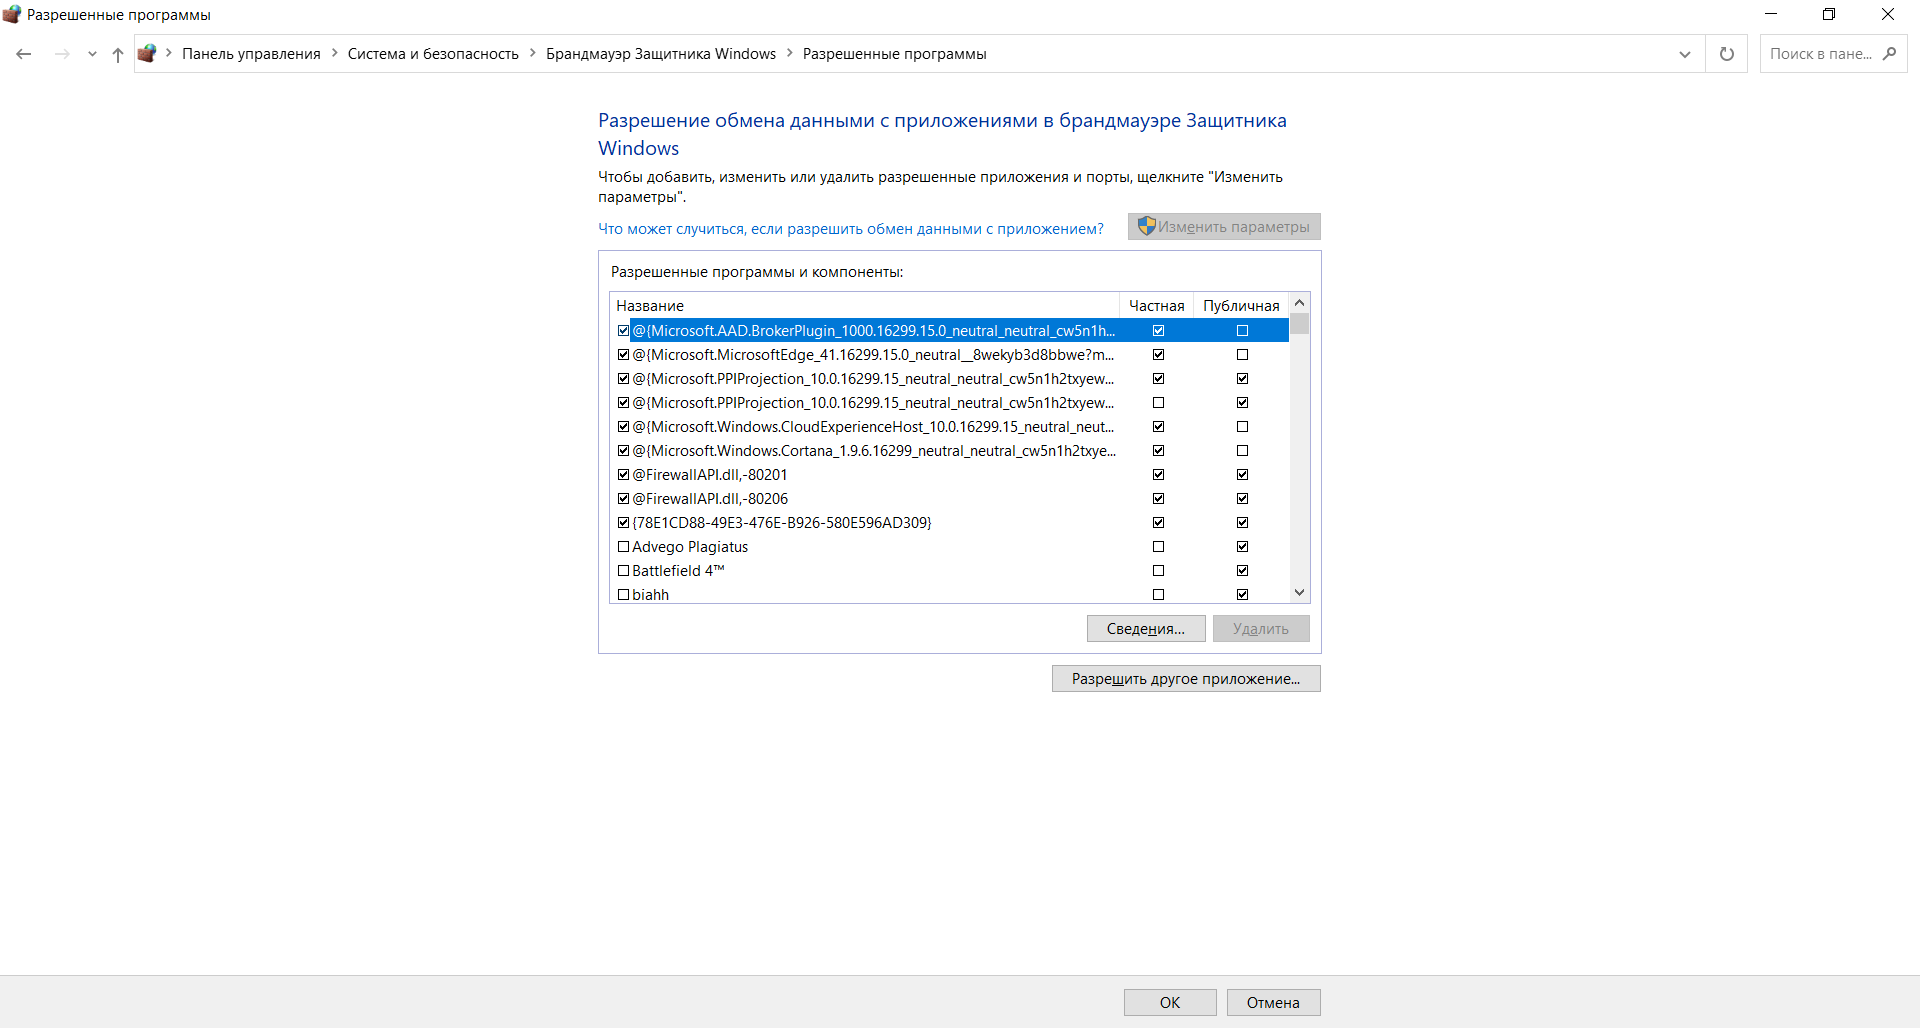
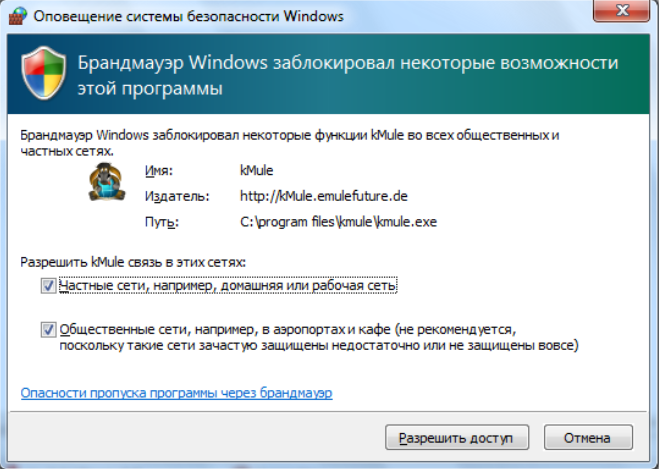
По умолчанию в сеть выпускаются все службы Windows и модули устанавливаемых программ, если в них при установке не был обнаружен вредоносный код. Игры обычно при первом запуске выдают запрос на разрешение доступа. Предоставлять его или нет, зависит от пользователя. Если никаких действий он не осуществляет, считается, что выходить в сеть разрешено.
Параметры для семьи
Модуль «Параметры для семьи» доступен, как и предыдущие, через поиск Windows. Это наиболее простой запуск настройки ограничений доступа в сеть для детей. Здесь же имеется доступ к истории посещений, счетчик времени, проведенного в интернете, перечень скачанных приложений, видео и другого мультимедийного контента.
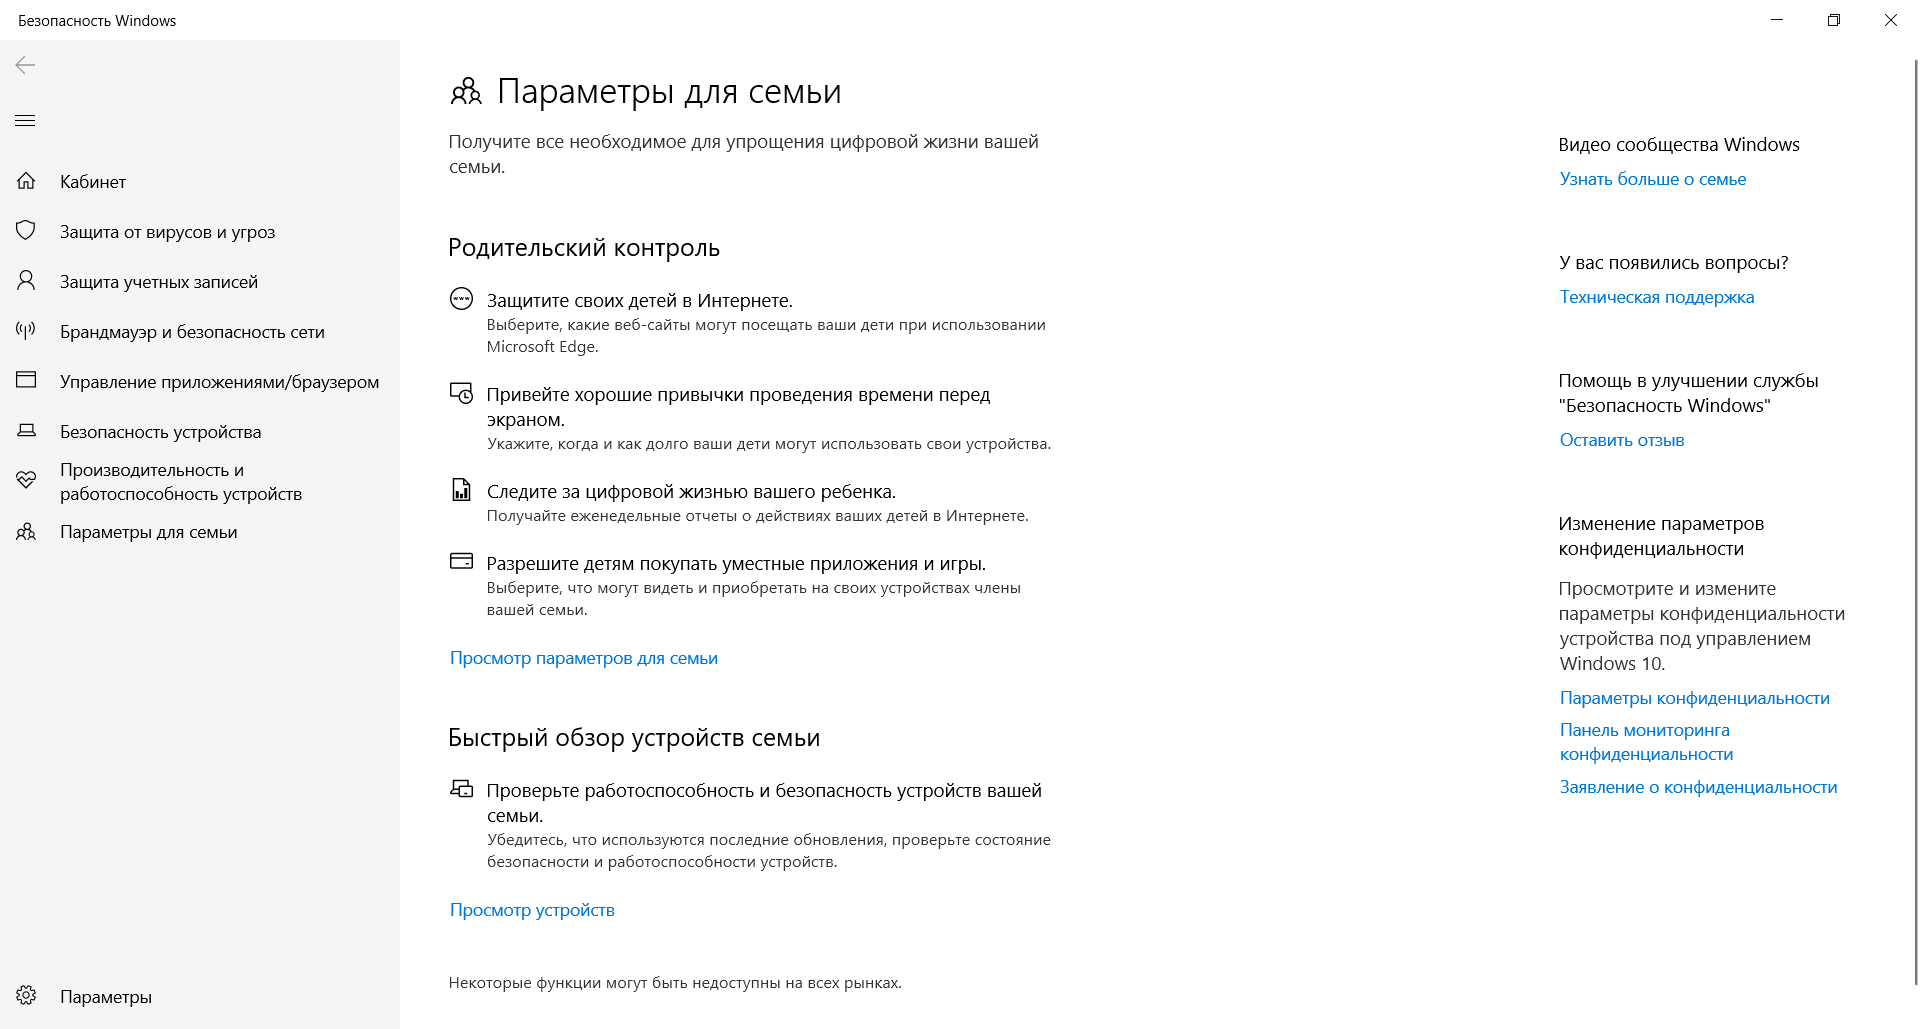
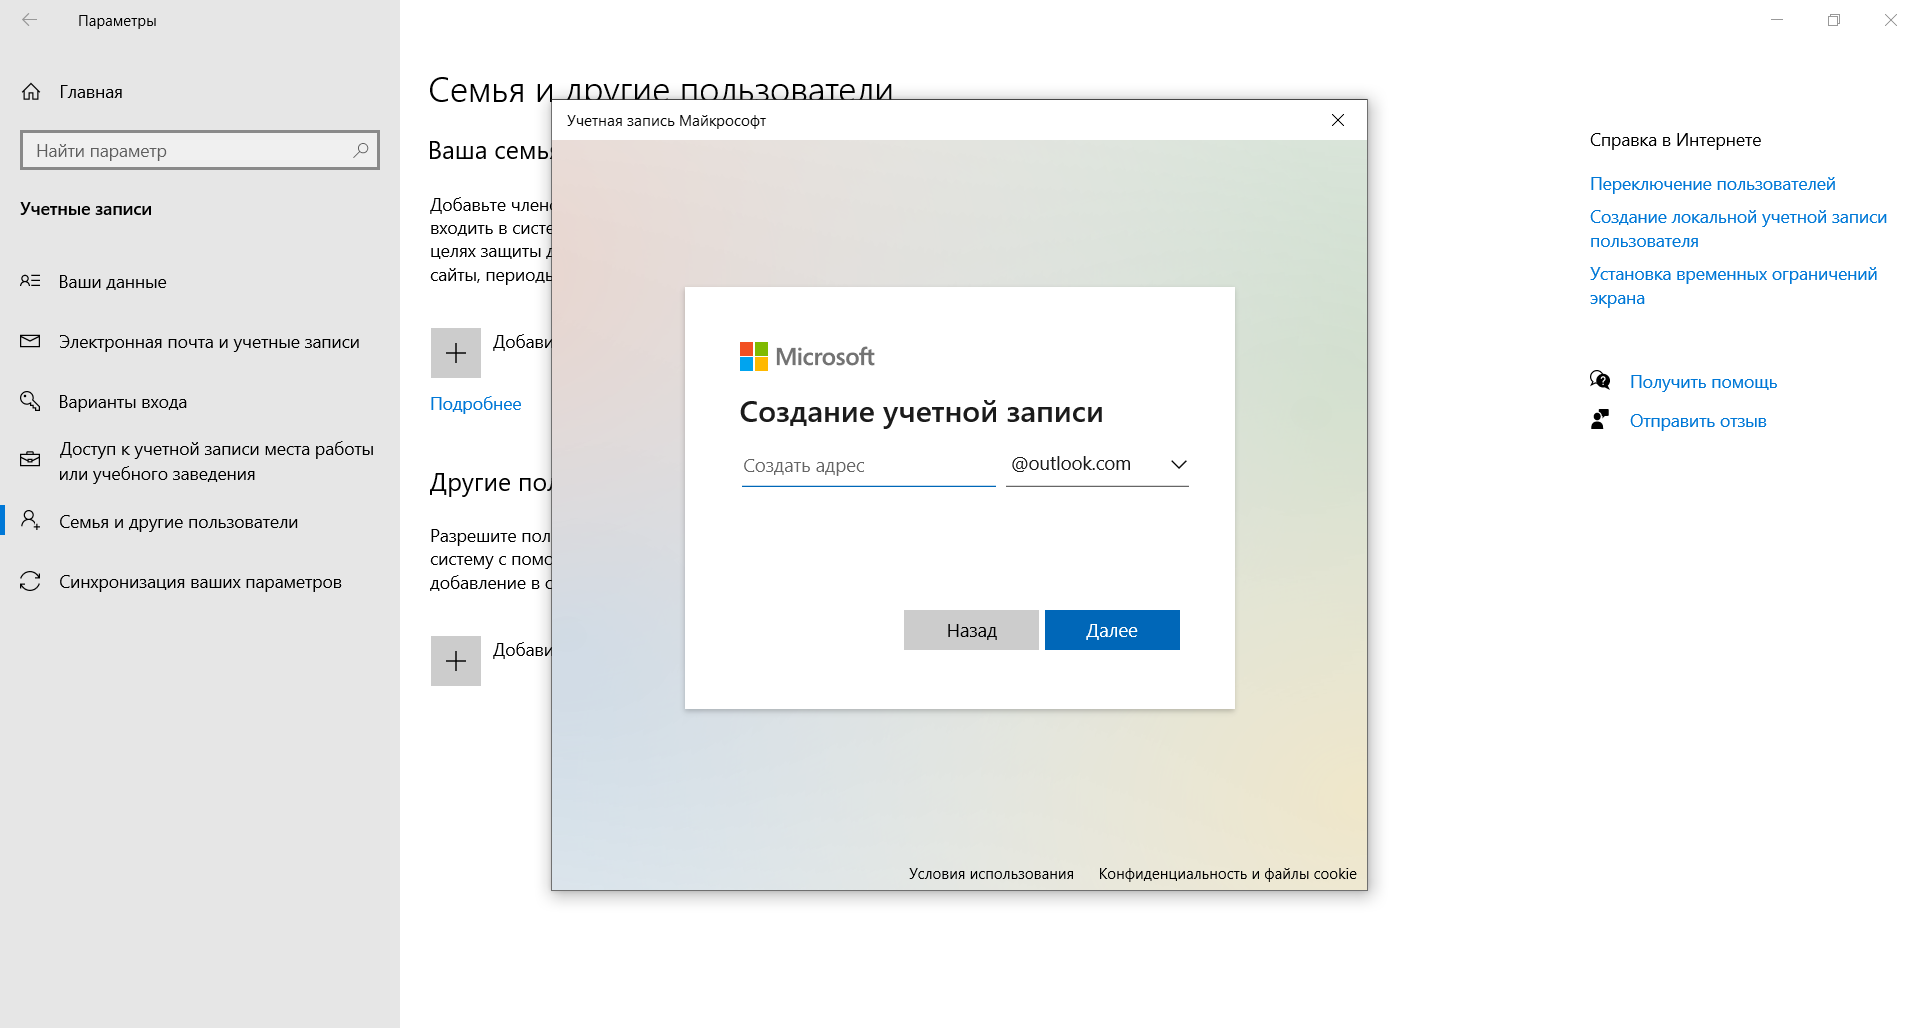
Чтобы защита начала работать, нужно создать отдельный аккаунт для ребенка:
- Открыть приложение «Параметры» через поиск Windows (комбинацией клавиш <Win+S>).
- Выбрать пункт «Учетные записи», в котором нужно перейти в раздел «Семья и другие пользователи».
- Нажать «Добавить члена семьи» и при запросе указать пункт «Создать для ребенка».
В идеале необходимо добавить аккаунт каждого, кто будет работать на компьютере. И в дальнейшем следить, чтобы все заходили в операционную систему под своей учетной записью. Система отчасти сложная, поэтому ее применяют редко – очень уж она похожа на систему безопасности в офисах. Домашние же ПК в основном приобретают для развлечений, а кому хочется что-то усложнять?
Принудительное сканирование
Если компьютер некоторое время работал с отключенной защитой, и у него появились симптомы заражения компьютерным вирусом, рекомендуется провести «ручную» проверку ПК. Процесс запускается в окне «Защита от вирусов и угроз». Для этого в главном окне выбирается пункт «Параметры сканирования».
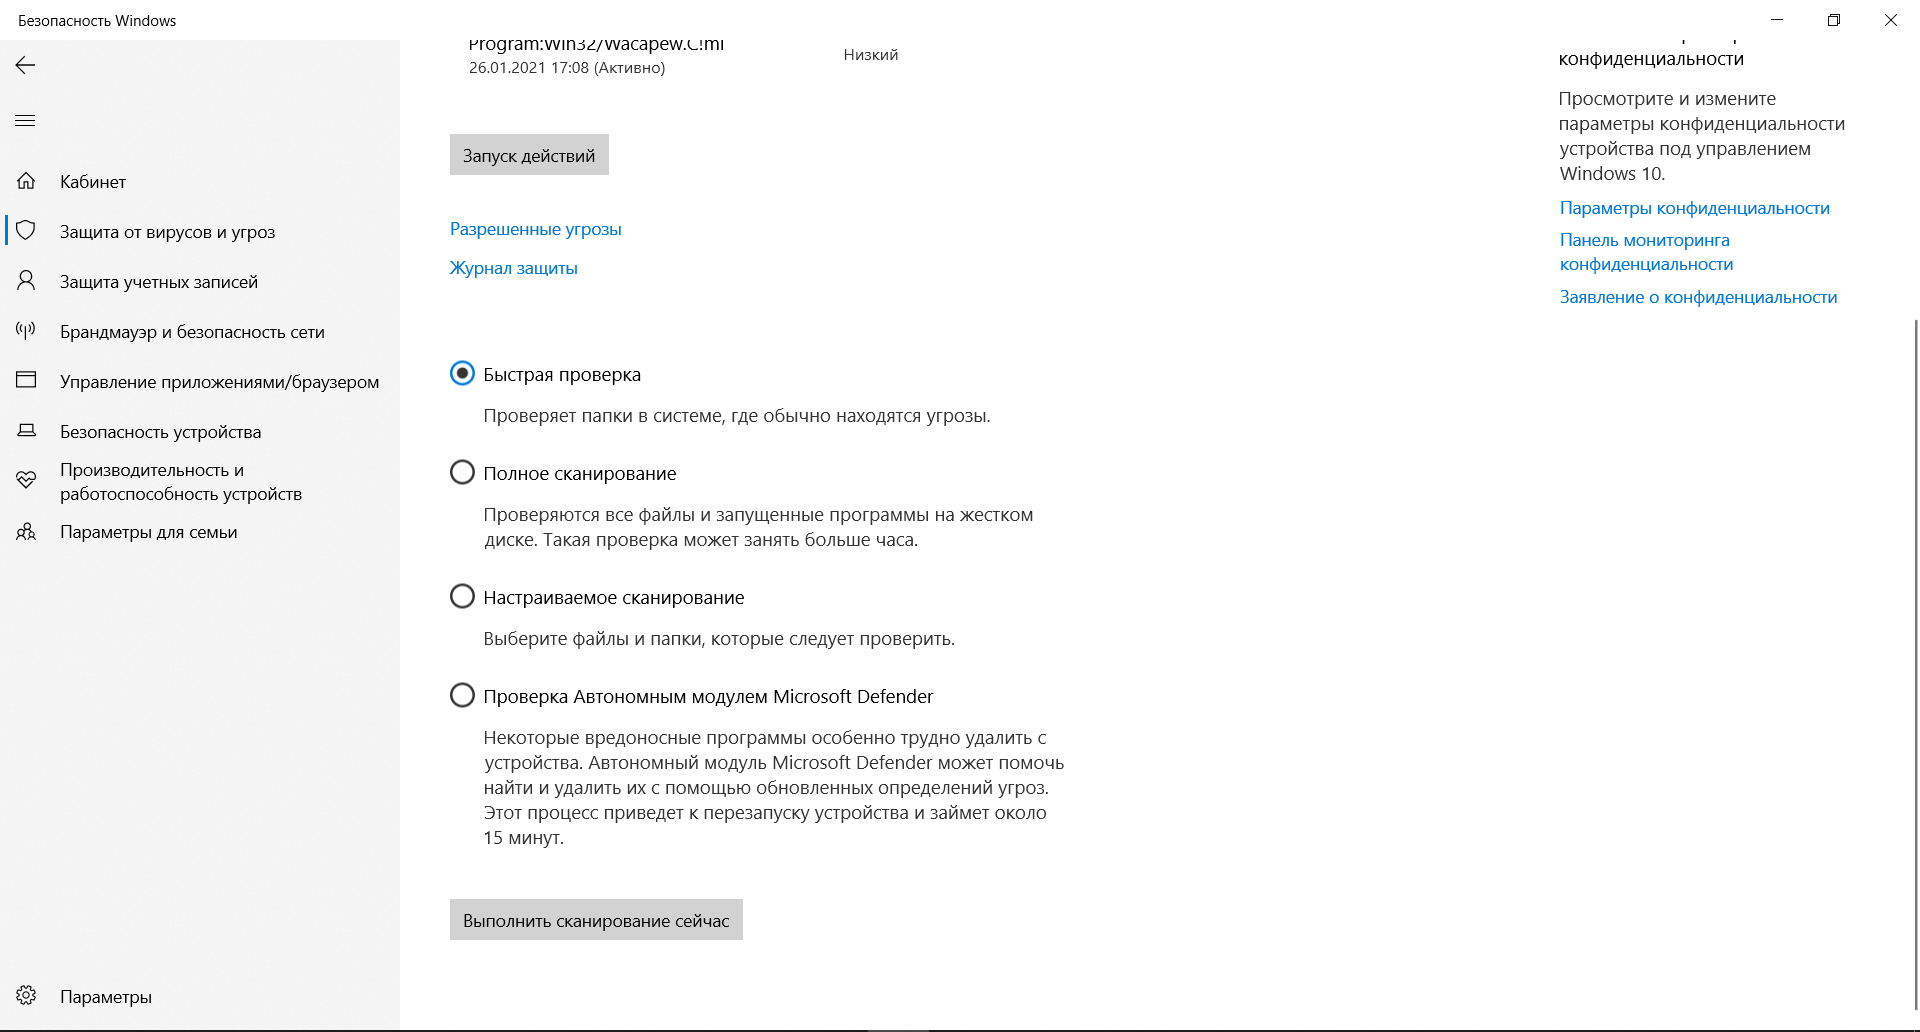
Затем нужно выбрать режим (быструю или полную проверку) и нажать на кнопку «Выполнить сканирование сейчас». В отдельных случаях рекомендуется использовать автономный модуль Microsoft Defender или ручной выбор папок для антивирусной проверки. Последнее востребовано для только что скачанных файлов и при подключении внешних носителей.
Полное сканирование обычно продолжается несколько часов – все зависит от количества файлов на компьютере. Поэтому большинство пользователей ограничиваются защитой в режиме реального времени, ведь она выявляет те же угрозы, что и принудительная проверка. К тому же многие привыкли ко встроенному Защитнику и всегда оставляют его включенным.
Полностью отключать Защитник, не имея платного антивируса на руках, ни в коем случае не рекомендуется.