
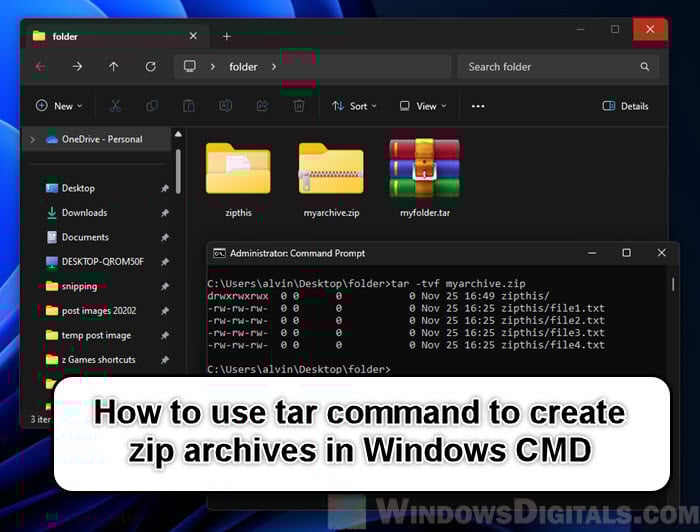
The tar command, which is very common in Unix and Linux systems for archiving and compressing files (also known as zipping), is also available in Windows 11 and Windows 10. It mainly helps you pack many files and folders into one file, called a tarball. In this guide, we’ll show you how to use the tar command in Windows to make ZIP archives.
Also see: How to Open or Extract .Gz, Tar.gz or .Tar File in Windows 11/10
Check if you have tar installed in Windows 11
Before we start making ZIP files with the tar command, make sure you have all the needed tools on your Windows 11 or Windows 10 PC. Starting with Windows 10’s Fall Creators Update and also in Windows 11, the tar command is built-in and you can use it from Command Prompt or PowerShell. Below is how you can check if tar is on your computer and install it if it’s not.
- Open Command Prompt or PowerShell.
- Type
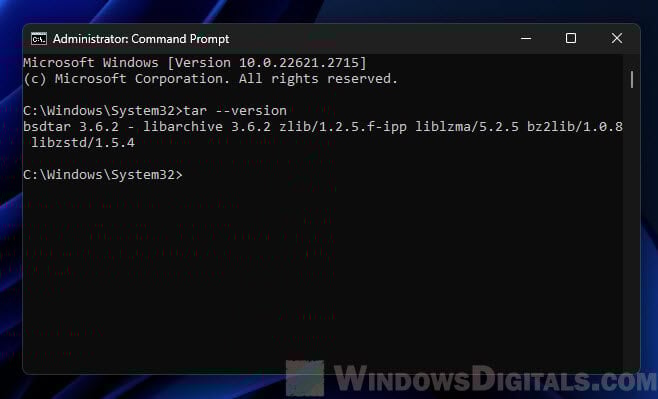
tar --versionand press Enter. - If you see a version number, tar is already on your computer. If you get an error or the command doesn’t work, you need to install it.

- If tar is not on your computer, the simplest way to install it is by turning on the Windows Subsystem for Linux (WSL).
- Go to the Windows search bar, type “Turn Windows features on or off”, and click on it.
- In the Windows Features window, tick the box for “Windows Subsystem for Linux” and click OK.
- Restart your computer when asked.
- After restarting, you can install the Linux version you like from the Microsoft Store, like Ubuntu.

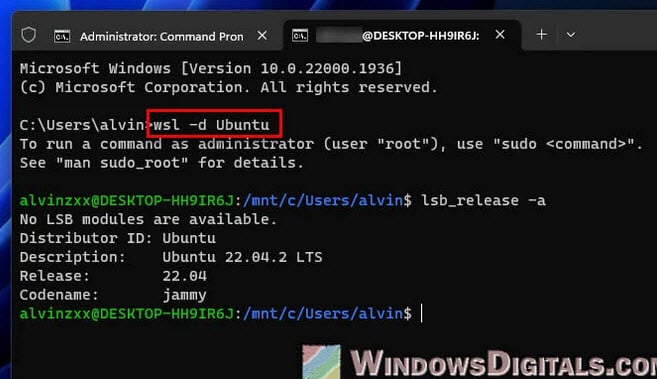
- Once you have WSL with your chosen Linux version installed, you can use tar by starting the Linux app from the Start menu.
- You can also use tar directly in Windows Command Prompt or PowerShell.
With tar ready to use on your Windows machine, you can now start making ZIP archive files. In the next part, we’ll go through the basic commands and how to use them.
Suggested read: How to Zip Files and Folders in Windows 11/10 Without Any Software
Create ZIP archives with tar command
Now that you have tar ready on your Windows computer, let’s see how to use it to make ZIP archive files. It’s quite simple and uses basic command line steps.
- Start Command Prompt or PowerShell, whichever you like more.
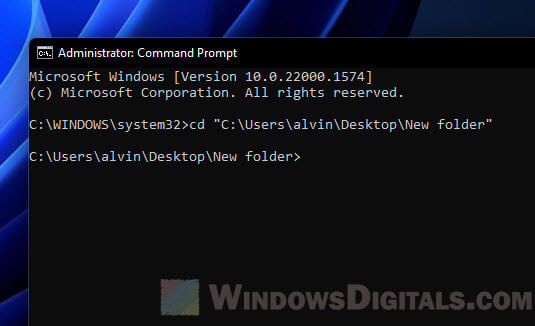
- Move to the folder where your files are by using the
cdcommand. For instance,cd C:\Users\Username\Desktop\.
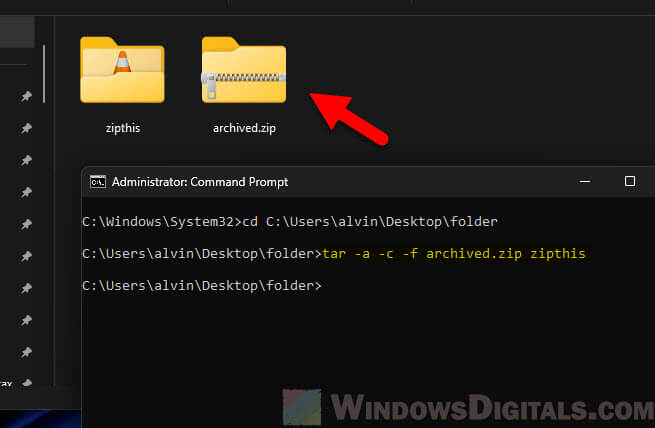
- The basic way to make a ZIP file with
taris like this:tar -a -c -f archive_name.zip file_or_directory_to_compress
- Here,
-apicks the ZIP format automatically,-cmeans create, and-fnames the archive. - To make a ZIP archive of a folder called MyFolder, the command would be:
tar -a -c -f myarchive.zip MyFolder

- This command makes a ZIP file named myarchive.zip with MyFolder inside.
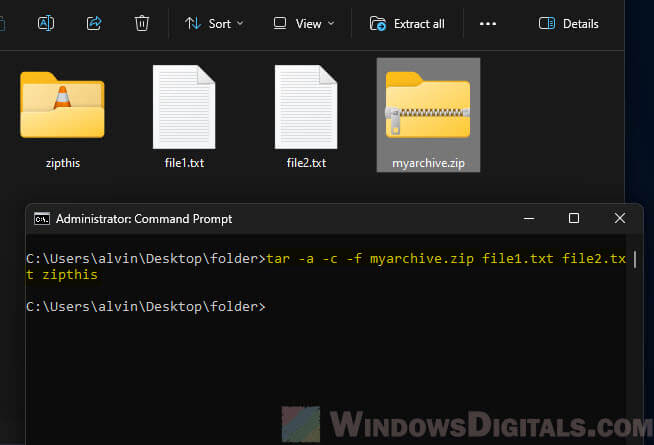
- You can also pack several files or folders in one go:
tar -a -c -f myarchive.zip file1.txt file2.txt MyFolder

- This makes a ZIP file with file1.txt, file2.txt, and the MyFolder folder inside.
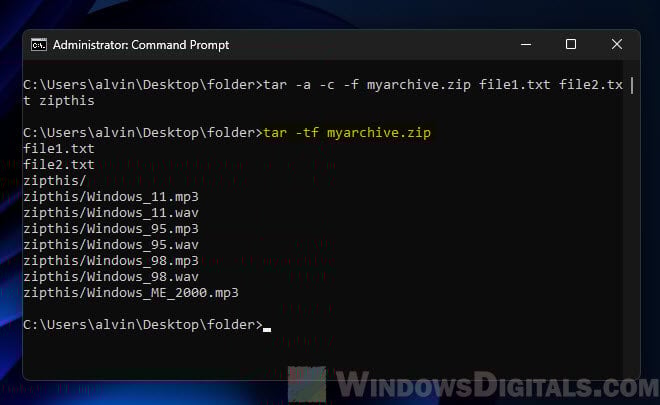
- To check if your files are correctly packed, you can list what’s in the ZIP file:
tar -tf myarchive.zip

- This shows the files in myarchive.zip.
Pro tip: How to Split a File Into Multiple Files in Windows 11
In the next part, we’ll share some extra tips to make your ZIP archiving with tar even better.
Some tips for more efficient ZIP archiving with tar command
The basic tar command for making ZIP files is simple, but there are more options and tricks that can help you archive better and fit your needs.
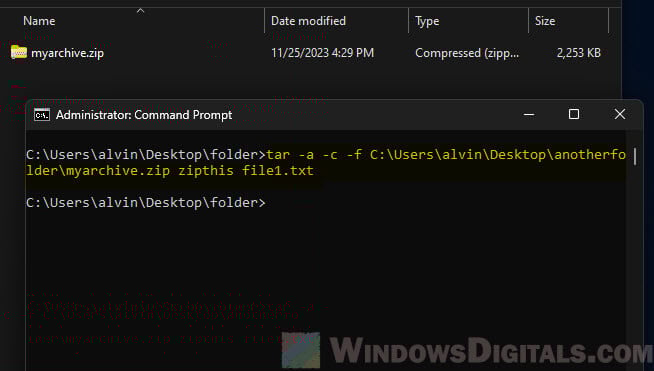
- Usually,
tarmakes the ZIP file right where you are. To make the archive in a different place, add the path to the archive name. For example:tar -a -c -f C:\Archives\myarchive.zip MyFolder

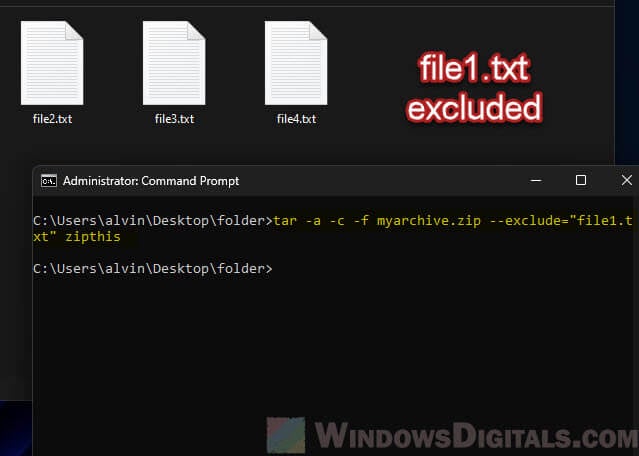
- Sometimes, you might not want to include certain files or folders in the archive. Use the
--excludeoption for this:tar -a -c -f myarchive.zip --exclude="file1.txt" MyFolder

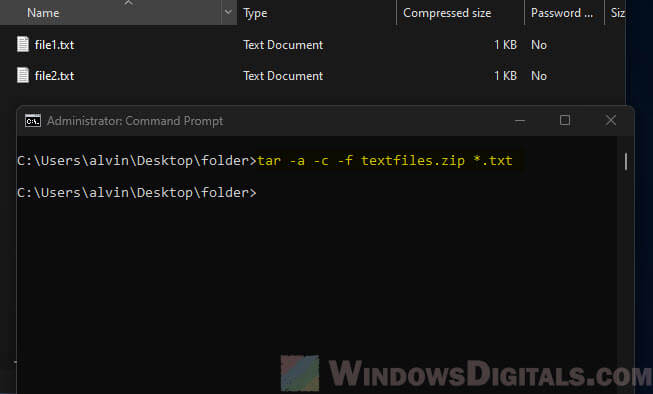
- You can use wildcards (*) to pack files that match a certain pattern. For example, to pack all
.txtfiles:tar -a -c -f textfiles.zip *.txt

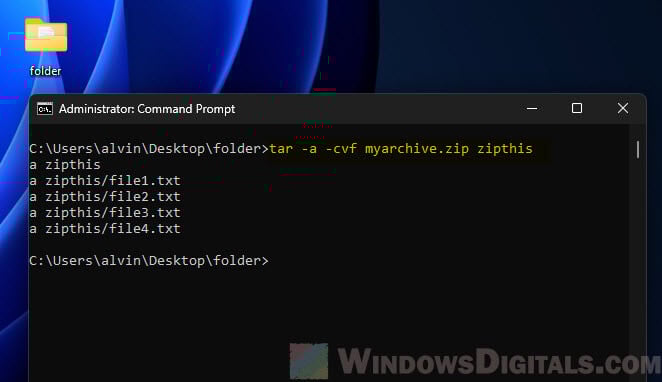
- If you want to see the files being packed, add the
-v(verbose) option:tar -a -cvf myarchive.zip MyFolder

- This will show each file as it’s added to the archive.
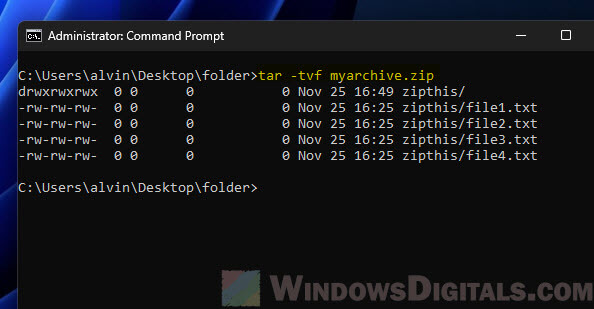
- After making an archive, it’s good to check if it’s all okay. Do this by:
tar -tvf myarchive.zip

- This not only shows the contents but also checks if the files are fine.
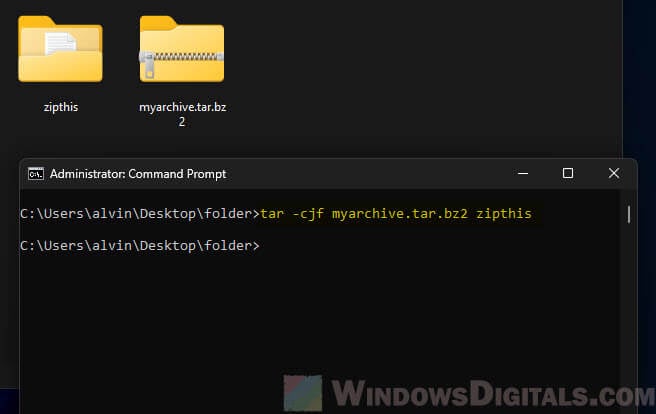
- While
-apicks ZIP compression by itself, you can choose other compression methods like gzip or bzip2 with-zor-j:tar -czf myarchive.tar.gz MyFolder tar -cjf myarchive.tar.bz2 MyFolder

- Note that these commands make
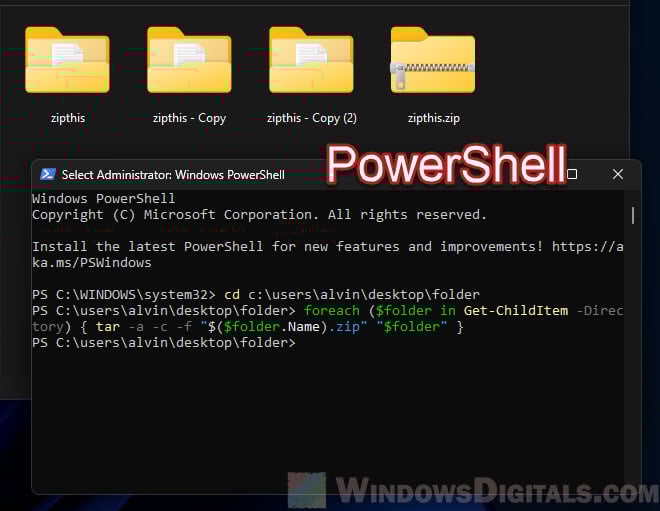
.tar.gzor.tar.bz2files, not ZIP. - For batch archiving multiple directories into separate archives, you can use a simple script or loop in the command line. For example, in PowerShell:
foreach ($folder in Get-ChildItem -Directory) {
tar -a -c -f "$($folder.Name).zip" "$folder"
}
Useful guide: Move All Files from Subfolders to Main Folder (Windows)
Create tar.gz and tar archives with tar command in Windows 11
Besides making ZIP files, the tar command in Windows can also make .tar.gz (tarball compressed with gzip) and .tar (uncompressed tarball) archives. These types are very common in Unix and Linux systems and are useful for many things, like backing up and sharing software.
Create a tar.gz archive
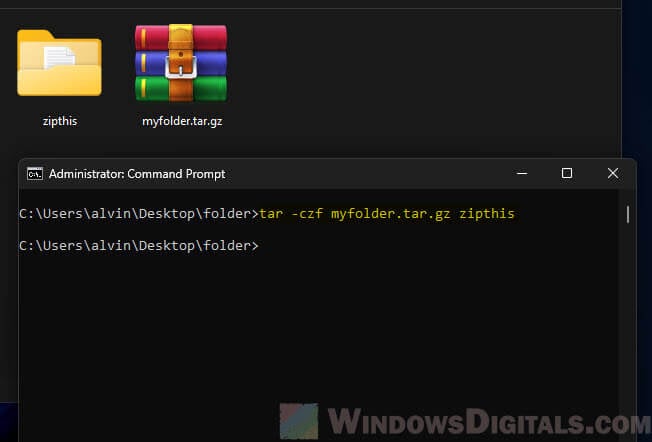
- To make a .tar.gz archive, use the
-zoption for gzip compression. The basic command looks like this:tar -czf archive_name.tar.gz file_or_directory_to_compress
- Here,
-cmeans create,-zapplies gzip compression, and-fnames the archive file. - To compress a folder called MyFolder into a .tar.gz archive, the command is:
tar -czf myfolder.tar.gz MyFolder

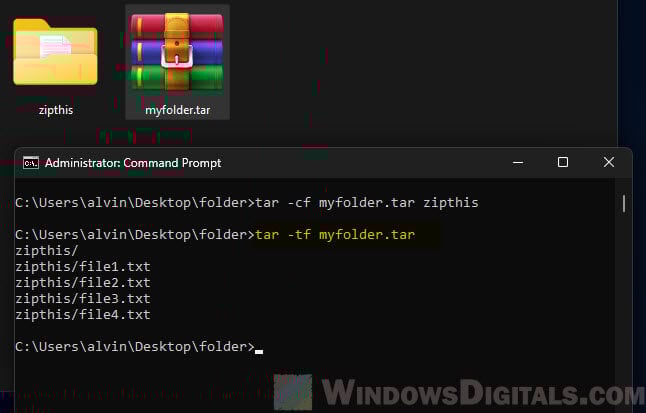
Create a tar archive
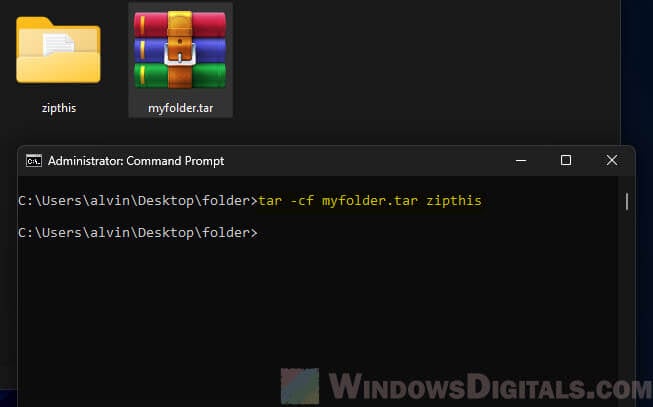
- Making an uncompressed tar archive is simple. Just leave out the compression option (
-zfor gzip or-jfor bzip2). The command goes like this:tar -cf archive_name.tar file_or_directory_to_compress
- To pack MyFolder into a .tar file, use:
tar -cf myfolder.tar MyFolder

Some other options
- Just like with ZIP archiving, you can use the
-v(verbose) option to see the files being added to the archive. - The
--excludeoption works the same way as with ZIP files, letting you leave out specific files or folders. - Use
tar -tf archive_name.tar.gzortar -tf archive_name.tarto list what’s in your .tar.gz or .tar archive.
Содержание статьи:
- Архивация файлов в Windows 11
- Способ 1
- Способ 2
- Альтернативные варианты сжатия
- Вопросы и ответы: 0
Приветствую!
В современной Windows 11 24h2 появилась встроенная возможность сжимать* файлы и папки в архивы 7Z и TAR (в дополнении к ZIP // на мой взгляд не хватает еще RAR, GZ). Т.е. для работы с этими форматами более не нужен сторонний архиватор, а все действия можно сделать прямо из проводника (что, собственно, сегодня и хочу кратко показать…).
📌 Для справки! Зачем может понадобиться сжимать файлы в 7Z:
- для того, чтобы уменьшить размер папки/файла (например, для ее более быстрой отправки по сети, или записи на флешку). 7Z показывает хор. степень сжатия (лучше, чем у ZIP);
- чтобы иметь дело с одним архивом, а не с сотней мелких файлов;
- для шифрования файла, чтобы запаролить его (правда Windows 11 такую опцию пока не предоставляет), и др.
*
Архивация файлов в Windows 11
Способ 1
Итак…
Если у вас Windows 11 24h2+ (как узнать версию ОС) — то достаточно сделать правый клик мышки по файлу/папке и выбрать в меню «Сжать до…», затем указать формат и архив будет создан (см. скриншот ниже). 👇
Обратите внимание, что есть возможность также открыть доп. параметры для ручной настройки создания архива (стрелка-4 на скрине ниже).
Примечание: если у вас при клике ПКМ по файлу появл. классическое контекстное меню (в котором нет 7Z) — то откл. его и вкл. меню от Windows 11. Вот пример, как это делается. Также проверьте версию своей ОС.

Сжать до (после ПКМ по файлу) — Windows 11
Среди доп. параметров можно выбрать место размещения нового архива, формат, метод сжатия (для 7Z: Store, Deflare, Bzip2, LZMA 1/2, PPMd), уровень сжатия. См. пример ниже. 👇

Выберите место назначения и создайте архив — меню Windows 11
Работает архиватор быстро, в моих тестах не зависал. Из недостатков лично я бы выделил следующее:
- отсутствие возможности поставить пароль;
- нельзя добавить в уже существующий архив новые файлы (для 7Z);
- не работает в старом контекстном меню проводника (просто его многие вкл. по умолчанию в отличие от нового…).
Тем не менее считаю, что поддержка основных форматов архивов ОС Windows — дело полезное (а то иной раз после переустановки ОС, когда под-рукой нет комп. аптечки, — думаешь чем открыть архив с драйверами… 👀).
Кстати!
Открывать архивы 7Z, TAR, ZIP в Windows 11 можно как обычные файлы: по двойному клику левой кнопки мыши (только у них значок в виде папки с замочком). См. пример ниже. 👇

Открыл архив 7Z в проводнике (Windows 11)
*
Способ 2
Если функционала архиватора (встроенного в Windows 11) недостаточно — можно прибегнуть к сторонней программе. В плане работы с форматом 7Z, наверное, нет ничего лучше, чем 📌7-Zip (ссылка на офиц. сайт).
После ее установки — достаточно сделать правый клик мыши по файлу (перейти в контекстно меню, нажав показать доп. параметры), и выбрать в меню «7-ZIP -> Добавить к архиву».
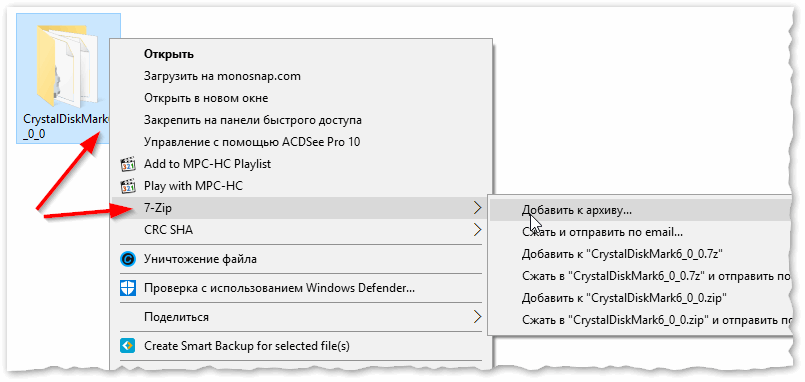
7-Zip — добавить к архиву (проводник Windows)
Далее откроется окно с кучей параметров. В общем случае достаточно указать формат сжатия (7Z), затем выбрать степень сжатия (например, ультра) и нажать OK. Всё просто?! 😉
Примечание: если вам нужно создать зашифрованный архив с доступом по паролю — то см. вот этот пример (он как раз для 7-ZIP).
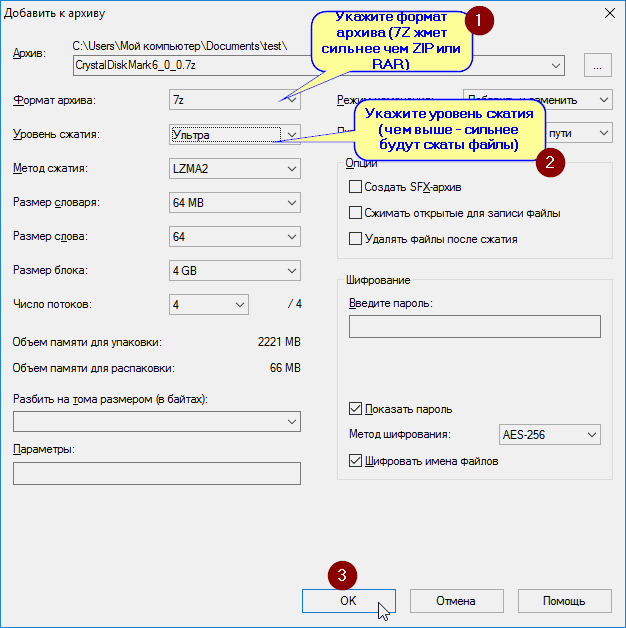
Добавить к архиву — настройки архиватора 7-ZIP (необходимо задать основные параметры: уровень сжатия, метод, размер блока и т.д.)
Кстати, помимо 7-ZIP и WinRAR — есть и др. достаточно неплохие архиваторы, способные открывать десятки (если не сотни) всевозможных форматов. В этой заметке привел неск. таких продуктов, рекомендую к знакомству!
https://ocomp.info/arhivatoryi-analog-winrar.html
*
Альтернативные варианты сжатия
Не все файлы одинаково хорошо сжимаются. Например, картинки или видео (иногда документы в PDF, образы ISO, MDF) с помощью архиватора сжать практически не удается. И в таких случаях (при необходимости уменьшить их размер) — можно пойти «другим путем»…
О чем речь: можно попробовать их переконвертировать в иной формат, «отрезать» лишнее, удалить часть ненужных страниц (если это документ), и т.д. Несколько практических примеров для разных файлов я показал в этой заметке (рекомендую!).
https://ocomp.info/kak-umenshit-razmer-fayla.html
*
Дополнения по теме заметки — приветствуются в комментариях.
Удачи!
👋
Creating archive files is an essential task for many computer users, whether for backup, compression, or simply to organize files. In Windows 11, users have access to various tools that allow them to create different types of archive files, including two of the most popular formats: 7Z and TAR. This article will guide you through the step-by-step process of creating 7Z and TAR archive files using native tools on Windows 11, highlighting features, advantages, and best practices.
Understanding Archive File Formats
What is a 7Z File?
A 7Z file is an archive format that utilizes various compression algorithms to reduce file size while maintaining data integrity. Developed by the 7-Zip program, 7Z files often provide better compression rates than other formats, such as ZIP. The 7Z format supports lossless compression, meaning that original data can be perfectly reconstructed from the compressed data. This compression format is particularly useful for users dealing with large files or a significant quantity of files, as it helps save storage space and facilitates easier file sharing.
What is a TAR File?
TAR (Tape Archive) is a widely used file format that collects multiple files into a single archive file without any compression. The primary purpose of TAR is to bundle files together, making it easier to store or transfer large sets of files at once. Although TAR itself does not compress data, it is often used in conjunction with compression tools. For instance, a common practice is to compress a TAR file using Gzip or Bzip2, resulting in .tar.gz or .tar.bz2 files.
Natively Creating 7Z and TAR Files in Windows 11
Creating a 7Z File
While Windows 11 does not come with built-in support for creating 7Z archives directly, you can use Windows’ default compression features in combination with third-party software like 7-Zip. Fortunately, the application is free to download and easy to use. Here’s how to create a 7Z file step by step:
Step 1: Download and Install 7-Zip
-
Visit the official website: Go to 7-Zip’s official website.
-
Choose the appropriate version: Select the version that corresponds with your Windows architecture (32-bit or 64-bit).
-
Install the application: After downloading the installer, locate the file and double-click to run it. Follow the prompts to complete the installation.
Step 2: Selecting Files for Archiving
-
Browse to your files: Open Windows Explorer and navigate to the files or folders you want to include in the 7Z archive.
-
Select the files: Hold down the
Ctrlkey while clicking on the files you want to add. Alternatively, you can select an entire folder by clicking on it.
Step 3: Creating the 7Z Archive
-
Right-click on the selected files: In the context menu, hover over the
7-Zipoption. -
Select «Add to archive…»: This action will open the 7-Zip configuration window.
-
Configure your archive settings:
- Archive format: Ensure the «Archive format» dropdown is set to «7z».
- Compression level: You can adjust the compression level (from «Store» to «Ultra») as per your needs.
- Compression method: Choose a method that best fits your requirements, such as LZMA or LZMA2.
- Other options: You can specify additional parameters such as encryption, split volume size, or a custom file name.
-
Choose the destination: By default, the archive will be saved in the same directory as the files, but you can change the path if desired.
-
Click «OK»: 7-Zip will begin to compress your files into a 7Z archive. Once complete, you will see the new archive file in the specified location.
Creating a TAR File
Creating a TAR archive in Windows 11 can be achieved by using the Windows Subsystem for Linux (WSL) or by leveraging Windows PowerShell. Here are the two ways to create TAR files natively:
Method 1: Using Windows Subsystem for Linux (WSL)
-
Enable WSL: If you haven’t already enabled WSL on your Windows 11 machine, you can do so by following these steps. Open PowerShell as an administrator and run:
wsl --install -
Install a Linux distribution: After enabling WSL, download a Linux distribution from the Microsoft Store (such as Ubuntu).
-
Open your Linux terminal: Launch your Linux distribution and navigate to the files you want to archive.
-
Creating the TAR file:
- Use the
tarcommand to create an archive. The command structure is as follows:tar -cvf archive_name.tar /path/to/files - Replace
archive_name.tarwith your desired archive name and/path/to/fileswith the directory or files you intend to archive. The-cflag creates an archive, the-vflag is for verbose output, and the-fflag specifies the file name.
- Use the
-
Verify the TAR file: After the command runs, you can use the
lscommand to verify that the .tar file has been created in the desired directory.
Method 2: Using Windows PowerShell
For users who prefer not to use WSL, PowerShell provides an alternative method to create TAR files.
-
Open PowerShell: Right-click the Start button and select
Windows Terminal (Admin)orPowerShell (Admin). -
Use the TAR command: Similar to the Linux command, PowerShell also supports the compress command for creating TAR files. Utilize the following command:
Compress-Archive -Path C:pathtofiles -DestinationPath C:pathtoarchive_name.tar- Ensure to replace paths and names accordingly.
-
Verify the TAR file: After executing the command, use Windows Explorer to navigate to the specified directory and verify the presence of your TAR file.
Advantages of Using 7Z and TAR Formats
Benefits of 7Z
-
High Compression Ratios: The 7Z format often yields smaller file sizes compared to other formats, making it ideal for storage and transfer.
-
Robust Security: 7-Zip supports AES-256 encryption, ensuring your data remains secure during storage and transfer.
-
Support for Large File Sizes: The 7Z format can handle files larger than 4 GB, making it suitable for modern data requirements.
-
Multi-threaded Compression: 7-Zip takes advantage of multi-core processors, speeding up the compression process significantly.
Benefits of TAR
-
Simple File Collection: TAR offers an efficient way to group multiple files into one, simplifying tasks like backups and transfers.
-
File Permissions: TAR retains file permissions and information for Unix/Linux files, making it ideal for developers and IT professionals.
-
Versatility: TAR is often used in conjunction with compression tools, allowing users to create compressed TAR files like .tar.gz or .tar.xz.
-
Native Support on Linux: While not the default on Windows, TAR is a prevalent tool among Linux distributions, enhancing cross-platform functionality.
Best Practices for Creating Archive Files
-
Choose the Right Format: Select between 7Z and TAR based on your needs. For compression, 7Z is often preferable. If you are archiving multiple files with no compression, TAR may be beneficial.
-
Organize Your Files Before Archiving: Clean and organize the files you plan to archive. Consider grouping by category or date to simplify future retrieval.
-
Use Strong Passwords for Encryption: If using 7Z’s encryption features, always employ strong passwords to protect your data.
-
Test Your Archives: After creating an archive, it’s wise to test it by extracting the contents to ensure integrity and that all intended files are included.
-
Utilize Volume Splitting: If dealing with extremely large files, consider splitting them into smaller volumes when creating your archive. This approach is especially helpful when transferring over email or uploading to cloud services.
-
Backup Regularly: Regularly archive and back up your important files to prevent data loss in the event of hardware failure.
-
Stay Updated: Keep your file compression software updated for the best performance and security.
Conclusion
Creating 7Z and TAR files in Windows 11 natively is a straightforward process that can be accomplished quickly with readily available tools. 7-Zip provides an excellent solution for those looking for high compression ratios and secure archiving, while TAR offers a reliable method for bundling files together without compression. By following the steps and best practices outlined in this article, you can efficiently manage your files and directories, ensuring they are stored safely and organized appropriately. Whether for personal or professional use, mastering the art of creating archive files will enhance your productivity and data management skills.
Background
Needed a quick command to create a single file out of multiple files.
In years past I would have reached for pzkip command line.
Googled
Googled for a more modern approach.
Stack Overflow
Got a hefty lift via Stack Overflow.
It says, if you using MS Windows 10, go with tar, as it is built in.
- Create .zip folder from the command line – (Windows)
Link
Found MSFT now supports tar.
Outline
- Tar Help ( –help )
- Create Tar File ( -c )
- List Tar File ( -t )
- Extract Tar File ( -x )
Options
File Specifier
| Objective | Explanation | Option | Option Argument |
|---|---|---|---|
| Generic | |||
| Specify the file name as a specific filename or a file name pattern | -f | Filename | |
| Verbose Mode | -v | Verbose | |
| Interactive | -w | Interactive | |
| Create Archive ( -c ) | |||
| File Specifier | |||
| Filename | File | ||
| Directory | Directory | ||
| A file that can contain a list of files to process | @archive | ||
| Compression Algorithm – Compress archive with gzip/bzip2/xz/lzma ( -z, -j, -J, –lzma ) | |||
| gzip | -z | ||
| bzip2 | -j | ||
| xz | -xz | ||
| lzma | -lzma | ||
| Archive Format – Select archive format ( format {ustar|pax|cpio|shar} ) ( –format ) | |||
| –format | |||
| ustar | ustar | ||
| pax | pax | ||
| cpio | cpio | ||
| shar | shar | ||
| Exclude Files Matching Pattern | |||
| –exclude | |||
| Exclude files that match a pattern | <file-pattern> | ||
| Base directory or folder | |||
| Change to a base folder | –C | <folder> | |
| Folder/File Listing Target for packaging (@<archive> ) | |||
| Add entries from <archive> to output | @<archive> | <filename> | |
| List Archive ( -t ) | |||
| File Specifier | |||
| Only list files matching a specific file name or pattern | File | ||
| List Archive ( -x ) | |||
| Change to a base folder | –C | <folder> | |
| File Patterns ( When indicated, only files that match this pattern are extracted ) | <file pattern > | ||
| Keep Don’t overwrite existing files | -k | ||
| Don’t restore file’s last modification timestamp | -m | ||
| Files Should not be restored to File System. Only show File Contents on the console |
-O | ||
| Restore each file permission (including ACLs, owner, file flags) | -p |
Tar Help
Syntax
tar --help
Output
Output – Image

Create Tar File
Syntax
tar -c -f [destination-files] [source-files]
Sample
tar -c -f filesfortheweek.tar dailyfiles.txt
Output
Output – Text
tar: Removing leading drive letter from member names
Create Compress Tar File
Syntax
tar -c -z -f [destination-files] [source-files]
Sample
tar -c -z -f filesfortheweek.tar.zip dailyfiles.txt
Output
Output – Text
tar: Removing leading drive letter from member names
List Tar Files
Syntax
tar -t -f [destination-files]
Sample
tar -t -f filesfortheweek.tar
Extract From Tar File
Syntax
tar -x -f [destination-files] -C [source-files]
Sample
if not exist "C:\dailyFiles" mkdir "C:\dailyFiles"

tar -x -f filesfortheweek.tar -C "C:\dailyFiles"
Output
Error
Error – Missing Destination Folder
Outline
If your targeted extract folder does not exist, when attempting to extract files, you will get an error message.
The error message will read unable to chdir ( change directory ) to the targeted folder.
Remediation is simple.
Create the folder manually.
Or in script via, if not exist %target_folder% mkdir %target_folder%
Image

Text
tar: could not chdir to 'C:\dailyfiles'
Referenced Work
- libarchive.org
- libarchive.org
Link
- libarchive.org
- Microsoft
- Tech Community
- Virtualization Team
- Tar and Curl Come to Windows!
Link
- Tar and Curl Come to Windows!
- Virtualization Team
- Windows Command Line
- Rich Turner
- Tar and Curl Come to Windows!
Link
- Tar and Curl Come to Windows!
- Rich Turner
- Tech Community
- PurInfoTech
- Mauro Huc
- How to quickly extract .tar.gz files on Windows 10
Link
- How to quickly extract .tar.gz files on Windows 10
- Mauro Huc
- Stack Overflow
- Create .zip folder from the command line – (Windows)
Link
- Create .zip folder from the command line – (Windows)
In this post, we will show you how to create 7z or TAR files from Files Explorer on a Windows 11 PC. With an earlier update, Windows 11 received a new feature that allowed users to open and extract 7z and TAR archives natively. However, creating these types of archives required an external app. The good news is that this is no longer the case. Windows 11 now includes the ability to create 7-Zip and TAR archives (in addition to ZIP) directly within the operating system, eliminating the need for third-party software. It will gradually be rolled out to the Windows stable version.

While the new feature is exciting, it won’t be instantly accessible to everyone. It’s part of a beta build, and Microsoft will release it to users in phases. Initially, only a selected group of users will have access to it, but over time, the feature will become available to more users as Microsoft continues the rollout.
To create 7z or TAR files from the context menu in File Explorer, you need to follow these steps:
- Open File Explorer.
- Navigate to the target files.
- Select and compress the files into a 7z or TAR archive.
Let us take a detailed look at the process.
Create a 7z File natively in Windows 11
Open File Explorer and navigate to the location containing the files and folders you want to compress. Select the desired files/folders, right-click, and select Compress to > 7z File.

An archive file will instantly be created using the default compression method and level. Now you have to rename the file and you’re done.

If you want greater control over creating the archive (and you’re not in a hurry), you can choose to go through some advanced steps. Here’s how:
Right-click the selected files/folders and select Compress to > Additional options.

A Create Archive wizard will appear.
Make sure 7z is selected in Archive format dropdown and click the Browse button to choose the location where the archive will be stored (default is where the original files are located).
Next, select the Compression method – Store, Deflate, BZip2, LZMA1, LZMA2 (default), or PPMd.

Next, select the Compression level – 0 (Faster) to 9 (Smaller). A lower compression level (closer to 0) will result in a faster compression process but a larger file size, while a higher compression level (closer to 9) will take longer to compress but produce a smaller file size.

Next, ensure the Retain symbolic links option is checked to preserve links pointing to other files or directories. The Retain hard links option maintains hard links within the archive, ensuring they point to the same data blocks after extraction.
Once you’re done, click the Create button. The 7z file will be created based on the specified settings.
Create a TAR File natively in Windows 11
Creating a TAR file natively in Windows 11 follows the same process as above.
To use the default compression method and level, right-click selected files/folders, select Compress to, and choose the TAR File option.
To use custom compression settings, right-click selected files/folders, select Additonal options, then follow these steps:
Click the Browse button to change the destination folder for the compressed archive (default is the current folder).
Next, select a TAR archive option under the Arhcive format dropdown. The GNU option is the most commonly used, but TAR offers various options such as POSIX pax interchange, Restricted POSIX pax interchange, and POSIX ustar.

Next select a Compression method and a Compression level. Keep the the ‘Retain symbolic links’ option selected and click the Create button. The TAR file will be created as per the specified settings.
Note:
- Since Windows 11 supports many archival formats natively, you can use File Explorer to open and extract these 7z/TAR files.
- If you can’t see the options, go to Settings > Update & Security > Windows Update. Click ‘Check for updates‘ and install any available updates. If the feature is still not available, it might not be rolled out to your device yet. Keep an eye on Windows updates, as Microsoft will eventually release the feature to all users.
That’s all about it. I hope you find this useful.
Read: Unzip, open, or extract TGZ, GZ, TAR.GZ Files in Windows.
How to extract .7z files in Windows 11?
To extract .7z files, use Windows 11’s native support for .7z archives in File Explorer. Right-click the file and select Extract All from the context menu option. Then in the Extract Archive wizard, click the Browse button to select the destination folder and click the Extract button. You may also use a third-party File Archiver software such as 7-Zip to extract files from .7z archives.
How to create a rar file in Windows 11?
To create a RAR file in Windows 11, download and install WinRAR. Right-click the files or folders you want to compress, select Add to archive, choose RAR as the archive format, and click OK. The RAR file will be created in the specified location. WinRAR is a paid software, but it offers a trial version that can be used with limited functionality.
Read Next: How to open RAR files in Windows.