
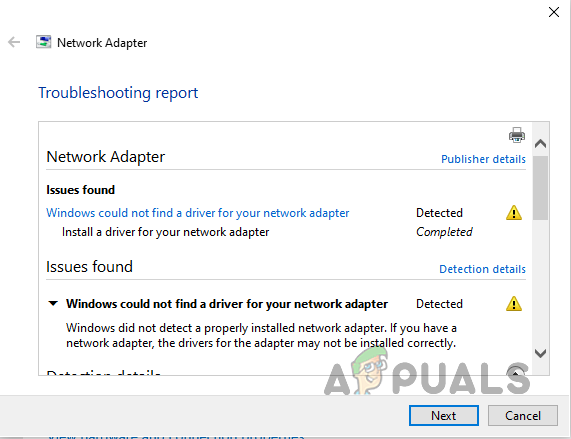
When troubleshooting a missing network driver, you may encounter the ‘Windows could not find a driver for your network adapter’ error message. This message indicates that you need to install a driver for your network adapter to resolve the problem.
The issue could also arise if your network interface card has malfunctioned. In such cases, finding a replacement is necessary to allow your PC to connect to the network. This guide will provide various methods to help you install a driver for your network adapter.
1. Scan for Hardware Changes
Begin by scanning for hardware changes through the Device Manager, which can be helpful if your network driver stops working unexpectedly.
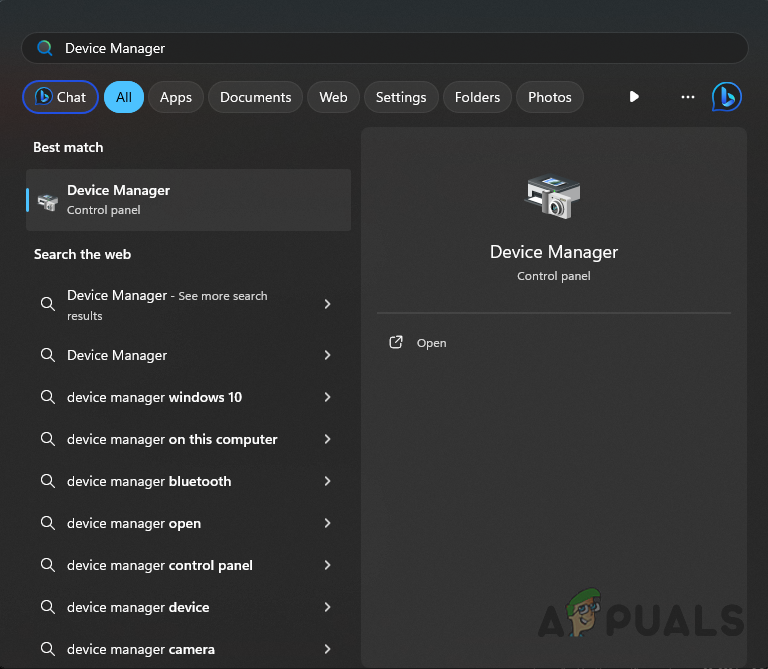
- Open the Start Menu and search for “Device Manager”. Open it.

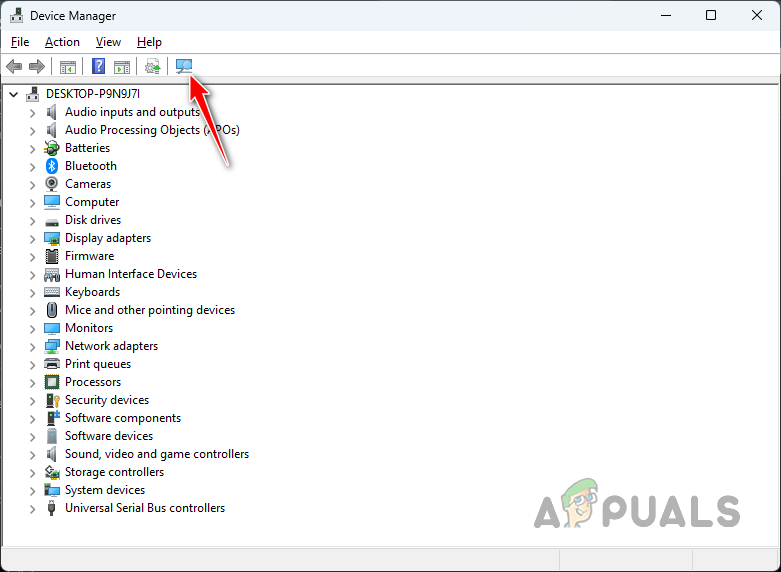
Opening the Device Manager - In the Device Manager window, click the magnifier icon to scan for any hardware changes.

Scanning for Hardware Changes in Device Manager - Wait for the process to complete.
- Check if your network adapter is now detected.
2. Automatically Install Network Driver
Fixing the issue may also involve automatically searching for a network driver in Windows to install on your computer. Though generic, these drivers should work with most network interfaces.
2.1. Using Windows Updates
- Press the Win key + I on your keyboard to open the Settings app.
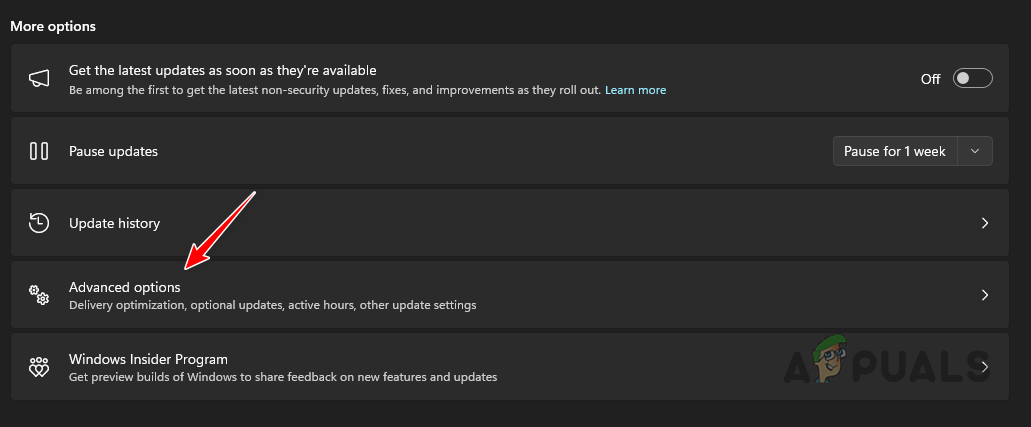
- Go to Windows Update > Advanced Options > Optional Updates > Driver Updates in the Settings app.

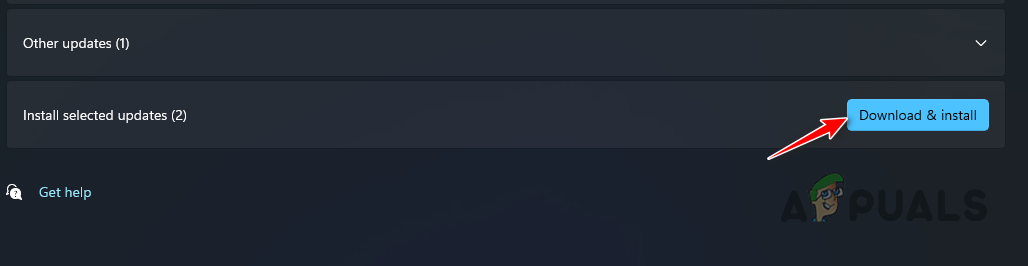
Navigating to Advanced Options - Look for a network driver and select the corresponding checkbox.
- Click on Download and Install.

Installing Optional Windows Updates
2.2. Using Device Manager
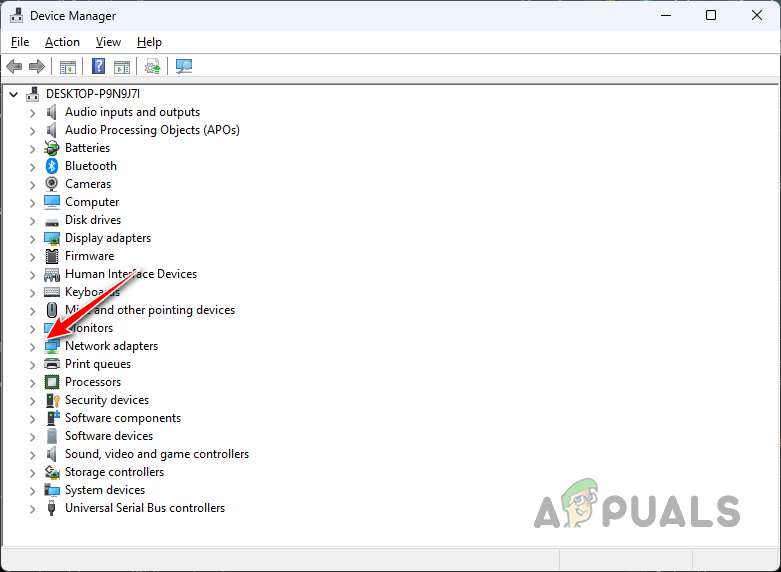
- Open the Start Menu and search for “Device Manager”. Open it.
Opening the Device Manager - In the Device Manager window, expand the Network adapters list.
Expand Network Adapters List - If your network adapter is not visible, look for an Unknown device.
- Right-click on the unknown device and select Update driver.
- Check if this resolves your issue.
3. Manually Install Network Driver
The optimal method for installing a missing network driver is to manually download it from the manufacturer’s website, as these drivers are designed for specific network interface cards.
To download the driver, you must know your PC’s motherboard model. If it’s unknown, here’s how to find it:
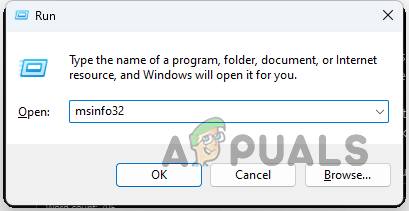
- Open the Run dialog by pressing Win key + R.
- Type msinfo32 and hit Enter.

Opening System Information Window - In the System Information window, look for BaseBoard Manufacturer and BaseBoard Product.

Checking Motherboard Details - Note down your motherboard’s make and model.

With the motherboard details, use Google to find the official page, then navigate to the Drivers and Support section and download the necessary network drivers. After installation, this should resolve your issue.
4. Enable Network Adapter in BIOS
If the network adapter is entirely absent from Windows, it’s possible that the issue stems from your BIOS settings. The BIOS menu allows for the enabling or disabling of devices connected to your computer.
Therefore, ensure the onboard network adapter is enabled in your BIOS menu. Restart your computer, access the BIOS menu, and navigate to Advanced settings to find Onboard Devices Configuration (note that the exact name may vary by manufacturer).
Make sure the LAN card is enabled, then press F10 to save and exit the BIOS menu. Check if this solves the problem.
If the network adapter is still not visible in Windows, it’s likely that the device is defective. In such a case, obtaining a third-party network adapter might be necessary to continue using an Ethernet connection.
Alternatively, reach out to the official Microsoft support team for further assistance with the issue.
Kevin Arrows
Kevin Arrows is a highly experienced and knowledgeable technology specialist with over a decade of industry experience. He holds a Microsoft Certified Technology Specialist (MCTS) certification and has a deep passion for staying up-to-date on the latest tech developments. Kevin has written extensively on a wide range of tech-related topics, showcasing his expertise and knowledge in areas such as software development, cybersecurity, and cloud computing. His contributions to the tech field have been widely recognized and respected by his peers, and he is highly regarded for his ability to explain complex technical concepts in a clear and concise manner.

Is your PC unable to connect to the internet? You might get the error “Windows could not find a driver for your network adapter”. A common problem often occurs when your network adapter drivers are out of date.
A network adapter is a fundamental component that enables your PC to connect to the internet. If your computer cannot connect to the available network, chances are that your PC is missing a LAN driver for Windows 11,10,7 or later.
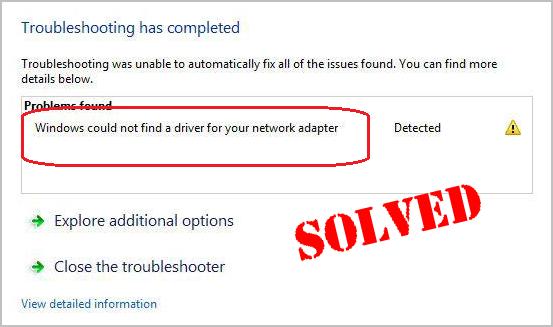
The issue can be easily highlighted by running the troubleshooter. Usually, the error states says, “Windows could not find a driver for your network adapter.”
In this blog, let us take a closer look at how you can resolve this issue easily.
Also Read: A Driver Cannot Load on This Device
Ways To Fix Windows Could Not Find a Driver For Network Adapter
Windows is an advanced operating system with built-in diagnostic capabilities to find and troubleshoot errors. If you are facing an issue related to the network adapter driver on Windows 10 PC, chances are that your computer can fix the problem on its own.
The first and most common way to solve the error is manually installing the required drivers. The error “Windows could not find a driver for your network adapter” only occurs when the driver installed for the adapter is either outdated, corrupted, or it is unavailable to use.
Here’s how you can resolve the issue –
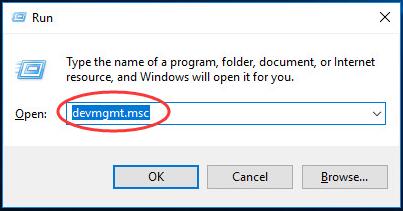
- Press Windows + R on your keyboard to bring up the Run box.
- Type – devmgmt.msc and press Enter to open the Device Manager.
- In the Device Manager, click on the network adapter and select the adapter from the dropdown.
- Right-click on your network adapter and from the context menu, click on→Update Driver.

- This will open up a new window that has two options. One asks you to connect to the internet and find the best available drivers to install. The second one allows you to find the driver file on your PC.
- If you have a downloaded driver file ready, simply click on browse computer.

- Locate the driver software on your hard disk and install it right away. Restart your PC, and it should do the trick for you.
If installing the updated network adapter driver for Windows 10 manually does not crack it for you, there’s another way that you can try; however, it has its ups and downs. What you have to do is completely remove the network adapter from your PC and uninstall the existing drivers.
Also Visit: How to Find Existing Driver Versions on Your Windows PC
This way, when you restart, the computer will automatically install the latest drivers, and your PC might start running properly. Here’s how you can do that!
- Press Windows + R on your keyboard to bring up the Run box.
- Type – devmgmt.msc and press Enter to open the Device Manager.
- In the Device Manager, click on the network adapter and select the adapter from the dropdown.
- Right-click on your network adapter to open the context menu. Click on the Uninstall Device option.

- Remove the network adapter completely by following the onscreen instructions to uninstal the driver.
- On the top of the window, you will find an Action toggle. Click on it and then click on Scan for hardware changes.

- Once the scan is completed, your PC will have automatically reinstalled the adapter.
These are the two ways integrated within the operating system that you can use to rectify the situation with the network controller driver. It is possible that these do not yield the expected results as their use case is somewhat limited.
If you do not get the resolution through these two ways, do not worry as there’s another way to handle the error. Check out the next section to find out more!
Advanced Driver Updater: The Ultimate Fix to Windows Could Not Find a Driver for Network Adapter
Advanced Driver Updater is a tool used to update all the missing drivers from a PC. It works flawlessly with your computer and finds the list of all the drivers that are outdated, corrupted or missing on your PC.
The tool can find the latest drivers for your network adapter and resolve the connectivity issue in just a few clicks –
- Install the Advanced Driver Updater from the below button.
- Click on Start Scan to initiate the search for missing drivers. The software will search for all the missing drivers, which means the ones other than your network adapter will also be highlighted.

- The scanning might take a few minutes based on the number of applications and drivers on your PC. Ideally, it takes not more than 5 minutes.


- Find your Network Adapter Driver to install on priority, or if you have time, you can simply click on the Update driver and let the software work and you can also update all outdated driver in one click.

After initiating the process, give the software time to install the drivers. Once the process is completed, restart your computer, and your problem will be solved.
Also Read: How to Update Drivers On PC
In Conclusion
If you are missing out on multiple drivers and your PC is turning into a sluggish machine, scanning it with Advanced Driver Updater is a good option. It will highlight the outdated, missing, and corrupt drivers causing the problem. Download the software today and see the impact for yourself.
I hope the blog gives you the solution you need. “Windows could not find a driver for your network adapter” is a common problem, and you are not the only one facing it. So relax and use the given fixes to resolve the issue. Good Luck!
Recommended-
Fix – Unable To Connect To Intel 82579LM Gigabit Network Connectivity Driver
Here’s How To Fix Wi-Fi Network Not Showing Up Issue On Windows PC (2022)
How to Download HP Network Driver for Windows 11,10,8,7
How To Fix Realtek Ethernet Drivers That Keep Disappearing
You couldn’t search online? Besides, are you seeing the error saying Windows could not find a driver for your network adapter? Don’t worry. You won’t be stuck with it there. Here in this article, you’ll the real fix to solve the problem. Read on to find how…
Try these fixes:
- Modify the Power Management setting of your network adapter
- Update your network adapter driver
Solution 1: Check the power management of your network adapter
- On your keyboard, press the Windows logo key and R together to bring up a Run box.
- Type devmgmt.msc and press Enter to open Device Manager.

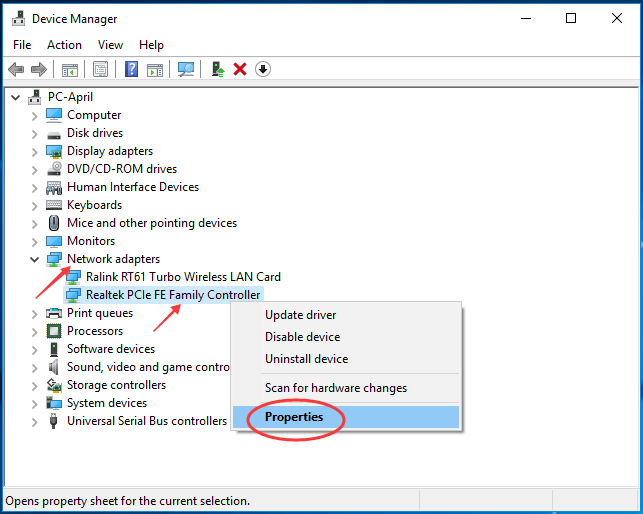
- Double-click Network adapters. Then right-click on your network adapter to select Properties.

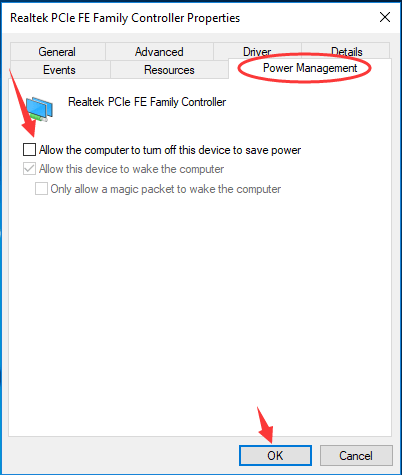
- Choose to view on Power Management pane. Untick the box of Allow the computer to turn off this device to save power. Then click OK to save your setting.

- Run Windows Network troubleshooter again to see if the error still exists.
If the error keeps there, it’s very likely that there was something wrong with your network adapter driver. Go on with the following solution.
Solution 2: Update your network adapter driver
If the system on your computer fails to find a driver for your network adapter, you can download and install one by yourself, or if you don’t have the time, patience or computer skills to update your network adapter driver manually, you can do it automatically with Driver Easy.
Driver Easy will automatically recognize your system and find the correct drivers for it. You don’t need to know exactly what system your computer is running, you don’t need to risk downloading and installing the wrong driver, and you don’t need to worry about making a mistake when installing.
You can update your drivers automatically with either the FREE or the Pro version of Driver Easy. But with the Pro version it takes just 2 clicks:
- Download and install Driver Easy.
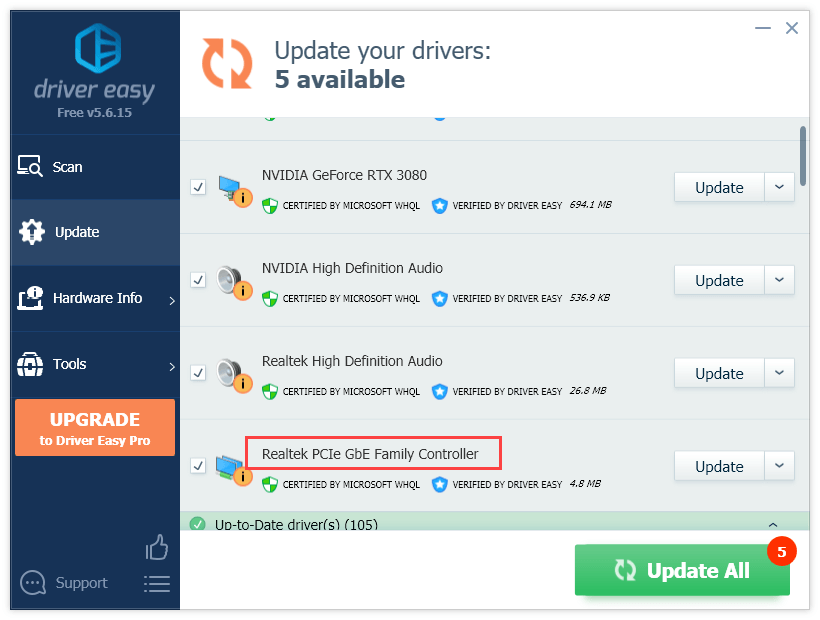
- Run Driver Easy and click the Scan Now button. Driver Easy will then scan your computer and detect any problem drivers.

- Click Update next to the device you want to update.
Or click Update All to automatically download and install the correct version of all the drivers that are missing or out of date on your system (this requires the Pro version – you’ll get full tech support and a 30-day money-back guarantee).

It needs a network connection for Driver Easy to help you update all the drivers with one click. But without the Internet, you still can use its Offline Scan feature to update your network adapter drivers.
Quick Tips
- Make sure the Network Adapter is enabled on your computer and prevent Windows from turning it off to save power.
- Consider updating or reinstalling the network adapter driver on your Windows PC.
- If the error persists, consider performing a system restore as a last resort.
Fix 1: Enable Network Adapter
Windows may fail to communicate with the network adapter if you’ve previously disabled it. Hence, the first thing you should do is enable the network adapter.
Step 1: Click the search icon on the taskbar, type in control panel, and press Enter.

Step 2: Change the view type to Large icons and select Network and Sharing Center.

Step 3: Select Change adapter settings in the left pane.

Step 4: In the Network Connections window, right-click on your network adapter and select Enable.

After that, run the network troubleshooter and see if Windows can detect your network adapter driver.
Fix 2: Update or Reinstall the Network Adapter Driver
The “Windows could not find a driver for your network adapter” error can also appear if your PC’s current network driver is old or corrupt. You can update the network adapter driver via the Device Manager.
Step 1: Right-click on the Start icon and select Device Manager from the list.

Step 2: Double-click on Network adapters to expand it. Right-click your network adapter and select Update driver.

From there, follow the on-screen instructions to finish updating the network driver. After that, run the network troubleshooter again.
If the error persists even after you update the driver, there’s a chance that the network adapter driver is corrupt. In that case, you can uninstall the driver to fix the error message.

Once removed, restart your PC, Windows should automatically install the missing network adapter driver. Following that, you should no longer see the “Windows could not find a driver for your network adapter” error when you run the troubleshooter.
Fix 3: Change Power Management Settings
Windows may turn off your lesser-used devices and drivers if you’ve configured it to save power. When that happens, Windows will fail to communicate with those drivers and trouble you with such errors.
You can prevent Windows from turning off the network adapter driver by configuring its power management settings.
Step 1: Right-click on the Start icon and select Device Manager from the list.
Step 2: Expand Network adapters, right-click on your network adapter, and select Properties.

Step 3: Under the Power Management tab, uncheck Allow the computer to turn off this device to save power, and hit OK to save changes.

Fix 4: Use System Restore
System Restore is a useful utility that creates a backup of your entire system regularly or before making major system changes. You can use it to revert Windows to its earlier state in case the above solutions don’t work. Here’s what you’ll need to do.
Step 1: Open the search menu, type in create a restore point, and select the first result that appears.

Step 2: Under the System Protection tab, click the System Restore button.

Step 3: Click Next.

Step 4: Select the restore point before the error first appeared.

Step 5: Review all the details one more time before hitting Finish.

Was this helpful?
Thanks for your feedback!
The article above may contain affiliate links which help support Guiding Tech. The content remains unbiased and authentic and will never affect our editorial integrity.
You are here: Home / Windows / Windows Could Not Find A Driver For Your Network Adapter – How To Fix?
Recently many users have come across an error “Windows could not find a driver for your network adapters” while trying to connect to the internet. This error basically defines that some issue is preventing the PC from interacting with the network drivers. When the PC is unable to find any network drivers, it also fails to use the network hardware and fails to connect to the internet.
This issue is quite serious as the internet is very important in the current time. In this article, I have discussed the troubleshooting you can do in order to fix this error.
We have shown a VIDEO walk through at the end of the post for easy solution.
Also checkout:
- Tor Browser Not Working – How To Fix?
Why No Driver For Network Adapter Is Detected?
Drivers for network adapters are the link between the OS and the network hardware. Without this link, the OS fails to make use of the network hardware and is unable to connect to the internet. This can happen due to various reasons. Here are some commonly known causes of this error:
- Corrupted Network Drivers: Corrupted network drivers can remain undetected from the OS and thus the PC fails to find and use it. This can be the cause of why no driver for network adapter is detected.
- Deleted Network Drivers: The network drivers may have got deleted. Normally a restart should make Windows reinstall it, but it can also be bugged out for some reason.
- Outdated Network Drivers: Outdated network drivers are another known cause of this error. Older versions tend to become incompatible and Windows may fail to recognize it.
- Power Management Options: Power management options can stop drivers from working in order to save power. This feature when enabled can cause such an error.
- VPNs And Other 3rd Party Applications: VPNs or other malicious applications are also known to cause this error.
After you have checked the possible causes of “Windows could not find a driver for your network adapters” error, it is time to troubleshoot it. To troubleshoot this error, I have provided many methods or solutions below. Follow the procedure as given and you should be able to fix this error.
Solution 1: System Restore
If system restore is enabled on your PC and you have saved a previous restore point before this error appeared, then you can restore to it. By restoring to a previous system point, you should be able to get rid of this error.
This is one of the first solutions you should try if you have the System Restore feature enabled. If not, then you can skip this solution and move to the next. If you are unsure, then try the steps to check it. To restore to a previous system point, follow the steps given below:
- Type Create a restore point in the start menu and select the top result. The System Properties will open on your screen.
- In the System Protection tab, select the System Restore option.
- Click on the restore point made before this error appeared and follow the on-screen information to restore your PC to that state.
Solution 2: Run The Network Adapter Troubleshooter
If you are unable to restore your system and get rid of the “Windows could not find a driver for your network adapters” error, then you can try running the Windows inbuilt Network Adapter troubleshooter. Running the troubleshooter will make Windows detect the issues and possibly fix it. To run the troubleshooter, follow the steps given below:
- Type Troubleshoot settings in the Windows search bar and select the top option.
- Click on the View additional Troubleshooters option.
- In the Fix and other problems section, click on the Network Adapter option.
- Select the Run the troubleshooter option.
- Follow the on-screen instructions to complete the process.
Solution 3: Update Network Drivers
If the network drivers are outdated, then Windows may fail to recognize it. In this situation, you can try updating the drivers and see whether it fixes it. To update the network drivers, follow the steps given below:
- Press the Windows + R keys to open the Run utility.
- Type devmgmt.msc and press Enter to open the Device Manager.
- Expand the Network Adapter tree and right-click on the network driver.
- Select the Update Driver option from the right-click context menu.
- Click on the Search automatically for drivers option.
- Follow the on-screen instructions to complete the process.
- Restart your PC.
After your PC restarts, check whether now the drivers for network adapters are detected.
Solution 4: Uninstall And Reinstall The Network Drivers
Corrupted or malfunctioning network drivers are another known cause of the “Windows could not find a driver for your network adapters” issue. Uninstalling and installing the network drivers can fix this. To do it, follow the steps given below:
- Press the Windows + R keys to open the Run utility.
- Type devmgmt.msc and press Enter to open the Device Manager.
- Expand the Network Adapter tree and right-click on the network driver.
- Select the Uninstall Device option.
- Follow the on-screen instructions to complete the process.
- Now, to install a driver for your network adapter, right-click on the Network Adapters tree and select the Scan for hardware changes option from the pop-up menu.
- Wait for Windows to reinstall the network drivers and restart the PC.
If this doesn’t work, or if the network drivers are not showing at all, then try the next solution.
Solution 5: Reinstall The Network Drivers Manually
If Windows doesn’t reinstall the network drivers after following the above steps, or if you find that there are no Network drivers in the device manager, you can download and reinstall it manually. Considering that you are unable to connect to the internet on your PC, use another system to visit the manufacturer’s website, and download the network drivers.
Once you have downloaded the network drivers, move it to the system that is facing this error using flash drives. Install the driver in the original system and check whether it fixes this issue.
Solution 5: Disable Power Conservation Option
Power conservation options of Windows 10 can disable drivers for saving power. So, it is possible that the network drivers are getting disabled due to this. To fix this, follow the steps given below:
- Open the Run utility again.
- Type devmgmt.msc in the search box and press Enter to open the Device Manager.
- Expand the Network adapter tree.
- Right-click on the adapter causing this issue for you and select the Properties option.
- Select the Power Management tab and uncheck the Allow the computer to turn off this device to save power option.
- Click on Apply and Ok to save the changes.
Solution 6: Check For VPNs And Other 3rd Party Network Applications
Sometimes VPNs and other networking applications can be incompatible with the system and cause this error. In this situation, you can try uninstalling them to check whether it fixes this issue. To uninstall them, follow the steps given below:
- Press the Windows key on your keyboard and type Control Panel in the search bar.
- Select the Control Panel option, that should be listed on the top of the search results.
- Next, in the Programs section, click on the Uninstall a program option.
- After you have opened the Uninstall a program page, locate the VPN or other suspicious apps in the list present there.
- Right-click on it and select the Uninstall option.
- Follow the steps in the uninstall wizard and the app will be removed from Windows 10.
Or
- Press the Windows key and type Apps and Features in the search bar.
- You can also access this directly from the WinX menu (press Win + X together or right click on the start button).
- Select the top option on the list from the search result.
- Now, you can see a list of all the apps present on your computer.
- Select the VPN or other suspicious apps and click on the Uninstall option.
Wrapping Up
So, there you have it. Now you know how to fix the Windows could not find a driver for your network adapter error. The above troubleshooting procedure should fix this issue for you. If you have any questions related to this article, ask them in the comment section below.