
Last updated on
Table of linux and windows commands equivalents like:
- shutdown vs reboot
- ipconfig vs ifconfig
- F7 vs history
- help vs man
Have you ever wonder about a command — is it a Linux one or a Windows one? For me, this happens all the time. I’m using commands quite often so I’ve made my own cheat-list with Linux and Windows pairs of commands. You can use it also when you want to learn the other operating system.
If you find any mistakes or incomplete information feel free to comment. I’m open for suggestions.
Note: It’s personal list based on personal experience. Some of the commands are used with different version of the OS so they could vary a little.
Next part is: Windows and Linux variable equivalents
Full page version:
Windows vs Linux commands cheat sheet
Here’s the result of it:
|
Windows |
Linux |
||||||
|
Type |
Description |
Command |
Example |
Result |
Command |
Example |
Result |
|
General |
Logoff |
shutdown |
shutdown -l |
reboot |
reboot |
||
|
Restart |
shutdown |
shutdown -r |
logout |
logout |
|||
|
Shutdown |
shutdown |
shutdown -s |
poweroff |
poweroff |
|||
|
Show user |
echo %USERNAME% |
echo %USERNAME% |
user |
echo |
echo $USER |
user |
|
|
Install application |
apt-get |
sudo apt-get install ${package} |
|||||
|
Remove application |
apt-get |
apt-get remove ${package} |
|||||
|
Zip/unzip current folder |
zip |
zip -r file.zip folder |
unzip |
sudo apt-get install zip unzip |
|||
|
Connect ssh |
You need putty client |
plink [email protected] -P 33 |
ssh |
ssh [email protected] -p 33 |
|||
|
List mounted devices |
net use |
net use |
findmnt |
findmnt -lo source,target,fstype,label,options |
|||
|
Mount Remote |
net use |
net use \\Server\ShareFolder |
mount |
mount 192.168.1.1:/home /mnt/nfs/home |
|||
|
Show network info |
ipconfig |
ipconfig /all |
Windows IP Configuration |
ifconfig |
ifconfig |
eth0 Link encap:Ethernet HWaddr |
|
|
Execute script |
test.cmd |
./ |
./test.sh |
||||
|
History |
F7 |
F7 |
0: dir |
history |
history |
|
|
|
Go to previous command |
↑ or F8 |
F8 or ↑ |
↑ |
↑ |
|||
|
Search for commands |
CTRL+R |
CTRL+R and type the command |
|||||
|
Clears screen |
cls |
cls |
clear |
clear |
|||
|
Closes shell prompt |
exit |
exit |
exit |
||||
|
Displays or sets date |
date |
date |
date |
||||
|
Displays command help |
command /? |
dir /? |
info |
man command |
|||
|
Displays command help 2 |
help command |
help dir |
man |
info command |
|||
|
Autocompletion |
TAB |
TAB |
TAB |
TAB |
|||
|
Uptime and logged user |
quser |
C:\Users\user\Desktop>quser |
USERNAME;SESSIONNAME;ID; |
uptime |
uptime |
06:18:56 up 75 days, 17:31, 1 user, |
|
|
Files & |
Show current folder |
cd |
cd |
C:\Users\user |
pwd |
pwd |
/home/user |
|
Show current folder 2 |
chdir |
chdir |
C:\Users\user |
echo |
echo $PWD |
/home/user |
|
|
Create file |
copy NUL file1.txt |
touch |
touch file.txt |
||||
|
Create file |
echo. 2>file2.txt |
cat |
cat > myfile.txt |
||||
|
Renames a file |
ren |
ren file1.txt file2.txt |
mv |
mv tfileold.txt filenew.txt |
|||
|
Copies files |
copy |
copy file1.txt C:/foldercopy |
cp |
cp file.txt /home/foldercopy |
|||
|
Moves files |
move |
move file1.txt C:/newfolder |
mv |
mv file.txt /home/newfolder |
|||
|
Lists files |
dir |
ls |
ls |
||||
|
Collect file names |
dir |
dir «C:\» >FilesC.txt /b /o |
file1 |
find |
find /home -name ‘*’ |
/home/file1 |
|
|
Deletes files |
del |
del deleteme.txt |
rm |
rm deleteme.txt |
|||
|
Deletes folder |
rmdir |
rmdir /S deleteme |
rm -r |
rm -r deleteme |
|||
|
«Echoes» output to the |
echo |
echo |
echo this message |
||||
|
Delete file content |
type |
type nul |
cat |
> file.txt |
|||
|
Compares the contents of files |
fc |
fc file1.txt file2.txt |
Comparing files file1.txt and |
diff |
diff file1.txt file2.txt |
||
|
Finds a string of text in a file |
find |
find «test» 123.txt |
|
grep |
grep test file1.txt |
test line |
|
|
Displays help |
command /? |
dir /? |
info |
man command |
|||
|
Displays help 2 |
help command |
help dir |
man |
info command |
|||
|
Creates a folder |
mkdir |
mkdir newfolder |
mkdir |
mkdir directory |
|||
|
View file content |
more |
more file1.txt |
less |
less file1.txt |
|||
|
View file content 2 |
type |
type file1.txt |
tail |
tail -n 15 file1.txt |
|||
|
Edit file |
edit |
edit file1.txt |
vi |
vi file.txt |
|||
|
Changes directories with a |
cd |
cd C:/ |
cd |
cd /directory/directory |
|||
|
Go one folder |
cd |
cd .. |
cd |
cd .. |
|||
|
Search for a file |
dir |
dir /s *test* |
07/31/2010 02:30 AM 301 test.png |
find |
find / -name ‘*test*’ |
/home/test.txt |
|
|
Search for text files |
dir |
dir /b/s *.txt |
find |
find / -name ‘*.txt’ |
|||
|
Change files extension to lower |
ren |
ren *.TXT *.txt |
mv |
for i in $( ls |
|||
|
Check files permissions |
ls |
ls -l /home/user |
«-rwxr—xr-x 1 root root 53 Mar 23 |
||||
|
Change Permissions |
chmod |
chmod 755 file |
|||||
|
Changing ownership |
chown |
chown user file |
|||||
|
Changing group ownership |
chgrp |
chgrp group file |
|||||
|
Other |
Displays the date |
date |
date /T |
Wed 07/05/2017 |
date |
date ‘+%d %W %Y’ |
05 27 2017 |
|
Displays the time |
time |
time /T |
1:27 PM |
date |
date ‘+%X’ |
12:18:22 PM |
|
|
Shows amount of RAM in use |
wmic |
wmic OS get FreePhysicalMemory |
free |
free |
|||
|
Show disk space |
wmic |
wmic logicaldisk |
dh |
dh -f |
|||
|
Show processes |
tasklist |
tasklist |
top |
top |
|||
|
Services |
Stop execution |
CTRL+C |
CTRL+C |
CTRL+C |
CTRL+C |
||
|
Start service |
net |
net start [serviceName] |
service |
sudo service [serviceName] start |
|||
|
Stop service |
net |
net stop [serviceName] |
service |
sudo service [serviceName] stop |
|||
|
Start service 2 |
sc |
sc start [serviceName] |
systemctl |
sudo systemctl start [serviceName] |
|||
|
Stop service 2 |
sc |
sc stop [serviceName] |
systemctl |
sudo systemctl stop [serviceName] |
|||
|
Variables |
Display all variables |
set |
set |
USERNAME=user |
printenv |
printenv |
HOME=/home/user |
|
Display variable |
echo |
echo %USERNAME% |
user |
echo |
echo $HOME |
/home/user |
|
|
Display variable 2 |
set |
set USERNAME |
USERNAME=user |
printenv |
printenv | grep |
HOME=/home/user |
|
|
Set variable |
set |
set MYVAR=VALUE |
export |
export MYVAR=/path/to/var |
|||
|
Set variable permanent |
setx |
setx MYVAR VALUE |
change profile |
vi ~/.bash_proflle |

If you live a double life where part of your day is spent on Linux and the other part on Windows, I’m about to make things a lot easier. Ever come home, open your Windows machine, type ls by reflex, only to see an error message? Don’t worry; you’re not alone. With a small tool called BusyBox, you can bring familiar Linux commands like ls, pwd, and grep to Windows Command Prompt, no WSL or Cygwin needed. Here’s how to set it up quickly so you can switch between Windows and Linux environments with ease.
Why BusyBox?
BusyBox is a tiny, standalone executable that packages many Unix commands. Originally made for embedded systems, it combines dozens of commands into one lightweight program. You can think of it as a Swiss Army knife for Linux commands on Windows! With BusyBox, you get familiar commands without needing a complex setup.
Getting Started with BusyBox on Windows
Here’s a quick guide to set up BusyBox, allowing you to use commands like ls and grep in Windows Command Prompt just as you would in Linux.
Step 1: Download BusyBox
- Go to BusyBox for Windows and download the standalone executable.
- Place
busybox.exein a folder (for example,C:\busybox\). I like to keep all my custom tools under «C:\Program Files\» so I’d put it inC:\Program Files\busybox\.
Step 2: Add BusyBox to Your System Path
To make BusyBox accessible from any Command Prompt location, add it to your system’s PATH.
- Search for “Environment Variables” in the Windows Start menu and open Edit the system environment variables.
- In the System Properties window, click on Environment Variables….
- Under System variables, locate the Path variable, select it, and click Edit.
- Add the directory where you saved
busybox.exe(likeC:\Program Files\busybox\) and click OK.
To check if it worked, open a new Command Prompt and type busybox ls. If you see a directory listing, BusyBox is set up correctly! If not, double-check the PATH setup.
Step 3: Create Symlinks for Linux Commands
Right now, you’d need to prefix every command with busybox, as in busybox ls or busybox clear. But we can simplify things further by creating symbolic links (symlinks) so that typing ls or clear works as you’d expect. Here’s how:
- Open Command Prompt as Administrator. Search for «cmd,» right-click, and select Run as administrator.
- Run these commands to create symlinks for frequently used commands:
   mklink "C:\Windows\System32\ls.exe" "C:\path\to\busybox.exe"
   mklink "C:\Windows\System32\pwd.exe" "C:\path\to\busybox.exe"
   mklink "C:\Windows\System32\grep.exe" "C:\path\to\busybox.exe"
   mklink "C:\Windows\System32\cat.exe" "C:\path\to\busybox.exe"
   mklink "C:\Windows\System32\clear.exe" "C:\path\to\busybox.exe"
   mklink "C:\Windows\System32\rm.exe" "C:\path\to\busybox.exe"
Enter fullscreen mode
Exit fullscreen mode
Replace C:\path\to\busybox.exe with the actual path where you saved busybox.exe. For example, on my machine, I’d use:
mklink "C:\Windows\System32\ls.exe" "C:\Program Files\busybox\busybox.exe"
Enter fullscreen mode
Exit fullscreen mode
Each command above creates a symlink, meaning ls, pwd, grep, etc., will point to BusyBox automatically, no prefix needed.
Pro Tip: BusyBox has many commands available! To see a full list, type:
busybox --help
Enter fullscreen mode
Exit fullscreen mode
You can repeat the mklink command for any other commands you want to use directly.
Step 4: Test Your New Linux Commands
After setting up the symlinks, open a new Command Prompt window and try a few commands. Run ls, pwd, or grep just as you would on Linux. Here are a few examples:
ls
pwd
grep "text" file.txt
Enter fullscreen mode
Exit fullscreen mode
If you see normal output without errors, congrats! You’ve just added Linux functionality to your Windows Command Prompt.
Optional: Automate with a Batch File
If you have many symlinks to create, save time by placing all mklink commands in a .cmd batch file. For example, create setup_busybox.cmd, add your commands, then run the file once to set up all symlinks at once. You can run .cmd files by simply writing their name(e.g: setup_busybox.cmd) on the command prompt then pressing the ENTER key.
Final Thoughts
By using BusyBox and symlinks, you can now run common Linux commands on Windows easily. No complex environments, just a lightweight tool and a few shortcuts. BusyBox covers most basic Linux commands, but if you need more specialized tools, consider options like Git Bash or WSL.
Give it a try and enjoy a unified command-line experience on Windows!
Как вы знаете, Windows 10 может похвастаться Bash консолью Ubuntu, которая позволяет пользователю получить доступ и запускать приложения Ubuntu Windows 10. Баш предназначен для консольных приложений и услуг и позволяет запускать даже GUI — приложения с помощью небольшой хитрости. В этой статье мы рассмотрим, как выполнить команду Linux непосредственно из строки cmd.exe в операционной системе Windows 10.
Можно опустить необходимость в отдельной консоли для Bash на Ubuntu в Windows 10 и запустить конкретную команду или набор команд непосредственно из командной строки. Это стало возможным благодаря реализации подсистеме Windows для Linux (WSL) .
Консоль Баш может быть запущена с помощью следующего файла:
c:\windows\system32\bash.exe
Это приложение консоли, которое поддерживает несколько аргументов командной строки. Вы можете посмотреть их, выполнив команду:
bash --help
Вывод –help выглядит следующим образом:
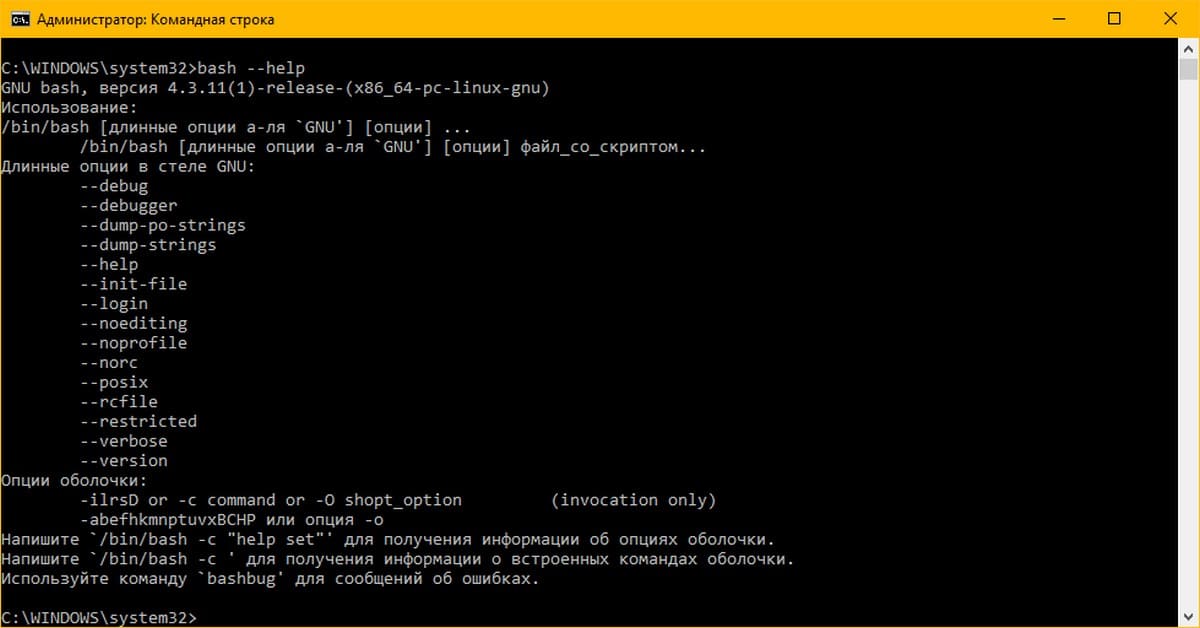
Как видно из краткой помощи, вы можете вызвать команду Linux напрямую, используя следующий синтаксис:
bash -c «команда Linux»
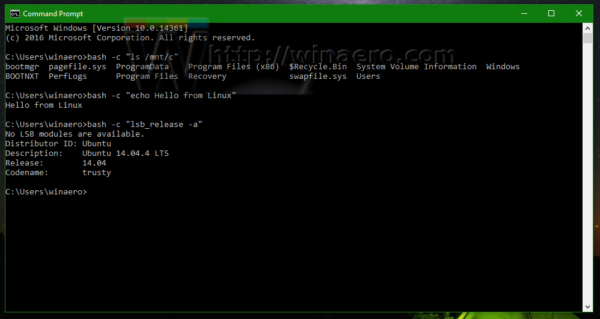
Следующий пример демонстрирует эту способность:
bash -c "lsb_release -a"

Вот некоторые команды Linux которые можно выполнить напрямую из Командной строки Windows 10.
Системная информация
- bash -c «lsb_release -a» — Посмотреть версию Ubuntu
- bash -c «uname -r» — Проверить версию ядра
- bash -c «uname -a» — Посмотреть всю информацию о ядре
- bash -c «arch» — отобразить архитектуру вашего компьютера
- bash -c «cat /proc/cpuinfo» — информация о ЦПУ
- bash -c «cat /proc/meminfo» — проверить использование памяти
- bash -c «df» — информация о использовании дисков
- bash -c «uptime» — время работы с момента включения
- bash -c «uname -a» — Посмотреть информация о ядре
Статьи по теме: (WSL2) Что такое подсистема Windows для Linux 2?
Доступ к файлам WSL Linux с помощью Проводника Windows 10
Как установить WSL 2 подсистему Windows для Linux 2 в Windows 10
Windows 10, Установка локального веб-сервера (Apache, MySQL, PHP) в Wsl 1 и Wsl 2.
Skip to content
As you may already know, Windows 10 Anniversary Update comes with a Bash on Ubuntu console, which allows the user to access and launch Ubuntu apps on Windows. Targeted for console apps and services, it allows you to run even GUI apps with a trick. In this article, we will see how to run a Linux command from the cmd.exe prompt in Windows 10 directly.
You can omit the need for a separate console for Bash on Ubuntu in Windows 10 and run a specific command or a set of commands directly from the command prompt. This is possible thanks to the implementation of Bash on Ubuntu.
The bash console can be started via the following file:
c:\windows\system32\bash.exe
This is a console app, which supports a number of command line arguments. You can learn them by running
bash --help
The output is as follows:
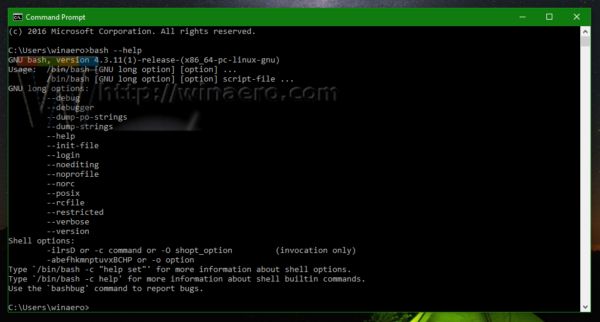
As is apparent from the brief help it provides, you can call a Linux command directly using the following syntax:
bash -c "linux command here"
The following example demonstrates this ability:
Watch the following video to see this trick in action:
Tip: You can subscribe to Winaero at Youtube.
That’s it. Now you can extend your command line scripts with Linux apps.
Support us
Winaero greatly relies on your support. You can help the site keep bringing you interesting and useful content and software by using these options:
If you like this article, please share it using the buttons below. It won’t take a lot from you, but it will help us grow. Thanks for your support!
In the first chapter of Cybersecurity Ops with bash we go over some of the ways you can leverage the power of the Linux command line directly from the Windows environment.
One of my favorite ways of doing this is by using the Windows Subsystem for Linux or WSL.
WSL was introduced as part of Windows 10, and it allows you to run an emulated or virtualized version of Linux natively within Windows.
There are several Linux distributions to choose from including Ubuntu and Kali.
How to Install WSL in Windows 10
In order to use WSL you will first need to install it.
1. Using the Windows Start Menu, search for «Windows Features»
2. Select «Turn Windows features on or off»
3. Check the box next to «Windows Subsystem for Linux» and select «OK»
4. After the installation completes select «Restart now»
5. Once the system is restarted use the Windows Start Menu to search for «Microsoft Store»
6. In the Microsoft Store, search for «Linux» and select the Linux distribution you would like to install
7. Click the «Install» button and then «Get»
8. After the Linux distribution is done installing click the «Launch» button.
You are now ready to start using the Windows Subsystem for Linux!
How to Run WSL
Once the Windows Subsystem for Linux is enabled and you have installed a Linux distribution you can start it by opening the Windows Command Prompt and typing wsl
C:\>wsl

Welcome to Ubuntu 20.04.2 LTS (5.4.72-microsoft-standard-WSL2 x86_64)
$
Error Message — No Installed Distributions
Sometimes when running WSL for the first time you may receive the following error:
C:\>wsl

Windows Subsystem for Linux has no installed distributions.
Distributions can be installed by visiting the Microsoft Store:
To resolve this, perform a search using the Windows Start Menu for the name of the Linux distribution you installed from the Microsoft Store. For example, search for «Ubuntu»:
Click the program to launch it and that should finish the installation on your system. You should not longer receive the error message when running wsl from the Command Prompt.
Once inside the WSL Linux distribution you can do things you normally would such as run Linux commands and install packages.
You can also directly run Linux commands from the Windows Command Prompt by using the wsl command and providing the Linux command as an argument. The command will execute in the WSL Linux distribution and the results will be returned back to the Windows command prompt.
In the example below you can see the Linux cowsay command run directly from the Windows Command Prompt:
Note that you must precede the Linux command with wsl, if you do not you will receive an error. Here is the incorrect method:
C:\>grep

'grep' is not recognized as an internal or external command,
operable program or batch file.
And here is the correct method:
C:\>wsl grep

Usage: grep [OPTION]... PATTERNS [FILE]...
Try 'grep --help' for more information.
Piping and Redirection
You can also use input/output piping and redirection when using the wsl command, but you need to be careful how you do it to ensure it occurs within the correct operating system environment. Let’s see what happens if you run the following command pipeline from the Windows command prompt:
C:\>wsl ps -e | grep ps

'grep' is not recognized as an internal or external command,
operable program or batch file.
Note that the output states that the grep command is not recognized. That is because Windows executes the ps -e command from within the WSL environment, but then returns the result back to the Windows environment. Windows then tries to pipe that output into the grep command, which of course does not exist in the Windows environment. To overcome this, simply add the wsl command again after the pipe so the grep command runs in the Linux environment.
C:\>wsl ps -e | wsl grep ps
    7 tty1     00:00:00 ps
I/O redirection works the same way. Here is an example:
Here the ps -e command is executed in the Linux environment using wsl and the results are returned to the Windows environment. Windows then redirects the output to the file ps.txt.
WSL and Windows PowerShell
Running WSL works exactly the same way from the Windows PowerShell. That means you are able to access your favorite Linux commands, bash scripts, and programs from directly within PowerShell scripts!
WSL 2
In mid-2020 Microsoft released WSL version 2. WSL 2 provides a more full-featured virtualized environment allowing for complete access to system calls. That means you can now install the complete array of Linux applications including Docker and similar programs.
Recent releases of WSL also supports running Linux programs that have graphical user interfaces.
Links and Resources
-
Installing WSL
-
Command reference for Windows Subsystem for Linux
-
WSL Version 2