
Все способы:
- Полезные советы перед удалением файлов через консоль
- Способ 1: Использование команды DEL
- Способ 2: Использование команды ERASE
- Способ 3: Использование команды RMDIR (RD) для директорий с файлами
- Способ 4: Использование PowerShell и команды Remove-Item
- Способ 5: Использование сторонней утилиты SDelete от Microsoft
- Вопросы и ответы: 0
Полезные советы перед удалением файлов через консоль
Прежде чем приступить к удалению файлов с помощью терминала Windows, важно правильно определить путь к необходимым файлам и освоить базовые приемы навигации в консоли. Работа с консолью может показаться сложной для неопытных пользователей, однако несколько простых приемов значительно облегчат этот процесс. Корректное определение пути является ключевым элементом для выполнения любых операций с файлами в «Командной строке». Неправильно указанный путь может привести к ошибкам или, что еще хуже, к удалению не тех файлов, которые планировалось удалить. Следующие рекомендации помогут избежать типичных проблем и сделают работу с консолью более эффективной.
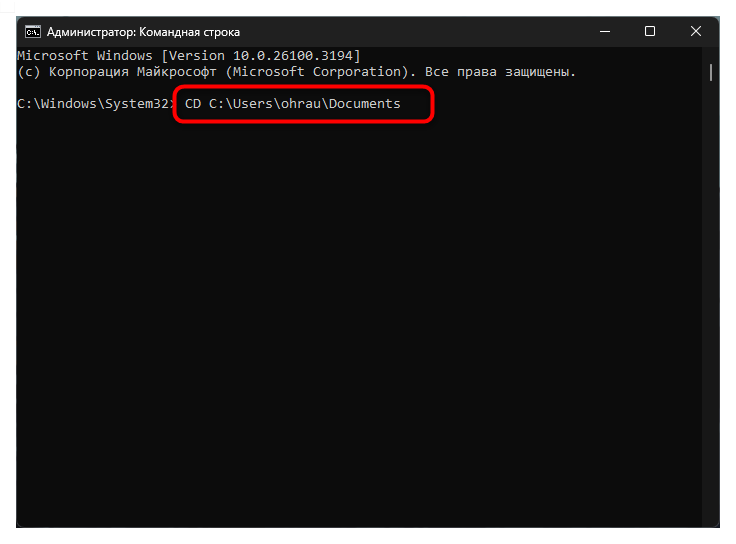
- Использование команды CD для навигации. Команда CD (Change Directory) позволяет перемещаться между директориями файловой системы, что устраняет необходимость ввода полного пути к файлу при каждой операции. Например, введя команду
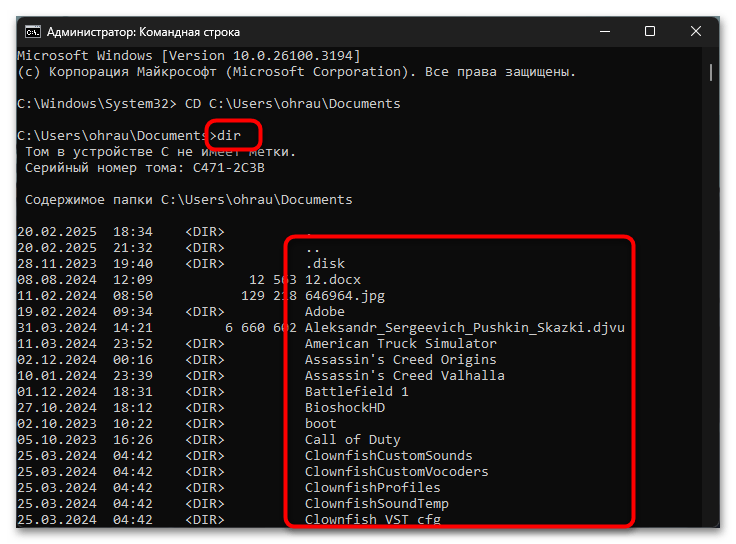
CD C:\Users\Username\Documents, вы переместитесь в директорию Documents, после чего сможете обращаться к файлам в ней, указывая только их имена без полного пути. Это существенно сокращает количество вводимых символов и уменьшает вероятность ошибки. - Просмотр содержимого директории с помощью DIR. Перед удалением файлов рекомендуется проверить содержимое текущей директории с помощью команды DIR, которая выводит список всех файлов и папок. Такая проверка поможет убедиться в правильности выбранной директории и точно определить имена файлов для удаления. Команда DIR также может использоваться с масками (например,
DIR *.txt) для фильтрации результатов по расширению. - Использование автодополнения с помощью клавиши Tab. Для ускорения ввода пути и избежания опечаток используйте клавишу Tab, которая автоматически дополняет имена файлов и директорий. Начните вводить путь или имя файла и нажмите Tab – система предложит возможные варианты завершения. Повторное нажатие Tab переключает между доступными вариантами, что особенно удобно при работе с файлами, имеющими длинные или сложные имена.
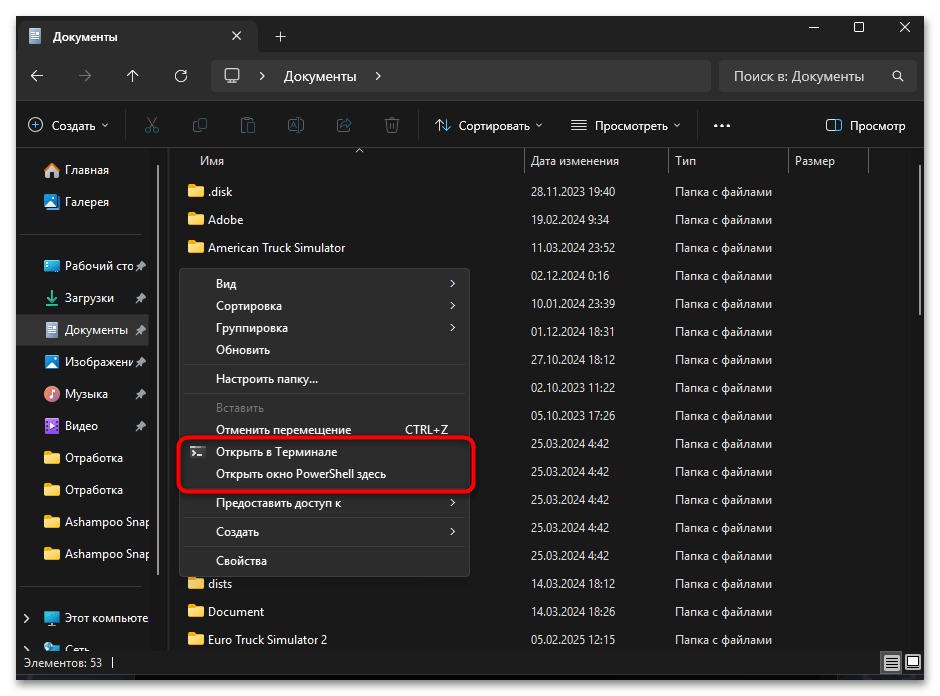
- Открытие «Командной строки» в определенной директории. Чтобы сразу открыть консоль в нужной папке, можно использовать проводник Windows. Перейдите к необходимой директории в проводнике, затем нажмите клавишу Shift, удерживая правую кнопку мыши, и выберите в контекстном меню пункт «Открыть окно командной строки здесь» или «Открыть окно PowerShell здесь». Этот метод позволяет избежать ручной навигации через CD и сразу начать работу в нужной директории.
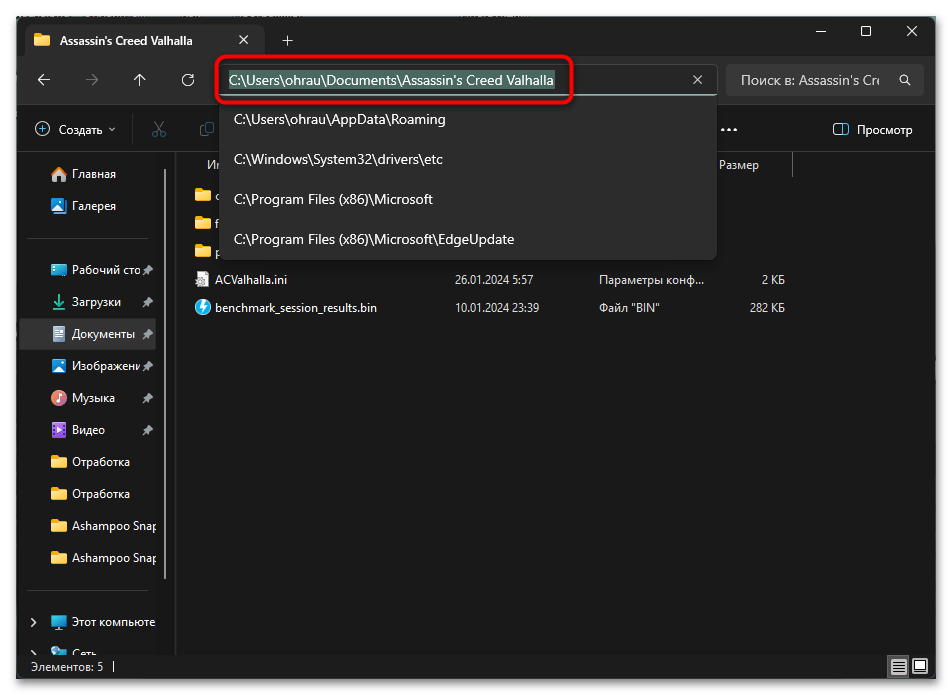
- Копирование пути из проводника Windows. Если вы не уверены в правильности пути, можно скопировать его непосредственно из проводника Windows. Перейдите к нужной папке или файлу в проводнике, нажмите в адресной строке, чтобы выделить путь, и скопируйте его (Ctrl+C). Затем вставьте путь в консоль (правый клик мыши или Ctrl+V в PowerShell). При вставке в традиционную «Командную строку» может потребоваться заключить путь в кавычки, особенно если он содержит пробелы.
Способ 1: Использование команды DEL
Удаление файлов через консоль Windows является распространенной задачей для пользователей, желающих быстро и эффективно управлять своими данными без использования графического интерфейса. Команда DEL (сокращение от delete) представляет собой стандартный инструмент, встроенный в операционную систему Windows. Данная команда позволяет удалять как отдельные файлы, так и группы файлов по маске, что особенно удобно при необходимости массового удаления. Использование DEL не требует установки дополнительного программного обеспечения и доступно во всех версиях Windows.
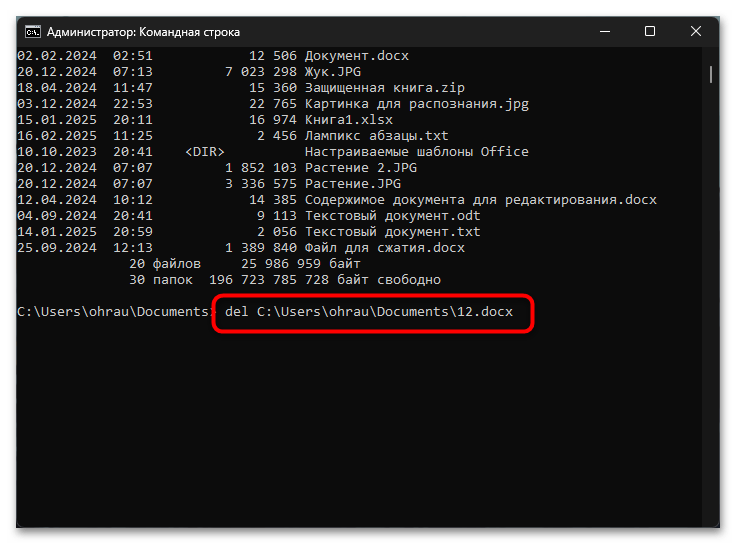
Для удаления файла с помощью DEL необходимо открыть «Командную строку» и ввести команду в следующем формате:
DEL путь\имя_файла
Команда DEL также поддерживает различные аргументы для более гибкого управления процессом удаления:
- /P. Этот аргумент запрашивает подтверждение перед удалением каждого файла, что помогает избежать случайного удаления важных данных. При использовании данного параметра система выведет запрос «Имя_файла, Удалить (Y/N)?» для каждого файла. Пользователю необходимо ответить Y (да) или N (нет) для продолжения операции.
- /F. Используется для принудительного удаления файлов, имеющих атрибут «только для чтения». Данный параметр особенно полезен при необходимости удаления системных или защищенных файлов без предварительного изменения их атрибутов. Применение этого аргумента требует осторожности, так как может привести к удалению критически важных файлов.
- /S. Применяет команду удаления ко всем файлам в указанной директории и всех ее поддиректориях. Этот аргумент особенно полезен при необходимости массовой очистки структуры папок от определенных типов файлов. При использовании данного параметра следует быть особенно внимательным, чтобы не удалить нужные файлы.
- /Q. Отключает запрос подтверждения при удалении нескольких файлов по маске. Данный параметр позволяет ускорить процесс массового удаления, но снижает уровень контроля над процессом. Рекомендуется использовать его только при полной уверенности в правильности выбранной маски файлов.
Способ 2: Использование команды ERASE
Терминал Windows также предоставляет альтернативный метод удаления файлов посредством команды ERASE. Данная команда является синонимом команды DEL и обладает идентичной функциональностью, однако название ERASE может быть более интуитивно понятным для новых пользователей консоли. Команда ERASE поддерживает те же аргументы и синтаксис, что и DEL, что делает переход между этими командами полностью прозрачным. Выбор между DEL и ERASE является исключительно делом личных предпочтений пользователя.
ERASE путь\имя_файла

Команда ERASE поддерживает те же аргументы что и DEL, включая /P, /F, /S и /Q, с аналогичной функциональностью и назначением.
Способ 3: Использование команды RMDIR (RD) для директорий с файлами
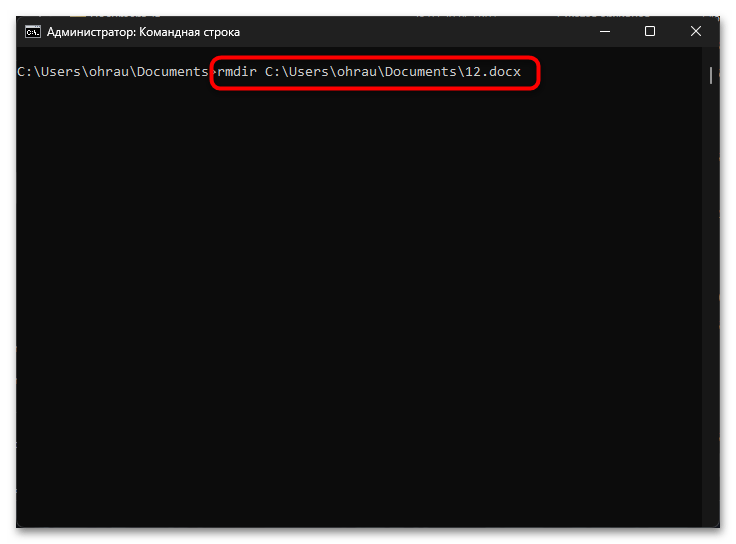
Консоль Windows предлагает специализированную команду для удаления директорий вместе с содержащимися в них файлами. Команда RMDIR (или сокращенно RD) изначально предназначена для удаления пустых каталогов, но при использовании с определенными параметрами позволяет рекурсивно удалять директории вместе со всем содержимым. Этот метод особенно эффективен, когда необходимо полностью удалить структуру папок без необходимости предварительного удаления файлов. Данный подход экономит время и упрощает процесс очистки файловой системы. Для удаления директории вместе со всеми файлами и поддиректориями используется следующий синтаксис:
RMDIR путь_к_директории /S
При использовании RMDIR доступны следующие ключевые аргументы:
- /S. Указывает на необходимость удаления всех файлов и поддиректорий в указанном каталоге. Данный параметр превращает команду из инструмента для удаления пустых папок в мощное средство для очистки целых ветвей файловой системы. Без этого параметра команда RMDIR работает только с пустыми директориями и выдает ошибку при попытке удалить каталог, содержащий файлы.
- /Q. Отключает запрос подтверждения при удалении директории с содержимым. При использовании этого параметра система не будет запрашивать подтверждение «Вы уверены (Y/N)?», что ускоряет процесс удаления. Данный аргумент следует использовать с осторожностью, так как он снимает последнюю линию защиты от случайного удаления важных данных.
Способ 4: Использование PowerShell и команды Remove-Item
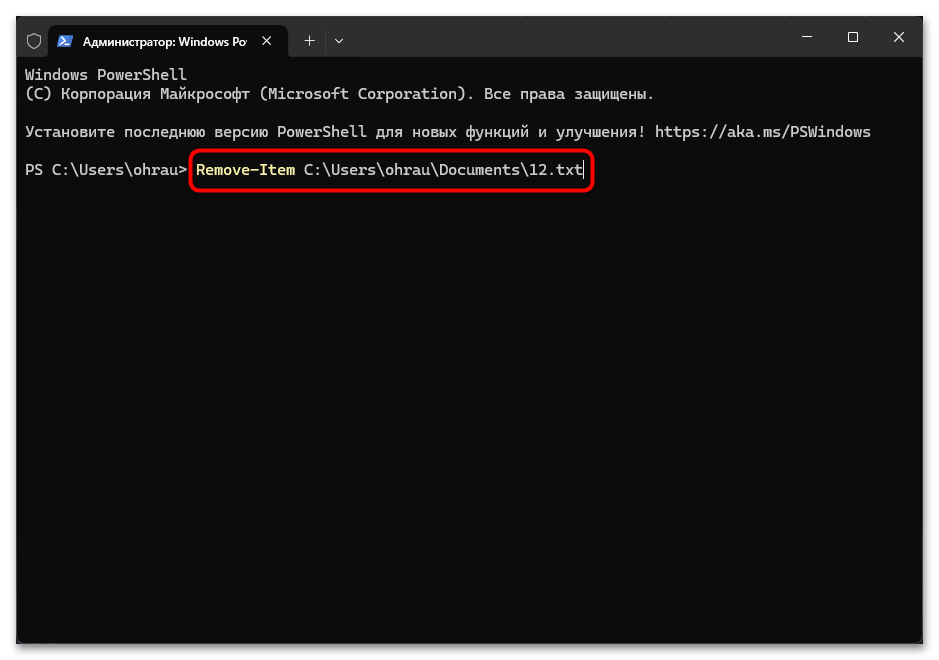
Консоль PowerShell представляет собой более современный и мощный терминал, доступный во всех современных версиях Windows. PowerShell предлагает расширенные возможности по сравнению с традиционной «Командной строкой» и включает в себя команду Remove-Item для управления файлами и директориями. Данная команда отличается более богатым набором параметров и возможностью интеграции с другими командами PowerShell через конвейеры. Remove-Item обеспечивает более гибкий контроль над процессом удаления и поддерживает работу с различными провайдерами данных.
Remove-Item путь\имя_файла
PowerShell также поддерживает сокращенный алиас для Remove-Item: rm путь\имя_файла.
Команда Remove-Item имеет расширенный набор параметров:
- -Recurse. Данный параметр позволяет рекурсивно удалять содержимое директорий, включая все вложенные файлы и поддиректории. Функционально этот параметр аналогичен комбинации DEL /S или RMDIR /S, но интегрирован в единую команду PowerShell. Использование -Recurse упрощает процесс удаления сложных структур каталогов.
- -Force. Обеспечивает принудительное удаление защищенных и скрытых файлов, а также файлов с атрибутом «только для чтения». Данный параметр объединяет функциональность различных аргументов традиционной «Командной строки» и предоставляет более унифицированный подход к преодолению ограничений доступа к файлам.
- -Confirm. Запрашивает подтверждение перед удалением каждого объекта, что аналогично использованию параметра /P в командах DEL или ERASE. Использование данного параметра обеспечивает дополнительный уровень защиты от случайного удаления данных и рекомендуется при выполнении операций с важными файлами.
- -WhatIf. Уникальный параметр PowerShell, который показывает, что произойдет при выполнении команды, но не выполняет фактического удаления. Данный режим позволяет безопасно проверить результаты команды перед ее фактическим выполнением, что особенно полезно при работе со сложными масками файлов или рекурсивным удалением.
Способ 5: Использование сторонней утилиты SDelete от Microsoft
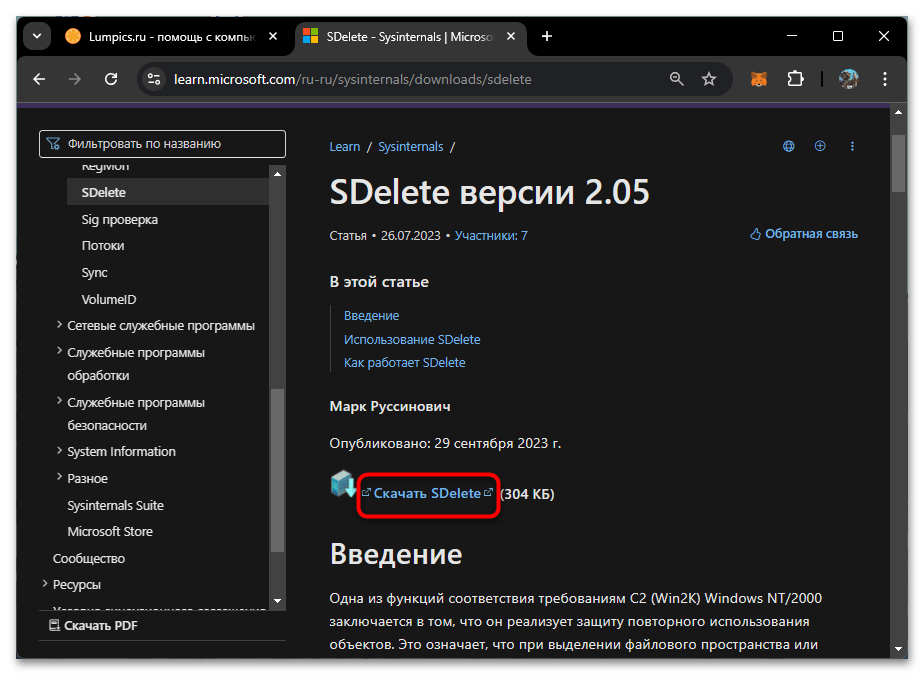
Для более продвинутых сценариев удаления файлов Microsoft предлагает специализированную консольную утилиту SDelete из набора инструментов Sysinternals. Данная утилита обеспечивает безопасное удаление файлов с возможностью многократной перезаписи данных, что делает восстановление удаленной информации практически невозможным. Утилита особенно полезна для удаления конфиденциальной информации, когда простого удаления через стандартные средства Windows недостаточно. Однако перед ее использованием придется осуществить скачивание с официального сайта, что выглядит так:
Скачать утилиту SDelete с официального сайта Microsoft
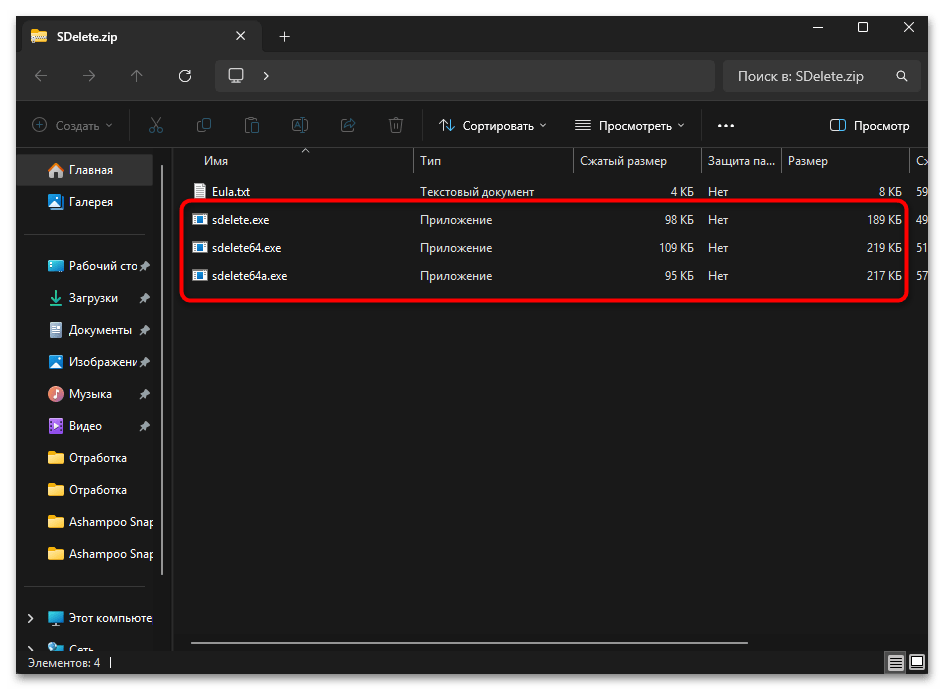
- Перейдите по ссылке выше, скачайте архив с утилитой и распакуйте его в любое удобное место на ПК.
- В этом каталоге вы найдете несколько исполняемых файлов. Можете запустить один из них для первичной проверки работы SDelete.
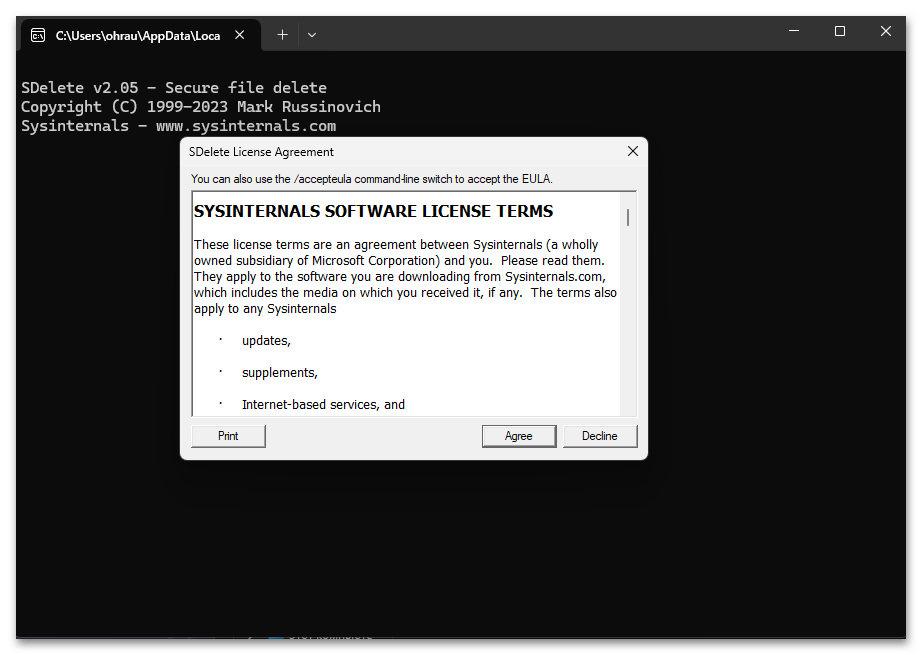
- Вам нужно будет подтвердить лицензионное соглашение, чтобы иметь возможность выполнять команды.
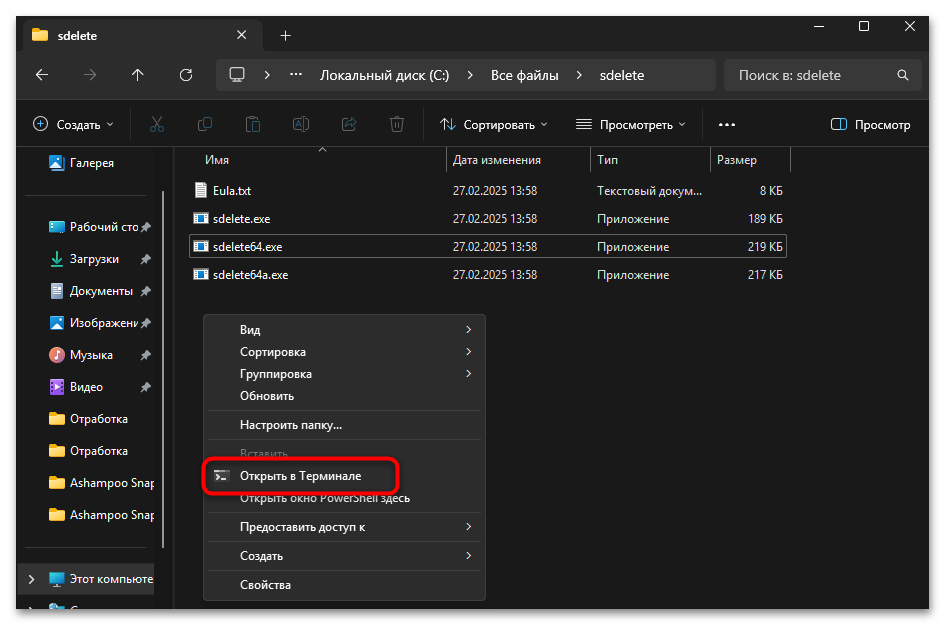
- Теперь, находясь в папке с утилитой, запустите консоль в этом расположении, используя контекстное меню. Можете использовать команду
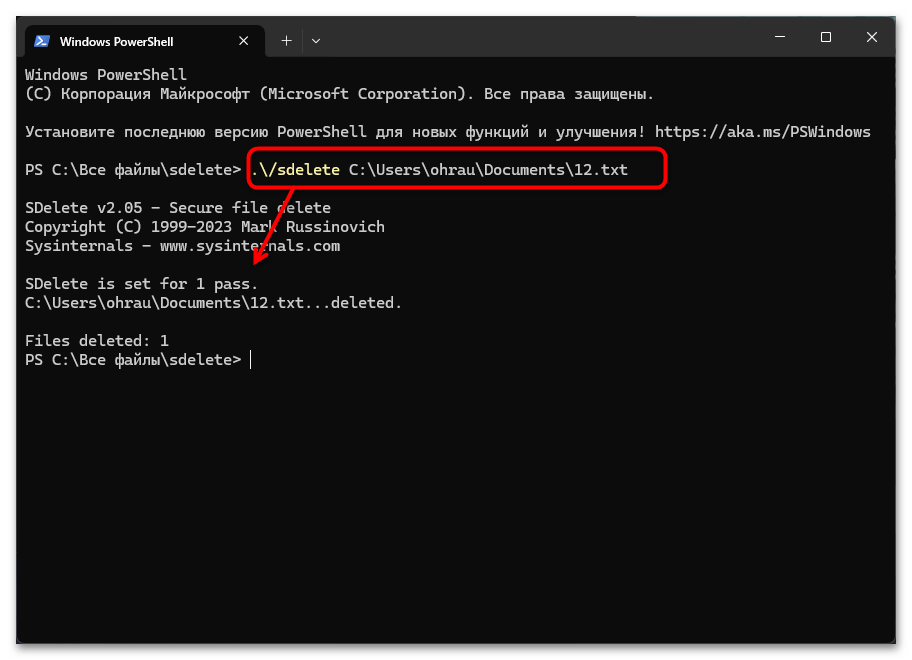
.\/sdelete, чтобы вызвать окно помощи и проверить, работает ли утилита.
Как только произведена установка и была выполнена проверка утилиты на работоспособность, можно перейти по пути, где хранится файл для удаления, либо же узнать полный адрес этого пути. Далее остается только выполнить удаление, используя команду просто так или с дополнительными аргументами, о которых ниже.
.\/sdelete параметры путь\имя_файла
SDelete поддерживает следующие ключевые аргументы:
- -p. Определяет количество проходов перезаписи данных перед удалением файла. Чем больше проходов выполняется, тем более надежным является удаление, но при этом увеличивается время выполнения операции. По умолчанию утилита использует стандарт DoD 5220.22-M с тремя проходами перезаписи.
- -s. Рекурсивно обрабатывает все поддиректории указанного пути. Данный параметр позволяет выполнить безопасное удаление файлов во всех вложенных папках указанной директории. Этот аргумент аналогичен параметру /S в стандартных командах Windows.
- -z. Выполняет очистку свободного пространства на диске, перезаписывая ранее удаленные файлы. Данный режим не удаляет существующие файлы, а лишь обеспечивает невозможность восстановления ранее удаленных стандартными средствами файлов. Это особенно полезно перед передачей компьютера другим лицам.
- -a. Устанавливает атрибуты файлов в нормальное состояние перед удалением, что позволяет обойти защиту файлов с атрибутом «только для чтения». Данный параметр функционально аналогичен аргументу /F в команде DEL, но интегрирован в процесс безопасного удаления.
Наша группа в TelegramПолезные советы и помощь
on August 5, 2015
Deleting files is one of the frequently done operation from Windows command prompt. This post explains how to use ‘del’ command from CMD for different use cases like deleting a single file, deleting files in bulk using wild cards etc. Before we start to look at the syntax, note that the command works only for files and can’t handle folders.
How to delete a file
Run del command with the name of the file to be deleted, you are done!
del filename
You do not see message after running the command if the file is deleted successfully. Error message is shown only when something goes wrong.
Delete files in bulk
Del command recognizes wildcard(*) and so can be used to delete files in bulk from CMD. Some examples below.
To delete all the files in current folder
del *
To delete all the files with ‘log’ extension
del *.log
Delete all files having the prefix ‘abc’
del abc*
Delete all files having ‘PIC’ somewhere in the file name.
del *PIC*
The above are the basic use cases of del command. Continue to read below for non trivial use cases.
Delete multiple files
‘Del’ command can accept multiple files as argument
del filename1 filename2 filename3 filename4....
Example:
D:\>dir /s /b
1.pdf 2.pdf 3.pdf
D:\>del 1.pdf 2.pdf 3.pdf
D:\>
D:\>dir /s /b
D:\>
Delete Read only files
We can’t delete a read-only file using simple‘del’ command. We get access denied error in this scenario.
c:\>attrib readonlyfile.txt
A    R       C:\readonlyfile.txt
c:\>del readonlyfile.txt
c:\readonlyfile.txt Access is denied.
c:\>
A read-only file can be deleted by adding /F flag.
del /F readonlyfile.txt
Alternatively, we can use the below command too
del /A:R readonlyfile.txt
Last Updated :
16 May, 2024
While working on Windows devices, we used to work on Windows File Explorer for working with files. On File Explorer of Windows, the creation of new files as well as deleting old ones is one of the easiest processes. However, if your File Explorer is not responding, then the process to Delete Folder using CMD can be an alternative.
The Windows Command Prompt is the command line tool that executes different tasks with the help of Windows Commands. Using CMD in Windows, the File Creation for Windows can also be executed. If you are having trouble Deleting Files or Folders on Windows directly by right-clicking, then you can Delete files using CMD.
This article is going to discuss the commands required to Remove Files & Folders using the UsingCommand Prompt of Windows.
Table of Content
- Methods to Delete Files and Folders Using Command Prompt
- Method 1: Delete Files or Folders on CMD using DEL Command
- Method 2: Delete Files or Folders on CMD using RMDIR Command
- Delete a Folder and Subfolders in Command Prompt
Methods to Delete Files and Folders Using Command Prompt
To Erase Windows Files or Folders using CMD, the following guidelines should be used properly. Let us start with the DEL Command Execution.
Method 1: Delete Files or Folders on CMD using DEL Command
Note: DEL Command is used to delete a file. Here, we will take our sample file “hello.txt” located on the desktop, and try to delete it using the del command in CMD. Follow the steps given below to delete the file:
Step 1: Change the Path of the Directory in CMD and set it to the path of the file. Type the following command and press Enter.
cd desktop
Step 2: Delete the file hello.txt with the following Windows Command.
del hello.txt

Method 2: Delete Files or Folders on CMD using RMDIR Command
Note: RMDIR Command is used to delete the entire folder or directory. Here, we will take our sample folder named “Tasks” placed on the desktop and try to delete it using RMDIR Command in CMD.
Step 1: Change the Directory’s Path in Command Prompt and set it to the path of the folder.
cd desktop
Step 2: Delete the folder Tasks with the following command.
rmdir tasks

From the above discussion, this should become clear that the Deletion of Windows Files using CMD is a matter of a few seconds. You have to just move inside the Windows Directory using the Windows CD Command. And then, as per your choice execute any one of the Windows File Deletion Commands in CMD.
Delete a Folder and Subfolders in Command Prompt
Step 1: Open Command Prompt.
Step 2: Navigate to the directory where the folder you want to delete is located using the cd command.
Command: cd <FolderName>
Step 3: To delete a single folder, use the following command.
Command: rmdir <FolderName>
Step 4: To delete a folder and all its subfolders and files, just include “/s” in between the rmdir and <folderName>, use the following command.
Command: rmdir /s <FolderName>
Step 5: Press Enter to execute the command.
Also Read
- Useful CMD commands for daily use in Windows OS
- CMD Commands to Gather Information of a System
- How to Show all the previously connected WiFi Networks using CMD in Windows?
Conclusion
In this article, we explored how to use Command Prompt in Windows to delete files and folders efficiently when facing issues with File Explorer. We discussed two methods: using the DEL command to delete files and the RMDIR command to delete folders. Additionally, we provided a step-by-step guide on how to delete folders and subfolders using Command Prompt.

Sometimes it’s just faster to do things with the command line.
In this quick tutorial we’ll go over how to open Command Prompt, some basic commands and flags, and how to delete files and folders in Command Prompt.
If you’re already familiar with basic DOS commands, feel free to skip ahead.
How to open Command Prompt
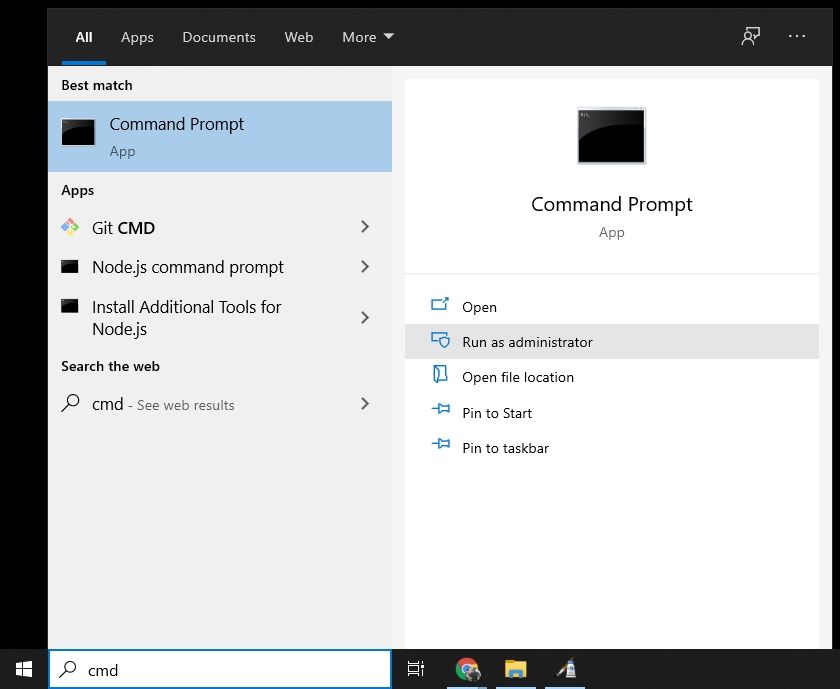
To open Command Prompt, press the Windows key, and type in «cmd».
Then, click on «Run as Administrator»:
After that, you’ll see a Command Prompt window with administrative privileges:
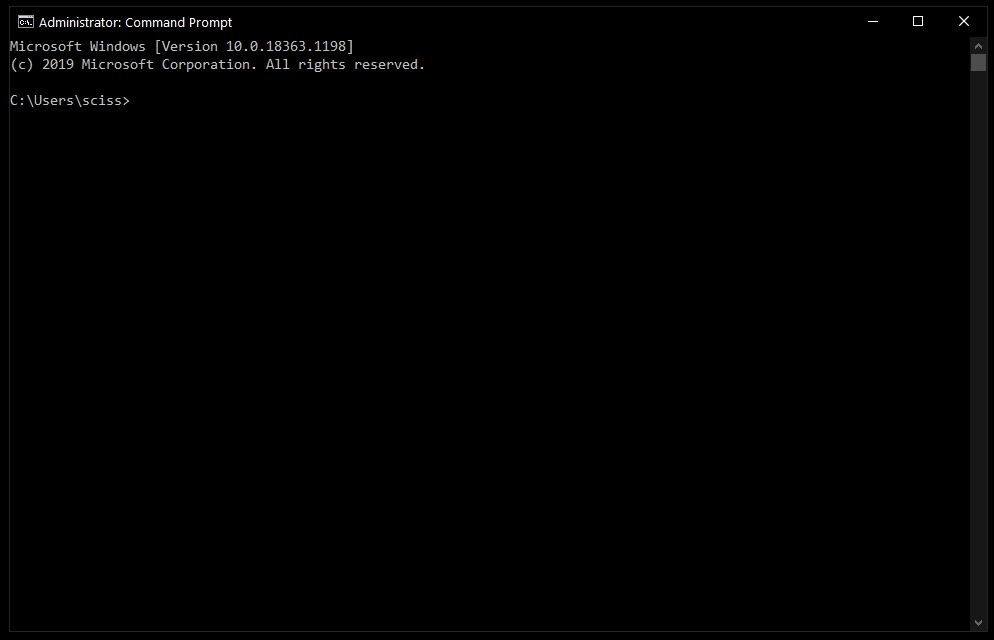
Screenshot of Command Prompt window
If you can’t open Command Prompt as an administrator, no worries. You can open a normal Command Prompt window by clicking «Open» instead of «Run as Administrator».
The only difference is that you may not be able to delete some protected files, which shouldn’t be a problem in most cases.
How to delete files with the del command
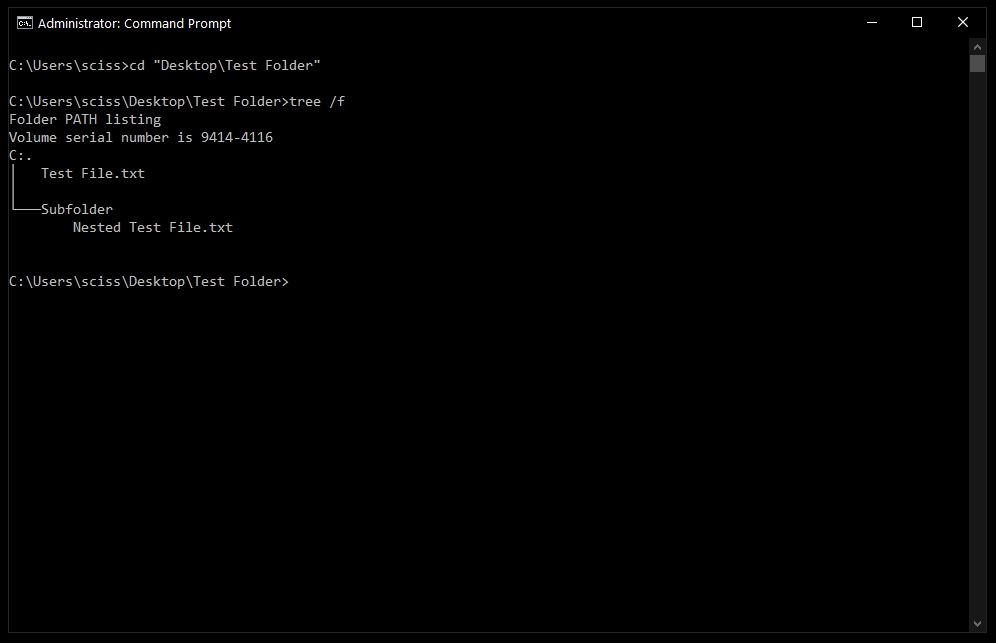
Now that Command Prompt is open, use cd to change directories to where your files are.
I’ve prepared a directory on the desktop called Test Folder. You can use the command tree /f to see a, well, tree, of all the nested files and folders:
To delete a file, use the following command: del "<filename>".
For example, to delete Test file.txt, just run del "Test File.txt".
There may be a prompt asking if you want to delete the file. If so, type «y» and hit enter.
Note: Any files deleted with the del command cannot be recovered. Be very careful where and how you use this command.
After that, you can run tree /f to confirm that your file was deleted:

Also, bonus tip – Command Prompt has basic autocompletion. So you could just type in del test, press the tab key, and Command Prompt will change it to del "Test File.txt".
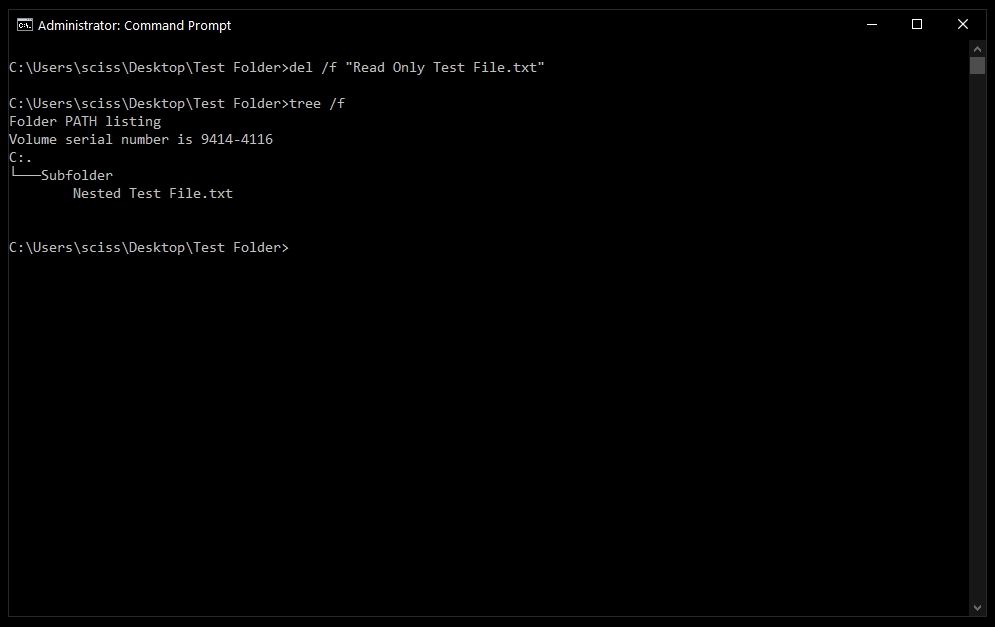
How to force delete files with the del command
Sometimes files are marked as read only, and you’ll see the following error when you try to use the del command:
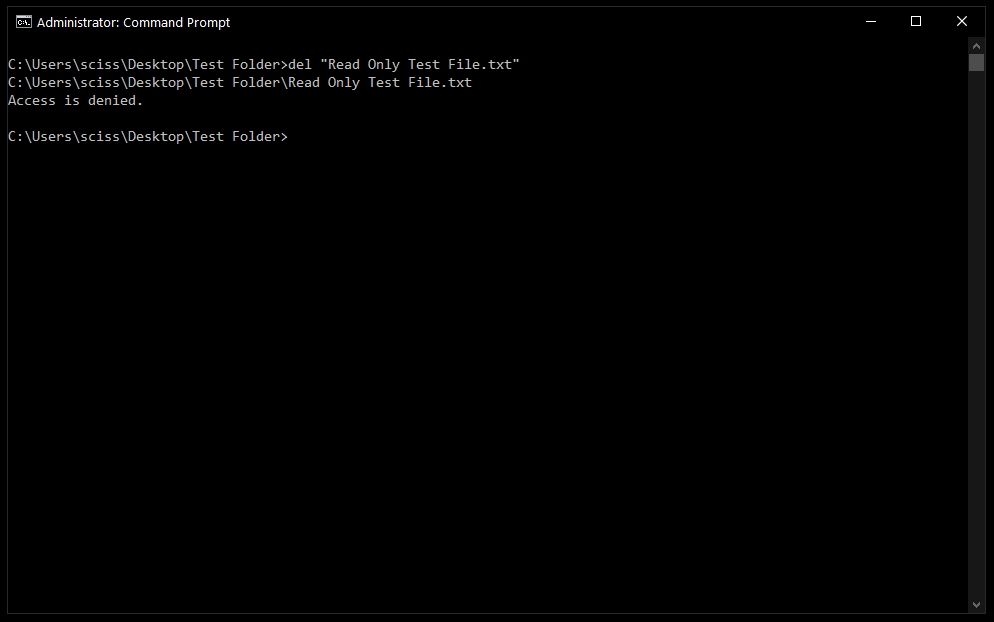
To get around this, use the /f flag to force delete the file. For example, del /f "Read Only Test File.txt":
How to delete folders with the rmdir command
To delete directories/folders, you’ll need to use the rmdir or rd command. Both commands work the same way, but let’s stick with rmdir since it’s a bit more expressive.
Also, I’ll use the terms directory and folder interchangeably for the rest of the tutorial. «Folder» is a newer term that became popular with early desktop GUIs, but folder and directory basically mean the same thing.
To remove a directory, just use the command rmdir <directory name>.
Note: Any directories deleted with the rmdir command cannot be recovered. Be very careful where and how you use this command.
In this case I want to remove a directory named Subfolder, so I’ll use the command rmdir Subfolder:
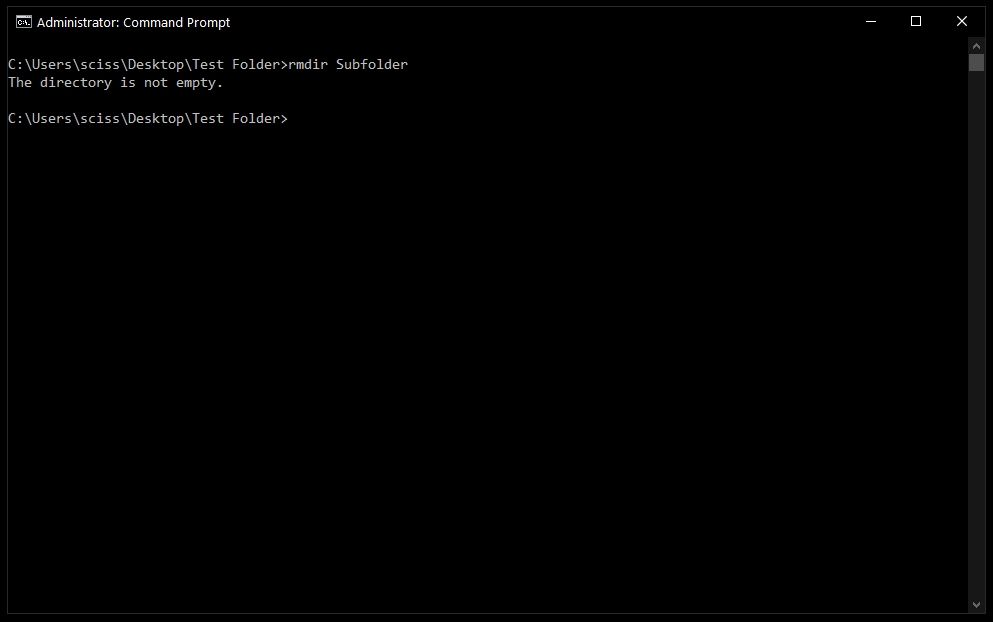
But, if you remember earlier, Subfolder has a file in it named Nested Test File.
You could cd into the Subfolder directory and remove the file, then come back with cd .. and run the rmdir Subfolder command again, but that would get tedious. And just imagine if there were a bunch of other nested files and directories!
Like with the del command, there’s a helpful flag we can use to make things much faster and easier.
How to use the /s flag with rmdir
To remove a directory, including all nested files and subdirectories, just use the /s flag:
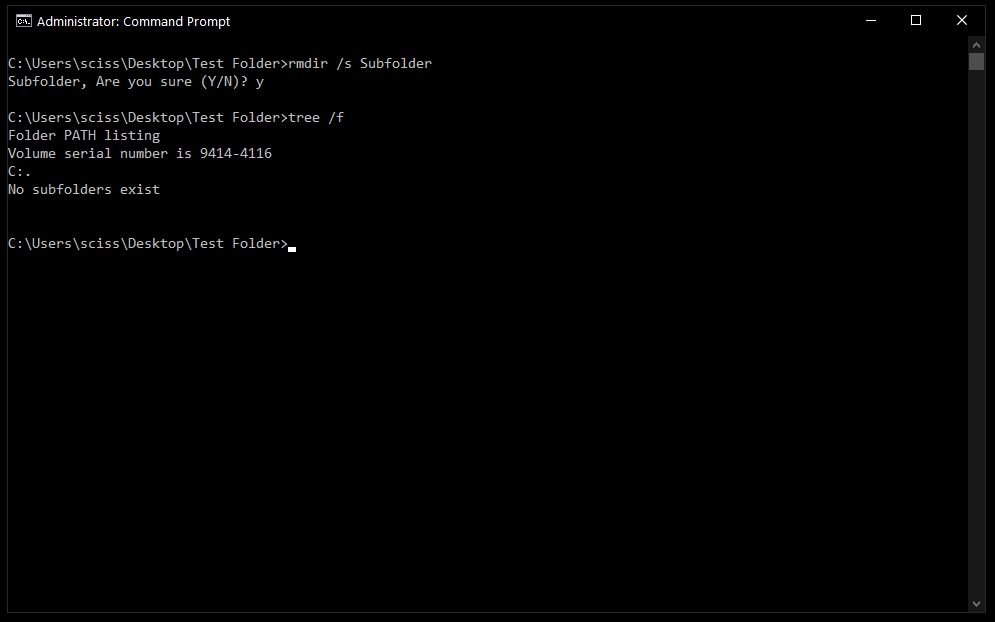
There will probably be a prompt asking if you want to remove that directory. If so, just type «y» and hit enter.
And that’s it! That should be everything you need to know to remove files and folders in the Windows Command Prompt.
All of these commands should work in PowerShell, which is basically Command Prompt version 2.0. Also, PowerShell has a bunch of cool aliases like ls and clear that should feel right at home if you’re familiar with the Mac/Linux command line.
Did these commands help you? Are there any other commands that you find useful? Either way, let me know over on Twitter.
Learn to code for free. freeCodeCamp’s open source curriculum has helped more than 40,000 people get jobs as developers. Get started
The `del` command in CMD is used to delete one or more files from a directory in Windows, allowing users to manage their system’s file storage efficiently.
Here’s an example syntax to delete a file named `example.txt`:
del example.txt
Understanding the `del cmd` Command
The `cmd del command` is one of the most essential commands in Command Prompt, primarily used for file management. It is responsible for deleting files and can also be used in conjunction with other CMD commands for more intricate file operations. Understanding how to utilize the `del` command effectively can significantly streamline your workflow.
Mastering Cmd Dos Commands: A Quick Guide
Syntax of the `del` Command
The basic syntax of the `del` command is as follows:
del [options] [drive:][path][filename]
Each component serves a specific purpose:
- options: Various flags that modify the behavior of the command.
- drive:: The drive letter where the target file resides (e.g., C:).
- path: The directory location of the file.
- filename: The specific name or pattern of the file you wish to delete.

Mastering Cmd Help Command for Quick Guidance
Common Options for the `del` Command
Utilizing options with the `del` command can add significant power and flexibility to your file management practices. Here are some common options:
-
/P: Prompt for confirmation before deleting files. This is particularly useful to ensure you do not delete the wrong file accidentally.
del /P example.txt -
/F: Forcefully delete read-only files. This option ensures that files marked as read-only can still be deleted.
del /F example.txt -
/S: Delete files from all subdirectories. When you need to delete the same file type from multiple folders, this option proves invaluable.
del /S *.tmp -
/Q: Quiet mode. Suppresses confirmation prompts, making the delete operation faster, especially when deleting numerous files.
del /Q *.bak
Each of these options can be used individually or combined to tailor the `cmd del command` to fit specific needs.
Mastering Cmd DNS Commands: A Quick Guide
Practical Examples of Using the `del` Command
Deleting a Single File
To delete a single file from your system, you simply need to specify the file name along with its path.
del C:\Users\Username\Documents\example.txt
When executed, this command removes `example.txt` from the specified directory. It’s a straightforward action that doesn’t require additional syntax.
Deleting All Files in a Directory
If you want to clear out all the files within a specific directory, you can use the wildcard `.` to represent every file type.
del C:\Users\Username\Documents\*.*
Be cautious with this command, as it will delete every file in the given directory without any prompts unless you’ve specified the `/P` option.
Using Wildcards with the `del` Command
Wildcards allow for more flexible file deletion. The asterisk `*` can replace multiple characters, while the question mark `?` can replace a single character.
For instance, to delete all `.txt` files, execute:
del C:\Users\Username\Documents\*.txt
This command targets all files with the extension `.txt`, which is exceptionally handy for batch deletions.
Delete in CMD with Subdirectories
To delete files in a directory and all of its subdirectories, use the `/S` option:
del /S C:\Users\Username\Documents\*.log
This command will eliminate all `.log` files found in the `Documents` directory and any of its subdirectories. However, be mindful, as this could lead to extensive deletions if you are not careful.
Using the `/Q` and `/P` Options Together
For added control, you can combine `/Q` and `/P`, using `Q` for quiet mode with `P` to prompt for confirmation:
del /Q /P C:\Users\Username\Documents\example.txt
This setup allows for safe deletions where you will receive a prompt before a file is removed, all while doing so without the nuisance of multiple confirmations.
Mastering The Cmd Run Command: A Quick Guide
Tips for Safely Using the `del` Command
To avoid mistakes when using the `cmd del command`, keep the following tips in mind:
- Double-check file paths and names: Always ensure you are targeting the correct file. A misplaced character can lead to unintended deletions.
- Use the `/P` option: This can save you from accidentally deleting crucial files.
- Handle wildcards with care: Understand that using wildcards can lead to multiple deletions; verify your command before hitting enter.
Mastering The Cmd IP Command: Quick And Simple Guide
Troubleshooting Common Issues
While using the `del` command, you may encounter some common issues:
Access Denied Errors
If you face an “Access Denied” message, it often means that you do not have sufficient permissions to delete the file. In such cases, try running Command Prompt as an Administrator.
File Not Found
This error indicates that the file you are trying to delete does not exist at the specified path. Verify the filename and its directory before retrying.
Cannot Delete Read-Only Files
If you attempt to delete a read-only file without the `/F` option, you may receive an error. If you know you want to delete the file, add `/F` to bypass the restriction.
Cmd Best Commands: Your Quick Guide to Mastery
Conclusion
The `cmd del command` is a powerful tool for anyone looking to manage files more efficiently through Command Prompt. By mastering this command and its options, you can perform precise file operations that simplify your workflow. Remember always to take care when deleting files to ensure that you are preserving the necessary data.
Mastering Cmd User Commands for Everyday Tasks
Additional Resources
For further mastery, consider checking out the official Microsoft documentation or engaging with communities focused on CMD commands.
FAQs
What is the difference between `del` and `erase`?
Both commands serve the same function, and you can use them interchangeably. However, `del` is more commonly used.
Can I recover files deleted using the `del` command?
Files deleted using the `del command` do not go to the Recycle Bin and are generally considered unrecoverable unless recovery tools are used.
Is there any way to undo a delete operation?
Unfortunately, once a file has been deleted using the `del command`, it cannot be directly recovered from the Command Prompt. It is advisable to back up important files to prevent accidental loss.