
На чтение 6 мин Просмотров 3.5к. Опубликовано
И в данном посте я рассмотрю замену и копирование файлов через командную строку, а именно, утилиты COPY и REPLACE. Но сперва, как всегда немого лирики.
Пожалуй, любой программист сталкивался с вопросом написания функции для копирования каталога с файлами. Как правило, эти задачи решались при использовании рекурсии. В былые времена, не было мышки и правого клика со вкладкой «копировать, вырезать, вставить», да и синий Волков не сразу появился. Это теперь все так привычно, сидишь за клавиатурой, втыкаешь в зеленое поле Винды, клик туда, клик сюда, и все, задачу решил. Но, бывали и трудные ситуации, когда приходилось прибегать к синему менеджеру. Как не странно, но командная строка и ее утилиты от версии к версии меняют свой вид, Есть даже целый набор утилит типа PsUtils, которые эффективней стандартных ДОСовских. Логический вопрос, кому это все надо! Какой смысл изобретать современного динозавра, йоп те! С другой стороны, такова наша природа человеческая, мы готовы даже велосипед снова изобрести, лишь бы занять свой ум.
Командная строка COPY
Данный шедевр человеческой мысли позволяет произвести копирование (copy) через командную строку файла или файлов или даже их конкатенацию (объединение). Для решения подобных задач север сценариев Windows Script Host предоставляет в распоряжение метод CopyFile объекта FileSystemObject. Синтаксис утилиты командной строки copy, довольно устрашающий:
COPY [/D] [/V] [/N] [/Y | /-Y] [/Z] [/A | /B] источник [/A | /B] [+ источник [/A | /B] [+ …]] [результат [/A | /B]]
Давайте начнем:
/D – указывает на возможность создания зашифрованного файла.
/Y | /-Y – если выбран первый параметр, то будут отсутствовать запросы системы на подтверждение во время копирования (проще говоря, если придется топкой 1000 файлов копировать, то на каждый не будет выпрыгивать надоедливое “а вы уверены, или, может, другу позвоните?”), понятно, что второй параметр как раз то включает запрос подтверждения.
/Z – позволяет копировать данные по сети, кстати, в предыдущих вариантах данной утилиты этого ключа не наблюдалось.
/А – указывает, что файл является текстовым, если мы укажем данный параметр, то копирование прервется на метке конца файла ASCII код 26.
Если же данный параметр указан в самом конце, то эффект совсем другой. Произойдет полное копирование документа, но в копии будет добавлена метка конца файла если ее не было. Как результат, можете попробовать поэкспериментировать с pdf документом (my_file.pdf – размер документа составляет 247217 байт):
copy my_file.pdf/A new_file.pdf – на выходе мы получим документ new_file.pdf размером в 2538 байт.
/B – данный ключ идет по умолчанию и указывает, что файл является бинарным. То есть, происходит копирование всего документа.
/V – данный параметр включает проверку правильности копирования, сравнивая данные после завершения процедуры.
И так командная строка, копирование файлов и парочка примеров:
Копирование через командную строку файла 123.txt из текущего каталога в каталог D:NEW под тем же именем:
COPY 123.txt D:NEW
Копирование файла 123.txt из текущего каталога в каталог D:NEW под новым именем new.txt:
COPY 123.txt D:NEWnew.txt
Копирование всех документов с расширением txt с диска D: в каталог My Data на диске C:
COPY D:*.txt «С:My Data»
Допустим, мы находимся в каталоге D:NEW и нам надо копирнуть в него все данные из каталога C:DATA, в таком случае достаточно прописать следующий синтаксис:
COPY C:DATA *.*
Используя командную строку, копируемые файлы можно склеить. Для этих целей достаточно использовать знак плюса «+», например:
COPY 1.txt +2.txt 3.txt– в данном примере содержимое документов 1.txt и 2.txt было объединено в 3.txt. Стоит помнить, что по дефолту, утилита COPY воспринимает данные как текстовые.
Вот пример с двоичными данными:
COPY /В *.dat all.dat – в данном варианте все данные с расширением dat из текущей папки были объединены в один файл all.dat.
Вообще, используя символ плюса «+» и мысли типа «а что если», можно проделать парочку экспериментов. Также стоит помнить ряд моментов:
Если название целевого объекта совпадает с одним из копируемых (кроме первого), то исходное содержимое целевого объекта будет утеряно.
Если имя целевого объекта опущено, то в его качестве будет использован первый объект из списка:.
COPY l.txt+2.txt – тут мы добавили к содержимому первого объекта содержимое второго.
COPY 1.txt +,, – данная конструкция позволяет присвоить объекту 1.txt текущую дату без его модификации.
Утилита COPY по своему первенству содержит ряд недостатков:
- нельзя производить копирование файлов через командную строку с атрибутами скрытый или системный, а также системных и с атрибутом «Только для чтения».
- обрыв всего процесса копирования при встрече с объектом, который в данный момент не поддается копированию.
В связи с такими неудобствами, умные люди подумали, и прибавили букву Х к названию COPY, чем решили массу проблем, создав утилиту XCOPY.
Командная строка REPLACE
Фактически, отличие данной утилиты в том, что она умеет заменять данные. Синтаксис довольно простой и понятный:
REPLACE [диск1:][путь1]имя_файла [диск2:] [путь2] [/А] [/Р] [/R] [/W]
REPLACE [диск1:][путь1]имя_файла [диск2:] [путь2] [/Р][/R][/S][/W][/U]
[диск1:] [путь1]имя_файла – определяем местонахождении копируемого объекта, или объектов.
[диск2:] [путь2] — определяем местонахождении объекта-результата. Как видно, имена замещаемых объектов задавать нельзя.
/А – добавляем в каталог-результат только новые объекты из каталога-результата (без перезаписи). Этот ключ нельзя использовать с ключами /S и / U.
/Р – выводится запрос на подтверждение перед заменой целевого или добавлением исходного файла.
/R – замещение не только обычных, но и защищенных от записи документов.
/S – позволяет производить поиск по всем подкаталогам целевого каталога и заменять файлы с совпадающими именами. Этот ключ нельзя использовать совместно с ключом /А. Поиск в каталогах, заданных параметром путь1, не производится.
/W – ожидание вставки диска перед началом выполнения
/U – режим обновления, то есть будут заменены только те объекты, которые имеют более раннюю дату модификации. Несовместимость с ключом /A.
Пример:
Replace D:Datamy_file.txt D:Work – в папке Work заменяем файл my_file.txt на D:Datamy_file.txt
При копировании файлов через командную строку посредством утилиты REPLACE, отсутствует возможность обновления скрытых или системных файлов. Для этого надо предварительно сменить их атрибуты.
The `copy` command in CMD allows you to copy files from one location to another, and using the `/y` switch enables you to overwrite existing files without prompting for confirmation.
copy /y source.txt destination.txt
Understanding the Copy Command
What is the Copy Command?
The copy command in CMD (Command Prompt) is a fundamental command used for duplicating files and directories in a Windows environment. It allows users to transfer data from one location to another, whether on the same drive or to a different drive. Understanding how to use this command efficiently can save time and streamline file management.
Basic Syntax of the Copy Command
The basic syntax of the copy command is straightforward, formatted as follows:
COPY [source] [destination]
- Source: This is the path of the file(s) you want to copy.
- Destination: This is where you want the copied file(s) to be placed.
For example, if you wanted to copy a text file named `file.txt` from your C drive to your D drive, you would use:
COPY C:\source\file.txt D:\destination\
This command will copy `file.txt` to your specified destination, preserving the existing file content.
Discovering Cmd Computername: Simple Commands to Use
Overwriting Files with the Copy Command
What Does Overwriting Mean?
In computing terms, overwriting refers to the act of replacing existing data with new data. When it comes to the `cmd copy with overwrite`, it means that if a file with the same name already exists at the destination, the copy operation will replace the original file with the new file without creating a duplicate.
Using the Copy Command with Overwrite
When you use the copy command, if a file with the same name exists in the destination folder, CMD will display a prompt asking for your confirmation before overwriting. This feature is designed to prevent accidental data loss. However, you can bypass these prompts when you’re confident that overwriting is what you want to do.
Forcing Overwrite Without Prompt
If you want to overwrite files without receiving a confirmation prompt, you can utilize command line switches.
Using Command Line Switches
The `/Y` switch is employed to force the overwrite without prompts. This allows for smoother and quicker operations when handling files.
The syntax using the `/Y` switch is as follows:
COPY /Y [source] [destination]
For instance, if you want to copy a report from one directory to another while forcing any existing files at the destination to be overwritten silently:
COPY /Y C:\Users\John\Documents\report.doc D:\Backup\
In this example, if `report.doc` already exists in the D:\Backup\ directory, it will be replaced without asking for confirmation.
Example Scenarios
-
Scenario 1: Overwriting Without Prompt
Using the command:COPY /Y C:\Users\John\Documents\report.doc D:\Backup\If `report.doc` already exists in `D:\Backup\`, the command will replace it immediately.
-
Scenario 2: Working with Multiple Files
If you wish to copy multiple `.txt` files and overwrite all of them at once, you can utilize wildcards. For example:COPY /Y C:\source\*.txt D:\destination\This command will copy all text files from the specified source to the destination, overwriting any pre-existing files of the same names.
Master Cmd Copy Files with Ease and Efficiency
Handling Confirmation Prompts
How to Suppress Confirmation Prompts Globally
For users looking to suppress confirmation prompts globally when dealing with files across certain CMD versions, the `/N` switch can be useful. However, this switch is not universally applicable for all versions of Windows, so check compatibility beforehand.
Advantages of Suppressing Prompts
By suppressing confirmation prompts, users can enhance their efficiency, especially when performing repetitive tasks that might involve overwriting numerous files. However, it is critical to proceed with caution, as overwriting files can lead to unintended data loss.
Master Cmd for Windows: Quick Tips & Tricks
Best Practices for File Overwriting
Importance of Backups
Always prioritize creating backups before executing copy commands that involve overwriting. This practice becomes essential especially when you’re unsure about whether the existing files need to be preserved. Keeping copies of important files in a separate location prevents unintended loss of data.
Clear Structuring of File Systems
Maintaining an organized file structure is crucial in reducing the chances of accidental overwrites. Developing a routine of organizing files into clearly defined directories can mitigate confusion and streamline workflows.

cmd Xcopy Example for Efficient File Management
Troubleshooting Common Issues
Permission Denied Errors
One common issue when using copy commands is encountering Permission Denied errors. This usually arises when CMD does not have the required privileges to copy files from or to specific directories. To resolve this:
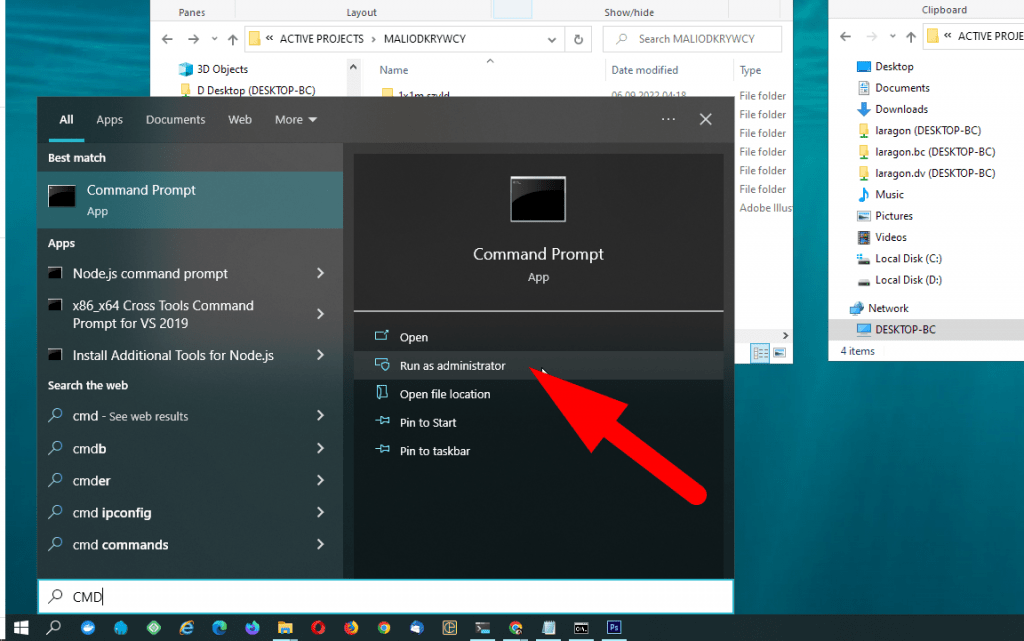
- Ensure you have administrative rights.
- Run CMD as an administrator by right-clicking the CMD icon and selecting “Run as administrator.”
Overwriting Files with Different Attributes
Files may have different attributes such as read-only or hidden, which can prevent overwriting. To address this, use the `ATTRIB` command to modify these attributes before copying. For instance:
ATTRIB -R C:\source\file.txt
This command removes the read-only attribute from `file.txt`, enabling it to be overwritten.
Docker Override Cmd Explained: A Quick Guide
Conclusion
Understanding the cmd copy with overwrite command is an invaluable skill in managing files efficiently within Windows. By mastering the use of the `/Y` switch and applying best practices, users can leverage the copy command to optimize their workflows, avoiding victimization to accidental data loss. Remember to perform adequate backups and maintain well-organized file systems to safeguard your data.
- Copy files and replace them in another folder using CMD?
- Copy Files and Folders in Windows CMD with Copy and Xcopy
- How to copy specific files from one folder to another from the command
- Copy a file to another folder in cmd command line
- Batch File To Copy All Files From One Folder To Another
- Copy Command
Copy files and replace them in another folder using CMD?
Code: robocopy <source> <destination> /mir. Putting some sample folders in
place, it might look like this: Code: robocopy d:\source e:\destination /mir.
Tip: If you want to …
robocopy <source> <destination> /mir


robocopy d:\source e:\destination /mir


robocopy <source> <destination> /mir


robocopy d:\source e:\destination /mir
Copy Files and Folders in Windows CMD with Copy and Xcopy
Copy Command. On Windows, we can use the copy command to copy one or more
files from one location to another: copy C:\data\sales.doc C:\backup. The
preceding command will …
copy C:\data\sales.doc C:\backup


copy /y C:\data\sales.doc C:\backup


copy file1.txt file2.txt


copy /y C:\data\* C:\backup
copy /y C:\data\*.doc C:\backup


copy file1+file2 file3
copy error* C:\backup\report.txt


xcopy sales.doc C:\backup


xcopy /s /e /h /i /y C:\data\accounts C:\backup\accounts


xcopy /s /e /h /y C:\data\accounts C:\backup\


xcopy /s /e /t /y C:\OneDrive C:\backup\


xcopy /s /h /y C:\data\*.jpg C:\backup


for %i in (sales.doc, products.doc) do xcopy /y %i C:\backup


xcopy /s /e /h /y /exclude:C:\Users\user1\files-to-exclude.txt C:\data\ C:\backup\


.doc
sales*
How to copy specific files from one folder to another from the command
prompt
I have a large folder of pictures (thousands), and I have a long list of
files, by exact file name, that I need to copy to another folder using Windows
commands, through …
xcopy /d /y /s "\Your Image Folder\*.jpg" "C:\Users\%username%\Desktop\Master Image Folder\"


copy *.<extension> <other folder>


copy C:\Users\desktop\*.jpg D:\backup


xcopy /s "c:\source\*.jpeg" "c:\destination\"


copy c:\scr\*.jpg c:\dst
copy c:\src\*.bmp c:\dst
Copy a file to another folder in cmd command line
First, to copy one file from a folder to another folder and keep the same name
and extension: copy C:\Folder\file.txt C:\Folder2\file.txt. In addition, you
can change the name …
copy C:\Folder\file.txt C:\Folder2\file.txt


copy C:\Folder\file.txt C:\Folder2\newfile.txt


copy C:\Folder\*.txt C:\Folder2\
copy C:\Folder\file*.txt C:\Folder2\


copy /v C:\Folder\file.txt C:\Folder2\file.txt


copy /y C:\Folder\file.txt C:\Folder2\file.txt


copy /-y C:\Folder\file.txt C:\Folder2\file.txt
Batch File To Copy All Files From One Folder To Another
Syntax. xcopy /s/z c:\source d:\target. Here is some of the options we can
find: /s/e – recursive copy. /v – verify the copy versus the original. /h –
copy system and hidden files. …
xcopy /s/z c:\source d:\target


@echo off

xcopy c:\folder\*.* d:\another_folder\.
Copy Command
Copy and Rename. copy Y:\install\j93n.exe Y:\more\m1284.msi. You can use the
copy command to rename a file and even change its file extension. In this
example, the …
copy Z:\Software\program.iso C:\Users\Jon\Downloads\Programs\


copy Y:\install\j93n.exe Y:\more\m1284.msi


copy D:\i386\atapi.sy_ C:\Windows\atapi.sys


copy D:\readme.htm


copy /y /v C:\Users\Jon\Downloads\*.mp3 C:\Users\Jon\Music\DownloadedMusic\


copy Z:\file1.txt+Z:\file2.txt+Z:\file3.txt Z:\combined.txtSkipping unchanged/unmodified files using Copy&Paste on Windows?
Did you ever try how to move a whole directory to a backup folder, skipping all files which were not changed? This can not be done with simple copy/paste in Windows GUI. However, Windows already has a solution to your problem.
xcopy to the rescue
You will have to use Windows CMD terminal. The entire process is very easy and straight forward. To make it even easier, I will divide those actions into steps (also works for network directories).
Step I – Open In Explorer src and dest directories.
Open in windows explorer both folders. Copy source folder directory and store it somewhere for a moment (open a simple text file of your choice). Now open destination folder and also copy folder path to a text file. We will need them shortly to set variables in Windows terminal.
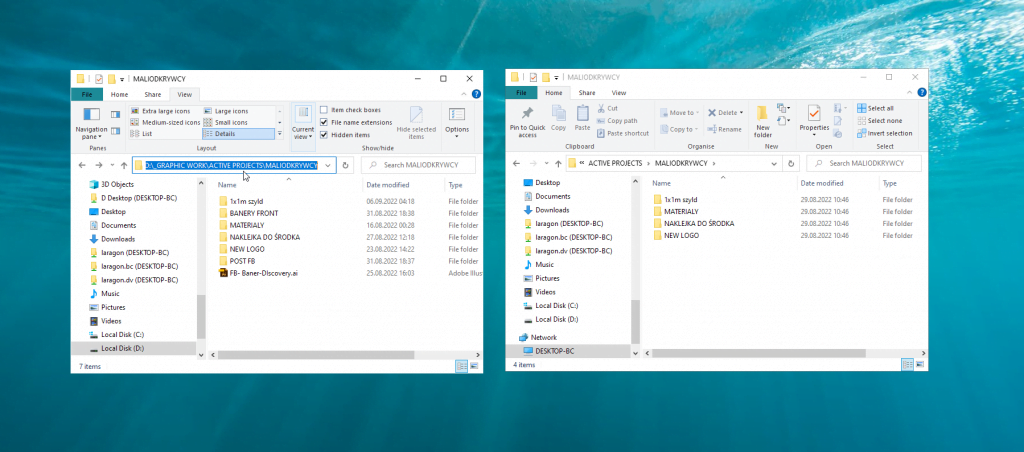
The paths might look line this:
src (localy):
D:\_GRAPHIC WORK\ACTIVE PROJECTS\MALIODKRYWCY
dest (on the network):
\\DESKTOP-BC\D Desktop_GRAPHIC WORK\ACTIVE PROJECTS\MALIODKRYWCY
Step II – Open CMD terminal
Open CMD (Windows terminal).
Step III – Set the source and destination directory
Modify and paste the fallowing script (make sure to change Source and Target directory path to what ever you want to move):
set SourceDir="D:\_GRAPHIC WORK\ACTIVE PROJECTS\MALIODKRYWCY"set TargetDir="\\DESKTOP-BC\D Desktop\_GRAPHIC WORK\ACTIVE PROJECTS\MALIODKRYWCY"
Step IV – Start data migration
xcopy %SourceDir% %TargetDir% /e /h /c /i /d /y

Step V – Clenup
Now clean the variable just in case you would rerun the command and forgot to modify one of the variables. Always do that after your data migration was completed.
set SourceDir=
set TargetDir=
xcopy modifiers
- /d – Copies source files changed on or after the specified date only. If you do not include a MM-DD-YYYY value,
xcopycopies all source files that are newer than existing destination files. This command-line option allows you to update files that have changed. - /e – Copy subdirectories, including any empty ones.
- /h – Copy files with hidden and system file attributes.
- /c – Continue copying even if an error occurs.
- /i – If source is a directory or contains wildcards and destination does not exist,
xcopyassumes destination specifies a directory name and creates a new directory. Then,xcopycopies all specified files into the new directory. By default,xcopyprompts you to specify whether destination is a file or a directory.
PowerShell instead of Windows CMD
Note that you could also use it with in powershell. Then your commands would look as fallow:
$SourceDir="D:\_GRAPHIC WORK\ACTIVE PROJECTS\MALIODKRYWCY"$TargetDir="\\DESKTOP-BC\D Desktop\_GRAPHIC WORK\ACTIVE PROJECTS\MALIODKRYWCY"xcopy $SourceDir $TargetDir /e /h /c /i /d /yAlternative solutions
Features comparison xcopy vs robocopy
Note that you could also use robotcopy instead of xcopy. This is slightly newer version of xcopy providing you with new flags and capable of returning more information about the process.
The other solution would be to use rsync, which is a Linux tool not available by default in Windows CLI. This might not be an issue since we can use Cygwin! Which will let us use many of the Linux features on a Windows machine.
You could use rsync in WSL if both folders are placed with the same machine as WSL will not mount Windows network drives, therefore they will not be visible / accessible from WSL system.
xcopy docs
robocopy docs
Mounting network drive to WSL
Mount network drive to WSL
Mounting drive in WSL permanently
Difference between xcopy & robocopy
-
Copy Files in a New Folder in Batch
-
Copy Files by Overwriting Existing Files in Batch
-
Copy Files by Overwriting All Files Without Prompt in Batch
-
Copy Files Over a Network in Batch

Xcopy is a command-line utility used to copy one or more files or directories, including subdirectories, from one location to another. It is similar to the copy command but more powerful as it can copy entire directories from one location to another.
It is powerful enough to copy even drives. Xcopy is a fast command which can copy files and folders, overwrite existing files with or without prompt, exclude files based on name, path or extension, identify updated files, etc.
It is supported in almost all versions of Windows starting from Windows 98. It can be used as a DOS command to use xcopy in MS-DOS.
The syntax for the xcopy command is:
xcopy <source> <destination> </parameters>
source— location and names of the files to be copied. It must include the drive and path of the files or directories.destination— the destination of the files to be copied. It can be a drive, directory or file name.parameters— options provided by thexcopycommand. They can be viewed by runningxcopy /?in the command prompt window.
There are several other commands similar to xcopy, some even more powerful than it, such as robocopy, rsync, teracopy, etc. But, we will stick with the xcopy in this article.
This tutorial will teach how to overwrite all files in the destination without a prompt while copying files using the xcopy command.
Copy Files in a New Folder in Batch
To copy files from one location to another, execute the following command.
xcopy C:\testfolder D:\testfolder /i /s

/s— copies directories, subdirectories and files within the folder to be copied, unless they are empty./i— forcesxcopyto assume the destination to be a directory and creates a new directory. You will be prompted to enter whether the destination is a file or a directory if it is not used.
To copy only the directory tree and not the files, i.e., directory structure, execute the following command.
xcopy C:\testfolder D:\testfolder /t /e

/t— copies the directory structure excluding files./e— copies all subdirectories, even if they are empty. It is used with/tand/soptions.
Output:
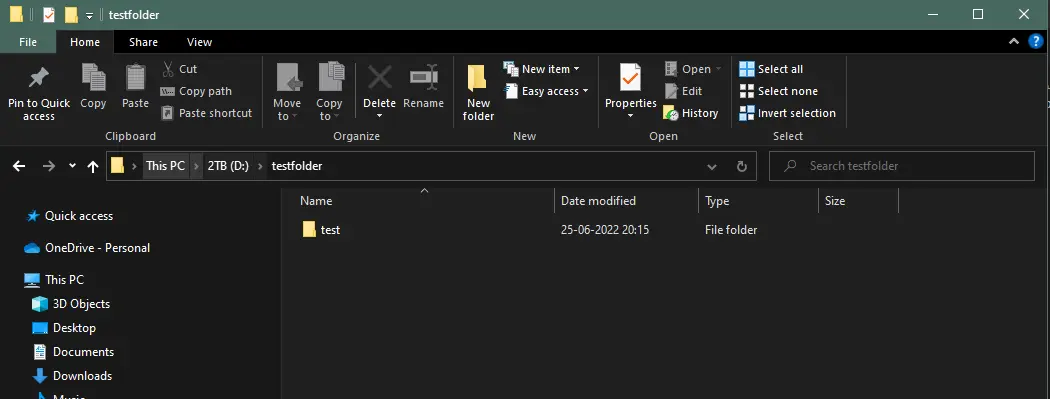
As shown above, only the directory is copied and not the files.
Copy Files by Overwriting Existing Files in Batch
To overwrite existing files while copying, execute the following command.
xcopy C:\testfolder D:\testfolder /i /s
.webp)
As shown in the image above, it is asking to overwrite the existing file or all files. When we copy many files over existing files, it will show a prompt for every file with the same name.
This is too time-consuming to confirm for every file. To avoid this, we need to use the /y option and the above command.
Copy Files by Overwriting All Files Without Prompt in Batch
Execute the following command to copy existing files without prompt to overwrite existing files.
xcopy C:\testfolder D:\testfolder /i /s /y
.webp)
/y — avoid prompt that confirms whether to overwrite the existing files or not at the destination.
Copy Files Over a Network in Batch
xcopy C:\Videos "\\server\media\videos" /s /i /z /w
/s— copies directories, subdirectories and files within the folder to be copied, unless they are empty./i— forcesxcopyto assume the destination to be a directory and creates a new directory. You will be prompted to enter whether the destination is a file or a directory if it is not used./z— copies over a network in restart mode, i.e., if the connection is lost during copying, it is resumed when the connection is restored. It also shows the completion percentage./w— Display the following message:Press any key to begin copying file(s). It waits for your response to start the copying process.
So, we discussed how to overwrite all existing files without showing a prompt while copying many files, i.e., it confirms to overwrite all files without showing a prompt for each file.
There are many other options that the xcopy command provides; you can check them by running xcopy /? in the command prompt.
Enjoying our tutorials? Subscribe to DelftStack on YouTube to support us in creating more high-quality video guides. Subscribe