
В версиях Windows Server, предшествующих Windows Server 2016, создать отказоустойчивый кластер из нескольких серверов можно было только между серверами одного домена Active Directory. В новой версии теперь можно создавать двух (и более) узловой failover кластер между серверами в разных доменах, и даже между серверами рабочей группы (вообще без домена Active Directory).
Естественно, что на всех узлах кластера нужно устаровить Windows Server 2016. Поддерживаются следующие сценарии кластеризации:
| Служба | Статус | Комментарий |
| SQL server | Поддерживается | Рекомендуется использовать встроенную аутентификацию SQL Server |
| Файловый сервер | Поддерживается, но не рекомендуется | Не поддерживается Kerberos-аутентфикация для SMB |
| Hyper-V | Поддерживается, но не рекомендуется | Не поддерживается режим Live Migration, доступна только Quick migration |
| Message Queuing (MSMQ) | Не поддерживается | MSMQ хранит свои свойства в Active Directory. |
На всех будущих узлах кластера нужно
- Установить роль Failover Clustering:
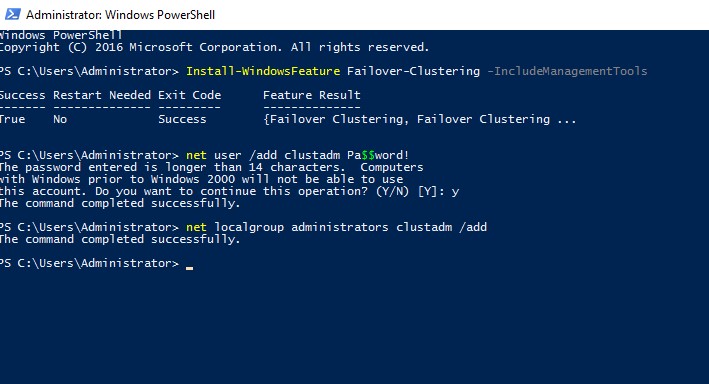
Install-WindowsFeature Failover-Clustering –IncludeManagementTools - На каждой кластерной ноде нужно создать локальную учетную запись с правами администратора (или использовать встроенную учетку администратора) с одинаковыми паролями.
net user /add clustadm Pa$$word!
net localgroup administrators clustadm /add
- При появлении ошибки Requested Registry access is not allowed, необходимо изменить в реестре параметр удаленного UAC — Данный ключ разрешает удаленный доступ к административным шарам.
New-ItemProperty -Path HKLM:\SOFTWARE\Microsoft\Windows\CurrentVersion\Policies\System -Name LocalAccountTokenFilterPolicy -Value 1 - На всех узлах кластера нужно задать одинаковой первичный DNS суффикс (Primary DNS suffix). Это нужно для того, чтобы сервера кластера могли обращаться друг к другу по FQDN именам
- Также нужно снять галку Register DNS connection addresses
- В файл hosts на всех узлах кластера нужно внести изменения, чтобы сервера могли отрезолвить имена других членов кластера, а также имя кластера (в том числе FQDN имена). Добавить имена в файл c:\windows\system32\drivers\etc\hosts можно так:
Set file="%windir%\System32\drivers\etc\hosts"
echo 192.168.1.21 clust-host1 >> %file%
echo 192.168.1.21 clust-host1.mylocal.net >> %file%
echo 192.168.1.22 clust-host2 >>  %file%
echo 192.168.1.22 clust-host2.mylocal.net >> %file%
echo 192.168.1.20 cluster1 >> %file%
echo 192.168.1.20 cluster1.mylocal.net>> %file%

Для предварительной валидации узлов кластера можно воспользоваться командой:
test-cluster -node "clust-host1.mylocal.net"," clust-host2.mylocal.net"
Для создания кластера через PowerShell, нужно выполнить такую команду:
New-Cluster -Name cluster1 -Node clust-host1.mylocal.net, clust-host2.mylocal.net -AdministrativeAccessPoint DNS -StaticAddress 192.168.1.20
Теперь можно проверить статус кластера и его компонентов командлетами get-cluster и get-clusterresource.
Для подключения (и удаленного управления) кластером через GUI нужно воспользоваться оснасткой Failover Cluster Manager (входит в состав) RSAT для Windows 10.
Теперь с помощью пункта меню Connect to cluster можно подключаться к созданному кластеру. В том случае, если в кластере четное количество серверов, придется настроить ресурс-свидетель. Отметим, что в качестве кворумного свидетеля нельзя использовать сетевую папку SMB. Поддерживается режим Disk Witness — общий диск (с одновременным доступом к нему с обоих узлов), либо Cloud Witness — облачный дисковый ресурс в Azure.
Problem
In a previous tip on Implementing Database Mirroring in SQL Server 2005 across domains, we have seen how we can configure Database Mirroring to achieve local high availability for SQL Server databases that are not joined to an Active Directory domain. We need to upgrade our SQL Server 2008 R2 databases before extended support ends. However, we do not have an Active Directory domain in our environment. How do we go about it?
Solution
SQL Server Availability Groups were introduced in SQL Server 2012 as a replacement to Database Mirroring. While Database Mirroring was intended to be either a high availability OR disaster recovery solution, Availability Groups can be used for both local high availability AND disaster recovery. You can have multiple Availability Group replicas, depending on the version of SQL Server that you are using.
While Availability Group was a viable replacement for Database Mirroring, there were a couple of blocking issues that prevented customers from upgrading. The first one was licensing. Availability Group was only available in Enterprise Edition prior to SQL Server 2016. If a customer was running Database Mirroring in Standard Edition, there’s no way to upgrade without paying for expensive licenses. However, this is really not a big of a deal for large organizations who already are running Enterprise Edition or are covered under Software Assurance.
The second one was the requirement to run a Windows Server Failover Cluster (WSFC). Database Mirroring has no requirement for external dependencies other than DNS service. Availability Group required a WSFC. This means you need to have a team of highly skilled engineers and database administrators responsible for designing, implementing and managing a WSFC outside of SQL Server.
But what isn’t explicitly mentioned in most of the Microsoft documentation is that a WSFC requires Active Directory. WSFC’s dependency on Active Directory is a more challenging hurdle to overcome, especially if the existing Database Mirroring configuration does not use Active Directory. I have had several customers who postponed upgrading because they didn’t want to implement Active Directory specifically just for Availability Group.
Initial Attempts to Remove WSFC Dependency on Active Directory
Prior versions of Windows Server operating system required Active Directory when you deploy a WSFC: the member servers/nodes have to be joined to an Active Directory domain — the same Active Directory domain. A cluster name object (CNO) is created in Active Directory when a WSFC is created. When a SQL Server failover clustered instance (FCI) or an Availability Group listener name is created, a corresponding virtual computer object (VCO) is also created in Active Directory. The CNO and VCO will also have their corresponding DNS entries created. This is described in this Microsoft TechNet article: Overview of Active Directory accounts needed by a failover cluster. However, this tight integration between a WSFC and Active Directory is the main cause of issues when deploying and managing SQL Server failover clustered instance (FCI) or an Availability Group.
Windows Server 2012 R2 attempted to remove WSFC dependency on Active Directory when the feature called Active Directory-detached Cluster was introduced. This allowed administrators to deploy a WSFC without a corresponding CNO and, thereby, no corresponding VCO in Active Directory. Only the corresponding DNS entries will be created. However, there is a caveat to implementing an Active Directory-detached WSFC: this still requires that the WSFC member servers/nodes are joined to an Active Directory domain.
Deploying an Active Directory Domain-independent WSFC
The previous tip on Step-by-step Installation of SQL Server 2016 on a Windows Server 2016 Failover Cluster – Part 1 introduced a new feature in Windows Server 2016: Active Directory domain-independent failover clusters. This enables administrators to deploy a WSFC without an Active Directory domain. The WSFC member servers/nodes could be a part of a workgroup and this configuration is a viable migration path from Database Mirroring to Availability Group.
While you can also create a WSFC with member servers/nodes in different Active Directory domains or forests, the goal of this tip is to create a WSFC with member servers/nodes that are not joined to an Active Directory domain in preparation for deploying a SQL Server Availability Group.
Prerequisites
Hardware
The hardware requirements for deploying a WSFC — whether the member servers/nodes are joined to an Active Directory domain or not — remain the same. All of the servers should be running Windows Server 2016 and must have the Windows Server 2016 Certified logo on the underlying hardware. And since the WSFC will be used specifically for SQL Server 2016 Availability Group, there is no requirement to use shared storage.
Accounts
The account that you will use to create the WSFC needs to be a member of the local Administrators group — this was the same in previous versions of the Windows Server operating system. This allows you to perform the installation and configuration of the WSFC. While you can use the built-in local Administrator account, it is recommended to have a dedicated local user account specifically for this purpose. However, because there is not a centralized directory service like Active Directory for managing accounts, you will be responsible for manually managing the account on all of the member servers/nodes in your WSFC.
A couple of things that you need to do:
- Create a local user account on all of the member servers/nodes in the WSFC
- The user name and password of the local user account must be the same on all of the member servers/nodes
- Add the local user account as a member of the local Administrators group. In this example, the local user account clussvc was created. This will be used to create and manage the WSFC
- Change the Remote User Account Control (UAC) LocalAccountTokenFilterPolicy registry setting. This registry setting affects how administrator credentials are applied to remotely administer the server. Since you are using a local user account, you will be passing the credentials from one of the member servers/nodes in the WSFC to another to perform administrative tasks. You need to do this on all of the member servers/nodes in the WSFC.
Open an elevated PowerShell command prompt and run the command below.
New-ItemProperty -Path HKLM:\SOFTWARE\Microsoft\Windows\CurrentVersion\Policies\System -Name LocalAccountTokenFilterPolicy -Value 1
DNS
Because the WSFC will be deployed without an Active Directory CNO, it will have to rely on DNS for both the administrative and client access points. This means that the DNS can potentially become a single point of failure. Talk to your DNS administrators regarding the reliability and resiliency of your DNS infrastructure. In the example below, the network adapter that will be used for client connectivity is configured to have both a preferred and an alternate DNS server. This has to be done on all of the member servers/nodes in the WSFC.
You also need to configure the primary DNS suffix for all of the member servers/nodes in the WSFC. The primary DNS suffix is used in DNS name registration and DNS name resolution. This is for every member servers/nodes in the WSFC to access each other via a fully qualified domain name (FQDN).
To configure the primary DNS suffix for a server,
- Open the System properties of the server
- In the Computer Name tab, click the Change button.
- In the Computer Name/Domain Changes dialog box, review the network membership of the server. In the example below, the server is not a member of any Active Directory domain.
- Click the More… button.
- In the DNS Suffix and NetBIOS Computer Name dialog box, type the name of the DNS domain name in the Primary DNS suffix of this computer textbox. The example below uses the TESTDOMAIN.COM DNS domain name for the server.
- Click OK until all of the dialog boxes have been closed. You will be prompted to reboot the server.
After configuring the primary DNS suffix on all of the member servers/nodes in the WSFC, you need to add their corresponding DNS entries. This is simply a mapping of the server hostname with its IP address. You can either ask your DNS administrator to perform this task for you or you can do it yourself, assuming you have administrative privileges on the DNS server.
- To create the DNS entries on a Microsoft DNS server, open the DNS Manager administrative console.
- Expand the Forward Lookup Zone for the DNS namespace that you used for the server’s primary DNS suffix. For this example, the Forward Lookup Zone for the DNS namespace TESTDOMAIN.COM is used.
- Right-click on the DNS namespace and select the New Host (A or AAAA) … option

- In the New Host dialog box, type the server hostname and its corresponding IP address. Click the Add Host button to add the DNS entry.
Do this for all of the member servers/nodes in the WSFC. For this example, the servers WSFC2016-WG1, WSFC2016-WG2, and WSFC2016-WG3 will be used.

After adding the DNS entries, perform a simple DNS resolution test by using the PING command.

Alternatively, if you are doing this for testing purposes, you can use local HOSTS file to perform the IP-to-hostname mappings.
DNS Dynamic Updates
Depending on how your DNS servers are configured, you need to talk to your DNS administrators regarding DNS dynamic updates. DNS client computers can use dynamic update to register and dynamically update their resource records with a DNS server whenever changes occur. This is typically used in conjunction with a DHCP server because the IP addresses of computers change on a regular basis.
Dynamic updates are performed in a secure fashion in DNS zones that are configured for Active Directory integration. This is a common configuration. However, if you don’t have an Active Directory infrastructure, the configuration might be slightly different. Below is a screenshot of how a Microsoft DNS server is configured for dynamic updates.
If not properly configured, the Failover Cluster Validation Wizard will fail. You can temporarily switch this to the Nonsecure and secure option prior to creating the WSFC and switch it back afterwards.
NOTE: The DNS-related tasks described above apply to Microsoft DNS servers. The process will be different if you are running a BIND DNS server in your network.
In the next tip in this series, you will go thru the process of creating the WSFC and configure the cluster quorum settings.
Next Steps
- Review the previous tips on Step-by-step Installation of SQL Server 2016 on a Windows Server 2016 Failover Cluster – Part 1, Part 2, Part 3 and Part 4
- Review the previous tip on Implementing Database Mirroring in SQL Server 2005 across domains
- Read more on the following topics
- Workgroup and Multi-domain clusters
- Workgroup and Multi-domain clusters in Windows Server 2016
- Deploy an Active Directory-detached Cluster
- Understanding Dynamic DNS Updates
Windows allows us to create two or more node failover clusters between servers.
SQL Server Availability Groups were introduced in SQL Server 2012 as a replacement to Database Mirroring. While Database Mirroring was intended to be either a high availability OR disaster recovery solution, Availability Groups can be used for both local high availability AND disaster recovery. You can have multiple Availability Group replicas, depending on the version of SQL Server that you are using.
Here at Ibmi Media, as part of our Server Management Services, we regularly help our Customers to perform related Windows queries.
In this context, we shall look into Workgroup Failover Cluster without Active Directory.
Workgroup Failover Cluster without Active Directory in Windows
The new version of Windows allows us to create two or more nodes failover clusters between servers joined to different domains.
We can also create nodes between workgroup servers – a so-called Workgroup Cluster.
Obviously, we need to install Windows Server 2016 on all cluster nodes.
It supports the following cluster scenarios:
Service          Status                          Comment
SQL server       Supported                        It is recommended to use the integrated SQL Server authentication
File server      Supported, but not recommended   Kerberos authentication for SMB is not supported
Hyper-V          Supported, but not recommended   Live Migration is not supported, only Quick migration is available
Message Queuing  Not supported                    MSMQ stores its properties in Active Directory
On all future cluster nodes:
1. Initially, we install the Failover Clustering role:
Install-WindowsFeature Failover-Clustering –IncludeManagementTools<
2. Then we create a local account with the administrator privileges with the same passwords:
net user /add clustadm Sup33P@ssw0Rd!
net localgroup administrators clustadm /add
3. In case of the error, Requested Registry access is not allowed, we edit the remote UAC parameter in the registry:
New-ItemProperty -Path HKLM:\SOFTWARE\Microsoft\Windows\CurrentVersion\Policies\System -Name LocalAccountTokenFilterPolicy -Value 1
4. We set the same primary DNS suffix. It enables the cluster servers to communicate by FQDN names.
5. Then we uncheck Register DNS connection addresses in the Advanced TCP/IP Settings.
6. We make changes to the host’s file so that the servers can resolve the names of other cluster members and the name of the cluster.
We add the names to c:\windows\system32\drivers\etc\hosts as follows:
Set file=”%windir%\System32\drivers\etc\hosts”
echo 192.168.1.21 clust-host1 >> %file%
echo 192.168.1.21 clust-host1.mylocal.net >> %file%
echo 192.168.1.22 clust-host2 >> %file%
echo 192.168.1.22 clust-host2.mylocal.net >> %file%
echo 192.168.1.20 cluster1 >> %file%
echo 192.168.1.20 cluster1.mylocal.net>> %file%
To validate cluster nodes, we run:
test-cluster -node “clust-host1.mylocal.net”,” clust-host2.mylocal.net”
Then to create a cluster using PowerShell, we run:
New-Cluster -Name cluster1 -Node clust-host1.mylocal.net, clust-host2.mylocal.net -AdministrativeAccessPoint DNS -StaticAddress 192.168.1.20
We can check the status of the cluster and its components using get-cluster and get-clusterresource cmdlets.
To connect the cluster through a GUI, we need to use Failover Cluster Manager snap-in.
Then, using Connect to cluster menu item, we can connect to the created cluster.
Suppose, the cluster has an even number of servers, then we have to configure a witness resource.
However, we cannot use the SMB shared folder as a quorum witness.
It supports two modes:
- Disk Witness – a shared disk.
- Cloud Witness – a cloud disk resource in Azure.
[Need help with the cluster settings? We’d be happy to assist. ]
In Windows Server 2012 R2 , you can deploy a failover cluster without dependencies in Active Directory Domain Services (AD DS) for network names. This is referred to as an Active Directory-detached cluster. Using this deployment method enables you to create a failover cluster without the previously required permissions for creating computer objects in AD DS or the need to request that computer objects are prestaged in AD DS.
When you create an Active Directory-detached cluster, the cluster network name (also known as the administrative access point) and network names for any clustered roles with client access points are registered in Domain Name System (DNS). However, no computer objects are created for the cluster in AD DS. This includes the computer object for the cluster (also known as the cluster name object or CNO) and computer objects for any clustered roles that would typically have client access points in AD DS (also known as virtual computer objects or VCOs).
To deploy an Active Directory-detached cluster, you must use Windows PowerShell. You cannot use Failover Cluster Manager. To create the failover cluster, start Windows PowerShell as an administrator, and then use the New-Cluster cmdlet with the –AdministrativeAccessPoint parameter set to a value of Dns.
But how to create such a cluster
New-Cluster SQLCL02 –Node mvpsql021,mvpsql022 –StaticAddress 10.255.255.12 -NoStorage –AdministrativeAccessPoint Dns

New-Cluster SQLCL02 –Node mvpsql021,mvpsql022 –StaticAddress 10.255.255.12 -NoStorage –AdministrativeAccessPoint Dns
the key is in the –AdministrativeAccessPoint
The option gives you the cluster you want.
PARAMETERS
-AdministrativeAccessPoint <AdminAccessPoint>
Specifies the type of administrative access point that the cmdlet creates for the cluster. The acceptable
values for this parameter are:
— ActiveDirectoryAndDns. The cmdlet creates an administrative access point for the cluster. The
administrative access point is registered in DNS and enabled in Active Directory Domain Services.
— Dns. The cmdlet creates an administrative access point for the cluster. The administrative access point is
registered in DNS but is not enabled in Active Directory Domain Services.
— None. The cmdlet does not create an administrative access point for the cluster. Some clustered roles and
functionality might not be available for a cluster that does not have an administrative access point. Also,
you cannot use Failover Cluster Manager to manage a cluster that does not have an administrative access point.
There is only one way to show the state of the cluster
(Get-Cluster).AdministrativeAccessPoint

But is a non domain joined CNO any usefull ?
Well I see no good reasons why you would do this.
You can set the type of administrative access point only when you create the cluster. You cannot change it after the cluster is deployed.
SO If you build a SQL cluster and later you think oh I need Kerberos there is NO PowerShell option
set-cluster –AdministrativeAccessPoint ActiveDirectoryAndDns
You will have to rebuild your cluster !
| Cluster Workload | Supported/Not Supported | More Information |
|---|---|---|
|
SQL Server |
Supported |
We recommend that you use SQL Server Authentication for an Active Directory-detached cluster deployment. |
|
File server |
Supported, but not recommended |
Kerberos authentication is the preferred authentication protocol for Server Message Block (SMB) traffic. |
|
Hyper-V |
Supported, but not recommended |
Live migration is not supported because it has a dependency on Kerberos authentication. Quick migration is supported. |
|
Message Queuing (also known as MSMQ) |
Not supported |
Message Queuing stores properties in AD DS. |
In addition, be aware of the following issues for this type of cluster deployment:
- BitLocker Drive Encryption is not supported.
- Cluster-Aware Updating (CAU) in self-updating mode is not supported.
Robert Smit is Senior Technical Evangelist and is a current Microsoft MVP in Clustering as of 2009.
Robert has over 20 years experience in IT with experience in the educational, health-care and finance industries.
Robert’s past IT experience in the trenches of IT gives him the knowledge and insight that allows him to communicate effectively with IT professionals
who are trying to address real concerns around business continuity, disaster recovery and regulatory compliance issues. Robert holds the following certifications:
MCT — Microsoft Certified Trainer, MCTS — Windows Server Virtualization, MCSE, MCSA and MCPS. He is an active participant in the Microsoft newsgroup community and is currently focused on Hyper-V, Failover Clustering, SQL Server, Azure and all things related to Cloud Computing and Infrastructure Optimalization.
Follow Robert on Twitter @ClusterMVP
Or follow his blog https://robertsmit.wordpress.com
Linkedin Profile Http://nl.linkedin.com/in/robertsmit
Robert is also capable of transferring his knowledge to others which is a rare feature in the field of IT. He makes a point of not only solving issues but also of giving on the job training of his colleagues.
A customer says » Robert has been a big influence on our technical staff and I have to come to know him as a brilliant specialist concerning Microsoft Products. He was Capable with his in-depth knowledge of Microsoft products to troubleshoot problems and develop our infrastructure to a higher level. I would certainly hire him again in the future. »
Details of the Recommendation: «I have been coordinating with Robert implementing a very complex system. Although he was primarily a Microsoft infrastructure specialist; he was able to understand and debug .Net based complext Windows applications and websites. His input to improve performance of applications proved very helpful for the success of our project
View all posts by Robert Smit [MVP]
This is a step by step demonstration to help database administrator deploy SQL Server 2016 Always On high availability solution on core version of Windows server 2016 without Active Directory domain. The demonstration environment will be created as following,
* Two servers are Windows Server 2016 Datacenter core version (without Desktop Experience) configured with two network interface (NIC)
* First server (node 1) configuration:
host name: sqln1.lab.dbaplus.ca
NIC 1: 10.10.25.201
NIC 2: 192.168.1.201
* Second server (node 2) configuration:
host name: sqln2.lab.dbaplus.ca
NIC 1: 10.10.25.202
NIC 2: 192.168.1.202
* Database is SQL Server 2016 Enterprise
1. Install Windows Server 2016 Datacenter on both nodes
The installation is pretty straight forward. Please choose «Windows Server 2016 Datacenter» when you are asked to select the operating system you want to install. This option (called core version) does not include a GUI, and the server can be fully managed locally or remotely with Windows PowerShell or other tools.
After finishing the installation process and automatic reboot, you will have an option to create an administrator password. Make sure use same password for administrator on both nodes.
2. Remove password complexity and password age policy (optional)
This is optional step and not recommended for production environment. I have many test-purpose hosts and do not want to change passwords periodically and remember many complicated passwords.
Export security settings by PowerShell command secedit
PS C:\> secedit /export /cfg c:\secPolicy.cfg /areas securitypolicy
The task has completed successfully.
See log %windir%\security\logs\scesrv.log for detail info.
Open the exported text file with notepad
PS C:\> notepad secPolicy.cfg
Change values of «PasswordComplexity» and «MaximumPasswordAge» as following, then exit notepad with saving changes
[System Access]
… …
MaximumPasswordAge = -1
… …
PasswordComplexity = 0
… …
Write back the new values to system
PS C:\> secedit /configure /db c:\windows\security\local.sdb /cfg c:\secPolicy.cfg /areas SECURITYPOLICY
The task has completed successfully.
See log %windir%\security\logs\scesrv.log for detail info.
Now, I can use my favorite password for administrator and never need to change it 
C:\>net user administrator microsoft
The command completed successfully.
3. Configure computer name and the Primary DNS Suffix
By default, Primary DNS Suffix is empty for standalone (not in Active Directory domain) Windows server. To be able to create a Windows cluster without any Active Directory domain, Primary DNS Suffix has to be set to same value on all nodes. Here, lab.dbaplus.ca is used as Primary DNS Suffix.
Find out current computer name of node 1
C:\>hostname
WIN-EN0L6Q2PN7B
C:\>echo %computername%
WIN-EN0L6Q2PN7B
Show current Primary DNS Suffix node 1
C:\>ipconfig /all
Windows IP Configuration
Host Name . . . . . . . . . . . . : WIN-860APORJIRT
Primary Dns Suffix . . . . . . . :
Node Type . . . . . . . . . . . . : Hybrid
IP Routing Enabled. . . . . . . . : No
WINS Proxy Enabled. . . . . . . . : No
<<Content truncated>>
Change computer name and the primary DNS suffix on node1
C:\>netdom computername %computername% /add:sqln1.lab.dbaplus.ca
Successfully added sqln1.lab.dbaplus.ca
as an alternate name for the computer.
The command completed successfully.
C:\>netdom computername %computername% /makeprimary:sqln1.lab.dbaplus.ca
Successfully made sqln1.lab.dbaplus.ca
the primary name for the computer. The computer must be rebooted for this name
change to take effect. Until then this computer may not be able to authenticate
users and other computers, and may not be authenticated by other computers in
the forest. The specified new name was removed from the list of alternate
computer names. The primary computer name will be set to the specified new
name after the reboot.
The command completed successfully.
Reboot node1
c:\>shutdown /r /t 0
Confirm the changes
C:\Users\Administrator>hostname
sqln1
C:\Users\Administrator>ipconfig /all
Windows IP Configuration
Host Name . . . . . . . . . . . . : sqln1
Primary Dns Suffix . . . . . . . : lab.dbaplus.ca
Node Type . . . . . . . . . . . . : Hybrid
IP Routing Enabled. . . . . . . . : No
WINS Proxy Enabled. . . . . . . . : No
DNS Suffix Search List. . . . . . : lab.dbaplus.ca
<<content truncated>>
In same way, change computer name & Primary DNS Suffix of node 2 to sqln2 & lab.dbaplus.ca.
4. Configure IP addresses
List available network interface,
PS C:\> get-NetIPInterface -AddressFamily IPv4
ifIndex InterfaceAlias AddressFamily NlMtu(Bytes) InterfaceMetric Dhcp ConnectionState PolicyStore
——- ————— ————- ———— ————— —- ————— ————
3 Ethernet 2 IPv4 1500 25 Enabled Connected ActiveStore
4 Ethernet IPv4 1500 25 Enabled Connected ActiveStore
1 Loopback Pseudo-Interface 1 IPv4 4294967295 75 Disabled Connected ActiveStore
Configure IP addresses on sqln1 (node 1)
PS C:\> new-NetIPaddress -InterfaceAlias Ethernet -IPAddress 10.10.25.201 -PrefixLength 24 -DefaultGateway 10.10.25.1
IPAddress : 10.10.25.201
InterfaceIndex : 2
InterfaceAlias : Ethernet
AddressFamily : IPv4
<<content truncated>>
PolicyStore : ActiveStore
IPAddress : 10.10.25.201
InterfaceIndex : 2
InterfaceAlias : Ethernet
AddressFamily : IPv4
<<content truncated>>
PolicyStore : PersistentStore
PS C:\> new-NetIPaddress -InterfaceAlias «Ethernet 2» -IPAddress 192.168.1.201 -PrefixLength 24
IPAddress : 192.168.1.201
InterfaceIndex : 4
InterfaceAlias : Ethernet 2
AddressFamily : IPv4
<<content truncated>>
PolicyStore : ActiveStore
IPAddress : 192.168.1.201
InterfaceIndex : 4
InterfaceAlias : Ethernet 2
AddressFamily : IPv4
<<content truncated>>
PolicyStore : PersistentStore
Confirm the changes,
PS C:\> get-NetIPConfiguration
InterfaceAlias : Ethernet 2
InterfaceIndex : 3
InterfaceDescription : Intel(R) PRO/1000 MT Desktop Adapter #2
NetProfile.Name : Unidentified network
IPv4Address : 192.168.1.201
IPv6DefaultGateway :
IPv4DefaultGateway :
DNSServer : fec0:0:0:ffff::1
fec0:0:0:ffff::2
fec0:0:0:ffff::3
InterfaceAlias : Ethernet
InterfaceIndex : 4
InterfaceDescription : Intel(R) PRO/1000 MT Desktop Adapter
NetProfile.Name : Network 2
IPv4Address : 10.10.25.201
IPv6DefaultGateway :
IPv4DefaultGateway : 10.10.25.1
DNSServer : fec0:0:0:ffff::1
fec0:0:0:ffff::2
fec0:0:0:ffff::3
In same way on sqln2 (node 2), configure 10.10.25.202 for network interface «Ethernet» and 192.168.1.202 for «Ethernet 2»
5. Configure host naming
Configure following FQDN of both nodes in DNS server.
  sqln1.lab.dbaplus.ca
  sqln2.lab.dbaplus.ca
If DNS server is not configured in the network, add following lines to file C:\Windows\System32\drivers\etc\hosts on both nodes
  10.10.25.201   sqln1.lab.dbaplus.ca
  10.10.25.202   sqln2.lab.dbaplus.ca
It guarantee both nodes’ FQDN can be resolved if DNS is not configured in the network. Otherwise, Windows Cluster cannot be created.
6. Disable firewall (optional)
Firewall rules could become your headache when building new server or deploying new service on existing server, because you have to figure out how the communication is created between server and client (protocol, data flow direction, port number, etc). Typically, following protocol/port (may be different on your servers) have to be enabled on the firewall,
   TCP 1433    - default port for SQL Server Instance
   TCP 1434    - default port for SQL Dedicated Admin Connection
   TCP 5022    - default port for SQL Always On Availability Group Endpoint
   TCP <port>  - port for SQL Always On Availability Group listener if you listener is created
Making it simple, I am going to disable the firewall.
Check current firewall state
C:\>netsh advfirewall show allprofiles state
Domain Profile Settings:
———————————————————————-
State ON
Private Profile Settings:
———————————————————————-
State ON
Public Profile Settings:
———————————————————————-
State ON
Ok.
Turning Off Firewall
C:\>netsh advfirewall set allprofiles state off
Ok.
C:\>netsh advfirewall show allprofiles state
Domain Profile Settings:
———————————————————————-
State OFF
Private Profile Settings:
———————————————————————-
State OFF
Public Profile Settings:
———————————————————————-
State OFF
Ok.
7. Install Windows Server Failover Cluster (WSFC)
One fabulous new feature of Windows Server 2016 is that WSFC can be created without any Active Directory domain. Therefore, SQL Server Always On which uses the functionality of WSFC can be deployed on servers without any Active Directory domain.
Check if WSFC is installed on all nodes
PS C:\> get-WindowsFeature -Name Failover-Clustering
Display Name Name Install State
———— —- ————-
[ ] Failover Clustering Failover-Clustering Available
Install WSFC on all nodes on which WSFS is not installed
PS C:\> Install-WindowsFeature -name Failover-Clustering -IncludeManagementTools
Success Restart Needed Exit Code Feature Result
——- ————— ——— —————
True No Success {Failover Clustering, Remote Server Admini…
PS C:\> get-WindowsFeature -Name Failover-Clustering
Display Name Name Install State
———— —- ————-
[X] Failover Clustering Failover-Clustering Installed
8. Create Windows cluster
Note: finish this step only on ONE node.
Make sure you have same password for administrators on all nodes before running following command on one of the nodes
PS C:\> new-cluster -name sqlcluster -Node sqln1,sqln2 -StaticAddress 10.10.25.203 -NoStorage -AdministrativeAccessPoint DNS
WARNING: There were issues while creating the clustered role that may prevent it from starting. For more information view the report file below.
WARNING: Report file location: C:\Windows\cluster\Reports\Create Cluster Wizard sqlcluster on 2019.05.01 At 13.05.30.htm
Name
—-
sqlcluster
Following warning message may be found in the report file created by new-cluster command,
An appropriate disk was not found for configuring a disk witness. The cluster is not configured with a witness. As a best practice, configure a witness to help achieve the highest availability of the cluster. If this cluster does not have shared storage, configure a File Share Witness or a Cloud Witness.
It can be ignored for testing system, but not recommended. As a best practice, it is strongly recommended to install and configure shared storage (i.e. SAN, iSCSI) as disk witness for the cluster.
9. Install SQL Server 2016 on both servers
Install SQL Server 2016 on sqln1 (node 1):
Setup.exe /QS /ACTION=Install /FEATURES=SQL,IS /INSTANCENAME=MSSQLSERVER /SQLSVCACCOUNT=»NT Service\MSSQLSERVER» /SQLSYSADMINACCOUNTS=»sqln1\Administrator» /AGTSVCACCOUNT=»NT Service\SQLSERVERAGENT» /IACCEPTSQLSERVERLICENSETERMS /SECURITYMODE=SQL /SAPWD=»microsoft″ /TCPENABLED=1
Install SQL Server 2016 on sqln2 (node 2):
Setup.exe /QS /ACTION=Install /FEATURES=SQL,IS /INSTANCENAME=MSSQLSERVER /SQLSVCACCOUNT=»NT Service\MSSQLSERVER» /SQLSYSADMINACCOUNTS=»sqln2\Administrator» /AGTSVCACCOUNT=»NT Service\SQLSERVERAGENT» /IACCEPTSQLSERVERLICENSETERMS /SECURITYMODE=SQL /SAPWD=»microsoft″ /TCPENABLED=1
10. Enables Always On feature on the instance of SQL Server
The Enable-SqlAlwaysOn PowerShell command enables Always On on an instance of SQL Server. If the Always On availability groups feature is enabled while the SQL Server service is running, the database engine service must be restarted for the changes to complete. Unless you specify the Force parameter, the command prompts you to restart the service.
To enable SQL Always On, we need to provide SERVERNAME\INSTANCENAME as value of the parameter -ServerInstance. If the default instance name is used like I did above (MSSQLSERVER), just provide the SERVERNAME.
Enable SQL Always On on sqln1 (node 1)
PS C:\> Enable-SqlAlwaysOn -ServerInstance sqln1 -Force
Enable SQL Always On on sqln2 (node 2)
PS C:\> Enable-SqlAlwaysOn -ServerInstance sqln2 -Force
11. Create Database Mirroring Endpoint with certificate-authenticating Database Mirroring Connections
SQL Always On replicates data from primary database to secondary database through Database Mirroring Connections between Endpoint of SQL instances. Therefore, Endpoints must be correctly configured as following on all nodes.
Note: All Transact-SQL statements have to be run in the master database. Since Windows Server is core version and GUI is not available, all Transact-SQL will be run locally with SQL Server command utility sqlcmd, start sqlcmd as SA and connect to master database as following (on all nodes)
C:\>sqlcmd -U sa
userPassword:
1> select db_name();
2> go
————————-
master
(1 rows affected)
Configure server instances for outbound mirroring connections on sqln1 (node1)
— Create a database master key
— Use a unique, strong password, and record it in a safe place. Do not use microsoft like me
CREATE MASTER KEY ENCRYPTION BY PASSWORD = ‘microsoft’
GO
— Create a new certificate
— When EXPIRY_DATE option is used to create certificate, it is recommended to use SQL Server Management
— Studio to create a Policy-Based Management rule to alert you when your certificates are expiring
CREATE CERTIFICATE sqln1_cert
WITH SUBJECT = ‘sqln1 certificate for database mirroring’,
EXPIRY_DATE = ’12/31/2029′
GO
— View the certificates in the master database
SELECT * FROM sys.certificates;
GO
— Check if the database mirroring endpoint exist on the server instances
SELECT name, role_desc, state_desc, connection_auth_desc, encryption_algorithm_desc
FROM sys.database_mirroring_endpoints;
GO
— Create an Endpoint if it does not exist
— Note: use ALTER ENDPOINT instead of CREATE ENDPOINT to link endpoint with new certificate created above (sqln1_cert)
CREATE ENDPOINT Endpoint_Mirroring
STATE = STARTED
AS TCP (
LISTENER_PORT = 5022,
LISTENER_IP = ALL
)
FOR DATABASE_MIRRORING(
AUTHENTICATION = CERTIFICATE sqln1_cert,
ROLE = ALL,
ENCRYPTION = REQUIRED ALGORITHM AES
);
GO
— Back up the certificate and the backup file will be copied to the other nodes.
BACKUP CERTIFICATE sqln1_cert TO FILE = ‘c:\sqln1_cert.cer’
GO
Configure server instances for outbound mirroring connections on sqln2 (node2)
CREATE MASTER KEY ENCRYPTION BY PASSWORD = ‘microsoft’
GO
CREATE CERTIFICATE sqln2_cert
WITH SUBJECT = ‘sqln2 certificate for database mirroring’,
EXPIRY_DATE = ’12/31/2029′
GO
CREATE ENDPOINT Endpoint_Mirroring
STATE = STARTED
AS TCP (
LISTENER_PORT = 5022,
LISTENER_IP = ALL
)
FOR DATABASE_MIRRORING(
AUTHENTICATION = CERTIFICATE sqln2_cert,
ROLE = ALL,
ENCRYPTION = REQUIRED ALGORITHM AES
);
GO
BACKUP CERTIFICATE sqln2_cert TO FILE = ‘c:\sqln2_cert.cer’
GO
Copy certificate backup to other nodes
— On sqln1 (node1)
C:\>dir *.cer
C:\>copy \\sqln2\c$\sqln2_cert.cer .\
C:\>dir *.cer
— On sqln2 (node2)
C:\>dir *.cer
C:\>copy \\sqln1\c$\sqln1_cert.cer .\
C:\>dir *.cer
Configure server instances for inbound mirroring connections on sqln1
— Create a login for the other node (sqln2)
— Substitute a password of your own for the sample password
CREATE LOGIN sqln2_login WITH PASSWORD = ‘microsoft’;
GO
— Check if login is created
SELECT name,create_date FROM sys.server_principals;
GO
—Create a user for that login
CREATE USER sqln2_user FOR LOGIN sqln2_login;
GO
— Check if user is created
select name,createdate from sys.sysusers;
GO
— Associate the certificate copied from other node (sqln2) with the user created above
CREATE CERTIFICATE sqln2_cert AUTHORIZATION sqln2_user FROM FILE = ‘C:\sqln2_cert.cer’;
GO
— Grant CONNECT permission on the login for the remote mirroring endpoint
GRANT CONNECT ON ENDPOINT::Endpoint_Mirroring TO sqln2_login;
GO
This completes setting up certificate authentication for sqln2 to log in to sqln1. Now, we need to perform the equivalent inbound steps for sqln1 on sqln2.
Configure server instances for inbound mirroring connections on sqln2
— Create a login for the other node (sqln1)
CREATE LOGIN sqln1_login WITH PASSWORD = ‘microsoft’;
GO
—Create a user for that login
CREATE USER sqln1_user FOR LOGIN sqln1_login;
GO
— Associate the certificate copied from other node (sqln1) with the user created above
CREATE CERTIFICATE sqln1_cert AUTHORIZATION sqln1_user FROM FILE = ‘C:\sqln1_cert.cer’;
GO
— Grant CONNECT permission on the login for the remote mirroring endpoint
GRANT CONNECT ON ENDPOINT::Endpoint_Mirroring TO sqln1_login;
GO
12. Create a test database on sqln1 for Always On feature testing
— Create database
create database TESTDB
go
— Check created databases
select name from sys.databases
go
— alter database to use the full recovery model
— Prerequisite for candidate database to join Availability Group
ALTER DATABASE TESTDB SET RECOVERY FULL;
GO
— Make a full backup
— Prerequisite for candidate database to join Availability Group through SQL Server Management Studio
backup database TESTDB to disk = ‘c:\testdb.bak’;
go
13. Create Availability Group
Run following Transact-SQL in master database on sqln1 where TESTDB is created
CREATE AVAILABILITY GROUP TESTGRP
WITH
(
AUTOMATED_BACKUP_PREFERENCE = SECONDARY,
)
FOR DATABASE TESTDB
REPLICA ON
‘sqln1’ WITH
(
ENDPOINT_URL = ‘TCP://sqln1.lab.dbaplus.ca:5022’,
FAILOVER_MODE = AUTOMATIC,
AVAILABILITY_MODE = SYNCHRONOUS_COMMIT,
SECONDARY_ROLE
(
ALLOW_CONNECTIONS = ALL
)
),
‘sqln2’ WITH
(
ENDPOINT_URL = ‘TCP://sqln2.lab.dbaplus.ca:5022’,
FAILOVER_MODE = AUTOMATIC,
SEEDING_MODE = AUTOMATIC,
AVAILABILITY_MODE = SYNCHRONOUS_COMMIT,
SECONDARY_ROLE
(
ALLOW_CONNECTIONS = ALL
)
)
GO
The Availability Group is created with following options,
* Database backup job should occur on a secondary replica except when the primary replica is the only online replica. In that case, the backup should occur on the primary replica.
* All connections are allowed to the databases in the secondary replica for read-only access.
* Automatic failover is enabled
* The secondary replica will be initially seeded (automatic seeding) over the network, and does not require to backup and restore a copy of the primary database on the replica
Run following Transact-SQL in master database on sqln2 to join sqln2 as the secondary replica to the availability group
ALTER AVAILABILITY GROUP TESTGRP JOIN;
GO
Grant create database permission on in master database on sqln2 (secondary replica) to availability group
ALTER AVAILABILITY GROUP TESTGRP GRANT CREATE ANY DATABASE
GO
Monitor the replication status by running Transact-SQL in master database on any any nodes
select ag.name as group_name, db.name as database_name, ar.replica_server_name,
rs.is_primary_replica, rs.synchronization_state_desc, rs.synchronization_health_desc
from sys.availability_groups ag, sys.dm_hadr_database_replica_states rs,
sys.availability_replicas ar, sys.databases db
where ag.group_id=rs.group_id and ar.replica_id=rs.replica_id and db.group_database_id=rs.group_database_id;
On the primary replica (sqln1), it returns a row for each primary database and an additional row for the corresponding secondary database
group_name database_name replica_server_name is_primary_replica synchronization_state_desc synchronization_health_desc
———- ————- ——————- —————— ————————— —————————
TESTGRP TESTDB sqln2 0 SYNCHRONIZED HEALTHY
TESTGRP TESTDB sqln1 1 SYNCHRONIZED HEALTHY
On a secondary replica (sqln2), it returns a row for every secondary database on the server instance
group_name database_name replica_server_name is_primary_replica synchronization_state_desc synchronization_health_desc
———- ————- ——————- —————— ————————— —————————
TESTGRP TESTDB sqln2 0 SYNCHRONIZED HEALTHY