
Download Article
Get faster performance by clearing your RAM cache
Download Article
- 3 Ways to Clear Your RAM Cache
- Other Ways to Free Up Memory
- Should you clear your RAM cache?
- Signs You’re Having Memory Problems
- Consider Buying More RAM
- Expert Interview
|
|
|
|
|
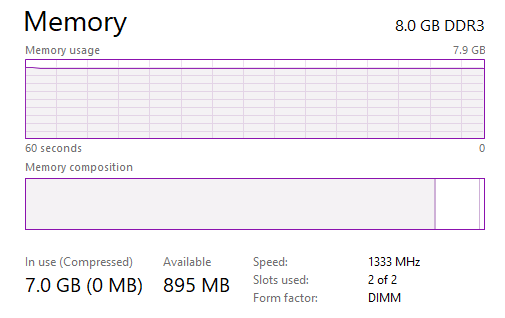
RAM cache is the portion of your RAM (Random Access Memory) used to store frequently accessed data by your computer. When your memory gets full, you may experience performance problems, error messages, program crashes, and more. Clearing your RAM cache can free up some memory and make your computer run a little better. This wikiHow article teaches you how to clear the RAM cache on your PC and gives you tips for improving performance.
- Restart your computer to flush your RAM cache.
- Install RAMMap to analyze RAM usage and clear RAM cache
- Create a desktop shortcut to clear the RAM cache.
-

The easiest way to clear your RAM cache is to save your work and restart your computer. When you restart your computer, all the data in your memory cache is cleared.
-

Advertisement
-
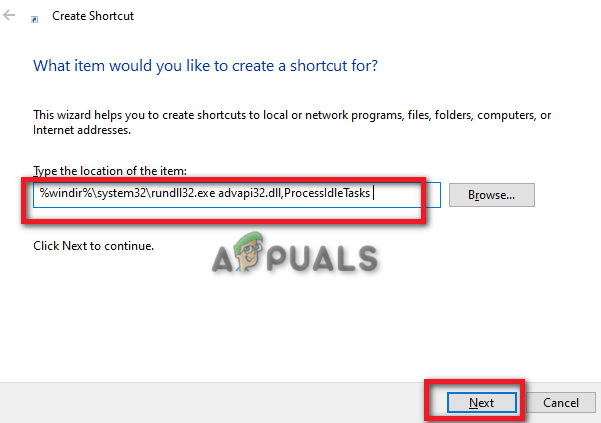
Use the following steps to create a desktop shortcut that will flush your RAM cache whenever you click it:
- Right-click a blank space on your desktop and select New > Shortcut.
- Enter %windir%\system32\rundll32.exe advapi32.dll,ProcessIdleTasks in the field where it asks you to enter the item location.
- Click Next.
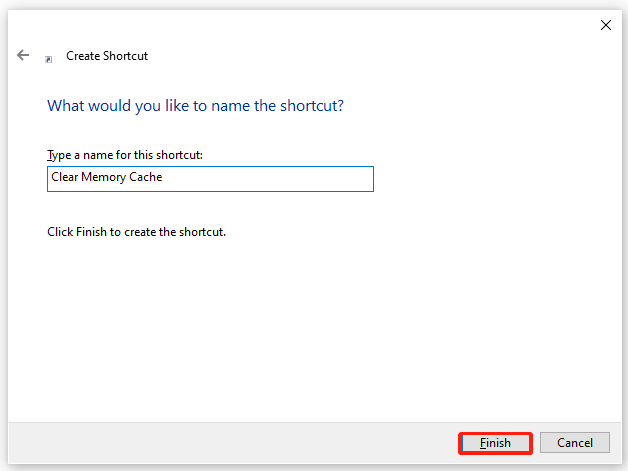
- Enter a name for the shortcut (i.e., «Flush RAM Cache») and click Finish.
- Double-click the shortcut on your desktop to flush your RAM cache.


Advertisement
-
Closing some background tasks and apps you’re not currently using can free up some memory for your computer to use and improve performance.
- Press Ctrl + Shift + Esc to open Task Manager.
- Click the Processes tab.
- Click a process that’s taking up a lot of RAM (check the «Memory» column).
- Click End Task.
-
Having too many tabs open in your browser uses a lot of RAM. Click the «x» icon in the tabs you’re not using to close them.
- If you have any extensions on your browser that you don’t use, you may want to remove them as well.
-
If your memory is getting full soon after starting your computer, you may have too many programs launching at startup. For some programs, you may need to disable launch at startup in the program’s settings menu.[2]
- Click the Windows Start menu.
- Click the Settings/Gear icon.
- Click Apps.
- Click Startup
- Click the toggle switch next to the apps you don’t want starting up with your computer.
-
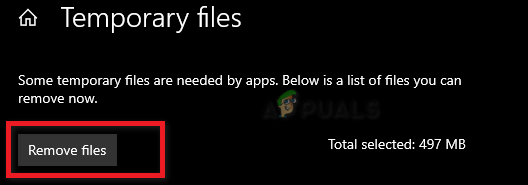
Temp files are temporary files used by various programs to temporarily store data, move files, manage settings, and more.[3]
Over time, they can accumulate and start to eat up your memory. Use the following steps to delete your temp files:- Press Windows Key + R to open Run.
- Enter %temp% in Run and click Ok.
- Press Ctrl + A to select everything.
- Press the Delete key.
-
Old software versions and driver versions may take up more memory. Newer versions of software and drivers may be optimized to use fewer resources, including memory. Be sure to update all the programs you use. You can update your drivers by updating Windows. Use the following steps to do so:
- Click the Windows Start menu.
- Click the Settings/Gear icon.
- Click Windows Update (Windows 11) or Update & Security (Windows 10).
- Click Windows Update (Windows 10).
- Click Check for Updates.
- Click Install Now.
-
Visual effects can look pleasing, but sometimes you would rather your computer run properly than look pretty. Luckily, Windows allows you to optimize visual effects for performance rather than appearance. Use the following steps to adjust your computer’s visual effects:
- Press Windows Key + R to open Run.
- Enter sysdm.cpl in Run and click Ok.
- Click the Advanced tab.
- Click Settings in the «Performance» box.
- Select Adjust for best performance and click Apply.
-
Page files have many functions. One of which is to store infrequently accessed data from the RAM. While RAM is cleared when you restart your computer, page files are not. Clearing the page files can help reduce the amount of RAM cache your computer uses. Use the following steps to set your system to clear the page file when your computer shuts down:
- Type regedit into the windows search bar and click Ok.
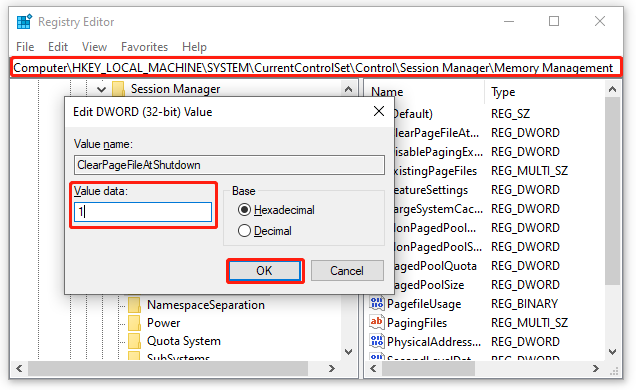
- Navigate to HKEY_LOCAL_MACHINE > SYSTEM > CurrentControlSet > Control > Session Manager > Memory Management.
- Double-click ClearPageFileAtShutdown
- Set the «Value data» to «1«.
- Click OK and restart your computer.


Advertisement
-
Your computer uses the RAM cache to store data from frequently used applications so that it can be accessed more easily. Clearing your RAM cache may actually make those applications run slower. If it does work, it may only be a temporary fix.

-
If you start seeing error messages like «Low memory» or «System out of resources,» this is usually a sign that your memory is full.
-
If you experience frequent program crashes or freezing, this could also be a sign that you don’t have enough memory to run that program.
-
If you notice your computer is slow or unresponsive, this may be a sign that your computer is running out of memory.
-
If you notice your computer is using more CPU than it should, this could be a sign that it doesn’t have enough RAM to run the tasks it needs.


Advertisement
-
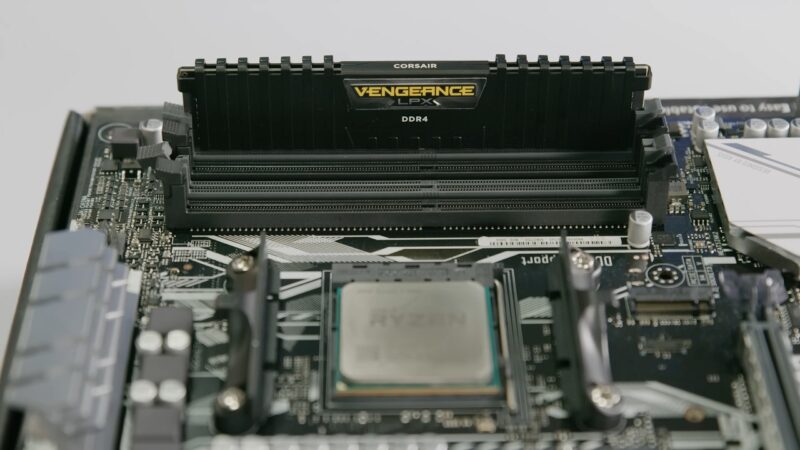
While freeing up RAM may temporarily boost performance on your PC, it is often a band-aid solution to a greater problem: Not having enough RAM. Most PCs have expandable RAM slots on the motherboard. You will need to research your computer model to see what type of motherboard it has and what type of RAM chips it’s compatible with so you can buy more RAM and install it.

Ask a Question
200 characters left
Include your email address to get a message when this question is answered.
Submit
Advertisement
Thanks for submitting a tip for review!
About This Article
Thanks to all authors for creating a page that has been read 25,852 times.
Is this article up to date?
Все способы:
- Способ 1: Перезагрузка компьютера
- Способ 2: ATM
- Способ 3: RAMMap
- Способ 4: Системные средства
- Вопросы и ответы: 6
ОС семейства Виндовс кэшируют данные запущенных приложений в оперативную память для ускорения их запуска. Устаревшие сведения обычно выгружаются автоматически, однако иногда требуется проводить их очистку самостоятельно. Сегодня мы рассмотрим то, как выполняется эта процедура в Windows 10.
Способ 1: Перезагрузка компьютера
Самый простой вариант решения озвученной задачи заключается в банальной перезагрузке компьютера, поскольку во время неё модули RAM кратковременно обесточиваются, что и удаляет кэшированное содержимое. Несмотря на свою простоту, этот метод доступен далеко не всегда, поэтому если рестарт компьютера невозможен, воспользуйтесь одним из способов ниже.
Способ 2: ATM
Следующий метод очистки кэша RAM заключается в использовании сторонних решений, одним из которых является программа ATM.
Скачать ATM с официального сайта
- Загрузите приложение, воспользовавшись ссылкой «Download ATM».
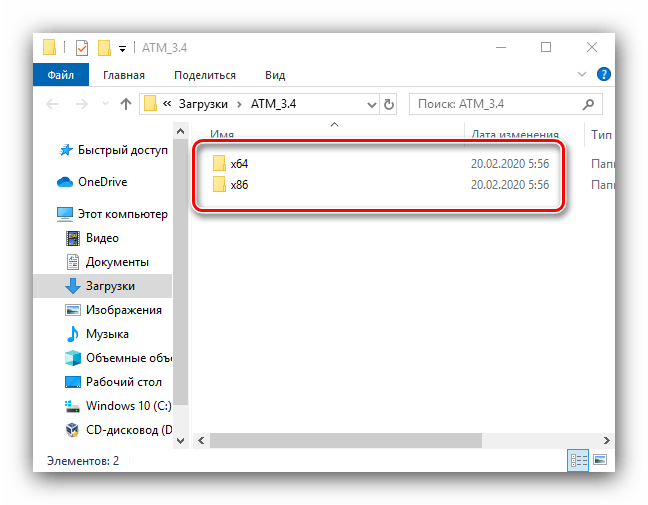
- Его не нужно устанавливать на компьютер – достаточно просто распаковать ZIP-архив. Там есть две папки, «x64» и «x86», воспользуйтесь последней, поскольку 64-разрядная версия работает нестабильно.

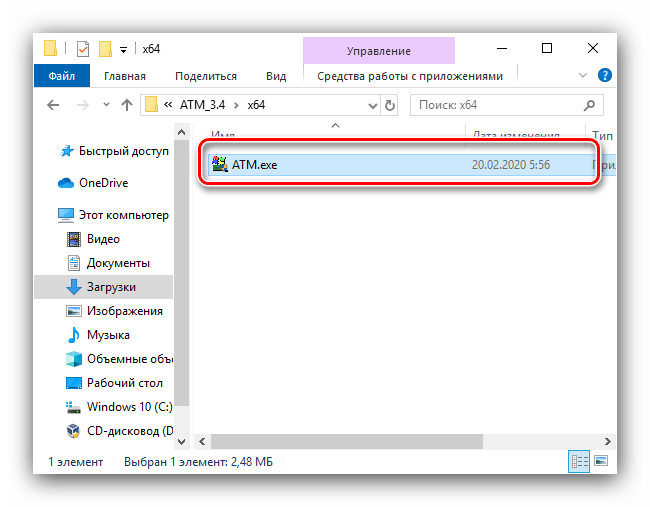
Запустите исполняемый файл с именем ATM.exe.
- Главное окно средства мало что скажет неопытному пользователю, однако нам нужны только две кнопки – «Flush Cache WS» и «Flush All Standby», последовательно нажмите их.


Рассмотренная утилита хорошо решает поставленную нами задачу, но обладает довольно громоздким интерфейсом и не имеет локализации на русский язык.
Способ 3: RAMMap
Компания Майкрософт знает о случаях бесконтрольной утечки пространства ОЗУ в кэш, поэтому создала приложение для решения этой проблемы, которое называется RAMMap.
Скачать RAMMap с официального сайта
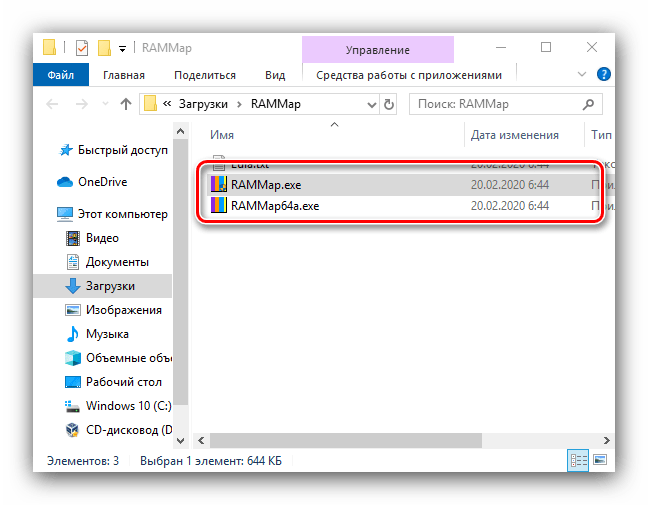
- Как и в случае первой упомянутой программы, РАММап не требуется устанавливать на компьютер, для работы нужно запустить один из исполняемых файлов.
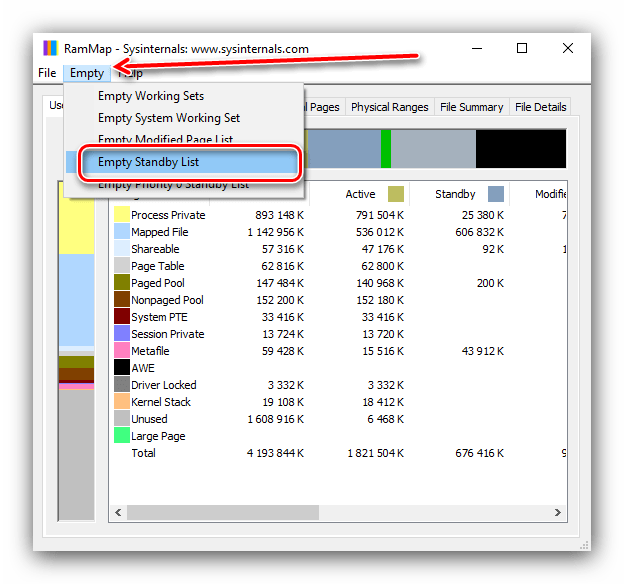
- Для очистки кэша воспользуйтесь пунктами «Empty» – «Empty Standby List».
- Проверьте результативность процедуры посредством вкладки «Производительность» в «Диспетчере задач» – скорее всего, кэш будет очищен.
Способ 4: Системные средства
Очистку кэша ОЗУ можно произвести и системными средствами, с помощью одной из системных утилит.
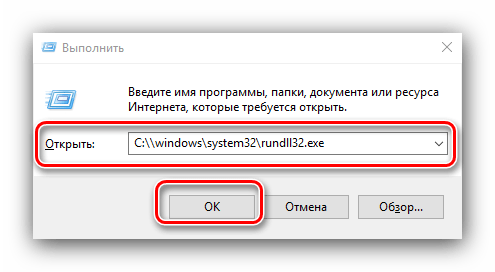
- Вызовите окно «Выполнить» комбинацией клавиш Win+R. Когда оно появится, введите запрос:
C:\\windows\system32\rundll32.exe
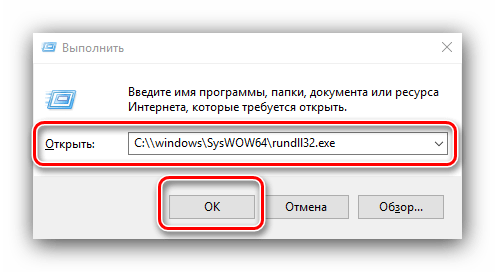
Для 64-разрядных версий «десятки» запрос выглядит так:
C:\\windows\SysWOW64\rundll32.exeПроверьте правильность ввода и нажмите «ОК».
- Запущенное средство работает в фоновом режиме без каких-либо уведомлений, поэтому нужно подождать около 10 секунд, после чего кэш должен быть очищен.
Системные средства довольно эффективны, и обычно не возникает потребности в установке сторонних программ.
Мы рассказали вам о методах очистки кэша оперативной памяти в Windows 10.
Наша группа в TelegramПолезные советы и помощь
It so annoying that your computer is running slowly due to a lot of cached memory. What is cache memory? How to clear RAM cache Windows 10/11? Now, let’s start exploring the answers together with MiniTool.
What Is Cache Memory
When opening the Task Manager, you may find the cached memory. What is cache memory? It is a chip-based computer component that can make the data be retrieved from the computer’s memory more efficiently. It severs as temporary storage where a computer’s processor can retrieve data between RAM and CPU.
Sometimes, however, you may find that lots of cached memory pile up and slow down your computer. In this case, you need to free up RAM cache timely. How to clear RAM cache Windows 10? Let’s keep reading.
How to Clear RAM Cache Windows 10/11
There are 8 applicable ways to clear memory cache Windows 10. You can try them in order.
# 1. Close the Hogging Tasks
The first and simplest solution is to close these memory-consuming processes. Here’s how to clear memory on Windows 10 by closing unwanted programs.
Step 1. Press Ctrl + Shift + Esc shortcut to open the Task Manager window and click on More details to access the full view.
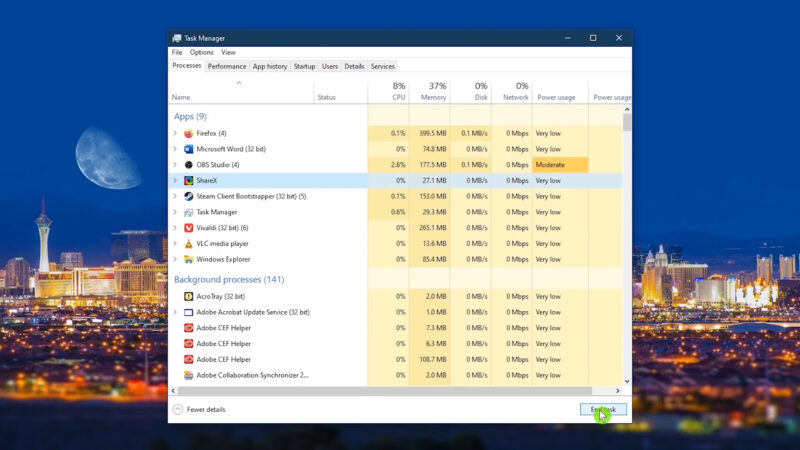
Step 2. In the Processes tab, click on the Memory header to sort from most to least RAM usage.
Step 3. Right-click the progress that takes up much RAM, and select End Task. Then repeat the same process for other tasks.
# 2. Reduce the Startup Programs
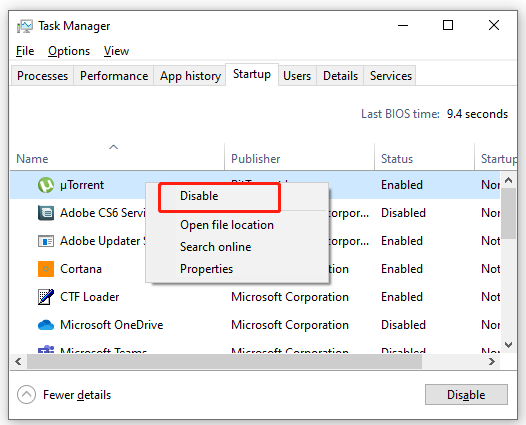
If there are many programs or apps running in the background, they may contribute to much cached memory. So, we recommend you reduce the startup programs. To clear memory cache Windows 10, open Task Manager, and then go to the Startup tab, right-click the program and select Disabled.
# 3. Disable Some Visual Effects
As you know, Windows 10 comes with lots of busy visual effects, which can take up much RAM. If you have a small RAM installed, these effects may affect your PC performance. To clear RAM cache, you can try reducing the visual effects.
Step 1. Press Win + E keys to open the File Explorer, and then right-click This PC entry and select Properties.
Step 2. Select About from the left window, and then scroll down the right sidebar and click on the Advanced system settings.
Step 3. Go to the Advanced tab and click on the Settings button under the Performance section.
Step 4. Tick the checkbox next to Adjust for the best performance to disable all the animated visual effects.
Tip: This operation will free up memory, but it limits your computer’s aesthetics significantly. So, you can also select Custom and choose some visual effects according to your preferences.
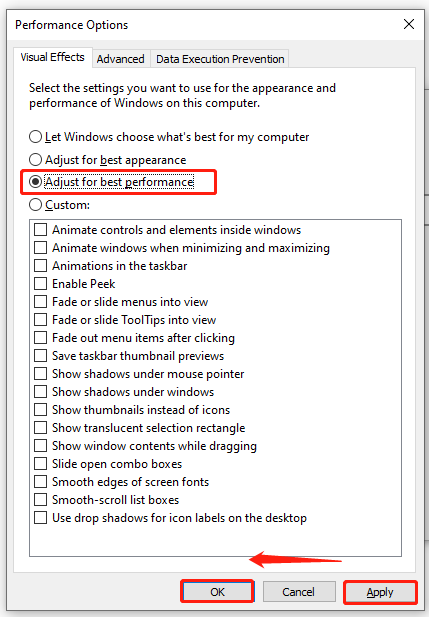
Step 5. Click on Apply and then on OK to save the change.
# 4. Clear Page File When Shutting Down
The system RAM will be cleared once you shut down the computer, but the page file is still stored on the hard drive. Clearing paging files can help clear memory cache Windows 10. Here you can clear the page file automatically clear when shutting down.
Step 1. Press Win + R keys to open the Run box, and then type regedit in it and hit Enter. Then click on Yes to open Registry Editor.
Step 2. Go to the following registry key via the left navigation bar:
HKEY_LOCAL_MACHINE/SYSTEM/CurrentControlSet/Control/Session Manager/ Memory Management
Step 3. With the Memory Management folder selected in the left panel, double click the ClearPageFileAtShutdown DWORD and set it Value data to 1, and click on OK.
# 5. Flush RAM Cache
There is a shortcut that can be used to flush the memory cache. If you don’t know how to do that, follow the steps below:
Step 1: Go to your desktop and right-click on any empty space.
Step 2: In the pop-up menu, select New > Shortcut.
Step 3. In the pop-up window, type %windir%system32rundll32.exe advapi32.dll,ProcessIdleTasks in the field and click on Next.
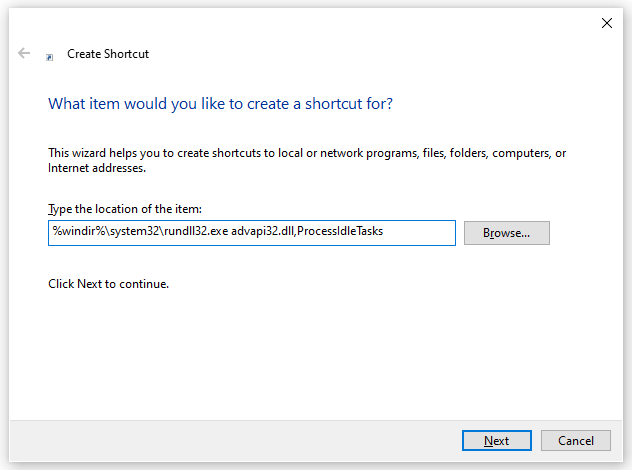
Step 4. Give a new name for the shortcut, such as Clear Memory Cache, and click on Finish. After that, you can double-click the shortcut at any time you want to flush the memory cache.
# 6. Check Your Device Driver
Sometimes outdated or corrupt device drivers can lead to many corrupt driver files, causing a memory leak. To avoid this problem, it’s important to keep your device driver updated. Here’s how to clear RAM cache Windows 10 by updating the device driver.
Step 1. Press the Win + R keys to open the Run dialog box, and then type devmgmt.msc and hit Enter to open Device Manager.
Step 2. Expand each category inside Device Manager and look for the driver marked with a yellow exclamation mark icon. It indicates there’s a driver issue.
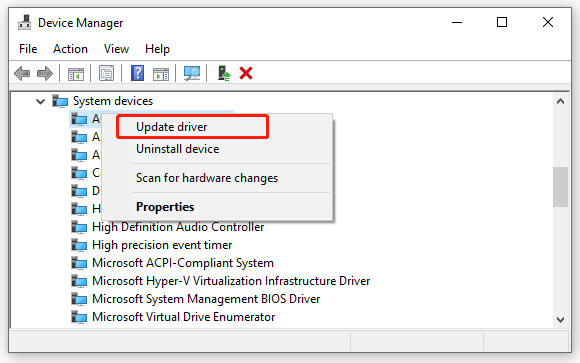
Step 3. Right-click the device driver and select Update driver, and follow the on-screen instructions to install the latest version of the device driver.
# 7. Clear RAM Cache Using RamMap
You can also utilize a professional memory cleaner tool like RamMap to free up memory cache. Here’s a tutorial on how to clear memory cache Windows 10 using RamMap.
Step 1. Click here to download RamMap from the Microsoft Official website.
Step 2. Once downloaded, extract it on your computer and double click the executable file to run RamMap.
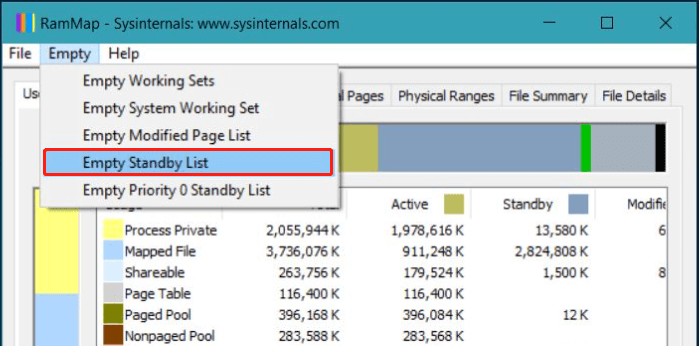
Step 3. In the main interface, select Empty from the top toolbar and click on Empty Standby list.
# 8. Add More RAM
Of course, the most effective way on how to clear memory on Windows 10 is to add more RAM. This solution can help fix the high memory usage fundamentally. If you have a tiny amount of RAM, we recommend you use this method.
There are 2 appliable options to add more RAM. The first option is to use the Windows built-feature ReadyBoost along with a USB, and the other is to upgrade your RAM to a larger one. To do so, you can refer to the following guides:
How to Use USB as RAM to Speed Up Your Windows (ReadyBoost)
How to Install RAM in Your PC – Here’s a Complete Guide
Tips:
Experience peak PC performance with MiniTool System Booster — Free up RAM for a smoother computing journey.
MiniTool System Booster TrialClick to Download100%Clean & Safe
The performance and efficiency of a Windows operating system heavily depend on how it manages its Random Access Memory (RAM). Over time, the RAM can become cluttered with residual data from various applications, leading to a decrease in system performance.
Clearing the RAM cache is a vital maintenance step for any Windows user, aimed at improving system responsiveness and efficiency.
In this article, we’ll explore the necessity of clearing the RAM cache in Windows, provide detailed instructions on how to do it, and discuss the potential impacts on system performance.
Step-by-Step Guide
Step 1: Open the Task Manager by pressing Ctrl + Shift + Esc.
Step 2: Under the “Processes” tab, identify applications that are using a significant amount of memory but are not currently needed.
Step 3: Select these applications and click “End Task” to close them and free up RAM.
Using Command Prompt
Step 1: Press Win + R, type cmd, and press Enter to open the Command Prompt.
Step 2: Type ipconfig /flushdns and press Enter. This command clears the DNS cache, freeing up some RAM.
Step 3: Type Rundll32.exe advapi32.dll, ProcessIdleTasks and press Enter. This command allows Windows to perform maintenance tasks that can help free up memory.
Disk Cleanup Utility
Step 1: Type Disk Cleanup in the Windows search bar and open the utility.
Step 2: Select the drive you want to clean (usually C:).
Step 3: Check the boxes next to the files you want to delete (such as Temporary Files) and click “OK” to clear them, which can indirectly help free up RAM.
How to Automate RAM Cache Clearing
Windows includes a feature for automatic maintenance, which can help manage the RAM cache. You can set it up by going to the Control Panel, selecting “System and Security,” and then “Security and Maintenance.” Here, you can adjust the settings for automatic maintenance, including the time it runs.
Third-Party Software Solutions
There are numerous third-party applications designed to automatically clear the RAM cache. These programs often provide more options and flexibility compared to built-in Windows features. Some popular choices include CCleaner and RAMRush.
Scheduled Tasks
For advanced users, creating scheduled tasks in Windows Task Scheduler can be an effective way to automate RAM cache clearing. This requires scripting knowledge but offers a high degree of customization and control over when and how the RAM cache is cleared.
What Happens After This Process?
1. Immediate Performance Improvements
After clearing the RAM cache, users often notice an immediate improvement in their system’s performance. Applications may load faster, and switching between programs becomes smoother. This is particularly noticeable in systems that were experiencing significant slowdowns due to RAM constraints.
2. Long-Term System Health
Regularly clearing the RAM cache can contribute to the long-term health and efficiency of your computer. It prevents the accumulation of unnecessary data, ensuring that the system resources are optimally utilized. This can extend the lifespan of your hardware by reducing the strain on the system.
Considerations and Best Practices
While the whole process is beneficial, it should be done judiciously. Frequently closing and reopening applications can lead to more wear and tear on the hard drive. Understanding the balance between maintaining sufficient cache for efficient operation and clearing redundant data is key.
Advanced Techniques
| Method | Description |
|---|---|
| Resource Monitor | The Resource Monitor tool in Windows offers a detailed overview of RAM and resource utilization. It allows users to pinpoint processes and services consuming excessive memory. This data aids in informed decisions regarding application closure or optimization. |
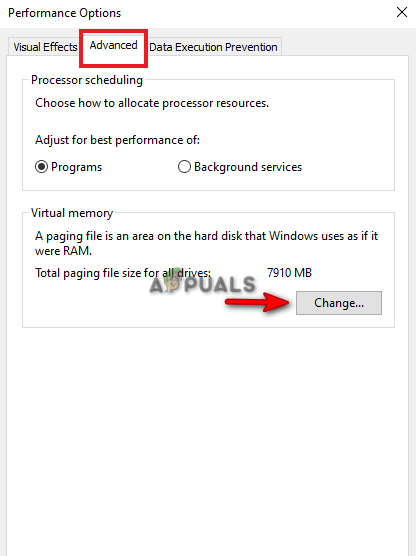
| Virtual Memory Adjustment | Virtual memory serves as an extension of physical RAM when RAM is fully utilized. Managing virtual memory settings can enhance system performance. This involves sizing the paging file appropriately, which acts as a RAM buffer. Access this via System Properties -> Advanced system settings -> Performance Settings -> Advanced tab -> Change under Virtual Memory. |
| Group Policy Editor (Pro Versions) | In professional and enterprise Windows versions, the Group Policy Editor provides various tweaks for RAM optimization. These adjustments encompass managing application working set sizes and system caching policies. Caution is advised as these changes can significantly impact system behavior. |
RAM plays a crucial role in the functioning of your computer. It temporarily stores data for active programs and processes, allowing for quicker access than reading from the hard drive. However, when it is full, your system may start to slow down, as it has to rely more on the slower hard disk.
Cache memory is a small-sized type of volatile computer memory that provides high-speed data access to a processor and stores frequently used computer programs, applications, and data.
However, when the cache is not managed properly, it can lead to decreased performance. Excessive or outdated cache can occupy a significant portion of the RAM, slowing down the system.
Benefits
Regularly clearing the RAM cache can help improve the performance of your Windows computer. It frees up memory space, ensuring that your system has enough RAM to handle new tasks efficiently.
This is especially beneficial for users who run multiple applications or high-demand programs.
Tools and Utilities to Enhance RAM Management
There are several tools available that can assist in managing RAM more effectively. Some popular examples include:
- CCleaner: Known for its cleaning capabilities, it also offers features to manage startup programs and background processes.
- RAMRush: Specifically designed to free up physical memory and improve system performance.
- MemReduct: A lightweight tool for monitoring and cleaning system memory in real time.
Comparing Built-in Windows Tools vs. Third-Party Software
While Windows provides built-in tools like Task Manager and Resource Monitor, third-party software often offers more user-friendly interfaces and additional features. However, it’s essential to choose reputable software to avoid security risks.
Built-in tools, on the other hand, are more straightforward and secure, though they might lack advanced features. When using any RAM management tool, it’s important to understand what each feature does to avoid unintended consequences.
Regularly monitoring system performance and making adjustments based on actual usage patterns is recommended. Users should also ensure that any third-party software is kept up-to-date to benefit from the latest optimizations and security updates.
Long-Term Strategies for Optimal RAM Usage
1. Upgrading Hardware for Better Performance
One of the most effective ways to improve RAM performance is by upgrading the hardware. Adding more RAM to a system can significantly boost performance, especially for users who run memory-intensive applications or multitask frequently.
2. Regular System Maintenance and Updates
Keeping the Windows operating system and all installed software up-to-date is crucial for optimal RAM usage. Updates often include performance improvements and memory management enhancements.
Additionally, regular system maintenance, such as disk cleanup and defragmentation, can help improve overall system performance.
3. Educating Users on Efficient Computing Habits
Finally, educating users on efficient computing habits can play a significant role in managing RAM effectively. This includes understanding which applications are resource-intensive, avoiding unnecessary multitasking, and restarting the computer regularly to clear the RAM.
FAQs
Does restarting my Windows computer automatically clear the RAM cache?
Yes, it is one of the simplest methods. When you restart, all the temporary data stored in the RAM is wiped out, and the system starts afresh, which can improve performance and resolve minor glitches.
Can clearing the RAM cache lead to data loss?
No, this does not lead to the loss of personal data. RAM stores temporary operational data that are required for running applications and system processes. Once these are closed or cleared, the data is no longer needed.
However, it’s always a good practice to save your work before clearing the cache, as unsaved data in open applications might be lost.
How often should I clear my RAM cache in Windows?
The frequency of clearing the RAM cache depends on your usage. For regular users, doing it once every few weeks should suffice. However, if you frequently use resource-intensive applications or experience slowdowns, you might need to do it more often, like once a week or whenever you notice performance issues.
Is it safe to use third-party RAM cleaning tools?
While many third-party RAM cleaning tools are safe, it’s essential to choose reputable ones. Some tools might come with bundled software or pose security risks. Always download such tools from the official websites or trusted sources, and check user reviews and ratings before installation.
Will increasing my computer’s virtual memory replace the need to clear the RAM cache?
Increasing virtual memory can alleviate some of the issues caused by RAM being full, but it’s not a complete replacement for clearing the RAM cache. Virtual memory is slower than RAM, as it uses your hard drive space.
Clearing the RAM cache is still necessary for optimal performance.
Can clearing the RAM cache fix software crashes and errors?
Yes, it can sometimes resolve software crashes and errors that are caused by memory management issues. If an application is not functioning correctly due to insufficient RAM or memory leaks, clearing the cache can free up RAM and potentially resolve these issues.
However, persistent software problems might require more specific solutions such as software updates or reinstallation.
Summary
In summary, managing the RAM cache in Windows involves a combination of manual interventions, utilizing built-in tools, leveraging third-party software, and adopting long-term strategies.
Understanding and applying these methods can lead to significant improvements in system performance and longevity. These insights and techniques will empower you to take control of your system’s memory management for a smoother computing experience.
RAM itself does not have exclusive cache memory. Instead, it is created by multiple programs and applications on your computer. As you run these programs on your system, the cache file increases, making RAM cached. Since RAM does not store memory permanently, it remains in the RAM until it is active. Once you restart your system, the cache in your RAM is cleared. However, you don’t want to reboot your system just to clear your RAM’s cache.
We have prepared this guide to help you clear your RAM’s cache, making your system run faster without constantly restarting it.
Advantages of Clearing the RAM Cache:
There are many advantages to clearing your RAM cache; we have listed the most significant ones below for better understanding.
- Improved System Performance: Clearing the RAM cache can free up memory resources, which allows your system to run more smoothly and efficiently. This results in faster application loading times, smoother multitasking, and improved overall system responsiveness.
- Potential Troubleshooting: In some cases, clearing the RAM cache can help resolve certain software-related glitches. For example, if your thumbnails are not loading properly, it could be because your thumbnail cache might be corrupted. By clearing the cache, you can resolve such glitches, since Windows creates the RAM cache from scratch once it is removed.
- Updated Data: Clearing the cache ensures that you have the most up-to-date data when accessing websites or applications. That’s because, over time, the cached data can become outdated or corrupted. Once you clear the cache, the programs fetch newly available information, hence providing you with better and more accurate information.
- Privacy and Security: Clearing the cache can help protect your privacy and security by removing temporary files that may contain sensitive information. This is particularly important when using shared computers or public networks, as it reduces the risk of others accessing your personal data.
- Resource Allocation: Clearing the cache allows for better resource allocation within the system. By freeing up memory, you provide more room for other applications and processes to run smoothly without being hindered by limited available memory.
Disadvantages of Clearing the RAM Cache:
Don’t let these advantages obscure the bigger picture. While you may get a temporary performance boost in your system’s performance, is it really worth all the disadvantages that clearing this RAM cache brings with it?
- Temporary Slowdown: When you clear the RAM cache, the system may experience a temporary slowdown, as it needs to reload data from the disk into memory when the applications are accessed again. However, this slowdown is usually negligible and temporary, and the system’s performance typically stabilizes once the cache is rebuilt.
- Increased Resource Usage: Clearing the cache entails that applications will have to reload data from the disk into memory more frequently, resulting in increased disk and CPU usage. This can potentially lead to slower overall system performance, especially if the system has limited resources.
- Loss of Cached Data: The purpose of the cache is to store frequently accessed data for faster retrieval. When you clear the cache, you lose the benefit of having that data readily available. As a result, the system may need to fetch it from slower storage devices, such as a hard drive, causing potential delays in accessing the data.
- Delayed Application Startup: After clearing the cache, applications may take slightly longer to start up initially, as they need to retrieve data from the disk instead of accessing it quickly from the cache. This can be noticeable, especially for larger applications or those that rely heavily on cached data.
- Lower Efficiency for Cached Processes: Clearing the cache can have a negative impact on processes that rely heavily on cached data. For example, database applications or web browsers may experience decreased performance until the cache is rebuilt and data is recached.
Is it safe to clear cached RAM?
Yes. Clearing cached RAM is completely safe. The cache is a collection of temporary data that helps speed up access to frequently used applications and data. Clearing the cache does not remove essential system files or data; it merely eliminates the temporary copies stored in the cache. However, it is generally not necessary to do this frequently. Modern operating systems have efficient memory management systems that automatically handle memory allocation and cache management. Clearing the cache is typically recommended as a troubleshooting step or when experiencing specific performance issues.
What happens when the RAM cache is full?
When your RAM cache is full, it indicates that the entire available cache is in use. This prevents you from making any space to store your data. Most of the time, your RAM cache becomes full when it can only store a fixed amount of data, which results in it gradually filling up over time and requiring you to clear it.
Does clearing RAM Cache increase computer speed?
Yes, clearing the RAM cache is more likely to increase your computer speed than any other method. It is by far the most effective way to boost your system’s speed, especially upon boot. This is because when your computer stops relying on the page files and the hard drive, it will perform faster.
Clearing the RAM cache can free up resources, which Windows can automatically dedicate to the program you are using. This makes your computer run smoothly and stably.
How do I clear my RAM cache?
Now that we know everything about clearing the RAM cache, here’s how to actually clear your RAM cache. There are many ways to clear your RAM cache. We have listed some of the most effective methods below.
Method 1. Delete Temporary Files
Upon running programs and files, they store temporary data in the RAM, which causes the RAM cache to increase. Therefore, deleting these files will help clear the RAM cache. Below, we have listed how you can delete the temporary files stored in the RAM:
- Press Win + R to open the Run command.
- Type “%tmp%” and click “OK” to open the temporary files folder.
Opening tmp folder - Press Ctrl +A keys together to select all files in the folder.
- Press the Delete button to empty the folder.
- Type “temp” in the run command and click OK.
Opening temp folder - Delete all the content in this folder as well, using the same keys.
- Open the Windows Settings by pressing Win + I keys.
- Navigate to System > Storage.
- Click on the Temporary Files section and select “Remove Files” (Do not remove the Downloads folder).

Removing temporary files - This will delete all the tempray files on your system and clear the RAM cache.
Method 2. Manually flush the cache
Windows has a feature that allows you to create a shortcut, which can be used to flush the cache in your RAM. Below is how you can manually flush the memory cache:
- Right-click on the Desktop Window and open the menu.
- Navigate to New > Shortcut.

Creating new shortcut - Paste the following command into the location box under “Type the location of the item” and click Next:
%windir%\system32\rundll32.exe advapi32.dll,ProcessIdleTasks

Typing location of item - Type the name of the shortcut as “Flush RAM Cache” and click Finish.

Typing name of shortcut - Double-click on the shortcut and run it to manually flush the RAM cache.


Method 3. Clear the paging files
Paging files refer to the data that is stored on the hard drive even after shutting down your system. Clearing them will help clear the RAM cache on the system, making your system perform faster. Below, we have provided instructions on how to clear paging files in Windows.
- Open the run command by pressing the Win +R keys.
- Type “regedit” and click OK to open the registry editor.
Opening registry editor - Open the following path in the registry editor:
HKEY_LOCAL_MACHINE/SYSTEM/CurrentControlSet/Control/Session Manager/ Memory Management - Right-click on the ClearPageFileAtShutdown REG DWORD.
- Click on the Modify option.
- Set the value from 0 to 1 under the ‘Value date.’
- Click OK to make the changes.
Modifying the registry key
Method 4. Create a .VBS Script
Since programs are known to store their individual data in RAM, it may take you a significant amount of time to determine which program is causing an increase in the RAM cache. Therefore, you can run a .VBS script to manually clear the RAM cache. However, before you run the script, you must close some programs that consume a high amount of memory. Follow the instructions below to run the .VBS script:
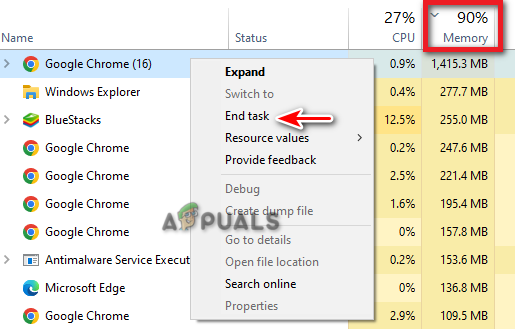
End high-memory-usage tasks.
- Press the Win +X keys together to open the secret start menu.
- Click on the “Task Manager” option.
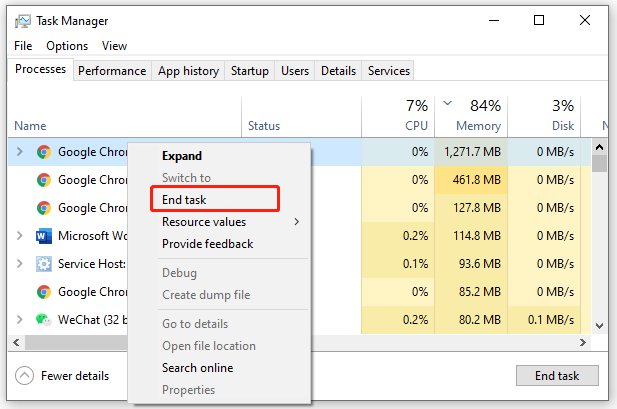
Opening the Task Manager - Open the Processes tab and click on the Memory option.
- Right-click on the unwanted applications with the highest memory usage (in this case, Google Chrome).
- Select the “End task” option to end the application.

Ending the task
Multiple startup programs can also lead to high memory usage which increases the cache in your RAM. Therefore, you can also disable them.
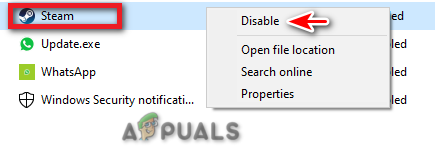
- In the Task Manager, click on the “Startup” tab.
- Select the startup programs that you don’t need to start during boot.
- Right-click on them and select the “Disable” option.

Disabling startup program
Running a .VBS script.
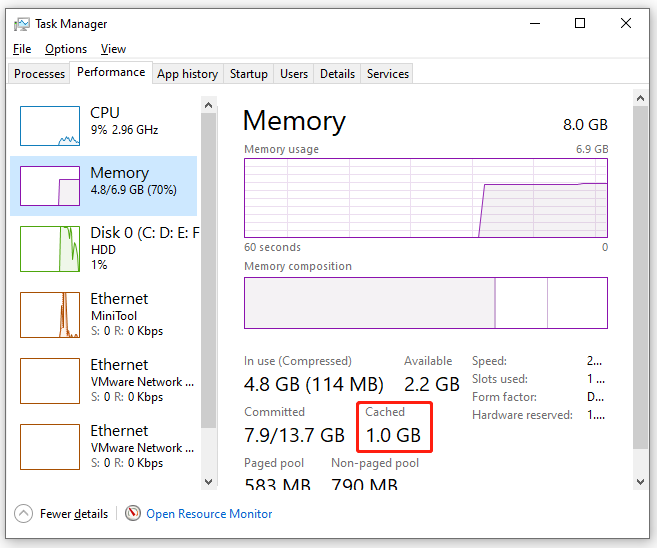
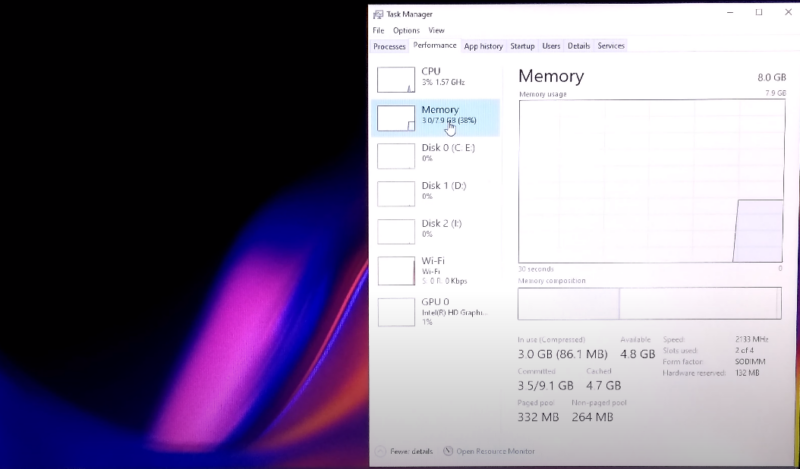
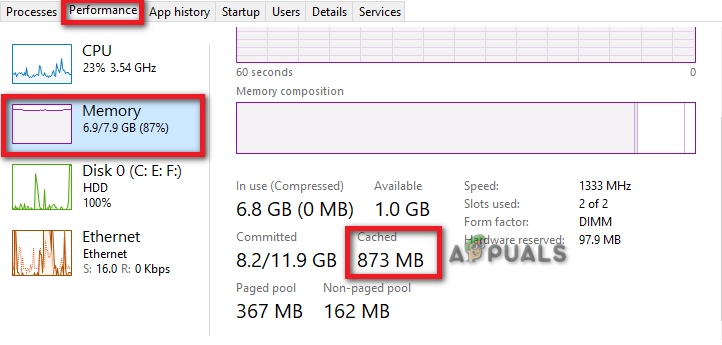
- Open the Performance tab on the Task Manager.
- Select the Memory slot.
- Note down the cached value listed under “Cached” (This indicates how much memory is being cached in your RAM).

Finding cached value - Press Win +R to open the run command.
- Type “Notepad” and click OK.
Opening the notepad - Type the following command into Notepad to free 500 MB of memory:
FreeMem = Space(500000000)
- Press Ctrl + S and save the command as a .vbs file.
- Double click on the saved .vbs file and run it.
- This will clear the RAM cache.
- Make sure to change the values in the command if you have a higher amount of cached data.
Method 5. Use the RamMap Tool
RamMap Tool is a Windows utility that helps clear unwanted RAM cache on your system. You can download and use this tool to clear RAM cache easily. Simply follow the steps below to see how you can use this tool on your computer:
- Go to the Official Microsoft website.
- Click on the “Download RamMap” option.

Downloading RamMap tool - Select the folder where you want to save the tool.
- Open the downloads page by pressing the Ctrl + J keys.
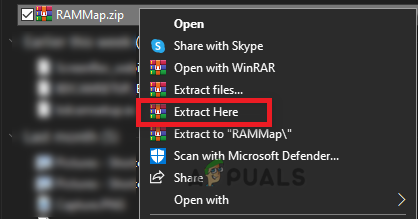
- Open the file location.
- Right-click on the zip file and extract it.

Extracting zip file - After extracting, double click on the RamMap.exe file.
- Click Agree to confirm the License Agreement.

RamMap License agreement - After launching the RamMap tool, click on the Empty option above.
- Select Empty Standby List, Empty System Working Set and Empty Working Set.
Clearing RAM cache on RamMap - Once done, it will clear the RAM cache on your system.


Method 6. Increase Page size or Virtual Memory
As a last resort, you can manually increase your virtual memory or page size by allocating a larger size. Below, we have provided step-by-step instructions for increasing your page size.
- Press the Win + R keys to open the Run command.
- Type “control panel” and click OK.
Opening the control panel - Click on the “View by” option and select “Large icons.
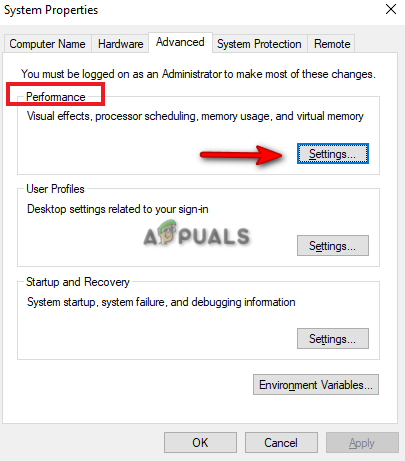
Changing View By to Large icons - Navigate to System > Advanced system settings.
- Select “Settings” under Performance.

Changing performance settings - Open the “Advanced” tab.
- Click “Change” under Virtual Memory.

Changing virtual memory Note: If the “Currently allocated” virtual memory is larger than the “recommended” virtual memory then you must choose a custom size.
- Uncheck the “Automatically manage paging file size” box.
- Select the default drive.
- Click on the “Custom size” box.
- Add the recommended virtual memory size in the “Initial size” slot (here, it is 1916).
- Add 1.5 times your RAM size in the “Maximum size” slot. (For 8 GB of RAM, input 8 * 1024 * 1.5).
- Click Set and OK to confirm the actions.
Setting custom memory size - Restart your computer.
In conclusion, clearing the RAM cache can have advantages in terms of improved system performance, but the temporary slowdown and impact on specific programs are generally minor. It is important to understand that clearing the cache is a temporary measure and does not substitute for other actions such as optimizing system settings, managing startup programs, or upgrading hardware components when necessary.