
Windows 11 comes with a built-in tool to extract, create, and browse through archives without any need for external software. Most of the time, it works properly. But sometimes, it also starts facing issues in working well. When we extract an archive file, it returns the “Windows Cannot complete the extraction. The destination file could not be created” error.
Luckily, some fixes exist to fix it in Windows 11. In this guide, we’ll share some potential fixes to fix Can Not Complete the Extraction in Windows 11. So read ahead and fix the “Can Not Complete the Extraction” error on your Windows PC or laptop.
Why Does the “Can Not Complete the Extraction” Error Appear in Windows 11?
The “Can Not Complete the Extraction” error appears for various reasons in the new Windows 11. But in this section, we’ll mention the most common reasons for this irritating error. You can check all the possible reasons for this prominent error message below:
- Outdated Windows 11
- Large File Name
- Corrupted Archive
- Corrupted PC Files
- Third-Party Apps and Services
- Bad Sectors on Hard Drive
- Buggy Windows 11 Archive Tool
- File Is Encrypted
- Ill Windows Explorer Process
- Malware and Viruses
- Random Bugs and Glitches
Fix Can Not Complete the Extraction in Windows 11
In this section, we’ll share the potential fixes to fix Can Not Complete the Extraction in Windows 11. So try all the workarounds to see what eliminates the issue on your PC or laptop:
1. Check Whether You Can Open Another Zip File
Your archive likely has some issues, which is why it isn’t being extracted on your Windows 11 PC. To check whether it’s right, open another zip file. If they open properly, it means the file has some issues. If you don’t know how to do so, follow the below steps:
1. Right-click on your Windows 11 computer’s zip file, then choose the Extract All… option.
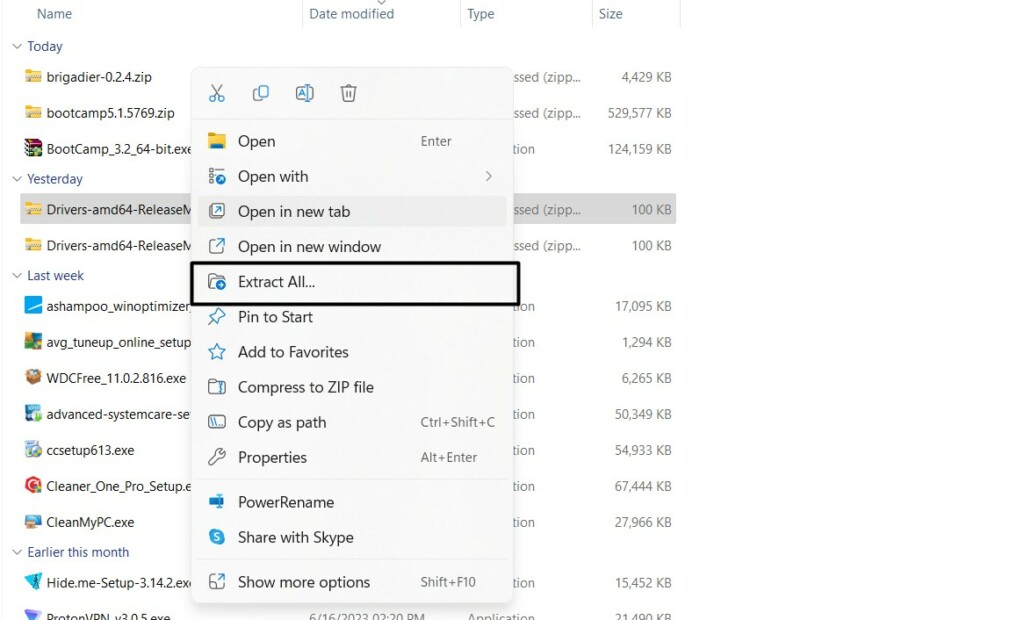
2. In the Extract Compressed (Zipped) Folders window, click Browse… and choose the folder where you want to extract the selected compressed file on your Windows 11 device.
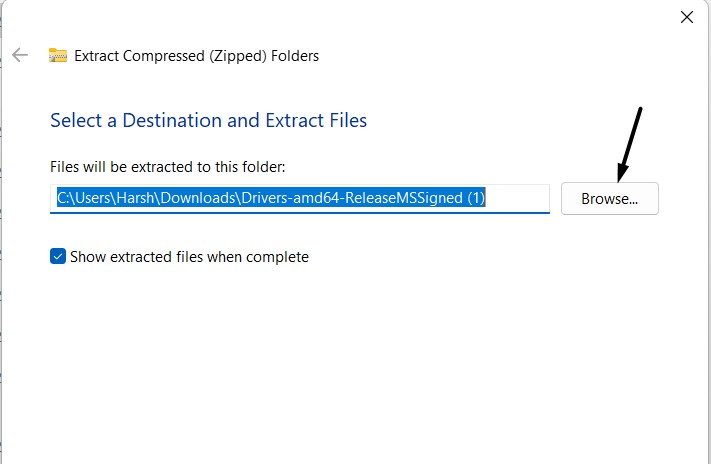
3. At last, choose Extract to start extracting the archive file in the selected location on the PC.

2. Redownload the Archive File
If the above-mentioned fixes help you fix Can Not Complete the Extraction in Windows 11, then we suggest you redownload the archive file on your PC, as it could be possible that the current file is corrupted.
Hence, the “Can Not Complete the Extraction” error is appearing when decompressing the file. If redownloading the file doesn’t fix the issue, download it from another site and then check if the same error still appears on the PC.
3. Reboot the Computer
You can consider rebooting your Windows 11 PC or laptop, as it’ll eliminate all the temporary bugs and glitches that could be the reason for this error on your Windows 11 PC. So restart your Windows 11 PC by following the listed steps to check if it fixes the issue:
1. Press the Windows key on your keyboard, and in the box, right-click on the Power icon.
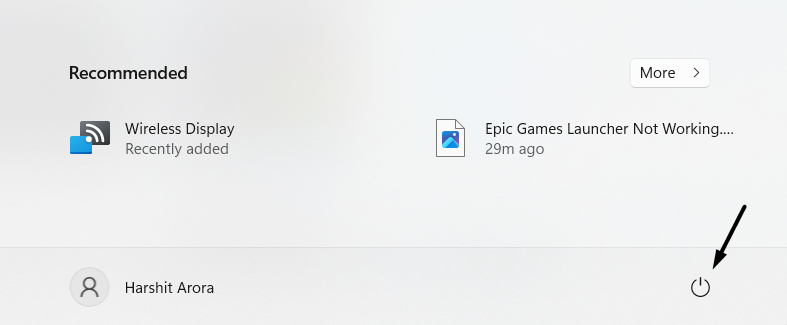
2. From the context menu, choose the Restart option to reboot your Windows 11 PC or laptop.
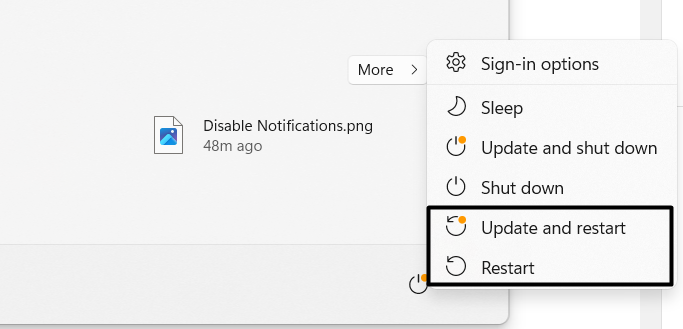
3. Once the device is restarted, extract the archive again to check if the error still appears.
4. Move the ZIP file to Another Location
Several previously affected users in the Microsoft forum mentioned they were able to extract the zip file on their Windows 11 PC by moving it to an unprotected folder on the PC. Considering this, we also suggest you move your archive to one of your user profile folders, like Downloads, Documents, etc., and then extract it there. So, check the below-mentioned steps to know how to move the file into any of these folders and unzip it:
1. Launch the File Explorer utility on the PC, and go to the location where you’ve saved the zip.
2. Right-click the archive and choose the Copy option from the menu to copy it into the clipboard.
3. Once done, go to any user profile sub-folders, like Documents, and hit Ctrl + V to paste it there.
4. After pasting the folder into another location, extract it to check if the error message still appears.
5. Shorten the File Name
If your archive’s name is more than 260 characters, you won’t be able to extract it and get the “The destination path is too long” error message following the “Can Not Complete the Extraction” error message in the other line. Due to this reason, we suggest you shorten your zip file’s name. So, follow the below steps to shorten your zip file’s name:
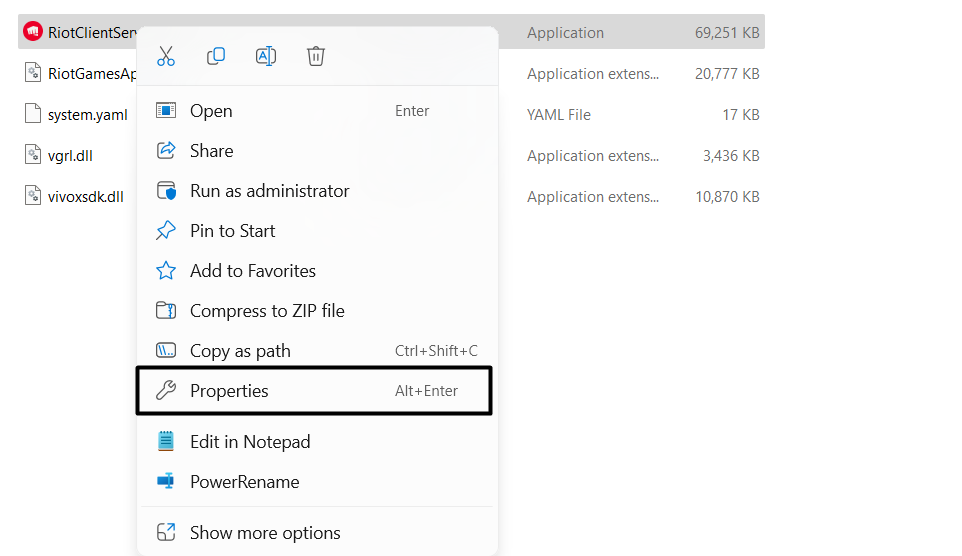
1. Go to the path where your zip file is saved, and then right-click it to get the right-click menu.
2. Choose the Properties option from the menu, and in the General tab, shorten the file name.
3. Once done, choose Apply, and then click the OK button to save the file and fix this issue.

6. Make Sure the File Isn’t Encrypted
If your archive file is protected, you won’t be able to extract it on your Windows 11 PC or laptop. So, we suggest you ensure the archive file isn’t encrypted. You can check the below-mentioned prompts to learn to know whether the archive file is locked in Windows 11:
1. Right-click the zip file, and from the context menu, select Properties to open its properties.
2. In the Properties window, under General, next to Attributes, you’ll see if the zip file is locked.
Note: If you don’t find the required details there, use a third-party app to easily know the same.
7. Install Windows Updates
One of Microsoft’s Independent Advisors in the Microsoft forum advised users to install the new Windows 11 updates on their PCs, as it could be possible that the current Windows 11 build has some bugs and glitches.
As a result, this issue is appearing. Thus, we suggest you do the same on your PC and check whether it works for you. You can check the below-mentioned instructions to know how to install the new Windows 11 updates:
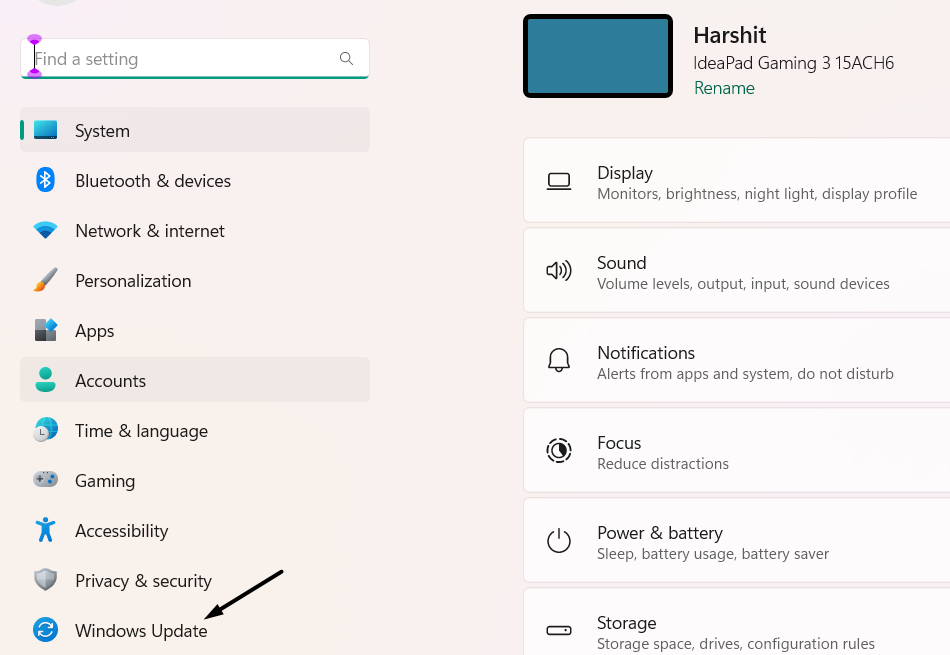
1. Launch Settings using the Windows + I shortcut and go to the Windows Update category.
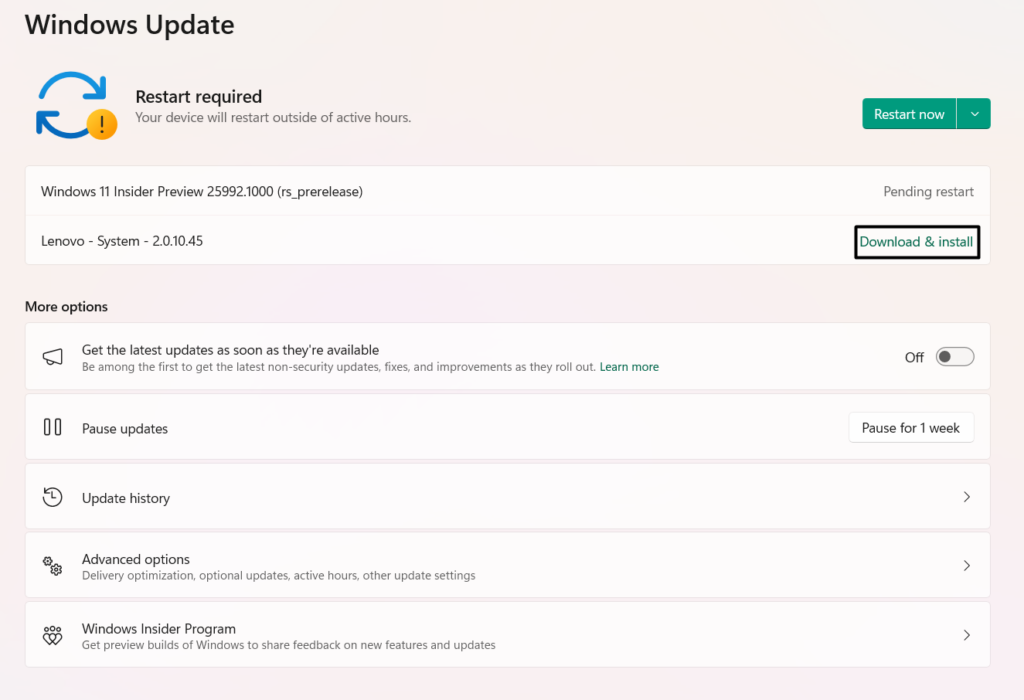
2. In the Windows Update window, select Check for updates to search for new updates.

3. Once you see new updates to install, choose Download & install all to download and install them. After installing the new updates, confirm whether the error message still appears.
8. Check for Bad Sectors
It may be possible that your Windows 11 PC’s hard drive has some bad sectors, which may be stopping you from extracting the files on it. Due to this reason, we suggest you run Windows 11’s built-in CHKDSK command line tool, as this will look for corrupted sectors on your hard drive and attempt to resolve them. So follow the below steps to run it:
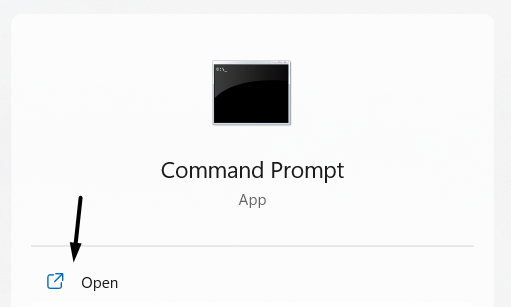
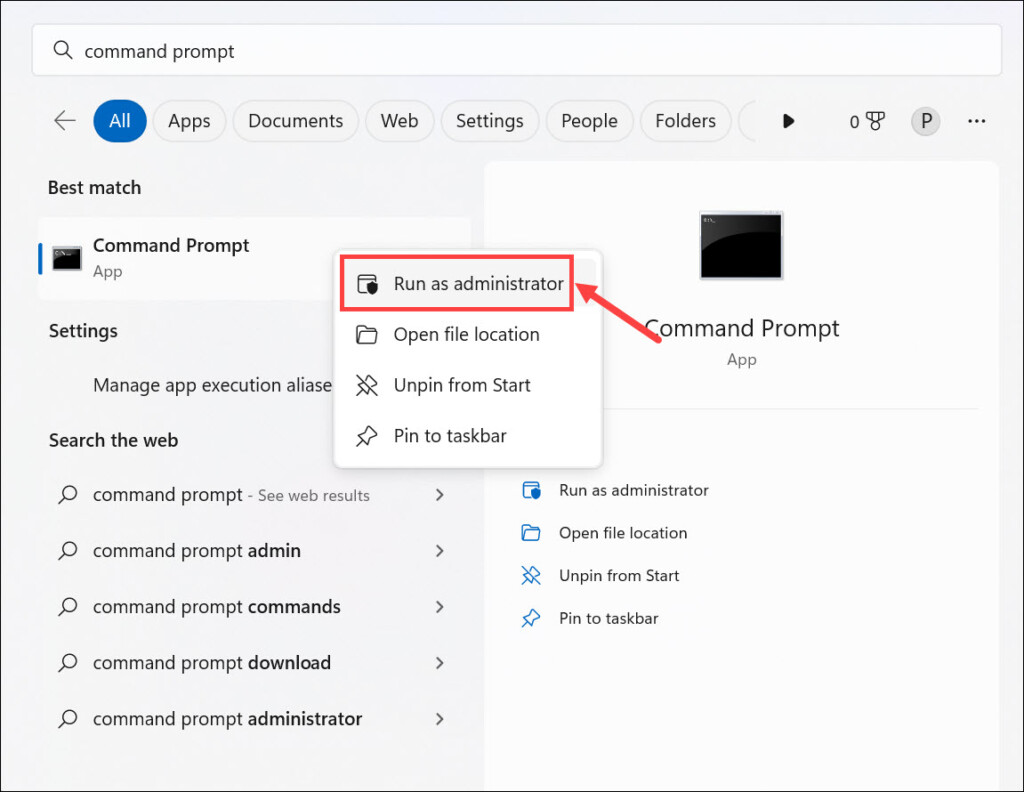
1. You need to open the Command Prompt app on your Windows 11 PC with admin rights.
2. Copy-paste the below-mentioned command in Command Prompt, and then press the Enter key:
chkdsk /r3. Lastly, wait for the CHKDSK scan to start and scan for issues with the hard drive to fix them.
9. Restart the Windows Explorer Process
It may be possible that Windows Explorer, which plays an essential role in the proper functioning of the computer’s zip utility, is now facing issues in working. As a result, it’s returning the “Can Not Complete the Extraction” error on the PC.
Thus, to fix all the issues with it, we suggest you reboot the Windows Explorer process on your PC. So follow the mentioned steps to know how to reinstate this particular service in Windows 11:
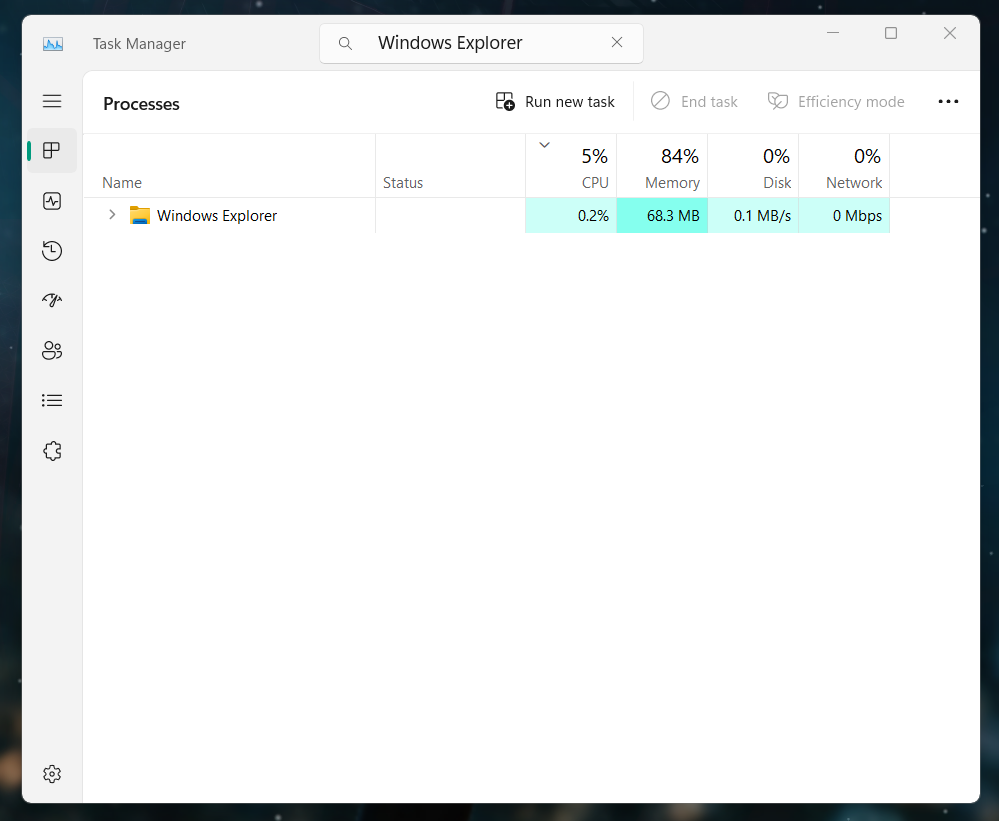
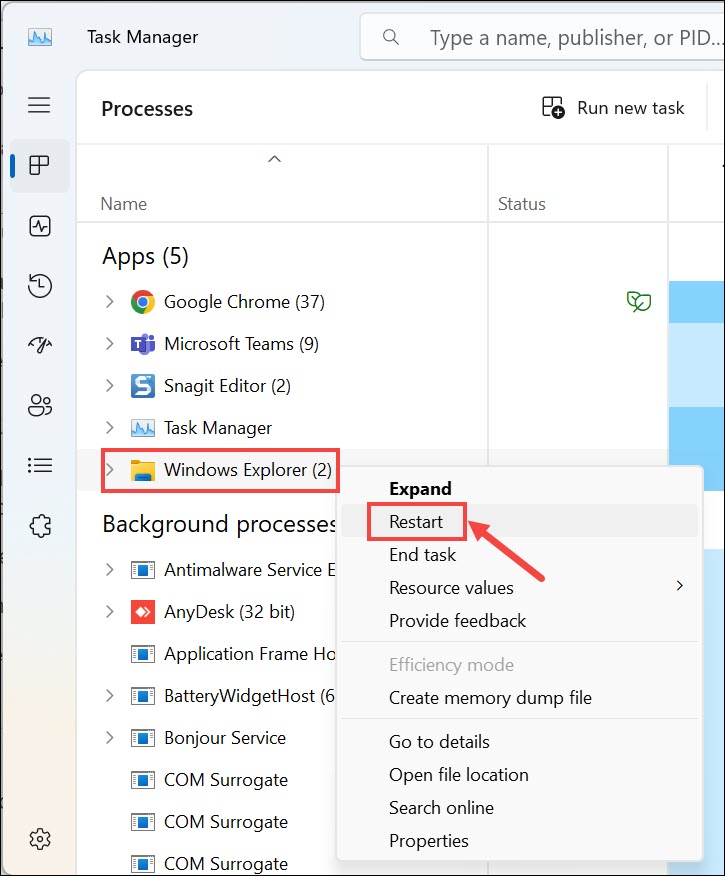
1. Launch Task Manager on your Windows 11 PC using the Ctrl + Shift + Esc shortcut.
2. Search for the Windows Explorer process in Task Manager and right-click it to get the menu.
3. From the menu, choose the Restart option to reinstate the Windows Explorer app on your PC.
10. Execute the DISM Scan
One reason for this error in Windows 11 could be the corrupted Windows image. So, run the Deployment Image Servicing and Management (DISM) scan on your PC to repair the image. We’ve explained the process of executing the DISM scan in Windows 11 below:
1. To run the DISM scan on your computer, open the Command Prompt program using any method.
2. In Command Prompt, run the below-mentioned commands individually to start the DISM scan:
Dism /Online /Cleanup-Image /CheckHealthDism /Online /Cleanup-Image /ScanHealthDISM.exe /Online /Cleanup-image /Restorehealth3. After running the DISM scan, check if the “Can Not Complete the Extraction” error still appears.
11. Run the System File Checker Scan
It may be possible that your computer’s essential files have gotten corrupted, which is why the “Can Not Complete the Extraction” error appears when decompressing an archive on the PC. Due to this, we suggest you run the SFC scan on your PC to repair all the corrupted files. You can check the below prompts to know how to run it on your PC:
1. Open the Windows Search Box on your PC, type CMD in it, and choose it from the results.

2. In Command Prompt, type the sfc /scannow command and press Enter to run the scan.
3. Lastly, wait for the System File Checker (SFC) scan to complete on the PC to check the issue’s status.
12. Scan for Malware
One reason for the “Can Not Complete the Extraction” error in Windows 11 could be malware and viruses in the device. They may have made some wrong changes to your Windows 11 computer’s configuration. Due to this, this error message is appearing on the PC. In that case, run the malware scan on your Windows 11 PC by trying the below steps:
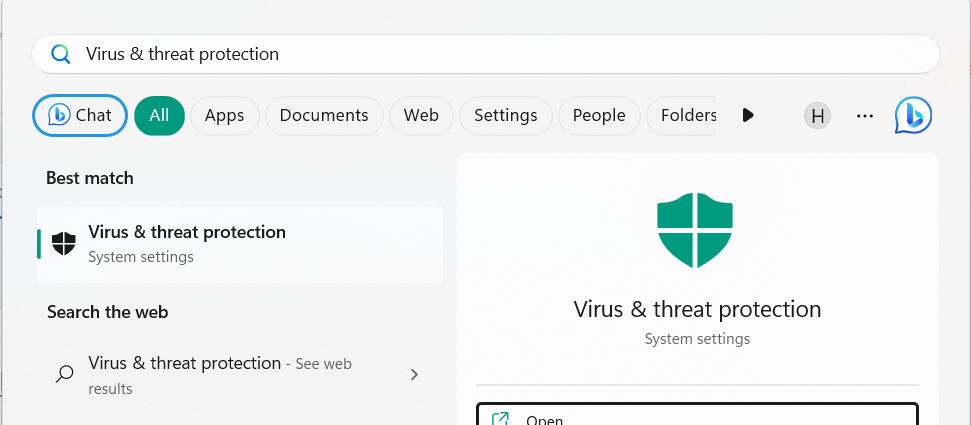
1. Open the Windows Search Box by pressing the Windows key, and type Virus & threat protection in it.
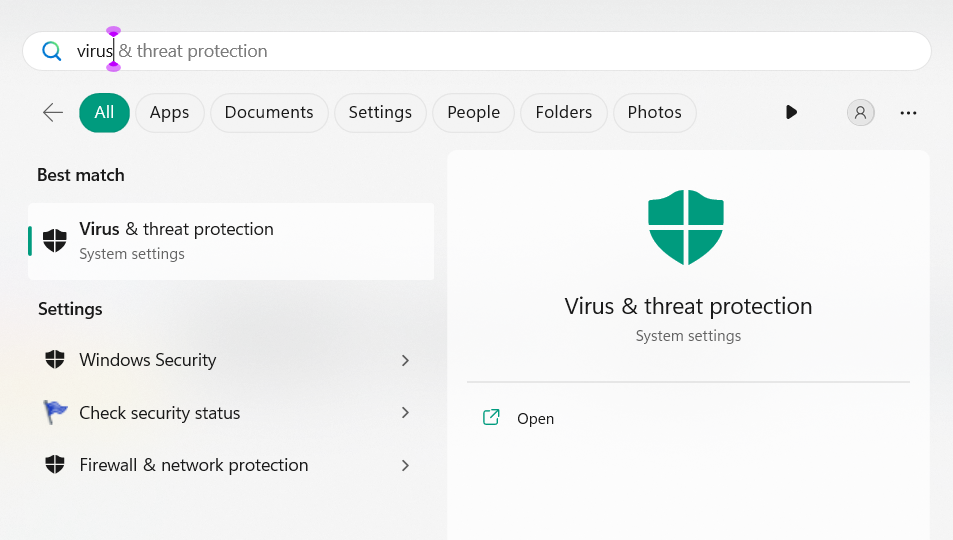
2. Select it from the search results to open the Virus & threat protection app on your PC.
3. In the Virus & threat protection window, click the Quick scan button to start the virus scan.
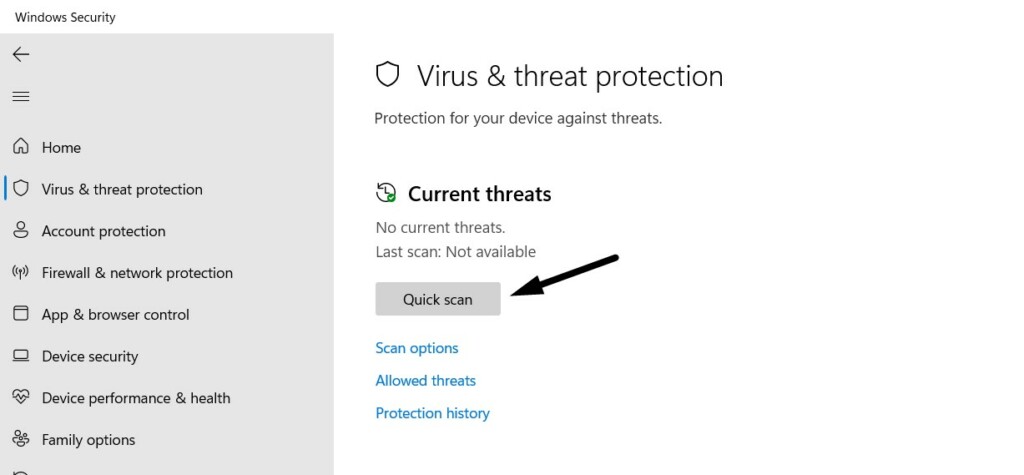
4. Wait for the mentioned time for the malware scan to complete, and check the issue’s status.
13. Extract the ZIP File With the Command Prompt
If you aren’t able to decompress the archive file via the contextual or right-click menu, then we suggest you do so using the Command Prompt utility on your PC or laptop. We hope this method will not display the “Can Not Complete the Extraction” error on your PC. You can follow the below-mentioned steps to learn to extract the zip file using the CMD app:
1. In File Explorer, go to the location where the archive file you want to decompress is saved.
2. In the top address bar, type cmd and press Enter key to open the Command Prompt app.
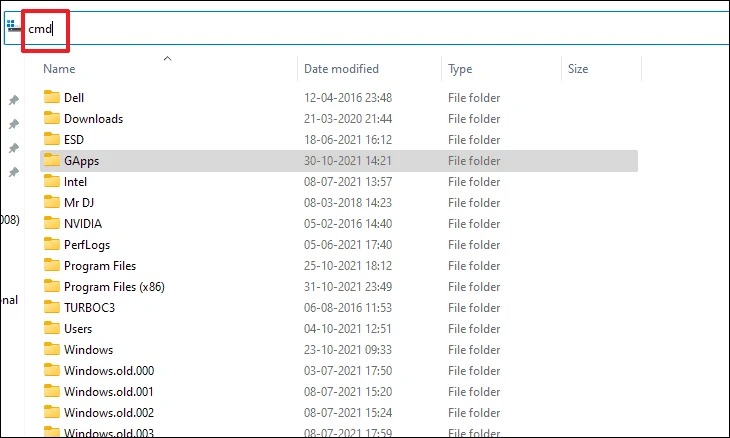
3. In the Command Prompt window, copy-paste the tar -xf filename.zip command and press the Enter key.
Note: Make sure to replace the “filename.zip” with the actual name of the compressed file.
4. After executing the above command, close the Command Prompt and check the issue’s status.
14. Use an Alternative Software to Extract Files
It may be possible that the issue is with your computer’s built-in zipping tool, which is why the file isn’t able to be extracted to your desired location. So, until the issues with the utility get fixed, you can use a third-party file archiving software. There are plenty of similar tools, like WinRAR, 7-Zip, WinZip, and more.
We’ve talked about some great archiving utilities in a guide. So, make sure to check them to get more choices. Also, if you don’t want to use an alternate tool, troubleshoot problems with the built-in Zip utility.
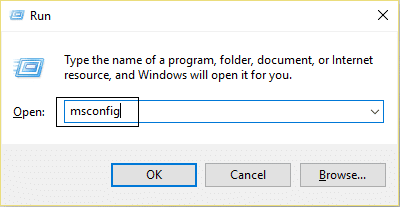
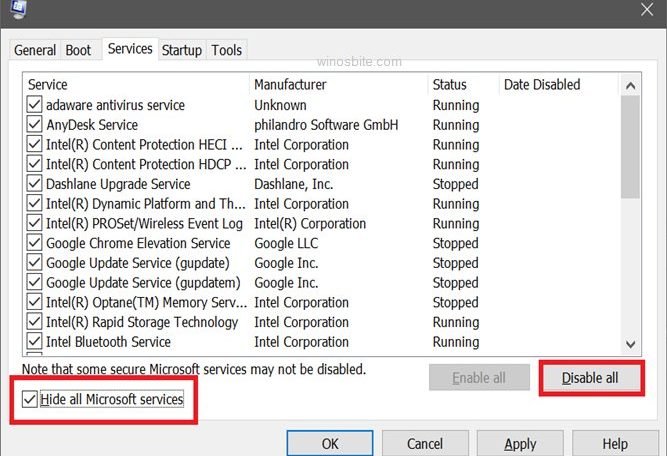
15. Perform a Clean Boot
Some users in the online forums mentioned that a third-party program or service could be the reason for this issue. This could be the same in your case. So, boot your PC into Clean mode, as this’ll start the device with PC programs only. This will help you know whether an external program is leading to this error. So, check the below steps to do the same:
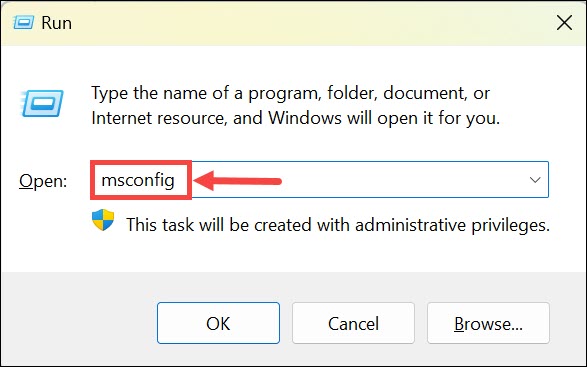
1. Use the Windows + R hotkey to open the Run utility, type msconfig in its search, and hit the Enter key.
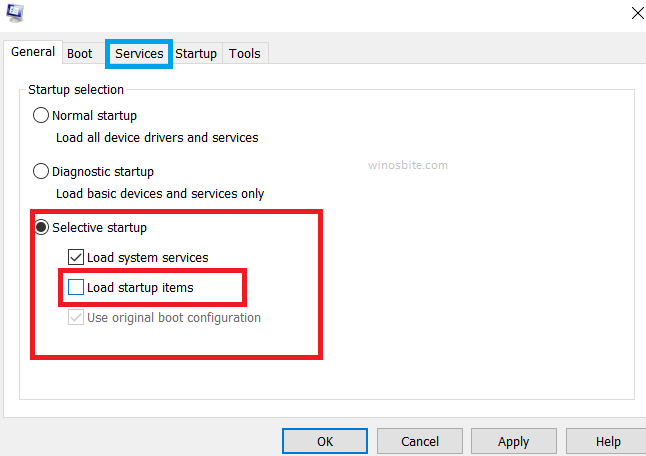
2. In the System Configuration window, head to the Boot tab from the top and select the Safe boot option.
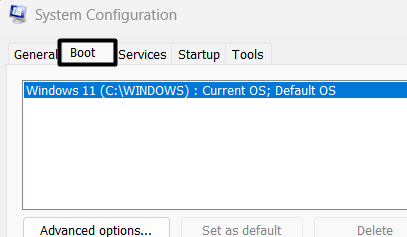
3. After checking the Safe mode option, choose Network, and then choose the OK button.
4. After making the change, go to the Services tab and check the Hide all Microsoft services checkbox.

5. Choose the Disable all button to turn off all the third-party services, and then click the OK option.

6. In the new dialog box, choose Restart now to restart your PC to boot it into Safe mode.
16. Reset Your Windows 11 PC
If none of the above-mentioned workarounds help you fix Can Not Complete the Extraction in Windows 11, then you’ve no other option than resetting your Windows 11 PC or laptop. Fret not; you won’t need to sacrifice your personal data on the Windows computer to perform this solution. So follow the below-mentioned steps to know to do the same:
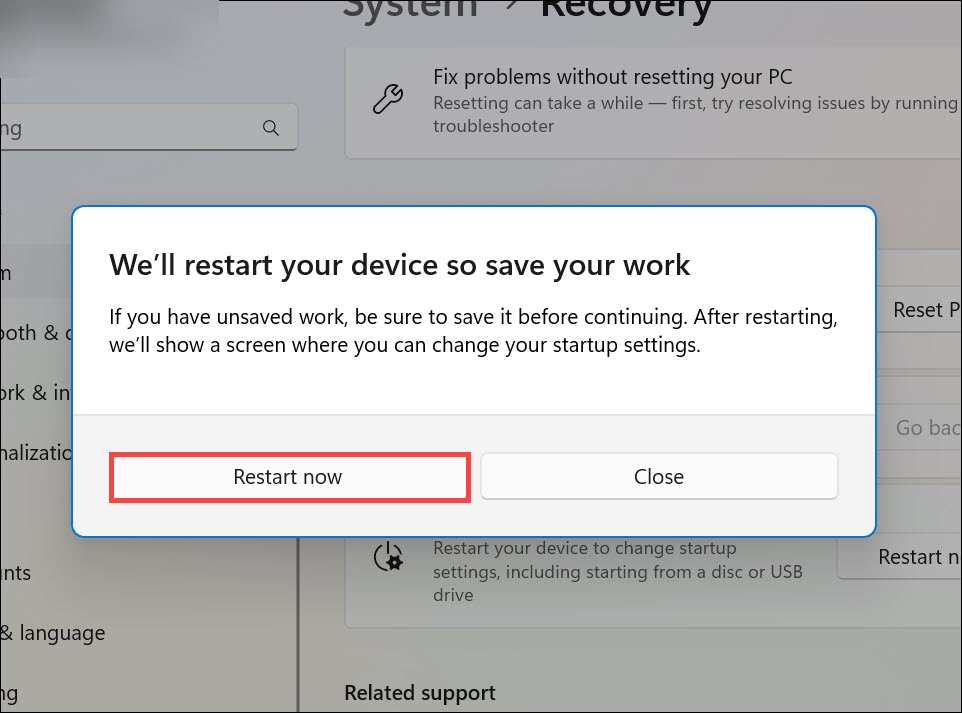
1. Proceed to the Recovery section of Settings from the right pane and click the Reset PC button.

2. After clicking Reset PC, choose the Keep my files option in the new Choose an option window.
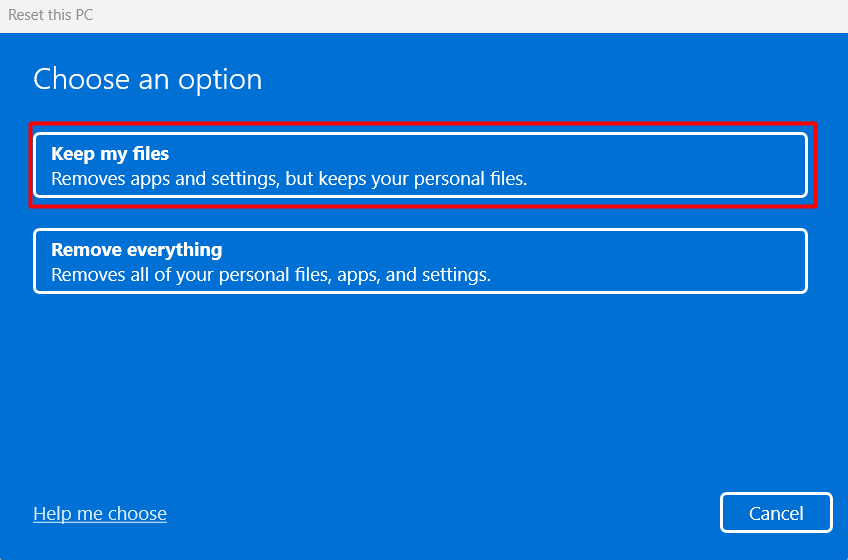
3. In the How would you like to reinstall Windows 11? either choose Local install or Cloud download option.
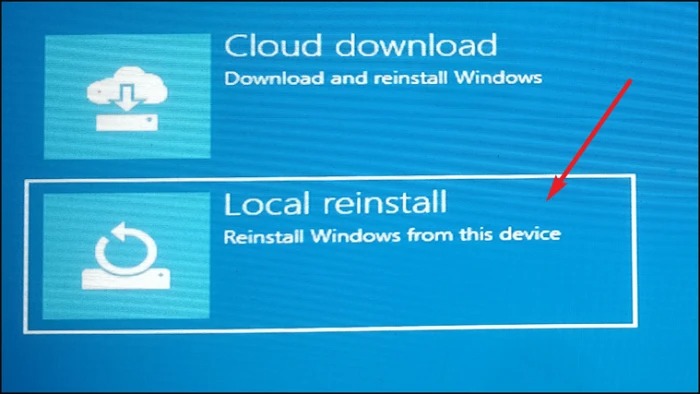
4. Follow the on-screen steps, and check the “Can Not Complete the Extraction” error’s status.
FAQs
How Do You Fix the Extraction Operation Was Not Completed?
If you’re getting any error related to incomplete extraction of the file, reboot your PC, as it may be occurring due to temporary bugs and glitches. In case this doesn’t resolve the issue on your PC, update or reinstall the software you’re using to extract archives on your Windows 11 PC.
Why Can’t I Extract a Zip File Windows 11?
It may be possible that your device has some temporary bugs and glitches, which is why you can’t extract a zip file on it. Another reason could be corrupted and essential system files.
Why Is My Computer Saying Windows Cannot Complete the Extraction?
One reason for the computer showing the “Can Not Complete the Extraction” error in Windows 11 could be malware and viruses on the PC that made the wrong changes to your computer. Another potential reason could be the ill-working Windows Explorer process.
How Do I Enable Extract All in Windows 11?
The Extract All option comes pre-enabled in Windows 11. You can find it in the contextual menu by right-clicking the zipped file on your Windows 11 computer and choose Extract all.
How Do I Give Permission to Extract a Zip File in Windows 11?
You don’t need to allow any permission on your Windows 11 PC to extract zip files in Windows 11.
Hopefully, the Can Not Complete the Extraction Error Is Fixed Now
There could be several reasons for getting the “Can Not Complete the Extraction” error in Windows 11 when extracting the zipped files. Fortunately, it can easily be removed in Windows 11. Thus, in this guide, we shared potential workarounds to fix Can Not Complete the Extraction in Windows 11 with ease.
So, we hope the fixes we shared in this guide helped you eliminate this error on your computer. In the end, let us know which mentioned fix assisted you in fixing the “Can Not Complete the Extraction” error message.
If you want to watch a video guide on this topic, we have one for you.
Fix Windows cannot complete the extraction error: While trying to extract contents of a zip file you may face the following error message “Windows cannot complete the extraction. The destination file could not be created.” and in order to fix this issue just follow this guide. Now there are other variations of this error such as “The compressed (zipped) folder is invalid” or The destination path is too long, or The compressed zipped folder is invalid etc.

It’s also possible that you may receive any of the above error messages while trying to compress a file or while extracting the contents of a zipped file. So without wasting any time let’s see how to actually Fix Windows cannot complete the extraction error with the help of below-listed troubleshooting guide.
Table of Contents
Make sure to create a restore point just in case something goes wrong.
Method 1: Move the zip file to another location
If you’re facing the error message “Windows cannot complete the extraction. The destination file could not be created” then it’s possible that the zip file you’re trying to open or extract is in the protected area. To resolve this issue, just move the zip file to Desktop, documents, etc. If this doesn’t work, then no worries, just follow the next method.

Method 2: See if you can open another zip file
Chances are Windows Explorer might get corrupted and that’s why you’re not able to access your files. In order to make sure this is the case here just try to extract any other zip file in different locations in Windows Explorer and see if you’re able to do so. If other zip files open properly then this particular zip file may be corrupted or invalid.
Method 3: Run SFC and CHKDSK
1.Press Windows Key + X then click on Command Prompt(Admin).
2.Now type the following in the cmd and hit enter:
Sfc /scannow
sfc /scannow /offbootdir=c:\ /offwindir=c:\windows (If above fails then try this one)

3.Wait for the above process to finish and once done restart your PC.
4.Next, run CHKDSK from here Fix File System Errors with Check Disk Utility(CHKDSK).
5.Let the above process complete and again reboot your PC to save changes. See if you’re able to Fix Windows cannot complete the extraction error, if not then continue with next method.
Method 4: Perform Clean Boot
1.Press Windows Key + R then type msconfig and hit enter to System Configuration.
2.On General tab, choose Selective Startup and under it make sure the option “load startup items” is unchecked.

3.Navigate to the Services tab and checkmark the box that says “Hide all Microsoft services.“

4.Next, click Disable all which would disable all the other remaining services.
5.Restart your PC check if the problem persists or not.
6.After you had finish troubleshooting make sure to undo the above steps in order to start your PC normally.
See if you’re able to extract the contents of the zip file in Clean Boot if you’re then some 3rd party app might be conflicting with Windows. Troubleshoot the issue via this method.
Method 5: Fix The file name(s) would be too long for the destination
If you are facing the above error message then it clearly states the file name is too long, so just rename the zip file to something short such as test.zip and again try to access the zip file and see if you’re able to Fix Windows cannot complete the extraction error.
Method 6: Fix The compressed (zipped) folder is invalid
If you are facing above error message then you may try using 3rd party applications in order to access the content of zip file. Try the following zip archive software:
Winrar
7-zip
See if you’re able to compress or extract the contents of zip file using any one of the above software.
Recommended:
- Fix Steam Error Failed to load steamui.dll
- Change Template of a Drive, Folder, or Library in Windows 10
- Fix Could Not Connect to the Steam Network Error
- Fix DHCP is not enabled for WiFi in Windows 10
That’s it you have successfully Fix Windows cannot complete the extraction error but if you still have any questions regarding this post then feel free to ask them in the comment’s section.
On your windows 11 or 10 computer when you are trying to extract a zipped folder and trying to uncompress files on your windows 11 or 10 computer and you are getting an error message “Windows Cannot Complete the Extraction Error in Windows 11 or 10 destination folder cannot be created error, then you can fix this issue easily on your own. So, lets see in detail below.
Windows Cannot Complete the Extraction Error in Windows 11 or 10 error can be caused due to an extraction tool which is not supported and unable to extract or due to insufficient permissions of folder and other issues.
Below windows 11 or 10 computer troubleshooting methods will fix the issue of Windows Cannot Complete the Extraction Error in Windows 11 error easily.
Restart your Windows 11 or 10 Computer
Step 1: Click on windows logo and select restart
Step 2: Wait for your windows computer to restart successfully and then go ahead and try to unzip or extract zipped folder or file.
If there are any minor issues then by just restraining your windows 11 or 10 computer will fix Windows Cannot Complete the Extraction Error in Windows 11 error.
Change Zip file Location
If zip file location is in subfolder then you need to move it to main folder or desktop and extract it.
Change File Name
If the zip file is having a very lengthy name then you need to rename the zip folder or file name to shorter name and extract the file.
Also Read:
1) Fix system restore failed to extract the file in windows 10
2) Unable to extract zip file on windows 10
3) How to Fix Compressed Zipped Folder Is Invalid on Windows 11 or 10
4) How to Fix Error 0x80004005 Unspecified Error on Windows 11 or 10
5) Win+X menu not working in Windows 10
If you are using any extraction software on your windows computer like winrar or by default zip folder extraction and getting an error message then you need to download other extraction tool utility software like 7zip or other extraction files and your Windows Cannot Complete the Extraction Error in Windows 11 will be fixed.
Step 1: Click on windows search and search for edit environment variable and open it.
Step 2: In Edit Environment Variable for your Account option ->Double click on TEMP
Step 3: Enter this -> %USERPROFILE%\AppData\Local\Temp and press ok.
Step 4: Now, copy the file that you want to extract to the temp folder.
Step 5: Now, open the command prompt as administrator and execute this command -> takeown /f %TEMP% /r /d y and hit enter.
Step 6: Now, in command prompt -> type icacls %TEMP% /grant SYSTEM:F /T and hit enter.
Step 7: Next, Execute this command -> icacls %TEMP% /grant SYSTEM:F /T and hit enter.
Step 8: Change the drive name and icacls %TEMP% /grant Drivename:F /T and hit enter and wait for the command to execute.
Now, go ahead and restart your windows computer and your issue of Windows Cannot Complete the Extraction Error in Windows 11 or 10 will be resolved successfully.
Encryption File System Issues
Step 1: Right click on the compressed file and select properties.
Step 2: Click Advanced
Step 3: UnCheck the box next to Encrypt contents to secure data.
Once you change these settings of Encryption file system permissions to extract in zipped file properitse then your issue will be resolved and you will be able to extract folders without any issues.
Use File Repair Utility
There are manu repair utility tools available online and you can download one of those and install it on your windows 11 or 10 computer and run them on your computer which will fix the issue of Windows Cannot Complete the Extraction Error in Windows 11 or 10.
Step 1: In Windows Search -> Type winrar and open it.
Step 2: Using drop down -> Select the file location of the zipped folder.
Step 3: Select the file and click on Repair button on top.
Step 4: Choose the path where you want to save the repaired zip file and click ok and wait for the zip file to repair.
That’s it, once you use winrar extract tool and repair the file then go ahead and extract zip file and your issue of Windows Cannot Complete the Extraction Error in Windows 11 or 10 will be fixed.
This can be due to corrupted zip file or it can also be due to software which you are extracting is unable to extract the file and if the file is damaged or corrupted or also due to folder extraction permissions (encryption file system permissions issues).
FAQ
Windows cannot complete the extraction the destination file cannot be created 7zip
Try changing the zip file location to new location and extract the file or use another zip extraction tool like 7zip or use winrar to repair zip file.
What does it mean when it says the destination file could not be created?
Move the file from one location to another and extract the file and try renaming the folder to short name and move it to main folder instead of sub folder.
Windows cannot complete the extraction the destination path is too long
Move the file to another location and rename the file with a shorter name and extract the zip file.
Rajeshwari Chiluveru
Rajeshwari is Senior Content Writer, Author, and Also Senior Editorial Team Member at A Savvy Web and She has a Degree in Bachelor of Technology (Btech) and (Master of Technology) Mtech from JNTU and is a real time expert. She writes about technology guides and troubleshooting guides (tips and Solutions) and helps users to solve issues easily. She has expertise in this area for more than 5+ years of experience and enthusiastic to provide troubleshooting tips and fixes and how to articles on Tech Related subjects like iPhone, Android, iOS, Smart tv and other tech related solutions and easy methods to fix.
Compressing a file uses various compression and encryption techniques to reduce the file size and faster data transmission. Windows can easily extract and decrypt data from a compressed file unless it runs into issues with the compressed file, its location, or its encryption technique. In these cases, Windows explorer cannot complete the extraction.
Typically, if you are trying to extract a file that is in a protected area, Windows is likely to display a “Windows cannot complete the extraction” error message. Besides this, several reasons, like advanced encryption or longer filename, may cause the OS to halt the extraction process.
If the compressed file is protected, simply moving the file to your desktop and extracting the file should fix the issue. But, if the cause is something else, you may need to perform other steps to fix the issue.
What Causes the “Windows cannot complete the extraction” Error?
Besides compressed files in protected areas and compressed files using advanced encryption, let us look at some other reasons Windows cannot complete the extraction.
- Corrupted ZIP file
- Longer filename
How to Fix the “Windows cannot complete the extraction” Error?
Let us start with the solution to the most common reason you get the error message, Compressed file in a protected area.
Extract the file to a different Location
Extracting a ZIP file that is protected or extracting a ZIP file in a protected location is likely to cause an error message saying, “Windows cannot complete the extraction.” The protected area includes the folder where you do not have write access or folders that are password protected.
For example, folder from another user’s account that you can access from your user account are considered as protected area.
Fixing this is rather simple. You just need to move the compressed file to a different location that is not protected.
- Copy the compressed file and paste it onto your desktop.
- Now, try extracting the file.
Note: Ensure you set the right location when extracting the file. Do not extract the file in a private location.
Once you do this, Windows should extract the file without any error message.
Shorten the Filename
Windows only support a maximum path length of 256 characters. This includes file name, file path, and namespace. If the compressed file you are trying to extract has a long file name or is in a location where the path is too long, Windows will not perform the action.
To fix this, you can rename the file to something short so that it does not exceed the limitation of 256 characters. Alternatively, you can also move the file to the desktop to decrease the file path.
You can also permanently enable long paths by changing the Registry’s settings. However, changing wrong values in the registry may cause some serious issues in the OS. Therefore, make sure you back up the registry before changing any of its values.
- Press the Windows + R key to open Run.
- Type
regeditand press Enter. - Navigate to
HKEY_LOCAL_MACHINE\SYSTEM\CurrentControlSet\Control\FileSystem. - On the right panel, double-click on LongPathEnabled.

- Set Value data to 1 to enable the long path option.
- Press OK.
- Restart your PC to save changes made to the registry.

Re-download the ZIP File
Files downloaded from the internet may be corrupted if something interrupts the download process. And if the compressed file you downloaded suffers from such interruption, you may face issues when extracting such files.
Try downloading the ZIP file once again. Make sure that the download process is not interrupted. Once the download process is complete, extract the file.
You can find several solutions on the internet that say running the SFC/DISM command and performing a clean boot fixes the issue. But, these solutions are not remotely related to the extraction of a compressed file.
However, if you think corrupted system file or a third-party service is causing the issue with Windows’ compression tool, you can try running the SFC command or performing a clean boot to eradicate such issues.
Using a different Archive Application
Sometimes, if the encryption on the compressed file is advanced than what windows explorer uses, Windows explorer may not be able to extract the document. If this happens, Windows displays an error message Windows cannot complete the extraction.
To fix this type of issue, you will need a third-party archive application that supports decompressing these files. Applications like 7-Zip and WinRAR are great for decompressing all types of compressed files.
To install them,
- Download any of the two applications, 7-Zip or WinRAR.

- Install the application by running the executable (.exe) file.

- Now extract the desired file using the new archive application. Windows should now begin the extraction process.


You may often compress a file, especially the huge ones before transferring or say sharing the files. The compressed file version is usually low in size compared to the original file. However, to extract such a compressed file, we often use the file compression functionality like Winzip. And in case if you are one of those who are encountering errors while extracting the files, then this article will help you successfully diagnose the error.
When a user tries to extract the compressed file then its shows an error message that says “Windows cannot complete the extraction The destination file could not be created”
This error may appear on Windows 10, 8, or 7. It may also show an error message like “The destination path is too long” when you were trying to extract the file.

What can be the possible reasons behind the unsuccessful extraction?
Well, there can be several reasons for which Windows cannot complete the extraction. Some of the important ones are as follows:
- The compressed file might be a corrupted one.
- The compressed file may be in a secured location inside your Windows system.
- It very well may be a result of software conflict during the extractions process.
- Due to the very long name of your compressed/zip file.
Just because of such reasons you may eventually end up encountering irritating error messages.
Quick Overivew
Methods to Fix Incomplete Extraction Process
I have briefed down some of the easy-to-implement methods, implementing any of these methods can help you to get your desired extracted file.
By Restarting the Computer
Sometimes the incomplete extraction problem can be fixed by just restarting the system. This is usually a temporary issue that can be fixed by rebooting your system.
This should fix the issue, if not then follow the next method.
By Running SFC Scan
By performing an SFC scan of the corrupted system files you can easily fix such corrupted files. In order to run an SFC scan follow the steps referenced below.
- Press Windows + R key
- Now type cmd.
- Now press Ctrl + Shift + Enter
- Now in elevated cmd type or just copy the command sfc /scanow.
- Press the Enter key to execute the application
That’s it, now wait until the scanning process is completed. Eventually, after the scanning is completed, try to extract the file, hopefully, you would not receive any error.
In case if the error still persists then you must implement the next method.
Move Zip/Compressed file to Another Location in PC
Moving the compressed file works to somewhere else in the PC works in the cases when you get the extraction error just because the compressed file is present in the protected/secured location of your PC. Hence just move the file to a different location in your PC then try to extract the zip/compressed file.
Renaming the Long Filename
Many times a user gets an error message saying “path is too long or file name is too long’”, in such cases it is suggested to just rename the file name to a shorter file name. So just rename the file name and then try to extract the compressed/zip file.
Try Another Extract Software
If you are using the system default zip tool or Winzip then you may try other free file compression software.
There are several such good zip software like:
- WinRAR
- 7-zip
- PeaZip
Perform a Clean Boot
If none of the methods work and you are still unable to extract your compressed/zip file, then performing a clean boot is your last recommended method. Here are the steps:
1. Press the Windows + R
2. Now type MSConfig and hit Enter, to open System Configuration.

3. Now select the third option saying Selective Startup.
4. Next, uncheck the box of Load Startup Items as shown below.
5. Next click on apply button.
6. Now switch to the Services
7. Uncheck the box of Hide all Microsoft services and then click on Disable all button as shown below.
8. Now click on Apply button and then click on the Ok button.
That’s it, now restart your Windows System and hopefully, your problem will be resolved.
I am hoping my article helped you in successfully extracting your desired compressed. For any kind of extra information or help, you are always welcome to comment below and reach to us.
Read next:
- Fix: USB Mouse Not Working on Windows 10
- Fix LastPass Error Code 1603
- Fix Monitor Screen Turning Black for a Few Seconds