
Readers help support Windows Report. We may get a commission if you buy through our links.
Read our disclosure page to find out how can you help Windows Report sustain the editorial team. Read more
If you cannot change your desktop background on your Windows 10 computer, it could be the setting is disabled, or there’s another underlying cause.
Several users have reported not being able to change the background on their Windows 10 and Windows 11 PCs, ultimately not allowing them to customize their PCs as per their requirements.
If you’ve tried all the basic fixes you know and nothing seems to work, then you can check out some of the workarounds below and see if one of these does the trick for you.
Why can’t I change my background on Windows 10?
Here are some common reasons you can’t change the background on your Windows 10 PC.
- Check if your copy of Windows 10 is activated.
- Some critical system files might be corrupted or missing.
- There is a presence of a virus or malware.
- The wallpaper that you are trying to set is not supported.
- The TranscodedWallpaper file might have gone corrupt.
- Prevent changing desktop background group policy might be enabled.
- There is some issue with your registry settings.
- The power options have some issues.
What do I do if I can’t change the background on Windows 10?
- Preliminary fixes
- Check that your Windows 10 is activated
- Create a new user profile with admin rights
- Delete TranscodedWallpaper or slideshow file in Registry editor
- Use Registry Editor
- Perform a clean boot
- Disable the video driver
- Use Ease of Access center
- Check that Plugged In option in desktop background settings is available
- Use Group Policy Editor
- Activate ‘Show Windows Background’
1. Preliminary fixes
- Turn off Show Windows background.
- Check if you have installed a third-party customization software, as it could restrict you from changing the desktop background. If so, uninstall it and restart your computer, then try to change the background again.
- Reinstall Windows again from your recovery key.
2. Check that your Windows 10 is activated
- Press Win + R to open the Run dialogue.
- Type explorer shell:::{D555645E-D4F8-4C29-A827-D93C859C4F2A}\pageEasierToSee and press Enter.
- Go to the Make the computer easier to see option.

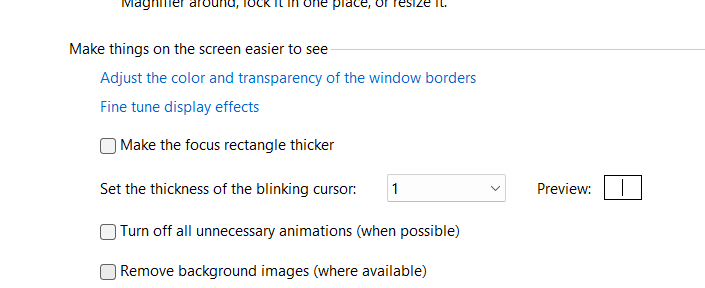
- Uncheck the Remove background images (where available) checkbox.

- Click OK when done.
- Reboot your computer and try changing the background again.


3. Create a new user profile with admin rights
- Press the Win + I buttons to open Settings.
- Click Family and Other people.

- Select Accounts.

- Click Add someone else to this PC.

- Fill in the form with the username and password. Your new user account will be created.
- Click on Change account type.
- Click the drop-down arrow and choose Administrator to set the account to administrator level.
- Restart your computer.


Login to your new account and set the desktop background again.
4. Delete TranscodedWallpaper or slideshow file in Registry editor
- Open File Explorer.
- Paste this path in the address bar:
%USERPROFILE%\AppData\Roaming\Microsoft\Windows\Themes - Double-click the slideshow.ini file and open it in Notepad.

- Empty the contents of that file in Notepad by selecting all the text and deleting it.
- Save the changes and close File Explorer.
- Try and change the background again.

- Fix: An Error Occurred While Loading a Higher Quality Version of This Video
- iTunesMobileDevice.dll is Missing From Your Computer [Solved]
- SYNSOACC.DLL Could Not Be Located: How to Fix in Cubase
- Fix: Omen Gaming Hub Undervolting Not Working
5. Use Registry Editor
- Right-click Start and select Run.
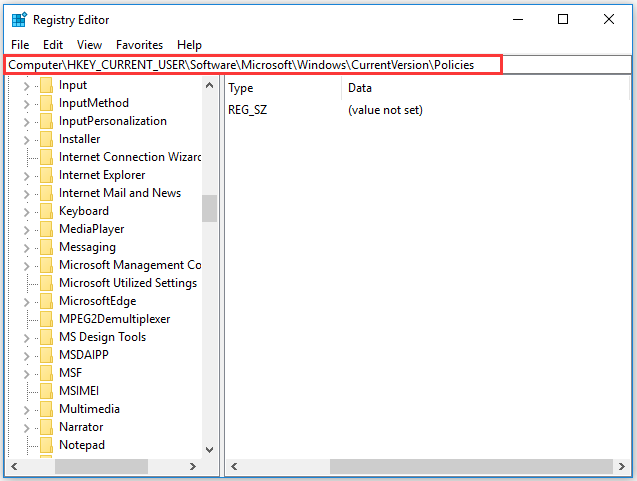
- Expand HKEY_LOCAL_MACHINE.

- Click Software\Microsoft\Windows\CurrentVersion\Policies.
- Right-click on Policies.
- Click New.
- Click KEY and name it as ActiveDesktop.
- On the right side, right-click New.
- Select DWORD and name it as NoChangingWallPaper. The DWORD value 1 will restrict change in desktop wallpaper. To allow change give it a value of 0.
- Restart your computer.

6. Perform a clean boot
- Log on as an administrator, and type msconfig in the search box.
- Select System Configuration.
- Find Services tab.

- Select Hide all Microsoft services box.

- Click Disable all.
- Go to the Startup tab.
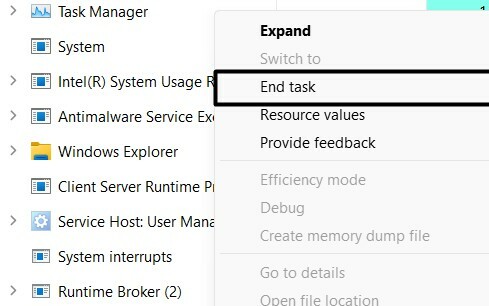
- Click Open Task Manager.

- Close Task manager, then click OK.
- Reboot your computer.


7. Disable the video driver
- Right-click Start and select Device manager.
- Right-click your graphics card.
- Select Disable device.

- Restart your computer.
- Try to change the background image again.

8. Use Ease of Access center
- Press the Win + I buttons to open Settings.
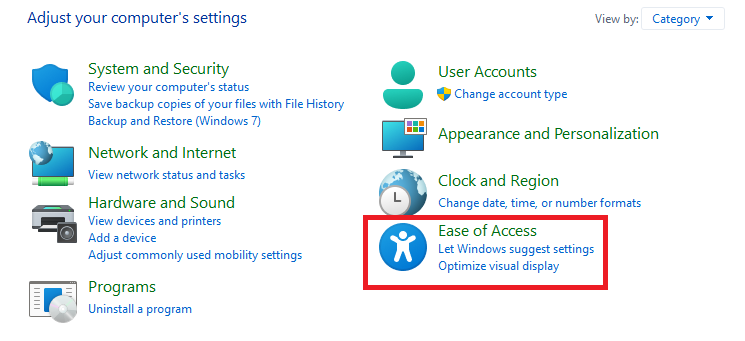
- Select Ease of Access.

- Click Optimize Visual Display.
- Scroll down and find Make the computer easier to see section.
- Make sure that Remove background images (where available) are unchecked.

- Click Save, Apply, and Exit.


9. Check that Plugged In option in desktop background settings is available
- Open Control Panel.
- Click Hardware and Sound.

- Click Power Options.
- Select your power plan.
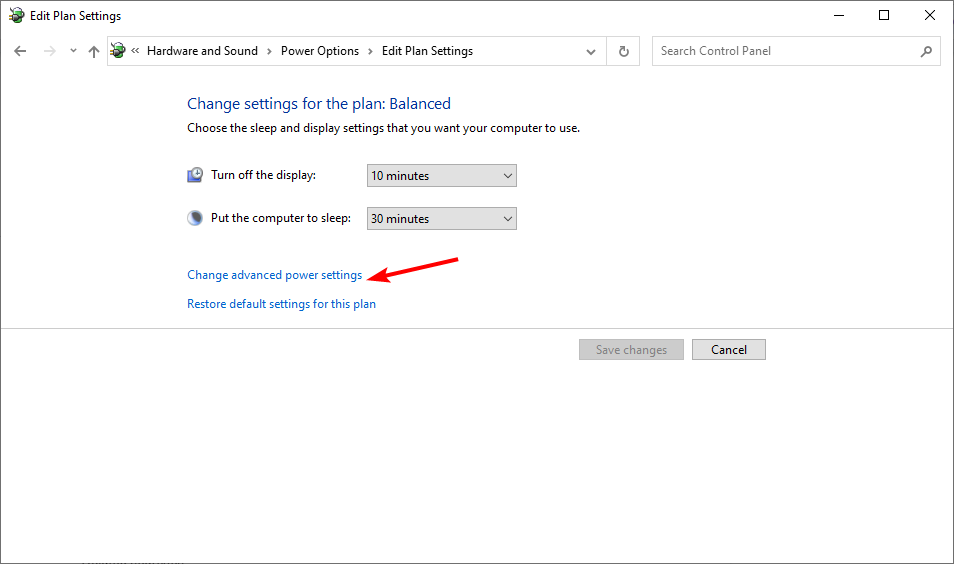
- Click Change plan settings.
- Click Change advanced power settings.

- Select Expand the desktop background settings.
- Click Expand slideshow.
- Set the Plugged In option to Available.


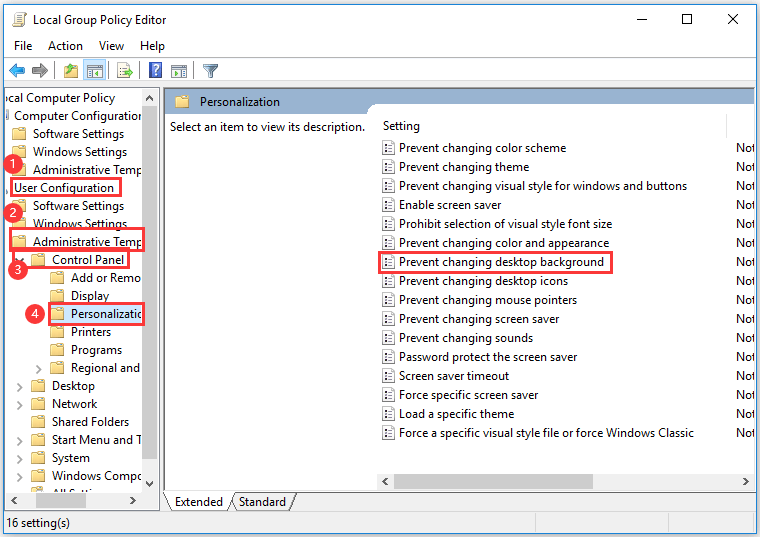
10. Use Group Policy Editor
- Right-click Start and select Run.
- Type gpedit.msc and press Enter.
- Go to User configuration.

- Select Administrative Templates.
- Double click Control Panel.

- Double Click Personalization.
- Look for the policy Prevent changing desktop background.

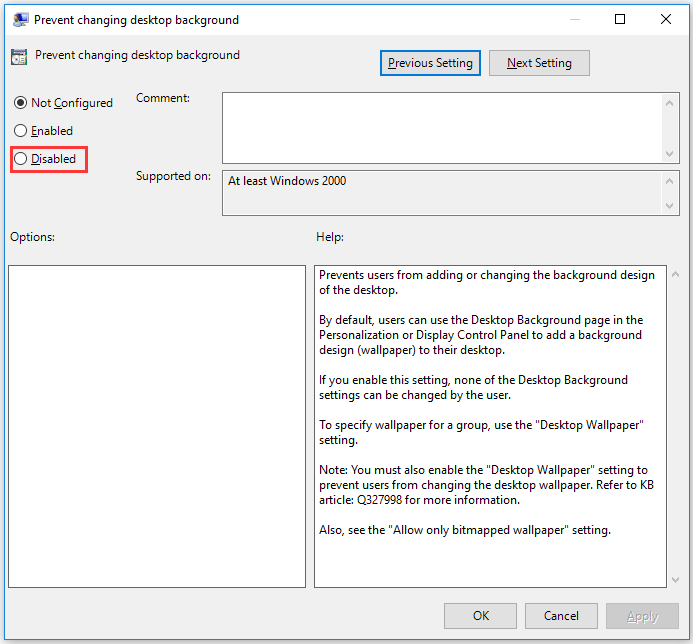
- Double-click on it to access its properties.
- Select Not Configured or Disabled to enable changing desktop background. If it is enabled, disable it.


11. Activate the Show Windows Background option
- Open Settings.
- Select Ease of Access.
- Click More Options.
- There’s a slider that reads Show Windows Background.
- Activate it and change the background again to see if it works.
What do I do if I can’t change the background on Windows 11?
You can also apply all the solutions mentioned above for Windows 11 PC, where you cannot change the desktop background.
However, if nothing works, we suggest you perform a clean install. Not only will this eliminate all the bugs, glitches, viruses, or malware that might be present on your PC, but it will also replace the corrupt or missing system files.
How do I reset my desktop background?
- Press the Win + R keys to open the Run dialogue.
- Type regedit and hit Enter.
- Navigate to the below path.
HKEY_CURRENT_USER\Software\Microsoft\Windows\CurrentVersion\Explorer\Wallpapers - On the right side, select the BackgroundHistoryPath0, BackgroundHistoryPath1, BackgroundHistoryPath2, BackgroundHistoryPath3, and BackgroundHistoryPath4 string values, right-click on them and select Delete.

- Click Yes to confirm the changes.
- Close the Registry Editor.

Did any of these solutions help you restore the change background feature? Let us know by leaving a comment in the section below.
Milan Stanojevic
Windows Toubleshooting Expert
Milan has been enthusiastic about technology ever since his childhood days, and this led him to take interest in all PC-related technologies. He’s a PC enthusiast and he spends most of his time learning about computers and technology.
Before joining WindowsReport, he worked as a front-end web developer. Now, he’s one of the Troubleshooting experts in our worldwide team, specializing in Windows errors & software issues.
You are here:
Home » Windows 10 » Fix: Cannot Change Desktop Background In Windows 10
By default, changing desktop background or desktop wallpaper is easy in Windows 10. You can just right-click on any picture file and click Set as desktop background option to set it as desktop wallpaper. One can also navigate to Settings > Personalization > Background to choose a picture for the desktop background.
If you are unable to change the desktop background or set a new picture as the desktop background, you can easily enable changing desktop background by making appropriate changes to Group Policy or Registry.
If the personalization section of Settings is displaying “Some settings are managed by your organization” message, it’s likely because changing desktop background has been disabled in Group Policy or Registry.

The following are the three easy fixes to enable changing desktop background in Windows 10.
Fix 1 of 3
Check activation status of Windows 10
First of all, before checking anything else, please check your activation status of Windows 10 by following instructions in our how to check if your copy of Windows 10 is activated guide. So, if your copy of Windows 10 is not activated, you can’t change the desktop background via Settings. You can read more about it in our how to change Windows 10 wallpaper without activating it guide.

However, even if your copy is not activated, you should be able to set a picture as wallpaper by right-clicking on the picture and then clicking Set as desktop background option.
Fix 2 of 3
Enable changing wallpaper in Group Policy
Because Group Policy is available only in Pro and Enterprise editions, this method does not apply to Home edition. So, if you are on Home edition, please skip to the directions mentioned in Fix 3.
One can prevent you from changing the desktop background by enabling policies in Group Policy. Complete the given below directions to make sure that changing the desktop background is not disabled in Group Policy.
Step 1: Type Gpedit.msc in Start/taskbar search field. Press Enter key to open Group Policy Editor.

Step 2: Navigate to User Configuration > Administrative Templates > Control Panel > Personalization.
Step 3: On the right-side, look for the policy named Prevent changing desktop background, and double-click on the same to open its properties.

Step 4: Select Not Configured or Disabled to enable changing desktop background. Disable it if it’s enabled.

Fix 3 of 3
Enable changing wallpaper in Registry
Step 1: Open Registry Editor by typing Regedit in the Start/taskbar search box and then hitting Enter key. Click Yes button if you see the User Account Control prompt.

Step 2: In the Registry Editor, navigate to the following key:
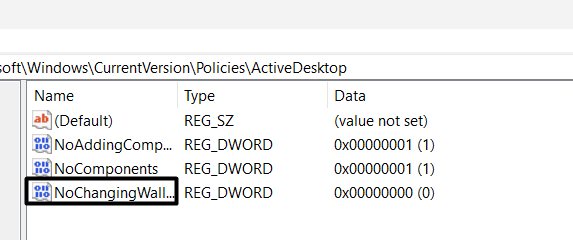
HKEY_CURRENT_USER\SOFTWARE\Microsoft\Windows\ CurrentVersion\Policies\ActiveDesktop

Step 4: Double-click on NoChangingWallpaper value and set its value data to “0” to enable changing wallpaper in Windows 10.

I hope this helps you fix the issue.
We all like to customize our Windows 11 PC’s background or wallpaper to make it attractive and stylish. But what if, one day, you want to change the system’s wallpaper and can’t do it? Of course, it’ll upset you, just like other Windows 11 users. Many users in the online forums said that they can’t change their Windows 11 PC’s desktop background.
If that’s the same with you, fret not, as in this guide, we’ll share some easy ways to fix this issue. So, try the below-mentioned fixes if you can’t change the background in Windows 11.
Why Can’t I Change My Wallpaper on Windows 11?
Several reasons can prevent you from changing your Windows 11 PC’s wallpaper. Below, we’ve listed the most common reasons for not being able to change the background in Windows 11:
- Corrupted System Files
- Malware and Viruses
- Outdated System
- Windows 11 Isn’t Activated
- Incorrect Group Policies
- Settings Are Syncing
- Corrupted TranscodedWallpaper File
- Incorrect Power Settings
- Bugs and Glitches in the PC
Fix Can’t Change Background in Windows 11
In this section, we’ll share some ways to resolve issues with your Windows 11 PC’s wallpaper. You can try all the mentioned fixes if you can’t change the background in Windows 11:
1. Make Sure Your Windows 11 Is Activated
One reason for not being able to change your Windows 11 computer’s wallpaper or background is the non-activated Windows 11. In order to change your PC’s background, you must be using Windows 11’s premium version.
To check whether your Windows 11 is activated, search the “Activate Windows” watermark in the bottom right corner of it. If the same watermark is there, then purchase Windows 11’s premium version to get rid of it.
You can check all the disadvantages of not activating Windows 11 in this detailed guide.
2. Try Other Ways to Change the Wallpaper
If you aren’t able to change your Windows 11 computer’s wallpaper via the Settings app, you can try some other methods to do this. You can change your Windows 11 PC’s desktop background via File Explorer, context menu, third-party wallpaper-changing apps, etc. Below, we’ve listed all the possible ways to change the wallpaper in Windows 11:
With File Explorer
You can follow the mentioned steps to change the PC’s background with the File Explorer utility:
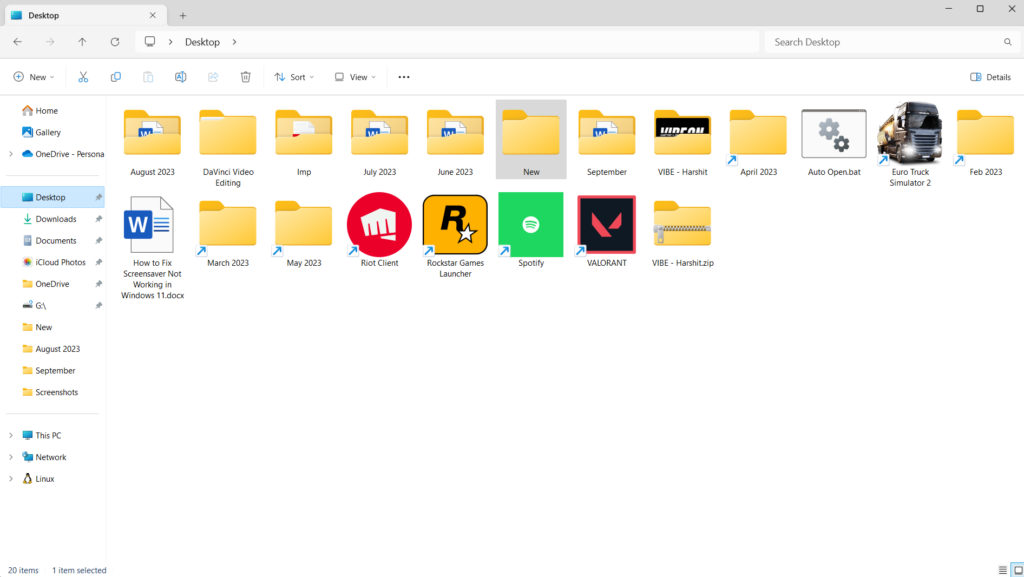
1. Press Windows + E to open File Explorer and locate the image you want to set as wallpaper.
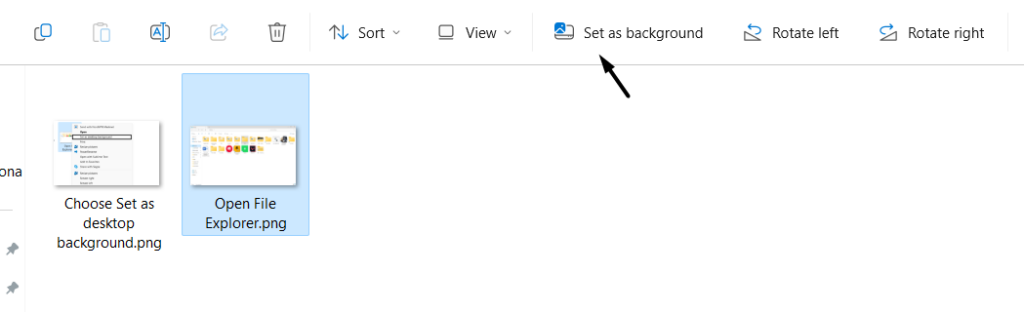
2. Choose the image, and click Set as background in the top menu to change the wallpaper.
3. Once done, close the File Explorer program and check if the wallpaper is changed now.
Via the Context Menu
You also get the option to change the Windows system’s wallpaper in your Windows 11 PC’s contextual menu. To know how to easily do the same, check the below-mentioned steps:
1. In File Explorer, go to the folder where you’ve saved the picture you want to use as background.
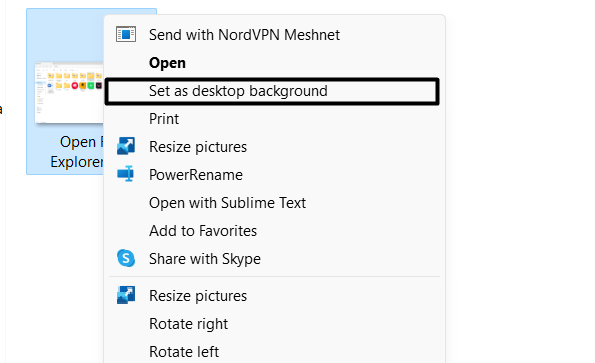
2. Right-click the picture, and choose Set as desktop background from the context menu.
3. Once done, exit the File Explorer utility and check whether the PC’s wallpaper is changed now.
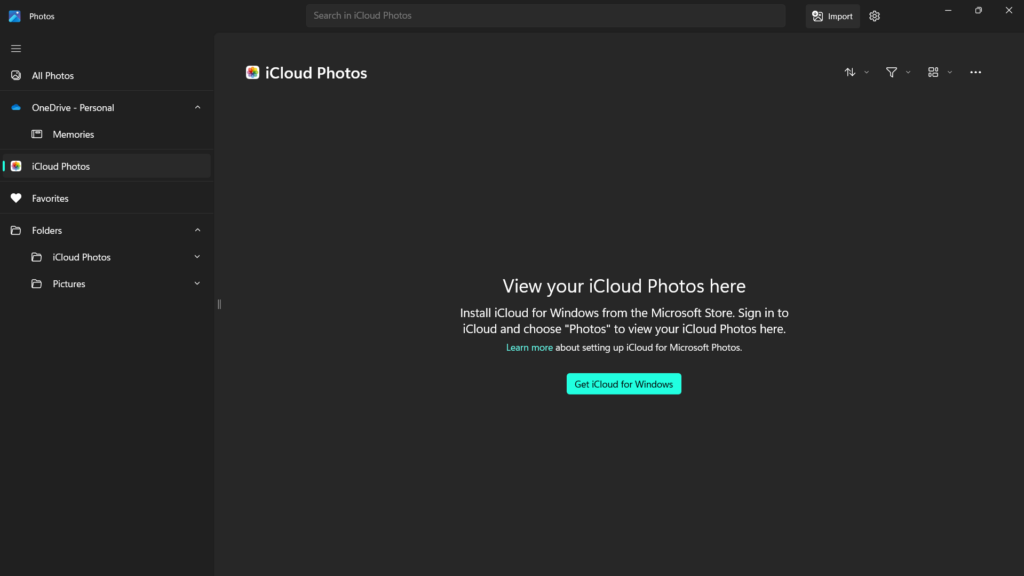
With Photos App
Windows 11 has a Photos app to view and edit all the photos on your Windows PC. This app also lets you set an image as the wallpaper. So try the same by following the below steps:
1. In the Photos app, locate the picture you want to set as your Windows 11 PC’s wallpaper.
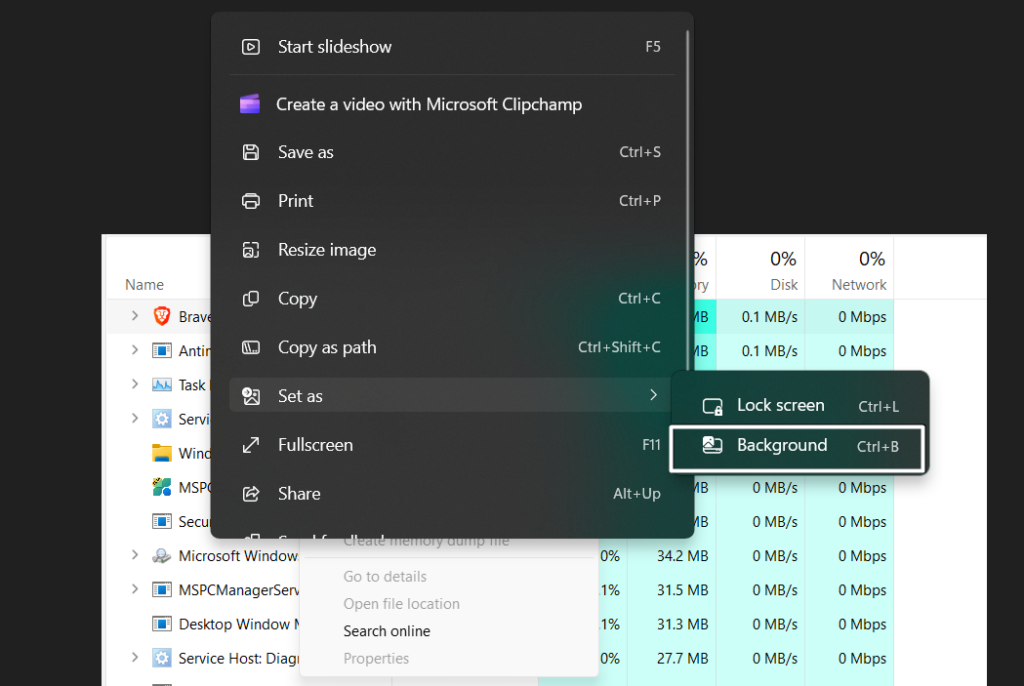
2. Open the picture, click the three dots at the top, and then hover the arrow on the Set as option.
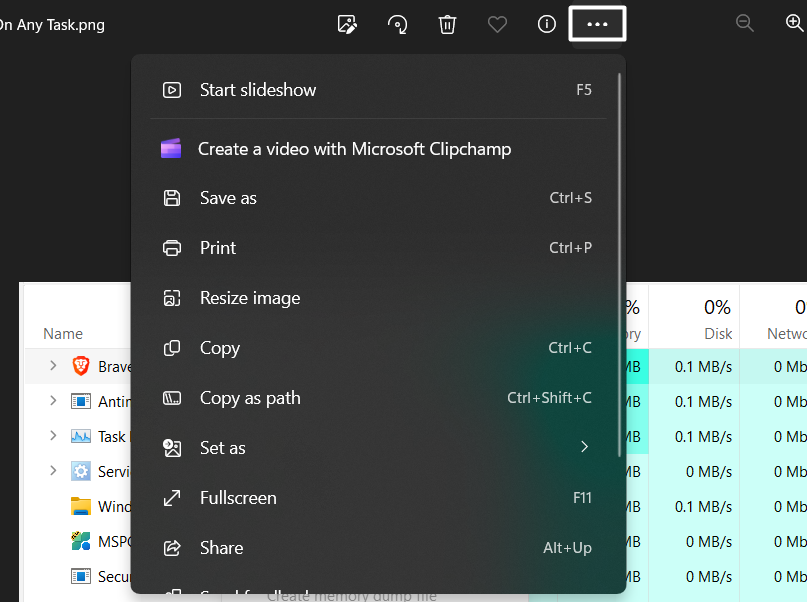
3. From the dropdown menu, choose the Background option to set it as your PC’s wallpaper. You can also do the same by pressing the Ctrl + B keyboard shortcut on your PC.
4. After doing the same, the selected picture will be set as a PC background within a second.
With Windows 11 Wallpaper Changer Apps
If none of the above-mentioned methods help you change the PC’s background or wallpaper, then you can use a third-party wallpaper-changing program to easily do the same.
3. Perform a Quick Reboot
Sometimes, the problems in the latest Windows 11 also appear because of temporary bugs and glitches. This could be the same in your case. Due to this reason, perform a quick reboot, as rebooting the PC often fixes these kinds of issues.

To restart your PC or laptop, press Alt + F4 and choose the Restart option from the dropdown menu in the new window. Once done, press the Enter key to restart the PC and check the issue’s status.
4. Check the Remove Background Setting Under the Ease of Access Settings
One of Microsoft’s Independent Advisors in the Microsoft forum advised affected users to untick/uncheck the Remove background images checkbox in the Ease of Access settings section of the Control Panel. They say that if you check this checkbox, the PC will automatically remove the wallpaper. So follow the below steps to disable it on your PC:
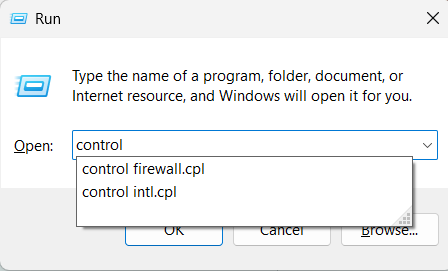
1. Press Windows + R to open the Run program, type Control in it, and press the Enter key. Besides this, you can open the same utility using Windows Search Box or any other way.
2. In Control Panel, click the Ease of Access option and then choose Ease of Access Center.
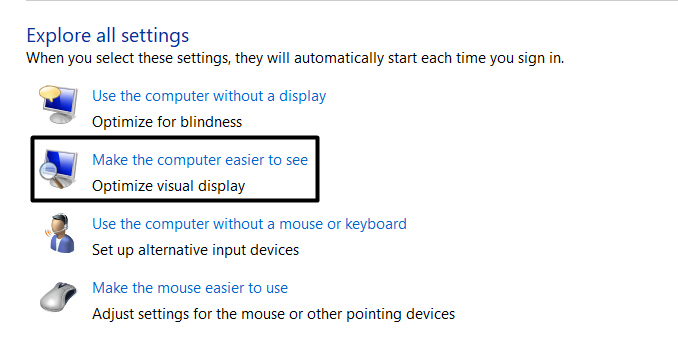
3. In the Explore all settings section, choose the Make the computer easier to see option.
4. Under Make things on the screen easier to use, uncheck Remove background images (where available).
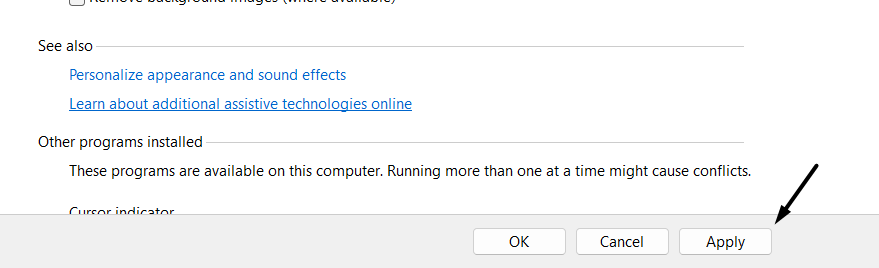
5. Once done, click the Apply button and then click the OK button to save this change now.
6. After saving the above-mentioned change, restart the computer and check the issue’s status.
5. Check the Group Policies Settings
If you’re facing this issue on a Windows 11 Pro-enabled PC, you can fix this issue by making some necessary changes to Group Policy Editor. To be specific, you need to set the Prevent changing desktop background policy to Not configured if you can’t change the background on your Windows 11 PC. You can follow the below steps to do so:
1. Press the Windows + R keyboard shortcut to open the Run utility, and type gpedit.msc in it.
2. Press the Enter key to launch the Group Policy Editor utility on your Windows 11 PC.
3. In the Group Policy Editor window, go to the below location to disable the above option:
User Configuration > Administrative Templates > Control Panel > Personalization
4. Double-click the Prevent changing desktop background policy on the right to open it.
5. In the new window, choose the “Not configured” option and then click Apply to save it.
6. Restart your Windows 11 PC and check whether you can now change the PC’s background.
6. Modify ActiveDesktop Value in Registry Editor
Some users mentioned that they resolved the issues with their system’s background by removing some bad keys and values from Registry Editor. So, we suggest you do so and check if it improves the situation. You can check the below steps to know what you need to do:
1. Open the Run app on your Windows 11 PC, type regedit in it, and press the Enter key.
2. Once the Registry Editor utility is opened, navigate to the below-mentioned location in it:
HKEY_LOCAL_MACHINE\SOFTWARE\Microsoft\Windows\CurrentVersion\Policies3. On the left, click the ActiveDesktop key, and then right-click on the right side of the panel.

4. Hover the arrow on New and then choose DWORD (32-bit) Value from the New menu.
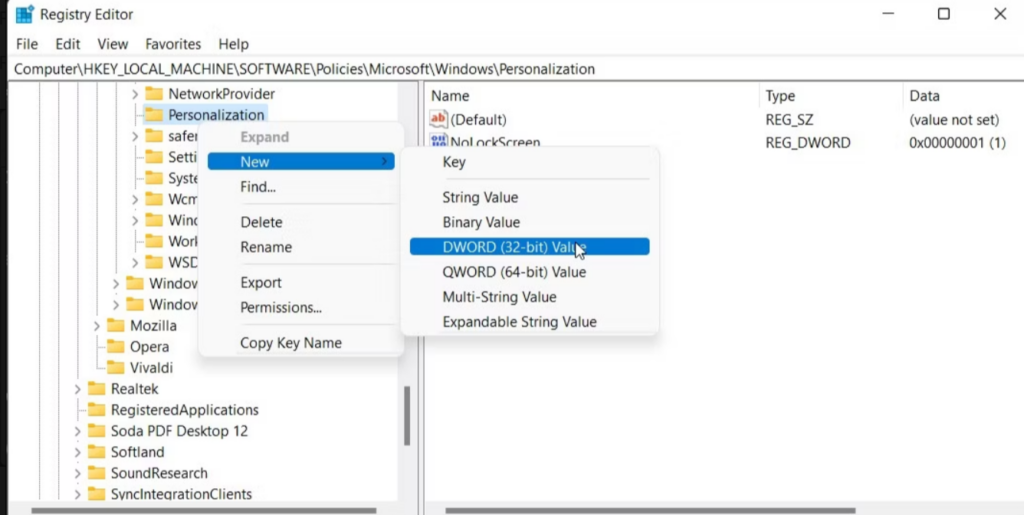
5. Rename the new value as NoChanging WallPaper, and then click OK to save the value.
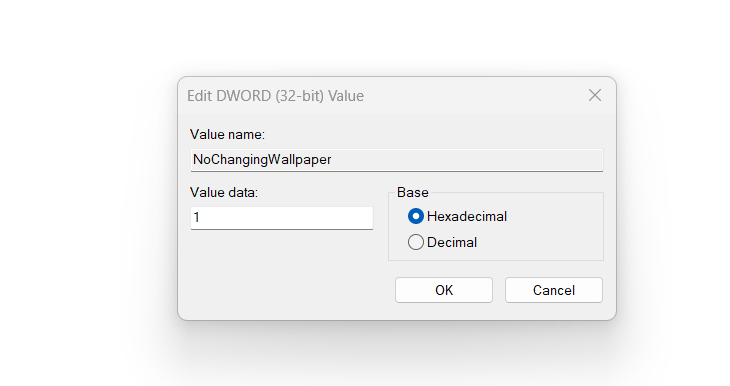
6. Once done, double-click the NoChanging WallPaper value and add “1” in the Value data: field.
7. After making the above-mentioned change, see if you can now customize your PC’s wallpaper.
7. Disable the Windows 11 Sync Settings
For some users, preventing the system from syncing settings and preferences across all the devices resolved the issue. Thus, we suggest you do the same and check if it fixes the issue. You can follow the below steps to know what exactly you need to do on your system:
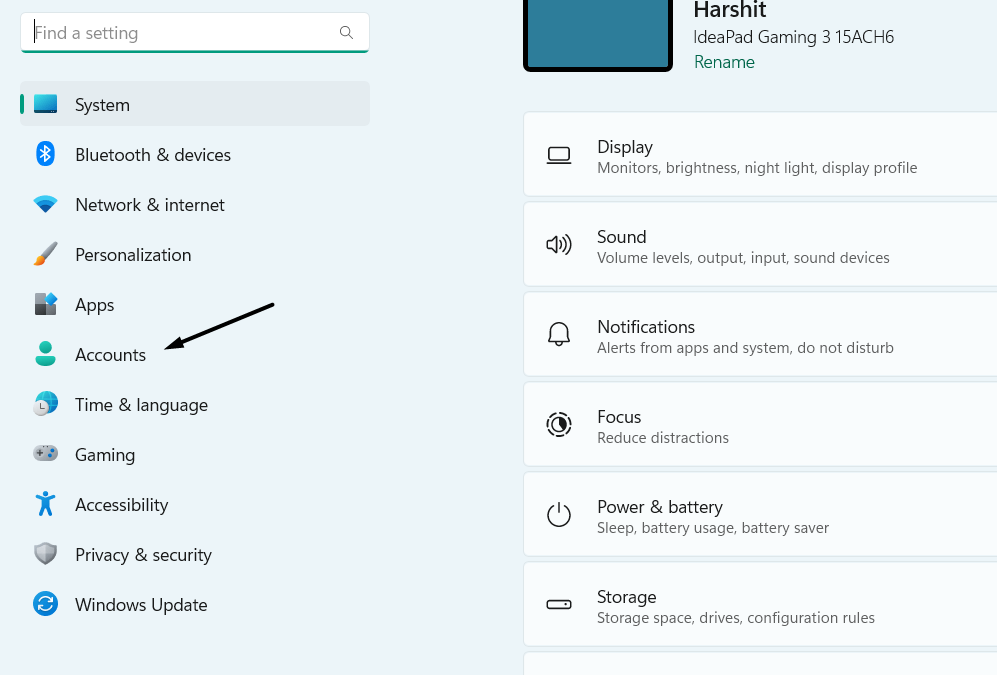
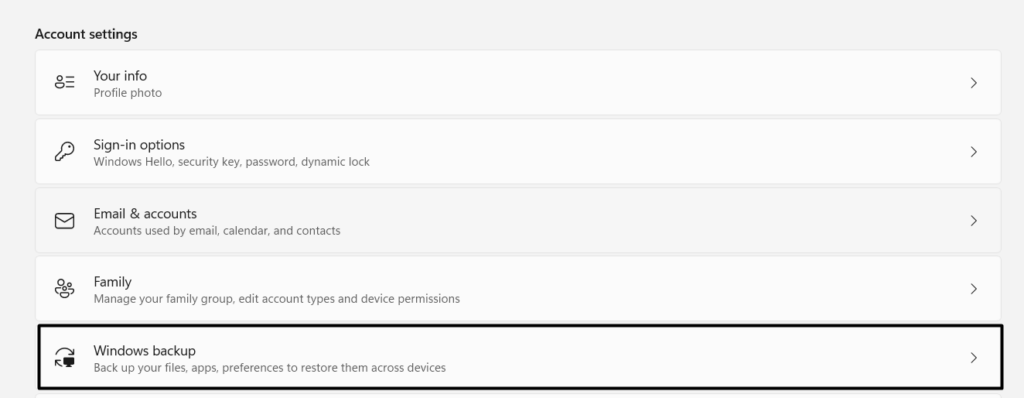
1. Launch the Settings app on your Windows computer and choose Accounts from the left of it.
2. In the Accounts window, select Windows backup on the right to access the backup settings.
3. On the next screen, turn off the Remember my preferences toggle and untick the below checkbox:
Other Windows settings
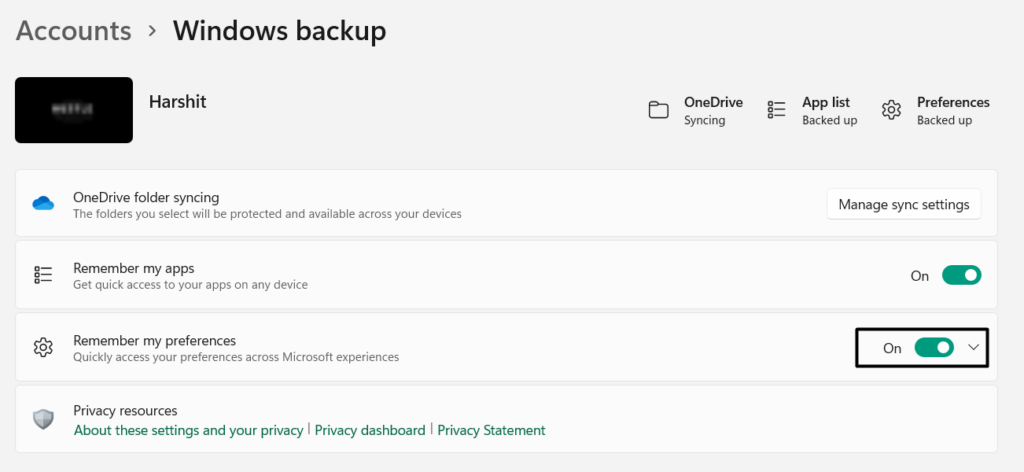
4. Once done, apply the above changes, and check whether you can now change the wallpaper.
8. Fix the Corrupted TranscodedWallpaper File
It could be possible that your Windows 11 computer’s TranscodedWallpaper.jpg file that lets you change the PC’s wallpaper has been corrupted, which is why you can’t change it with ease.
In that case, we suggest you delete this file from the system to eliminate the issue. We’ve mentioned the prompts to do the same below, so follow them to try this method:
1. Open the Run program on your Windows 11 PC using the Windows + R keyboard shortcut.
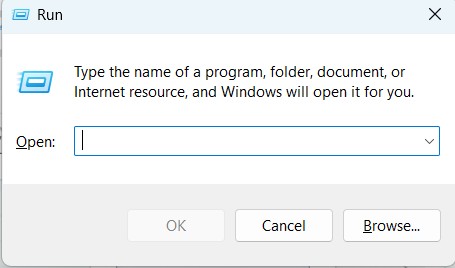
2. In the Run’s Open: text field, copy-paste%USERPROFILE%\AppData\Roaming\Microsoft\Windows\Themes\, and press the Enter key.
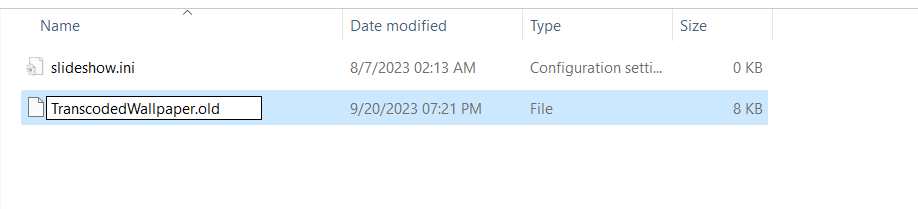
3. In the Themes folder, right-click TranscodedWallpaper, and then click the Rename button.
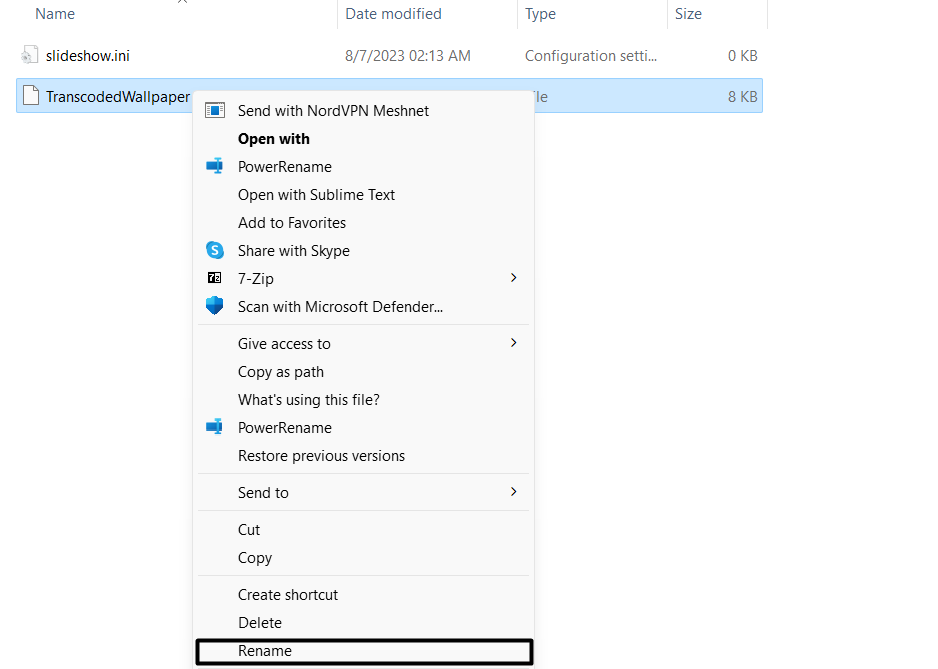
4. In the text field, type TranscodedWallpaper.old, and press the Enter key to save the name.
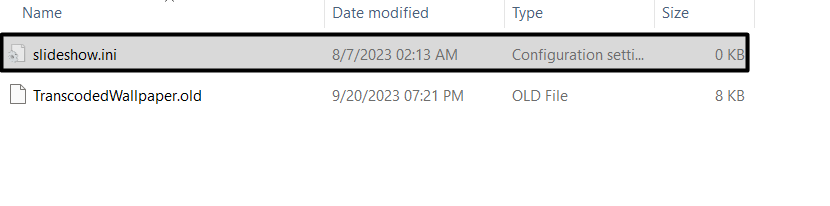
5. Once done, double-click the slideshow.ini folder in the Themes folder to view or open it.
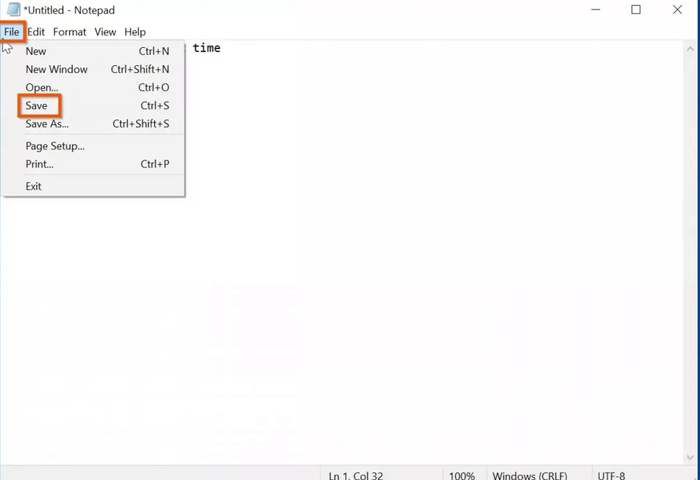
6. Once the file is opened, delete all the text in it by hitting the Backspace key on your keyboard.
7. Click the File option in the menu, and then choose the Save option from the dropdown menu to save it.
8. Open the Photos app, choose the image you want to set as wallpaper, and then set it as wallpaper.
9. Set Wallpaper Without Needing Windows Activated
If your Windows 11 isn’t activated, but you still want to change your desktop’s wallpaper, then we have a quick hack to do so. To do this, you only need the Paint app on your PC, which comes pre-installed on all PCs. You can follow the below steps to learn how to do so:
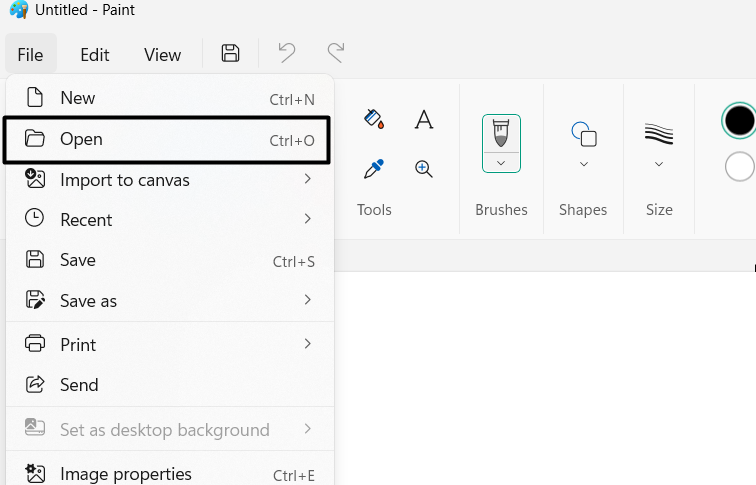
1. To set wallpaper without needing Windows activated, open the Paint program on your PC.

2. In the Paint app, click the File option at the top and choose Open from the dropdown menu.
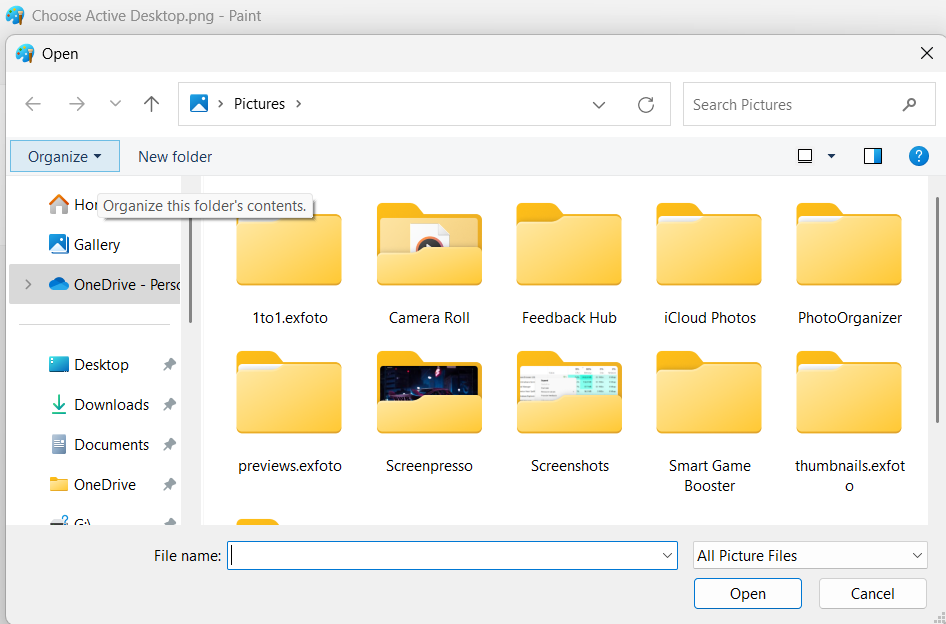
3. In the Open window, go to the location where the image you want to set as wallpaper is saved.
4. Hover your arrow key on Set as desktop background, and select any placement options.
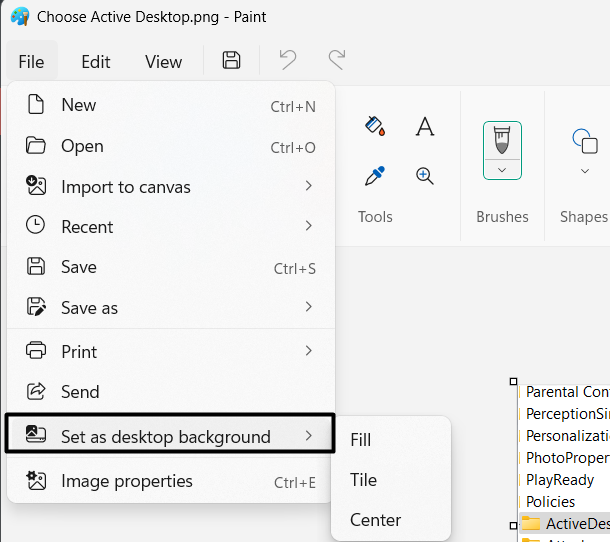
5. Once done, exit the Paint app and then restart your system to apply all the recent changes.
10. Fix Corrupted System Files
It could be possible that some of your PC’s essential files, which let you customize the PC’s wallpaper, have been corrupted. Due to this reason, run the DISM and SFC scans on your PC. The DISM scan will repair the corrupted Windows image. Whereas the SFC scan will repair the corrupted system files. You can follow the below steps to run these scans:
1. Open the Command Prompt app on your Windows 11 PC with administrative privileges.
2. In the Command Prompt window, run the below commands individually to start the DISM scan:
DISM /Online /Cleanup-Image /CheckHealthDISM /Online /Cleanup-Image /ScanHealthDISM /Online /Cleanup-Image /RestoreHealth3. After executing the above DISM commands, the DISM scan will begin on your Windows 11 PC; find the issues with the Windows system image and resolve them to fix this issue.
4. Once the DISM scan is finished, run the below-mentioned command to begin the SFC scan:
sfc/ scannow5. Once the SFC scan is also completed, check whether the current issue is fixed on your PC.
11. Check Power Options
Some users in the online forums said that making changes to the system’s power options resolved the issue for them. To be specific, they made changes to the computer’s Desktop Background Settings. You can also try this and check if it works for you. We’ve mentioned the steps below, so follow them and get rid of the can’t change background issue:
1. Launch the Control Panel on your Windows 11 PC using the search box or any other method.

2. In the Control Panel window, choose Power Options by setting View by: to Small icons.
3. Click Change advanced power settings and then expand the Desktop background settings section.
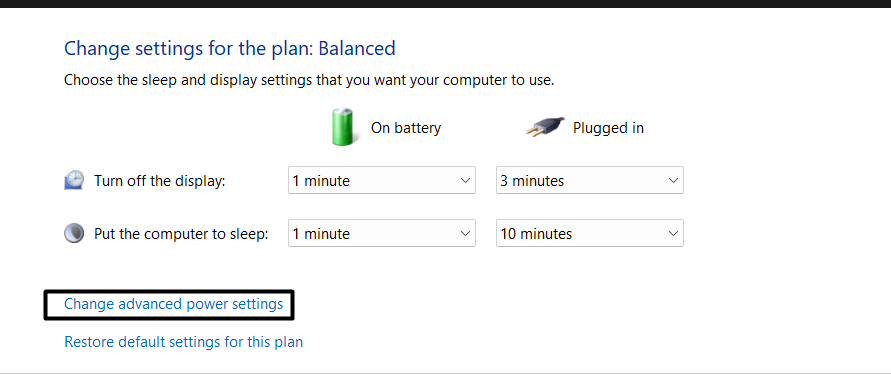
4. Under the Desktop background settings section, double-click Slide Show to expand it.
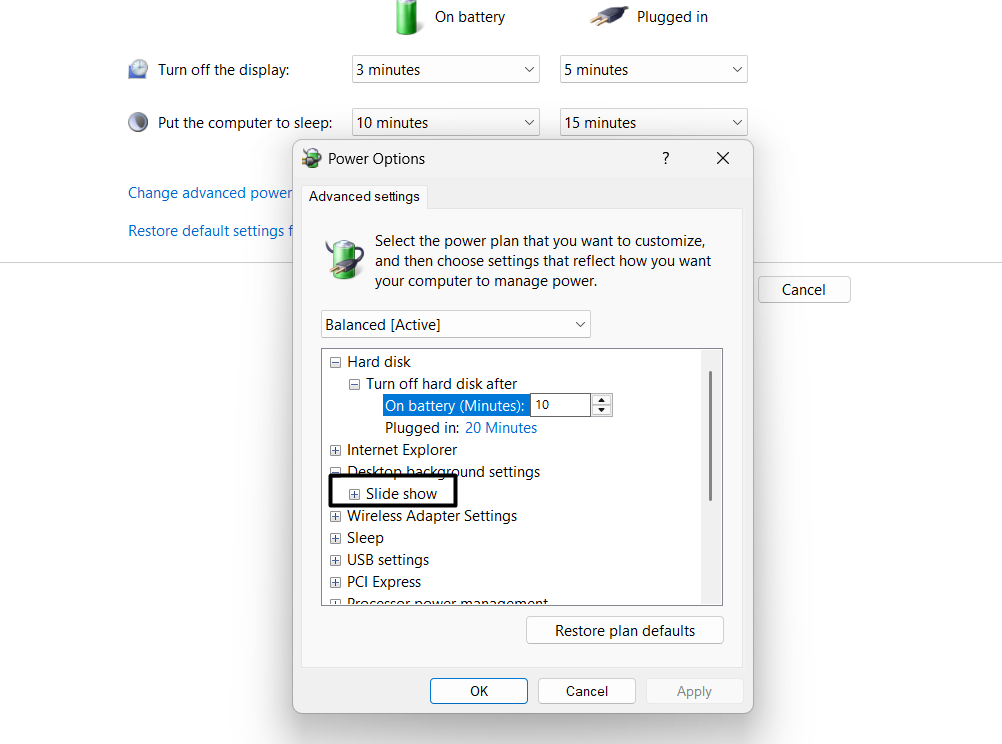
5. Under Slide Show, set the Plugged in: dropdown menu to the Available option and apply it.
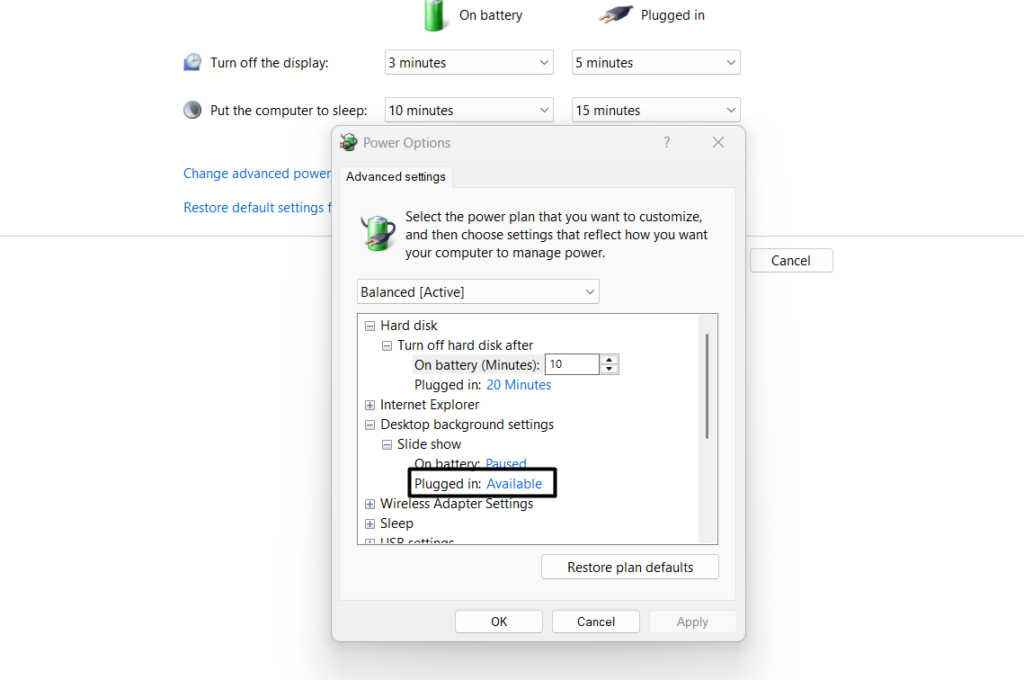
6. Once done, restart your Windows 11 computer and check if you can now personalize the wallpaper.
12. Install the Latest Windows 11 Updates
It could be possible that your current Windows 11 version has some bugs and glitches, which can only be fixed by updating it. Due to this, we suggest you update your operating system to the latest version. You can check the below steps to know how to do so:
1. Open the Settings app on your PC and choose the Windows Update option from the left.
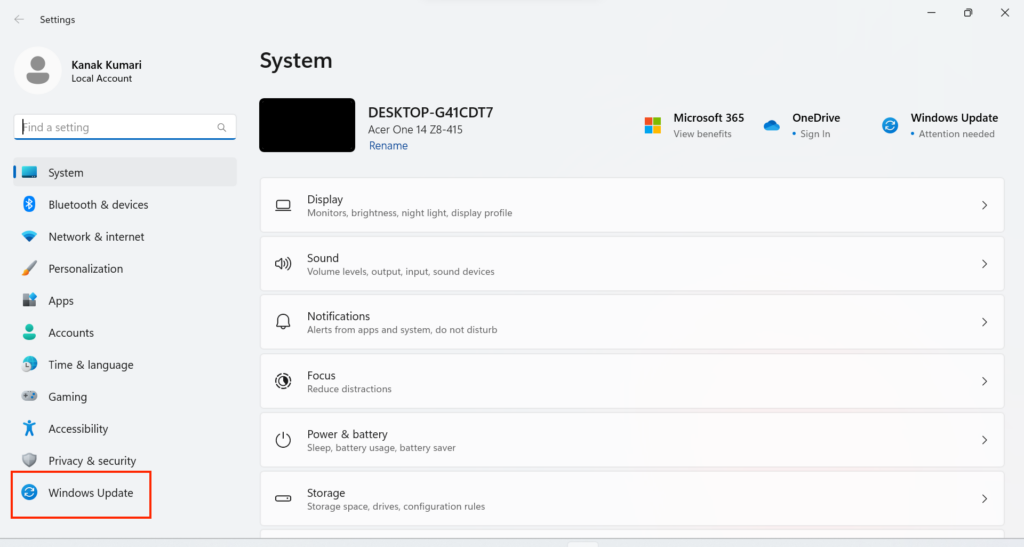
2. In the Windows Update window, select the Check for updates button to search for new updates.

3. If you see any updates, click the Download & install button to install the new Windows updates.

13. Clean Boot Your PC
If updating the Windows 11 PC doesn’t fix the issue, then consider clean booting your PC. Doing this will help you know whether a third-party app or service is interrupting the PC and causing this issue. So follow the below-listed steps to boot your PC into Safe mode:
1. Use the Windows + R hotkey to open the Run utility and type msconfig in its Open: text field.

2. Press the Enter key to get the System Configuration window and move to its Boot tab.
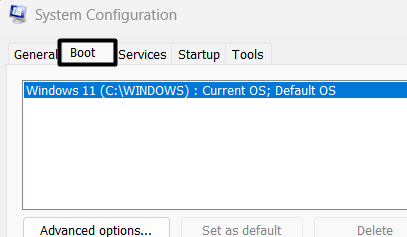
3. In the Boot window, in the Boot options section, check the Safe boot and Network box.

4. After doing so, go to the Services tab, and in it, check the Hide all Microsoft services box.

5. Move to the Startup tab, and click on the Open Task Manager option to open Task Manager.

6. In the Task Manager program, force close or end all the running non-Microsoft tasks to know if a third-party app is causing the problem. If yes, then the issue will be fixed with ease.
14. Reset Your Windows 11 PC
If none of the above-mentioned workarounds let you change your PC’s wallpaper, then consider resetting your PC. This will delete all the data from your PC and also resolve the issue. If you want to try this solution, ensure to take a backup of your Windows 11 PC first. Once done, implement the below-mentioned steps to try it on your Windows computer:
1. Move to the Recovery tab of the Settings app, and click Reset PC under Recovery options.
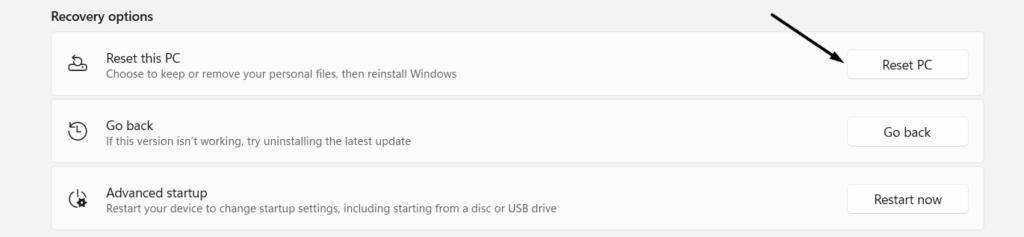
2. On the next window, select the Remove everything option and then the Local reinstall option.

3. Keep following the on-screen instructions to reset your Windows 11 PC and fix this issue.
FAQs
Why Am I Not Able to Change My Desktop Background in Windows 11?
It could be possible that your Windows system’s essential files have been corrupted, which is why you aren’t able to change your Windows 11 PC’s desktop background or wallpaper.
How Do I Unlock My Desktop Background in Windows 11?
You can follow the below-mentioned prompts to unlock your Windows 11 PC’s desktop background:
1. Open the Control Panel utility on your Windows PC and choose the Ease of Access option.
2. In the Ease of Access window, under Explore all settings, select Make computer easier to see.
3. On the next screen, untick the Remove background images (where available) box to unlock it.
Why Is My Desktop Background Spotlight Not Working Windows 11?
If your Windows 11 PC’s Spotlight feature isn’t working, it may be possible that you aren’t connected to an active internet connection. Other reasons could be the enabled metered connection option, third-party antivirus programs corrupted Windows system files, and more.
How Do I Force My Desktop Background to Change?
You can change the system’s desktop background from the Personalization tab of the Settings app.
Set Any Image as a Desktop Background or Wallpaper You Want
In Windows 11, we can set any image as our PC’s desktop background or wallpaper with ease. But sometimes, when we command the system to apply a certain image as wallpaper, it fails to do so.
If the same was happening with you, we hope this guide helped you do so, as in this guide, we shared ways to fix can’t change the background in Windows 11. Lastly, do let us know which workaround helped you resolve the issue with ease.
-
Home
-
Partition Manager
- Can’t Change Desktop Background on Windows 10? Here Are 4 Fixes
By Vicky |
Last Updated
It is easy to switch to another wallpaper on Windows 10. However, some Windows 10 users ran into “can’t change desktop background Windows 10”. If you are facing the same issue, you come to the right place. This post offers 4 solutions to this issue. You can try them one by one.
Windows 10 Wallpaper Not Changing
Changing the wallpaper on Windows 10 is quite easy —you just need to right-click the picture you prefer and then choose the Set as desktop background option.
However, sometimes Windows 10 can’t change desktop background. Why does this issue happen? Keep reading to find the causes and corresponding fixes.
Tip: Are you seeking for a utility for disk management on Windows 10? If yes, you can try MiniTool Partition Wizard. It is a professional partition manager, skilled in resizing partition, recovering data, backing up disk and partition, etc.
MiniTool Partition Wizard DemoClick to Download100%Clean & Safe
Fix 1: Reboot Your Computer
Have you ever encountered this issue before? If this is the first time that you are facing “can’t change desktop background Windows 10”, please try rebooting your computer and see if the issue gets fixed. If rebooting your computer is useless, please try the following fixes one by one.
Fix 2: Install the Pending Windows Update
Click the Windows icon on the taskbar and then click the power icon to see if any Windows update is pending or not.
If you see the Update and shut down option or Update and restart option, please complete the update and then check if “Windows 10 wallpaper not changing” is removed.
Fix 3: Check If Windows 10 Has Been Activated
If you have not activated Windows 10, this likely prevents you from changing your desktop background. Follow the tutorial below to check if you have activated Windows 10.
Step 1: Right-click the Windows icon on the taskbar and then select the Settings option.
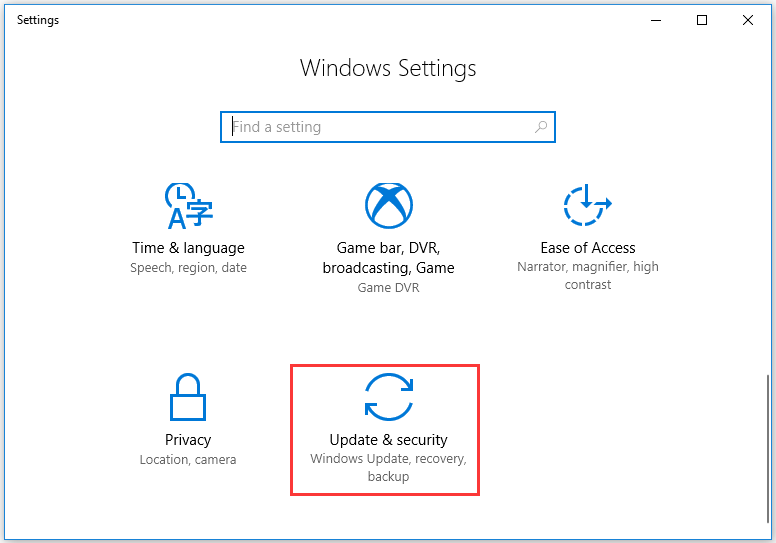
Step 2: Select the Update & security option from the Settings window.
Step 3: Scroll down the left side of the Update & security window and select the Activation option.
Step 4: Look through the information on the left side to check if your Windows has been activated.
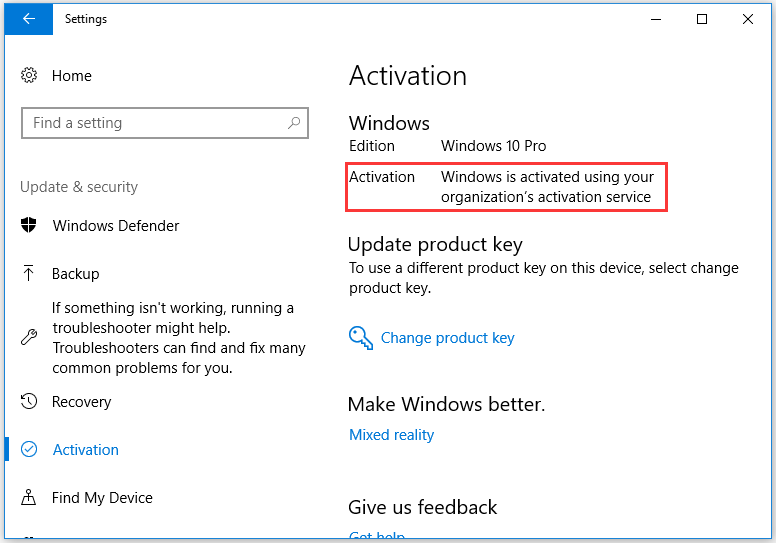
If your Windows has not been activated, please activate it and you should be able to change your desktop background successfully.
Fix 4: Disable the Prevent Changing Desktop Background Option
It is possible that the option that prevents you from changing desktop background is enabled. Therefore, disable it.
If you are using the Professional or Enterprise edition of Windows 10, you can disable the option via Local Group Policy Editor. If you are using Windows Home Edition, you can disable the option via Registry Editor (you might be interested in Windows 10 Home or Windows 10 Pro).
Disable the Option via Local Group Policy Editor
Step 1: Open Local Group Policy Editor.
- Press Windows + R to call out the Run dialogue box.
- Type gpedit.msc on the Run dialogue box and then click the OK button.
Step 2: Navigate to the path: User Configuration > Administrative Templates > Control Panel > Personalization.
Step 3: Locate the Prevent changing desktop background option from the right side of the window and double-click it.
Step 4: Select the Disabled option on the properties window. Then, click Apply and OK to execute and save the changes.
Making changes in Local Group Policy Editor can also be helpful when D drive is not showing up.
Disable the Option via Registry Editor
Note: Any improper changes in Registry Editor could lead to issues. Therefore, make sure there is a computer backup before carrying out the following operations.
Step 1: Open Registry Editor.
- Call out the Run dialogue box by pressing Windows + R.
- Type regedit in the Run dialogue box and click the OK button.
Step 2: Navigate to the path: HKEY_CURRENT_USERSOFTWAREMicrosoftWindows CurrentVersionPolicies
Step 3: Right-click the Policies entry, choose New and Key, and name the key as ActiveDesktop.
Step 4: Right-click the blank space on the right side, select New and DWORD (32-bit) Value, and name it as NoChangingWallPaper.
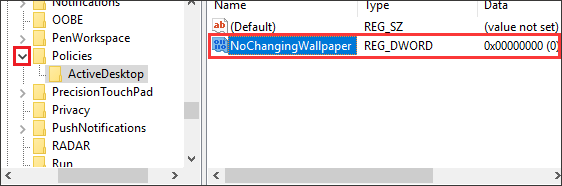
Step 5: Double-click NoChangingWallPaper, switch the value data to 0, and click the OK button to save the change.
Step 5: Close Registry Editor and then restart your computer.
All fixes to “can’t change desktop background Windows 10” have been displayed. Have you tried some of them? Hope you can change your desktop background again after applying these fixes.
About The Author
Position: Columnist
Vicky is a website editor who has been writing tech articles since she was graduated from university. Most of her articles talk about Windows PC and hard disk issues. Some of her articles also touch on YouTube usage and issues.
During her spare time, she likes to spend time reading, watching videos, and sitting on her Yoga mat to relax.
Quick Tips
- On Windows, you can change the desktop wallpaper with a few simple steps and set up a slideshow to keep things fresh.
- Try renaming the TranscodedWallpaper file on Windows to fix the issue.
- If the issue persists, review the Group Policy or Registry settings.
Fix 1: Ensure Windows Is Activated
Although you can use an unactivated version of Windows 10 or 11, there are a few limitations. One of them is the inability to change the desktop background or themes. Here’s how to check Windows’ activation status in the Settings app.
Step 1: Press the Windows key + I to open the Settings app and head to System > Activation.

Step 2: Check the status of Activation state.

If it says “Not active,” purchase a license key to activate Windows first.
Fix 2: Rename Corrupt Transcoded Wallpaper File
Windows saves your desktop wallpaper image in a file named TranscodedWallpaper. However, if this file has become corrupted, you can’t change the desktop background.
To fix this, rename the TranscodedWallpaper file on your PC, forcing Windows to recreate the file.
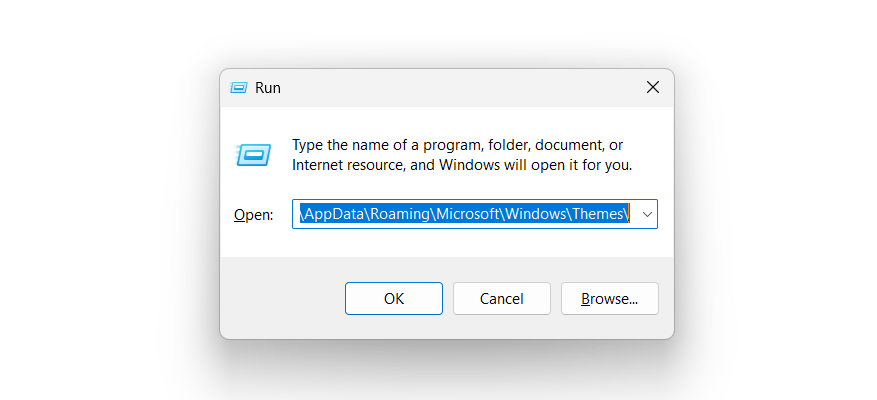
Step 1: Press the Windows key + R to open the Run dialog box. In the text field, type the following path and press Enter.
%USERPROFILE%\AppData\Roaming\Microsoft\Windows\Themes\
Step 2: Select the TranscodedWallpaper file, press F2, and rename it to TranscodedWallpaper.old or something else.

After completing the above steps, see if you can change the desktop wallpaper on Windows.
Fix 3: Modify Ease of Access Settings
Did you recently change the Ease of Access settings on your Windows PC? If so, that might be why you can’t change the desktop background. Here’s how to fix that.
Step 1: Click the search icon on the taskbar, type control panel, and press Enter.

Step 2: Use the drop-down menu at the top right corner to change the view type to Large icons. Then, click on Ease of Access Center.

Step 3: Click on Make the computer easier to see.

Step 4: Clear the Remove background images checkbox and hit Apply.

Fix 4: Check Group Policy Settings
Another reason you may be unable to change the desktop background on Windows is if the “Prevent changing desktop background” policy is enabled. As a result, you may get the “Custom backgrounds have been turned off by your administrator” message while changing the desktop wallpaper.
To fix this, you must change the Group Policy settings. Note that this is only possible if you run the Windows 11 Pro, Education, or Enterprise edition.
Step 1: Press the Windows key + R to open the Run dialog box. Type gpedit.msc and press Enter.
Step 2: Use the left pane to navigate to the following folder:
User Configuration\Administrative Templates\Control Panel\Personalization
Step 3: Double-click the Prevent changing desktop background policy in the right pane.

Step 4: Select Disabled and click Apply, followed by OK.

Fix 5: Modify Registry Files
If you can’t access the Group Policy Editor or the issue persists, modify a few registry entries to restore your ability to change the desktop background on Windows.
Step 1: Click the search icon on the taskbar, type registry editor, and select Run as administrator.

Step 2: In the Registry Editor window, paste the following path in the address bar at the top and press Enter:
HKEY_CURRENT_USER\Software\Microsoft\Windows\CurrentVersion\Policies

Step 3: Right-click on the Policies key, go to New, and select Key from the submenu. Name the key ActiveDesktop.

Step 4: Right-click the ActiveDesktop key, go to New, and select DWORD (32-bit) Value. Name the DWORD as NoChangingWallPaper.

Step 5: Double-click the NoChangingWallPaper value and enter 0 in the value data field. Then, click OK.

Restart your PC to check if you can change the desktop background.
Was this helpful?
Thanks for your feedback!
The article above may contain affiliate links which help support Guiding Tech. The content remains unbiased and authentic and will never affect our editorial integrity.