

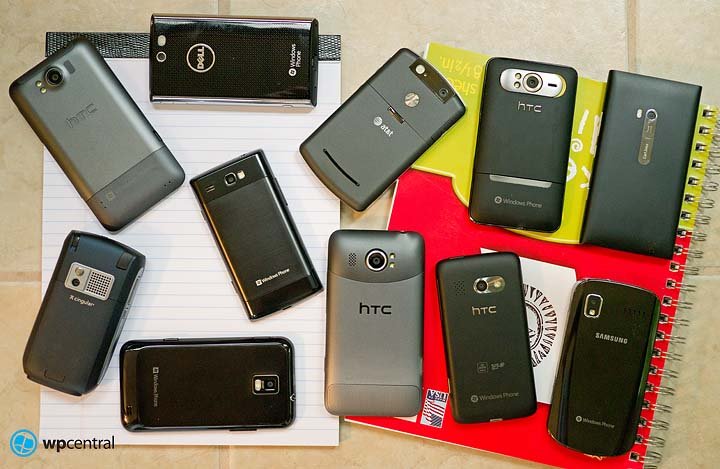
While the camera on your Windows Phone may not have been a key factor in the past, with the HTC Titan II sporting a 16mp camera and the Nokia Lumia 900 using a Carl Zeiss lens these little cameras are being seen in a new light. Where in the past many saw the camera as a nice accessory or even a novelty, as technology improves the Windows Phone camera’s performance it’s becoming a more influential feature.
Additionally, as our Windows Phone camera evolves so does the software that drives it. You have more control over the camera these days along with special settings to use effects, adjust exposure settings, and program settings. From your children at play to a stunning sunset to your new pet the camera on your Windows Phone is a great tool for capturing and sharing memories.
With all the advancements we’ve recently seen with our Windows Phone cameras (along with a few suggestions from our readers) it’s time to offer our guide to understanding the basics of your Windows Phone camera and a few tips on taking pictures. After the break, we’ll cover the principles of photography, the terminology involved, what some of your Windows Phone settings will do, and a few tips to take better pictures with your Window Phone.
Windows Phone Camera: The Basics
The basic concept of digital photography is that an image is captured by passing light waves through a lens that eventually hits a imaging sensor. Light is regulated by shutter speeds and apertures to achieve proper exposure. Briefly, the shutter speed is the time a camera’s sensor is exposed to light and the aperture (or f-stop) is the size of the opening in the lens where light passes through.
Your Windows Phone lacks a mechanical shutter or aperture so exposure is regulated by a fixed aperture and the duration your sensor is powered up. Instead of opening a mechanical shutter for 1/125th seconds your Windows Phone camera sensor is powered on for 1/125th seconds.
While some cameras will let you regulate exposure manually, your Windows Phone controls all of this based on the amount of light present. You can manipulate exposure on your Windows Phone by tweaking some of the settings (more on this in a minute) but for the most part your Windows Phone runs with it. Once exposed or captured, the image is processed by the camera’s image processor and eventually saved in .JPEG format.
Along with exposure controls, your Windows Phone is likely equipped with digital zoom feature to let you move in closer to your subject without worrying with your foot zoom. Digital zoom is accomplished by cropping an image down to a centered area with the same aspect ratio as the original. In a nutshell you are cropping to simulate an increase in magnification. The end result may pull you closer to your subject but in the process you sacrifice image quality. Optical zoom (e.g. your typical zoom lens), which isn’t available, provides an mechanical increase in focal magnification without sacrificing image quality.
All the latest news, reviews, and guides for Windows and Xbox diehards.
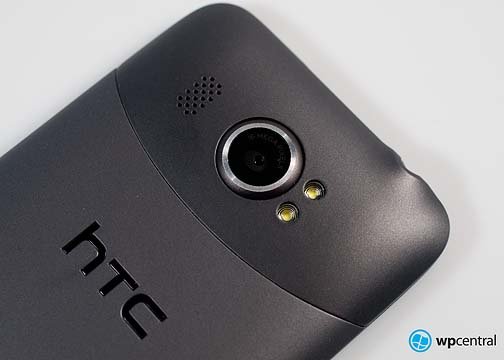
One last basic element is the flash. Well, it’s actually a light. Traditional flashes send a pulse of light the instance the shutter on the camera is fully open. The light on your Windows Phone follows the same principle but lacks the reach and brightness of traditional flashes. The light on the Windows Phone also doubles as a focus assistant lamp. When lighting is low and your subject lacks the contrast to let the autofocus work, the lamp sheds enough light on the subject to attain proper focus.
I’m not a fan of the camera lights and prefer natural lighting. There is a sweet spot where these lights work work like a charm. Too close and your subject gets washed out, too far and things get underexposed. Finding that spot takes practice and when you do, the light can come in handy.
Windows Phone Camera: Post Script on Digital Zoom
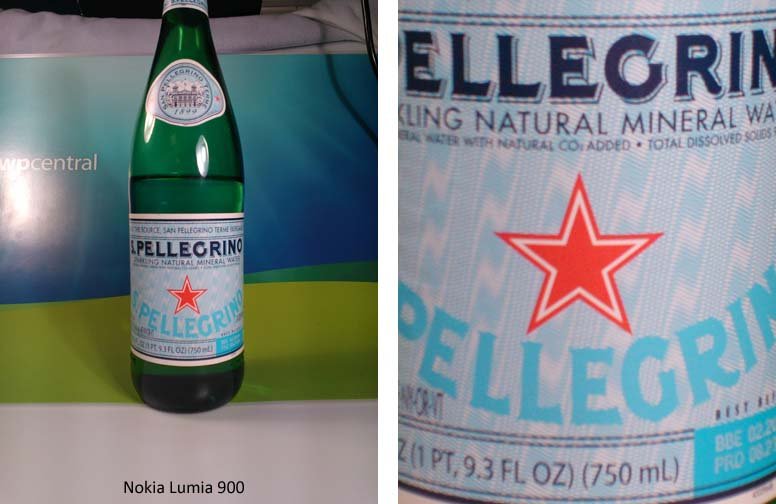
While I have my reservations on the digital zoom feature on our Windows Phones, the HTC Titan II may have changed our minds a bit. In comparing the 16mp sensor of the Titan II to the 8mp sensor on the Nokia Lumia 900 with the digital zoom applied to its fullest, the image quality was rather impressive on the Titan II.
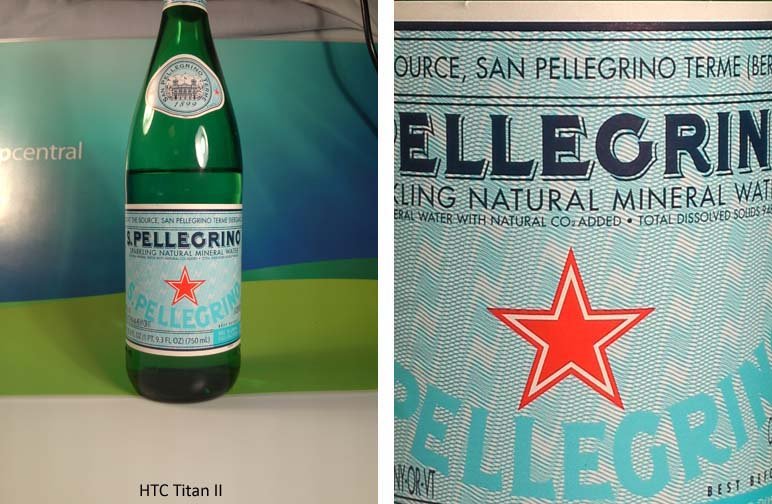
There is more real estate on the 16mp sensor to accommodate the digital crops the zoom feature creates. Resulting in less quality loss to your images. We’ve also noticed that the zoom on the Titan II is noticeably more smoother (feels more like an optical zoom) than what you find on any other Windows Phone. For example on the Samsung Focus S, the zoom seems choppy or jumpy as the zoom increases.
While the technology behind digital zoom has improved, I’m still inclined to rely on my foot zoom than the zoom on my Windows Phone camera. However, if the Titan II is the sign of things to come, I may have to re-think that position.
Windows Phone Camera: Settings

There are several controls at your disposal that will influence how an image is taken and processed. While these settings may vary from manufacturer to manufacturer, here’s a listing of the more common settings and what they control.
ISO Level: An image sensors ISO (International Standards Organization) determines how sensitive to light your sensor is. The lower the ISO the less sensitive the sensor is. For example, outdoors on a bright sunny day you may only need an ISO of 60 where indoors in lower light you’d use an ISO of 200 or higher. Most Windows Phone cameras ISO settings are set to automatic but if your images are coming out dark, you may try manually raising the ISO. The downside to higher ISO levels is that they tend to produce more image noise or grain that results in poor image quality.
So to get the best images possible, you can manually lower your ISO for cleaner shots (especially useful on Nokia’s phones). But remember, this is only good for still objects as the exposure time will be longer resulting in blur if not held steady. If indoors with low-light, aim for ISO 200 or 400 if you can steady the camera. Bonus tip: use the tap-to-focus feature to snap that photo instead of the physical shutter button.

White Balance: Different types of light produce varying shades of white. Warmer light often produces an orange or brownish tint while cooler lights results in blue tints. A camera’s white balance simply balances the different light sources to produce whiter whites. Most Windows Phone cameras will be defaulted to an automatic white balance with options to select a white balance based on particular lighting conditions such as florescent, incandescent, daylight, cloudy, etc.

Sharpness, Saturation, Contrast, etc.: These settings tell your camera how much of that particular processing aspect you want applied to an image. For example, if you have Saturation set to high the image processor will raise the color saturation levels as it processes your image. You can used these settings to increase or decrease the amount of these processes are applied to your photos for effect or to compensate for harsh lighting, bright colors, etc.

Metering: This is how you’re camera measures the light and adjust the shutter speed, aperture and ISO (when set to auto) to achieve proper exposure. There are various metering modes that include spot metering (meters on a specific spot that’s usually the center of your viewfinder or your focal point), center weighted (concentrates the metering to the collective area in the center of your viewfinder), matrix or multi-zone (meters several points in the viewfinder and combines the results for a collective reading).

EV or Exposure Compensation: This setting allows you to manipulate the exposure settings your metering determines will produce proper exposure. The compensation or EV adds or subtracts from this exposure settings. For example if your subject is back lit you may compensate for greater exposure by using a positive EV number (the greater the number the more exposure compensation). If you’re compensation for a lot of glare, you would use a negative EV number to lessen the exposure.
In addition to the basic exposure settings, some Windows Phones have additional settings that influence how your camera performs. In addition, there are third party apps now available that will help you in a similar fashion.

Panoramic Imaging: Panoramas are wide angle views often composed of several images stitched or pieced together. HTC provides a simple, straightforward panoramic feature with their cameras. For the others, you have third party apps such as Auto Panorama that will allow you to take several landscape images and stitch them together to create that panoramic image. The key to taking good panoramas is simple, keep your camera steady and on a constant plane. A tripod is a great tool in helping you take better panoramas.

Burst Mode: Burst mode tells your Windows Phone camera to shoot a series of frames or photos quickly. The HTC Windows Phones have this setting built in to allow you to shoot five frames in burst mode. Burst Mode can help capture action shots or help capture impromptu expressions. Say your son acting goofy, doesn’t think you can take the picture fast enough and you want to capture as many blackmail photos as possible. If your Windows Phone lacks a burst mode, check out Turbo Camera as an alternative.
Image Stabilization: While fairly new to Windows Phone cameras, image stabilization has been around for years. With most stand alone cameras, you have small motors that hold the lens or image sensor still when slight movements occur. This reduces the chance of images being blurred by camera movement when slower shutter speeds are used. With your Windows Phone camera, the image stabilization simply raises the ISO to allow for a faster shutter speed to reduce any blurring caused by slight movement of your Windows Phone as you take the picture. The downside is that because you are raising the ISO, you may see more image noise or grain when you use the image stabilization.
Red-eye reduction: Red eye is caused by light reflecting off the back of your pupil when a flash is used. Red-eye reduction sends a small pulse of light towards your subject to acclimate their eyes to the brighter light and then the full discharge of the flash occurs.

Macro: On your Windows Phone camera, macro is simply close up focusing. It is not a traditional macro setting (recording the subject at life size magnification) but will get you closer to your subject to record finer detail. Your macro setting is great for flowers, coins, and other small objects. The challenge with macro is making sure enough light gets to your subject because of the close distances. Set to macro, your Windows Phone camera will focus about six to ten inches away from your subject. Your Windows Phone can easily cast a shadow over your subject at those distances.
Geo-tagging: One nice feature with your Windows Phone camera is that it can tap into your Windows Phone’s location services to geo-tag your pictures. Geo-tagging simply adds your GPS coordinated to your image’s EXIF file. This is a nice tool to remember where you took the picture and with Windows Phone apps such as Image Map, you can pin these locations to a NAVTEQ map.
The downside to geo-tagging your pictures is that if you keep this information on any uploaded photos, with the right software, everyone can see the location. If you prefer to keep your locations private, you can go into your Windows Phone settings under Applications and Pictures + Camera and turn off the option to keep location information on uploaded pictures. Now you can share your pictures while keeping your locations private.
Smile Detection and Face Detection: Here’s a couple of interesting settings that I’ve only seen on the HTC Titan II. When turned on Smile Detection will identify your subjects face and when they smile, the camera will take the picture. Face Detection will detect any faces in your photo and adjust the focus to make sure the faces are dialed in just right.
Windows Phone Camera: Scenes and Effects

Most Windows Phones will have settings for scenes and effects. Scenes are basically a collection of programmed settings or modes designed to tackle a particular photographic scene. For example, the HTC Titan II has eighteen scene choices ranging from portraits to nighttime to food. In my experience, most Windows Phone cameras will have enough scenes to cover the basics; portrait, landscapes, macro, sports, night, etc.

In addition, to illustrate how the camera software has developed, the Titan II has an Intelligent Auto setting that considers the variables detected by the camera (lighting, distance to subject, focus shifts, etc.) and automatically selects the best scene for that particular picture. Other cameras will have an auto setting under the scenes settings but the Intelligent Auto seems more refined. Such features help take the guess work out using your camera.
Effects are a collection of filters and image processing effects that can be applied to a photograph while the camera’s processor is processing the image. For example, the Lumia 900 has five effects that can be applied to images that includes normal, black & white, sepia, negative, and solarized. If you’re looking for an old time feel to your picture you may choose the sepia effect. If you like gray scale images, then black and white might be your cup of tea.

Camera effects are a great way to add a bit of creativity and uniqueness to your photographs. If your Windows Phone lacks enough effects to your liking, there are plenty of third party apps available, such as Sketch Camera, Pictures Lab, and Clever Photo to give you plenty of options.
Windows Phone Camera: Tips on taking better pictures
I think the key to taking better pictures with your Windows Phone is lighting. It’s key for any photography but because of the limited control you have over the camera and the smaller sensor, it seems more influential with a Windows Phone camera. Granted the BSI sensor HTC is using has helped, you still need to try to shine ample light on your subject.
Besides shining ample light on your subject, another issue that plagues Windows Phone photography is the lack of a steady hand. It is really, really, really important you hold your Windows Phone steady when you take a picture. There are times, due to low light, your camera will use a slow shutter speed. If you move your Windows Phone before the shutter is closed, you’re going to blur your image. Remember, tap the screen to select a focus region and to snap the photo instead of using the dedicated camera button. The lack of physical movement will help steady the shot and reduce blur (plus you get selective focus on some Windows Phones).
I would highly recommend getting a tripod mount for your Windows Phone if you are going to do any landscape or low light (beyond a snap shot) photography. If you have a tripod that is used with your video camera or stand alone camera, why not take advantage of it with your Windows Phone camera. Even a small Gorillapod tripod can be used and is compact enough to fit in your back pocket.
Practice is key. When I’m teaching classes on photography I urge my classes to experiment and practice as much as they can. With digital photography you get instant results and if they aren’t to your liking, you can delete the images and try again. Back in the day when film was the only game in town, results took an hour to see and if you messed up, experimenting could be very costly. So my advice is to experiment with angles, lighting, cropping and your imagination. If you take a bad picture, see what can be improved, delete it and try again.

When you’re taking photos experiment with angles and different crops/framing. Don’t always center your subjects. Sometimes having an off-center subject will improve an image’s composition. Your Windows Phone camera is mobile and easy to take to the ground level or elevate above your subjects. Also, tinker with still objects. While coins and figurines are easy subjects for sample photos, they can also serve as decent subjects to learn with.
Look for every day items and see how photogenic you can make them. From a lamp to a book to your car keys, you’ve got plenty of subjects just lying around the house. A sink full of water and a drippy faucet can also make for an interesting photographic subject.
My last piece of advice is to learn your way around post processing software. Whether it’s Photoshop, Picasa or another editor. There are also a handful of decent editing apps for your Windows Phone that can help fine tune your images.
Editing your images will allow you to crop your images for effect (getting rid of the dead space), fine tune the exposure of your images, and sharpen things up a bit. While the internal processing within your Windows Phone does a decent job of things, post processing will improve a marginal photo and make a good photo shine. For example, this is the image taken straight from the Windows Phone camera.
In using Photoshop Elements (Adobe’s basic photo editing software), I cropped off the dead space above the subjects and tweaked the exposure and sharpness a little. Here is what I came up with.

If you’re not inclined to use desktop editing software, take a look at some of the Windows Phone photography apps that allows you to perform basic editing tasks. Thumba, Pictomaphone, and Fhotoroom come to mind as possible photo editing apps for your Windows Phone. Which ever way you go, I think you will find a photo editing tool will help improve the quality of the photos you capture with your Windows Phone camera.

The cameras on our Windows Phones have improved dramatically over the years and we have every indication that the technology will continue to improve with the PureView cameras Nokia is developing. One day we may even see mechanical shutters and apertures to help improve exposure control. Who knows, we might even see optical zooms on Windows Phones.
If you have any tips and tricks to offer on using your Windows Phone camera, feel free to sound off in the comments.
George is the Reviews Editor at Windows Central, concentrating on Windows 10 PC and Mobile apps. He’s been a supporter of the platform since the days of Windows CE and uses his current Windows 10 Mobile phone daily to keep up with life and enjoy a game during down time.
- Программы
- Списки
В данном разделе вы можете скачать программы для камеры для Microsoft Lumia 535 бесплатно, все они совпадают с системными требованиями смартфона Microsoft Lumia 535, но это не дает гарантии, что все они запустятся. На нашем сайте программы для камеры для Microsoft Lumia 535 в формате XAP выкладываются постоянно, а это значит, что вы можете практически каждый день обновлять свой смартфон лучшими новинками!
Lumia Камера для Microsoft Lumia 535
18 августа 2015
Приложение «Lumia Камера» идеально подходит для камеры на устройстве Lumia.
ProShot для Microsoft Lumia 535
17 августа 2015
Представляем Вам одно из самых лучших профессиональных приложений для фотографирования на Windows Phone 8 — ProShot
ProShot для Microsoft Lumia 535
29 октября 2014
Представляем Вам одно из самых лучших профессиональных приложений для фотографирования на Windows Phone 8 — ProShot.
Clever Camera для Microsoft Lumia 535
29 октября 2014
Возможности профессиональных камер есть теперь и на Windows Phone. Все благодаря Clever Camera.
Creative Camera для Microsoft Lumia 535
29 октября 2014
Creative Camera для Windows Phone — это лучшее приложение-камера. Оно содержит в себе саму Creative Camera и Creative Photo Editor.
Webcam Remote Pro для Microsoft Lumia 535
24 сентября 2014
Это веселое приложение, которое позволяет просматривать веб-камеру с вашего ПК на смартфоне.
ISeeYou для Microsoft Lumia 535
13 августа 2014
ISeeYou открывает новые способы развлечения с помощью вашего телефона! Это приложение позволит вам транслировать потоковое видео с камеры вашего телефона, для ваших компьютеров или других телефонов.
HDR Photo Camera для Microsoft Lumia 535
26 июня 2014
Создавайте удивительные снимки с расширенным динамическим диапазоном с помощью приложения HDR Photo. Приложение последовательно снимает три кадра с разным уровнем экспозиции. Затем оно использует технику слияния, чтобы выбрать соответствующие элементы и объединить их в кадр с высоким динамический диапазоном(HDR).
Smart Mirror для Microsoft Lumia 535
20 июня 2014
Smart Mirror являет собой простое зеркало с использованием передней камеры.
Fhotolens для Microsoft Lumia 535
5 мая 2014
Fhotolens — отличное приложение-линза, которое может делать снимки в стиле fish-eye, HDR, макро, пейзаж и портрет. Fhotolens — это замечательный инструмент для съемки фотографий, как будто на вашей камере 10-24mm объектив.
- Сборки
From Wikipedia, the free encyclopedia
Windows Camera
|
Camera in Windows 10 Mobile |
|
| Developer(s) | Microsoft |
|---|---|
| Initial release | 5 November 2014; 10 years ago |
| Stable release |
February 2025 Update (2025.2502.17.0) |
| Operating system | Windows 8, Windows 8.1, Windows 10, Windows 11, Pocket PC,[2] Windows Phone, Windows 10 Mobile, Xbox system software[3] |
| Platform | ARM, x64, x86[3] |
| Website | www |
Windows Camera is an image and video capture utility included with the most recent versions of Windows and its mobile counterpart. It has been around on Windows-based mobile devices since camera hardware was included on those devices and was introduced on Windows PCs with Windows 8, providing users for the first time a first-party built-in camera that could interact with webcam hardware.[4] It is similar in structure and features to the iOS and Android Camera apps.
Camera can capture standard photos, videos, and «living images», which are similar to animated GIF images. It supports 16:9, 4:3, and 3:2 aspect ratios and offers square, rule of thirds, golden ratio, and crosshairs alignment frames, which are disabled by default. Video capture selections can be taken with detail levels of 640 × 360 pixels/30 frames per second, 1280 × 720 pixels/30 frames per second, or 1920 × 1080 pixels/30 frames per second. Flicker reduction and video stabilization can also be enabled.[5]
Photos and videos are saved by default to the Saved Images folder of the Pictures library in File Explorer, but users can change the storage location.
Camera’s captures include location information if the user provides the app permission to use it. Additional settings included in the app include time delay, zooming, focus control, sensitivity control, white balance control, shutter speed control, brightness control, and a toggle for switching between different cameras. For instance, most Windows phones and tablets have both front- and rear-facing cameras, so Camera’s switch button toggles between the two options..
Camera was introduced to Windows Mobile in 2000 and Windows PCs in late 2012. Prior to its introduction, there was no built-in tool for using built-in PC cameras or connected external webcams,[6] although some manufacturers included third-party camera software on devices they sold. On Lumia Windows 10 Mobile devices, it is the only camera as Microsoft discontinued support for the custom Lumia Camera apps.[7]
Camera does not have some of the features of the iOS app, such as slow-motion videos, a 1:1 photo ratio, and filters. However, all of these effects can still be added to already-created photos and videos by editing them in Photos. Camera does have a panorama capture feature similar to iOS’, but only on phones.
Microsoft launched a free camera app named Pix exclusively for iOS devices, despite already having its own mobile platform and Camera app. Pix has a different set of features than either Windows Camera or iOS Camera.[8]
- Microsoft Photos
- Microsoft Sway
- Microsoft Paint
- Imaging for Windows
- ^ «Windows Camera». Microsoft Apps. Retrieved 22 April 2025.
- ^ «Cameras for your Pocket PC/Pocket PC Phone». Geek.com. 10 June 2003. Archived from the original on 7 November 2017. Retrieved 31 January 2017./
- ^ a b «Windows Camera». Windows Store. Microsoft.
- ^ Marian Cularea (27 October 2021). «How to Access Webcam Settings in Windows 8, 8.1». Windows Report (published 29 August 2014).
- ^ Ciprian Adrian Rusen (7 May 2014). «How to Use the Camera App in Windows 8.1 with Your Webcam». Digital Citizen (published 5 July 2014).
- ^ Ciprian Adrian Rusen (27 February 2013). «Introducing Windows 8: How to Use the Camera App to Record Videos». Digital Citizen.
- ^ John Callaham (4 September 2015). «Microsoft to end support for several Lumia Windows Phone apps on October 30». Windows Central. Mobile Nations.
- ^ «Microsoft Pix». Research. Microsoft.
- Official website
Written By
published
February 29, 2024
UPDATE 3/19: We have expanded the rollout introducing the ability to use your Android phone or tablet camera in any video application on your Windows 11 PC to all Windows Insiders across all Insider Channels.
Hello Windows Insiders,
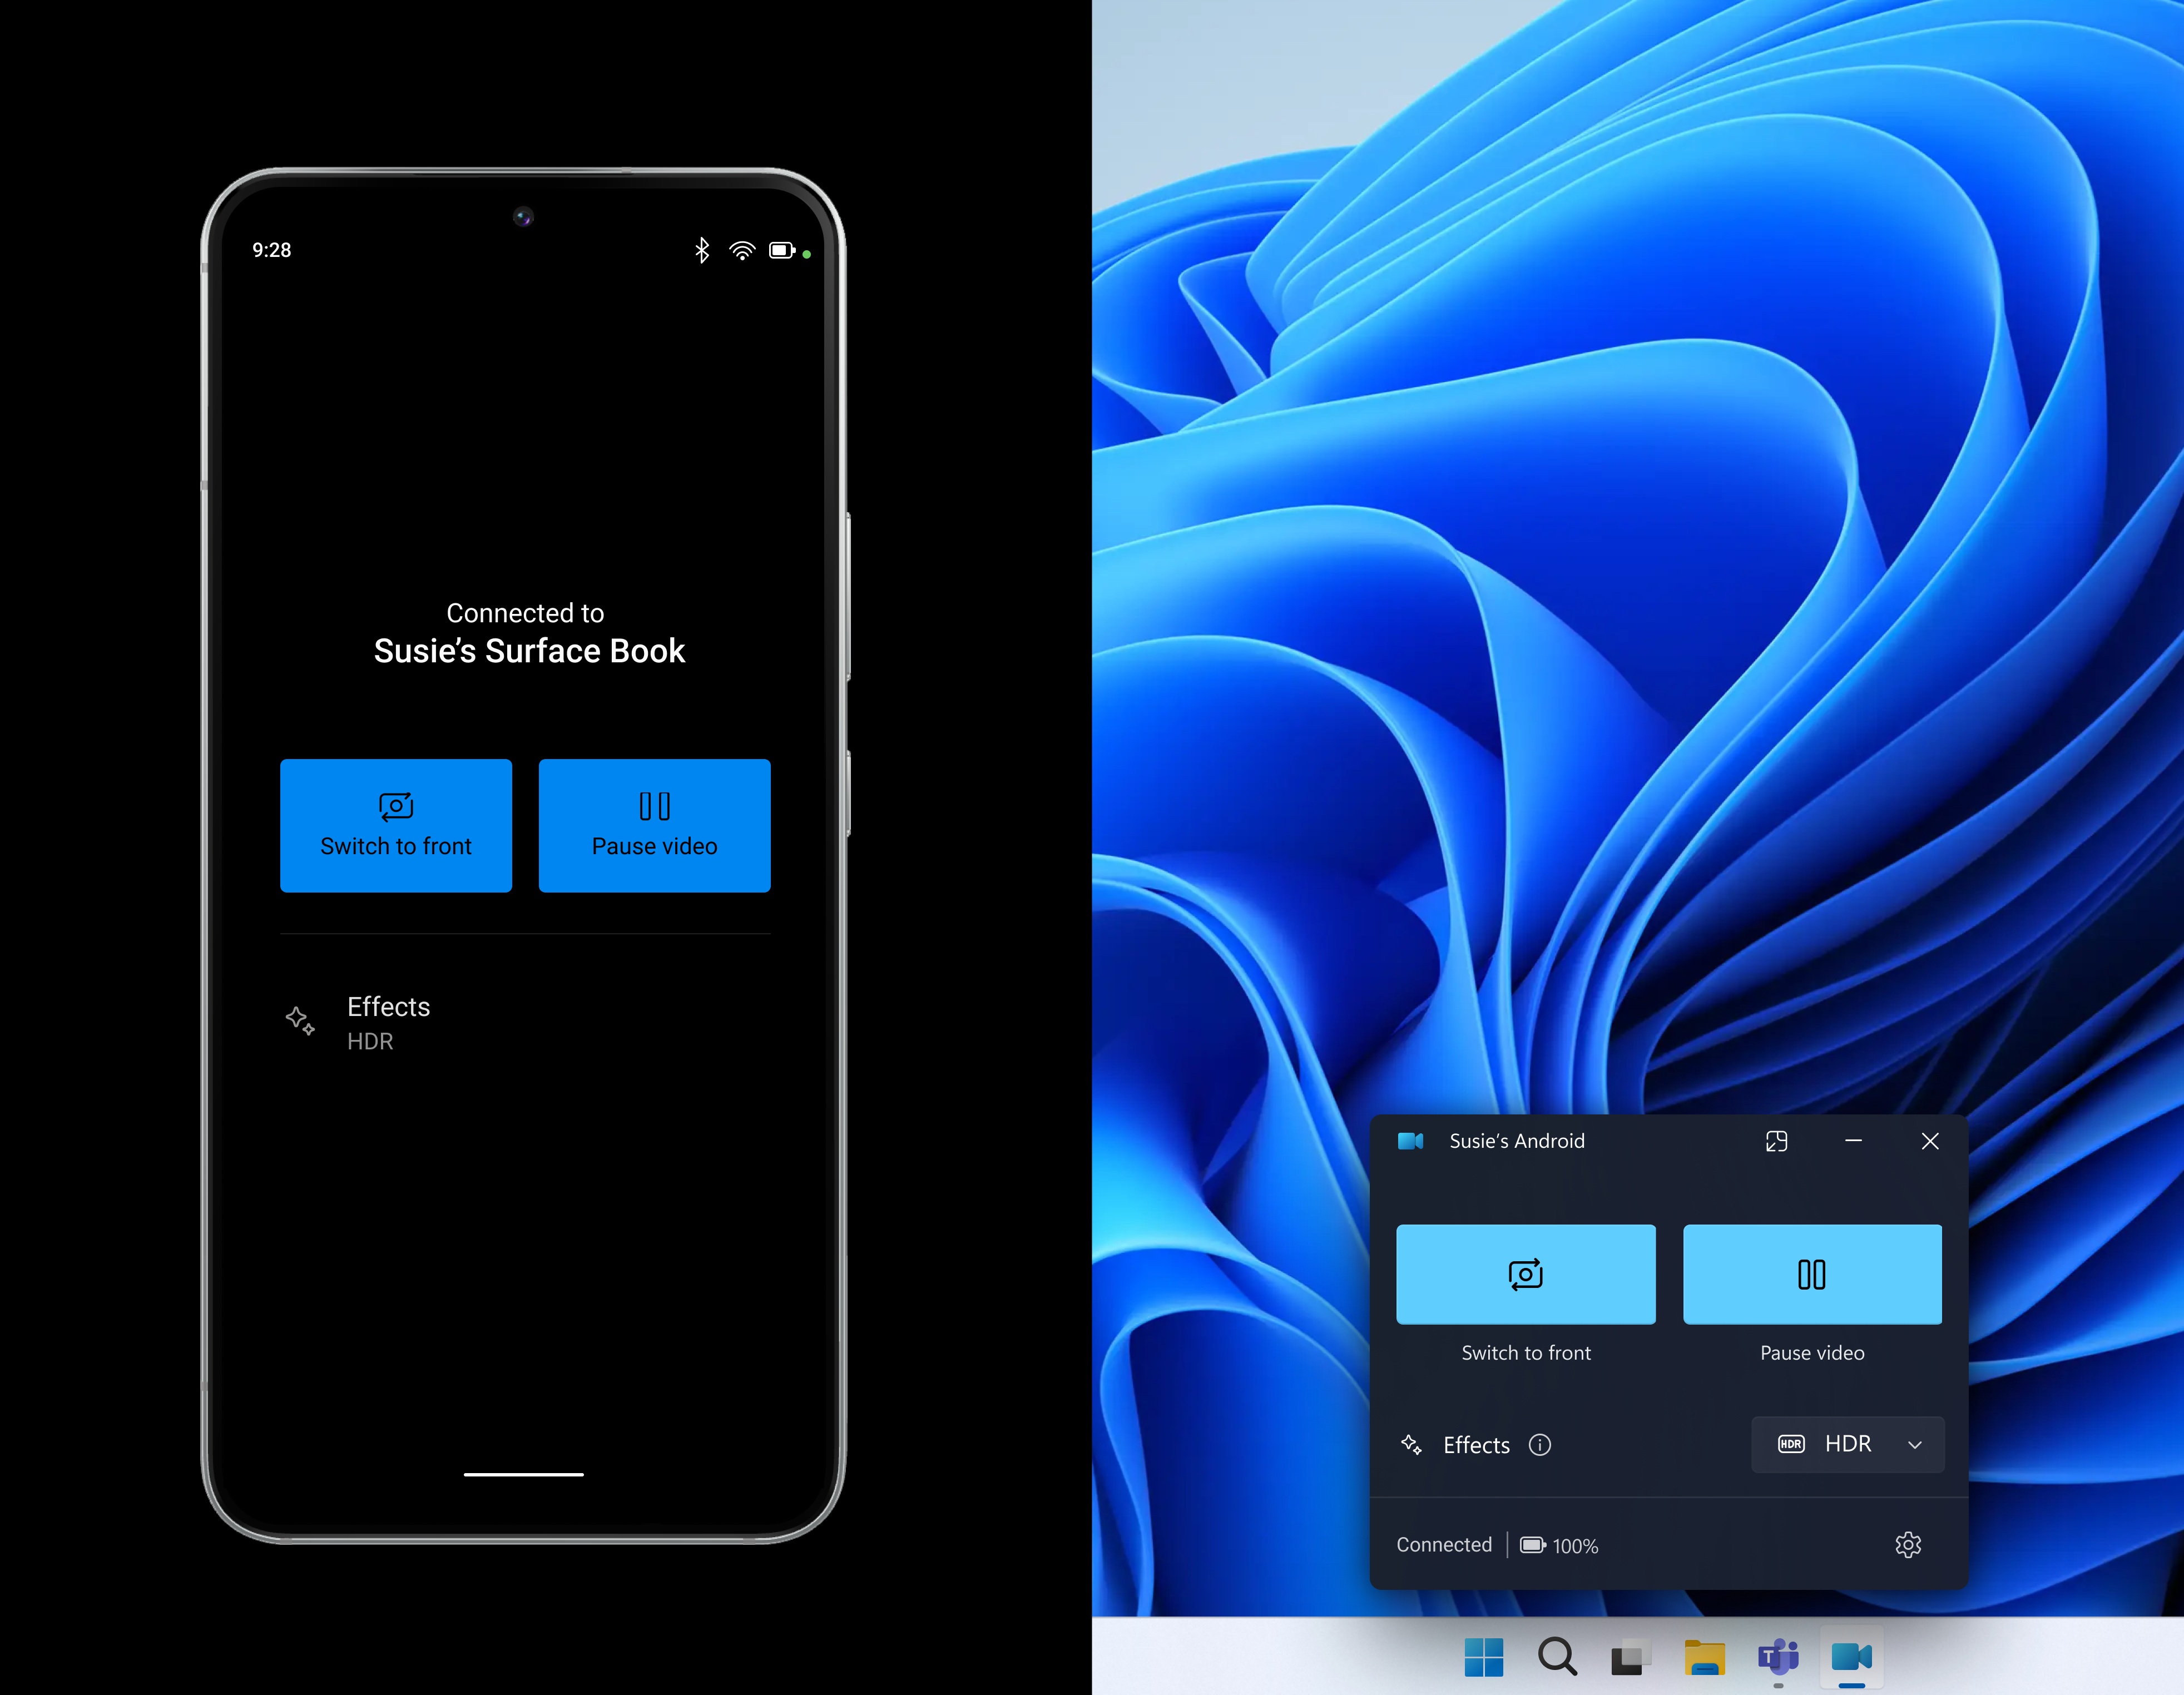
We are gradually rolling out the ability to use your Android phone or tablet camera in any video application on your Windows 11 PC to Windows Insiders across all Insider Channels. With this feature, you’ll be able to wirelessly enjoy the high quality of your mobile device’s camera on your PC with flexibility and ease. Some of the abilities include being able to switch between front and back camera, pausing the stream during interruptions, and enjoying effects provided by your mobile model.
Please ensure that your mobile device has Android 9.0+ and that you are running the BETA version of the Link to Windows phone application version 1.24012* or greater.
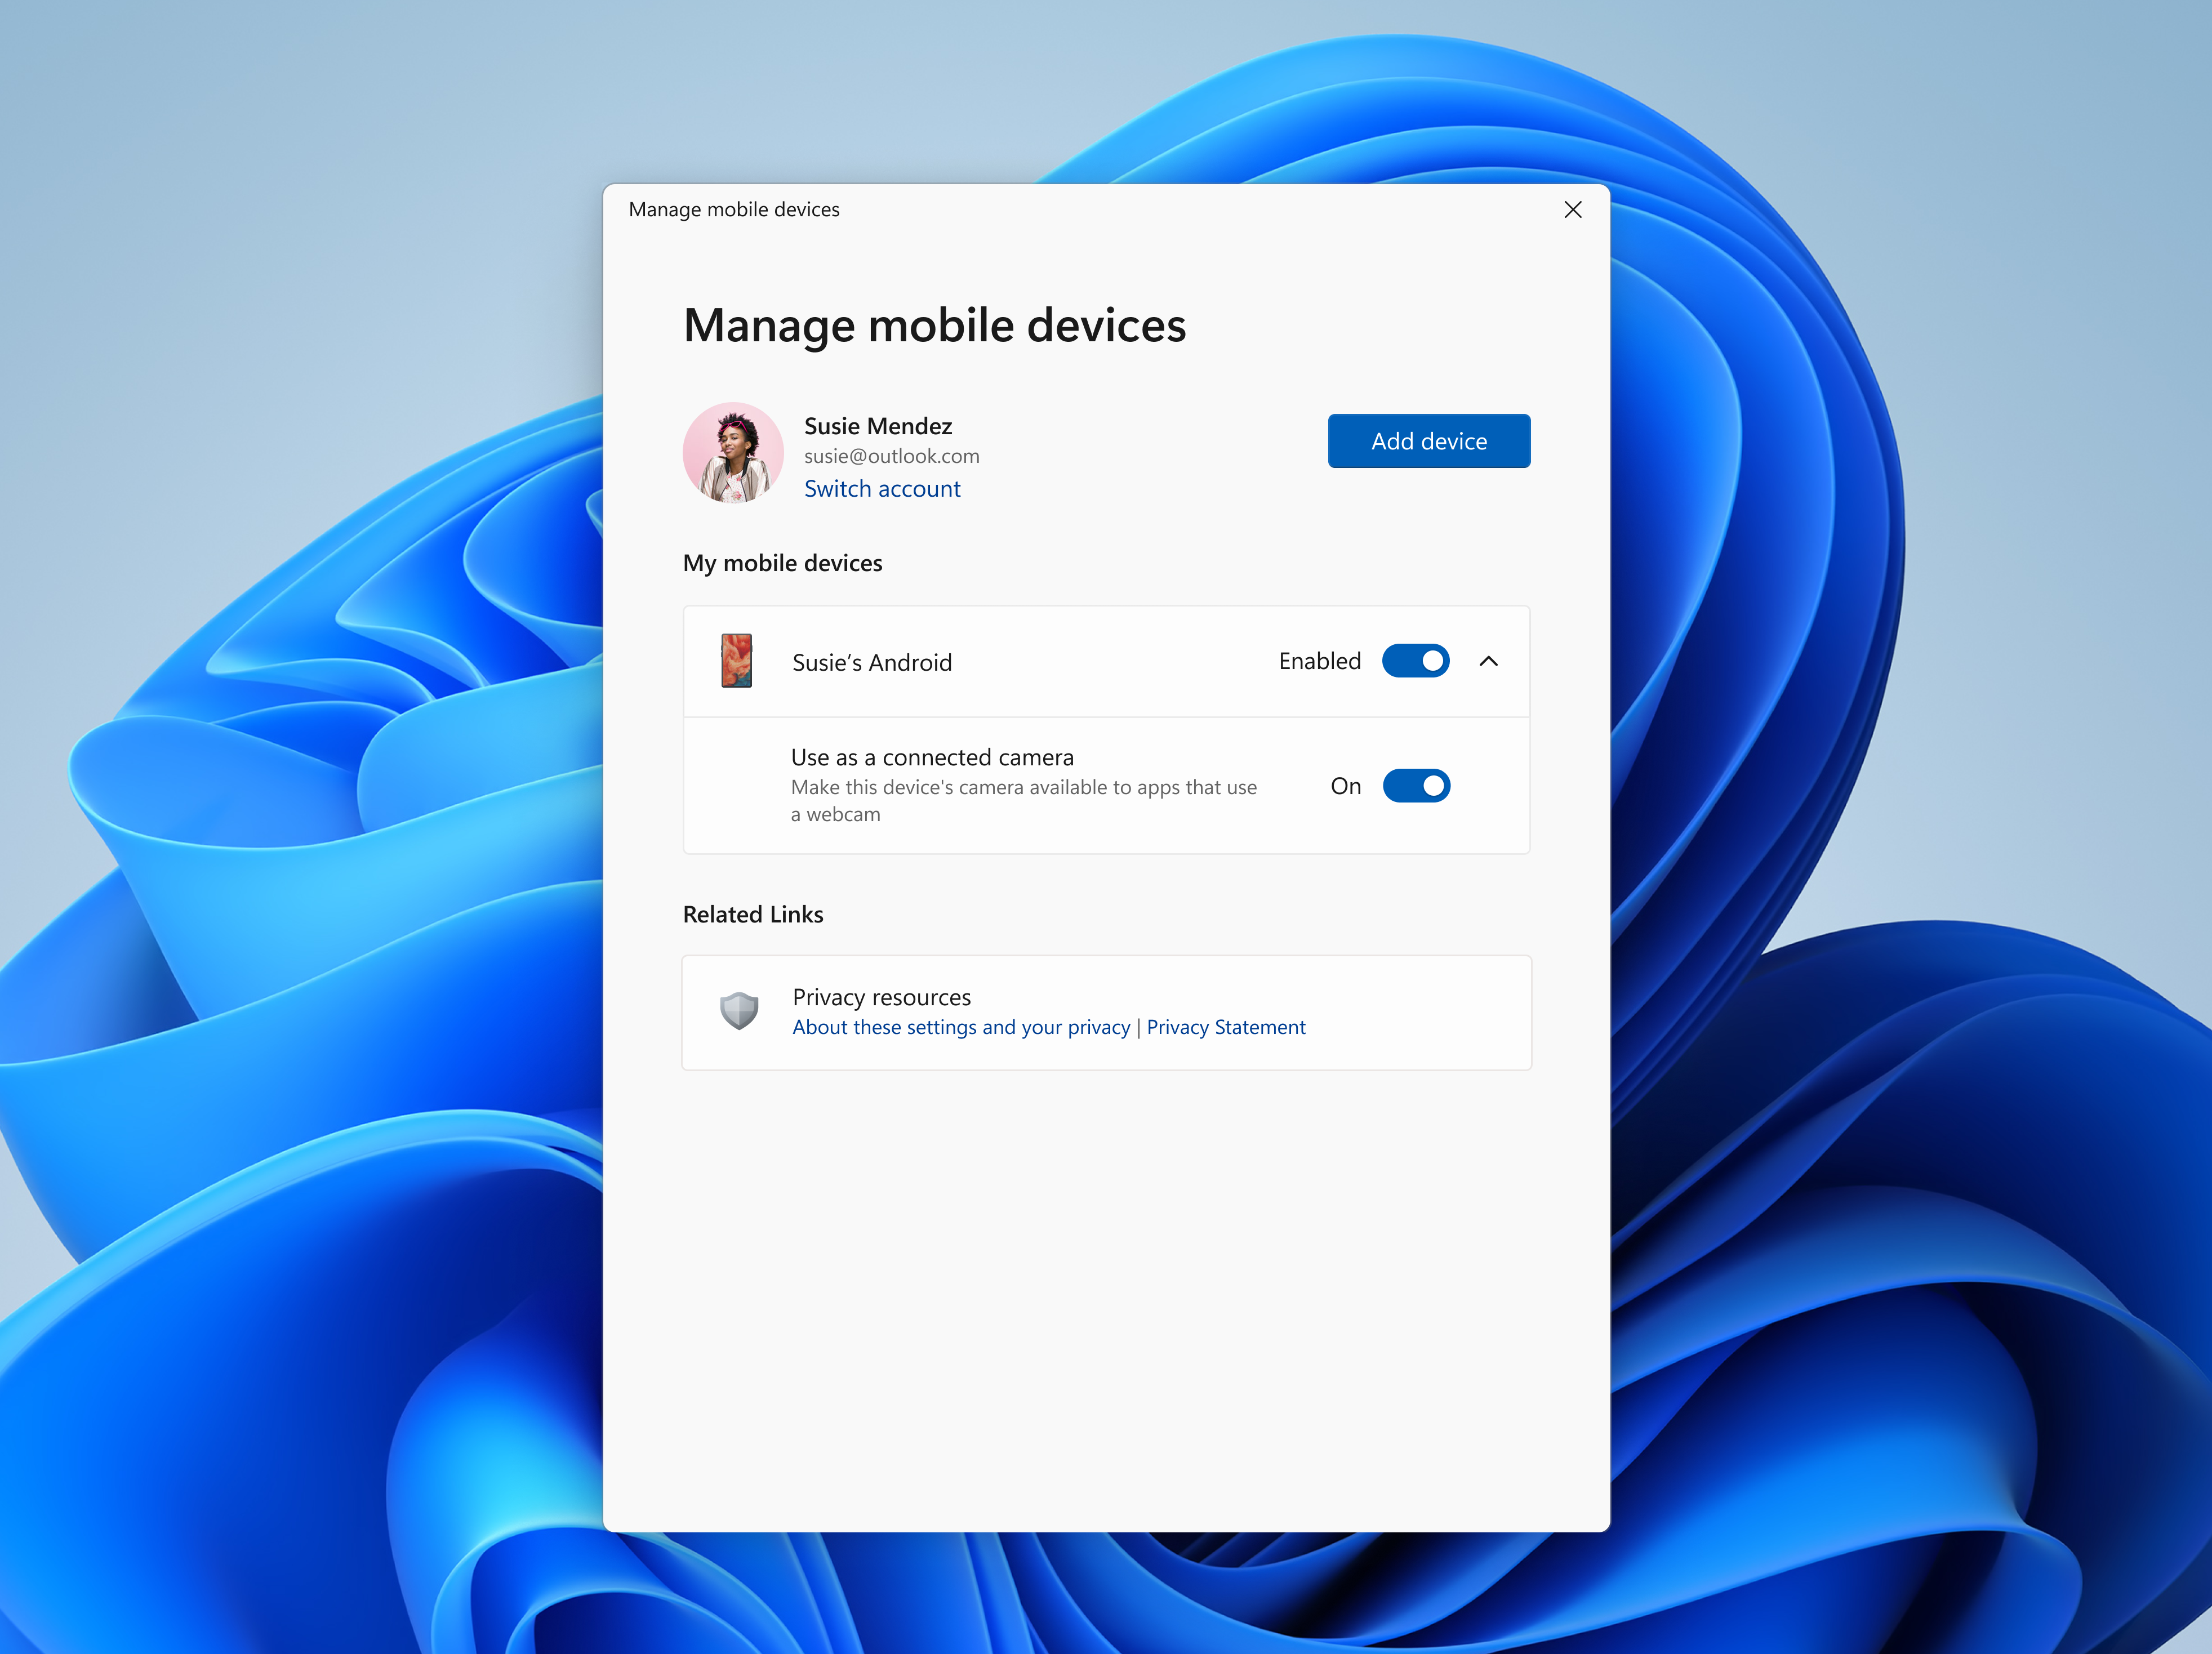
To enable this experience, go to Settings > Bluetooth & devices > Mobile devices and choose “Manage devices” and allow your PC to access your Android phone. Your PC will get a Cross Device Experience Host update in the Microsoft Store that is required for this experience to work.
FEEDBACK: Please file feedback in Feedback Hub (WIN + F) under Devices and Drivers > Linked devices.
Thanks,
Windows Insider Program Team
Работает только с Android-смартфонами.
Редактор новостей Hi-Tech Mail

Microsoft выпустила крупное мартовское обновление Windows, в котором много серьезных нововведений. Самое полезное из них — возможность использовать камеру Android-смартфона в качестве веб-камеры для видеозвонков. Так владельцам ПК не придется покупать «вебку», а пользователи ноутбуков смогут заметно увеличить качество записи во время созвонов.
Чтобы функция работала, нужно иметь смартфон, обновленный до Android 9 (и новее), обновленную до последней версии Windows 11, скачанное приложение «Связь с телефоном» (Phone Link).

Как использовать смартфон вместо веб-камеры на компьютере:
- Войдите в «Параметры» — «Bluetooth»;
- Выберите «Управление устройствами»;
- Разрешите компьютеру «доступ к телефону Android»;
- В приложении «Связь с телефоном» синхронизируйте смартфон с ПК — ваш телефон и компьютер должны быть подключены к одной сети Wi-Fi.
Теперь каждый раз, когда вы запускаете видеоразговор, в «панели управления» будет появляться иконка с выбором источника записи. Можно выбрать как встроенную камеру, так и камеру смартфона. В последнем режиме пользователю можно будет выбрать, какую именно камеру телефона использовать: основную или фронтальную. Также есть кнопка «эффекты», включающая запись в HDR, и кнопка прекращения записи.
На данный момент функция разворачивается — она доступна части юзеров. Всем людям нововведение будет доступно в течение месяца.