
In this article we will show you how to enable the ‘Web Server’ certificate template option on a Windows Certification Authority (Windows CA) Server. The Web Server option is usually not present in a fresh Windows CA server installation installation which can introduce difficulties for users or administrators who need the option to get their web server certificates signed:

Recommended Article: How to install and configure a Windows CA Server
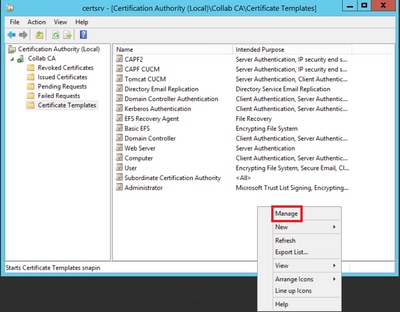
Enabling the Web Server certificate template is a simple and non-disruptive process. From the Administrative Tools, open the Certification Authority tool. Next, right-click on the Certificate Templates folder and select Manage:

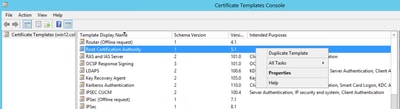
This will open the Certificate Templates Console as shown below. Double-click on the Web Server template:

The Web Server Properties window will now appear. Click on the Security tab and select the Authenticated Users from the Group or user names section. In the Permissions for Authenticated Users section tick the Allow action for the Enroll permission. When ready, click on OK:
Congratulations — you’ve now successfully enabled the Web Server certificate template option. Your Windows CA server should now present the previously mission option as shown below:

Summary
This article explained how to enable the Web Server certificate template option on your Windows Certification Authority (Windows CA) Server. We included step-by-step screenshots to ensure its a detailed and yet simple process to follow.
Your IP address:
86.14.38.42
All-in-one protection for Microsoft 365
FREE Hyper-V & VMware Backup
Wi-Fi Key Generator
Generate/Crack any
WEP, WPA, WPA2 Key!
Network and Server Monitoring
Follow Firewall.cx
Cisco Password Crack
Bandwidth Monitor
Free PatchManager
Security Podcast
Firewall Analyzer
Introduction
This document describes a step-by-step procedure to create certificate templates on Windows Server-based Certification Authorities (CA).
Prerequisites
Requirements
Cisco recommends that you have knowledge of these topics:
- CUCM version 11.5(1).
- Basic knowledge of Windows Server administration
Components Used
The information in this document is based on these software and hardware versions:
- CUCM Version 11.5(1).
- Microsoft Windows Server 2012 R2 with CA services installed.
The information in this document was created from the devices in a specific lab environment. All of the devices used in this document started with a cleared (default) configuration. If your network is live, ensure that you understand the potential impact of any command.
Background information
These certificate templates are compliant with X.509 extension requirements for every type of Cisco Unified Communications Manager (CUCM) certificate.
There are five types of certificates that can be signed by an external CA:
|
Certificate |
Use |
Impacted Services |
|
Callmanager |
Presented at secure device registration and can sign Certificate Trust List (CTL)/Internal Trust List (ITL) files, used for secure interactions with other servers such as secure Session Initiation Protocol (SIP) Trunks. |
· Cisco Call Manager · Cisco CTI Manager · Cisco TFTP |
|
tomcat |
Presented for Secure Hypertext Transfer Protocol (HTTPS) interactions. |
· Cisco Tomcat · Single Sign-On (SSO) · Extension Mobility · Corporate Directory |
|
ipsec |
Used for backup file generation, as well as IP Security (IPsec) interaction with Media Gateway Control Protocol (MGCP) or H323 gateways. |
· Cisco DRF Primary · Cisco DRF Local |
|
CAPF |
Used to generate Locally Significant Certificates (LSC) for phones. |
· Cisco Certificate Authority Proxy Function |
|
TVS |
Used to create a connection to the Trust Verification Service (TVS) when the phones are not able to authenticate an unknown certificate. |
· Cisco Trust Verification Service |
Note: ipsec certificate is not related to Cisco DRF Primary and Cisco DRF Local since 14, in newer versions, Tomcat certificate is used instead. There is no plan to add this change to 12.5 or earlier versions.
Each of these certificates has some X.509 extension requirements that need to be set, otherwise, you can encounter misbehavior on any of the aforementioned services:
|
Certificate |
X.509 Key Usage |
X.509 Extended Key Usage |
|
Callmanager |
· Digital Signature · Key Encipherment · Data Encipherment |
· Web Server Authentication · Web Client Authentication |
|
tomcat |
· Digital Signature · Key Encipherment · Data Encipherment |
· Web Server Authentication · Web Client Authentication |
|
ipsec |
· Digital Signature · Key Encipherment · Data Encipherment |
· Web Server Authentication · Web Client Authentication · IPsec End System |
|
CAPF |
· Digital Signature · Certificate Sign · Key Encipherment |
· Web Server Authentication · Web Client Authentication |
|
TVS |
· Digital Signature · Key Encipherment · Data Encipherment |
· Web Server Authentication · Web Client Authentication |
For more information, reference the Security Guide for Cisco Unified Communications Manager
Configure
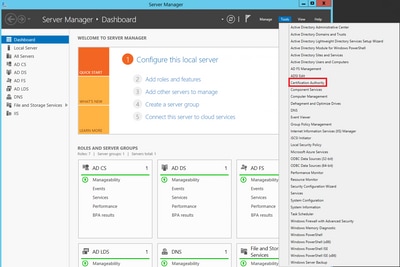
Step 1. On the Windows Server, navigate to Server Manager > Tools > Certification Authority, as shown in the image.
Step 2. Select your CA, then navigate to Certificate Templates, right-click on the list and select Manage, as shown in the image.
Callmanager / Tomcat / TVS Template
The next images display only the creation of the CallManager template; but the same steps can be followed to create the certificate templates for the Tomcat and the TVS services. The only difference is to ensure the respective service name is used for each new template in step 2.
Step 1. Find the Web Server template, right-click on it and select Duplicate Template, as shown in the image.
Step 2. Under General, you can change the certificate template’s name, display name, validity, and some other variables.
Step 3. Navigate to Extensions > Key Usage > Edit, as shown in the image.
Step 4. Select these options and select OK, as shown in the image.
- Digital signature
- Allow key exchange only with key encryption (key encipherment)
- Allow encryption of user data
Step 5. Navigate to Extensions > Application Policies > Edit > Add, as shown in the image.
Step 6. Search for Client Authentication, select it and select OK on both this window and the previous one, as shown in the image.
Step 7. Back on the template, select Apply and then OK.
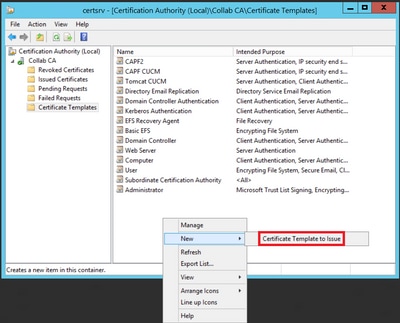
Step 8. Close the Certificate Template Console window, and back on the very first window, navigate to New > Certificate Template to Issue, as shown in the image.

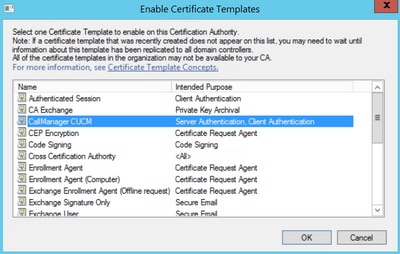
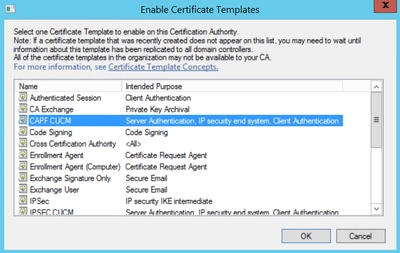
Step 9. Select the new CallManager CUCM template and select OK, as shown in the image.
Step 10. Repeat all previous steps to create certificate templates for the Tomcat and TVS services as needed.
IPsec Template
Step 1. Find the Web Server template, right-click on it and select Duplicate Template, as shown in the image.
Step 2. Under General, you can change the certificate template’s name, display name, validity, and some other vairiables.
Step 3. Navigate to Extensions > Key Usage > Edit, as shown in the image.
Step 4. Select these options and select OK, as shown in the image.
- Digital signature
- Allow key exchange only with key encryption (key encipherment)
- Allow encryption of user data
Step 5. Navigate to Extensions > Application Policies > Edit > Add, as shown in the image.
Step 6. Search for Client Authentication, select it and then OK, as shown in the image.
Step 7. Select Add again, search for IP security end system, select it and then select OK on this and on the previous window as well.
Step 8. Back on the template, select Apply and then OK, as shown in the image.
Step 9. Close the Certificate Templates Console window, and back on the very first window, navigate to New > Certificate Template to Issue, as shown in the image.

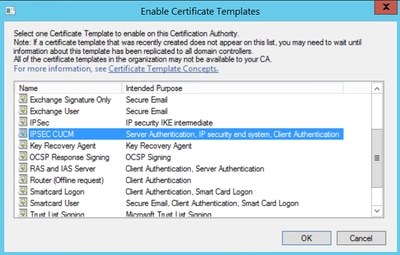
Step 10. Select the new IPSEC CUCM template and select OK, as shown in the image.
CAPF Template
Step 1. Find the Root CA template and right-click on it. Then select Duplicate Template, as shown in the image.
Step 2. Under General, you can change the certificate template’s name, display name, validity, ans some other variables.
Step 3. Navigate to Extensions > Key Usage > Edit, as shown in the image.
Step 4. Select these options and select OK, as shown in the image.
- Digital signature
- Certificate signing
- CRL signing
Step 5. Navigate to Extensions > Application Policies > Edit > Add, as shown in the image.
Step 6. Search for Client Authentication, select it and then select OK, as shown in the image.
Step 7. Select Add again, search for IP security end system, select it and then select OK on this and on the previous window as well, as shown in the image.
Step 8. Back on the template, select Apply and then OK, as shown in the image.
Step 9. Close the Certificate Templates Console window, and back on the very first window, navigate to New > Certificate Template to Issue, as shown in the image.
Step 10. Select the new CAPF CUCM template and select OK, as shown in the image.
Generate a Certificate Signing Request
Use this example in order to generate a CallManager certificate with the use of the newly created templates. The same procedure can be used for any certificate type, you just need to select the certificate and template types accordingly:
Step 1. On CUCM, navigate to OS Administration > Security > Certificate Management > Generate CSR.
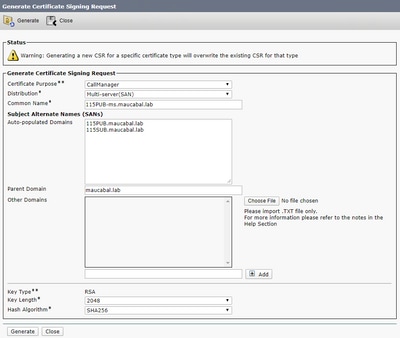
Step 2. Select these options and select Generate, as shown in the image.
- Certificate Purpose: CallManager
- Distribution: <This can either be just for one server or Multi-SAN>
Step 3. A confirmation message is generated, as shown in the image.
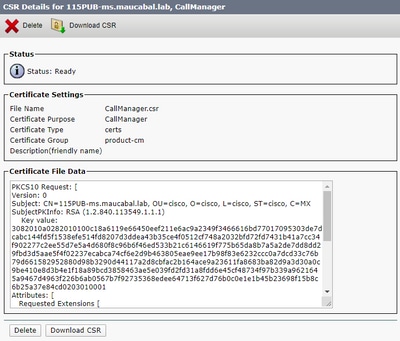
Step 4. On the certificate list, look for the entry with type CSR Only and select it, as shown in the image.

Step 5. On the pop-up window, select Download CSR, and save the file on your computer.
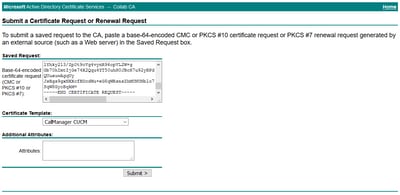
Step 6. On your browser, navigate to this URL, and enter your domain controller administrator credentials: https://<yourWindowsServerIP>/certsrv/.
Step 7. Navigate to Request a certificate > advanced certificate request, as shown in the image.

Step 8. Open the CSR file and copy all its contents:
Step 9. Paste the CSR in the Base-64-encoded certificate request field. Under Certificate Template, select the correct template and select Submit, as shown in the image.
Step 10. Finally, select Base 64 encoded and Download certificate chain. The generated file can now be uploaded to the CUCM.

Verify
The verification procedure is actually part of the configuration process.
Troubleshoot
There is currently no specific troubleshoot information available for this configuration.
Note: This guide is archived and is no longer updated on this website. For any future updates to this guide, please refer to the version that can be found on docs.mjcb.ca.
6.1 User Certificate Template Creation
The following Certificate Templates will need to be created in the Certification Authority Console on the TFS-CA01 Server:
| Template Name | Validity | Publish in ADDS | Additional Security |
|---|---|---|---|
| TFS Labs User Certificate | 1 Year | Yes |
|
| TFS Labs Workstation Certificate | 1 Year | Yes |
|
| TFS Labs Web Server Certificate | 1 Year | No |
|
These Certificate Templates will be used for issues Certificates to the organization. Some will be issued automatically, and the others can be requested by users or devices. The procedure for creating these Certificate Templates is mostly the same.
6.1.1 User and Workstation Templates
The settings for these templates will vary based on the needs of your organization, and the settings being used in this guide may or may not work for you. Ensure that you understand what the template settings are and how they will affect the users and devices in your organization.
- In the Certification Authority Console on the TFS-CA01 Server, ensure that the TFS Labs Enterprise CA Server is expanded in the Console tree.
- Right-click on Certificate Templates and then click Manage. The Certificate Templates Console window will open and display the Certificate Templates that are currently stored in Active Directory.
- In the details pane, right-click on the User Template and then click Duplicate Template.
- On the Properties of New Template window, click on the General tab. Change the name of the template to TFS Labs User Certificate. Ensure that the Validity Period is set to 1 Year.
- Ensure that the Publish certificate in Active Directory option checkbox is selected, as well as Do not automatically reenroll if a duplicate certificate exists in Active Directory is selected option is selected as well.
- On the Security tab, click the Add button and add the TFS-CA01 Server. Give it the Enroll permission.
- Select the Domain Users group and add the Read, Enroll and Autoenroll permissions.
- Click the OK button to close the Template window.
- Close the Certificate Templates Console window.
- In the Certification Authority Console, right-click on Certificate Templates, then select New and then select Certificate Template to Issue.
- In the Enable Certificate Templates dialog box, click TFS Labs User Certificate and then click OK.
6.1.2 User Certificate Template
Ensure that the user has their e-mail address entered into Active Directory, otherwise this Certificate will not deploy correctly to the User Account.
6.2 Workstation Certificate Template Creation
- In the Certification Authority Console on the TFS-CA01 Server, ensure that the TFS Labs Enterprise CA Server is expanded in the Console tree.
- Right-click on Certificate Templates and then click Manage. The Certificate Templates Console window will open and display the Certificate Templates that are currently stored in Active Directory.
- In the details pane, right-click on the Computer Template and then click Duplicate Template.
- On the Properties of New Template window, click on the General tab. Change the name of the template to TFS Labs Workstation Certificate. Ensure that the Validity Period is set to 1 Year.
- Ensure that the Publish certificate in Active Directory option checkbox is selected.
- On the Security tab, click the Add button and add the TFS-CA01 Server. Give it the Enroll permission.
- Select the Domain Computer group and add the Enroll and Autoenroll permissions.
- Click the OK button to close the Template window.
- Close the Certificate Templates Console window.
- In the Certification Authority Console, right-click on Certificate Templates, then select New and then select Certificate Template to Issue.
- In the Enable Certificate Templates dialog box, click TFS Labs Workstation Certificate and then click OK.
6.3 Web Server Certificate Template Creation
- In the Certification Authority Console on the TFS-CA01 Server, ensure that the TFS Labs Enterprise CA Server is expanded in the Console tree.
- Right-click on Certificate Templates and then click Manage. The Certificate Templates Console window will open and display the Certificate Templates that are currently stored in Active Directory.
- In the details pane, right-click on the Web Server Template and then click Duplicate Template.
- On the Properties of New Template window, click on the General tab. Change the name of the template to TFS Labs Web Server Certificate. Ensure that the Validity Period is set to 1 Year.
- On the Security tab, click the Add button and add the TFS-CA01 Server. Give it the Enroll permission.
- Select the Domain Admins group and add the Enroll and Autoenroll permissions.
- Click the OK button to close the Template window.
- Close the Certificate Templates Console window.
- In the Certification Authority Console, right-click on Certificate Templates, then select New and then select Certificate Template to Issue.
- In the Enable Certificate Templates dialog box, click TFS Labs Web Server Certificate and then click OK.
6.4 Active Directory Certificate Services Web Enrollment
The Active Directory Certificate Services Web Enrollment website is a feature that allows Authenticated Users in the organization the ability to submit Certificate Requests and download the completed Certificates. It can be found by going to the following URL:
http://tfs-ca01.corp.tfslabs.com/CertSrv/
The only minor issue with this is that SSL should be enabled on this site, but we will first need to add an SSL Certificate for it. Fortunately, the Certificate Authority is now able to issue certificates and a proper Certificate can now be requested and applied to this site.
- Open the Certificates Console (certlm.msc) under the Local Computer Account on the TFS-CA01 Server.
- Go to the Certificates > Personal > Certificates Store.
- Right-click on the Certificates folder, go to All Tasks and select Request New Certificate….
- On the Before You Begin screen, click the Next button to continue.
- On the Select Certificate Enrollment Policy screen, click the Next button to continue.
- On the Request Certificates screen, select the TFS Labs Workstation Certificate and click the Enroll button.
- On the Certificate Installation Results screen, click the Finish button to close the wizard.
- Close the Certificates Console.
- Open the Internet Information Services (IIS) Manager Console on the TFS-CA01 Server.
- In the Connections pane, select the TFS-CA01 Server and expand Sites.
- Select the Default Web Site and in the Actions pane, select Bindings….
- In the Site Bindings window, click the Add… button.
- In the Add Site Binding window, use the following settings and then click the OK button:
- Type: https
- IP Address: All Unassigned
- Port: 443
- SSL Certificate: TFS-CA01.corp.tfslabs.com
- Expand Default Web Site and select the CertSrv folder.
- In the /CertSrv Home pane, double-click on the SSL Settings icon.
- In the SSL Settings window, select the option for Require SSL and then click the Apply button in the Actions pane.
- You can easily verify that SSL is working correctly on the Enrollment page by opening the http://tfs-ca01.corp.tfslabs.com/CertSrv page (you can login with a Domain Administrator account). It should be secured with SSL.
If you go to the SSL Certificate properties of the web page, you will be able to see that the Certificate has been issued by the TFS Labs Enterprise CA and is valid for only 1 year.
- Introduction
- Part 1 — Offline Root CA Setup
- Part 2 — Subordinate CA Setup
- Part 3 — Deploy Root and Subordinate Certificate
- Part 4 — Certificate Revocation Policies
- Part 5 — Configure Private Key Archive and Recovery
- Part 6 — Certificate Template Deployment
- Part 7 — Certificate Auto-Enrollment
- Part 8 — Final Steps
Настройка веб-сервера Центра сертификации на MS Windows Server 2012 R2
Настройка веб-сервера Центра сертификации будет заключаться в следущем:
- корректировка шаблона сертификата веб-сервера;
- создание сертификата веб-сервера;
- настройка диспетчера IIS для работы веб-сайта центра сертификации по протоколу SSL.
Корректировка шаблона сертификата для веб-сервера
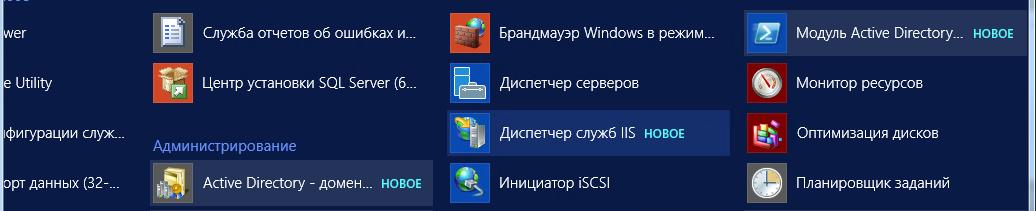
Запустить Центр сертификации. Для этого нажать кнопку Пуск,
в открывшемся окне на значок стрелки в кружке.Кликнуть дважды мышкой на
Центр сертификации.
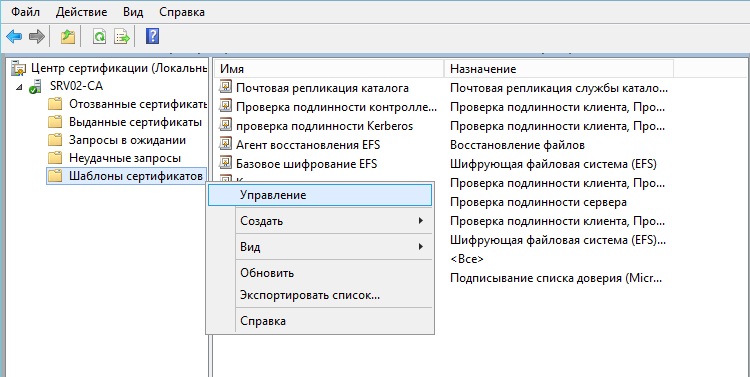
В центре сертификации переместиться на Шаблоны сертификатов,
вызвать контекстное меню, нажать на Управление:
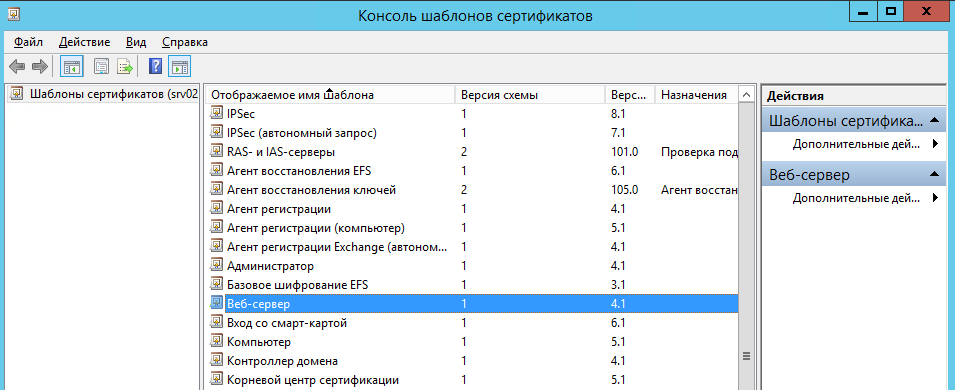
В открывшемся окне консоли шаблонов сертификатов выбрать Веб-сервер
и дважды кликнуть на нем мышкой:
В закладке Безопасность для группы пользователейПрошедшие проверку
поставить флажок Заявка и нажать кнопку Применить:
Закрыть окно центра сертификации.
Создание сертификата для веб-сервера
Запустить оснастку mmc. Для этого нажать правой кнопкой мыши на Пуск, в открывшемся окне выбрать Выполнить. В меню запуска
введите команду MMC:
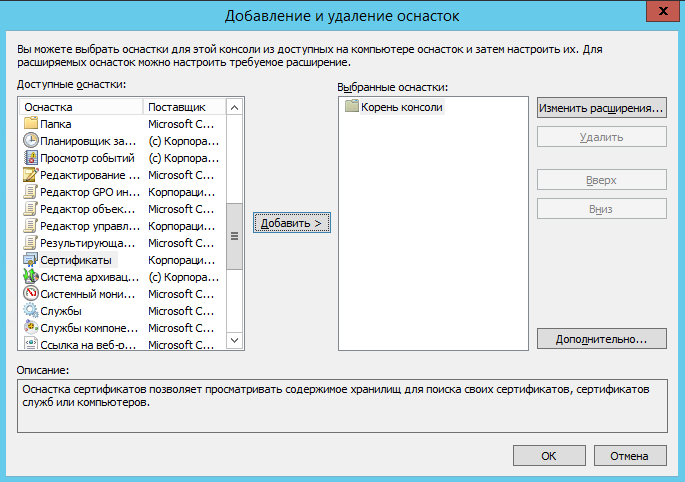
Добавить оснастку, для этого выбрать меню Файл/Добавить или удалить оснастку:
Выбрать Сертификаты и нажать кнопку Добавить:
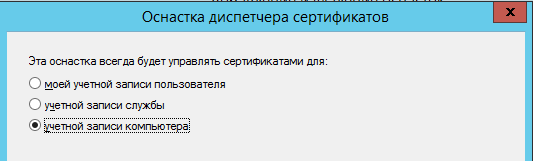
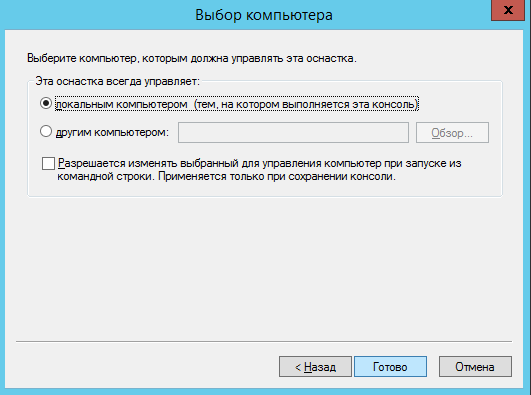
В окне Оснастка диспетчера сертификатов выбрать учетной записи компьютера:
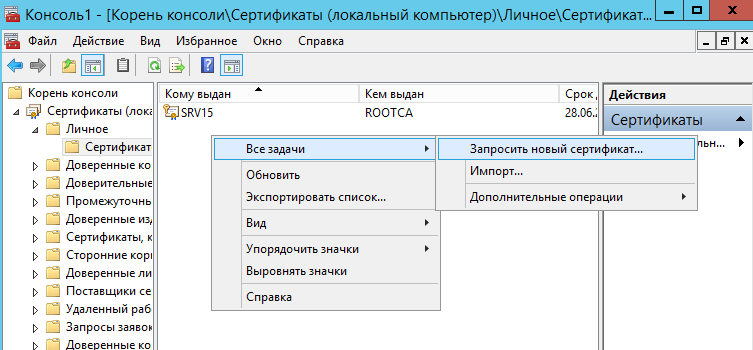
Создать настраиваемый запрос, для этого в окне консоли оснастки
сертификаты раскрыть меню Сертификаты (Локальный компьютер/Сертификаты
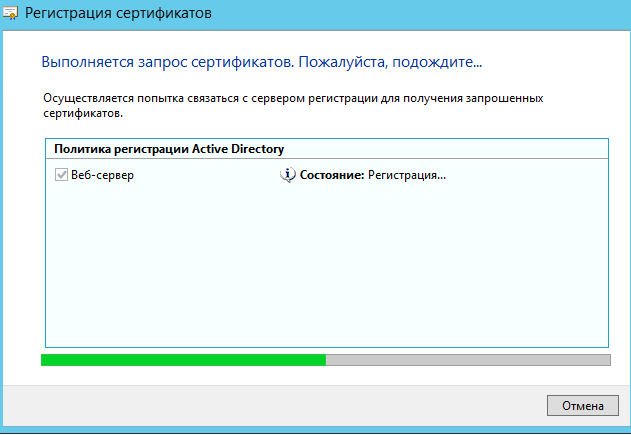
На строке Сертификаты вызвать контекстное меню Все задачи/Запросить новый сертификат:
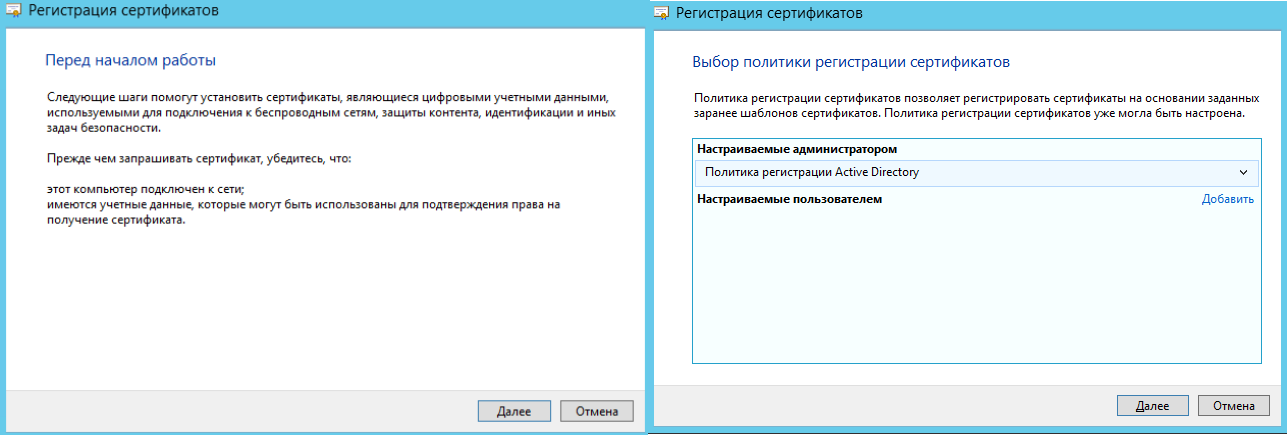
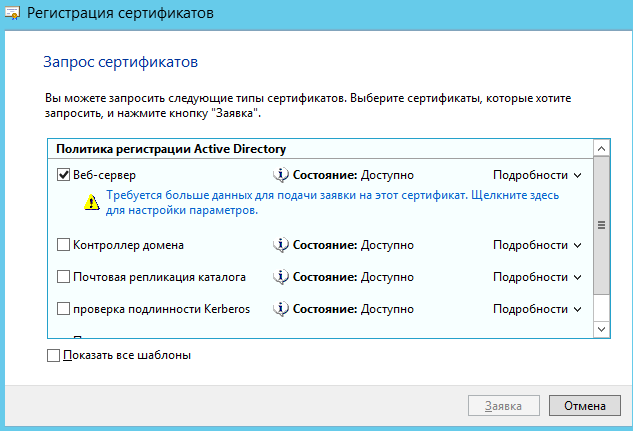
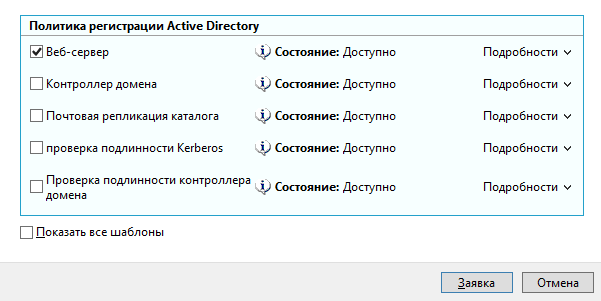
В окне запросов сертификатов ставим флажок возле шаблона Веб-сервер.
В связи с тем, что для создания запроса необходимо ввести дополнительные сведения о пользователе,
нажимаем на строку Требуется больше данных для подачи заявки на…:
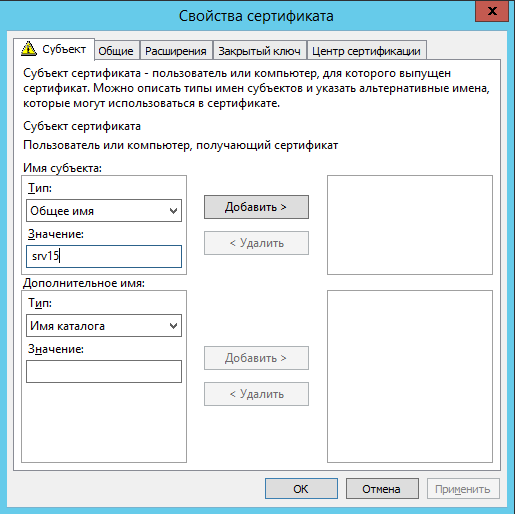
В закладке Субъект необходимо добавить значения Общее имя и Страна
. Общее имя должно соответствовать имени сервера (например,
SRV15), страна – RU. Нажимаем ОК и Заявка:
Настройка работы веб-сервера Центра сертификации протоколу SSL
Запустить Диспетчер служб IIS:
В левой части окна диспетчера выбрать Default Web Site,
затем в правой части окна – Привязки:
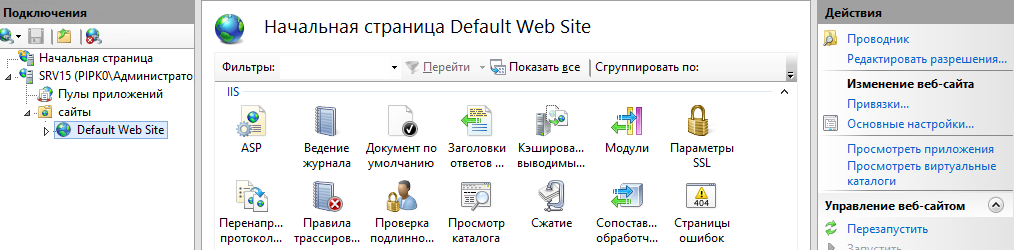
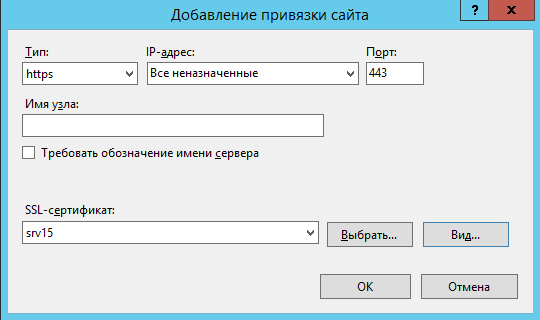
В появившемся окне нажать кнопку Добавить:

В окне Добавление привязки сайта выбрать тип HTTPS и
выбрать из списка созданный SSL сертификат. Назначение
сертификата должно быть Обеспечивает получение идентификации
от удаленного компьютера:
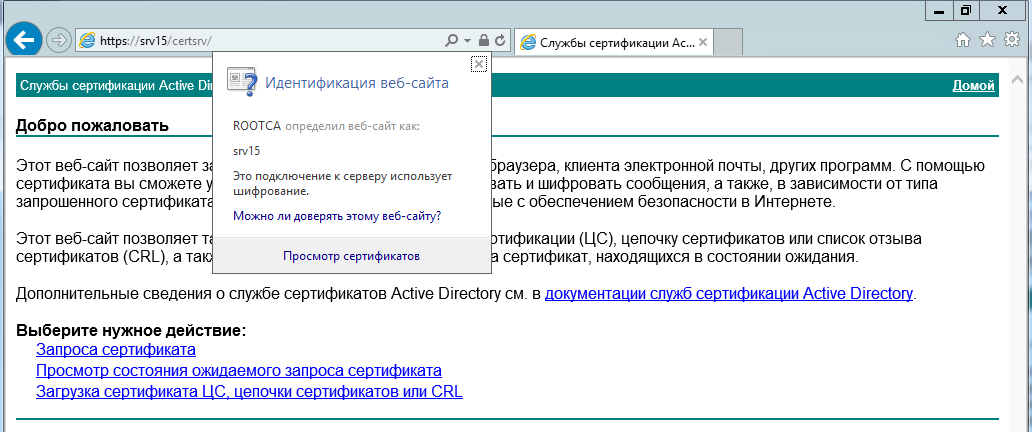
Закрыть окно. Сделать проверку работы SSL сертификата при доступе на сайт центра сертификации
через браузер. Ввести адрес – https://имя сервера/certsrv, где имя сервера вводим
самостоятельно.
При правильной настройке веб-сервера доступ к сайту будет выполнен без ошибок.

Лично я предпочитаю пользоваться веб-сервером на .nix системах, но иногда бывает необходимо развернуть web-сервер на Windows. Рассмотрим такой вопрос как установка веб-сервера на Windows Server. На примере Windows Server 2012. Хотя в остальных версиях процесс установки особо не отличается.
Первым делом нужно установить IIS. Делается это довольно просто. Диспетчер серверов -> Управление -> Добавить роли и компоненты -> Установка веб-сервера (IIS). Подробнее в видео.
Тег video не поддерживается вашим браузером.
Скачайте видео.
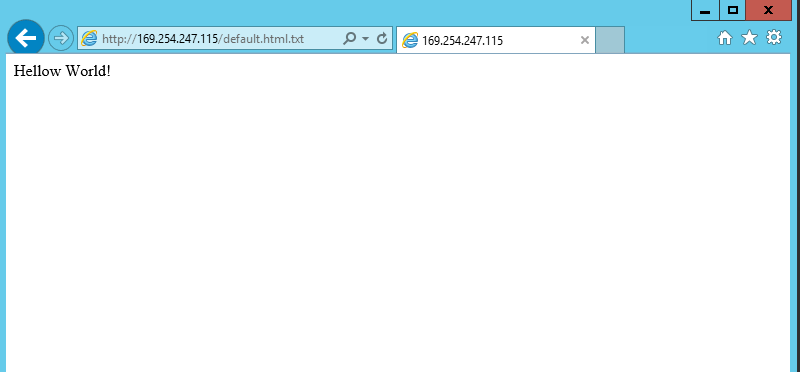
Создайте тестовую страницу, откройте блокнот, напишите любой текст и сохраните в C:\Inetpub\wwwroot под названием Default.html (в моем случае это txt файл — Default.html.txt).
Настройка веб-сервера
Создайте тестовую страницу, откройте блокнот, напишите любой текст и сохраните в C:\Inetpub\wwwroot под названием Default.html (в моем случае это txt файл — Default.html.txt).
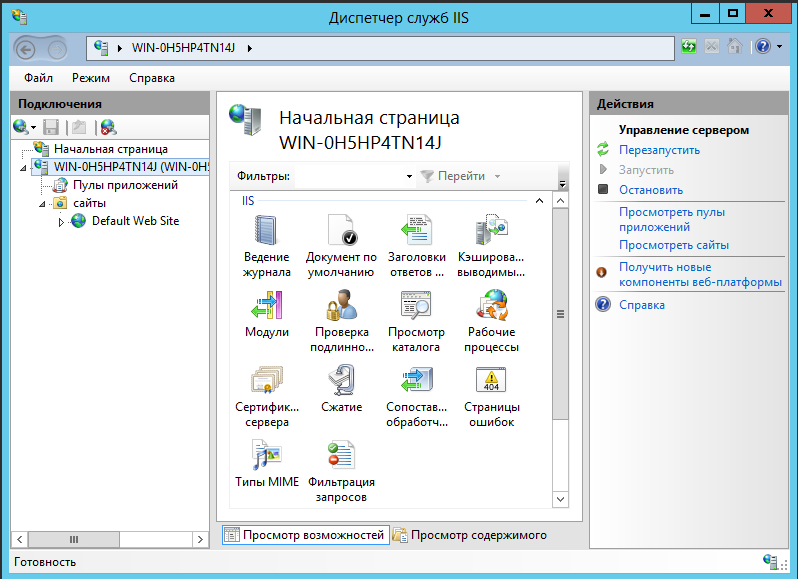
Что бы настроить web-сервер откройте Диспетчер служб IIS: Пуск -> Администрирование -> Диспетчер служб IIS. Слева будет отображаться web-узел по умолчанию.
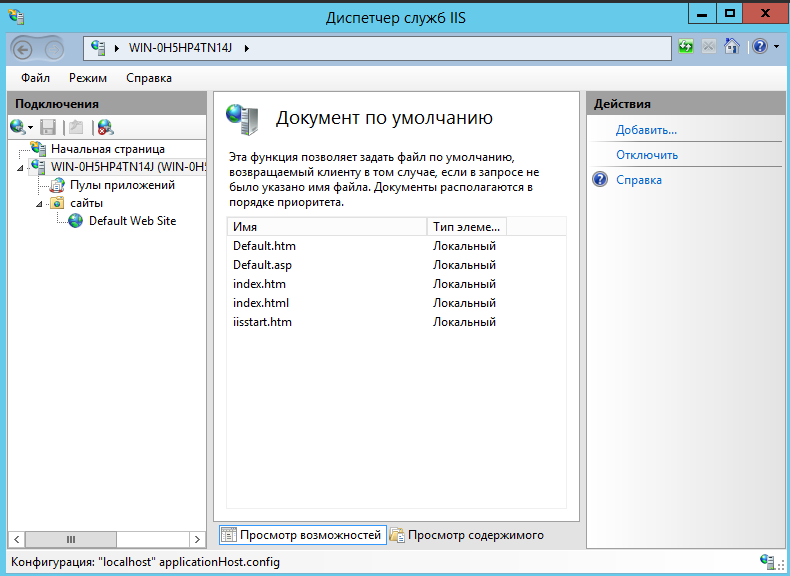
Для добавления web-страницы по умолчанию нужно выбрать сервер, а затем выбрать Документ по умолчанию.
Далее нам нужно узнать (если не знаем) IP-адрес сервера. Для этого заходим в PowerShell и выполняем команду – ipconfig /all.
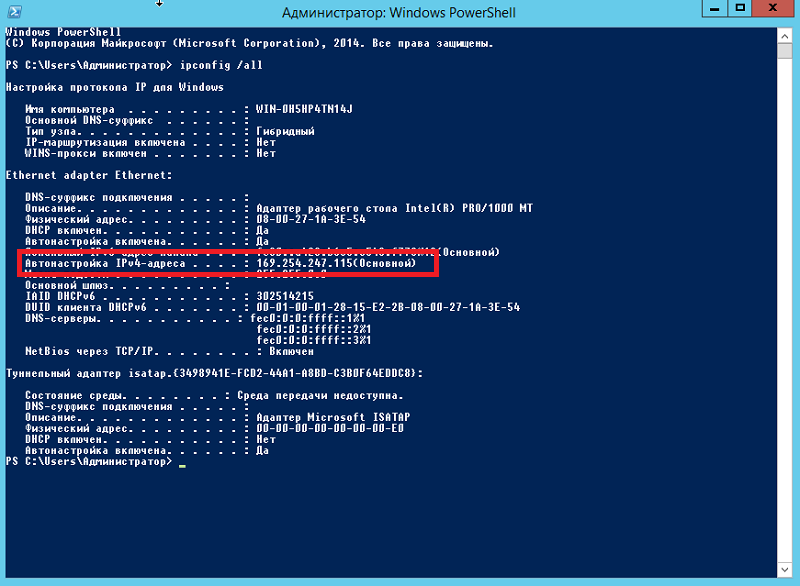
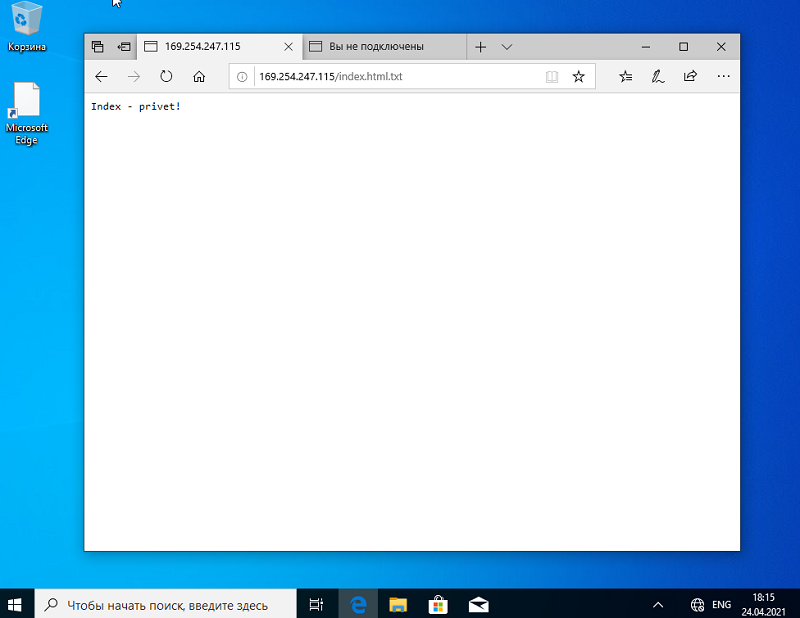
Запускаем браузер и набираем IP-адрес и названием страницы по умолчанию. В моем случае это 169.254.252.180/Default.html.txt.
Попробуйте открыть эту страницу с другого рабочего места в сети.

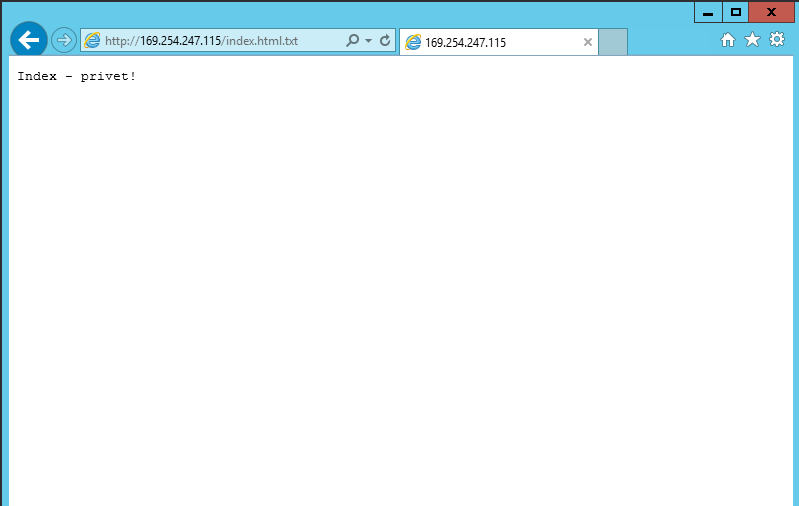
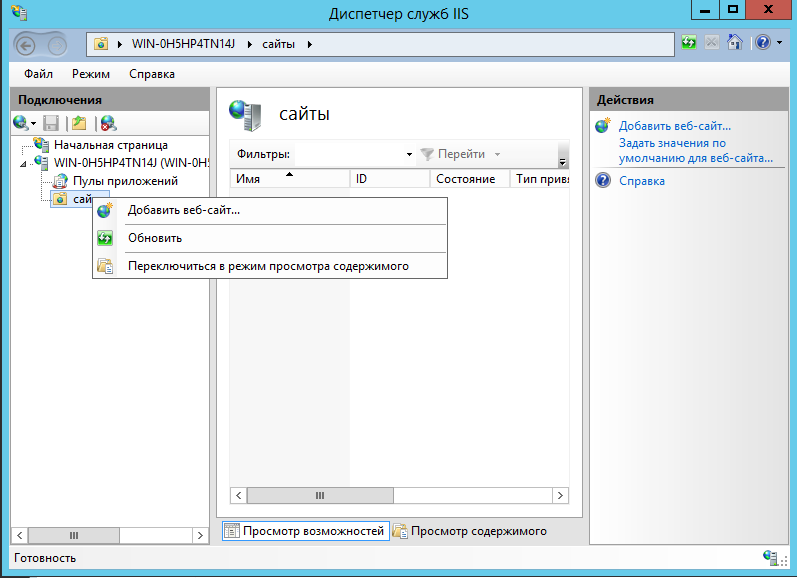
Создайте новый web-узел. Создайте папку для нового сайта на диске C. В моем случае это папка www. Создайте в папке тестовую страницу (как Default.html ранее). Удалите текущий узел, щелкните правой кнопкой мыши на узле «сайты» и выберите команду «Добавить веб-сайт».
Заполните поля:
- Имя сайта.
- Физический путь.
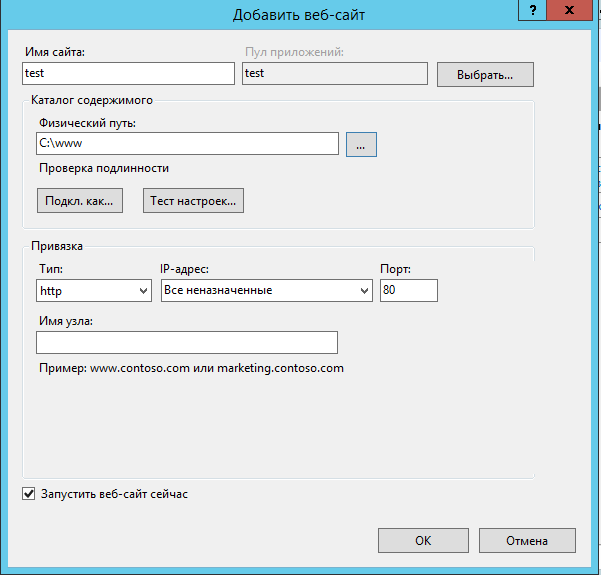
Нажмите ОК и проверьте работоспособность сайта на сервере.
Проверьте работоспособность сайта на другом компьютере в сети.
Установка FTP-сервера
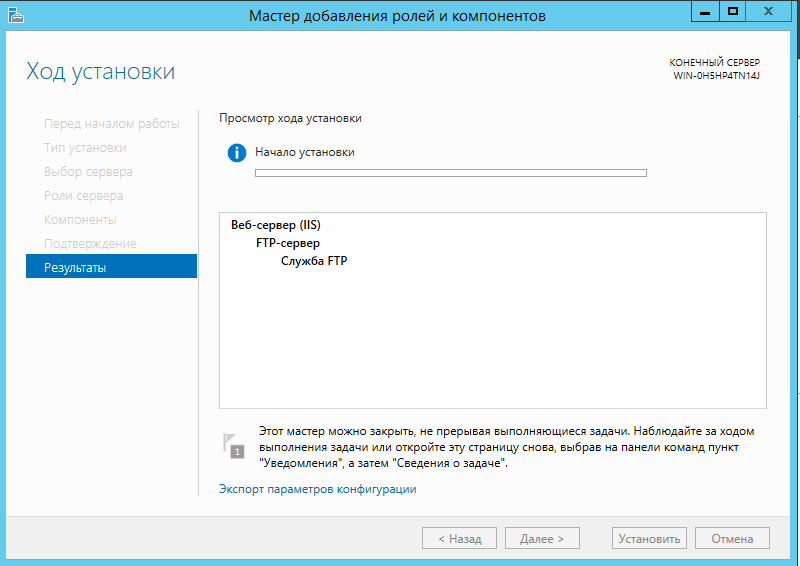
Установите FTP-сервер. Он устанавливается так же, как и веб-сервер IIS (Диспетчер серверов -> Управление -> Добавить роли и компоненты -> FTP-сервер).
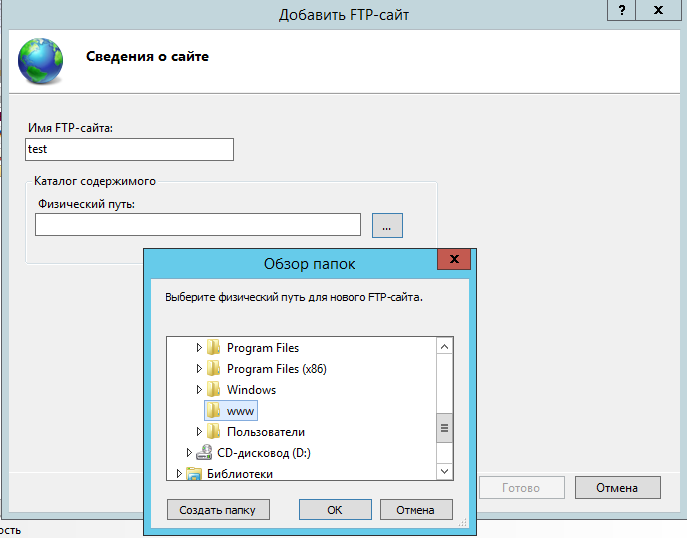
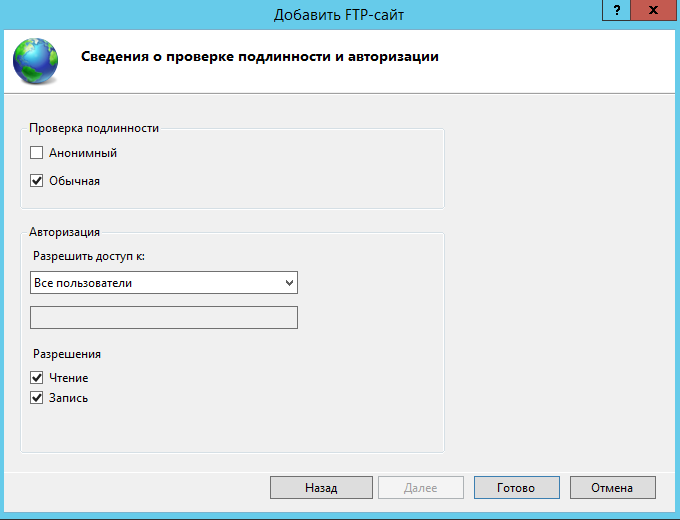
В диспетчере служб IIS нажмите «Добавить FTP-сайт». Откроется окно добавления нового FTP-сайта. Задайте имя сайта и физический путь.
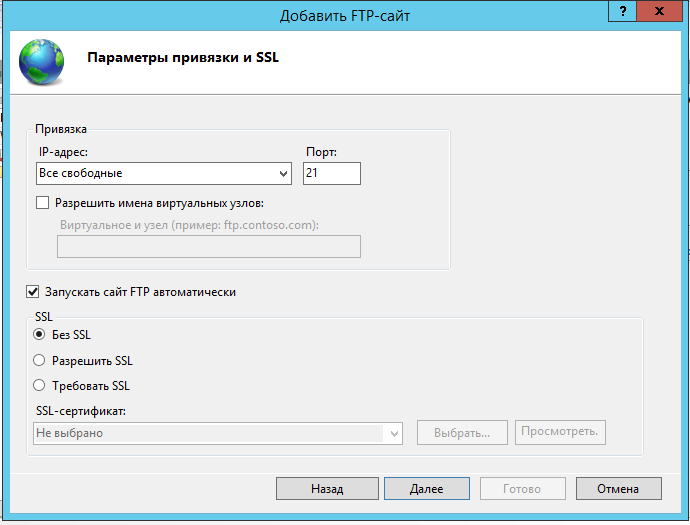
Укажите параметры привязки SSL.
Настройте разрешения. Предоставьте пользователям разрешения на чтение информации и на запись.
Далее необходимо создать виртуальный каталог веб-сервера. Это необходимо для того, чтобы веб-сервер мог получить доступ к корневому каталогу службы FTP.
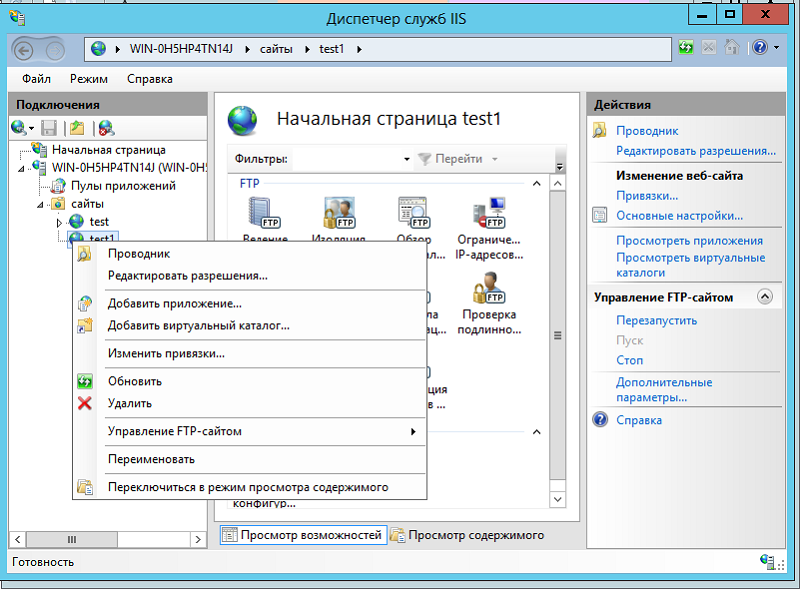
Задайте псевдоним и физический путь. Обычно они совпадают с именем и (test) и каталогом сайта (C -> www).
Настройки брандмауэра
Для того, что бы FTP соединение работало корректно нудно настроить брандмауэр.
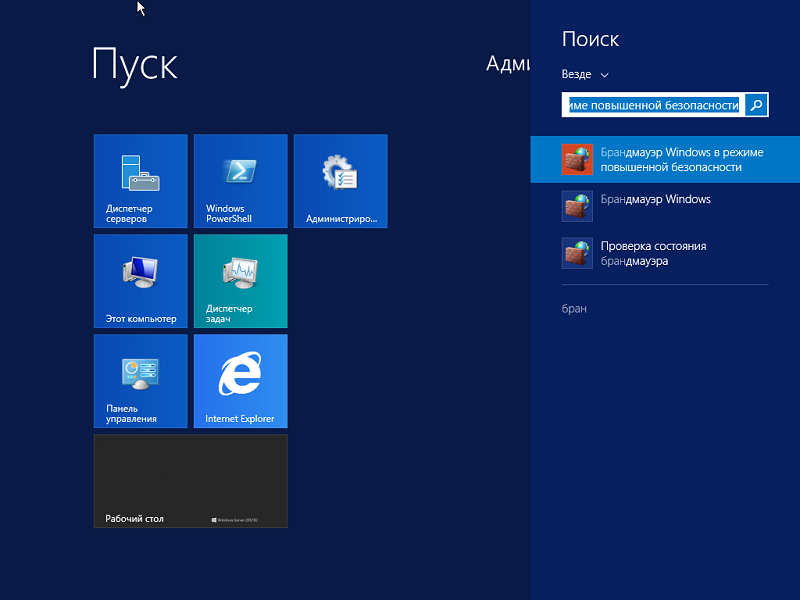
Откройте брандмауэр в режиме повышенной безопасности.
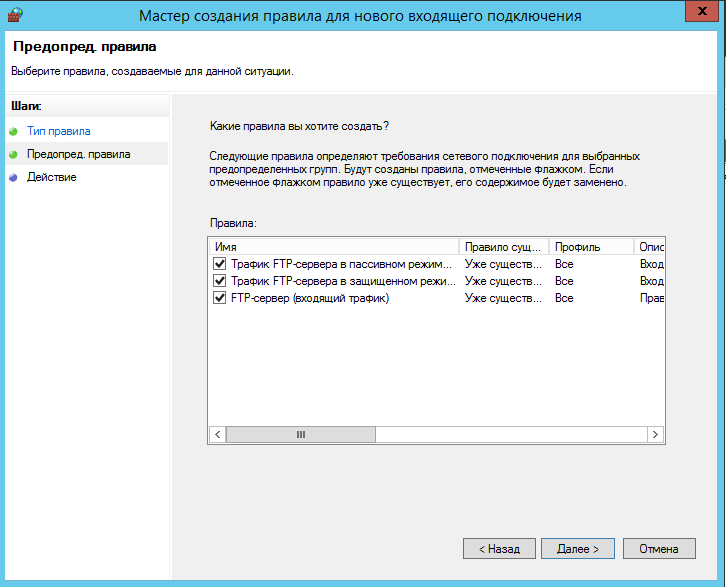
В вертикальном меню слева выберите Правила для входящих подключений.
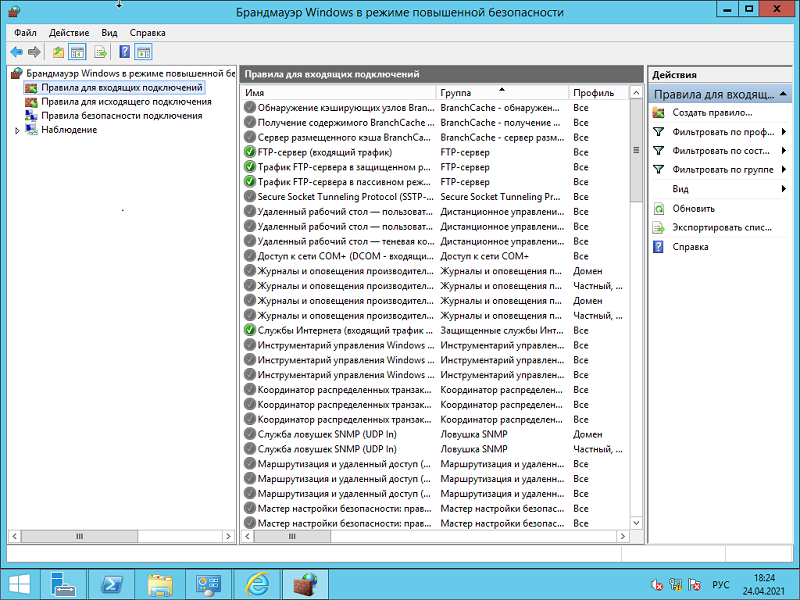
Выберите в вертикальном меню справа Создать правило. Выберите тип правила: Преопределенные: FTP-сервер. Далее установите все правила.
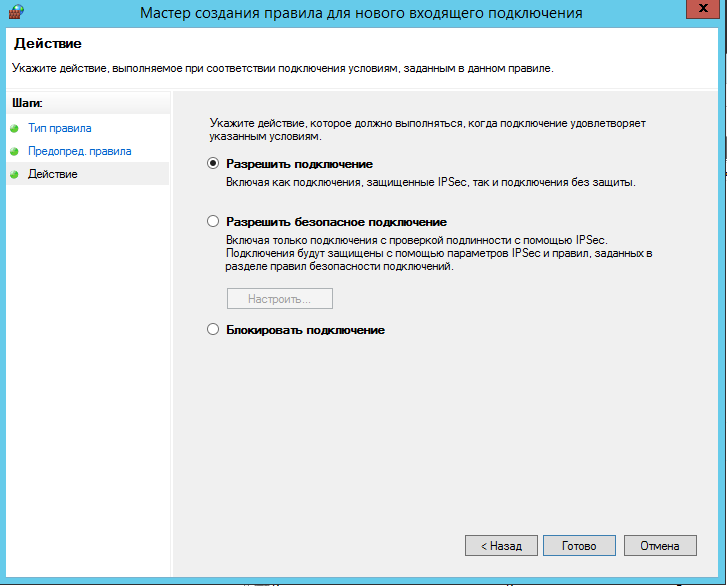
Далее выберите действие — разрешить подключение.
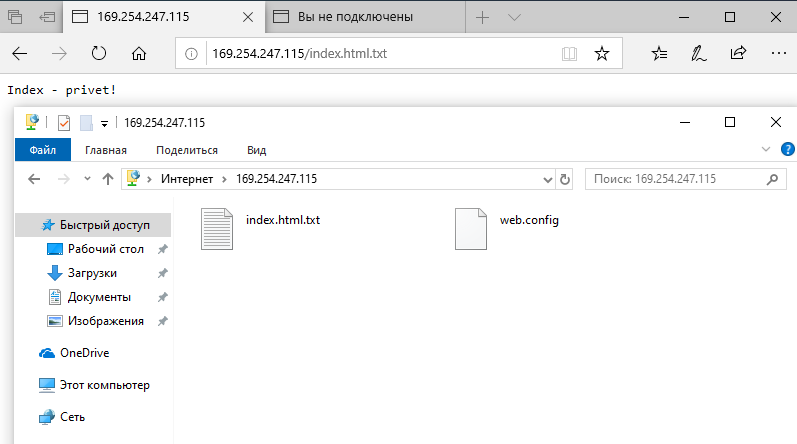
Подключитесь с помощью FTP с другого компьютера в локальной сети. Для этого наберите в браузере: ftp://IP-адрес сервера после чего введите логин и пароль от сервера.

FTP-соединение установлено!
Итак, в этой статье мы рассмотрели такую тему как установка веб-сервера на Windows Server. Если у вас появились вопросы обязательно задайте их в комментариях.
Анатолий Бузов / об авторе
Обучаю HTML, CSS, PHP. Создаю и продвигаю сайты, скрипты и программы. Занимаюсь информационной безопасностью. Рассмотрю различные виды сотрудничества.