
Довольно странно читать, как на вопрос про «ставить Линукс» отвечают примерно «а нафига тебе, ставь через виртуалку».
1. Линукс стоит на основном рабочем лаптопе уже 4 года. В заводскую Винду перезагружаюсь в среднем раз в месяц, чтоб открыть какой-нибудь cad-овский файл. Дистрибутив — Arch, обновляет пакеты постоянно, работает как хорошие часики. Иногда подключаю док-станцию и второй монитор. Нет, не ломался ни разу, драйверы в ручную не ковырял.
2. Не пользуюсь Грабом давно, просто потому что смысла нет. Записываю загрузчик или напрямую через efibootmgr, или же создаю отдельный загрузчик через bootctl (systemd-boot) и записываю там элементы загрузки. Основное отличие — меню выбора никогда не всплывает (все доступные ОС не высвечиваются), загружается всегда запись №1 из UEFI, очередность можно менять там же. Выбрать одноразово можно при загрузке через специальное меню UEFI, которая всплыват по нажатию одной из F кнопок (зависит от производителья МП) примерно в том же промежутке загрузки, когда еще можно открыть основное меню UEFI/BIOS.
Adding an entry on BCDEDIT we can boot Linux using Windows (Vista or later) Boot Manager. As earlier OS such as Windows XP does not have bcdedit we can boot Linux by adding entry on boot.ini file.
For Windows Vista or Later, using BCDEDIT
Let’s discuss how to do this. First, we shall install Windows on the target PC. Then we shall take a backup of Windows MBR before installing Linux.
# dd if=/dev/sda of=winmbrbackup.bin bs=512 count=1
After that we shall install Linux. Then we restore Windows MBR.
# dd of=/dev/sda if=winmbrbackup.bin bs=446 count=1
In this stage, we install Linux MBR on Linux partition using grub-install command
# grub-install /dev/sdaX
For example, it is ‘sda9’ in my case.
# grub-install /dev/sda9
Let’s copy required boot information: mbr into a file which we will use later on Windows.
# dd if=/dev/sda9 of=rhelmbr.bin bs=512 count=1
Copy this file from Linux and put it into system partition such as C: drive.
We shall add an entry in Windows BCDEDIT for Linux. We have to open command prompt with administrator privilege and apply following command,
$ bcdedit /create /d "RHEL 6" /application BOOTSECTOR
This command will give an ID of the entry created. Use this ID on subsequent commands,
$ bcdedit /set {ID} device partition=C:
$ bcdedit /set {ID}  path \rhelmbr.bin
$ bcdedit /displayorder {ID} /addlast
$ bcdedit /timeout 20
If you are using Windows 8, it’s better to set bootmenupolicy to legacy so that OS Selection Menu is displayed during initial boot.
$ bcdedit /set {default} bootmenupolicy legacy
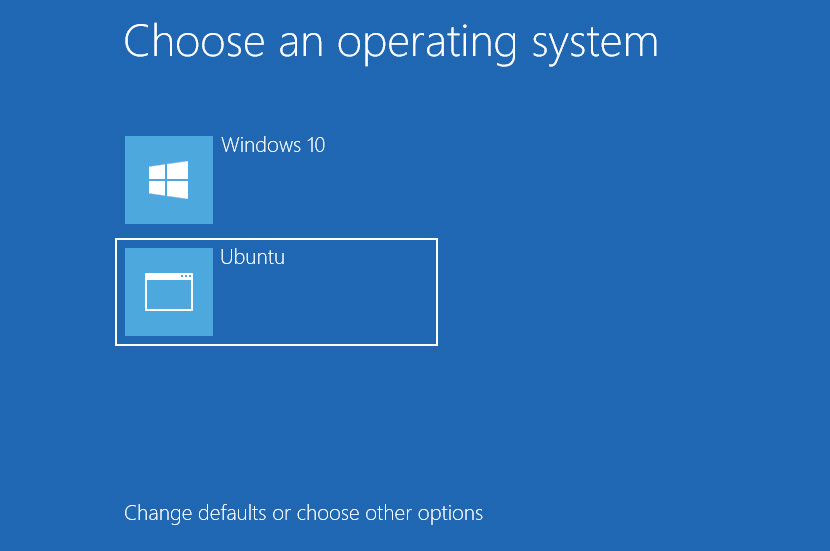
After restarting operating system you will be presented with option to boot Linux with Windows.
Earlier OS such as Windows XP
Opening boot.ini for edit can be little bit tricky. It might be set read-only. The file resides on C:\ drive. Windows XP boot.ini looks like this:
$ bcdedit /set {default} bootmenupolicy legacy[boot loader]
timeout=30
default=multi(0)disk(0)rdisk(0)partition(1)\WINNT
[operating systems]
multi(0)disk(0)rdisk(0)partition(1)\WINNT="Microsoft Windows 2000 Professional" /fastdetect
Add a line like this in boot.ini to add linux entry,
C:\rhelmbr.bin="RHEL 6".
References
- technet: How to use Windows Vista’s Boot Manager to boot Linux
- msdn: BCDEdit
- Windows and Arch Dual Boot
- Booting Solaris using Windows Boot Loader
Published by Atiq
Simple person
View all posts by Atiq
Published
When you dual-boot a Linux distro alongside Windows, the installer sets up a bootloader, generally GRUB, to ensure there are no conflicts between the two operating systems during the boot-up processes.
While GRUB is a versatile and easy-to-use bootloader, you might want to switch to using the Windows Boot Manager as your default. Let’s learn how you can use Windows Boot Manager instead of GRUB.
An easy way to boot from Windows Boot Manager instead of GRUB is to simply head over to the UEFI settings of your motherboard and switch up the boot priority order.
Generally, during boot, you can press the F12 or Delete key to open up the UEFI control center. There you should find a specific setting where the boot hierarchy is laid out.
You should find GRUB on top, followed by Windows Boot Manager. Simply exchange their positions by dragging or any means necessary (it differs from one motherboard to another).
Once you’re done with switching their positions, simply save the changes and exit out of the UEFI settings panel. You should now be booting from Windows Boot Loader.
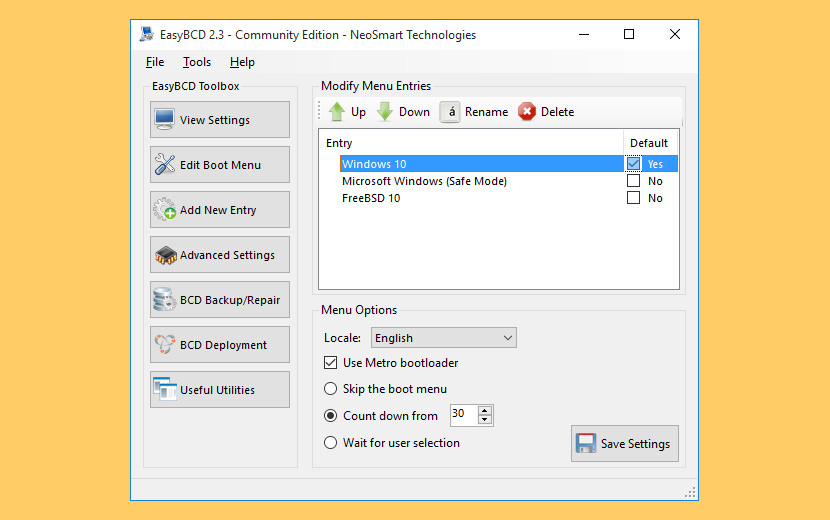
2. Add Linux to Windows Boot Manager Using EasyBCD
EasyBCD is a free software that helps you take control of your system’s boot process by allowing you to modify bootloader settings. It is a very potent and effective tool, so much so that we recommend using it as a last resort. You can accidentally end up corrupting your system’s boot process if you aren’t familiar with the technical side of things.
Download: EasyBCD (commercial edition available)
Here’s how to replace GRUB with Windows Boot Manager using EasyBCD:
- Fire up the EasyBCD application and click on the Add New Entry option.
- Next, select Linux from under the Operating System tab.
- Select GRUB2 in the Type field and type in the name of your Linux distro.
- Under the Drive tab, select the Linux partition i.e. the drive where your Linux system resides. Proceed with caution because selecting the wrong drive will lead to unsolicited data loss.
- Click on the Add (a plus sign) button to confirm your settings and add your Linux distro to the Windows Boot Manager.
Restart your PC, and you should find your Linux distro added to Windows Boot Manager. Now you should be able to boot into either of your installed OSes from there.
Now You Can Boot From Windows Boot Manager Instead of GRUB
Following the aforementioned steps should help you set up your dual-boot system to boot from Windows Boot Manager instead of the GRUB bootloader. While dual-booting has its advantages, it does bear some risks that can affect performance in the long run.
-
Home
-
News
- 2 Ways to Replace GRUB with Windows Boot Manager
By Amy | Follow |
Last Updated
If you are going to replace GRUB with Windows Boot Manager, this post is what you need is it offers you a full tutorial. It collects 2 available methods. Explore the content with MiniTool Partition Wizard now!
Why Do You Need to Replace GRUB With Windows Boot Manager
GRUB is often set as the bootloader when you dual-boot a Linux distro with Windows. This can ensure that there’re no conflicts between the two operating systems in the load-up process. Though GRUB is a versatile and easy-to-use bootloader, you may still want to set Windows Boot Manager as the default because of errors like GRUB not showing in dual boot setup or something else.
Here comes the question: how to switch from GRUB to Windows Boot Manager. Well, you don’t have to worry about it. This post would illustrate the whole process for you.
Further reading:
Windows Boot Manager (BOOTMGR) is a small piece of software that is loaded from the volume boot code. It enables you to boot operating systems including Windows Vista/7/8/10. However, it can prompt you with various errors.
For instance, you will receive errors like BOOTMGR is missing, Boot Manager failed to find OS loader, BOOTMGR is compressed, etc. If you are bothered by issues like that, try using MiniTool Partition Wizard to fix them.
MiniTool Partition Wizard DemoClick to Download100%Clean & Safe
This free partition manager enables you to rebuild MBR, set the partition as active, check the hard drive for errors, copy disks, and perform other operations that are related to partitions or disks.
How to Replace GRUB With Windows Boot Manager
There are 2 methods to switch from GRUB to Windows Boot Manager for you.
Method 1: Change the Boot Priority Order
A simple way to switch from GRUB to Windows Boot Manager is to change the boot priority order in the UEFI settings of the motherboard. The following steps will show you how to do that in detail.
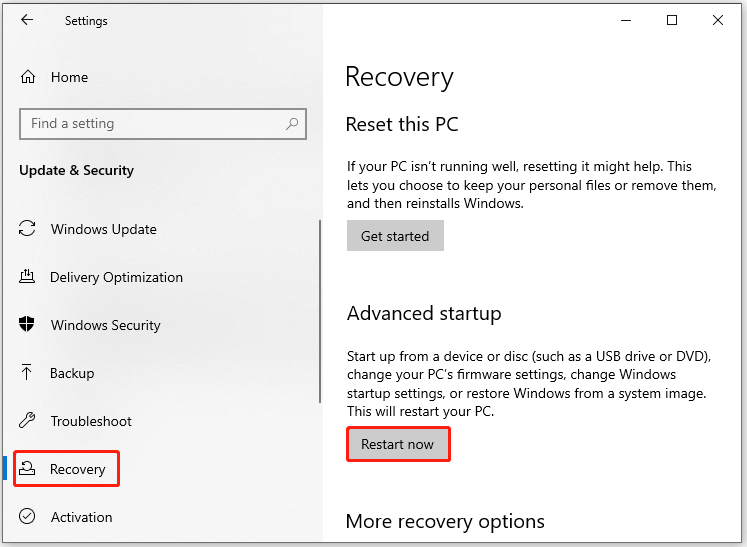
Step 1: Open Settings by pressing Windows and I keys.
Step 2: Then click Update & Security > Recovery > Restart now (under the Advanced startup section).
Step 3: Click on Troubleshoot > Advanced options > UEFI Firmware Settings and tap Restart.
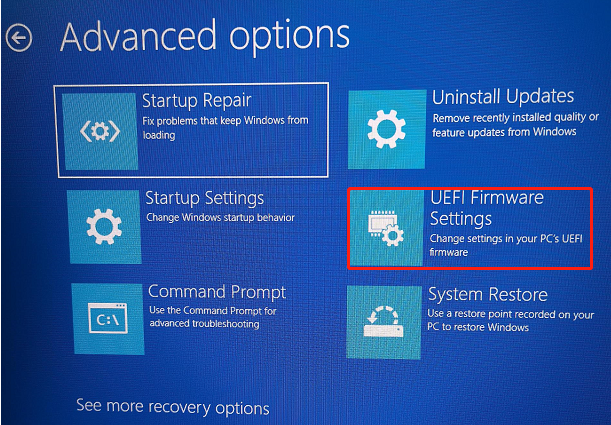
Step 4: After the computer restarts, it will enter the UEFI/BIOS setup utility.
Step 5: Navigate to the Boot section and set Windows Boot Manager as the first boot. To do that, click on Windows Boot Manager and keep pressing the “+” key until the option is placed at the first order.
Step 6: Then press F10 and Enter keys to confirm the change and exit the utility.
Method 2: Use EasyBCD to Add Linux to Windows Boot Manager
You can also replace GRUB with Windows Boot Manager via EasyBCD. It is a tool that is capable of controlling your system’s boot process. To be specific, you are able to modify bootloader settings through EasyBCD.
Step 1: Download and install EasyBCD on your computer.
Step 2: Run EasyBCD to enter its main interface and click the Add New Entry option.
Step 3: Click the Linux option under the Operating System tab.
Step 4: Choose GRUB2 in the Type field and type in the name of your Linux distro.
Step 5: Under the Drive tab, select the Linux partition where your Linux system resides. You need to take care because choosing the wrong drive will cause data loss.
Step 6: Tap on the Add (“+” icon) button to confirm your settings and add the Linux distro to the Windows Boot Manager.
Step 7: Restart your computer.
How to replace GRUB with Windows Boot Manager? This post has collected 2 available methods for you. Simply choose one from them to switch from GRUB to Windows Boot Manager.
About The Author
Position: Columnist
Having writing articles about computer tech for a long time, I am rather experienced especially on the aspect of computer optimization, PC enhancement, as well as tech terms explanation. The habit of looking through tech forums makes me a great computer issues collector. And then, many articles related to these issues are released, which benefit plenty of users. Professional, effective, and innovative are always the pursuit of an editing worker.
How to dual-boot Linux and Windows on the same hard disk? Typically a computer will have a single operating system installed on them, for those that want to dual-boot multiple OS such as a combination of Windows and Linux, you will need to make some changes and enable the option to choose which OS to boot from during startup.
Continue ➤ 3 Free Boot Camp Alternatives – Run Windows Applications And Games On macOS
You can install 2 operating systems provided that you partition your SSD or Hard Disk into 2 drives. When you install a Linux distribution, it typically installs the Grub boot loader. Grub loads instead of the Windows boot loader at boot time if Windows was already installed, allowing you to choose the operating system you want to boot by modifying the Boot Configuration Data.
1. Grub2Win

Grub2Win supports 64 and 32 bit EFI and BIOS on Windows. Safely dual boot Windows and Linux from GPT or MBR disks. Grub2Win boots native GNU Grub version 2 code. Everything is contained in a single 20 MB directory on your Windows C: drive. On EFI systems a few small modules are installed to your EFI partition.
Using the simple Windows GUI and instructions you can install Grub2Win quickly and safely. Select from many OS choices. Supports Antergos, Android, Ubuntu, Debian, Suse, Fedora, Mint, Clover and Windows. Also boots ISO files. You can enter your own custom commands for each menu entry.
- Supports 64 and 32 bit EFI as well as BIOS firmware.
- Requires just one directory on the Windows C: drive, about 20 MB disk space.
- Simple Windows GUI easily sets up Grub2Win in seconds.
- Lets you set your EFI firmware boot order from within Windows.
- Preview and customize the 9 included graphic background themes.
- Works with all filesystems including Mac hfs and Btrfs.
- Can search for and boot a partition by its label. Supports advanced scripting.
- Works with both GPT and MBR disks – up to 128 primary partitions per drive.
- Supports extremely large (over 40 TB) disks and partitions.
- Safely multiboot Windows, Antergos, Android, Ubuntu, Debian, Suse, Fedora, Mint, Clover and more.
- Grub customization is done from Windows – Configuration in Linux is not required.
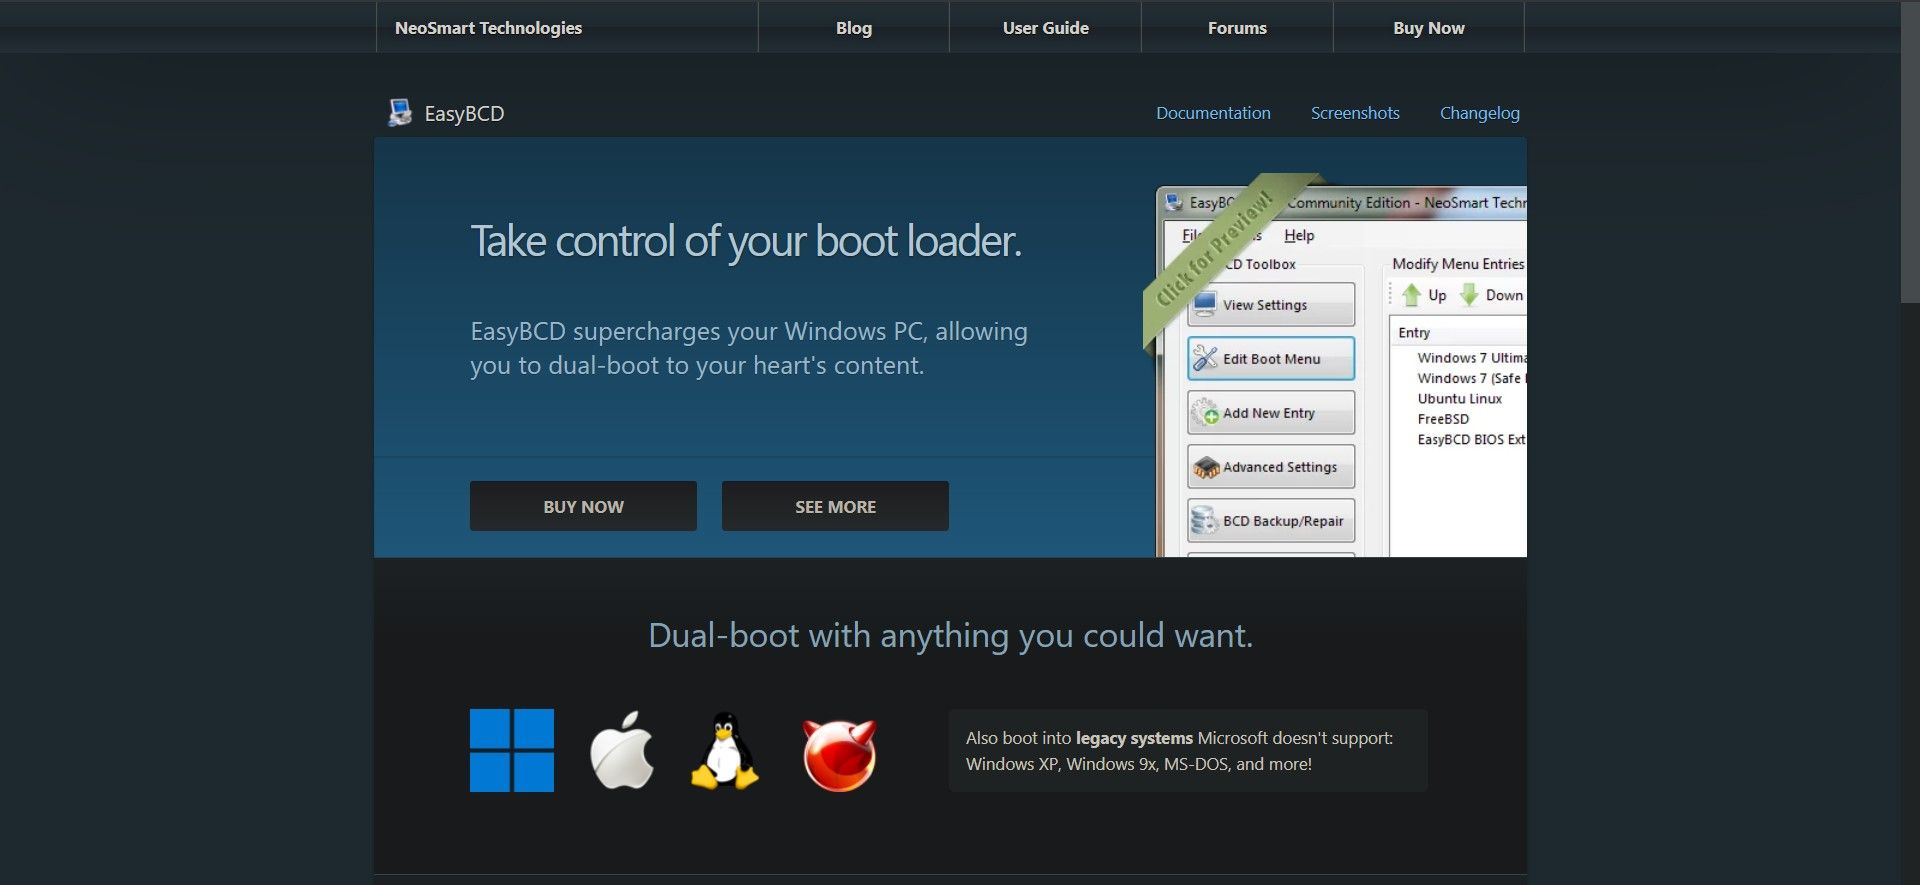
2. EasyBCD
Free for personal, non-commercial use
Take control of your boot loader, EasyBCD supercharges your Windows PC, allowing you to dual-boot to your heart’s content. Also boot into legacy systems Microsoft doesn’t support: MS-DOS, Windows 9x, Windows ME, and Windows 2000!
EasyBCD is geared for users of all kinds. Whether you just want to add an entry to your old XP partition or want to create a duplicate for testing purposes; if you’re interested in debugging the Windows Kernel or septuple-booting your seven test operating systems, EasyBCD is the key.
- Boot anything – Windows, Linux, macOS, & BSD! Boot both from and into USB drives, ISO images, virtual disks, and more.
- Boot anywhere – Create bootable USB sticks with repair utilities that you can take with you anywhere.
- Protect against disaster – Create entries to boot into recovery utilities or safe mode to prepare for a rainy day.
- Painless editing – Add, rename, remove, configure, and reorder entries at whim.
- Solve difficult problems – Use EasyBCD to troubleshoot Windows, back up and repair the bootloader, and more.
- Powerful scripting with NeoGrub – You’ll have the power to hide partitions, change active flags, and create complex boot scenarios.
3. rEFInd Boot Manager
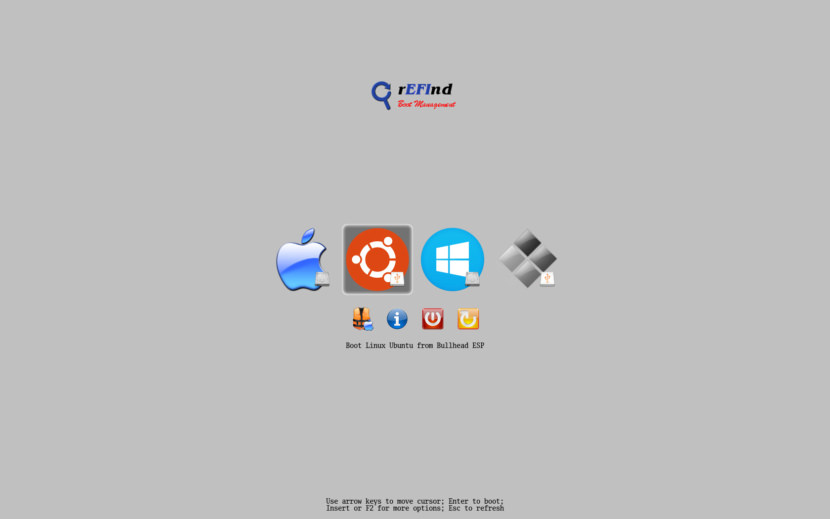
rEFInd is a fork of the Small rEFIt boot manager for computers based on the Extensible Firmware Interface (EFI) and Unified EFI (UEFI). Like rEFIt, rEFInd is a boot manager, meaning that it presents a menu of options to the user when the computer first starts up, as shown below. rEFInd is not a boot loader, which is a program that loads an OS kernel and hands off control to it.
4. Clover EFI bootloader
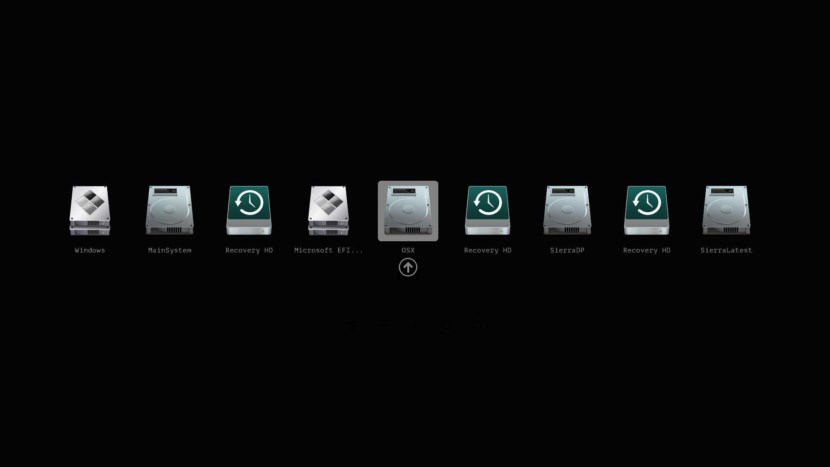
This is an EFI-based bootloader for BIOS-based computers created as a replacement to the EDK2/Duet bootloader. Clover is an operating system boot loader for computers already equipped with an UEFI firmware and for those equipped with legacy BIOS firmware. An operating system (OS) may support (U)EFI (macOS, Windows, Linux) or not (Windows XP). Legacy boot is used for the last one, that is, the old BIOS system is used to handle boot sectors.
- Boot macOS, Windows, and Linux in UEFI or legacy mode on Mac or PC with UEFI or BIOS firmware
- Boot using UEFI firmware directly or CloverEFI UEFI firmware emulation
- Customizable GUI including themes, icons, fonts, background images, animations, and mouse pointers.
- Ability to boot previously selected boot entry after default timeout
- Boot entries menu scrolls if screen resolution is too low for menu
- Create custom boot entries for personalizing boot entries and add support for other operating systems
- Create Clover boot entry in NVRAM with tool from GUI
5. Grub

GNU GRUB is a Multiboot boot loader. It was derived from GRUB, the GRand Unified Bootloader, which was originally designed and implemented by Erich Stefan Boleyn.
Briefly, a boot loader is the first software program that runs when a computer starts. It is responsible for loading and transferring control to the operating system kernel software (such as the Hurd or Linux). The kernel, in turn, initializes the rest of the operating system (e.g. GNU).
6. Super Grub2 Disk

Super GRUB2 Disk helps you to boot into most any Operating System (OS) even if you cannot boot into it by normal means. Super Grub2 Disk is a live CD that helps the user to boot into almost any operating system even if the system cannot boot into it by normal means. This allows a user to boot into an installed operating system if their GRUB installation has been overwritten, erased or otherwise corrupted.
Super Grub2 Disk can detect installed operating systems and provide a boot menu which allows the user to boot into their desired operating system. Super Grub2 Disk is not an operating system itself, but a live boot loader which can be run from a CD or USB thumb drive. Everything option to detect most Operating Systems.
- grub.cfg – (GRUB2 configuration files)
- menu.lst – (GRUB legacy configuration files)
- core.img – (GRUB2 installation (even if mbr is overwritten))
- Bootable ISOs (in /boot-isos or /boot/boot-isos)
- Enable GRUB2’s LVM support
- Enable GRUB2’s RAID support
- Enable GRUB2’s PATA support (to work around BIOS bugs/limitation)
- Mount encrypted volumes (LUKS and geli)
- Enable serial terminal
7. Ventoy
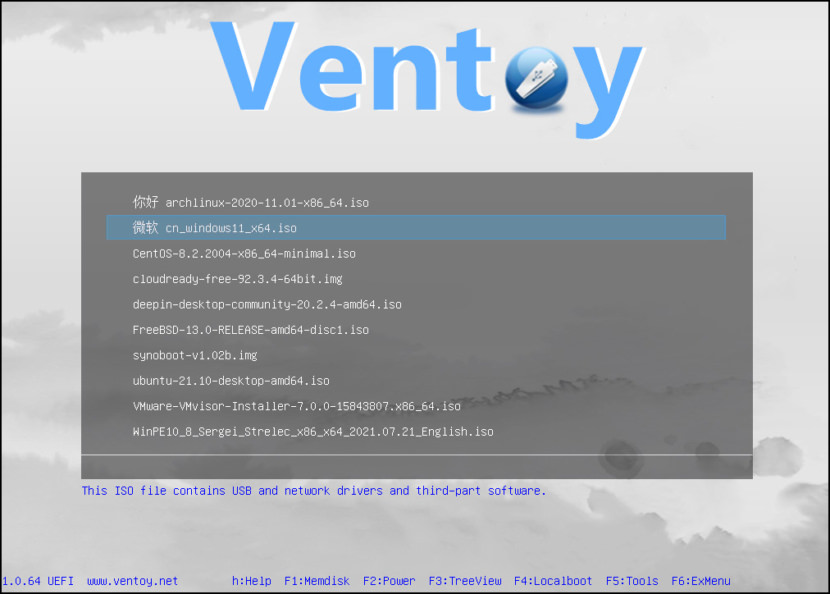
Ventoy is an open source tool to create bootable USB drives for ISO/WIM/IMG/VHD(x)/EFI files. With ventoy, you don’t need to format the disk over and over, you just need to copy the ISO/WIM/IMG/VHD(x)/EFI files to the USB drive and boot them directly.
MBR and GPT partition styles, x86 Legacy BIOS and various UEFI boot methods (including persistence) are supported. ISO files larger than 4 GB can be used. Ventoy supports various operating system boot and installation ISO files including Windows and above, Debian, Ubuntu, CentOS, RHEL, Deepin, Fedora and more than a hundred other Linux distributions; various UNIX releases, VMware, Citrix XenServer, etc. have also been tested.
- x86 Legacy BIOS, IA32 UEFI, x86_64 UEFI, ARM64 UEFI, MIPS64EL UEFI supported
- IA32/x86_64 UEFI Secure Boot supported Notes
- Linux Persistence supported Notes
- Windows auto installation supported Notes
- Linux auto installation supported Notes
- Variables Expansion supported for Windows/Linux auto installation script Notes
- FAT32/exFAT/NTFS/UDF/XFS/Ext2(3)(4) supported for main partition
- ISO files larger than 4GB supported