
The Windows® Server 2012 Essentials Assessment and Deployment Kit (ADK) is a collection of tools and binaries that you can use to customize, assess, and deploy Windows Server 2012 Essentials on new computers.
Important! Selecting a language below will dynamically change the complete page content to that language.
-
Date Published:
15/07/2024
File Name:
Windows Server 2012 Essentials Assessment and Deployment Kit_EULA 8-28-12.rtf
WindowsServer2012Essentials-ADK.iso
The Windows® Server 2012 Essentials Assessment and Deployment Kit (ADK) is a collection of tools and binaries that you can use to customize, assess, and deploy Windows Server 2012 Essentials on new computers.
-
Supported Operating Systems
Windows Server 2012 Essentials
Not Applicable
The Windows Assessment and Deployment Kit or Windows ADK replaces the former Windows Automated Installation Kit or Windows AIK. The Windows ADK has all of the same tools for creating Windows PE ISOs, The System Information Manager and the USMT. However it also includes the ACT or Application Compatibility Toolkit, the WPT or Windows Performance Toolkit and various other assessment tools.
I always recommend searching Microsoft’s download site for the most current Assessment and Deployment Kit. However Microsoft launched a new product called the Windows Server 2012 Essentials server, which is to replace Small Business Server. When looking for the proper ADK do not confuse yourself by looking for the Windows Server 2012 ADK. The Windows Assessment and Deployment Kit will be for Windows 8 and will detail it is also for Windows Server 2012.
The Windows ADK is not a single download and they do not provide a downloadable offline installation. The ADKsetup.exe is the online installation where you can choose which components to either download or download and install. You can use the adksetup program via command line to download all of the components to your Technician Computer. However I recommend using the GUI, since errors will just terminate the download. Complete offline instructions can be found here http://msdn.microsoft.com/en-us/library/hh825494.aspx.
Command Line for downloading the Windows ADK to a selected path:
adksetup /quiet /layout <path>
Assessment
and Deployment Kit (ADK) is a pre-requisite for installing SCCM 2012 SP1
successfully.
You can download it from the below Microsoft link.
1.Run adksetup.exe to start the
installation.
Specify Location: Specify the installation location and click next.

Join the customer experience Improvement
program (CEIP)
Select “Yes” if you want to join or “No” if not as desired.

License Agreement
Click “Accept” on the License agreement.

Select the features you want to
install:
Select
*Deployment tools
*Windows
Pre-Installation Environment (Windows PE)
*User State
Migration Tool (USMT)
And click Install as shown.

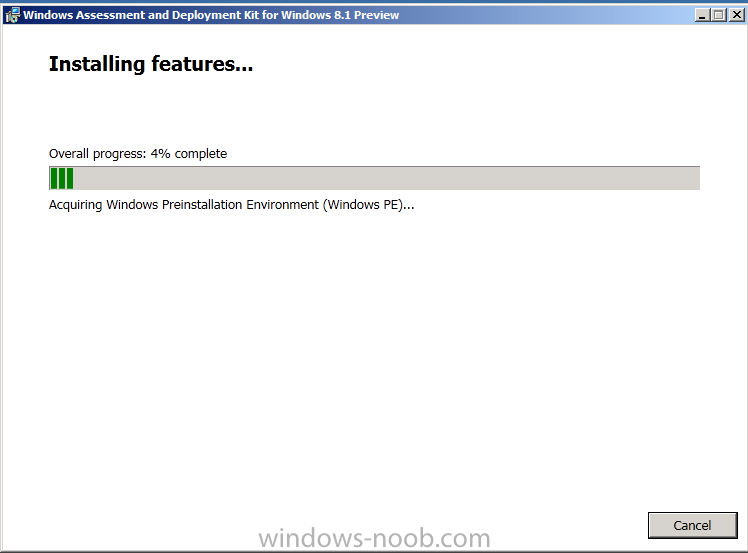
After that, installing features
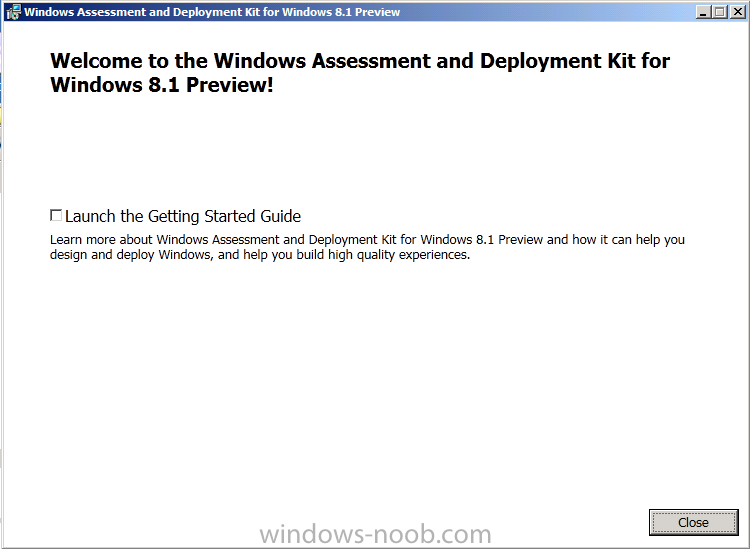
window comes up.Once the installation is completed, the below screen appears.
Click close.

Перейти к содержанию
На чтение 1 мин Просмотров 558 Опубликовано
Windows ADK – загрузка и установка
Подготовка к автоматическому развертыванию Windows 8.1 и Windows Server 2012 R2 ведется при помощи набора специализированных утилит под названием Windows ADK. Забегая вперед, скажу – на страницах сайта gotoADM.ru будут представлены и другие утилиты для подготовки ОС к автоматической установке и проверки (оценки) развертывания операционных систем. Сейчас рассмотрим установку данного компонента.
С официального сайта Microsoft выполняем загрузку необходимого продукта. При необходимости изменяем язык ПО на “русский”.
Подтверждаем лицензионное соглашение и установку .NET Framework.
В данном случае я выбрал загрузку всех пакетов программы – это более практично и не потребует ожидания загрузки ПО (как при следующей инсталляции, так и при текущей). На данном этапе указываем папку для сохранения.
Завершив скачивание набора утилит Windows ADK, переходим к установке ПО:
Установка завершена компонента завершена. В следующей статье рассмотрим варианты использования данного набора инструментов. Следите за обновлениями!
Занимаюсь IT с 2007 года. Всё началось с увлечения — разгона компьютерного оборудования. Много воды и азота утекло с тех пор… Сейчас уже более 3х лет со своей командой оказываю комплексную поддержку и продвижение бизнеса: SEO, Яндекс.Директ, рассылки и удалённое обслуживание серверов. Буду рад помочь, обращайтесь!
Мы используем cookies для улучшения работы сайта, анализа трафика и персонализации. Используя сайт или кликая на Я согласен, вы соглашаетесь с нашей политикой использования персональных данных и cookies в соответствии с Политикой о персональных данных. Вы можете прочитать нашу политику здесь
Introduction
Today at Tech Ed Europe 2013 in Madrid, Brad Anderson announced the availability of System Center 2012 R2 Configuration Manager preview (amongst other things). In this post I will focus on installing the R2 preview release on Configuration Manager 2012 SP1 (which just so happens to have Cu2 installed). In the past, R2 releases for System Center products traditionally add cool features to an otherwise complete product so this is going to be exciting.
Note: Test upgrading to R2 in a LAB before doing it in production and always backup your database before doing so. When upgrading a hierarchy always upgrade from the Top down, for example that would be CAS —> Primaries —> Secondaries —> clients
Step 1. Get the goodies
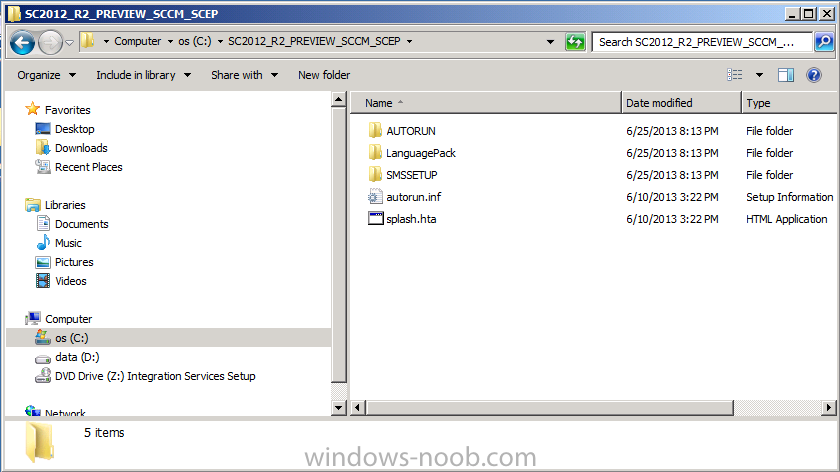
You can get the System Center 2012 Configuration Manager R2 Preview release from here. Once you’ve downloaded the bits extract them to somewhere like C:\SC2012_R2_Preview_SCCM_SCEP
Once done, download Windows ADK 8.1 from here.
Step 2. Uninstall Windows ADK 8.0
Before you install R2, you’ll need to satisfy certain prerequisites, and one of those is ADK 8.1, and as part of that you’ll need to uninstall Windows ADK 8.0, it’s not sufficient to simply install ADK 8.1 over ADK 8.0.
Open control panel and locate Windows Automated Installation Kit, click it and choose Uninstall (it’s the one with version 8.59.25584).
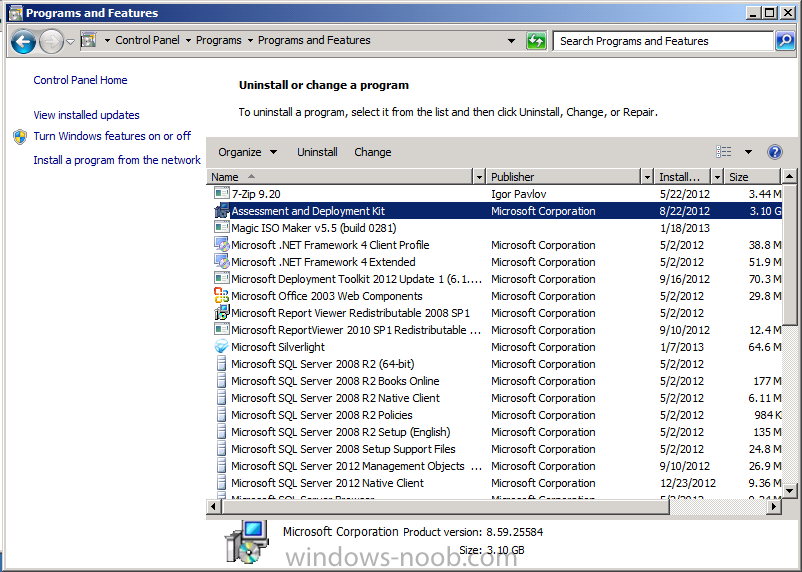
Once uninstalled, no need for a reboot.
Step 3. Install Windows ADK 8.1
Now that you’ve removed the previous version, download the new ADK to support Windows 8.1 and Server 2012 R2 from here.
Update: A new version of ADK 8.1 was released in the last week, see this post before continuing.
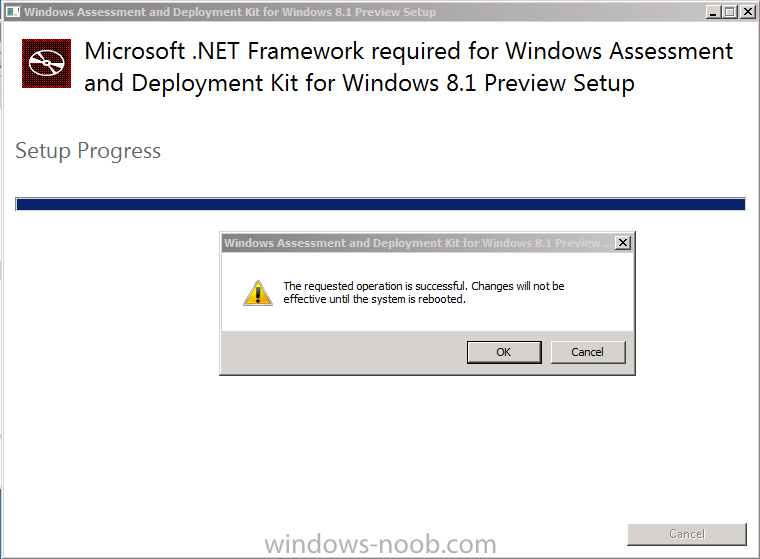
Run adksetup and accept the .NET 4.5 FrameWork agreement, make sure you’ve 2.25 GB free space on your C:\ drive before attempting to continue otherwise you may get a strange ASIA failure message (if you do get any failures, check %temp% for the .net installation logs to see why it failed.)

clicking on OK will enforce a reboot so if you don’t want a reboot at this time, then wait before clicking ok.
after the reboot, login and you’ll see the specify location screen for the new Windows ADK installation
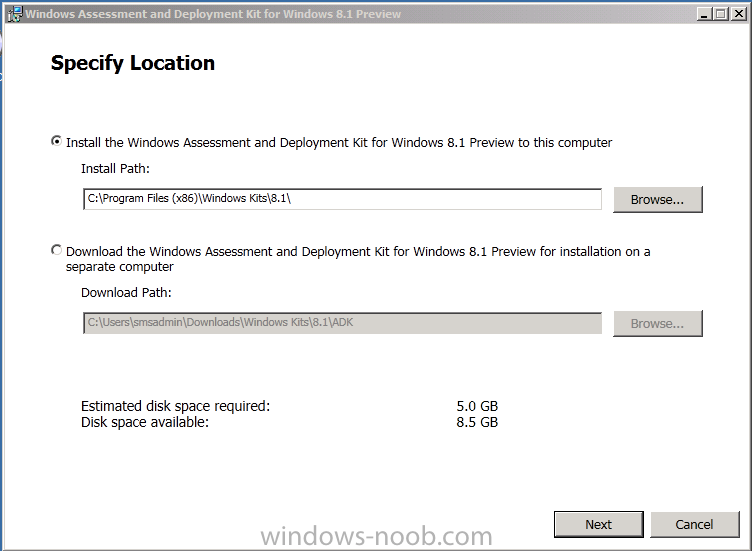
click next through the wizard and select at least the following 3 components
- User State Migration Tool (USMT)
- Windows Deployment Tools
- Windows PreInstallation Environment (Windows PE)

and the installation should continue…slowly but surely…
click close when done.
Tip: Installation of the ADK will produce several logs for the separate components in %temp%\adk if you have any issues with the installation of the ADK open those logs individually in CMTrace to look for any errors during the installation.
Step 3. Install/Upgrade to R2
Tip: before starting the install consider stopping any in-progress package distributions (or waiting until they are complete) and stop all normal activities in the console (package/application creation etc). Also reboot the server (s) involved before commencing the upgrade in case any update required a reboot that could interfere with the below process. Always upgrade your Primary servers first, then upgrade any secondaries.
Now that we’ve fixed Windows ADK, browse to the extracted System Center 2012 Configuration Manager R2 files and click on splash.hta to start the wizard
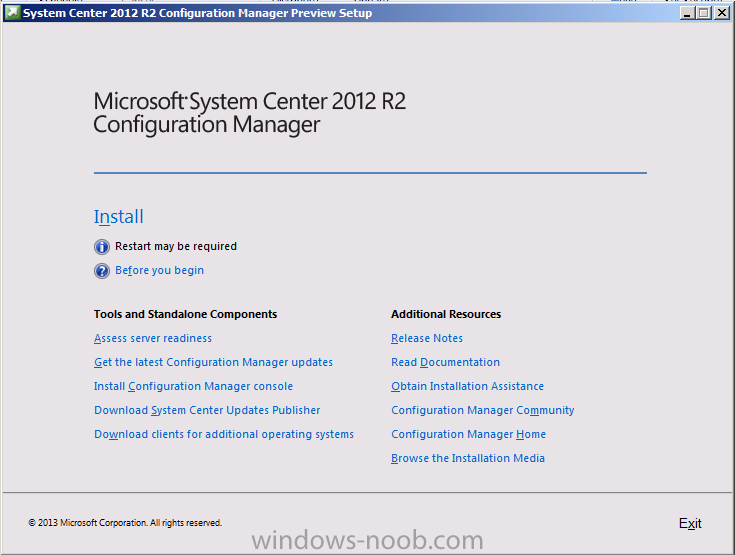
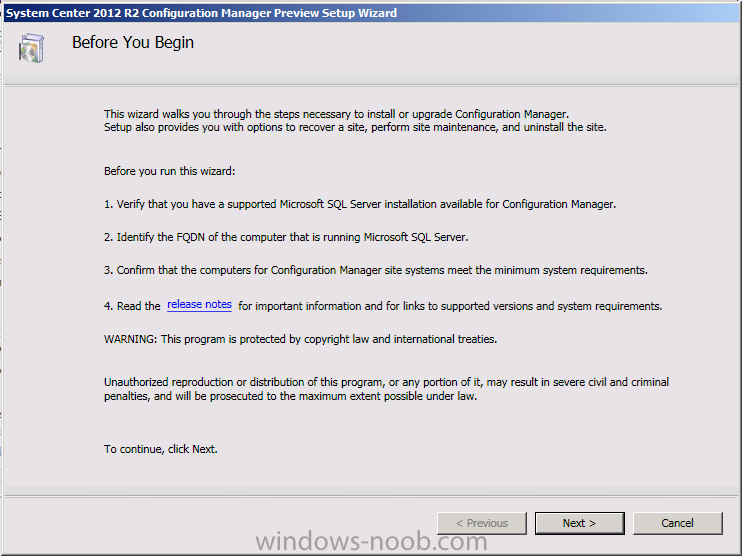
and click on Install to start the installer, you will be presented with the before you begin screen, click next
and then you’ll see the available setup options on the Getting started screen, it should auto detect that you have a primary installed and that you are upgrading the site

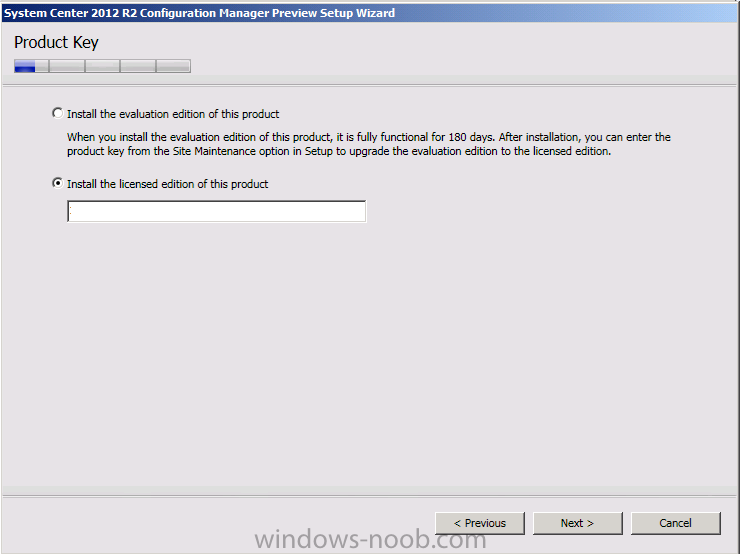
you can choose whether to input your license key or not, I entered the key it works fine
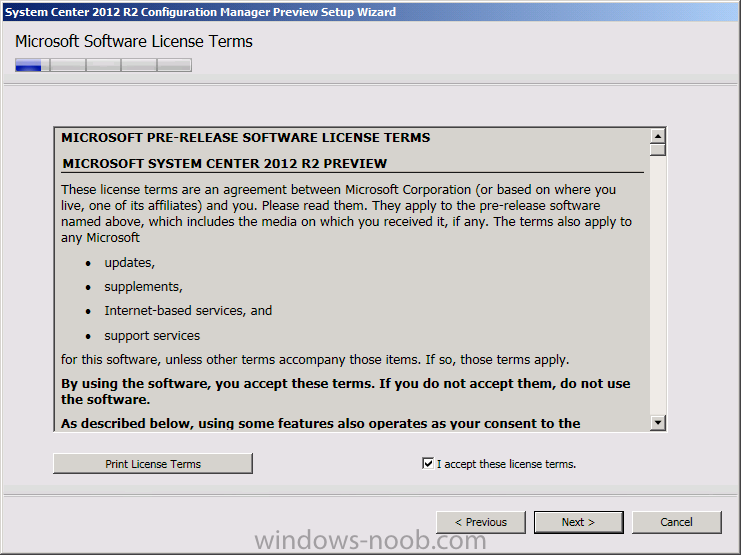
accept the EULA to continue
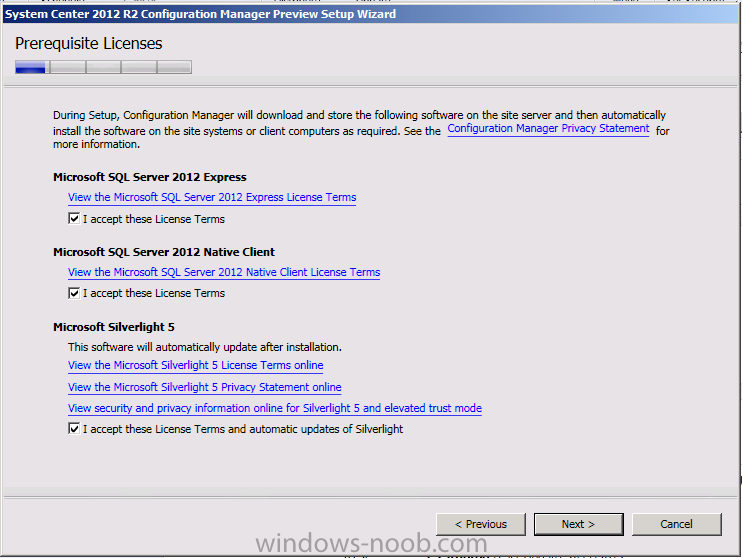
and place checkmarks in the products listed for Prerequisite licenses
choose to download the setup prerequisites locally or from a previously downloaded location
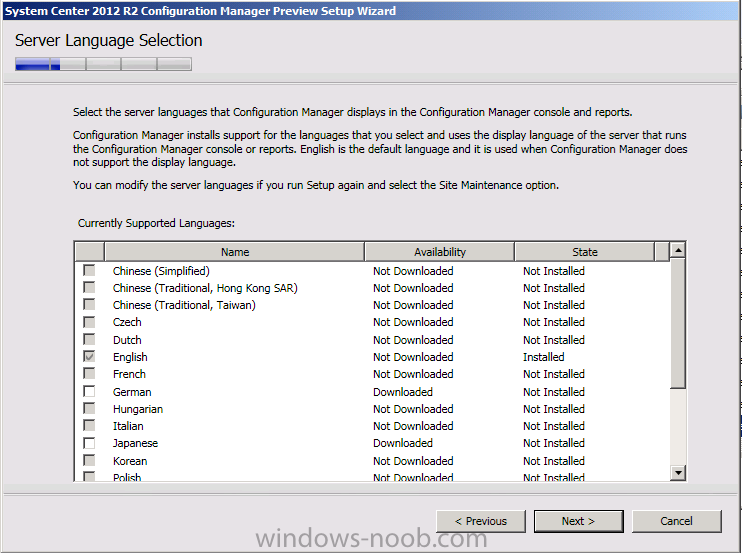
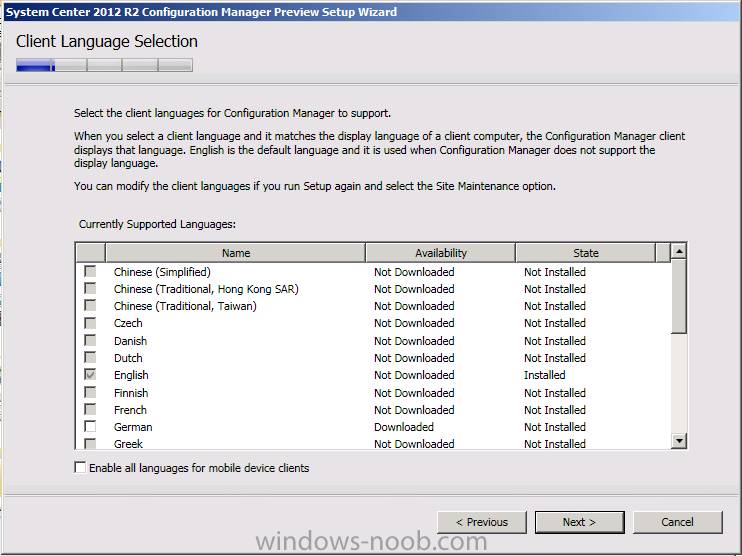
and then select the server languages that Configuration Manager will support
and then the client languages
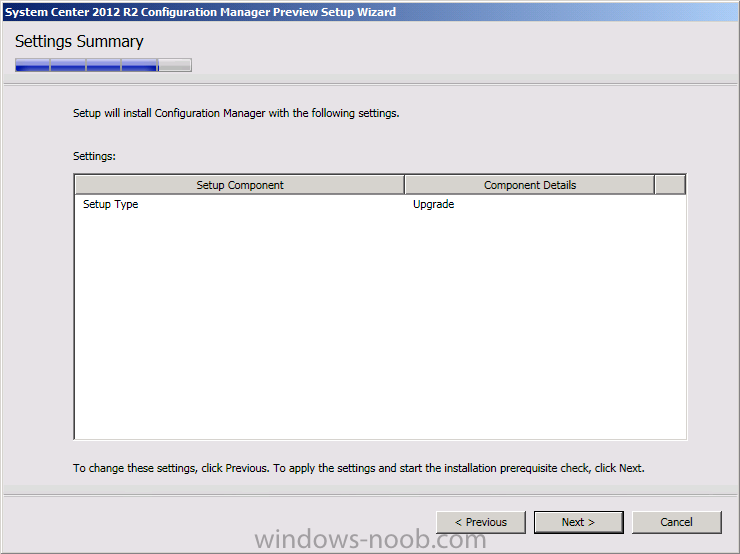
review the settings summary
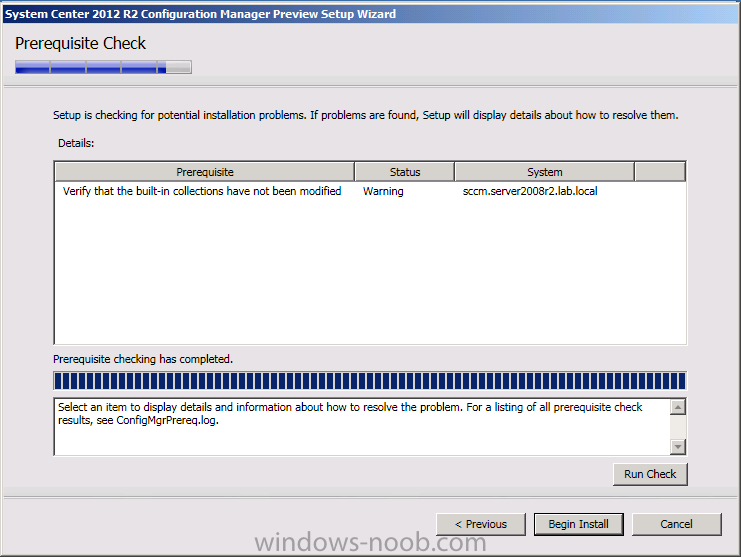
and the Prerequisite check will complete, it may list warnings (which are usually ok to ignore) or errors (failures, which you must fix). Click Begin install to continue (in the screenshot below I’ve modified a system collection, it’s ok, and it’s ok to continue)
time for a siesta (if you are in Madrid :-)) while it installs, as this will take some time…,
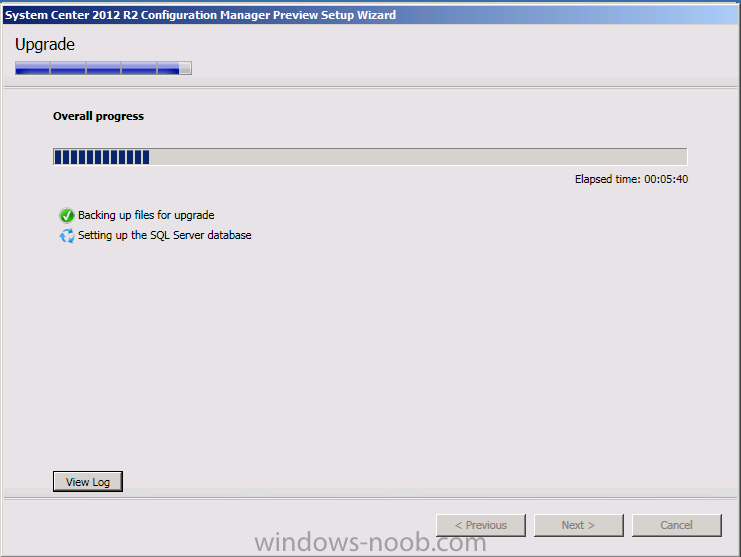
click on View Log to view the installation in CMTrace
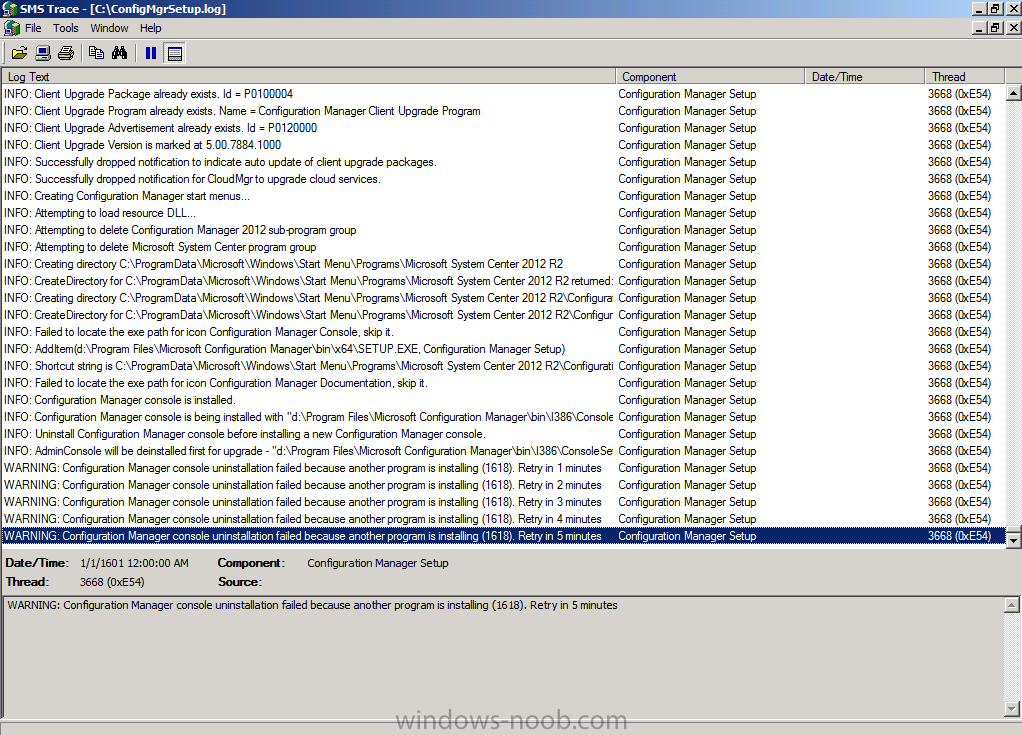
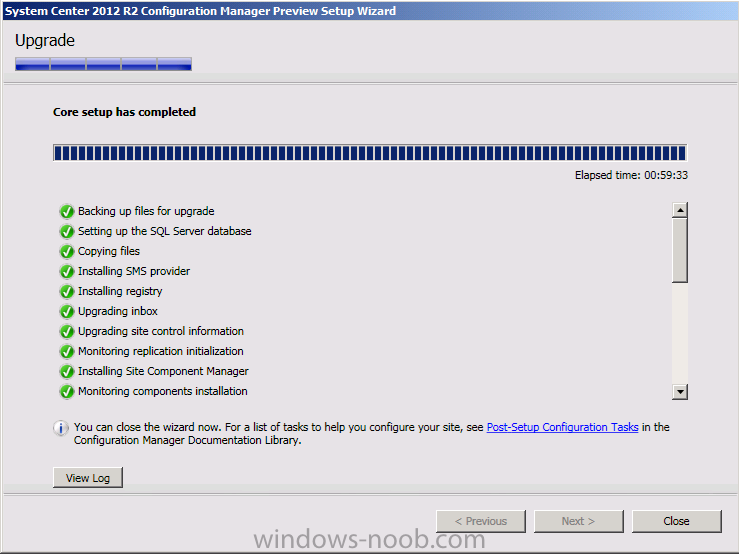
Once the installation of System Center 2012 R2 Configuration Manager is done you’ll see the following, I’d recommend you scroll up and down to verify all listed components are green, close the wizard when you can.
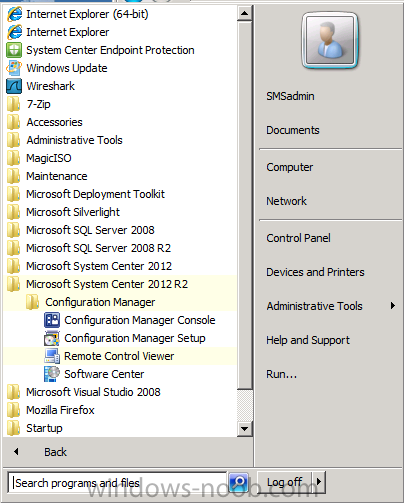
and start the new console via the new Start menu link, notice the R2 reference
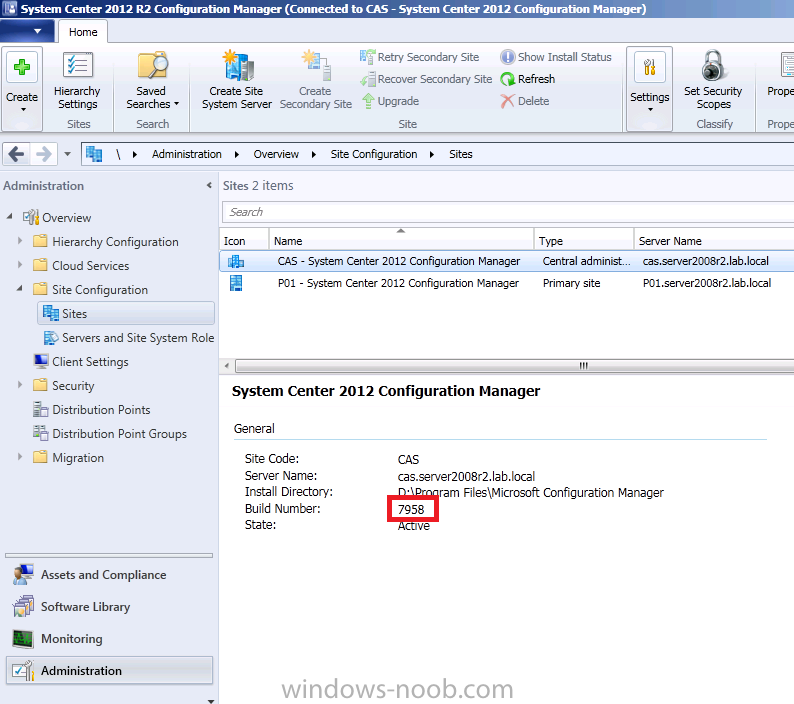
the console appears, congratulations you’ve installed System Center 2012 R2 Configuration Manager. Notice the new build number of 7598 in the screenshot below
Further Reading
What’s New in System Center 2012 R2 Configuration Manager — http://technet.microsoft.com/library/dn236351.aspx
System Requirements
Installation Guide
Evaluation Guide
cheers
niall.