
NOTE: THIS IS NOT A VIABLE SUBSTITUTE FOR VIRTUAL MACHINES.
Lovely Time Traveling
To transfer files to Win98 you’ll need WinImage (DL Page) Installed or Portable, DosBox-x has to be closed for it to work.
Open WinImage;
Inside WinBox 98 SE folder drag Windows98.img into the WinImage window;
Pick a directory where you want to drop the files and then drag them into the WinImage window.
- Addeddate
- 2021-08-17 00:59:24
- Identifier
- windows-98-in-dosbox-x
- Scanner
- Internet Archive HTML5 Uploader 1.6.4
comment
Reviews
(7)
There are 7 reviews for this item. .
Skip to content
Navigation Menu
Provide feedback
Saved searches
Use saved searches to filter your results more quickly
Sign up
Appearance settings
Repository files navigation
win98dosbox
Uses dosbox-x which supports installing Windows 98.
Hint: a different profile is used for installing Windows versus running it.
See the Makefile for more details
make deps
make setup
make run
This guide will be a step-be-step guide of how to setup Window 98 on a modern computer.
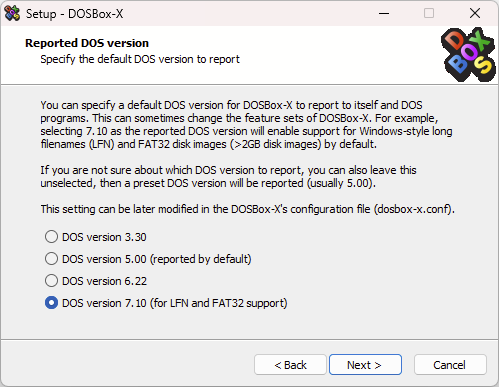
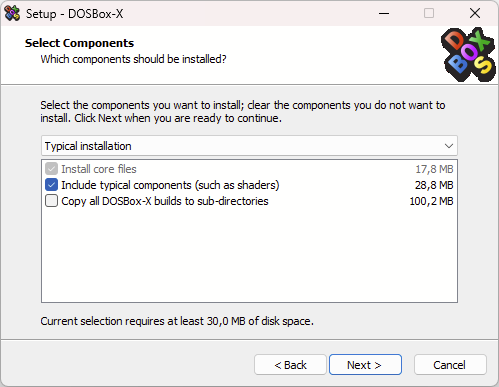
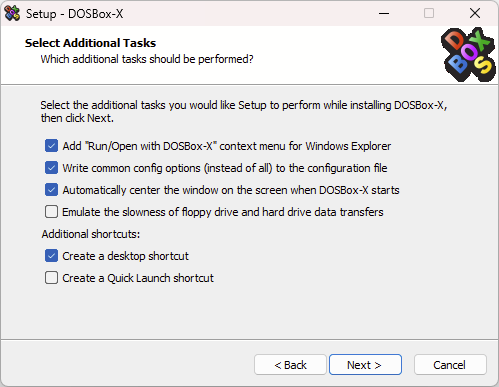
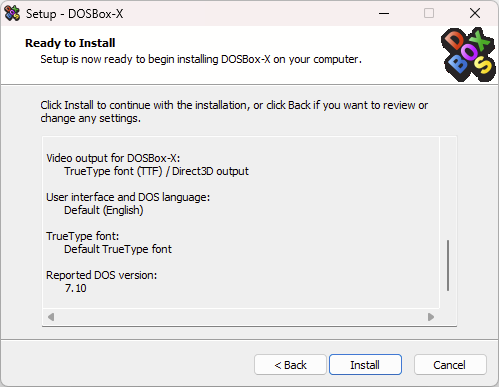
First download the application DOSBox-X (The download link is to the lower left, 32/64-bit Setup (XP+)):
https://dosbox-x.com/
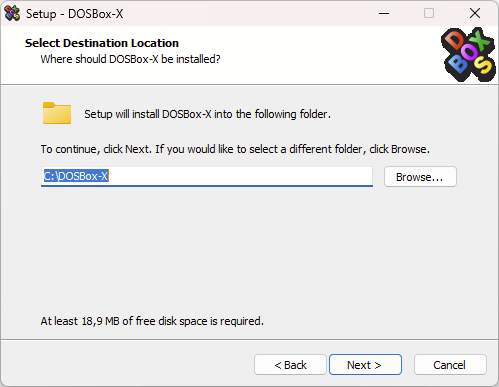
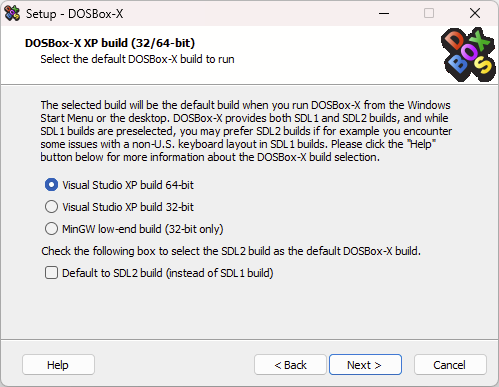
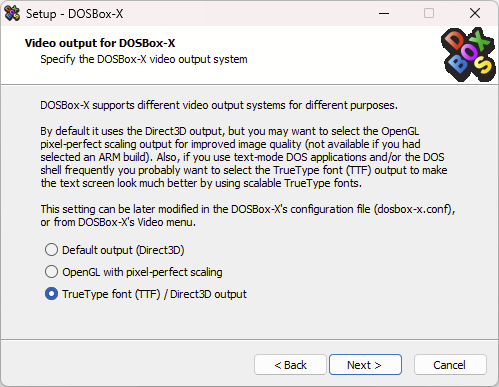
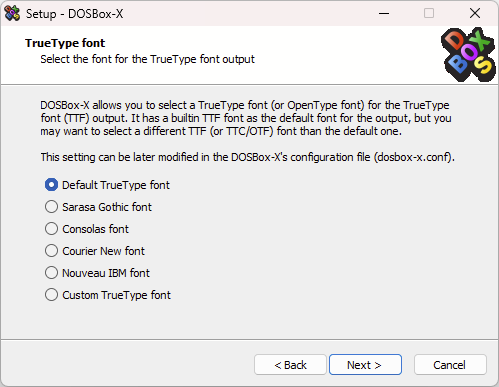
I choose to install mine at C:\DOSBox-X (The reaming of the instrucstion will refere to this path), follow the settings as below:

After the installation has finished, place a Windows 98 ISO file as well as any other application or game ISO file in the directory: C:\DOSBox-X
Create a configuration file at C:\DOSBox-X\win98.conf (source DOSBox-X config file):
[sdl]
autolock=true

[dosbox]
title=Windows 98
memsize=128


vmemsize=8
vesa modelist width limit=0
vesa modelist height limit=0

[dos]
ver=7.1
hard drive data rate limit=0
floppy drive data rate limit=0
keyboardlayout=dk

[cpu]
cputype=pentium_mmx
core=normal

[sblaster]
sbtype=sb16vibra

[fdc, primary]
int13fakev86io=true

[ide, primary]
int13fakeio=true
int13fakev86io=true

[ide, secondary]
int13fakeio=true
int13fakev86io=true
cd-rom insertion delay=4000

[render]
scaler=none

[config]
COUNTRY=45

[autoexec]
Now create a shortcut on the desktop, right-click followed by selecting New -> Shortcut
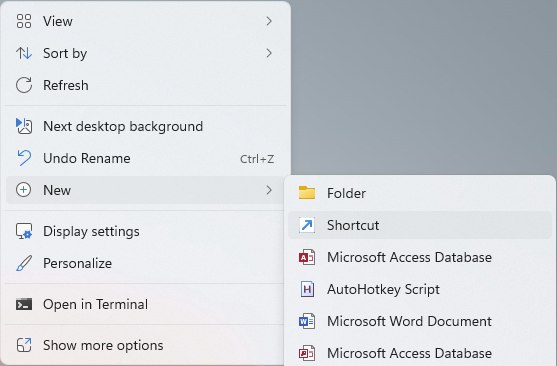
Insert the following in the Text Box "C:\DOSBox-X\dosbox-x.exe -conf C:\DOSBox-X\win98.conf"
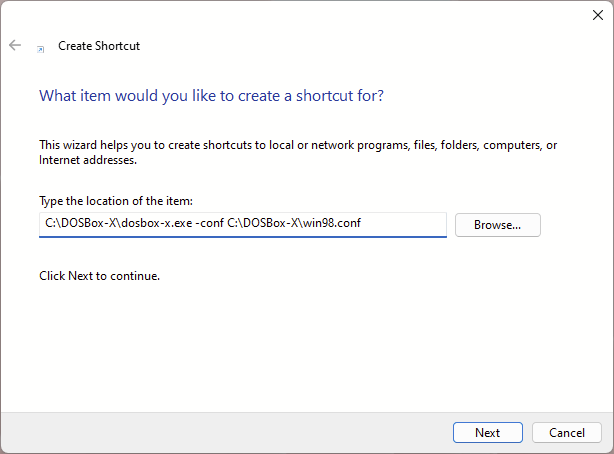
And set a reasonable name like "Windows 98"
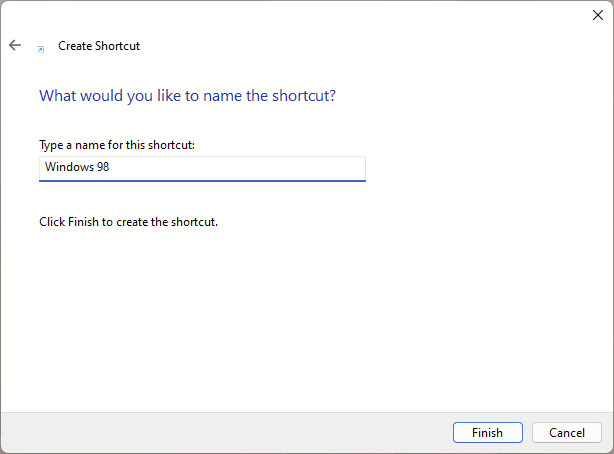
Now double-click on the shortcut
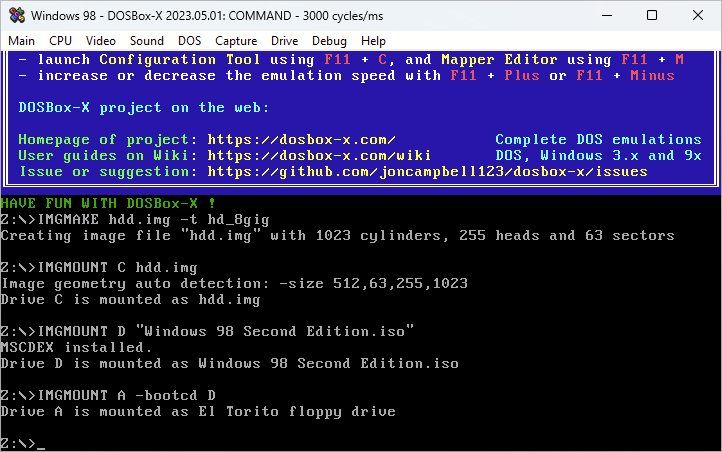
Execute the following commands in DOSBox-X
IMGMAKE hdd.img -t hd_8gigIMGMOUNT C hdd.imgIMGMOUNT D Win98.isoIMGMOUNT A -bootcd DBOOT A:
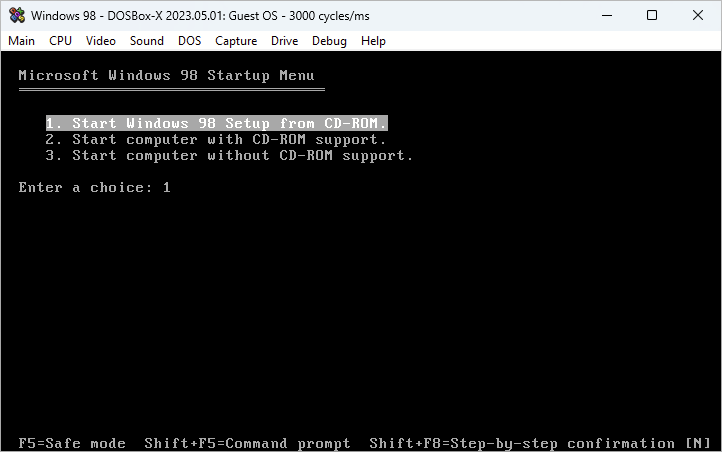
Select "Boot from CD-ROM"
Select "Start Windows 98 Setup from CD-ROM"
When the installation is done, close down DOSBox-X and change the configuration file C:\DOSBox-X\win98.conf to the following.
[sdl]
autolock=true

[dosbox]
title=Windows 98
memsize=128


vmemsize=8
vesa modelist width limit=0
vesa modelist height limit=0

[dos]
ver=7.1
hard drive data rate limit=0
floppy drive data rate limit=0
keyboardlayout=dk

[cpu]
cputype=pentium_mmx
core=normal

[sblaster]
sbtype=sb16vibra

[fdc, primary]
int13fakev86io=true

[ide, primary]
int13fakeio=true
int13fakev86io=true

[ide, secondary]
int13fakeio=true
int13fakev86io=true
cd-rom insertion delay=4000

[render]
scaler=none

[config]
COUNTRY=45

[autoexec]
IMGMOUNT C hdd.img
IMGMOUNT D "Windows 98 Second Edition.iso"
BOOT C:
Now start DOSBox-X again with the newly edited configuration file and finish the Windows installation.
When the installation finalize, do the following steps
- Create a directory inside Windows 98 at
"C:\WIN98" - Copy all content (except
olsandtour) from"D:\WIN98"to the newly created directory"C:\WIN98"(pro tip: might need to right-click on theD:\drive and selectexplorerto pass by the auto-run function) - Start
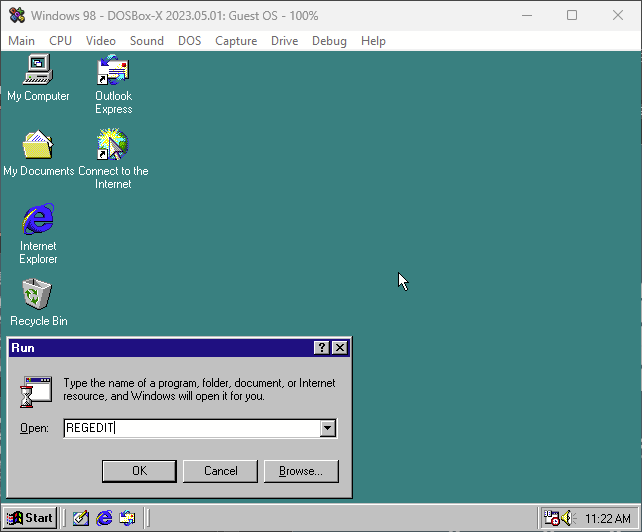
"REGEDIT"fromRun(Click onStartin the lower left corner and select the applicationRun)
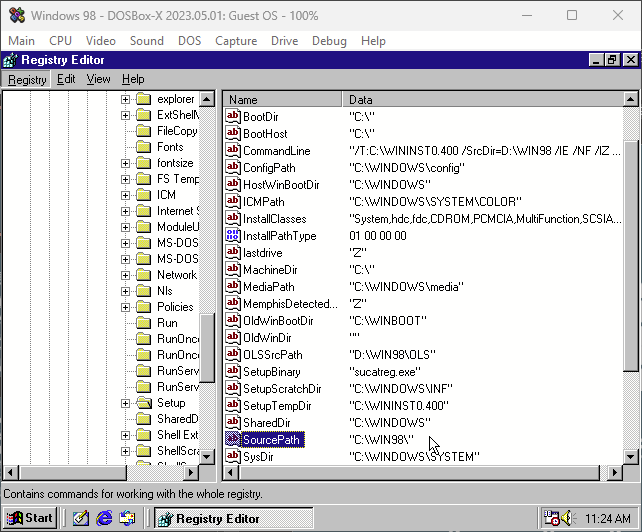
Navigate to "HKEY_LOCAL_MACHINE\Software\Microsoft\Windows\CurrentVersion\Setup" and change "SourcePath=" to the location where you copied the files "SourcePath=C:\WIN98"
Congratulations 👏
If you made it this far you have now sucessfully installed an old operating system on your computer.
Next Step
An game ISO is placed in the root directory C:\DOSBox-X\Gys Paa Regneslottet.iso (note, without the character å), to access this contain inside Windows 98 extended the C:\DOSBox-X\win98.conf to the following.
[sdl]
autolock=true

[dosbox]
title=Windows 98
memsize=128


vmemsize=8
vesa modelist width limit=0
vesa modelist height limit=0

[dos]
ver=7.1
hard drive data rate limit=0
floppy drive data rate limit=0
keyboardlayout=dk

[cpu]
cputype=pentium_mmx
core=normal

[sblaster]
sbtype=sb16vibra

[fdc, primary]
int13fakev86io=true

[ide, primary]
int13fakeio=true
int13fakev86io=true

[ide, secondary]
int13fakeio=true
int13fakev86io=true
cd-rom insertion delay=4000

[render]
scaler=none

[config]
COUNTRY=45

[autoexec]
IMGMOUNT C hdd.img
IMGMOUNT D "Windows 98 Second Edition.iso"
IMGMOUNT E "Gys Paa Regneslottet.iso"
BOOT C:
Furthermore, fullscreen might be desirable, add the following to the [sdl] of C:\DOSBox-X\win98.conf like so
[sdl]
autolock=true
fullscreen=true
Страница 1 из 6
-
UnknDoomer
Бредущий по мостуХелпер
- Регистрация:
- 26 мар 2012
- Сообщения:
- 2.467
Предположим, что в ваших руках оказалась интересующая вас игра, но по стечению обстоятельства она:
1. Адекватно не запускается в среде Windows 7/8/10/11.
2. Не работает в DOS / не может быть запущена в DosBox.
3. Есть неполадки в связке DosBox + Windows 3.11.
4. В придачу к этому отказывается нормально работать в среде реальной или виртуальной Windows XP, например хромает частота кадров, не удаётся добиться какого-либо режима игры кроме оконного и т.п.
5. Под рукой нет старого компьютера.
6. Может быть вам по душе только оконный интерфейс и вы хотите по возможности нивелировать любое прямое взаимодействие с DOS. Инструкция в целом допускает и такой сценарий.Вероятно всего в этом случае ваш взор пал на наиболее проблемный из всех существующих сегментов игр периода ~ 1996-2001, жёстко заточенных под работу в среде Windows 95 / 98.
——
1. DOSBox SVN Daum + Windows 95.
Последовательность действий.
1. Загрузить https://static.old-games.ru/utils/DOSBox_Win95_En.rar, любезно предоставленную @Uka, сборку DOSBox SVN Daum + Windows 95 с минимально необходимым для игр набором компонент, либо создать свою, следуя, например, этой обширной инструкции First Steps to Install Windows in DOSBox.
2. По умолчанию диск для файлов рассчитан на 100 мб, что может быть не всегда подходящим или удобным. В этом случае загружаем прикреплённы hdd-2gb.7z, полученный файл переименовываем в game.img и с заменой помещаем в каталог DOSBox_Win95_En — диск в 100 мб заменён на диск в 2 Гб.
3.1. Вы скачали образ диска с игрой, но обнаруживаете, что привычный вам метод монтажа не работает, а в самой виртуальной системе нет CD-привода. Откройте dosbox.conf и пролистайте в самый конец файла, найдите раздел [autoexec]. Его типовое содержимое в целом должно быть примерно таким:или
Если подключить нужно не iso, а образ формата .bin/.cue.
«game.img» в этом случае виртуальный жёсткий диск на 2 Гб.
«game.iso» или «game.bin» + «game.cue», в свою очередь, непосредственно образ диска с игрой, лежащий в том же каталоге, т.е. например исходной папке DOSBox_Win95_En.
3.2. Вы скачали рип или фуллрип, или по каким-то причинам являетесь противником использования образов дисков как таковых и вместо этого скопировали его содержимое в отдельную папку (что в ряде случаев может иметь последствия если, например, у игры нет no-cd и она требует наличия диска в приводе для запуска или, например, считывает с него аудио-треки), а может быть вам просто потребовалось перетащить какие-то файлы или программы в виртуальную среду. В этом случае вам пригодится WinImage, портативную версию которого можно загрузить здесь Download WinImage, в дальнейшем поместив её в ту же DOSBox_Win95_En.
4. Открываете WinImage, перетаскиваете в него ваш виртуальный жёсткий диск, game.img, в всплывающем окне жмёте подтверждение. Далее перетаскиваете нужную папку из основной системы на диск, закрываете WinImage.
5. Запускаете dosbox.exe. Далее можно будет запустить установку с ранее смонтированного диска, или же нужные вам файлы на дополнительном жёстком диске.Альтернативный монтаж дисков (Daemon Tools, обход проверки).
1. Откройте C:\Windows в виртуальной системе. Найдите QTw16del.exe и QTW32del.exe. Поочерёдно запустите их. После удалите эти два файла, а также лежащие рядом два установщика Quick Time с приставкой inst. Очистите корзину. QT нужен только запуска определённых игр, например Dinosaur Safari (1994, Windows 3.x), в то время как для настройки конфигурации потребуется дополнительное место на диске, без которого система перестанет нормально работать.
2. Воспользовавшись WinImage перебросьте на диск 3 файла:
2.1. eXtended USB Supplement for Windows 95 OSR 2.x.
2.2. Windows Installer for Win9x.
2.2. Daemon Tools 3.47.Все три прикреплены к сообщению.
3. Последовательно установите все три компонента. После установки Daemon Tools с некоторой вероятностью может выдастся ошибка защиты Windows при загрузке. Проигнорируйте её и перезапустите dosbox.exe. При первом запуске также может разово выдаваться ошибка о .dll файле, её также можно проигнорировать.
4. Если всё сделано правильно, то на диске C должно было остаться свободными ~ 17 мб, или 11, если вы ставили Daemon Tools на С, а в системе появится виртуальный привод, в который, как и в современных версиях Windows, можно монтировать диски.
На скриншоте одновременно смонтированы две игры. Одна через imgmount f monster.cue -t iso -fs iso -ide 2m, а другая через Daemon Tools.
Известные проблемы:
1. Попытка удалить виртуальный привод Daemon Tools приведёт к зависанию системы.
2. Использование Daemon Tools позволяет успешно проходить проверку наличие диска в приводе в случае, например, Destruction Derby 2 (1996), но CD-Audio воспроизводиться не будет как в случае этой игры, так и других — нужно смотреть в сторону альтернативных решений.
3. Аппаратное ускорение не поддерживается. Вопрос в целом сложный и универсального способа, гарантирующего работу разных игр на одной конфигурации, нет. В этом случае по возможности оптимальнее всего ориентироваться или на современную систему или на реальное железо.Технические проблемы на примере конкретных игр и их решение.
Начну с краткой справки.1 & 2. MM1 и MM2 можно без проблем развернуть на Windows, если воспользоваться dgVoodoo — Motocross Madness 2 + windows 10 FIX. Единственная проблема заключается в том, что меню жёстко завязано на работку в оконном режиме.
3. Math Ace, Js. может нормально работать под Windows 3.11, если удастся найти релевантную сборку или подходящую программу.
4. DD2 вполне можно запустить на Windows 11, если проделать определённые действия, описанные здесь.
5. Для IRC есть неофициальный патч + в работе может помочь dgVoodoo, а со звуком Index of /hosted/dsoal-builds/, сложенный в папку с игрой. Игра без проблем идёт на Windows 11.Таким образом в т.ч. те игры, что, на первый взгляд, в их исходном виде являются проблемными, зачастую так или иначе могут быть адаптированы под современные системы при наличии неофициальных патчей и в ряде случаев достаточном количестве дополнительного ПО, т.е. в этом смысле налегать на усложнённую виртуализацию действительно следует только в наиболее запущенных случаях, упоминаемые же игры приведены здесь в большей степени как тестовые примеры.
1 & 2. Monster Truck Madness (1996, Windows) & Monster Truck Madness 2 (1998, Windows)
+ 1. Игры невозможно запустить из-за нехватки памяти. Нужно изменить значения параметров vmemsize и memsize на большие, например 128.
+ 2. Игра сильно тормозит / медленно загружаются гонки. Измените параметры core= и cputype= на auto.
+ 3. Игра говорит о том, что в системе выбрано 32-бита и рекомендует снизить настройки, если нет 3D-ускорителя. Можно проигнорировать и отключить вывод сообщения в последующем.
— 4. Не возможно включить hardware-режим, работает только software, т.к. игра не может определить видеокарту.
+/- 5. Не проигрывается CD-Audio. Использование PCem, как альтернативы, решает проблему, но могут быть издержки с производительностью.3. Math Ace, Jr. (1994, Windows 3.x)
+ 1. При запуске выдаёт ошибку, ссылаясь на некий .dll. Ошибку можно проигнорировать и запустить игру ещё раз. Она выдаётся только при первом запуске.
+ 2. Игра говорит о том, что в системе выбрано 32-бита, когда приложение не является таковым. Можно проигнорировать.4. Destruction Derby 2 (1996, Windows/DOS, файлы)
+ 1. Для запуска windows-версии игра требует наличия диска в виртуальном приводе и она не воспринимает диск, смонтированный ранее обозначенным способом ввиду специфики конкретно данного образа. Для решения воспользуйтесь альтернативным способом монтажа через Daemon Tools.
+/- 2. CD-Audio. Аналогично ранее упомянутым играм.5. International Rally Championship (1997, Windows)
+ 1. Для запуска игра требует наличия диска в виртуальном приводе. Диск, смонтированный исходным образом, воспринимается нормально, Daemon Tools не требуется.
+ 2. На современных системах упоминается достаточно проблем, начиная от графических, до хрипящего звука и вылетов. Имеющиеся заплатки кому-то помогают, кому-то нет. Запуск в DosBox + 95 никаких проблем не выявил, кроме одной.
+/- 3. CD-Audio. Аналогично ранее упомянутым играм.——
2. DOSBox-X + Windows 98.
Загрузить — DBX_98.rar
Противоположной веткой, что позволяет решить большинство остаточных проблем присущих варианту А, за исключением пожалуй только аппаратного ускорения, гарантий, что та или иная игра не будет идти по кадрам здесь так же нет, является экспериментальная сборка, предоставленная @TheMadLynx.
Особенности:
1. Конфигурация: P233MMX/64RAM/Voodoo1. HDD на 4 Гб.
2. Запуск осуществляется через Launch_Win98.lnk, настройки хранятся в win98.conf.
3. Для переноса файлов и папок достаточно смонтировать Win98SE_Eng_Sys_C.vhd как виртуальный диск в Daemon Tools и сложить нужное на таковой. Единственное о чём здесь стоит помнить, так это не забыть размонтировать диск перед запуском системы.
4. DosBox-X поддерживает несколько большее число форматов дисков, чем обычный DosBox. В тоже время если вам подвернулся какой-то необычный по формату образ и после попытки его монтажа система не запускается, то ранее упомянутую Daemon Tools можно также развернуть и в самой системе, в этом случае предварительно хватит установки только Windows Installer for Win9x.
5. Используется билд от 26.12.22. Если возникнет желания обновить DosBox-X до новой версии, то достаточно скопировать все файлы из архива из подпапки bin/Win32/Release и заменить ими существующие. Как пример подойдёт vsbuild-win32 с наиболее свежей датой.——
Альтернативы.
3. 86box.
Готовые билды:
А. Сборка от @Jordan 63 за 25.02.23, 1.2 — загрузить. 86box 3.11 от 26.11.22, Pentium 166 MHz, ОЗУ 64 Мб, Voodoo 3, DirectX 8.0a, Windows 95 OSR2, драйвера установлены, звук настроен, Windows Installer 2.0, USB Supplement for Windows 95 OSR, Daemon Tools 3.47. Свободного места на диске > 2 Гб.
1. Нажав Media -> CD-ROM -> Image можно смонтировать любой диск или папку из основной системы.
2. Для перехода в полноэкранный режим и обратно нужно нажать ctrl+alt+pagedown.Б. 86box Wipeout XL : Psygnosis : Free Download, Borrow, and Streaming : Internet Archive. Зеркало — Загрузить. В Control Panel -> Multimedia -> Audio ползунок звука по умолчанию стоит на нуле. Нужно передвинуть его на большее значение.
При желании имеющиеся файлы в случае Б можно также совместить с последней версией, Releases · 86Box/86Box и WinBox for 86Box — Release v1.1.0.364 · 86Box/WinBox-for-86Box.
——
4. PCem.
2.0. Детальная инструкция по настройке с нуля на базе Windows 98 от 22.05.23.
2.1. DOSBox, ScummVM, PCem, VDMSound, DOS, эмуляторы, замедлялки, журналы на Old-Games.RU
Доступно несколько версий.
2.2. Готовая сборка, некогда упомянутая @Ogr 2, вроде бы ориентированная на высокую производительность (фактический результат у разных пользователей сильно варьируется) — Drive.Google, старое обсуждение. Включает как вариант вида DosBox + Win98SE, так и PCem + Win98SE.
Руководство посвящёно иному, но несколько комментариев относительно PCem оставлю.
1. Монтаж дисков осуществляется напрямую из реальной машины, CD-ROM -> Load Image…
2. Для того, чтобы переключаться между рабочими столами можно зажать третью кнопку мыши (колесо) или ALT+END.
3. Файлы, как и ранее, можно перетаскивать через WinImage.
4. Производительность конкретной игры в частности зависит от выбранного для сборки железа.2.3. Сборка от Farooq, 29.03.24, расчитанная на работу со слабыми процессорами. Более подробное описание здесь.
——
5. VMware.
Workstation 17 Pro — https://www.vmware.com/go/getworkstation-win. Pro-версия является бесплатной в течении 30 дней.
3.1. Ещё одним альтернативным решением также может быть сочетание виртуальной машине VMware с Windows 95 / 98, у чего также есть свои плюсы и минусы, желающие могут ознакомиться с детальными инструкциями здесь — How to Install Windows 95 on VMware — SYSNETTECH Solutions & How to Install Windows 98 on VMware — SYSNETTECH Solutions. Ориентир сделан на последнюю на данный момент версию VMware 17 и Windows 11.
3.2. Также можно попробовать воспользоваться готовыми образами, но стоит иметь ввиду, что в свободном доступе в данный момент нет тех, что сходу были бы совместимы с последней версией VMware. Этот вопрос, впрочем, потенциально решаем, если проследовать данной инструкции, при учёте в частности также того факта, что установлена VMware Pro или отдельно имеется утилита vmware-vdiskmanager, How to repair vmx file corrupted at VMWare?
3.3. Для того, чтобы общую папку между вашим реальным компьютером и виртуальной машиной потребуется развернуть VMware Tools. Взять ту или иную версию можно здесь — Index of /45848/tools/releases
15.1.0 {Windows 7, 8, 8.1, 10, 11}
Тестирование, проведённое Farooq, в связке с Windows XP выявило ощутимое падение производительности в трёхмерных играх на более свежих версиях VMWare. В тоже время на моей стороне попытка развернуть ранее упомянутые в теме игры приводила к зависанию системы, а в самих играх выдавался чёрный экран. Помимо этого более свежие версии не совместимы с Windows 7, которую по прежнему кто-то может использовать. Пройдясь по ранее озвученному списку тесты показали такие результаты (i7 4930K, GTX 1080):
+ 1. Monster Truck Madness. Все настройки на максимум, идёт более-менее приемлемо.
-/+ 2. В MTM2 производительность оказалось хуже + есть артефакты с прорисывованием текстур при включённом ускорении, в тоже время смог запустить игру на Windows 11, поэтому из дальнейшего тестирования пункт выбыл.
Установщик, несмотря на то, что некоторые манипуляции с инсталляторами я ранее уже проделывал, требует «Windows 95, NT или выше», но уже установленную ревизию можно вынуть из виртуальной ОС и запустить в основной. Помимо этого, в отличии от первой части, здесь не так выражено перескакивание на рабочий стол и обратно — полноэкранный режим работает более-менее в режиме 640×480, если в частности скрыть таскбар. Если в системе установлен враппер nGlide, то в разделе графики появится третья опция — 3dfx.
— 3. Math Ace, Jr. Ситуация схожа с артефактами в более свежих версиях VMWare. Не реагирует на нажатие клавиш. Впрочем это довольно частный случай и подобного рода игры лучше всего запускать в релевантой виртуальной Windows 3.11 / 95, как ранее говорил Uka.
+ 4. Destruction Derby 2. Звук немного хрипит, в остальном проблем не выявлено.
— 5. International Rally Championship. При попытке запуска выдаёт ошибку.
+ 6. Screamer 4×4 в D3D-режиме, настройки на максимум. Ранее в списке не упоминался, но в тестировании участвовал. В целом аналогично первому пункту, может несколько лучше, никаких артефактов. По запуску на Windows 11 см. это сообщение.
Вывод. Как итог как последнее универсальное решение, если иные варианты в вашем случае не справляются с вопросом графических ускорителей, а также если нет желания экспериментировать, можно воспользоваться этим вариантом.
Загрузить образ диска с Windows XP Pro SP3, предоставленный Farooq, можно здесь. И лишний раз напоминаю — разворачивать систему необходимо в VMWare Workstation Pro.
Несколько мелочей:
1. Папки и файлы в систему можно перетаскивать напрямую.
2. Если для какой-то игры критична буква диска, в том числе если есть вопрос с CD-Audio, как пример версия Destruction Derby 2 под Windows, то в настройках VMWare удалите привод из списка устройств, установите Daemon Tools и в нём назначьте букву виртуального привода как D.
3. Если игра идёт на языке отличном от английского, например на корейском и, как следствие, наблюдаются те или иные проблемы (пример), то потребуются следующие действия:3.1. Найти и смонтировать диск с системой в виртуальной ОС в Daemon Tools.
3.2. Проследовать по пути, показанному на скриншоте. Поставить галочку, перезагрузить компьютер.
3.3. В следующей вкладке сделать выбор из списка.
Аналогичную операцию при необходимости можно провернуть и в других версиях Windows, например 7 или 11.
16.2.x (Windows 10 & 11; 7 не поддерживается)
Windows 95 C — Microsoft Windows 95 C — preinstalled VMDK image for VMware Workstation virtual machine : Microsoft : Free Download, Borrow, and Streaming : Internet Archive
Windows 98 SE — Microsoft Windows 98 SE (Second Edition) — preinstalled VMDK image for VMware Workstation virtual machine : Microsoft : Free Download, Borrow, and Streaming : Internet Archive17.x.x (Windows 10 & 11; 7 не поддерживается)
С Windows XP SP3 вопрос обстоит проще. Большинство образов без проблем должны заводиться в последней версии.Windows 7 — загрузить. В качестве дополнения Farooq прислал Windows 7 SP1 x86 на базе VMWare 17.0.1. Как показали тесты в ряде случаев такой вариант оказывается вполне актуальным для пользователей Windows 10 / 11, в то время как конкретно в этой ревизии поддержка старых игр, по словам автора сборки, ещё не пострадала существенно. Тестирование проводилось на слабом железе — встроенная видеокарта, процессор i3 на 2 ГГц. В Star Wars: Rogue Squadron 3D (1998, Windows) в 3Dfx режиме обошлось без просадок. В систему включены 3 враппера — nGlide, Wine D3d, Dgvoodoo 2.
3.4. Если где-то в ближайшей доступности есть подходящая реальная машина со старым железом и ОС, то можно сделать на ней образ диска формата, пригодный для последующего запуска в VMware. Для этого потребуется данная утилита — https://customerconnect.vmware.com/…R_STANDALONE_630_GA&productId=1355&rPId=95099
——
6. VirtualBox + Windows 98.
4.1.
VirtualBox можно взять здесь.
Саму систему, версию с Sound Blaster, здесь.
С AC97 здесь.Обе сборки были предоставлены @Farooq. Созданы по этой инструкции.
4.2. Альтернативный вариант от Joel Lagace, в котором заявлена высокая производительность при работе с 3D-ускорителями.
Подробнее разбирался здесь, загрузить можно здесь. Тестирование проводилось на Windows 10 с картой Nvidia. Билд от 15.06.23.
——
7. DosBox Pure.
Примечателен возможностями связанными с 3D-играми, которые иным форкам ранее / по сей день остаются не по силам. Готовых сборок пока нет.
5.1. Руководство по настройке и использованию DOSBox-Pure.
5.2. Планы @ADF от 29.11.24 на будущее.Вложения:
Последнее редактирование: 2 янв 2025
-
Windows 95 появилась на рубеже лета и осени 1995 года. Соответственно, в играх 1994 года её поддержки нет (не считая переизданий этих игр). Абсолютное большинство игр 1995 года (включая и те, что выпущены в конце него) ещё имеет поддержку Windows 3.x, которая, к слову, более-менее часто встречалась и в 1996 году, а в детских играх — и в более поздние годы (по-моему, последняя детская игра с её поддержкой увидела свет то ли в 1999 году, то ли даже в 2000). Поэтому «проблемный» период корректнее обозначить как «1996-2001».
-
Uka
Переводчик
- Регистрация:
- 21 окт 2012
- Сообщения:
- 28.168
@UnknDoomer, спасибо за инструкцию!Видимо, имеется в виду: «не работает в DOS»? Это точно нужно уточнять? Ибо речь ведь в инструкции как раз о запуске игр в DOSBox, но — в среде Windows?Опять-таки: речь ведь о том, что игра не работает в Windows 3.1, а требует именно Windows 95.Я думаю, если у кого-то есть своя виртуальная машина с Windows XP, ему данная инструкция не нужна
У меня, например, виртуальной ХР нет и не было, но есть реальная. Так что можно просто сказать: «Отказывается работать нормально в среде реальной или виртуальной Windows XP». У нас и отдельная тема была про игры, которые идут только в 95/98, а в XP отказываются.Имеется в виду, что некоторые игры, рассчитанные на Windows 3.1 (а это 1994-1996 гг.), не работают нормально в Windows 3.1@DOSBox, а лучше себя чувствуют в 95?
А так — это зависит не (только) от года выпуска, а от движка, от качества работы программистов и т.д.Честно говоря, это самый спорный момент…
На мой взгляд, Windows 95@DOSBox — это не самое лучшее решение для подобных случаев. Ибо DOSBox на самом деле не рассчитан для запуска Windows 95/98! Он и с 3.11 еле справляется, и то не в 100% случаев.
Этот способ интересен для энтузиастов и может быть полезен в редких случаях. Но для широкого пользователя я бы рекомендовал PCem! Для него у нас много куда более разнообразных сборок выложено, в том числе с обширными жёсткими дисками.
С VMware я не очень знаком, но — по-моему, как и VirtualBox и прочие подобные «серьёзные» вещи, эти эмуляторы не рассчитаны на игры.
Вот VirtualPC — оптимальный выбор! Но только для Windows XP/7 — в 10/11 он не работает, увы.Не очень понятно, что имеется в виду. Какого дисковода нет, НГМД?Не обязательно же в той же папке — путь к образу можно указать куда угодно.»Невозможно» и «нехватки» пишется слитно.По-моему, это ещё одно из наиболее очевидных преимуществ PCem и VirtualPC…Но ведь это игра для Windows 3.1 — и прекрасно работает в Windows 3.1@DOSBox. А Windows 3.1@DOSBox прекрасно воспринимает и диски, смонтированные во внешней программе типа Daemon Tools, — зачем же мучаться с Windows 95@DOSBox?Но ведь можно просто запустить DOS-версию? Или Windows-версия чем-то отличается в лучшую сторону?
А так нормальная эмуляция CD-Audio — это ещё одно преимущество PCem. Ну и образ диска тут не совсем стандартный, его таким упрощённым образом и правда не подключить напрямую, система его не совсем видит.То же самое. Чем бороться за CD Audio в Windows 95@DOSbox, не проще ли взять PCem? -
UnknDoomer
Бредущий по мостуХелпер
- Регистрация:
- 26 мар 2012
- Сообщения:
- 2.467
Исправлено. Диапазон исходно был расширен, т.к. есть случаи, когда некоторые игры работают в такой конфигурации нормально, но не в связке с Windows 3.11.
Я посчитал нужным. Слегка скорректировано.
Несколько скорректировано.
Аналогично.
CD-привода. Исправлено.
Добавил примечание, CD-Audio работает. С производительностью, если не перебирать варианты с железом и попытаться запустить игры в конфигурации по умолчанию, по разному. MTM идёт по кадрам, в случае International Rally Championship и Destruction Derby 2 ситуация лучше, но некоторые просадки имеются.
VirtualPC, как уже было сказано, не развернуть на Windows 8/10/11, как следствие решение не универсальное, как и моему былому опыту он уступает возможностям VMware.
Замечены неполадки с графикой, отсутствующие при запуске в данной сборке. Проблем же с образом диска в случае этой игры нет.
Можно, но рассматривается Windows-версия. Добавил комментарий.
Комментарии добавлены.
Последнее редактирование: 21 фев 2023
-
VirtualPC изначально тоже явно делался не для игр, а возможности в плане запуска последних у тех же VMWare и VirtualBox, мягко говоря, шире.
Хотя я, например, ими по факту почти не пользуюсь (разве что готовыми сборками для отдельных игр и крайне редко; сейчас могу вспомнить лишь сборку VirtualBox с японской Windows XP SP1 и Garage, которая очень хорошо работает, ввиду чего была мной скачана и сохранена), а VirtualPC не пользовался и вовсе никогда: в зависимости от ситуации предпочитаю или реальное старое железо (лучше которого всё равно ничего нет и вряд ли будет), или PCem/86Box, или DOSBox с Windows 95, или DgVoodoo 2/DxWnd/подобное.
-
Uka
Переводчик
- Регистрация:
- 21 окт 2012
- Сообщения:
- 28.168
Есть такие случаи, да. Но они относятся уже к более поздним играм, когда поддержку 3.11 ставили для галочки, а основной всё равно была 95.Это проблема сборки, а не системы! Увы, тут всё зависит от драйверов — и именно для этого у нас на сайте выложено несколько сборок Windows 3.11@DOSBox. В одних есть проблемы с графикой в этой игре (и не только в ней), в других нет. Всё равно 3.11 проще и быстрее запустить, чем 95.Естественно! С этим никто не спорит, и я тоже его предпочитаю
Понятное дело, что инструкция и эмуляторы предназначены для тех, у кого нет такой возможности.Вероятно, да. Но по своему опыту могу сказать, что проблем с запуском игр в VirtualPC у меня было намного меньше, чем с 95@DOSBox и даже PCem. VMWare и VirtualBox я когда-то пробовал, но ничего полезного в них не нашёл (впрочем, это было давно). -
UnknDoomer
Бредущий по мостуХелпер
- Регистрация:
- 26 мар 2012
- Сообщения:
- 2.467
Добавлена информация по альтернативному монтированию дисков, а также краткая заметка по 86box, со ссылкой на готовую сборку.
-
UnknDoomer
Бредущий по мостуХелпер
- Регистрация:
- 26 мар 2012
- Сообщения:
- 2.467
Добавлены .vmdk-образы для VMware Workstation.
Последнее редактирование: 22 фев 2023
-
UnknDoomer
Бредущий по мостуХелпер
- Регистрация:
- 26 мар 2012
- Сообщения:
- 2.467
В продолжении темы с CD-Audio. Взял ещё для проверки Puzzle Bobble (1996, Windows). Вероятно т.к. в сборке от @Uka диск D по умолчанию занят HDD и подменить его в процессе не удаётся, в случае монтажа Puzzle Bobble выдаёт такую ошибку:
Всё же пожалуй было бы неплохо её обновить. Пусть 3D-ускорители не поддерживаются, но по крайней мере нивелировать вопрос с треками в ряде игр можно было бы.
Последнее редактирование: 24 мар 2023
-
Uka
Переводчик
- Регистрация:
- 21 окт 2012
- Сообщения:
- 28.168
Буква диска тут вряд ли виновата. CD Audio требует первого по счёту привода, а не именно что буквы «D», которая часто была занята в то время другим жёстким диском.
По-моему, Windows@DOSBox вообще не умеет воспроизводить CD Audio… -
UnknDoomer
Бредущий по мостуХелпер
- Регистрация:
- 26 мар 2012
- Сообщения:
- 2.467
В данном контексте это одно и тоже, как впрочем и от второго диска можно было бы и избавиться, если увеличить размер основного на, например, 1-2 Гб, вместо 100 мб.
Для сравнения. В экспериментальной сборке DosBox-X (раздел пока отсутствует в теме) от @TheMadLynx, после установки ранее упомянутых Windows Installer for Win9x и Daemon Tools 3.47, всё работает как следует. Daemon Tools забирает в этом случае диск D. Как и, на сколько помню, в твоей сборке с Windows 3.11 этой проблемы нет.
Последнее редактирование: 24 мар 2023
-
Uka
Переводчик
- Регистрация:
- 21 окт 2012
- Сообщения:
- 28.168
Совсем не одно и то же. Считаются только буквы приводов, а не накопителей. Если я ставлю первым приводом, скажем, F:\, то с него и играет музыка, — даже если в системе ещё куча жёстких дисков D:\, E:\ и др.
-
UnknDoomer
Бредущий по мостуХелпер
- Регистрация:
- 26 мар 2012
- Сообщения:
- 2.467
@Uka, тогда не совсем понятно откуда «растут ноги», но факт есть.
Последнее редактирование: 24 мар 2023
-
UnknDoomer
Бредущий по мостуХелпер
- Регистрация:
- 26 мар 2012
- Сообщения:
- 2.467
Добавлен блок с краткой информацией по связке Dosbox-X + Windows 98 SE. Экспериментальную сборку предоставил @TheMadLynx, ранее проверил на ней несколько игр. К текущему моменту можно отметить, что в теме были обозначены все основные варианты, хотя и конкретно вопрос с аппаратным ускорением, или точнее будет сказать условно универсальным решением в этой области, пока остаётся открытым.
Последнее редактирование: 2 апр 2023
-
Это на базе самого последнего билда dosbox-x (мартовского)?
Как правильно «транспортировать» установленный Виндоус из старой сборки dosbox-x в новую? Такой у меня вопрос
-
UnknDoomer
Бредущий по мостуХелпер
- Регистрация:
- 26 мар 2012
- Сообщения:
- 2.467
Нет, ближайший предыдущий билд, 26.12.22. На момент тестирования мартовского ещё не было.
В этот аспект пока детально не вникал, возможно @TheMadLynx подскажет, попутно дополним руководство.
-
Ещё интересно узнать, можно ли в конфиге сборки daum15 с windows 9x смонтировать виртуальный привод хоста, так чтобы выходить из окна досбокса и на основной системе подкручивать следующий диск игры? Я пробовал прописывать стандартное «mount D D:\ -t cdrom» как в играх для dos, но у меня не получилось. Эмулируемая ОС не увидела такой привод. Не обнаружил на форумах в сети однозначного ответа, что так точно нельзя. Может, я что-то делал не так.
-
yplus
- Регистрация:
- 13 апр 2006
- Сообщения:
- 972
Не, такой не прокатит. Только imgmount D image.iso -t cdrom
Папку как компакт только свежие 86box научились монтировать, но сам знаешь, какие у них системные требования… -
Если речь про обновление моего варианта на декабрьском DOSBox-X, то достаточно просто в папку существующей сборки скопировать все файлы с заменой из архива с новой версией (из подпапки bin/Win32/Release) скачанного из их репозитория.
-
Пользуюсь чаще всего как раз досбоксом с Windows 95/98. Позволю себе не согласится здесь с уважаемым @Uka
Этот способ полезен для меня в подавляющем большинстве случаев, тем более, когда есть огромный выбор сборок.
а) Это установленный ещё очень давно windows95 @yplus ‘ом в Daum 15 с несколькими жесткими дисками на 8 гб. Работает вполне сносно.
б) Сборка с наличием voodoo 3dfx и direct 3d от товарища из youtube под ником interlace, уже упомянутого тут. Вот его более свежая работа годичной давности.
в) Любезно предоставленный мне Windows 98 всё в том же Daum’е @kreol’ом
г) Несколько вариантов предустановленной Windows 98 в Dosbox-X, в том числе теперь и от @TheMadLynx
За развитием Dosbox-X я внимательно слежу и некоторые вещи иногда запрашиваю сам у Джона Кемпбелла и помощника Веньера. В частности, например, добавленная возможность монтировать огромные DVD до 8 гб.
Процентов 80 пройденных мной игр для Windows 9x — как раз с помощью обозначенных выше сборок.
Я играю в основном в квесты с CGI пререндерной графикой и FMV 1995-2000. Можно пересчитать наверно по пальцам те из них, где требуется 3д ускорение.
Из недостатков Daum’a отмечу очень конфликтное поведение Daemon Tools в среде «Dosbox+Win9x». У меня каждый третий-четвертый раз система даже выключиться не может должным образом пока не вырублю D-Tools. Но и это, бывает, не помогает. Система виснет и надо вызывать через меню Даума «Ctrl-Alt-Delete», чтобы отключить зависший процесс. Переключаться между CD приходится внутри эмулируемой ОС вызовом из меню команды «CTrl-Esc» с последующей попыткой добраться до значка Daemon рядом с временем. Очень неудобно, а иногда и невозможно. Эта проблема наконец была решена в Dosbox-X и теперь можно монтировать образ из меню.
Если игра требует высокой частоты (233 мгц, Gabriel Knight 3), то как и в случае PCem, здесь досбокс покажет у меня низкую производительность. Такие игры будут сильно тормозить, если не вызовут крэш самого эмулятора.И вот, где досбокс не справляется с циклами, на помощь приходит сборка Win98SE+VirtualBox. По инструкции пользователя youtube с ником Nevets я сделал себе свою
Не раз меня выручала сборка в играх 97-99 гг, если это не касалось трехмерного ускорения. Преимущество в том, что здесь уже нет лимита в мгц. Иногда, наоборот, всё слишком быстро и пришлось вставлять в гостевую ОС утилиту для замедления процессора. Такие замечательные игры как Space Bar, Tender Loving Care и Dark Side of the Moon я прошёл как раз на ней. Если для полноты картины потребуется мой Win98SE+VirtualBox, то я готов предоставить. Там два варианта, один с Sound Blaster’ом, другой c AC97. Установлено куча обновлений, видео-кодеков, программ вроде QT и DVD-проигрывателей. Из неприятных моментов отвечу, что в ряде игр курсор при наведении на анимированные объекты или FMV мигает.
Если всё таки мне и нужно запустить что-то трехмерное, то есть в наличии VMWare (которая не free, одна из последних версий) с установленным XP. Немало в общем-то идёт на подобной сборке без лишних манипуляций, кое где можно подсунуть враппер в папку с игрой или пожонглировать с совместимостью. Последние версии VMWare Station мне гораздо больше пришлись по вкусу, прежде всего потому, что теперь как в Виртуалбоксе, можно изменять окно ВМ как душе угодно, а гостевая ОС будет подстраиваться под это окно с сохранением разрешения. Осталось добавить только паузу как в Досбоксе, так чтобы сама ВМ при этом не сворачивалась.
Самый последний вариант, которым пользуюсь реже всего — PCem. У меня, что называется, low-end машина с 2 ггц процессором и встроенной в ноутбук интеловской видео-картой. При таких условиях эмулятор вроде PCem, требующий для оптимальной работы частоты I7, — не очень надежный друг. Тем не менее запустить там игры на первом пне, требующие не более 133 мгц, у меня выходит очень недурно. Что-то выше 133, и начинаются проседания, тормоза, заикающиеся звуки. Речь идёт о версии PCem 15, где автор эмулятора поработал над рекомпилятором.
Последнее редактирование: 11 апр 2023
Страница 1 из 6
Table of Contents
- Installing Microsoft Windows 98 in DOSBox-X
- Overview
- Windows editions this guide applies to
- External links
- DOSBox-X config file
- Dynamic vs Normal core
- Turbo mode
- Creating a Harddisk image
- Installation Method 1: Boot from CD-ROM image
- Requirements
- Starting the installation
- Transfer Windows 98 install files to your HDD image
- Installation Method 2
- Requirements
- Starting the installation
- Copying the contents of the CD-ROM
- Running SETUP.EXE
- Booting Windows 98 after installation
- Steps to take after installation
- Mounting CD or Diskette images
- Enabling networking
- Enabling NE2000 in your DOSBox-X config file
- Setting up NE2000 networking in Windows 98
- Emulated video adapter and video mode
- VESA driver
- Emulated sound card
- Enabling General MIDI
- Enabling printing
- Print to PostScript
- Epson emulation
- 3dfx Voodoo
- Glide pass-through
- Hard Disk Read-ahead optimization
- Host Folder mounts
- Known limitations
- Outstanding issues
Overview
This guide will give a general description of installing Windows 98 in DOSBox-X, in addition to addressing some common issues.
Windows editions this guide applies to
-
Windows 98 (RTM; Original release) — Retail Full
-
Windows 98 (RTM; Original release) — OEM Full
-
Windows 98 Second Edition (98SE) — Retail Full
-
Windows 98 Second Edition (98SE) — OEM Full
|
Note |
Windows 98 or 98SE Upgrade editions have additional requirements and are not covered by this guide. |
If you don’t know which Windows 98 edition to install, we recommend that you install Windows 98SE.
DOSBox-X config file
You first need to create a DOSBox-X config file.
[sdl]
autolock=true

[dosbox]
title=Windows 98
memsize=128


vmemsize=8
vesa modelist width limit=0
vesa modelist height limit=0

[dos]
ver=7.1
hard drive data rate limit=0
floppy drive data rate limit=0

[cpu]
cputype=pentium_mmx
core=normal

[sblaster]
sbtype=sb16vibra

[fdc, primary]
int13fakev86io=true

[ide, primary]
int13fakeio=true
int13fakev86io=true

[ide, secondary]
int13fakeio=true
int13fakev86io=true
cd-rom insertion delay=4000

[render]
scaler=none

[autoexec]
Copy the above config and save it as win98.conf
|
Note |
You can increase the allocated RAM up to the Windows 98 maximum of 512MB by setting memsize=512.Larger values may be possible with tweaks but are not covered here. |
Dynamic vs Normal core
The dynamic_x86 core, which should perform much better, has been sufficiently enhanced that it can now be used for most use-cases with Windows 98.
However, for now we still recommend that you do the installation of Windows 98 using core=normal until issue #2215 is resolved.
But after the installation is finished you should be able to change to core=dynamic_x86.
Should you run into problems such as application crashes or a Windows 98 blue-screen that cannot be reproduced with core=normal, please report the problem on the DOSBox-X Git issues page.
Turbo mode
Some parts of the installation, but also starting Windows 98 can take a considerable amount of time.
You may be able to speed this up considerably (depending on the host CPU) by using the DOSBox-X Turbo mode, which can be enabled from the drop-down menu bar by selecting «CPU» followed by «Turbo (Fast Forward)».
This turbo mode is not like the old Turbo button on retro PCs, but functions more like a fast-forward, and therefore should not be used when interacting with the guest OS.
By default, the moment you press a key on the keyboard, turbo mode will disengage.
|
Warning |
Using the mouse not disengage turbo mode, and double-clicks will be almost impossible to achieve as long as turbo mode is active. |
You may also want to enable turbo mode by default to allow Windows 98 to startup quicker by merging the following settings into your DOSBox-X config file.
|
Note |
This will cause some audio distortion on Windows 98 startup, if you have the Windows startup sound enabled. |
Creating a Harddisk image
|
Note |
In addition to the below DOSBox-X command line utility, it is possible to create harddisk images from the DOSBox-X menu. Go to the «DOS» menu and select «Create blank disk image…». This option allows for various common harddisk types to be created, for less common types you need to use the command line utility. |
|
Note |
When creating your HDD image with IMGMAKE, instead of specifying a custom size, you can choose a pre-defined template. The pre-defined HDD templates can be seen by running IMGMAKE without arguments.
|
-
Diskette (floppy) images are always created as FAT12.
-
If your reported DOS version is 7.1 or higher, then harddisk images up to 512MB will use FAT16 by default.
-
Larger size harddisk images will use FAT32 by default (larger than 2GB can only be created as FAT32).
Alternatively, you can use the -fat option to instruct IMGMAKE to create a certain FAT type (assuming that is possible for the harddisk size).
First you need to start DOSBox-X from the command-line, using your newly created win98.conf.
This assumes that dosbox-x is in your path and win98.conf is in your current directory.
dosbox-x -conf win98.confThen in DOSBox-X you need to create a new harddisk image file with IMGMAKE.
This example uses an 8GB hard disk image with a single FAT32 formatted partition.
Technically the FAT32 filesystem is capable of supporting partitions up to 2TB, but the generic IDE driver in Windows 98 cannot handle volumes greater than 128GB.
Larger partition sizes may be possible with 3rd party drivers but are not covered here.
In later Windows versions, starting with Windows 2000, Microsoft won’t let you format a volume bigger than 32GB with FAT32 using its built-in formatting tool, this was presumably to push migrations to NTFS and later exFAT.
|
Note |
Creating a 128GB volume will cause a «SU0650 Out of Memory» warning during install, you can however continue the installation. |
IMGMAKE hdd.img -t hd_8gigOr if you want to create a larger disk, you can create a custom type.
This is an example of a 16GB (16*1024=16384 MB) disk, which due to its size, will be formatted as FAT32.
IMGMAKE hdd.img -t hd -size 16384Installation Method 1: Boot from CD-ROM image
Starting with Windows 98, it is possible to boot directly from the CD-ROM, as long as you have the «OEM Full» edition, in which case no separate bootdisk is needed.
This installation method allows both FAT16 (up to 2GB) and FAT32 volumes, which can be up to 128GB for Windows 98.
Requirements
This method only works with the Windows 98 OEM Full edition CD-ROM image (named «Win98.iso» in the example below).
Getting this image file is outside the scope of this guide.
Starting the installation
This assumes you have already started DOSBox-X with the win98.conf config file and created your harddisk image.
First mount the harddisk image you created earlier:
Now let’s boot from the CD-ROM and start the installation.
IMGMOUNT D Win98.iso
IMGMOUNT A -bootcd D
BOOT A:|
Note |
If the second IMGMOUNT command gives an error «El Torito CD-ROM boot record not found«, your CD-ROM image is not bootable, and you will have to use either a different installation method or a different Windows 98 CD-ROM image.
|
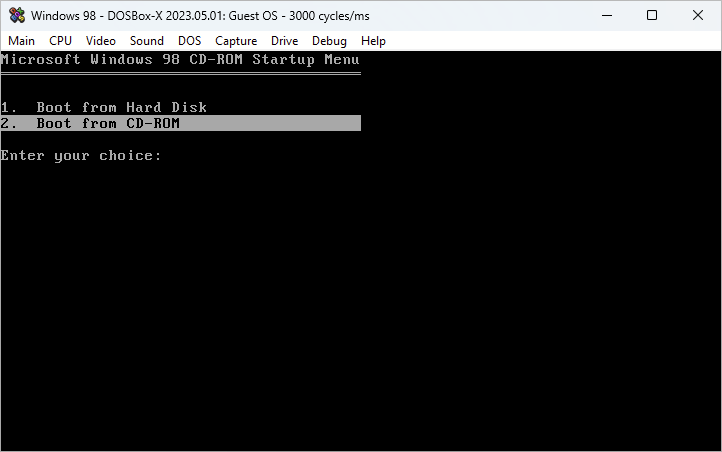
You will first get a Startup menu, where you need to select «Boot from CD-ROM».
At this point it should format the harddisk and the installation process should start.
When the Windows installer reboots, and your back at the DOSBox-X Z:\> prompt.
Close DOSBox-X and edit your win98.conf config file, and add the following lines in the [autoexec] section at the end of the file:
IMGMOUNT C hdd.img
IMGMOUNT D Win98.iso
BOOT C:
Now start DOSBox-X as follows to continue the installation process:
dosbox-x -conf win98.confTransfer Windows 98 install files to your HDD image
This is an optional step. It is to prevent Windows from asking for the CD-ROM whenever it needs additional files.
Boot Windows 98 with the CD-ROM image mounted. In Windows 98, copy the \WIN98 directory and its contents from the CD-ROM to your C: drive.
You can copy it to any directory you want, but we assume here that you copied it to C:\WIN98
Once the files are copied, start REGEDIT and navigate to HKEY_LOCAL_MACHINE\Software\Microsoft\Windows\CurrentVersion\Setup and change SourcePath= to the location where you copied the files. e.g., SourcePath=C:\WIN98
In the case of Windows 98SE, copying the entire directory will require roughly 174MB of diskspace.
The \WIN98\OLS and \WIN98\TOUR sub-directories can however be skipped which will save roughly 54MB, bringing the total to roughly 120MB.
Installation Method 2
This method will start the installation from DOSBox-X and does not require a bootable CD-ROM image.
Requirements
A Windows 98 CD-ROM image (named «Win98.iso» in the example below).
Getting this image file is outside the scope of this guide.
Starting the installation
This assumes you have already started DOSBox-X with the win98.conf config file and created your harddisk image.
First mount the harddisk image you created earlier:
You will also need to mount the Windows 98 CD-ROM. There are a few ways of doing so, but this guide assumes you have a ISO image.
If you have a copy of the Windows 98 CD-ROM as an ISO (or a cue/bin pair), you can mount it as follows:
Copying the contents of the CD-ROM
While not strictly necessary, as it is possible to run SETUP.EXE directly from the CD-ROM (if you have the CD-ROM automatically mounted in your [autoexec] section of the config file).
It is recommended to copy the installation files (contents of the WIN98 directory on the CD-ROM) to your HDD image, as it will prevent Windows 98 from asking for the CD-ROM when it needs additional files later.
XCOPY D:\WIN98 C:\WIN98 /I /EThe files in the above example are copied to the C:\WIN98 directory.
You may want to use C:\WINDOWS\OPTIONS\CABS instead, as that is the directory that OEM installs normally use.
But if you do, be aware that the installer will attempt to install into C:\WINDOWS.000 as C:\WINDOWS already exists.
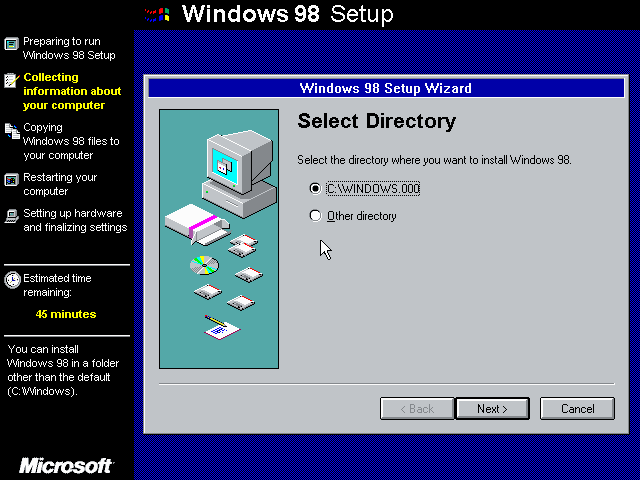
If you get the above screen during SETUP, select «Other directory» to change it back to C:\WINDOWS
Running SETUP.EXE
You can now run SETUP.EXE.
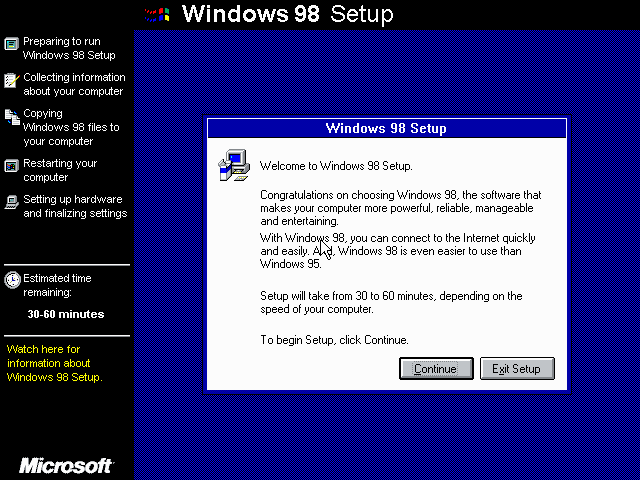
Now run through the installation process.
The actual steps will not be covered in this guide but are pretty self-explanatory and detailed guides on the Windows 98 install process can be found online such as YouTube.
When the installer reboots DOSBox-X, and you’re back at the DOSBox-X Z:\ prompt, type EXIT.
Now edit your win98.conf config file.
At the end of the file, in the [autoexec] section, add the following lines:
IMGMOUNT 0 empty -fs none -t floppy
IMGMOUNT 1 empty -fs none -t floppy -size 512,15,2,80
IMGMOUNT C hdd.img -ide 1m
IMGMOUNT D empty -t iso -ide 2m
BOOT C:|
Note |
The current DOSBox-X release seems to have a bug where Win98 will only see the first floppy drive. |
Save the config file, and at the command-prompt of your host PC you can type the below command to continue with the next phase of the installation process.
This is also the command you use, after the installation is finished, to start Windows 98 in DOSBox-X.
dosbox-x -conf win98.confBooting Windows 98 after installation
After the installation is finished, you can start Windows 98 from the command-prompt of your host PC, with the following command:
dosbox-x -conf win98.confYou can optionally create a shortcut on your desktop to start Windows 98 directly.
Steps to take after installation
Once Windows 98 is installed, here is some additional software you may want to install or update:
-
Install Microsoft .NET framework version 1.0, 1.1 and 2.0
-
Install Microsoft Visual C++ 2005 runtime
-
Update to Microsoft Internet Explorer 6.0 (rarely needed)
-
Update to Microsoft DCOM 4.71.1015.0
-
Update to Microsoft DirectX 9.0c
-
Install Microsoft Windows Installer 2.0
-
Install Microsoft WinG API 1.0 (needed by just a few games, and those games typically include it)
-
Install Microsoft GDI+ re-distributable
-
Install Adobe Acrobat Reader 6.0
-
Install/Update to Adobe Flash Player 9.0.47.0
-
Install Adobe PostScript driver 4.2.6
-
Install Apple QuickTime 6.5.2
Mounting CD or Diskette images
DOSBox-X supports mounting CD and diskette (floppy) images, and making those available to an OS booted in DOSBox-X.
To do so, an empty diskette or CD drive needs to be attached before booting a guest OS such as Windows 98, or diskette or CD images need to be attached (which will automatically cause an appropriate drive type to be emulated).
-
Disks can be changed after booting a guest OS from the drop-down menus under «DOS» → «Change current floppy image…»
-
CDs can be changed after booting a guest OS from the drop-down menus under «DOS» → «Change current CD image…»
For example, to specifying multiple image files with the IMGMOUNT command:
IMGMOUNT A disk1.img disk2.img disk3.img
IMGMOUNT D cd1.iso cd2.iso cd3.iso
You can then swap between disk images with the «DOS» → «Swap floppy drive» or «Swap CD drive» option from the drop-down menus, or using the hot-key.
Enabling networking
To enable networking, you first need to enable NE2000 adapter emulation in your win98.conf config file and select an appropriate back-end for the NE2000 emulation.
Enabling NE2000 in your DOSBox-X config file
There are two different back-ends to the NE2000 adapter emulation.
The default is backend=auto, which implies backend=slirp if SLIRP support is available, otherwise backend=pcap is implied if PCAP support is available.
backend=pcap
The PCAP back-end uses something called «Promiscuous mode».
This has the advantage that DOSBox-X can support various legacy network protocols, such as IPX and NetBIOS Frames (aka NetBEUI) in addition to TCP/IP.
This mode not only allows communication between DOSBox-X instances on the same network, but also with legacy PCs on the same network.
However, for this to work DOSBox-X needs to have very low-level access to your real network adapter.
In some cases, this is not possible, such as:
-
Network Adapter or Driver not supporting Promiscuous mode (most wireless adapters fall into this category).
-
Your Ethernet switch not allowing multiple MAC addresses on a single port or doing any kind of MAC address whitelisting.
-
Sandboxed versions of DOSBox-X (e.g., Flatpak) not allowing the required low-level access.
To enable NE2000 emulation with the pcap back-end, add the following to your win98.conf config file:
[ne2000]
ne2000=true
nicirq=10
backend=pcap

[ethernet, pcap]
realnic=list
The list value for realnic= will need to be replaced by a value representing your actual network adapter.
See Guide: Setting up networking in DOSBox-X for more information.
backend=slirp
Unlike the PCAP back-end, the SLIRP back-end does not require Promiscuous mode.
As such it will work with wireless adapters, and it will work in most sandboxed environments.
But obviously, it has its own limitations.
-
It is not supported in all platforms, such as Windows Visual Studio builds.
-
It only supports the TCP/IP protocol (other protocols must be TCP/IP encapsulated).
-
It is effectively behind a NAT (Network Address Translation) gateway, meaning that you can communicate outbound, but no systems on the LAN can instantiate a new connection to it. Which means that two DOSBox-X instances on the same LAN using
backend=slirpcannot communicate with each other.
To enable NE2000 emulation with the slirp back-end, add the following to your win98.conf config file:
[ne2000]
ne2000=true
nicirq=10
backend=slirp
Setting up NE2000 networking in Windows 98
If you enabled NE2000 support in the DOSBox-X config file, Windows 98 should detect it during installation, and you should get a screen like the following.
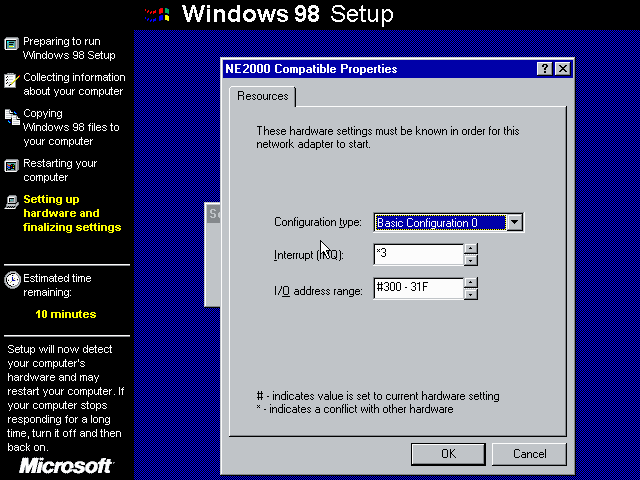
Change the Interrupt (IRQ) to 10 to match the nicirq= value set in your win98.conf file.
If Windows 98 did not detect the adapter during installation, or you enabled NE2000 emulation after you did the installation.
Go to «Start», «Settings» and «Control Panel» and double-click on «Add New Hardware», and let the wizard detect hardware.
It should find the emulated Novell NE2000 adapter and install the drivers.
|
Note |
By default, TCP/IP will try to get its network configuration over DHCP, if you need to manually specify the settings you can do so, in «Control Panel», double-click «Network». Once it opens, highlight «TCP/IP», and click the «Properties» button to modify the TCP/IP settings. |
|
Note |
In the Network settings, there will also be a «Dial-Up Adapter» listed, which you can safely remove. |
|
Note |
If you don’t want the Windows logon dialog on startup, and don’t care for file and printer sharing, you can remove the «Client for Microsoft Networks» component from the Network configuration settings (although, it will complain that «Your network is not complete», which you can ignore). |
|
Note |
If you want to share files between Windows 98 and Windows 10 on the network, have a look at this blog: SMB File Sharing between Win10 and Win98, but apparently this fails with the latest Win10 builds 2004 and 20H2. |
Emulated video adapter and video mode
The default video adapter that DOSBox-X emulates is the S3 Trio64, which is the best emulated video adapter that DOSBox-X offers, with the widest range of resolutions and colour depths.
In addition, this video adapter is supported out-of-the-box in Windows 98, simplifying the installation process.
The available video modes with the S3 Trio64 driver are:
-
4-bit colour (16): 640×480
-
8-bit colour (256): 640×480, 800×600, 1024×768, 1152×864, 1280×1024 and 1600×1200
-
16-bit colour (65536): 640×480, 800×600 and 1024×768
-
32-bit colour (16.7M): 640×480 and 800×600
A few enhancements have been made to the emulated S3 Trio64, compared to a real S3 Trio64:
-
No real S3 Trio64 was ever produced with more than 4MB video memory, under DOSBox-X you can optionally configure 8MB.
-
The real cards never supported wide-screen resolutions, wide-screen VESA modes can optionally be enabled in DOSBox-X.
However, these enhancements cannot be used in Windows 98 with the S3 video driver due to driver limitations.
There is no updated S3 Trio64 video driver available for Windows 98 (not even via installing DirectX 9c).
As such you will be limited to the above video modes with this driver.
VESA driver
First add the following lines to your DOSBox-X config file in the section:
allow high definition vesa modes=true
allow unusual vesa modes=true
allow low resolution vesa modes=false
Download and extract the latest VBEMP driver package and install the driver from the 032MB directory.
With these settings modes up to 1920×1080 in 32bit colour, or 1920×1440 in 16bit colour are possible.
|
Note |
Using the VBEMP driver does have a negative graphics performance impact, which when measured in WinBench96 Graphics WinMark, can be a reduction of up to 59%. |
Emulated sound card
The emulated sound card used in this guide is the SB16 Vibra, instead of the default SB16.
This is simply because the SB16 Vibra is an ISA PnP card, and therefore automatically detected by Windows.
There is no other real advantage of using the emulated SB16 Vibra over the SB16.
Both Windows 98 and 98SE include SB16 driver version 4.37.00.1998.
An optional driver update to 4.38.14 is available on the VOGONS Vintage Driver Library.
|
Note |
One often heard complaint of the real SB16 Vibra is its CQM synthesis, which was used as a low-cost replacement of the OPL3 chip found on earlier cards. However, DOSBox-X does not really emulate the CQM, instead it uses the same OPL3 emulation as for the regular SB16 model. Therefore, the CQM sound quality issues with the real SB16 Vibra do not apply to DOSBox-X. |
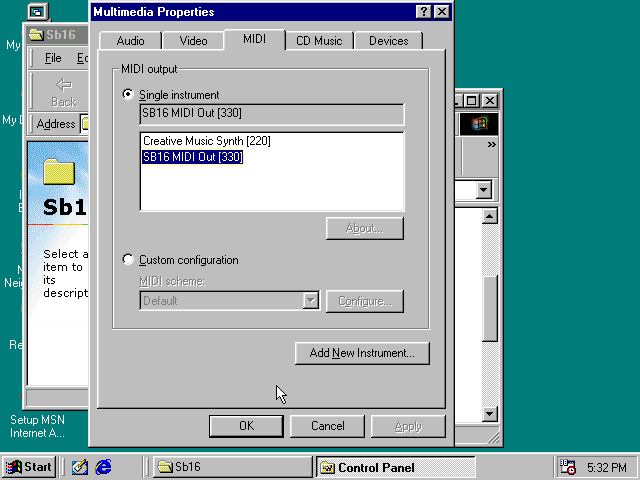
Enabling General MIDI
If you have a working DOSBox-X General MIDI setup, either emulated or real, you can use that in Windows 98.
Go to «Start», «Settings» and open «Control Panel», and then double-click on «Multimedia Properties».
Now on the «MIDI» tab, change the «Single instrument» option to «SB16 MIDI Out [330]», and click OK to close the window.
Enabling printing
Print to PostScript
For the best print quality, you will want to print to a PostScript printer in Windows 98.
First, set up your DOSBox-X config to print to a file as such:
[dosbox]
captures=capture

[parallel]
parallel1=file timeout=2000
You can either use the PostScript driver bundled with Windows 98, or alternatively install the newer Adobe PostScript 4.2.6 driver.
If using the bundled driver, select any PostScript printer such as the «QMS ColorScript 100 Model 30», during printer setup connected to LPT1.
Once the printer is installed, open the printers properties, and on the «Details» tab click on the «Spool Settings…» button.
In the «Spool Settings», you must select «Print directly to the printer» and click OK.
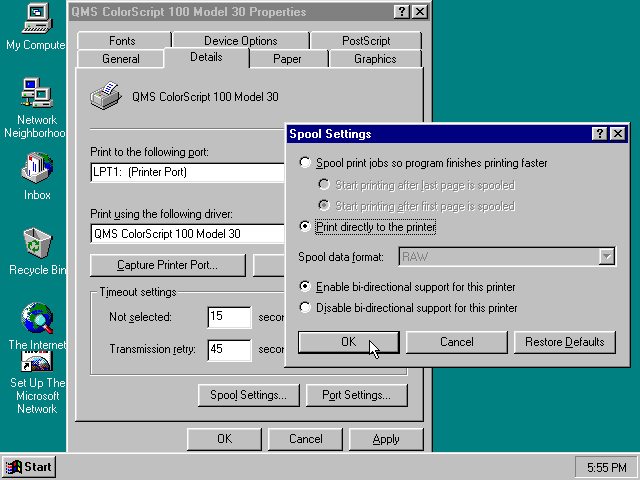
|
Warning |
Failing to change the spool setting, when printing to a file, will result in corrupted PostScript files! |
|
Note |
If two files end up being generated instead of just one for a printjob, you will want to revert the above spool setting. And perhaps try changing the spool setting to «Start printing after last page is spooled». |
When you print, a .prt file in your captures= directory will be created, which despite the extension, is actually a PostScript file.
On Linux and macOS, PostScript files are natively supported and can be viewed and printed.
On a Windows host, it is necessary to install a separate PostScript viewer such as GSview.
Epson emulation
As an alternative, you can use the integrated Epson printer emulation, but the output quality will be significantly less compared to PostScript.
First, set up your DOSBox-X config to emulate an Epson printer as such:
[parallel]
parallel1=printer
[printer]
printer=true
printoutput=ps
multipage=true
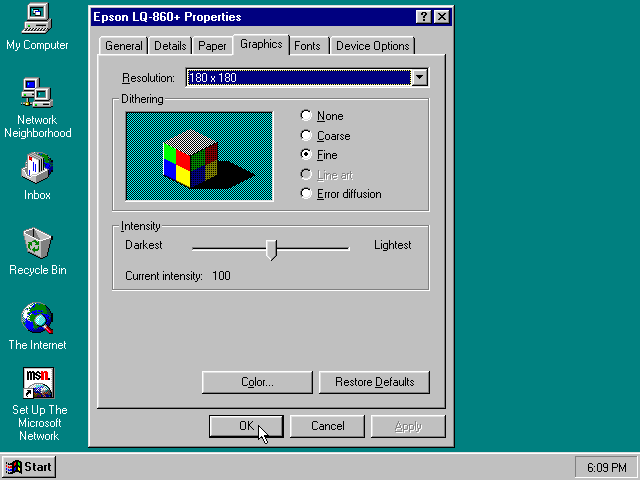
timeout=2000Next in Windows 98, select any Epson dot-matrix printer, such as the «Epson LQ-860+» option during printer setup connected to LPT1
|
Warning |
Make sure that you do not configure the Epson printer driver for a graphics resolution other than 180×180, or the output will be corrupted. |
When you print, a PostScript file with the .ps extension will be created in your current working directory.
The emulated Epson printer settings can be adjusted as documented on the above linked wiki printing guide.
3dfx Voodoo
The emulated 3dfx Voodoo PCI device is enabled by default in DOSBox-X, and both Windows 98 and 98SE include a driver and will automatically detect it.
Windows 98SE includes a driver dated 4-23-1999. There is a 3.01.00 update available.
After the update it will show a date of 4-29-1999.
If for some reason you do not want 3dfx Voodoo emulation, it can be disabled by adding the following lines to your DOSBox-X config:
[voodoo]
voodoo_card=false
Glide pass-through
Glide pass-through is an optional DOSBox-X feature, and not required to use a 3dfx Voodoo game with Windows 98.
It can provide better performance, but can also be rather tricky to get working properly. As such it is not recommended for most users.
If you decide to try this method, first ensure the game works without glide pass-through using the standard 3dfx Voodoo emulation.
There are a few points you need to be aware of.
-
The DOSBox-X and glide-wrapper installed on the host need to be the same architecture.
So, if you’re using a 64bit DOSBox-X, you need to use a matching 64-bit glide-wrapper. -
The Linux SDL2 DOSBox-X does not work with OpenGlide, this is a limitation of OpenGlide (see OpenGlide issue #20).
The work-around is to use the SDL1 DOSBox-X instead.
You need to set the following DOSBox-X config option:
You will also need a specially patched GLIDE2X.DLL file which you can place in either the C:\Windows\System directory of Windows 98, or in the game directory.
But be aware that some games come with their own GLIDE2X.DLL, which typically gets installed in the game directory.
If so, you will have to remove this DLL file for glide pass-through to work.
Hard Disk Read-ahead optimization
In «System Properties», select the «Performance» tab, and click the «File System…» button.
A separate «File System Properties» window will open.
On the «Hard Disk» tab you can specify the Read-ahead optimization.
Based on benchmark results (WinBench 96), it seems that setting this to «None» gives the best performance in combination with DOSBox-X, although the difference is marginal.
This is no doubt because the host system is better at caching then the Windows 98 cache function.
Host Folder mounts
Starting with DOSBox-X 2022.08.0, there is optional support to dynamically convert a host folder mount to an emulated FAT harddisk for use when you need to boot a guest OS, such as Windows 98.
This can be accomplished in one of two ways. Either when you issue the boot command, you add the option -convertfat. e.g. boot c: -convertfat.
Or by setting the following option in your DOSBox-X config file:
[sdl]
convertdrivefat = true
When you now boot from a real image file, it will attempt to convert ALL folder mounts at the time of booting to emulated FAT Harddisks.
|
Note |
You cannot boot from such an emulated FAT harddisk. You will still need some other bootable image file to actually boot a guest OS. |
|
Note |
This conversion is dynamic, effectively creating an emulated FAT harddisk out of a folder mount. This converted FAT harddisk is not automatically stored permanently. You can however, store it as a permanent image file that you can later mount with IMGMOUNT, using the «Drive» > «drive letter» > «Save to disk image» option from the menus.Please see the «Creating harddisk images from folder mounts» section in the Guide: Managing image files in DOSBox-X for more information. |
|
Note |
There is currently no support for creating emulated CD-ROM or Floppy drives out of folder mounts with this method. Any CD-ROM or Floppy folder mounts will also be converted to harddisk folder mounts, and may not actually work for the intended purpose. |
One thing to note, is that there is no way to specify the FAT type to use for the conversion.
The FAT type will be automatically selected based on the aggregate size of files in the folder, plus 250MiB (this can be adjusted with the convert fat free space option in the DOSBox-X config file).
If the total space of files + 250MiB does not exceed 2GiB, it will convert it into a FAT16 disk. Otherwise, it will become a FAT32, which in turn will require a guest OS with FAT32 support.
Alternatively, you can also make the emulated FAT drive read-only by using the -convertfatro option with the boot command. Or by setting convert fat free space=0 option in the DOSBox-X config file.
Known limitations
-
If you intend at any point to use a Floppy or CD during your usage of Windows 98, you must attach either a floppy and/or CD image before starting Windows 98, or an empty floppy or CD-ROM drive.
If a floppy or CD drive is not present when starting Windows 98 the drive is simply missing, and you cannot add it without rebooting the guest OS. -
When mounting a CD-ROM image using
imgmount, before booting Windows 98, you may have to specify the IDE device to attach it to for it to work properly in Windows 98. e.g.imgmount d game_cd.iso -ide 2mto make the CD-ROM drive appear as the master device on the secondary IDE controller.
Outstanding issues
-
Resolve «Drive A is using MS-DOS compatibility mode file system»