
If you are trying to install Windows updates but unable to do so, then it’s possible that Windows updating might be failing with error code 0xc8000222. The error is caused because of a number of issues such as corrupt Windows Update files, cache issue, virus or malware, etc. Sometimes it fails because the Update service might not have been running. So without wasting any time, let’s see how to actually fix Windows Update Error 0xc8000222 with the help of below-listed troubleshooting steps.

Table of Contents
Make sure to create a restore point just in case something goes wrong.
Method 1: Run Windows Update Troubleshooter
1.Now type “troubleshooting” in Windows Search bar and click on Troubleshooting.
2.Next, from the left window pane select View all.
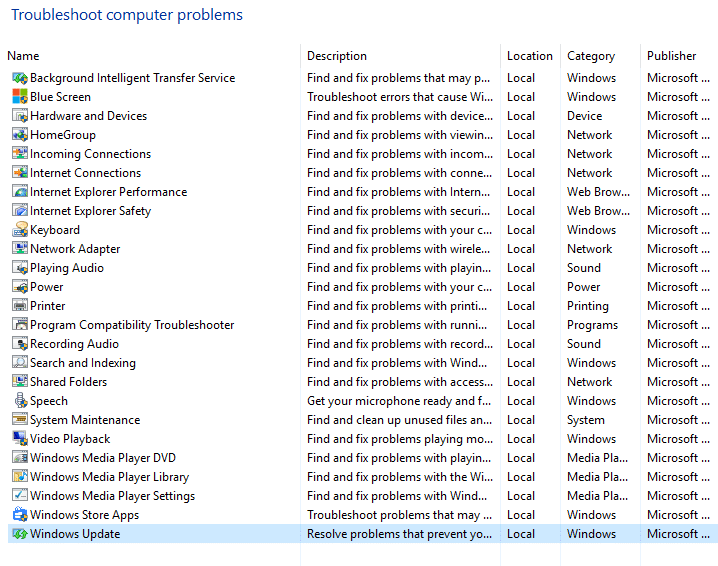
3.Then from the Troubleshoot computer problems list select Windows Update.
4.Follow on-screen instruction and let the Windows Update Troubleshoot run.
5.Restart your PC and you may be able to Fix Windows Update Error 0xc8000222.
Method 2: Temporarily Disable Antivirus and Firewall
1.Right-click on the Antivirus Program icon from the system tray and select Disable.
2.Next, select the time frame for which the Antivirus will remain disabled.

Note: Choose the smallest amount of time possible for example 15 minutes or 30 minutes.
3.Once done, again try to run Windows Update and check if the error resolves or not.
4.Press Windows Key + I then select Control Panel.
5.Next, click on System and Security.
6.Then click on Windows Firewall.

7.Now from the left window pane click on Turn Windows Firewall on or off.
8.Select Turn off Windows Firewall and restart your PC. Again try to open Update Windows and see if you’re able to Fix Windows Update Error 0xc8000222.
If the above method doesn’t work make sure to follow the exact same steps to turn on your Firewall again.
Method 3: Rename SoftwareDistribution Folder
1.Press Windows Key + X then select Command Prompt (Admin).
2.Now type the following commands to stop Windows Update Services and then hit Enter after each one:
net stop wuauserv
net stop cryptSvc
net stop bits
net stop msiserver

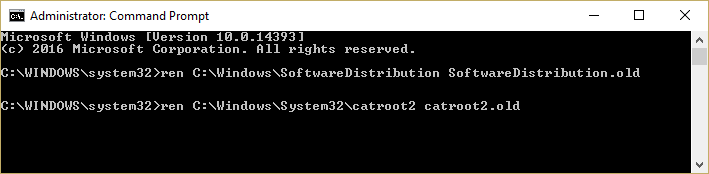
3.Next, type the following command to rename SoftwareDistribution Folder and then hit Enter:
ren C:\Windows\SoftwareDistribution SoftwareDistribution.old
ren C:\Windows\System32\catroot2 catroot2.old
4.Finally, type the following command to start Windows Update Services and hit Enter after each one:
net start wuauserv
net start cryptSvc
net start bits
net start msiserver

5.Reboot your PC to save changes and check if you are able to Fix Windows Update Error 0xc8000222.
Method 4: Perform Clean boot
Sometimes 3rd party software can conflict with Windows and can cause Windows Update error. In order to Fix Windows Update Error 0xc8000222, you need to perform a clean boot on your PC and diagnose the issue step by step.
Method 5: Run SFC and CHKDSK
1.Press Windows Key + X then click on Command Prompt (Admin).
2.Now type the following in the cmd and hit enter:
Sfc /scannow
sfc /scannow /offbootdir=c:\ /offwindir=c:\windows

3.Wait for the above process to finish and once done restart your PC.
4.Next, run CHKDSK from here Fix File System Errors with Check Disk Utility(CHKDSK).
5.Let the above process complete and again reboot your PC to save changes.
Method 6: Run DISM
1.Press Windows Key + X then click on Command Prompt (Admin).
2.Now type the following in the cmd and hit enter after each one:
a) Dism /Online /Cleanup-Image /CheckHealth
b) Dism /Online /Cleanup-Image /ScanHealth
c) Dism /Online /Cleanup-Image /RestoreHealth

3.Let the DISM command run and wait for it to finish.
4. If the above command doesn’t work then try on the below:
Dism /Image:C:\offline /Cleanup-Image /RestoreHealth /Source:c:\test\mount\windows
Dism /Online /Cleanup-Image /RestoreHealth /Source:c:\test\mount\windows /LimitAccess
Note: Replace the C:\RepairSource\Windows with the location of your repair source (Windows Installation or Recovery Disc).
5.Reboot your PC to save changes and see if you’re able to Fix Windows Update Error 0xc8000222.
Method 7: Run CCleaner and Malwarebytes
1.Download and install CCleaner & Malwarebytes.
2.Run Malwarebytes and let it scan your system for harmful files.
3.If malware is found it will automatically remove them.
4.Now run CCleaner and in the “Cleaner” section, under the Windows tab, we suggest checking the following selections to be cleaned:
5.Once you’ve made certain the proper points are checked, simply click Run Cleaner, and let CCleaner run its course.
6.To clean your system further select the Registry tab and ensure the following are checked:
7.Select Scan for Issue and allow CCleaner to scan, then click Fix Selected Issues.
8.When CCleaner asks “Do you want backup changes to the registry?” select Yes.
9.Once your backup has completed, select Fix All Selected Issues.
10.Restart your PC to save changes. This would Fix Windows Update Error 0xc8000222 but if it didn’t then continue to the next method.
Method 8: Reset Windows Update Components
If you receive a Windows Update error, try the steps listed in this guide to reset the Windows Update components.
Recommended for you: Fix Missing Open With Option From Right-click Context Menu
That’s it you have successfully fixed Windows Update Error 0xc8000222 but if you still have any queries regarding this post then feel free to ask them in the comments section.
Estimated reading: 3 minutes
406 views
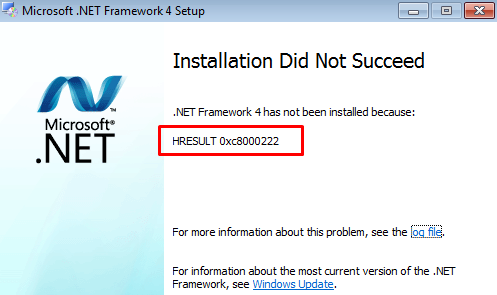
Microsoft .NET Framework is used by many Windows applications. But, while installing the .NET Framework on your computer, you might face this message “Installation did not succeed. HRESULT ox0xc8000222” on the setup page.
In this article, we will guide you through some methods to fix the above error.
Solution 1. Stop the Windows Update service
The main reason why you are facing this disruption is the windows update services is running on the system.
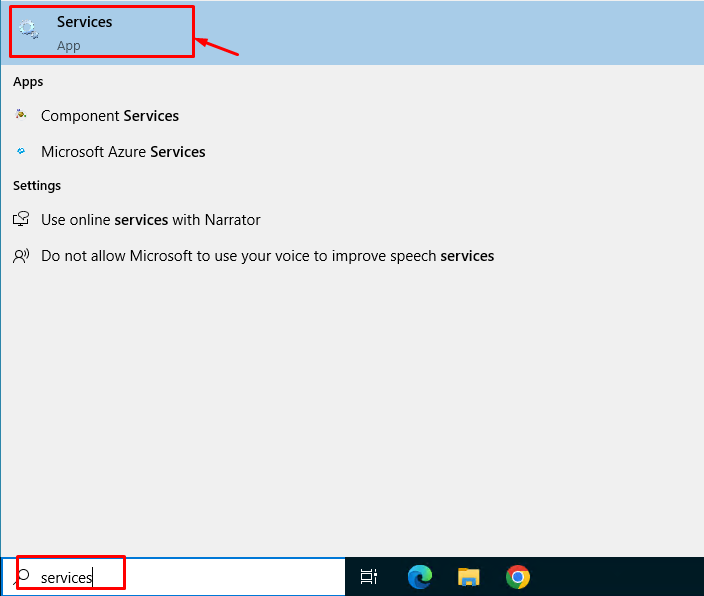
Step 1. Search “services” after hitting the Win+S keys together.
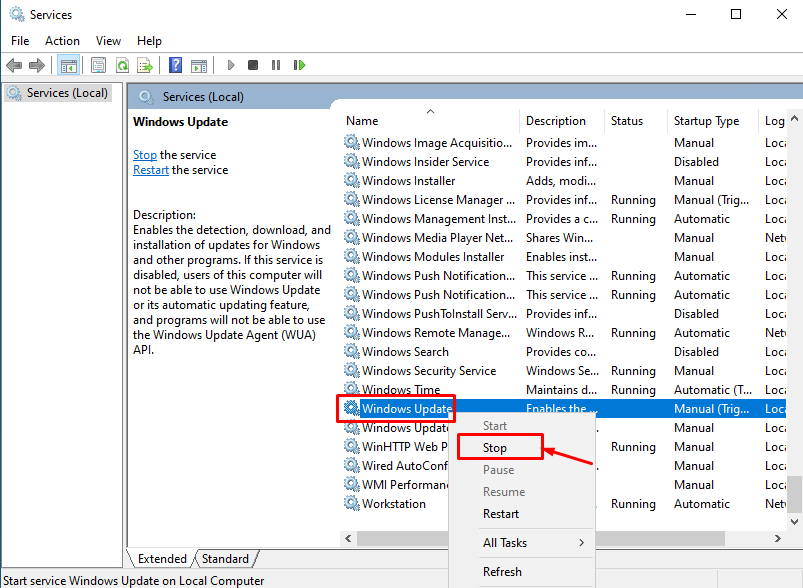
Step 2. When you are there, scroll all the way to the bottom to find the “Windows Update” service.
Step 3 . Next, right-click that service and tap “Stop“.
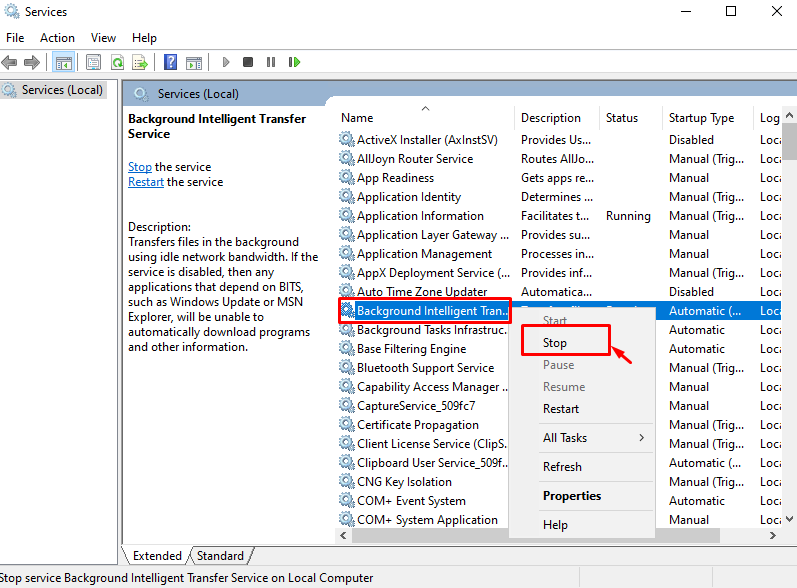
Step 4. Coming back to the main Services page, find the “Background Intelligence Transfer Service“.
Step 5. Rigt-click that service and click “Stop” to halt that as well.
After halting these services, quit the Services page.
Step 6. Now, hit the Windows+R buttons together.
Step7. Later, type this and hit Enter.
%windir%
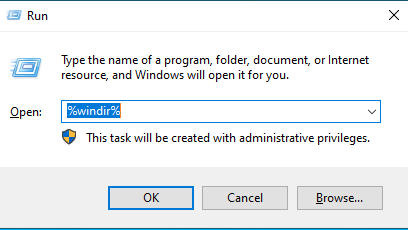
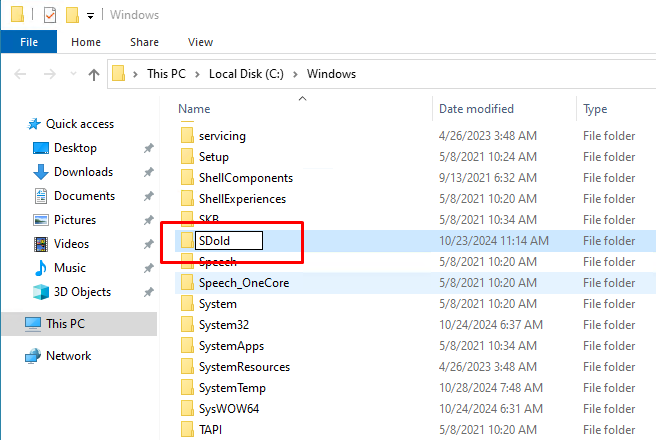
Step 8. This will take you to the Windows directory. Look for the “SoftwareDistribution” folder.
Step 9. Right-click that and tap the “Rename” icon from the context menu.
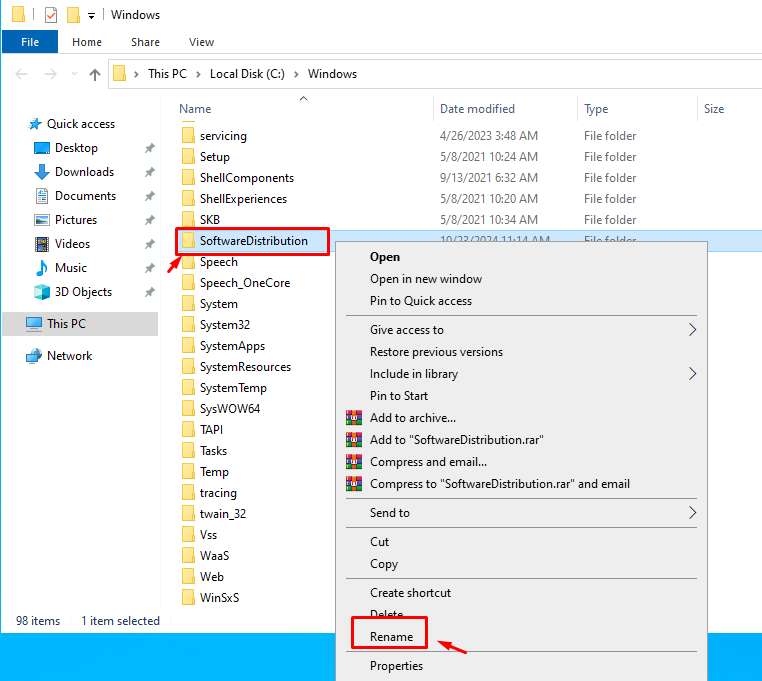
Step 10. Rename this to “SDold” and hit Enter.
Step 11. As this is a system folder, Windows will show up a cautionary message. Ignore that and click “Continue“.
This way, you have to change the name of the SoftwareDistribution folder.
After this, run the .NET Framework package installer and complete the setup process. Restart your computer after this and you are good to go!
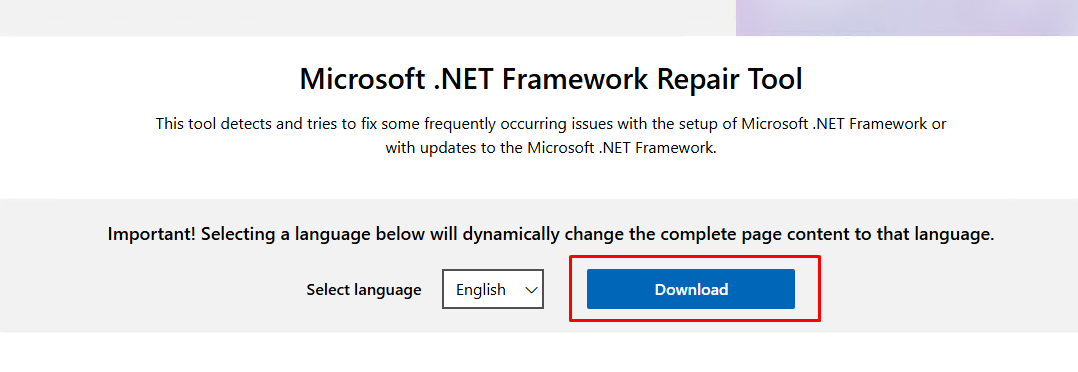
Solution 2. Run the .NET Repair tool
If you have a prior version of .NET Repair tool, download and run the repair tool to fix the problem.
Step 1. Download the .NET Framework Repair tool.
Step 2. Tap “Download” to download it.
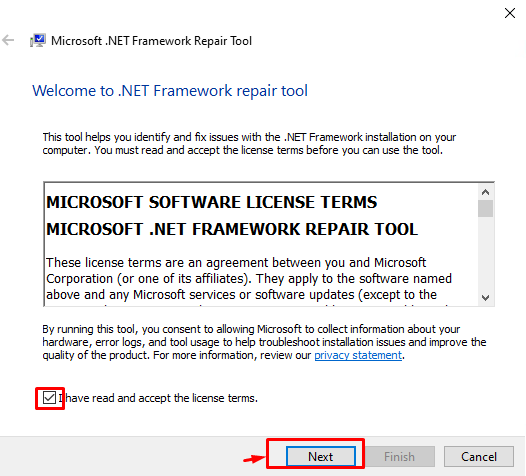
Step 3. Run this repair tool on your system.
Step 4. It will prescribe solutions for your system. So, tap “Next“.
Finally, run the original .NET Framework installer and complete the installation.
You won’t get any “HRESULT Error 0xc8000222” again in the .NET Framework setup.
Solution 3. Check Windows Update
Some of the crucial .NET Framework updates on Windows 11, 10 are delivered through the Windows updates.
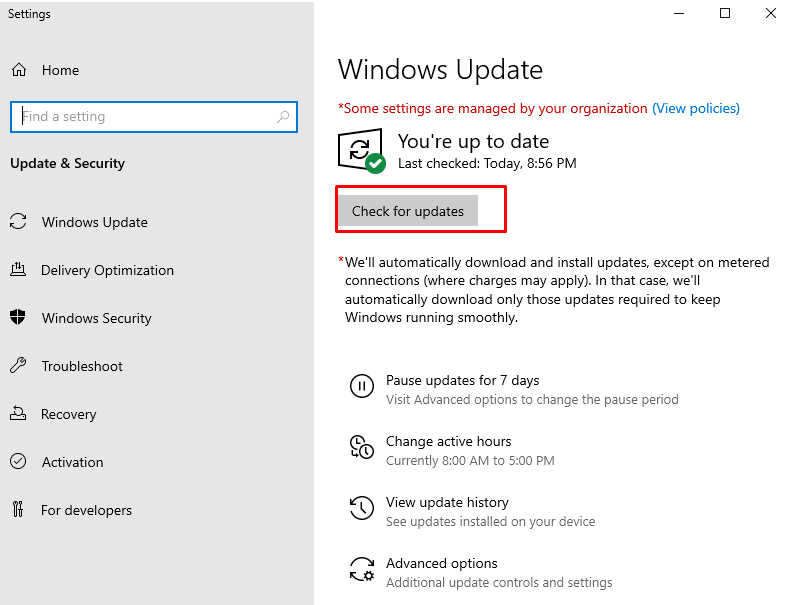
Step 1. Open the Settings page and get to the “Windows Update” tab.
Step 2. Tap “Check for updates” to check for the latest updates on your system.
Step 3. After this, tap “Restart now” to complete the system.
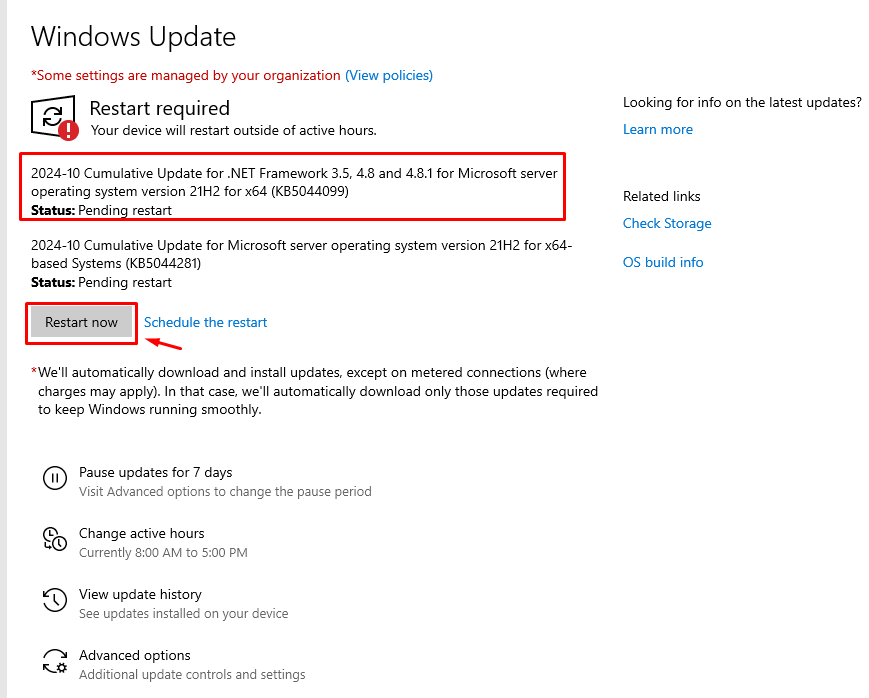
After this, try running the .NET Framework installer once more.
Solution 4. Enable the .NET Framework feature
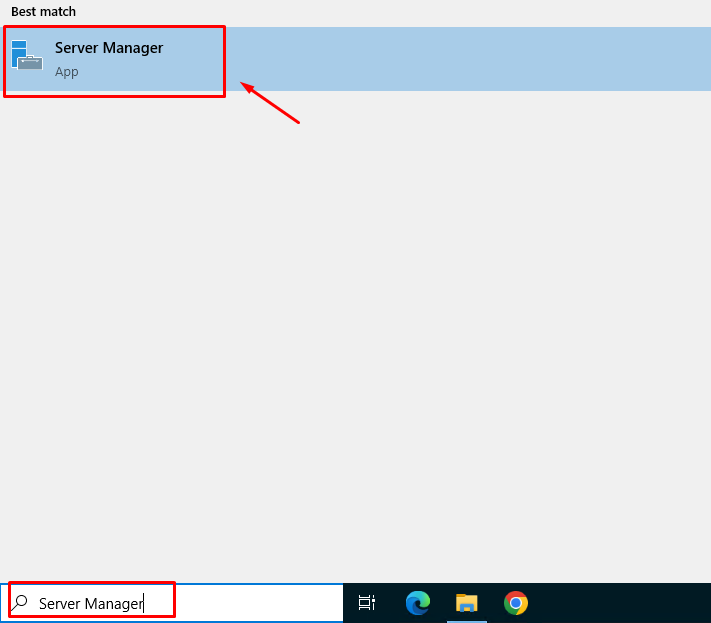
Step 1. Press the Windows key and type Server Manager
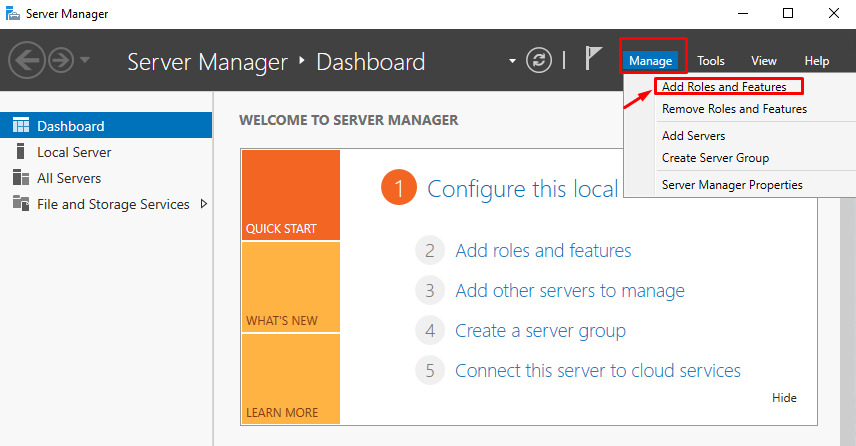
Step 2. In Manage select Add roles and Features.
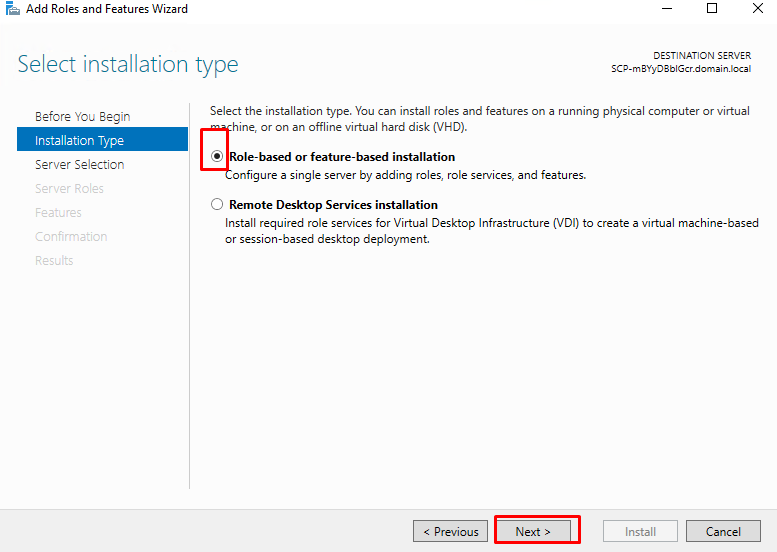
Step 3. Step forward to “Installation Type” and select “Role-based or feature-based installation”
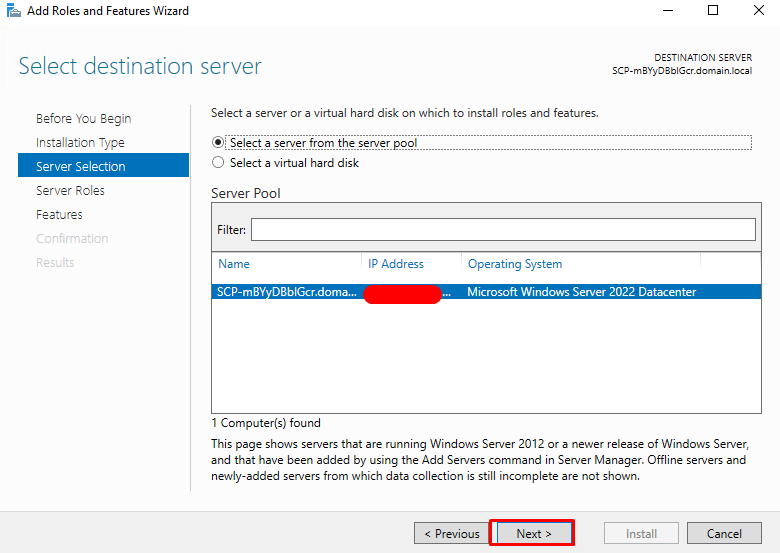
Step 4. Select the destination server for installation.
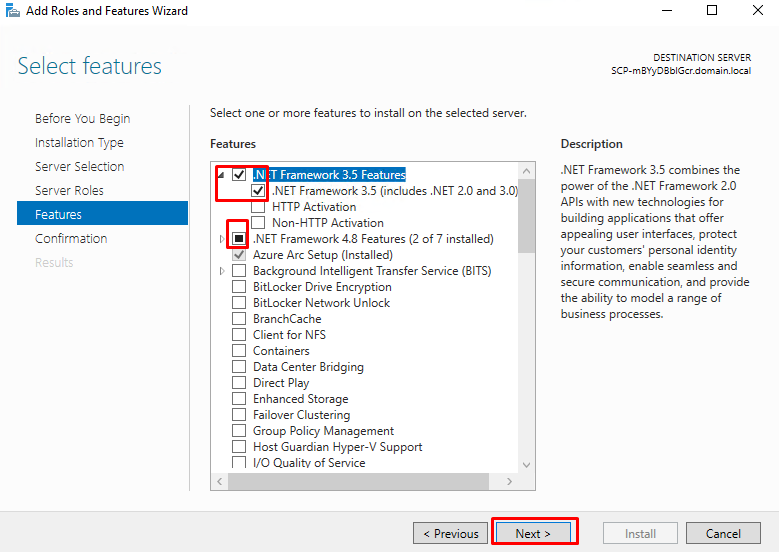
Step 5. Click on “Features”, select the sub-feature ” .NET Framework 3.5 (includes 2.0 and 3.0)” under .NET Framework 3.5 Features and .NET Framework 4.8
Step 6. Now, we get to the “Confirmation” step. Click “Install” to begin the installation.
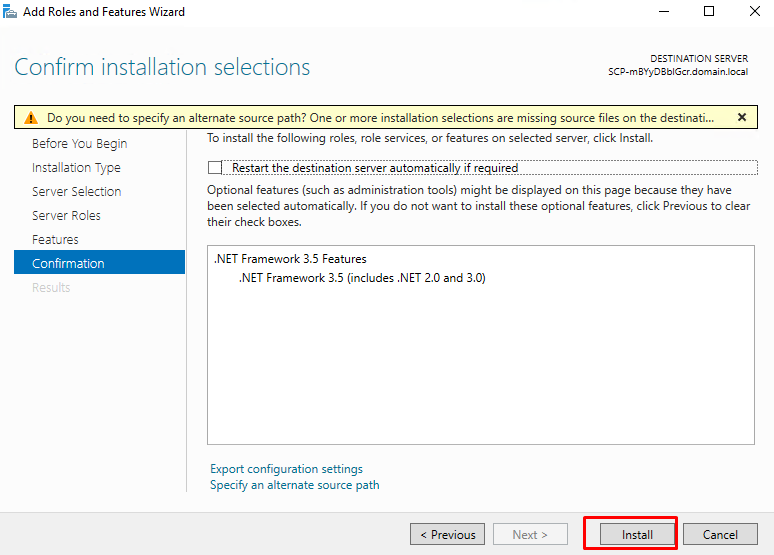
After this, Windows will automatically get this feature and install it on your computer. No need to use the standalone installer any more.
Step 7. Step Once completed, restart your Windows then try again.
Conclusion
In our case after performing the above steps, we did not see the error again.
Hopefully, this article will be helpful for you. Good luck!

Have you encountered the Windows Installer Error 0xc8000222 while trying to update your computer? This issue has been a concern to many Windows users.
If you see the “installer encountered an Error 0xC8000222” notification, you were likely trying to install specific Windows Updates or the Windows Update System Readiness Tool.
Here’s a classic user example of the Installer Error 0xc8000222:
“When I run Windows6.1-KB982018-v3-x64.msu, it immediately fails with error 0xc8000222.”
This user was trying to update a specific Windows Update – kb/982018 – before being prompted with the error message. In most cases, when this Windows Update error occurs, an error window will pop up and prompt the user with the following messages:
“Go for Windows Update.”
“Send a problem report to Windows using its error reporting service.”
“Windows could not search for new updates.”
“Installer encountered an error 0xc8000222”
Important!
The error 0xc8000222 can be result of Windows misconfiguration, junk files and system file conflicts. You can optimize your Windows performance automatically, using a quality PC Repair software. You can download it here.
Download PC Repair
Why Does the Windows Installer Error 0xc8000222 Happen?
The most common cause of the Windows Installer Error 0xc8000222 is broken or corrupt Windows system files. This causes the needed information for the proper functioning of the important Windows files, programs, and applications to be unavailable, which results in the Windows Update error code.
Other causes of the Windows Installer Error 0xc8000222 include:
- Improper system shutdown
- Hardware malfunction
- Malware or virus attack of the system
- Corrupted shared library files
- Deleted or corruption of file registry entries
- Incomplete installation or uninstallation or a program or application
- Misconfiguration of Windows Update system
- Corrupt or incomplete downloaded files cache
Note: These causes that we’ve listed here are the most common, as reported by many users. There might be other possible causes that are not listed here.
Fix the Windows Installer Error 0xc8000222
The following solutions will help you get rid of the Windows Installer Error 0xc8000222 so that you can continue with your Windows Update process.
Note: Most of these solutions will require you to use the elevated Command Prompt (or Command Prompt admin). This means you will need to open the Command Prompt as an administrator and allow the User Account Control (UAC) if prompted.
Scan Your System with a Quality Antimalware
When you see the ‘installer encountered an Error 0xc8000222’ notification, you shouldn’t rule out a virus or malware infection. This problem is known to cause many unexpected errors in the Windows operating system. Scanning your system with a quality antimalware software can help flush out the malware or viruses and restore your PC to its normal function.
Run the Windows Update Troubleshooter
When you encounter any Windows Update error, the Windows Update Troubleshooter should be your first troubleshooting solution to scan, identify, and repair damaged Windows Update components.
To run the Windows Update Troubleshooter:
- Press Win + S keys.
- On the search bar, type
troubleshooter - Click Troubleshooting.
- From the list of Troubleshoot computer problems, select Windows Update.
- Follow the on-screen instruction to let the Windows Update Troubleshoot run.
- After completion, restart your PC to save changes.
Temporarily Disable Third-Party Antivirus or Firewall
Some antivirus or antimalware software can be sensitive and cause unnecessary PC errors. Depending on your computer’s third-party antivirus program, follow the manufacturer’s instructions to disable it until you’re done with the Windows Update that you’re running.
You can also consider disabling your PC’s firewall using the following steps:
- Open Windows search, then type
control panel. - Open the Control Panel, the select System and Security.
- Click Windows Defender Firewall.
- Click on Turn Windows Defender Firewall On or Off.
- Now, select the Disable option for both the radio button.
Run System File Checker and CHKDSK
- Right-click Windows Start, then select Command Prompt (Admin).
- In the Command Prompt, type
sfc/ scannow(no quotes). Press Enter to run the command. - Again, input this command in the Command Prompt, then press Enter:
sfc /scannow /offbootdir=c:\ /offwindir=c:\windows - Scanning the system will begin automatically. Wait for the process to complete (it can take a few minutes).
If the SFC scan finds any problem, it will repair it automatically. Once done, restart the PC and check if the Windows Update error has been resolved.
Run DISM to Fix The Error 0xc8000222
If the SFC scan fails to yield positive information, try the DISM scan.
- If the SFC scan fails to yield positive information, try the DISM scan.
- Press Win + X keys > Select Command Prompt (Admin)
- Type the following commands in the cmd and press Enter after every command:
Dism /Online /Cleanup-Image /CheckHealth
Dism /Online /Cleanup-Image /ScanHealth
Dism /Online /Cleanup-Image /RestoreHealth - Let the DISM commands run to completion. It might take some time, so be patient.
- If the above commands don’t find anything to fix, type (copy and paste) the following commands in the Command Prompt again and press Enter after each command:
Dism /Image:C:\offline /Cleanup-Image /RestoreHealth /Source:c:\test\mount\windowsDism /Online /Cleanup-Image /RestoreHealth /Source:c:\test\mount\windows /LimitAccess
Once done, reboot your PC to save the changes you’ve made and see if they were able to fix the Windows Update Error 0xc8000222.
The DISM commands can also solve such errors like DISM error 0x800f081f and many Windows update issues like 0xc000012f.
Clear the Windows Update Configuration and Cache
You may need to clear the cache and rename the Windows Update service. To do so:
- Right-click on Start Menu > Command Prompt (Admin).
- If User Account Control (UAC) is enabled, select Yes.
- In the Command Prompt, type
net stop wuauserv. Then, wait for the message that indicates, “The Windows Update service was stopped successfully.” - Again, execute this command:
ren c:\windows\SoftwareDistribution softwaredistribution.oldNote: This command will rename the old Windows Update directly and cause the Windows Update service to recreate this folder. - Again, run this command:
net start wuauserv
Wait for the message that says, “The Windows Update service was started successfully”.
Perform a Clean Boot
Sometimes the third-party software in your computer can conflict with Windows essential services and cause the Windows Update error. If you perform a clean boot, you’ll get the opportunity to diagnose the issue step by step.
To conduct a clean boot in Windows 10:
- Sign in to your PC as an administrator.
- Open the search box, then type
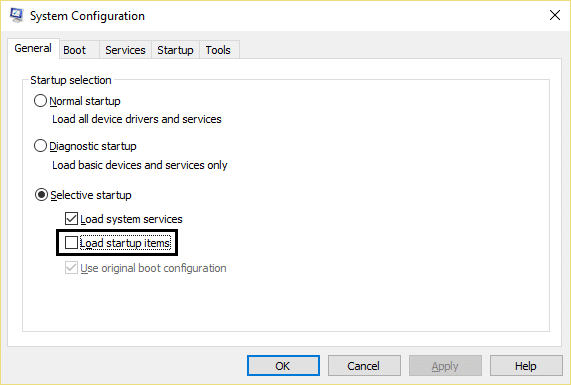
msconfig. - Click System Configuration, then go to the Services tab.
- Check the box of ‘Hide all Microsoft services’ and then click Disable all.
- Move to the Startup tab in the System Configuration > then select Open Task Manager.
- In the Task Manager, go to Startup.
- For each startup item in the list, select the item and then select Disable.
- Once you’ve disabled all the tasks, close the Task Manager.
- Now, still in the System Configuration Window, go to the Startup tab and select OK.
Now, try again to conduct the Windows Update and see if it works without the error.
- IT
- Cancel
При установке обновлений Windows возникает ошибка 0xc8000222.
Как и у большинства проблем и у этой есть решение.
1. Запускаем Командную строку (cmd) от имени администратора
2. Останавливаем службу обновлений Windows:
net stop WuAuServ3. Открываем C:\Windows (%windir%) и ищем папку «SoftwareDistribution». Переименовываем её в SD.old
4. Снова запускаем службу обновлений Windows:
net start WuAuServ5. Теперь снова запускаем установку обновления.
Вот такое вот простое решение.
Так же можно воспользоваться средством устранения неполадок Microsoft FixIt для сброса параметров центра обновления. В интернетах говорят, что помогает. Сам не пробовал 
Взято с
https://www.it-35.ru/windows/102-oshibka-pri-ustanovke-obnovleniy-0xc8000222.html
Have you ever met with the error hresult 0xc8000222 in net framework installation (as is shown in the image below)? If your answer is yes, then please go on reading this post.
It will deal with how to fix error hresult 0xc8000222 in net framework installation. There are mainly 2 methods to solve this problem.

- Method 1: Fix Error hresult 0xc8000222 by running command prompt
- Method 2: Fix Error hresult 0xc8000222 by installing SP1
Method 1: Fix Error hresult 0xc8000222 by running command prompt
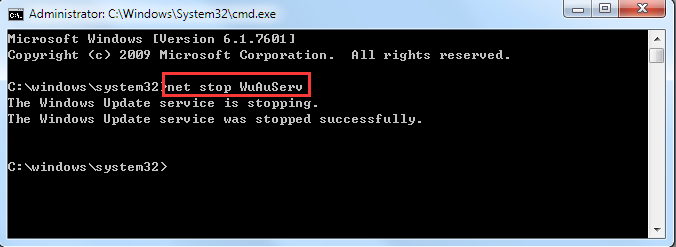
Step 1. Run command prompt as administrator, input net stop WuAuServ, then press Enter.
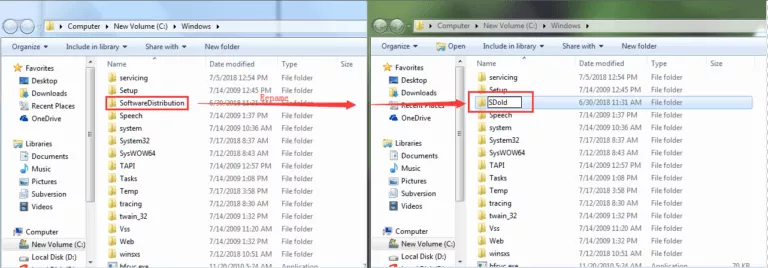
Step 2. Click Start button and input %windir% in the search box. In the search results, click the folder windows to open it. Then rename the folder SoftwareDistribution as SDold.
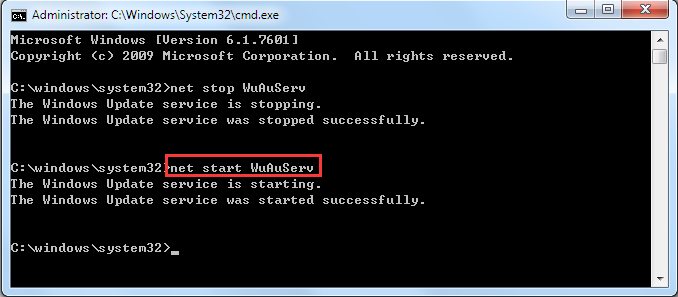
Step 3. Open cmd again and input net start WuAuServ.
Step 4. Reinstall net framework.
Method 2: Fix Error hresult 0xc8000222 by installing SP1
If this method doesn’t work for you and the error hresult 0xc8000222 in net framework installation still exists, then it is because that your Windows 7 computer has no SP1. What you need to do is to add SP1 to your computer. Here are the steps:
Step 1. Go to the Windows 7 Service Pack 1 download page on the Microsoft website and download SP1.

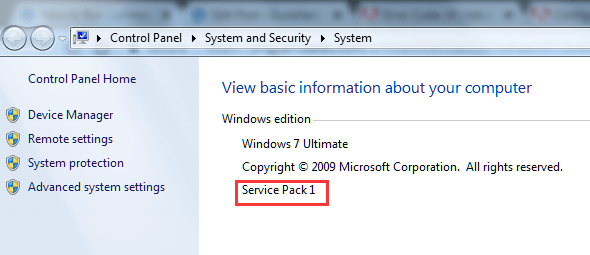
Step 2. Install SP1 according to the guide. After it is successfully installed, you can check Control Panel\System and Security\System to see if SP1 is on your computer, as the following image shows.
Step 3. Reinstall net framework.
You may also be interested in:
- How to Make a Windows 10/8/7 Repair/Recovery Disk with USB Flash Disk
- Boot a Virtual Machine from USB/CD/DVD on VMware Workstation
- Change User to Administrator in Windows 10 without Admin Password