
Все способы:
- Удаляем подключение Wi-Fi на Windows 7
- Способ 1: «Центр управления сетями и общим доступом»
- Способ 2: «Командная строка»
- Удаление сети не исправило ошибку «Не удалось подключиться…»
- Вопросы и ответы: 1
Нередко может приключиться такая неприятность – ПК или ноутбук отказываются подключаться к беспроводной сети несмотря на все манипуляции пользователя. В такой ситуации следует удалить сбойное подключение, о чём и пойдёт речь далее.
Удаляем подключение Wi-Fi на Windows 7
Удаление беспроводной сети на Виндовс 7 можно проделать двумя способами – через «Центр управления сетями» или с помощью «Командной строки». Последний вариант – единственное доступное решение для пользователей Windows 7 Starter Edition.
Способ 1: «Центр управления сетями и общим доступом»
Удаление сети Wi-Fi через управление подключениями происходит следующим образом:
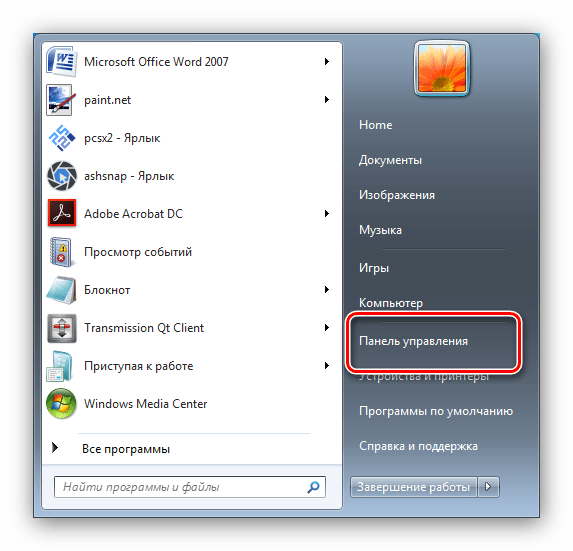
- Откройте «Панель управления» – проще всего сделать это с помощью «Пуск».
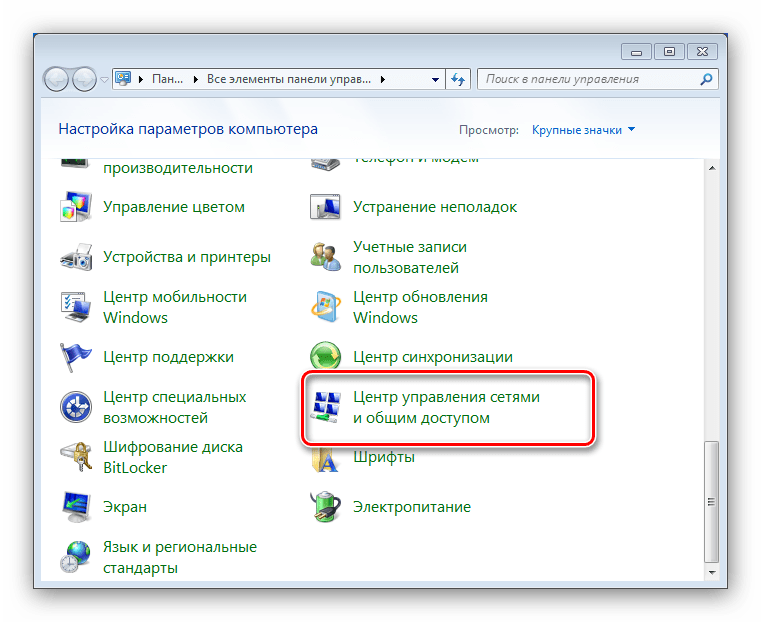
- Среди представленных элементов найдите «Центр управления сетями и общим доступом» и заходите туда.
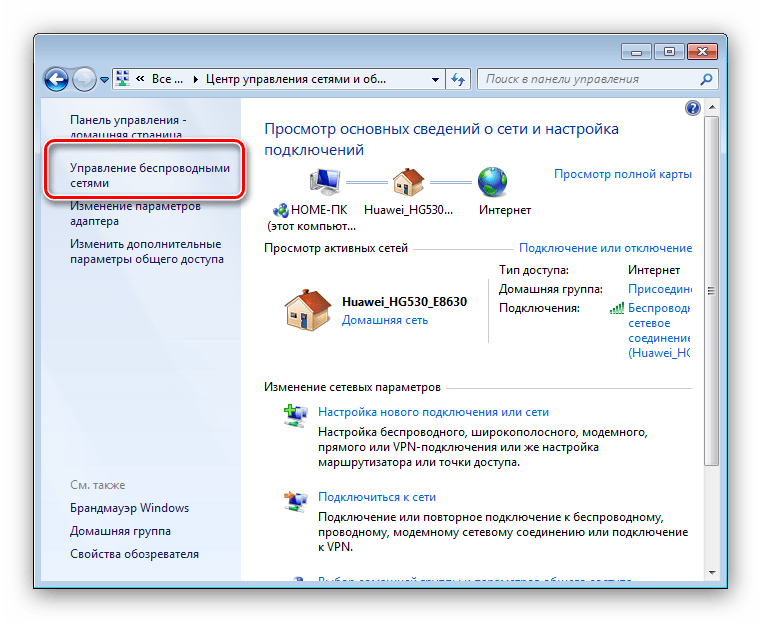
- В меню слева находится ссылка «Управление беспроводными сетями» – перейдите по ней.
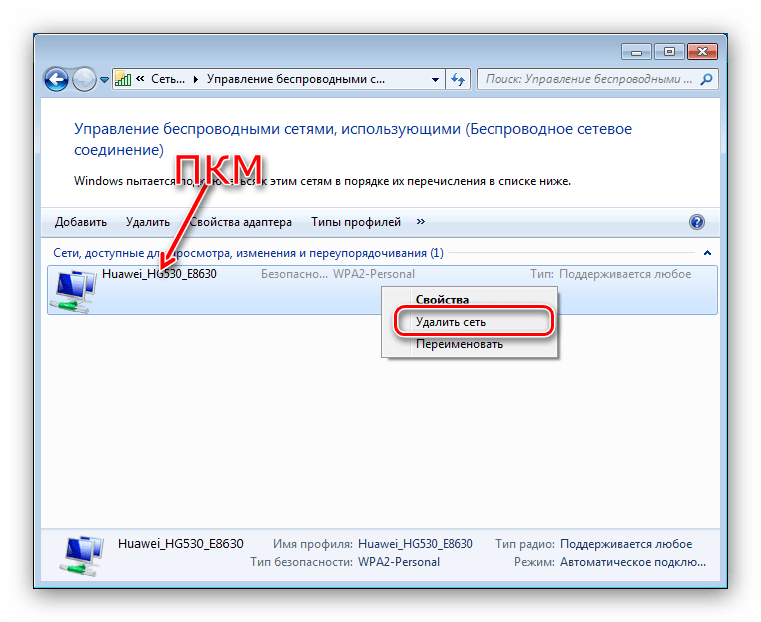
- Появится список имеющихся подключений. Отыщите то, которое желаете удалить, и щёлкните по нему ПКМ. В контекстном меню выберите вариант «Удалить сеть».

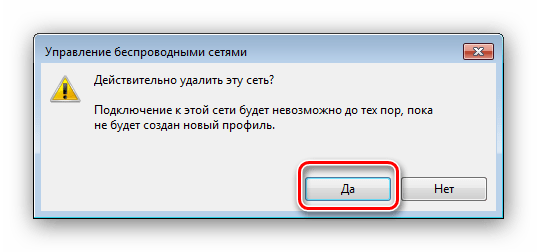
Подтвердите действие, нажав «Да» в окошке с предупреждением.
Готово – сеть забыта.
Способ 2: «Командная строка»
Интерфейс использования команд также способен решить нашу сегодняшнюю задачу.
- Вызовите требуемый системный элемент.
Подробнее: Как открыть «Командную строку» на Windows 7
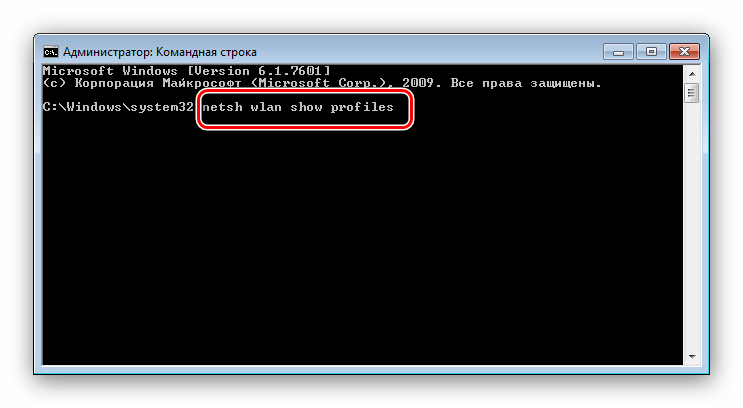
- Введите команду
netsh wlan show profiles, после чего нажимайте Enter.
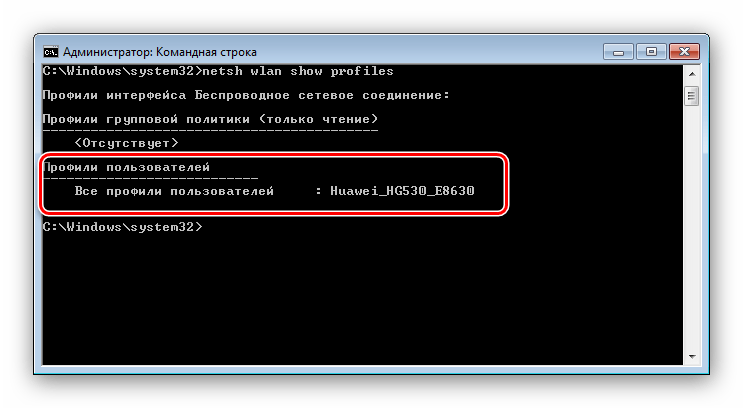
В категории «Профили пользователей» представлен список подключений — найдите среди них нужное.
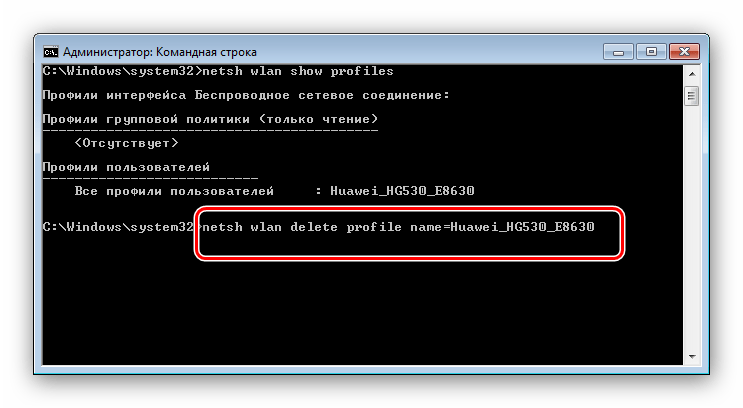
- Далее напечатайте команду по такой схеме:
netsh wlan delete profile name=*соединение, которое хотите забыть*
Не забудьте подтвердить операцию клавишей Enter.
- Закрывайте «Командную строку» – сеть успешно удалена из списка.
Если к забытой сети понадобится подключиться снова, отыщите в системном трее значок интернета и кликните по нему. Затем выберите в списке нужное соединение и щёлкните по кнопке «Подключение».
Удаление сети не исправило ошибку «Не удалось подключиться…»
Причина неполадки чаще всего заключается в несовпадении имеющегося имени подключения и профиля, который сохранён в Виндовс. Решением проблемы будет смена SSID подключения в веб-интерфейсе роутера. О том, как это делается, посвящён отдельный раздел в статьях о настройке маршрутизаторов.
Урок: Настраиваем роутеры ASUS, D-Link, TP-Link, Zyxel, Tenda, Netgear
Кроме того, виновником подобного поведения может быть включённый режим WPS на роутере. Способ отключения этой технологии представлен в общей статье о ВПС.
Подробнее: Что такое WPS
На этом завершаем руководство по удалению беспроводных подключений в Windows 7. Как видим, проделать эту процедуру можно даже без специфических навыков.
Наша группа в TelegramПолезные советы и помощь
Are you tired of your Windows 7 device constantly connecting to the same WiFi network, only to find out that it’s slow, unstable, or even worse, infected with malware? Do you want to disconnect from a WiFi network and start fresh, but don’t know how? You’re in luck! In this comprehensive guide, we’ll show you the step-by-step process on how to forget WiFi on Windows 7, giving you the freedom to connect to new networks or start over from scratch.
Why Forget a WiFi Network?
Before we dive into the process, let’s explore why forgetting a WiFi network might be necessary. Here are a few scenarios:
- Slow WiFi speeds: You’ve noticed that your WiFi connection has become sluggish, and you suspect it’s due to the network you’re connected to. Forgetting the network allows you to connect to a faster one.
- Security concerns: You’ve inadvertently connected to a public WiFi network that’s unsecured or infected with malware. Forgetting the network ensures you don’t accidentally reconnect and put your device at risk.
- Network changes: You’ve changed your router or Internet Service Provider (ISP), and you need to forget the old network to connect to the new one.
- Device troubleshooting: You’re experiencing connectivity issues with your device, and forgetting the WiFi network is part of the troubleshooting process.
Now that we’ve established the reasons why you might want to forget a WiFi network, let’s get started with the process.
Method 1: Forget WiFi Network through the WiFi Icon
This is the most straightforward method:
- Click on the WiFi icon in the system tray, usually located in the bottom right corner of the screen.
- Click on the network you want to forget from the list of available networks.
- Right-click on the network and select “Forget Network” from the context menu.
- Click “Yes” to confirm that you want to forget the network.
Alternatively, you can also follow these steps:
- Click on the WiFi icon in the system tray.
- Click on “Open Network and Sharing Center” at the top of the pop-up window.
- Click on “Manage wireless networks” on the left side of the window.
- Select the network you want to forget from the list of wireless networks.
- Click on the “Remove” button.
Method 2: Forget WiFi Network through the Device Manager
If the above method doesn’t work for you, you can try forgetting the WiFi network through the Device Manager:
- Press the Windows key + X and select Device Manager from the menu.
- In the Device Manager, expand the “Network Adapters” section.
- Right-click on the WiFi adapter (usually labeled as “Wireless Network Connection” or “WiFi”) and select “Properties” from the context menu.
- In the Properties window, uncheck the box next to “Connect to this network automatically” under the “Connection” tab.
- Click “OK” to save the changes.
Method 3: Forget WiFi Network through the Command Prompt
If you’re comfortable using the Command Prompt, you can use the following command to forget a WiFi network:
- Press the Windows key + R to open the Run dialog box.
- Type “cmd” and press Enter to open the Command Prompt.
- Type the following command and press Enter:
netsh wlan delete profile name="NETWORK_NAME"
Replace “NETWORK_NAME” with the actual name of the WiFi network you want to forget.
Troubleshooting Common Issues
While forgetting a WiFi network is a relatively straightforward process, you might encounter some issues along the way. Here are some common problems and their solutions:
Issue: Forget Network Option is Greyed Out
If the “Forget Network” option is greyed out, it’s likely because you’re currently connected to the network. Try disconnecting from the network and then attempting to forget it.
Issue: Network is Still Remembered After Forgetting
If you’ve forgotten a network, but it’s still appearing in your list of available networks, try restarting your device. This should clear out any cached network information.
Issue: Can’t Connect to New Network After Forgetting
If you’re having trouble connecting to a new network after forgetting an old one, ensure that your WiFi adapter is enabled and functioning properly. You can do this by checking the Device Manager or restarting your device.
| Issue | Solution |
|---|---|
| Forget Network option is greyed out | Disconnect from the network and try again |
| Network is still remembered after forgetting | Restart your device |
| Can’t connect to new network after forgetting | Ensure WiFi adapter is enabled and functioning properly |
Conclusion
Forgetting a WiFi network on Windows 7 is a simple process that can help you disconnect from a slow, insecure, or problematic network. By following the steps outlined in this guide, you should be able to forget a WiFi network and start fresh. Remember to troubleshoot any common issues that may arise, and don’t hesitate to reach out if you need further assistance. With a little practice, you’ll be a pro at forgetting WiFi networks in no time!
Why do I need to forget WiFi on my Windows 7 device?
Forgetting WiFi on your Windows 7 device can be helpful in various situations. For instance, if you’re experiencing connectivity issues with a specific network, forgetting the WiFi network can force your device to re-establish a fresh connection, which might resolve the problem. Additionally, if you’ve changed your WiFi password, forgetting the network will allow you to re-enter the new credentials.
By forgetting a WiFi network, you’re essentially removing the network’s profile from your device’s memory. This can also be useful if you’ve been using a public WiFi network and want to remove it from your device’s list of remembered networks for security reasons. Overall, forgetting WiFi on your Windows 7 device can help you troubleshoot connectivity issues, update network credentials, and maintain network security.
Will forgetting WiFi delete my internet history?
No, forgetting WiFi on your Windows 7 device will not delete your internet history. The process of forgetting a WiFi network only removes the network’s profile from your device’s memory, which includes the network’s name, password, and other connection settings. Your internet history, including your browsing history, cookies, and saved login credentials, will remain intact.
To delete your internet history, you’ll need to use your web browser’s settings or a third-party cleaning tool. Forgetting WiFi is a separate process that only affects the WiFi network connections on your device, leaving your internet history and other data untouched.
Can I forget WiFi on other versions of Windows?
Yes, the process of forgetting WiFi is not unique to Windows 7. You can forget WiFi on other versions of Windows, including Windows 10, Windows 8.1, and Windows XP. The steps to forget WiFi might vary slightly depending on the Windows version, but the general idea is the same: to remove the WiFi network’s profile from your device’s memory.
If you’re using a different version of Windows, you can search for instructions specific to your operating system. However, the steps outlined in this article are specific to Windows 7, so be sure to follow the correct instructions for your device.
Will forgetting WiFi disconnect me from the internet?
Yes, forgetting WiFi will disconnect you from the WiFi network you’re currently connected to. When you forget a WiFi network, your device will immediately disconnect from that network, and you’ll no longer be able to access the internet through that connection. If you want to reconnect to the same network, you’ll need to re-select it from the list of available networks and re-enter the password if prompted.
However, if you have other WiFi networks or internet connections available, such as a wired Ethernet connection or a mobile hotspot, you can switch to those connections to maintain internet access.
Can I forget WiFi on my mobile device?
Yes, you can forget WiFi on your mobile device, including smartphones and tablets. The process of forgetting WiFi on a mobile device is similar to doing so on a Windows device. You’ll need to go to your device’s WiFi settings, find the network you want to forget, and select the “forget network” or “remove network” option.
The steps to forget WiFi on a mobile device may vary depending on the device’s operating system, such as Android or iOS. You can search for instructions specific to your device’s operating system to learn how to forget WiFi.
Will forgetting WiFi affect my other devices?
No, forgetting WiFi on one device will not affect your other devices. The process of forgetting WiFi is specific to the device you’re using, and it only removes the WiFi network’s profile from that device’s memory. Your other devices will still remember the WiFi network and can continue to connect to it as usual.
This means that if you forget a WiFi network on your Windows 7 device, your other devices, such as your laptop or smartphone, will still be able to connect to that network unless you also forget the network on those devices.
Can I recover a forgotten WiFi network?
No, once you’ve forgotten a WiFi network, it’s permanently removed from your device’s memory, and you cannot recover it. However, if you remember the network’s name and password, you can re-add it to your device by selecting it from the list of available networks and re-entering the password.
If you’ve forgotten the network’s password, you may need to reset the password on your router or access point, depending on the specific situation. Remember to note down the network’s password in a secure location to avoid losing access to the network in the future.
Connecting to the internet has become a part of daily life, and for many of us using a Windows 7 operating system, the efficiency of managing our Wi-Fi networks plays a crucial role. While it’s easy to connect to various networks, you may sometimes need to remove or forget a Wi-Fi network. This is especially true for avoiding unwanted connections or cleaning up your network settings. In this comprehensive guide, we’ll walk you through the step-by-step process of forgetting a Wi-Fi network in Windows 7, along with additional tips and tricks to manage your connections effectively.
Understanding Why You Might Want to Forget a Wi-Fi Network
Before we dive into the specific steps for forgetting a Wi-Fi connection, it’s important to understand the reasons you might need to do this:
- Changing Internet Service Providers: If you’ve switched providers, you may not want to keep the old network credentials on your computer.
- Security Concerns: If you suspect your network may have been compromised, forgetting the network can prevent unauthorized access.
Whether you are troubleshooting connectivity issues or managing your Wi-Fi settings for safety, learning how to forget a Wi-Fi network is essential.
Step-by-Step Guide to Forget a Wi-Fi Network in Windows 7
Now, let’s explore how you can forget a Wi-Fi network in Windows 7 in a detailed and easy-to-follow manner.
Step 1: Access the Network and Sharing Center
To begin the process, you need to access the Network and Sharing Center. Follow these steps:
- Click on the Start menu at the bottom left of your screen.
- From the menu, select Control Panel.
- In the Control Panel, click on Network and Internet.
- Next, click on Network and Sharing Center.
Step 2: Manage Wireless Networks
After reaching the Network and Sharing Center, find the option to manage your wireless networks. Follow these steps:
- On the left-hand side of the Network and Sharing Center, click on Manage wireless networks.
- This will open a window displaying a list of all wireless networks you’ve connected to previously.
Step 3: Selecting the Wi-Fi Network to Forget
In this step, identify the specific network you wish to forget:
- In the Manage Wireless Networks window, you’ll see a list of networks. Look for the one you wish to forget.
- Once identified, right-click on the network name.
Step 4: Forgetting the Network
Now that you have selected the network, it’s time to forget it, allowing you to remove saved credentials:
- In the context menu that appears upon right-clicking, select the option Remove network.
- Confirm your choice when prompted to ensure that the network is removed from your list of known networks.
Step 5: Verification
After removing the network, it’s essential to verify that it has been successfully forgotten:
- Look back at the Manage Wireless Networks window.
- Ensure that the network you removed is no longer listed. If it is absent, you have successfully forgotten the Wi-Fi network.
Additional Network Management Tips
Having successfully forgotten a Wi-Fi network, you may want to apply better practices in managing your connections moving forward. Here are some tips to consider:
1. Prioritize Your Connections
You may have several networks saved, but not all will be equally important. Windows 7 allows you to prioritize certain networks over others. To ensure your computer connects to your preferred network first:
- Return to the Manage Wireless Networks section.
- Right-click on the network you wish to prioritize and select Move up until it is at the desired position.
2. Update Network Drivers Regularly
To maintain optimal performance and security of your Wi-Fi connection, it is crucial to keep your network drivers updated. Here’s how:
- Open the Device Manager from the Start menu.
- Locate the Network adapters section and expand it.
- Right-click on your Wi-Fi adapter and select Update Driver Software.
3. Regularly Audit Your Connections
Over time, your list of saved Wi-Fi networks can grow. It’s a good idea to conduct a regular audit of your connections. Unusual networks that you do not recognize should be forgotten immediately.
Troubleshooting Common Wi-Fi Issues in Windows 7
Despite best efforts in managing your Wi-Fi networks, you may encounter connectivity issues. Below are common problems and their troubleshooting steps:
1. Connection Drops
If your connection drops frequently, consider the following:
- Check your router’s signal strength and position.
- Restart your router and your computer.
2. Limited Connectivity
Experiencing limited connectivity may relate to incorrect IP settings:
- Go to the Network and Sharing Center and click on Change adapter settings.
- Right-click on your Wi-Fi connection, select Properties, and under Internet Protocol Version 4 (TCP/IPv4), ensure that it is set to obtain an IP address automatically.
3. Unable to Connect
If you’ve forgotten a network but struggle to reconnect:
- Re-enter the correct Wi-Fi password.
- Make sure the network is operational by checking other devices.
Conclusion
Managing Wi-Fi connections effectively is crucial for optimizing your network experience, particularly if you are using Windows 7. By following the steps outlined to forget a Wi-Fi network, you are taking proactive measures to enhance your device’s performance and security. Additionally, implementing the management tips and addressing common connectivity issues can significantly improve your overall online experience.
As technology continues to evolve, so must our interaction with it. By mastering these fundamental skills, you’re well on your way to becoming a savvy user of Windows 7’s networking capabilities. Whether you are tidying up your connections, ensuring better security, or troubleshooting issues, these practices will serve you well. Take control of your Wi-Fi and enjoy a seamless internet experience today!
What does it mean to “forget” a Wi-Fi network in Windows 7?
Forgetting a Wi-Fi network in Windows 7 means that your computer will no longer automatically connect to that network. When you forget a network, any saved settings, like the password and connection preferences, are removed from your device. This is particularly useful if you no longer want to connect to that network or if you’re troubleshooting connectivity issues.
By forgetting a network, you can also prevent your device from attempting to connect to it in the future without your permission. This can help improve your connection experience by allowing you to reset your preferences or remove networks that you no longer use or trust.
To forget a Wi-Fi network in Windows 7, start by clicking on the network icon in the system tray located at the bottom right corner of your screen. This will open a list of available wireless networks. Next, go to “Open Network and Sharing Center,” and select “Manage Wireless Networks.”
In the “Manage Wireless Networks” window, you will see a list of all the networks your computer is connected to. Right-click on the network you wish to forget and select “Remove Network.” Confirm your choice, and the network will be removed from your saved connections.
Will forgetting a Wi-Fi network delete my saved passwords?
Yes, when you forget a Wi-Fi network in Windows 7, all saved passwords associated with that network will also be deleted. This means that if you decide to reconnect to that network in the future, you will need to re-enter the password. If you think you might want to reconnect to the network later, make sure you have the password handy before forgetting the network.
This feature is beneficial in situations where you might be using a shared or public network. Forgetting a network can enhance your security by ensuring that your device does not automatically connect to potentially unsecured or old connections without your knowledge.
Can I recover a forgotten Wi-Fi network?
Once you have forgotten a Wi-Fi network, the saved settings and password are no longer retrievable through the standard Windows interface. However, if you have access to the router or network administrator, you can obtain the Wi-Fi password directly from them. This is especially important if you need to reconnect to the network after forgetting it.
Alternatively, if you are using a shared password manager or if the password was previously noted down, you can refer to those methods to retrieve the necessary information. Keep in mind that it’s good practice to maintain a record of your important passwords for future reference.
What should I do if I can’t forget a Wi-Fi network?
If you’re having trouble forgetting a Wi-Fi network in Windows 7, ensure that you are logged in with an account that has administrative privileges. Sometimes, permissions issues can prevent users from making changes to network settings. Try accessing the “Manage Wireless Networks” section again to confirm your access rights.
If you still cannot forget the network, consider restarting your computer and attempting the process again. If the issue persists, it may be beneficial to check for any updates to your network drivers or Windows itself, as outdated software can sometimes cause unusual behavior regarding connection settings.
Is it possible to manage multiple Wi-Fi networks in Windows 7?
Yes, Windows 7 allows you to manage multiple Wi-Fi networks efficiently. By going to the “Manage Wireless Networks” section within the “Network and Sharing Center,” you can view and modify all the networks your computer remembers. You can prioritize a network by clicking on it and using the options available, such as moving it up or down in the list.
Managing multiple networks is particularly useful when you frequently switch between different connections, such as home, work, or public Wi-Fi. By organizing and prioritizing these networks, you can ensure that your computer connects to the preferred network automatically, enhancing your overall connectivity experience.
Will forgetting a network affect my other devices connected to the same Wi-Fi?
Forgetting a Wi-Fi network on your Windows 7 device will only affect that particular device. Any other devices that are connected to the same Wi-Fi network will remain unaffected. They will continue to function normally, and you’ll still be able to connect to the network from those devices as long as you don’t forget the network on them as well.
This means you can make changes on one device without worrying that it will disrupt your connectivity on other devices. It’s a good way to manage connections on a single computer while keeping your other devices connected to the same Wi-Fi network with their own individual settings.
Remove or forget wireless network profile in Windows 7
August 21, 2018
Networking
If you change router, or modify wireless settings on the router, the wireless network profile that saved on Windows may be outdated and you may not be able to connect to the network and receive this message:
The settings saved on this computer for the
network do not match the requirements of
the network.
To fix this problem, you can try to remove or forget the current wireless network profile.
In this article, I will show 2 methods to remove or forget a wireless network profile in Windows 7.
- Forget wireless network profile from Network menu
- Remove wireless network profile from command prompt
Watch on YouTube
Step-by-step
Forget wireless network profile from Network menu
- On Windows desktop, right-click the wireless icon at bottom right and select Open Network and Sharing Center.
- Select Manage wireless networks on the left menu.
- You will see list of wireless network profile. Select a wireless network and click Remove to delete its profile.
- Click Yes to confirm.
- Try to connect to the network again. You need to re-enter wireless password. Now you should be able to connect to the wireless network.
Remove wireless network profile from command prompt
- On Windows desktop, open command prompt as administrator by:
- Click Start icon at bottom left
- Type cmd in search field
- Right-click the cmd program
- Select Run as administrator
- Click Yes.
- On Command prompt window, type this command to list wireless network profiles that currently saved on Windows.
- To remove a profile, type this command and replace profile name (in double quotes) with one that you want to remove.
netsh wlan delete profile name="Linglom-AP"
- Then, you can try to connect to the network again. You need to re-enter wireless password. Now you should be able to connect to the wireless network.
При подключении какого-либо устройства к беспроводной сети, оно по умолчанию сохраняет параметры этой сети (SSID, тип шифрования, пароль) и в дальнейшем использует эти настройки для автоматического подключения к Wi-Fi. В некоторых случаях это может вызвать проблемы: например, если пароль был изменен в параметрах роутера, то из-за несоответствия сохраненных и измененных данных вы можете получить «Ошибка аутентификации», «Параметры сети, сохраненные на этом компьютере, не соответствуют требованиям этой сети» и подобные ошибки.
Возможное решение — забыть сеть Wi-Fi (т.е. удалить сохраненные для нее данные с устройства) и подключиться к этой сети заново, о чем и пойдет речь в данной инструкции. В инструкции представлены способы для Windows (в том числе с помощью командной строки), Mac OS, iOS и Android. См. также: Как узнать свой пароль на Wi-Fi, Как скрыть чужие Wi-Fi сети из списка подключений.
- Забыть Wi-Fi сеть в Windows
- На Android
- На iPhone и iPad
- В Mac OS
Как забыть сеть Wi-Fi в Windows 10 и Windows 7
Для того чтобы забыть параметры сети Wi-Fi в Windows 10 достаточно выполнить следующие простые шаги.
- Зайдите в Параметры — Сеть и Интернет — Wi-FI (или нажмите по значку подключения в области уведомлений — «Параметры сети и Интернет» — «Wi-Fi») и выберите пункт «Управление известными сетями».

- В списке сохраненных сетей выберите сеть, параметры которой нужно удалить и нажмите кнопку «Забыть».


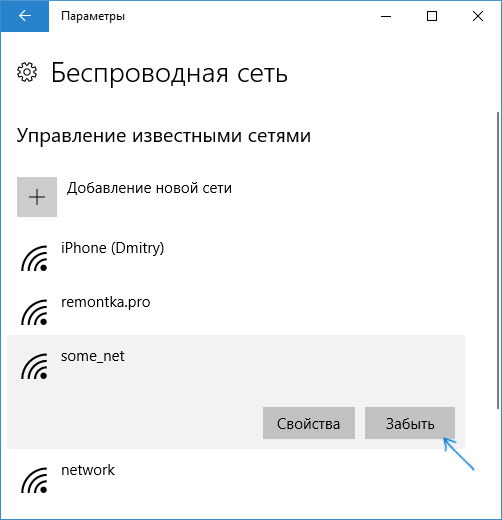
Готово, теперь при необходимости можно заново подключиться к этой сети, и вы вновь получите запрос пароля, как при первом подключении.
В Windows 7 шаги будут похожими:
- Зайдите в центр управления сетями и общим доступом (правый клик по значку соединения — нужный пункт в контекстном меню).
- В меню слева выберите «Управление беспроводными сетями».
- В списке беспроводных сетей выберите и удалите Wi-Fi сеть, которую требуется забыть.
Как забыть параметры беспроводной сети с помощью командной строки Windows
Вместо того, чтобы использовать интерфейс параметров для удаления Wi-Fi сети (который меняется от версии к версии в Windows), можно сделать то же самое с помощью командной строки.
- Запустите командную строку от имени Администратора (в Windows 10 можете начать набирать «Командная строка» в поиске на панели задач, затем нажать правой кнопкой мыши по результату и выбрать «Запустить от имени администратора», в Windows 7 использовать аналогичный способ, либо найти командную строку в стандартных программах и в контекстном меню выбрать «Запуск от имени Администратора»).
- В командной строке введите команду netsh wlan show profiles и нажмите Enter. В результате отобразятся имена сохраненных Wi-Fi сетей.
- Для того, чтобы забыть сеть, используйте команду (заменив имя сети)
netsh wlan delete profile name="имя_сети"

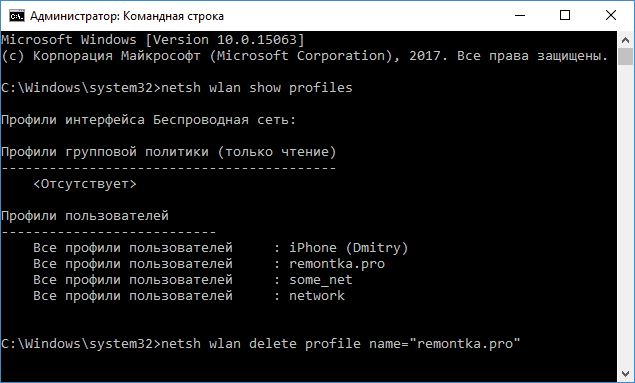
После этого можно закрыть командную строку, сохраненная сеть будет удалена.
Видео инструкция
Удаление сохраненных параметров Wi-Fi на Android
Для того, чтобы забыть сохраненную Wi-Fi сеть на Android телефоне или планшете, используйте следующие шаги (пункты меню могут слегка отличаться в различных фирменных оболочках и версиях Android, но логика действия одна и та же):
- Зайдите в Настройки — Wi-Fi.
- Если вы в текущий момент подключены к сети, которую требуется забыть, просто нажмите по ней и в открывшемся окне нажмите «Удалить».
- Если вы не подключены к удаляемой сети, откройте меню и выберите пункт «Сохраненные сети», затем нажмите по имени сети, которую нужно забыть и выберите «Удалить».
Как забыть беспроводную сеть на iPhone и iPad
Действия, необходимые для того, чтобы забыть Wi-Fi сеть на iPhone, будут следующими (примечание: удалить получится только ту сеть, которая «видна» в настоящий момент):
- Зайдите в настройки — Wi-Fi и нажмите по букве «i» справа от имени сети.
- Нажмите «Забыть эту сеть» и подтвердите удаление сохраненных параметров сети.
В Mac OS X
Для удаления сохраненных параметров Wi-Fi сети на Mac:
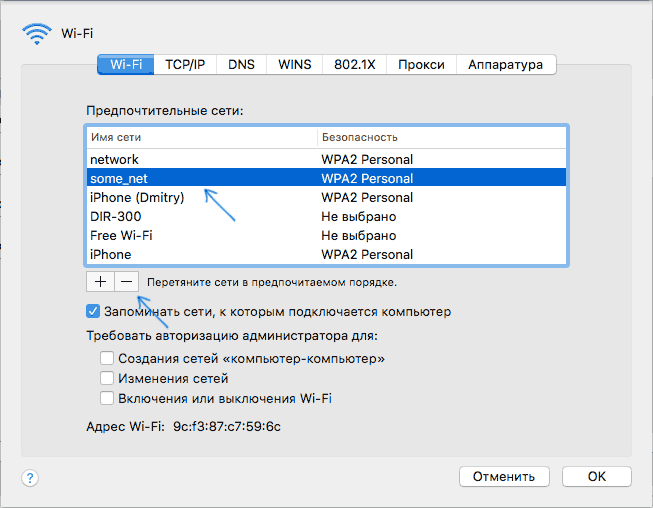
- Нажмите по значку соединения и выберите пункт «Открыть настройки сети» (или зайдите в «Системные настройки» — «Сеть»). Убедитесь, что в списке слева выбрана Wi-Fi сеть и нажмите кнопку «Дополнительно».

- Выберите сеть, которую требуется удалить и нажмите по кнопке со знаком «минус» для её удаления.


На этом всё. Если что-то не получается, задавайте вопросы в комментариях, постараюсь ответить.