
- Размер: 13.31 GB
- Категория: виндовс / windows 7
- Загрузок: 19 559
- Комментарии: 11
- Дата обновления:19.10.2012
полный обзор Windows 7 SP1 WPI USB
Год выпуска: 2012
Версия: v 30.001.12
Разработчик: Microsoft
Автор сборки: StartSoft
Платформа: 32bit+64bit
Совместимость с Windows7: полная
Язык интерфейса: только русский
Таблэтка: Не требуется
Системные требования:
*32-разрядный (x86) или 64-разрядный (x64) процессор с тактовой частотой 1,8 гигагерц (ГГц) или выше;
*1 гигабайт и более (ГБ) (для 32-разрядной системы) или 3 ГБ и более (для 64-разрядной системы) оперативной памяти (ОЗУ);
*19 гигабайт (ГБ) (для 32-разрядной системы) или 21 ГБ (для 64-разрядной системы) пространства на жестком диске;
*графическое устройство DirectX 9 с драйвером WDDM версии 1.0 или выше.
Описание:
Сборка создана на базе оригинальных образов ru_Windows7_Ultimate_SP1_x86_dvd_6677463 Final и ru_Windows7_Ultimate_SP1_x64_dvd_677391 Final .
В своем составе имеет 8 редакций Windows 7 SP1 с разными разрядностями, а так же WPI. По окончании установки все редакции выходят активированными.
Во все редакции интегрированы последние обновления с сайта производителя системы, в том числе и обновленный MS.NET FrameWork 4.
Произведены все необходимые настройки системы, отключены контроль учетных записей и Служба по совместимости программ.
Образ создан при помощи программы UltraISO и предназначен для создания загрузочного Flash накопителя.
Установленные программы в редакциях Windows 7
1.HashTab 4.0.0.2
2.HashCheck 2.1.11
3.IE9
4.DirectX(Июнь2010)
5.Visual C++ 2005-2008-2010-2012
6.SilverLight 5.1.1
7.MS.NET Framework 4 Client Profile
Программы WPI
Системные утилиты
1.AIDA64 Engineer Edition 2.60.2100 Final
2.CCleaner 3.23.1823
3.HashTab 4.0.0.2
4.HashCheck 2.1.11
5.RocketDock 1.3.5
6.RuntimePack Lite 12.5.3 x86 x64
7.Visual C++2005-2008-2010 Hybrid x86 x64
8.Visual C++ 2005-2008-2010-2012 x86 x64
9.Java SE RE 7.0 Update 9 x86 (Полуавтоматическая установка)
10.Java SE RE 7.0 Update 9 x64 (Полуавтоматическая установка)
11.DirectX (Июнь2010)
12.MS.NET Framework 4 (Без обновлений)
13.MS.NET Framework 4 SP1 x86 x64 (С обновлениями)
14.MS.NET Framework 4,5 SP1 x86 x64
15.Silverlight 5.1.1011 x86 x64
16.Unlocker 1.9.1 x86 x64
17.Revo Uninstaller Pro 2.5.9
18.Uninstall Tool 3.2.1.5285
19.Your Uninstaller!Pro 7.4.2012.5
Архиваторы
20.7-Zip 9.20
21.WinRAR 4.20 Final Rus
22.HaoZip 2.8.1 Rus
23.PowerArchiver 2012 13.2.2
24.WinZip 16.0.9715 Rus
Интернет
25.Adobe Flash Player 11.4.402.287 Final
26.Internet DownLoad Manager 6.12.22.3
27.Google Chrome 22.0.1.1289.92m (Обновляется с сайта производителя)
28.Opera 12.02 1578
29.Mozzila Firefox 16.0.1
30.Mozzila Thunderbird 16.0.1
31.The Bat!Pro 5.1.6.2
32.Radiotochka Plus 3.9
33.Skype 5.10.66.116
34.Mail.Ru Agent 6.0.5514
35.uTorrent 2.2.1
36.uTorrent 3.2.0.27886
37.ICQ 7.6.5618
38.QIP 2012 4.0.0.7221 Rus
39.FileZilla 3.5.3
Безопасность
40.AVG Internet Security 2013.0.5738 x86 (Инструкция по установке в папке BONUS)
41.AVG Internet Security 2013.0.5738 x64 (Инструкция по установке в папке BONUS)
42.Kaspersky Antivirus — YANDEX VERSION
43.Kaspersky Internet Security 2012 Final
44.Kaspersky Internet Security 2013
45.ESET Smart Security 5.2.9.12 x86
46.ESET Smart Security 5.2.9.12 x64
47.USB Disk Security 6.2.0.18
Графика
48.XnView 1.99.1 Complete
49.FastStone Image Viewer 4.6
50.FastStone Capture 7.3
51.PhotoLine 17.11. Rus x86 x64
52.CorelDraw X5 SP3 15.2.0.686
53.Adobe Illustrator CS5 15.0.0 Lite
54.Photoshop CS6 13.0 Rus
55.ACDSee Pro 5.1.137
56.ACDSee Pro Lite 6.0.169
57.GIMP 2.6.12
58.IrfanView 4.32 Plus Plugins
59.Picasa 3.9.0.136.01
60.Paint.NET 3.5.10 Final
61.Teorex Inpaint 4.7
Офисные приложения
62.ABBYY FineReader 11.0.102.536
63.Adobe Reader x10.1.2. Plus
64.PROMT 9.0 Proffesional
65.VueScan Pro 9.1.11 x86 x64
66.STDU Viewer 1.6.186
67.ICE Book reader Pro 9.0.7
68.WinDjView 2.0.1
69.WinOrganizer 4.4.1900 Business
70.Punto Switcher 3.2.7.84
Аудио и видео
71.Sony Sound Forge 10.0c 491
72.Power DVD Ultra 10.0.1516 Rus
73.Ashampo Music Studio 4.0.5.9
74.MPEG Video Wizard DVD 5.0.1.105
75.Free Studio 5.7.4.918
76.VirtualDubMod 1.5.10.3
77.Easy CD-DA Extrator 16.1.0.1
CD DVD утилиты
78.Alcohol 120% 2.0.2.3931
79.Daemon Tools Pro Advanced 5.1.0.0333
80.Ashampoo Burning Studio 2012
81.UltraISO 9.5.3.2901
82.NERO Micro 11.2.00400
83.NERO 12.0.02000 Lite
Конвертеры и Кодеки
84.FormatFactory 2.96
85.QuickTime Pro 7.22.80.56 Lite
86.K-Lite Mega Codec Pack x86
87.K-Lite Mega Codec Pack x64
88.Any DVD Converter Pro 4.5.5
89.Bigasoft Total Video Converter
90.SAM CoDec Pack 2012 BEST 4.55
Плееры
91.CyberLink PowerDVD Ultra 12.0.1905.56
92.AIMP2 2.61.583
93.AIMP3 3.10.1074
94.The KMPlayer 3.3.0.33 Rus
95.Gom Player 2.1.33.5071
96.Daum PotPlayer 1.5.34115 x86
97.Daum PotPlayer 1.5.34115 x64
98.MPC Home Cinema 1.6.4.6052 x86 x64
99.Splash Pro EX 1.12.2 Final Rus
100.VLC Media Player 1.1.11
101.Winamp 5.6.2.3189 Rus
102.Winamp 5.6.2.3199 Rus
Файловый Менеджер
103.Total Commander 8.0.1
104.Far Complete 6.0
Flash — USB
105.HP USB Disk Storage Format Tool 2.0.6
106.PeToUSB 3.0.0.7
107.WinToFlash 0.7.0026 b
108.USB Safely Remove 4.71
109.Zentimo xStorage Manager 1.6.3.1219
PDF
110.Solid Converter PDF 7.3 1541
111.PDF-xChange Viewer 2.5.201.0
112.Foxit Reader 5.4.2.0901
113.Foxit Phantom 2.2.4.0225
114.Infix PDF Editor Pro 5.22
Восстановление информации
115.R-Studio 6.1.152012
116.Recuva 1.42
117.Power Data Recovery 6.6
Оптимизация
118.Auslogic Disk Defrag 3.5.0.10
119.Defraggler 2.09.391
120.Auslogics BootSpeed 5.4.0.10
121.Glary Utilities Pro 2.49.0.1600
122.Vit Registry Fix Pro 12.3
123.WinMend Registry Cleaner 1.6.5
124.Wise Registry Cleaner 7.51 486
125.Wise Care 365 1.82.137
126.Raxco PerfectDisk Pro server 12.5.312
127.TuneUp Utilities 12.0.2120
Меню Windows 7
128.FileMenu Tools 6.3. Win Se7en
Офис
129.BusinessCards MX 4.71
130.SoftMaker Office Pro 2012
131.LibreOffice 3.5.4
132.Apache OpenOffice 3.4.1
133.MS Office 2003 SP3
134.MS Office 2007 SP3 Enterprise
135.Word+Exel Office 2010
136.Word+Exel+Powerpoint+Outlook Office 2010
137.MS Office 2010 Pro SP1 Full
Виртуальные машины
138.VirtualBox 4.1.22.8067
139.VMware Workstation 9.0.0 812388
Работа с HD
140.Acronis Dick Director 11.0.2343
141.Acronis Tru Image 2013 16.5551 Rus
142.Acronis Image PowerPack 2013 16.5551
143.Paragon Partition Manager 11.10.0.17.1
144.Hard Disk Sentinel Pro 4.10 5816
145.MiniTool Partition Wizard Sever 7.5 Rus (Ключик в папке BONUS)
Автозапуск CD-DVD
146.AutoPlay Menu Designer 4.4.156 Rus
Активация
147.Активация Windows 7
148.Активация Office 2010
Копирование — Запись
149.DVDFab 8.2.1.5
150.Nero 10.6.11800 Platinum HD
151.Nero 11.2.00400 Components
152.DVD Shrink 3.2.015
153.CDShot 3.5.0.1
154.Nero 6.6.1.5 Для Windows XP
Редакторы ресурсов
155.Restorator 2007
156.Resource Hacker 3.6.0.92
157.PE Explorer 1.99 R6
158.WinHex 16.1
Игры
159.Kasparov Chessmate
160.Алмазные бойцы
161.Длинные Нарды 2.0.59
162.Карточная игра в дурака 7.1.1
163.Миллионер 3.9.0.3
164.Морской бой
165.Убойный Космос 2.0
Драйверы
166.SPTD 1.81 x86 x64
167.FinePrint 7.05 Rus
Редакторы Текста
168.Notepad++ 6.1.8
169.EmEditor Pro 11.9.90 RC
Процедура лечения
После окончания установки системы и загрузки рабочего стола через 22 секунды произойдет автоматическая перезагрузка системы, после чего система становится активированной.
Контрольные суммы
CRC-32: e6043c4c
MD4: 5860e298740b172021bb6bf79658557d
MD5: 6c149b705bd73df655f6c158fc93d77e
SHA-1: 99548eb6334bda54ff836f33164b7753e2e8c2af
Специально для сайта Torrent-Windows.net
Скриншоты:
с нашего сервера
На этой странице доступно для скачивания Windows 7 SP1 WPI USB FLASH x86 x64 v.30.001.12 By StartSoft (2012) Русский
оставайтесь на раздаче, оставляйте комментарии и помогите другим оценить качество сборки windows и программы
На чтение 2 мин Просмотров 1к. Опубликовано
Создание загрузочной флешки Windows 7/8.1 и Server 2008R2/2012R2
Удивительное – рядом! Хоть данная заметка не сильно поможет ИТ специалистам в их профессиональном развитии, разве что самым “маленьким”, но тем не менее меня поражает следующий факт. Многие люди используют всякую ерунду и костыли для создания загрузочных флешек. Существует два адекватных способа:
1) Вручную, с помощью стандартной утилиты diskpart. Открываем командную строку – Win+R, выполнить: cmd
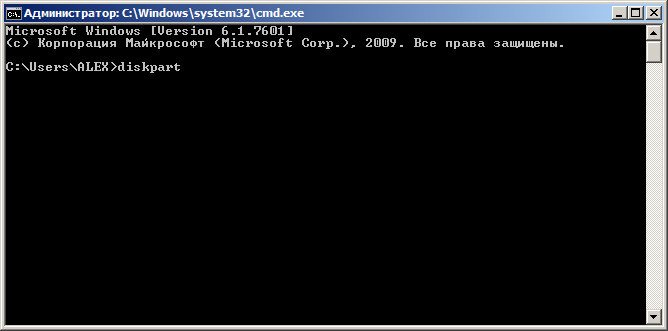
diskpart
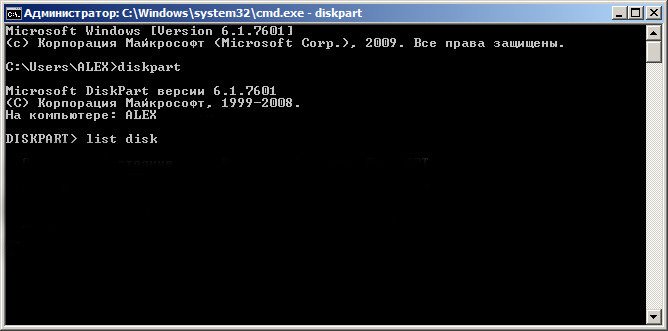
DISKPART> list disk
DISKPART> select disk 1
Disk 1 is now the selected disk.
DISKPART> clean
DiskPart succeeded in cleaning the disk.
DISKPART> CREATE PARTITION PRIMARY
DiskPart succeeded in creating the specified partition.
DISKPART> SELECT PARTITION 1
Partition 1 is now the selected partition.
DISKPART> ACTIVE
DiskPart marked the current partition as active.
DISKPART> FORMAT FS=NTFS
100 percent completed
DiskPart successfully formatted the volume.
DISKPART> ASSIGN
DiskPart successfully assigned the drive letter or mount point.
DISKPART> exit
Leaving DiskPart…
Далее нужно скопировать файла дистрибутива необходимой ОС Windows на флэшку. Если у вас DVD – просто копируйте содержимое диска в корень флэшки. Если у вас ISO-образ – раскройте его чем-нибудь в корень флэшки (например, winrar’ом). Далее переходим на флэшку (я считаю, что это диск F: – у меня так) и заходим в каталог boot, откуда мы запишем правильный загрузчик на флэшку, чтобы она, собственно, была загрузочной:
C:\Windows\system32>f:
F:\>cd boot
F:\boot>BOOTSECT.EXE/NT60 F:
Target volumes will be updated with BOOTMGR compatible bootcode.F: (\\?\Volume{0c823ba6-3886-11de-9951-001a6b686a1d})
Updated NTFS filesystem bootcode. The update may be unreliable since the
volume could not be locked during the update:
Access is denied.Bootcode was successfully updated on all targeted volumes.
F:\boot>
2) Автоматически, с помощью специализированной программы от Microsoft. Загружаем с официального сайта Windows USB/DVD Download Tool и запускаем:
Вот и все – никаких сторонних/крякнутых/portable версий ПО, только “свое, родное”. Таким образом, создание загрузочной флешки для всех современных версий ОС – Windows 7 / 8 / 8.1 , а также Windows Server 2008/R2 и Windows Server 2012 R2 готово!
Занимаюсь IT с 2007 года. Всё началось с увлечения — разгона компьютерного оборудования. Много воды и азота утекло с тех пор… Сейчас уже более 3х лет со своей командой оказываю комплексную поддержку и продвижение бизнеса: SEO, Яндекс.Директ, рассылки и удалённое обслуживание серверов. Буду рад помочь, обращайтесь!
Table of Contents
043 – INSTALL WINDOWS 8, SERVER 2012, WIN 7, 2K8 & VISTA FROM MULTIPLE ISO FILES ON THE SAME FLASH DRIVE
Please Note: As Windows 8/SVR2012 already contains most USB 3.0 drivers, Win8/SVR2012 ISOs will work even if the boot device is connected to a USB 3.0 port! Earlier OS’s won’t work on most USB 3.0 ports unless you first add the correct USB 3.0 drivers into the ISO file yourself.
ATTENTION: This Tutorial is now outdated – Windows 10 TH2 not supported (requires new ImDisk version)!
Please use Easy2Boot for Windows Install ISOs – it is much easier and better!
INTRODUCTION
This method describes how you can place all your Windows Vista 32-bit/64-bit ISOs, Windows 7 32-bit/64-bit ISOs, Server 2K8 R2 ISOs, Win8 ISOs, etc. all on one (large) USB Flash drive and install any version of Windows onto any system whenever you like.
Windows 8 Note: for Windows 8, the xml file needs to contain the Product Key – see http://reboot.pro/14593/page__view__findpost__p__142622 for details (post #47 and #49).
Some temporary product keys (which will be accepted but won’t activate) are detailed by Microsoft here.
This is a slightly neater alternative to tutorial #32 and uses FiraDisk.
Most of this is directly ‘pinched’ from a post by Karyonix (thanks!) on reboot.pro (this post) but I have added the AutoUnattend.xml file so that the process is completely automated if using a USB Flash drive.
All of the ISO files must be kept in one single folder (called ISO in this example, but you can change it) and if you want the user choice menu to work, then the ISO folder must also contain a marker file called ‘Choose_an_iso’. Note that the ISO folder that contains the ISO files and the special tag/marker file Choose_an_Iso can be on any drive (e.g. a hard disk or a USB hard disk). You can change the name of the folder or marker file if you like, as long as you also change the path and name in the menu or you can just use one of your iso files as the marker file and delete the ‘Choose_an_iso’ file so it is not listed when the iso files are listed on the screen.
Please note: Some new USB Flash drives are not the usual ‘Removable’ type but appear as ‘Fixed Disk’ in RMPrepUSB and ‘Local Disk’ in Windows Explorer – these flash drives will not work using this method as they will appear to Windows as a ‘hard disk’. If you have this type of USB flash drive you will also need a USB ‘Removable’ Flash drive as well (treat the Fixed-Disk flash drive as if it were a hard disk).
Note: You can also add entries to install Windows XP as well as the other OS’s. To install from a Setup CD (just like booting from an XP install CD) refer to Tutorial #30 here and add the files to those used in this tutorial or see Tutorial #63 which has instructions for both Win7 and XP and includes activation instructions.
History
Update 26 June 2011: Fixed 64-bit Windows ISO install which did not work, as devcon did not include an amd64 version and extraction of the x64-bit version is very awkward! The 64-bit version of devcon from the MS site KB article download (2003) does not actually run under 64-bit WinPE as it is an ia64 platform version!!! Please use the new version of my zip download which now includes both devcon versions (32&64).
- Update 26 June 2011 (19:00 BST): Added an Addendum to support hard disks and included two new files in the tutorial download.
- Updated 1st July 2011: Changed menu to not use wenv and use grub4dos variables instead, also now allows boot from BOOTMGR or non-ISO9660 iso files. New download Tut43_Fira_iso.zip
- Updated 20th July 2011: Typo in loadiso.cmd meant it reported devcon as missing – now fixed (thanks G R!).
- Updated 10th August 2011: Sushil1576 from Reboot.pro has found the if X:Setup.exe is run, you also get the repair option. This is useful for the Hard Disk version only – see Addendum section at the end of this page. The download has been updated with a new MySetup.cmd file so that the Repair option is offered.
- Updated 12th September 2011: Modification to add the ‘Repair’ option for all ISOs, so that no separate ‘repair grub4dos’ menu item is required
- Updated 1st June 2012: Added two menu entries for Windows 8 Release Preview
- Updated 4th July 2012: Added ImDisk as Server 2012 WinPE no longer works with FiraDisk. NOTE: You must add your own Product Key to the FiraDiskxxx.xml files for Win8/SVR8.
- Updated 25th Sept 2012: Delay added to allow detection of USB drive by OS and retries if no file found (thanks to Todd Fraser for reporting this)
- NOTE:
- Windows 10 TH2 (v1511 and later) does not work unless you update the ImDisk folder with the latest version of ImDisk – I recommend using Easy2Boot as this will be regularly updated!
- 2016-02-26 – Miklos has provided a modified download which contains the new ImDisk version and example menu.lst for Win10 here.
Using this method with USB Hard Disks
The method described immediately below works if you use a USB Flash drive but does not work automatically for a single bootable USB hard disk because the AutoUnattend.xml file MUST be on a removable drive (i.e. a USB flash drive or CD). If you want to use a USB hard disk, you have the following 4 options:
1. Prepare a USB Flash drive (Removable type) as described below (without the ISO files) but copy all the ISO files to the USB hard disk /ISO folder (or onto a separate partition on the internal hard disk on the target system into a /ISO folder). If using two USB drives (USB Flash & USB HDD), make sure both the Flash drive and the USB hard drive are connected to the computer when you boot from your Flash drive. The only Autounattend.xml should be on the Removable flash drive.
– OR –
2. Prepare a USB hard drive by following the instructions below for a Flash drive. Then move the single AutoUnattend.xml file to any spare USB flash drive that you have – it must be of the Removable type. To install Windows, boot from the USB hard drive but make sure the USB Flash drive is also connected to the same system.
– OR –
3. Prepare a USB hard drive following the instructions for a Flash drive below. Boot from the USB hard drive and when Windows Setup loads, press SHIFT+F10 to open a command console and type F:firadiskloadiso (where F: is the drive letter of your USB hard disk – which may vary depending on the system you are installing to).
– OR –
4. See the Addendum below for how to modify each Windows Vista/7/2K8 ISO so that a single bootable USB hard drive can be used, without a flash drive being needed and without the need for the user typing in any extra commands.
METHOD (FOR USB FLASH DRIVES)
Note: these instructions also apply if you already have a bootable grub4dos disk, just extract the Tut43_FiraISO.zip contents onto it (note that it will overwrite your menu.lst though!) and copy all your ISO files to the USB drive and overwrite your grldr file with the recent one included in the latest version of RMPrepUSB v2.1.623 or later.
1. Create a new folder on your hard drive called C:WINFira
2. Download the zip file Tut43_FiraIso.zip and extract the contents to the C:WINFira folder.
For Win7/8 and 10 try Miklos’s version for Win10 here.
Contents of Tut43_FiraIso.zip:
3. Now copy your Windows install ISO files to the C:WinFiraISO folder – Note: the iso filenames must NOT contain spaces!
You can download some Windows 7 ISOs from here. The Windows 8 Release Preview ISOs can be found here.
Notes:
- You must edit /firadisk/auWin8.xml with correct Product Key for Windows 8 install (if you use menu no. 4)!
- Menus 5 and 6 f for Win8 allow you to use any Product Key and thus install any version. Do NOT change the auWin8.xml file – it must have a key starting with TK8TP-.
4. The sample menu.lst contains 5 (0-4) menu entries. The first menu entry is set to boot a fixed iso name. Just copy the first menu entry to make as many more as you like for all your ISO files. The second menu entry is merely to allow you to reboot to your hard disk after Windows has been installed onto it. The 3rd menu entry allows the user to choose which iso to boot to, by getting the user to type in the name of the iso that they want to use (note: does not work with Win8 ISOs). The last two menu entries are for Win 8 RP. You can delete any menu entries that you do not require.
New: Note that menu number 5 is not included in the download of menu.lst – this is a new menu which prompts the user for a Windows 8 Product Key before Windows Setup is run.
Edit the menu.lst and change the first line (title) and 3rd line (ISO filename) in each menu, the sample menu included in the download, is shown below:
- # NORMAL HIGHLIGHT HELPTEXT HEADING in pairs consisting of foreground/background
- color black/cyan blue/cyan red/light-blue red/cyan
- # display this heading
- write (md)0x220+1 !BATnecho -n -P:0000 $[0133] — Windows install —
- initscript (md)0x220+1
- title 1 INSTALL Windows 7 32-bitnThis will install any edition of Windows 32-bit to your hard disk
- debug off
- set MYISO=win7.iso
- find –set-root /AutoUnattend.xml
- dd if=(bd)/firadisk/au.xml of=()/AutoUnattend.xml
- dd if=(bd)/firadisk/spaces.txt of=()/firadisk/ISONAME.CMD
- root (bd)
- write (bd)/firadisk/ISONAME.CMD SET MYISO=\iso\%MYISO%rn
- # make a <1MB ‘drive’ in memory
- map –mem (md)0x800+4 (99)
- echo Mapping /ISO/%MYISO% as an optical drive…
- map /ISO/%MYISO% (0xff)
- map (hd0) (hd1)
- map (hd1) (hd0)
- map –hook
- write (99) [FiraDisk]nStartOptions=cdrom,vmem=find:/ISO/%MYISO%;n
- chainloader (0xff)/BOOTMGR || chainloader (0xff)
- ### ADD MORE ISO MENU ENTRIES HERE – DUPLICATE THE ENTRY ABOVE AND CHANGE THE ISO FILENAME
- title
- root ()
- title 2 Boot from 1st Hard Disk nBoot from MBR of first hard disk and remove the USB drive
- map (hd0) (hd1)
- map (hd1) (hd0)
- map –hook
- chainloader (hd0)+1
- rootnoverify (hd0)
- title
- root ()
- title Choose any iso file…
- root ()
- title 3 INSTALL WINDOWS VISTA/7 – Boot from any Windows ISO to install WindowsnThis menu allows you to type in the name of any Windows ISO file and boot from it
- # find the ISO folder by looking for a marker file
- debug off
- find –set-root /ISO/choose_an_iso
- clear
- echo
- # list all files in the /ISO folder so the user can see them
- ls ()/ISO/
- echo
- # Ask user which iso they want (name is converted to uppercase as /u is specified)
- set /p /u ask=Enter iso filename WITH NO .ISO EXTENSION (e.g. Win7Pro32 ) :
- if “%ask%”==”” echo No iso file specified! && configfile /menu.lst
- clear
- # check if user entered a valid filename with no ISO extension!
- ls /ISO/%ask%.iso || echo Cannot find /ISO/%ask%.iso !!! && pause –wait=3 && configfile (bd)/menu.lst
- echo Loading /ISO/%ask%.iso – please wait …
- #set root drive to USB stick
- find –set-root /Autounattend.xml
- # make a <1MB ‘drive’ in memory
- map –mem (md)0x800+4 (99)
- dd if=(bd)/firadisk/au.xml of=()/AutoUnattend.xml
- dd if=(bd)/firadisk/spaces.txt of=()/firadisk/ISONAME.CMD
- root (bd)
- write ()/firadisk/ISONAME.CMD SET MYISO=\iso\%ask%.isorn
- find –set-root /ISO/%ask%.iso
- # run the grub4dos map command and specify the iso file we want to load
- map /ISO/%ask%.iso (0xff)
- map (hd0) (hd1)
- map (hd1) (hd0)
- map –hook
- # Specify the same iso file for when firadisk runs in winpe
- find –set-root /firadisk/loadiso.cmd
- write (99) [FiraDisk]nStartOptions=cdrom,vmem=find:/ISO/%ask%.iso;n
- chainloader (0xff)/BOOTMGR || chainloader (0xff)
- clear
- # Note: You must edit /firadisk/auWin8.xml with correct Product Key first!
- title 4 INSTALL Windows 8 32-bitnThis will install Windows 8 32-bit to your hard disk
- debug off
- set MYISO=Windows8-ReleasePreview-32bit-English.iso
- find –set-root /Autounattend.xml
- dd if=(bd)/firadisk/auWin8.xml of=()/AutoUnattend.xml
- dd if=(bd)/firadisk/spaces.txt of=()/firadisk/ISONAME.CMD
- root (bd)
- write ()/firadisk/ISONAME.CMD SET MYISO=\iso\%MYISO%rn
- # make a <1MB ‘drive’ in memory
- map –mem (md)0x800+4 (99)
- map /ISO/%MYISO% (0xff)
- map (hd0) (hd1)
- map (hd1) (hd0)
- map –hook
- write (99) [FiraDisk]nStartOptions=cdrom,vmem=find:/ISO/%MYISO%;n
- chainloader (0xff)/BOOTMGR || chainloader (0xff)
- # NEW MENUS – NOT IN DOWNLOAD!
- # Note: User must enter the Product Key first
- title 5 INSTALL Windows 8 32-bitnThis will install Windows 8 32-bit to your hard disk
- debug off
- set MYISO=Windows8-32bit-English.iso
- find –set-root /Autounattend.xml
- dd if=(bd)/firadisk/auWin8.xml of=()/AutoUnattend.xml
- set /p /u KEY=Enter Product Key (AAAAA-BBBBB-CCCCC-DDDDD-EEEEE-FFFFF) :
- cat –locate=TK8TP –replace=%KEY% /AutoUnattend.xml > nul
- dd if=(bd)/firadisk/spaces.txt of=()/firadisk/ISONAME.CMD
- root (bd)
- write ()/firadisk/ISONAME.CMD SET MYISO=\iso\%MYISO%rn
- # make a <1MB ‘drive’ in memory
- map –mem (md)0x800+4 (99)
- map /ISO/%MYISO% (0xff)
- map (hd0) (hd1)
- map (hd1) (hd0)
- map –hook
- write (99) [FiraDisk]nStartOptions=cdrom,vmem=find:/ISO/%MYISO%;n
- chainloader (0xff)/BOOTMGR || chainloader (0xff)
- # Copy the next menu and change the product key and highlighted text to install any version with your own key
- title 6 INSTALL Windows 8 32-bit Professional (Fixed Product Key)nThis will install Windows 8 32-bit to your hard disk
- debug off
- set MYISO=Windows8-32bit-English.iso
- find –set-root Autounattend.xml
- dd if=(bd)/firadisk/auWin8.xml of=()/AutoUnattend.xml
- # ———— change the next line to use your own product key ———-
- set KEY=AAAAA-BBBBB-CCCCC-DDDDD-EEEEE-FFFFF
- cat –locate=TK8TP –replace=%KEY% /AutoUnattend.xml > nul
- dd if=(bd)/firadisk/spaces.txt of=()/firadisk/ISONAME.CMD
- root (bd)
- write ()/firadisk/ISONAME.CMD SET MYISO=\iso\%MYISO%rn
- # make a <1MB ‘drive’ in memory
- map –mem (md)0x800+4 (99)
- map /ISO/%MYISO% (0xff)
- map (hd0) (hd1)
- map (hd1) (hd0)
- map –hook
- write (99) [FiraDisk]nStartOptions=cdrom,vmem=find:/ISO/%MYISO%;n
- chainloader (0xff)/BOOTMGR || chainloader (0xff)
# … more Win8 RP and 2012 menu entries are also included in the download.
5. Now prepare a USB Flash drive using RMPrepUSB (if you already have a bootable USB drive with grub4dos installed you do not need to do this – but you do the newish version of grldr)
Run RMPrepUSB (use v2.1.622 or later)
To wipe and format the USB drive (optional) – set the following options in RMPrepUSB:
- 1. MAX
- 2. (any volume name you like!)
- 3. WinPE v2/v3 (or DOS or FreeDOS or XP)
- 4. FAT32 or NTFS (or FAT16 but it has a 2GB limit) and also select the Boot as HDD option (‘Boot as HDD’ adds a small 2nd partition and makes the BIOS to boot it as a hard disk instead of a ZIP or Floppy drive and thus you don’t get ‘flashing cursor’ on boot on some BIOSes – e.g. EeePCs!)
- 5. Tick Copy OS Files box and set the Copy Folder to C:WINFIRA
- 6. Click Prepare Drive to format the drive and copy the files over
- AutoUnattend.xml
- Menu.lst
FiraDisk folder
- au.xml
- auWin8.xml
- firadi64.cat
- iradi64.sys
- firadisk.cat
- firadisk.inf
- firadisk.sys
- LOADISO.CMD
- slp.exe
- spaces.txt
- wenv (not used in this tutorial)
- i386devcon.exe
- ia64devcon64.exe
- mysetup.cmd (not actually used – see Addendum below)
- winpeshl.ini (not actually used – see Addendum below)
ISO folder
Choose_an_iso
<<<<<<< (your iso files go here)
Fig. 43.5.1 RMPrepUSB settings to make a bootable USB drive (don’t forget step 6 below!)
NOTE: Whether you already have an existing grub4dos USB drive or have just formatted one as detailed above, you need to install the latest version of grub4dos as follows:
6. Now click on Install grub4dos and choose Yes for MBR and hit Enter to copy across the grldr file. You need the correct grub4dos grldr file as this supports some newer grub4dos commands.
Contents of bootable grub4dos drive should now be:
- AutoUnattend.xml
- grldr (new ‘chenall build’ version as used by latest RMPrepUSB)
- Menu.lst
FiraDisk folder
- au.xml
- firadi64.cat
- firadi64.sys
- firadisk.cat
- firadisk.inf
- firadisk.sys
- LOADISO.CMD
- slp.exe
- spaces.txt
- wenv
- i386devcon.exe
- ia64devcon64.exe
ISO folder
Choose_an_iso
(your iso files go here) <<<<<<<<<<<<<<<<<<<<<<<<<<<<< (use short names if possible to avoid typing!)
That’s it!
To test your menu, run RMPrepUSB and hit F11 to run the QEMU emulator (you should create a small virtual hard disk so enter 100 when prompted – but if you want to try installing Windows to the virtual drive you will need a size of at least 10000). Note that you can only test the menu out using this method, once the ISO starts to runs it seems to crash under QEMU!
Fig. 43.6.1 grub4dos text menu displayed when you boot using QEMU or a real system.
This is the unchanged menu.lst provided with the download. You can add more entries or delete the ones you do not want.
Now go boot it and install Windows on something!
The screenshot below shows the INSTALL WINDOWS – Boot from any Windows ISO menu option action.
The grub4dos menu will look for a marker file (the file ‘ISOChoose_an_iso’) on every drive and list the files in that folder when it finds it, so that the user can choose one of them…
Fig. 43.6.2 The list of iso files in the folder is presented to the user so they can type the name of any one in.
Note: you must use the USB drive on a real system – WinPE needs to see a removable drive containing the AutoUnattend.xml file.
You may have problems using an emulator such as QEMU as the dd command needs a writeable drive in order to succeed – but most emulators do not allow writes to physical drives such as USB drives so test the USB drive on a real system not an emulated one as it will only work on a real system.
If your USB drive is NTFS, you must ensure that any file you write to is over 1K in size – grub4dos cannot use dd to write to small files on an NTFS system (the first 800 bytes or so are stored in the data section of the $MFT entry).
If a repair utility is present, you will be asked if you want to try to repair the current installation.
IMPORTANT: you should see the blue Windows Command Shell window which installs the FiraDisk driver and then load the ISO file when Windows Setup starts. If you don’t see this then it won’t work!
Fig. 43.6.5 First screen from Windows 7 install ISO
Fig. 43.6.6 The OS choice menu – this should list all the images present in the install.wim.
Once your OS has installed, if the system reboots back to the USB drive again, just use the 3rd menu item to boot from the hard disk (or just remove the USB drive and reboot).
Note: To add a standard XP install ISO to your USB drive, see Tutorial #30.
How to avoid needing a product key for Windows 8
If you don’t want to have to edit the auWin8.xml file or have the user enter a product key each time, you can do this by modifying the ISO file. Using UltraIso, load the iso file and edit the sourcesei.cfg file (depending on what version you have add one of the three versions) as follows:
FOR RETAIL:
- [EditionID]
- [Channel]
- _Default
- [VL]
- 0
FOR OEM:
- [EditionID]
- [Channel]
- OEM
- [VL]
- 0
FOR ENTERPRISE
- [EditionID]
- [Channel]
- Volume
- [VL]
- 1
Save the iso file again (and make sure you run WinContig on the ISO to ensure it is contiguous afterwards). You will now not be prompted for any Product Key but all images/SKUs should be dislayed, however you will still need to enter a valid product key and activate it before 30 days have elapsed.
This can be done on an All-In-One ISO so that you can select any of the images inside.
ADDENDUM – HOW TO USE THIS TECHNIQUE USING A BOOTABLE USB HARD DRIVE
The auto-detection of AutoUnattend.xml will not work if you use a hard drive (neither USB nor IDE/SATA) as a hard drive is not a ‘removable’ disk, we need to patch the ISO files themselves so that they will automatically run the LOADISO.CMD from the boot drive. To do this we need to copy the contents of the ISO file to an empty folder, modify the ISO file contents and then create a new version of the ISO file.
The guide below is for advanced users. I assume you already know how to mount images using ImageX (or DISM or GImageX) or can use similar tools. It is easiest to download and install the Windows 7 WAIK (over 1.3GB!). However, you can use Tutorial #83 to just download ImageX in about 30 seconds!
Please refer to my other tutorials (e.g. for WAIK and Virtual CloneDrive see Tutorial #1) for details on installing and using the WAIK.
1. Using your Windows ‘office’ system, Mount the ISO that you want to modify using ImDisk or Virtual CloneDrive or any suitable tool and extract all the contents to an empty folder on your hard drive (e.g. C:TESTISO)
2. If you want to be able to install any edition of Windows (e.g. all Vista/Win 7 SKUs rather than just Professional), then delete the C:TESTISOSOURCESEI.CFG file.
If you have Win8, you will need to change the ei.cfg file contents to:
- [Channel]
- _Default
- [VL]
- 0
3. Run a WAIK command prompt as Administrator (found in the Start Menu after installing WAIK) and mount the C:TESTISOSourcesboot.wim file (use Imagex /info to determine the correct image number that you need to mount, usually this is Index #2 – but not always!). e.g.
imagex /info C:TESTISOSOURCESboot.wim
(check what images you have by looking at the output)
- mkdir c:mount
- imagex /mountrw C:TESTISOSOURCESboot.wim 2 c:mount
IMPORTANT: Make sure you use the correct wim image number – it is not always 2!
4. Now we just need to copy the two files to the C:mountwindowssystem32 folder – winpeshl.ini and mysetup.cmd. Use the ones in the FiraDisk folder inside the tutorial download. Their contents are shown below just for reference:
winpeshl.ini
- [LaunchApps]
- x:windowssystem32mysetup.cmd
mysetup.cmd
- @echo off
- TITLE MYSETUP.CMD
- REM run wpeinit after loading ISO file
- :LDISO
- cmd /q /c “FOR %%i IN (C D E F G H I J K L N M O P Q R S T U V W X Y Z) DO IF EXIST %%i:FIRADISKLOADISO.CMD cmd /k %%i:FIRADISKLOADISO.cmd”
- TITLE MYSETUP.CMD
- REM find RAMDRIVE with ISO contents
- for %%I in (C D E F G H I J K L M N O P Q R S T U V W X Y Z) do if exist %%I:sourcesinstall.wim set RAMdrive=%%I:
- If “%RAMdrive%”==”” (
- for %%I in (C D E F G H I J K L M N O P Q R S T U V W X Y Z) do if exist %%I:sourcesinstall.wim set RAMdrive=%%I:
- )
- If “%RAMdrive%”==”” (
- for %%I in (C D E F G H I J K L M N O P Q R S T U V W X Y Z) do if exist %%I:sourcesinstall.wim set RAMdrive=%%I:
- )
- If “%RAMdrive%”==”” (
- for %%I in (C D E F G H I J K L M N O P Q R S T U V W X Y Z) do if exist %%I:sourcesinstall.wim set RAMdrive=%%I:
- )
- If NOT “%RAMdrive%”==”” echo Found Install.wim at %RAMdrive%sourcesinstall.wim
- IF “%RAMdrive%”==”” (
- echo ERROR – COULD NOT FIND INSTALL.WIM!
- pause
- pause
- REM Retry
- goto :LDISO
- )
- echo Run Setup.exe with Repair option from X: drive (if available)
- if exist X:Setup.exe X:setup.exe
- echo looking for setup in root of DVD ISO
- If exist %RAMdrive%setup.exe (
- %RAMdrive%
- REM setup will use its path to find the install.wim
- %RAMdrive%setup.exe
- goto :RBT
- )
- echo looking for setup.exe in sources on DVD ISO
- If exist %RAMdrive%sourcessetup.exe (
- %RAMdrive%
- REM setup will use its path to find the install.wim
- echo Launching %RAMdrive%sourcessetup.exe
- %RAMdrive%sourcessetup.exe
- goto :RBT
- )
- REM if not then just call setup in root of boot.wim and point it at install.wim
- if exist X:sourcesSetup.exe X:sourcessetup.exe /installfrom:%RAMdrive%sourcesinstall.wim
- if exist X:Setup.exe X:setup.exe /installfrom:%RAMdrive%sourcesinstall.wim
- goto :RBT
- :BAD
- dir X: /b
- echo Cannot find X:Setup.exe !
- @echo Press a key to reboot now…
- pause
- :RBT
- wpeutil reboot
- pause
Although these two files are located in the FiraDisk folder inside the Tutorial #43 Tut43_FiraIso.zip download for your convenience, they are not actually used in booting and can be deleted from theFiraDisk folder after copying them to the mounted ISO folder – if you wish.
4. Commit the changes and unmount the mounted image – e.g.
(close any Explorer windows which point at C:mount first!)
imagex /unmount /commit c:mount
imagex /cleanup
5. Create a new ISO file from the WAIK command prompt:
to make a bootable ISO use the command:
oscdimg.exe -b”C:Program FilesWindows AIKToolsPEToolsx86bootetfsboot.com” -u1 -d -h -m -lWIN732SP1 C:TESTISO C:Win732SP1.iso
– OR – for a non-bootable ISO (but still usable for this tutorial and it will still load Windows Setup) use:
oscdimg.exe -u1 -d -h -m -lWIN732SP1 C:TESTISO C:Win732SP1.iso
(-l specifies the volume Label – note that the source path C:TESTISO ends in a back-slash – however some versions of oscdimg may not like the final and you may get a ‘usage’ message – if so then remove the last backslash). The -u1 (ISO9660) option ensures that the ISO is readable in both UDF and ISO 9660 (grub4dos readable) format – NOTE: when mounted by grubdos, all filenames will be uppercase – e.g. BOOTMGR not bootmgr. For maximum compatibility (e.g. with WinImage) you can also add -j1 for Joliet format (upper/lower case and long filenames).
6. Now follow the tutorial above but use this new ISO file.
7. (optional)
The Autounattend.xml file in the root of the USB drive is not required and can be deleted.
If you delete the AutoUnattend.xml file, you need also to change the menu.lst slightly and delete the lines that mention AutoUnattend.xml, otherwise the grub4dos menu will give an error as the file will no longer exist.
8. The new ISO should allow you to install any edition of Windows that is contained within the Install.wim file. You can also use the same files on a USB Flash drive if you wish.
Note: MySetup.cmd can run different versions of Setup.exe
X:Setup.exe will run Setup and offer the Repair Operating System option.
%RAMDRIVE%Setup.exe and SourcesSetup.exe will go straight to the ‘Install Windows’ GUI and will not allow the user to Repair Windows.
If you do not want the Repair option offered, you should comment out the line shown in purple in MySetup.cmd (i.e. place a double colon :: in front of it – or delete the line).
To remove the Repair Y/N question, delete the following lines from the FiradiskLoadiso.cmd file
- if not exist X:sourcesrecoverystartrep.exe goto :SKIP_REPAIR
- echo.
- echo ********* REPAIR WINDOWS? **************
- echo.
- set /P ASK=”Do you want to try to repair Windows (Y/N)? : “
- if /I “%ASK%”==”Y” start /w X:sourcesrecoverystartrep.exe
TroubleShooting
See Tutorial 30 for XP troubleshooting.
Check you have a recent (2011) version of grub4dos – only later versions support grub4dos variables. If you already have a grub4dos boot drive and do not want to re-format it or install grub4dos using RMPrepUSB, then just copy over the grldr file from the RMPrepUSB folder to your USB boot drive to update it.
If any of the commands fail, try adding a pause command after each line to see which line gives the error:
- title Install Windows 7 64-bit Enterprise EditionnRun the Windows install DVD to install a copy of Windows to your hard disk
- echo 1 && pause
- find –set-root /Firadisk/loadiso.cmd
- echo 2 && pause
- etc,
- set mm=map /ISO/%MYISO% (0xff)
- %mm%
- echo %mm%
- pause
If the map command fails for ‘file not contiguous‘ – you will need to run WinContig.exe (CTRL+F2 in RMPrepUSB) on the failing ISO file (on the USB drive) to defrag it. If this fails to work (usually because you do not have enough spare space on the USB drive), then you will need to copy ALL the files from the USB drive to your hard disk, reformat the USB drive using RMPrepUSB as in step 3. It is often faster and easier to re-copy the files than it is to use WinContig on a large USB iso file.
Some grub error numbers are reported here – these may or may not be the same as in grub4dos, but may be useful as a reference.
If Setup seems to want to install the wrong version of Windows (e.g. you are prompted to install Vista Business instead of say Windows 7 Home Premium) check that none of your drives have a file in the folder SOURCES called INSTALL.WIM – this includes any Windows install DVD-ROM you may have left in your DVD-ROM drive!
Some members of reboot.pro have reported that their system does not detect the AutoUnattend.xml on their USB pen. In one case this turned out to be an unlucky combination of Buffalo USB pen, Server 2008 ISO (not R2) and a Dell Latitude E6400. Other USB pens worked and other OS ISO’s worked. Another user reported difficulty with their SanDisk pen. If the blue command console window does not briefly pop-up and run during the boot from the ISO or the first part of the Windows Setup GUI, then press SHIFT+F10 to get a console window and type DISKPART followed by LIST DISK to see if your USB drive is listed (if no USB drive is listed then it means your USB drive is incompatible with the OS ISO your are trying to use) – if the USB drive is not listed, type RESCAN and then LIST DISK to see if it is now listed. If it is you may have an incompatible USB drive – try a different make or model. Use EXIT to quit Diskpart.
Alternatively, try the workaround for Fixed disks at the top of this page (i.e. also insert another different USB pen drive with the AutoUnattend.xml file on it).
If you are using an OEM Recovery Disk ISO file, the AutoUnattend.xml detection may be suppressed. In this case you will have to use the manual method detailed in the workaround for Fixed disks at the top of this page and run a command prompt (SHIFT+F10 may not work so use the OEM Command prompt menu entry instead) – or – unpack the ISO and make a new one without any unattend.xml file in it (the new ISO does not need to be bootable so any ‘makeiso’ tool will do to make the ISO).
In rare cases if Windows cannot find the ‘CDDVD’ and asks for a driver, try this: click Cancel (you will be return to the welcome screen) – now remove your USB drive and insert it into a different USB port so that Windows will re-detect the USB drive – click Install Now again – the installation process may now find the ‘CD/DVD’ and will continue as usual.
How it works (when using a USB Flash drive)
The boot/mapping sequence goes like this:
ISO mapped as virtual drive by grub4dos -> load WinPE (ISO drive is now lost as in protected mode) -> find and load AutoUnattend.xml -> find and run FiraDiskLoadIso.cmd -> run FiraDisk (or ImDisk) and load ISO as virtual drive under WinPE (iso filename is passed via ramdrive from grub4dos) -> Exit command shell -> Setup continues and finds sourcesInstall.wim on virtual disk loaded by FiraDisk or ImDisk.
- The menu.lst basically just maps the ISO file as a DVD-ROM drive (0xff) but this mapping is lost as soon as Setup fully loads up into RAM and enters protected mode. However, we also write the name of the iso file to a ramdrive whilst in the grub4dos menu. We do this because we need to tell FiraDisk the name and path of the ISO file when Setup starts to run.
- When the ISO boots, it will prompt you to ‘Press any key to boot from the CD or DVD’ – because it thinks you are booting from a DVD (tip: press a key!).
- Now when a Windows Vista/7/2K8 WinPE based Setup runs, WinPE always tries to look for a file called AutoUnattend.xml or Unattend.xml which has a ‘WindowsPE’ section containing commands and configuration settings. The file AutoUnattend.xml must be on a Removable disk and not a Fixed disk. Luckily, we just happen to have such a file (AutoUnattend.xml) on the USB Flash drive (cos we put it there!). This contains a command to run the file FiraDiskLOADISO.cmd from wherever it can find it (it searches all drives until it finds it)
- LOADISO.cmd runs FiraDisk and maps the ISO file as a virtual drive, ready for Windows Setup to scan and recognise. if this does not work then ImDisk is used to load the ISO file.
- We then exit from the LOADISO script to allow WinPE to continue and run Setup.
- Setup continues to run once LOADISO has finished executing and starts to look for a drive which has the sourcesinstall.wim file on it (this contains the Windows images).
- Now when Setup looks for the sourcesinstall.wim file, it finds it on the new virtual drive which was made by FiraDisk and thus continues as normal – just as if it booted from a real DVD.
The way that we pass the correct path for the ISO file is via these lines in menu.lst
map –mem (md)0x800+4 (99) creates a new ram drive – must be <1MB or will not be seen by Firadisk
write (99) [FiraDisk]nStartOptions=cdrom,vmem=find:/ISO/win7.iso;n writes the name of the iso to the ramdrive – when the FiraDisk driver loads, it will try to find it
# here we also write a file so that ImDisk can get the name of the ISO we want to load (in case FiraDisk does not work)
dd if=()/firadisk/spaces.txt of=()/firadisk/ISONAME.CMD
write ()/firadisk/ISONAME.CMD SET MYISO=\iso\%MYISO%rn
When LOADISO loads the FiraDisk driver using devcon.exe, FiraDisk looks for the special grub4dos parameter in memory and then searches all media until it finds the file specified and then loads it as a CD/DVD.
If firadisk fails to load the ISO file, then the latest version then tries to use ImDisk. The iso filename is passed to ImDisk by this line in the grub4dos menu:
write ()/firadisk/ISONAME.CMD SET MYISO=\iso\%MYISO%rn
RMPrepUSB Blog – please leave a comment or feedback on RMPrepUSB or this Tutorial (please mention Tutorial number).
AUTOMATED INSTALLS
The xml file in the firadisk folder will need to be changed.
LARGE ALL-IN-ONE ISO FILES, NTFS AND MULTIPLE PARTITIONS
If you have an AIO ISO file which is over 4GB, you will need to use an NTFS partition because FAT32 cannot support files >4GB.
If you want a FAT32 and an NTFS partition on your flash disk, then the NTFS partition containing the ISO files must be the first entry in the partition table on a Flash drive. This is because WinPE (as used by Windows Setup) will only mount the partition that is in the first table entry on the USB flash (removable) drive. This is why Windows will only show one volume in Windows Explorer when you insert a multi-partition USB Flash drive.
The recommended partition order is therefore:
1. NTFS
2. FAT32
However, if your partitions are in a different order, if you use the RMPrepUSB – Ctrl-O function, you can re-order the two partitions in the partition table. Windows will only see the first entry in the partition table (regardless of the position of the actual partition areas on the disk).
The menu.lst and firadisk folder and AutoUnattend.xml files should all be on the NTFS partition.
Создание загрузочной флешки Windows 7 для установки на компьютер или ноутбук всё ещё актуально для многих пользователей, а с учетом некоторых сложностей, связанных с загрузкой UEFI и Legacy, структурой разделов GPT и MBR и другими нюансами, вопрос записи подходящего USB накопителя возможно даже более важен, чем во время выхода этой ОС.
В этой инструкции несколько простых способов сделать загрузочную флешку Windows 7 с помощью бесплатных программ и без программ. Обращу ваше внимание на то, что если вы уже записали такой накопитель, но с него не удается загрузиться, возможно, вы всё сделали правильно, но не изменили некоторые настройки БИОС/UEFI, подробнее об этом в материале Почему БИОС/UEFI не видит загрузочную флешку и как это исправить.
Прежде всего, для создания загрузочной флешки Windows 7 вам потребуется USB накопитель, размером 4-8 Гб (зависит от используемого образа ISO), а также образ ISO с Windows 7. К сожалению, на официальном сайте Майкрософт загрузка этого образа стала недоступной для большинства пользователей, но, надеюсь, он у вас есть в наличии. Также может быть полезным: Лучшие программы для создания загрузочной флешки, Как сделать загрузочную флешку Windows 10.
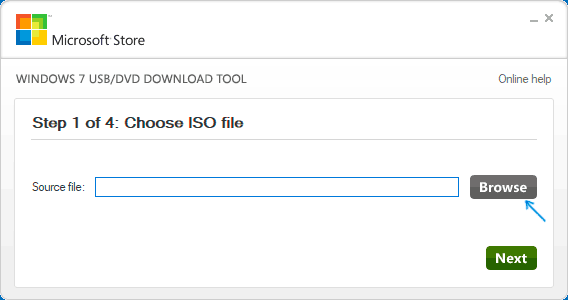
Создание загрузочной флешки в официальной утилите Windows 7 USB/DVD Download Tool
Через некоторое время после выхода ОС Windows 7 Майкрософт представила специальную бесплатную утилиту для записи загрузочной флешки или диска DVD. Программа доступна и сегодня, но учитывайте, что подойдет она только для установки в режиме Legacy на диск MBR (если вы не знаете, что это такое, то, если кратко: старые компьютеры и ноутбуки использовали только такой режим, современные по умолчанию используют загрузку UEFI и диски GPT, но можно переключить и на старый режим).
Порядок создания загрузочной флешки Windows 7 в утилите состоит из следующих шагов:
- Запустите Windows 7 USB/DVD Download Tool, нажмите кнопку Browse и укажите путь к образу ISO с Windows 7.

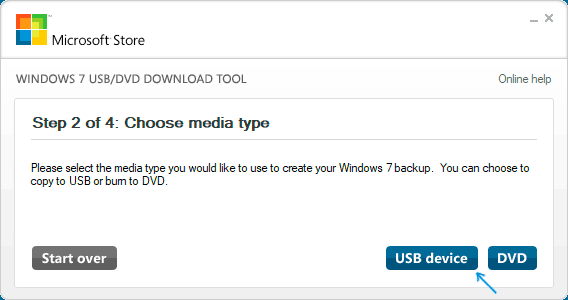
- На следующем шаге нажмите USB Device, чтобы записать образ на флешку.
- Выберите ваш USB накопитель и нажмите Begin copying. Вас предупредят о том, что все данные с флешки будут удалены, если вы согласны — нажмите кнопку Erase all data.
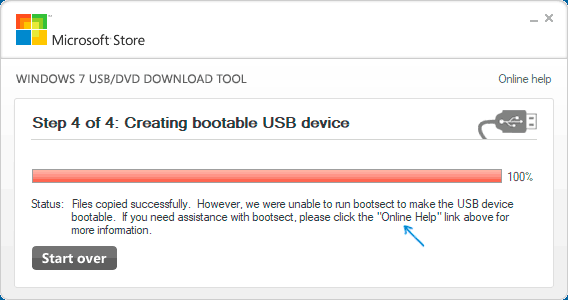
- По завершении вы получите готовую загрузочную флешку для установки Windows Если при создании вы увидите красную полосу и сообщение «We were unable to run bootsect to make the USB device bootable», запустите командную строку от имени администратора и введите команду bootsect /nt60 E: (заменив E вашей буквой флешки). После успешного выполнения команды флешка станет загрузочной.

Скачать Windows 7 USB/DVD Download Tool вы можете с официального сайта — wudt.codeplex.com Обновление: указанный сайт более не предоставляет загрузки Windows 7 USB/DVD Download Tool, но вы можете использовать способ загрузки удаленных с официальных сайтов программ из веб-архива.
Загрузочная флешка Windows 7 в Rufus
Rufus — одна из самых популярных бесплатных программ для создания загрузочных USB накопителей, полностью на русском языке, которая, в том числе поможет сделать установочную загрузочную флешку Windows 7.

Порядок действий в программе очень простой:
- Выбираем флешку и, нажав кнопку «Выбрать» указываем путь к образу ISO Windows 7.
- Выбираем схему разделов диска (MBR для Legacy и GPT для UEFI).
- Остальные параметры в общем случае менять не следует, достаточно просто нажать кнопку «Старт» для начала записи накопителя. Имеющиеся данные с флешки будут удалены.
Подробная инструкция об использовании программы последней версии и где её скачать в статье: Загрузочная флешка в Rufus.
Как сделать загрузочную флешку Windows 7 в UltraISO
UltraISO — очень популярная программа, которую многие используют для записи загрузочных накопителей в течение многих лет. Даже бесплатная версия программы позволяет выполнить запись образа на флешку и сделать её загрузочной, подойдет это и для Windows 7, причем накопитель будет работать и для Legacy (CSM) и для UEFI загрузки.
Отдельная подробная инструкция по использованию программы, видео и официальный сайт в материале Создание загрузочной флешки в UltraISO.
С помощью WinSetupFromUSB
Бесплатная программа WinSetupFromUSB позволяет записывать не только загрузочные, но и мультизагрузочные флешки сразу с несколькими образами. Например, вы можете на одном USB накопителей разместить не только Windows 7, но и другие версии системы. Обновление: для более удобного создания мультизагрузочной флешки рекомендую Ventoy.
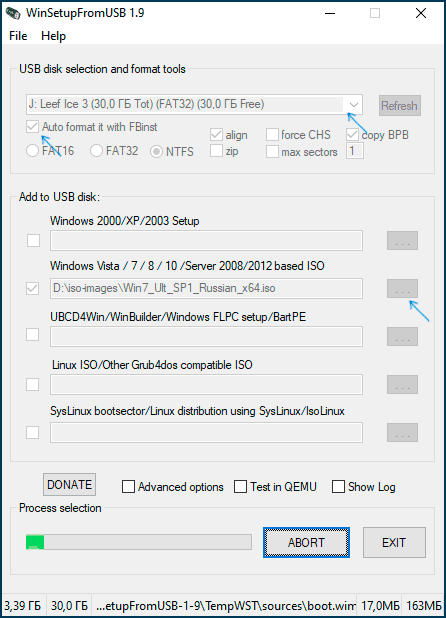
В самом простом случае порядок действий в программе состоит из шагов:
- Выбрали USB накопитель, поставили отметку Format with FBinst и выбрали файловую систему (NTFS для Legacy и MBR, FAT32 для UEFI и GPT).
- Рядом с пунктом для выбора образов Windows 7, 8 и Windows 10 нажимаем по кнопке с многоточием и указываем ваш образ Windows 7.
- Нажимаем кнопку «Go» и подтверждаем удаление имеющихся данных с накопителя.
Более подробно о программе, а также о том, как записать несколько образов в инструкции Загрузочная флешка в WinSetupFromUSB.
Загрузочная флешка Windows 7 без программ
Также вы можете создать загрузочный накопитель Windows 7 без использования каких-либо сторонних программ. В случае, если вам требуется загрузка в режиме UEFI и установка на GPT диск, шаги будут следующими:
- Отформатируйте флешку в FAT32 средствами системы.
- Смонтируйте образ Windows 7 или откройте его архиватором.
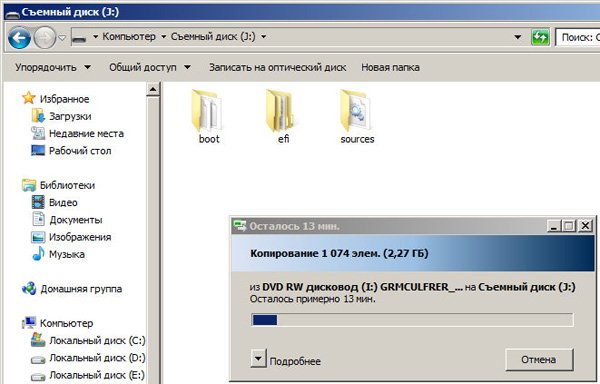
- Скопируйте все файлы с образа на вашу флешку. В образе обязательно должна присутствовать папка EFI.
После такого простого копирования накопитель будет успешно загружаться в режиме UEFI при отключенном Secure Boot. Для загрузки в режиме Legacy шаги будут несколько отличаться.
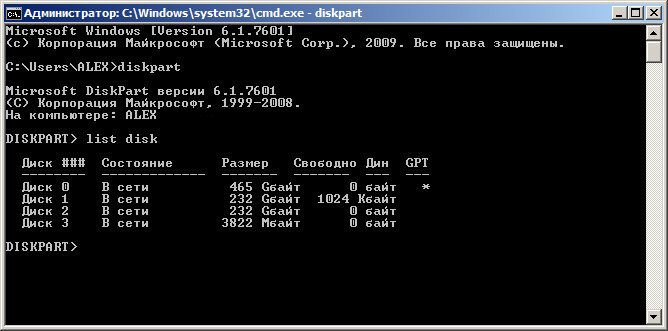
Запустите командную строку от имени администратора и введите команду DISKPART, в результате Вы увидите приглашение для ввода команд DISKPART. По порядку введите следующие команды:
DISKPART>list disk (обратите внимание на номер, который соответствует Вашей флешке)
DISKPART>select disk номер-флешки-из-предыдущей-команды
DISKPART>clean
DISKPART>create partition primary
DISKPART>select partition 1
DISKPART>active
DISKPART>format FS=NTFS quick
DISKPART>assign
DISKPART>exit
Этим мы закончили подготовку флешки к превращению ее в загрузочную. Смонтируйте образ Windows 7 в системе или вставьте диск с дистрибутивом ОС. Далее введите в командной строке команду:
CHDIR W7:\boot
Вместо W7 укажите букву диска с дистрибутивом Windows 7 или подключенного образа ISO. Далее введите:
bootsect /nt60 USB:
Заменив USB на букву флешки (но не убирая двоеточие). Ну и последняя команда, которая скопирует все нужные файлы для установки Windows 7:
XCOPY W7:\*.* USB:\ /E /F /H
В приведенной команде — W7 это буква диска с дистрибутивом операционной системы, а USB нужно заменить на букву USB накопителя. Процесс копирования файлов может занять продолжительное время, но в конце вы получите работающую загрузочную флешку Windows 7.
Видео инструкция
Надеюсь, один из методов подойдет в вашем случае. Если интересны более изощренные способы создания загрузочных накопителей, рекомендую ознакомиться со статьей Создание загрузочной флешки в Easy2Boot.
Сделать загрузочную флешку Windows 7 очень просто. Мы опишем четыре самых быстрых, известных и бесплатных способа создания загрузочной флешки из ISO-образа, начнём с самого простого и закончим сложным, применяя разное программное обеспечение. Все утилиты прекрасно работают и в Windows 7, а так же в Windows XP, проверено. Отдельно хочу сказать про четвёртый способ создания загрузочной флешки, создадим мы её с вами в Windows 7, используя только собственные средства этой операционной системы, не прибегая к использованию сторонних утилит.
Друзья, если у вас новый компьютер или ноутбук с БИОСом UEFI и жёстким диском стиля размещения таблиц разделов GPT, то установить на такой компьютер Windows 7 тоже можно, читайте нашу другую статью Как установить с флешки Windows 7 или Windows 8 на GPT-диск.
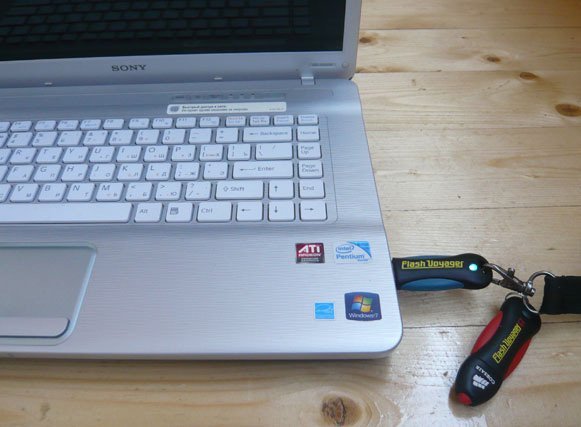
Также не забудьте, что если ваш компьютер, ноутбук или нетбук с портами USB 2.0, а так же USB 3.0 и вы решили установить на него Windows 7 с загрузочной флешки, то вам необходимо знать, что подсоединять флешку необходимо в порт USB 2.0, так как Windows 7 не поддерживает USB 3.0 (порты обычно закрашены синим цветом).
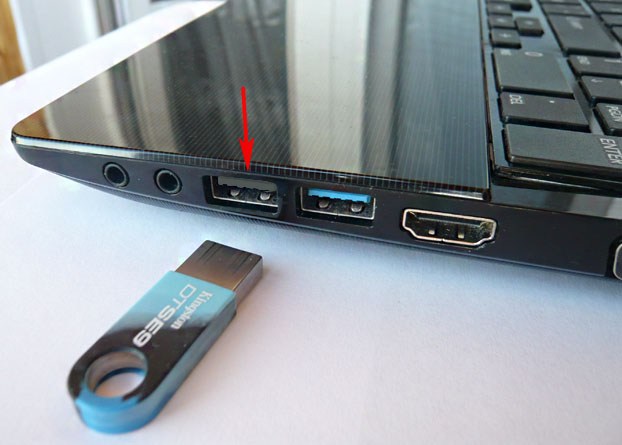
Если вы вставите загрузочную флешку в порт USB 3.0, то установка Windows 7 закончится вот такой ошибкой.
«Не найден необходимый драйвер для дисковода оптических дисков. Если у вас есть дискета, CD, DVD или флеш-накопитель USB с этим драйвером, вставьте этот носитель»
Сделать загрузочную флешку Windows 7
{banner_google1}
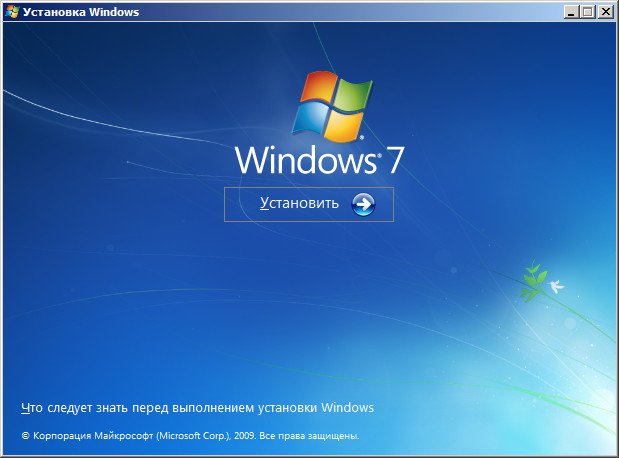
В самом конце статьи, мы с вами рассмотрим сам процесс установки операционной системы Windows 7.
Первое — что нам сейчас нужно, это сам оригинальный дистрибутив ISO-образ Windows 7, надеюсь что он у вас есть.
Второе — позаботимся о вашей флешке, так как она будет форматироваться, все данные с неё нужно перенести в безопасное место.
Третье — сама флешка нужна объёмом не менее 4 ГБ.
Четвёртое — если вы не знаете, как загрузить с флешки ваш компьютер или ноутбук, то читаем эту стать — «Как загрузить с флешки любой ноутбук», в данной статье подробно описано, как изменить приоритет загрузки на ноутбуке, нетбуке, стационарном компьютере в BIOS или используя специальное меню выбора загрузочного устройства.
Содержание нашей статьи: Друзья статья написана нами почти год назад, отзывы читателей показали, что первая программа UNetBootin срабатывает у вас очень редко, а вот Утилита от Microsoft — Windows 7 USB/DVD Download Tool на 100% и последний способ, средствами Windows 7, так же работает на 100%.
- Создание загрузочной флешки с помощью UNetBootin (Друзья используйте этот способ в последнюю очередь)
- Создание загрузочной флешки с помощью UltraISO
- Утилита от Microsoft Windows 7 USB/DVD Download Tool
- Создание загрузочной флешки средствами Windows 7
- Создание загрузочной флешки программой WinSetupFromUSB (самый безотказный и простой способ, написана отдельная статья, если интересно, переходите по ссылке и читайте).
- Создание загрузочной флешки программой Rufus (тоже написана отдельная статья).
Самое простое решение, как сделать загрузочную флешку Windows 7, это использовать программу UNetBootin или Windows 7 USB/DVD Download Tool (предпочтительнее), проще больше некуда, если только мы не придём к вам и не сделаем всё за вас.
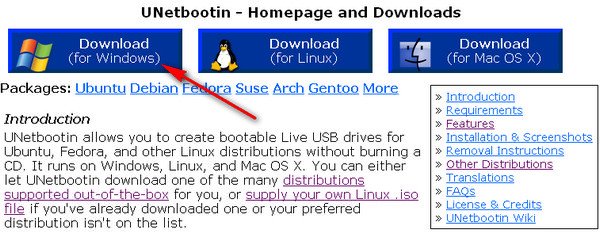
Программу UNetBootin, скачиваем по ссылке http://unetbootin.sourceforge.net выбираем Download for Windows и запускаем программу, она работает без инсталляции.
В главном окне программы отмечаем пункт ISO-образ и выбираем букву USB-накопителя
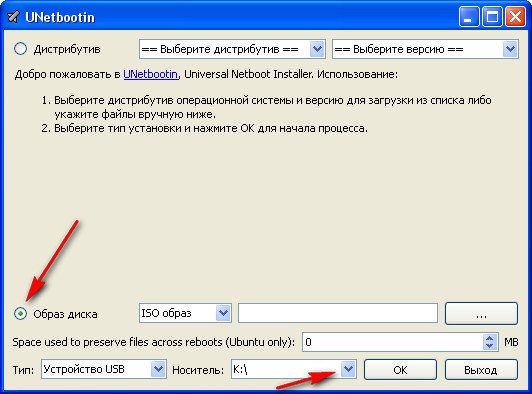
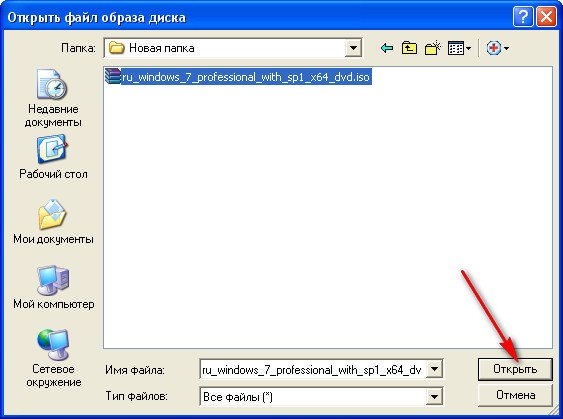
вручную указываем место нахождения нашего образа,
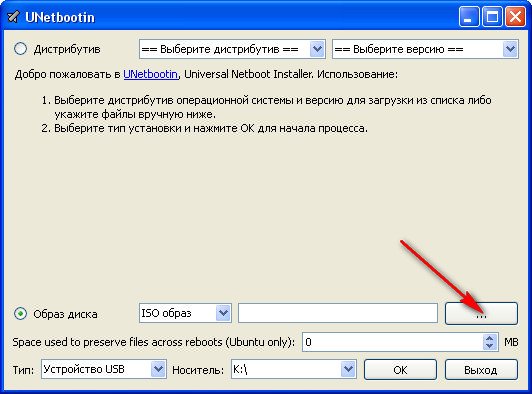
Нажимаем открыть
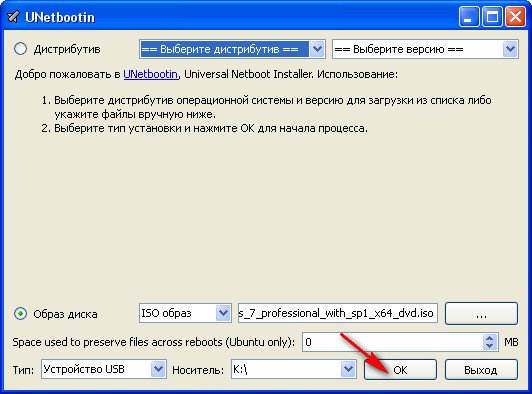
и всё, жмём «OK».
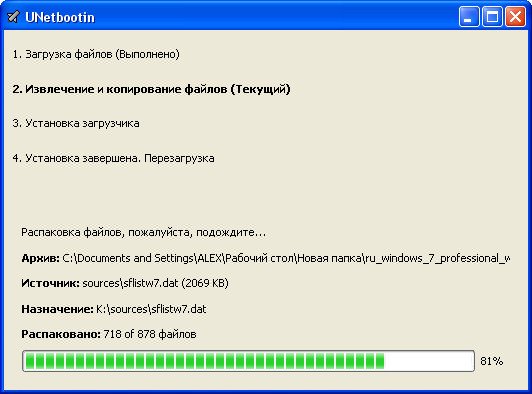
Недолгое извлечение и копирование файлов Windows 7 на флешку
Загрузочная флешка готова
{banner_google1}
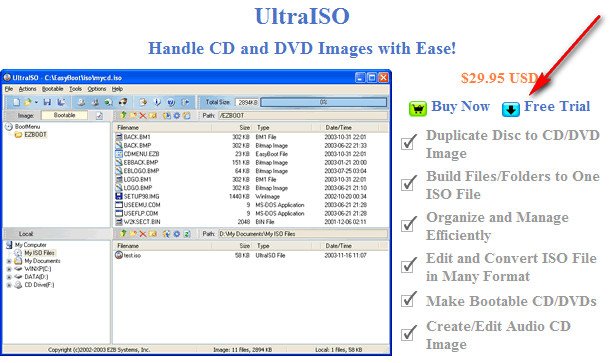
Решение немного посложнее, использовать программу UltraISO, она на русском языке и имеет вполне функциональный пробный период, сайт http://www.ezbsystems.com/ultraiso, выберете Free Trial
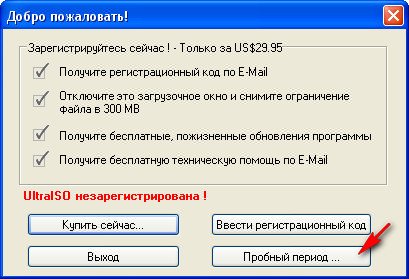
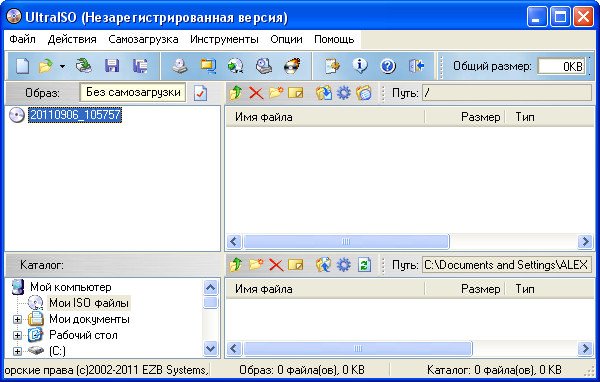
далее выбираем русский язык и скачиваем её, проще некуда. Запускаем программу от имени администратора и нажимаем пробный период,
и перед нами окно нашей программы,
далее ищем на нашем жёстком диске iso образ с операционной системой Windows 7, напоминаю вам, что вы можете создать свой образ с любой другой программой и указать его. В главном окне UltraISO, щёлкаем правой мышкой на кнопке файл и в открывшемся меню выбираем открыть,
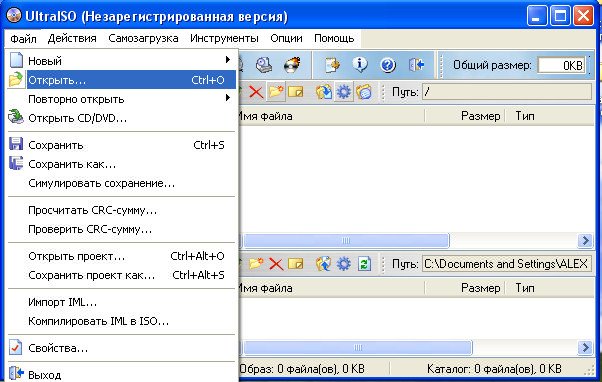
далее указываем образ с операционной системой, у меня образ Windows 7 64bit Service pack 1, находится на прямо рабочем столе в папке Новая, у вас не знаю где, находим и жмём открыть,
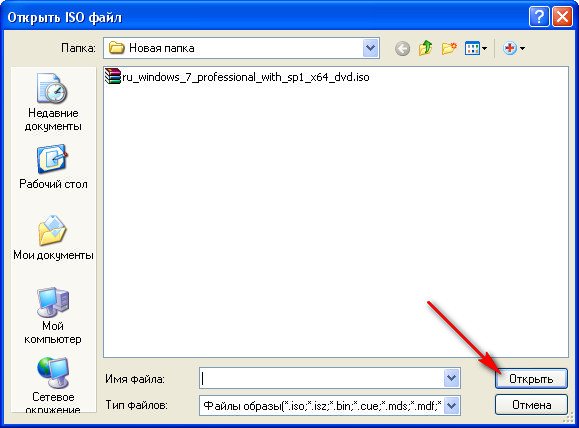
кстати сейчас можно вставить вашу флешку в ноутбук или нетбук.
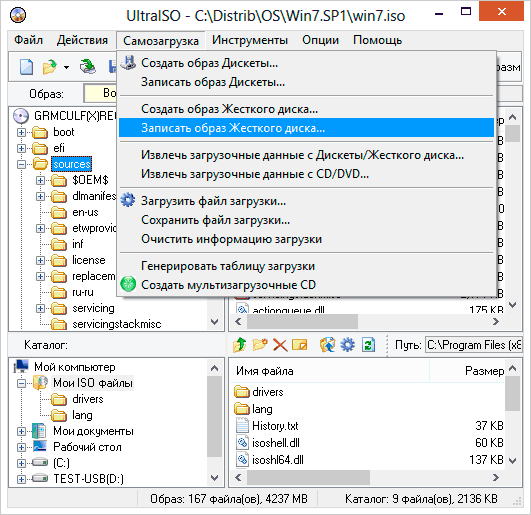
В главном окне программы выбираем меню Самозагрузка и Записать образ жесткого диска, в данном окне уже присутствует наша флешка.
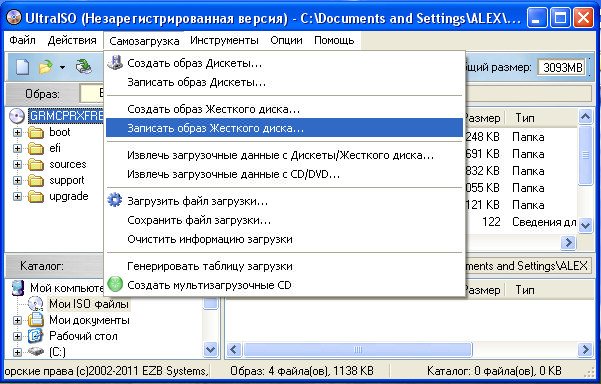
Нажимаем форматировать.

Выбираем тип файловой системы
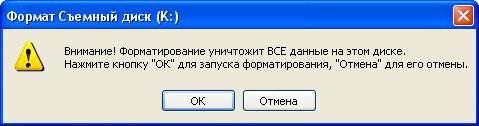
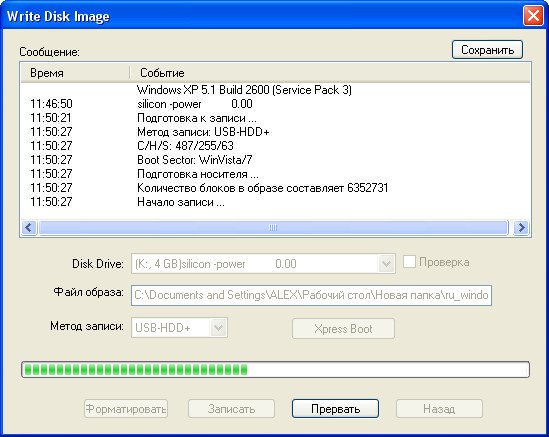
Записать
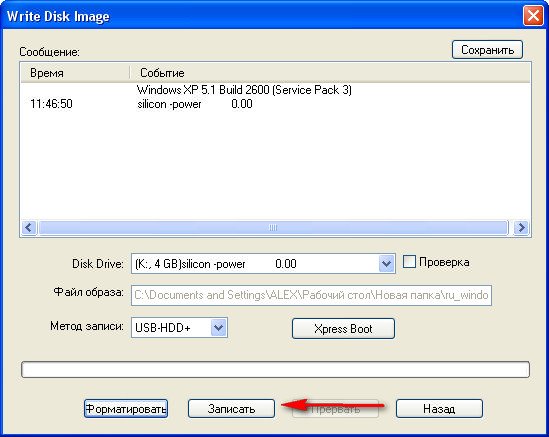
Нужно подождать окончания процесса записи
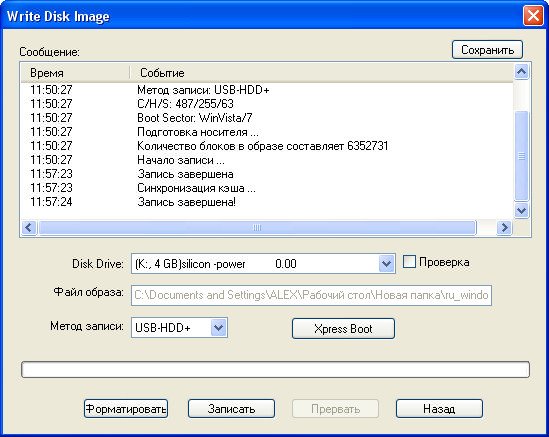
Всё, теперь мы с вами можем носить операционную систему Windows 7 64bit в кармане.
{banner_google1}
Теперь информация для тех, кто простых путей не ищет, создаём загрузочную флешку непосредственно из самой операционной системы Windows 7, при помощи командной строки, мой любимый метод.
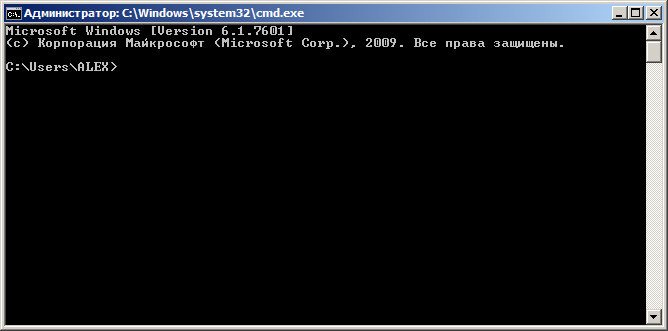
Вставляем нашу натерпевшуюся флешку в ноутбук или нетбук, а может в стационарный компьютер, далее запускаем Командную строку.
Меню Пуск, Выполнить, вводим команду cmd
Окно командной строки
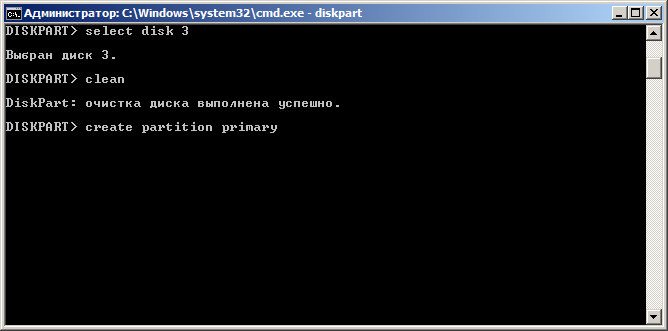
Нам нужно ввести команду diskpart командный интерпретатор, позволяющий управлять дисками, нажимаем Enter
Отображаем список всех устройств с помощью команды list disk, нажимаем Enter
Посмотрите внимательно, моя флешка на 4 ГБ, обозначена как Диск 3, у вас может быть другая цифра, в зависимости от цифры будет следующая команда, в моём случае она select disk 3 если не хотите форматировать вместо вашей флешки локальный том вашего жёсткого диска, определите её точно и составьте команду правильно, если ваша флешка определена как Диск 2, то команда для вас будет select disk 2
Итак я ввожу команду select disk 3, так как моя флешка обозначена номером 3 и нажимаю Enter
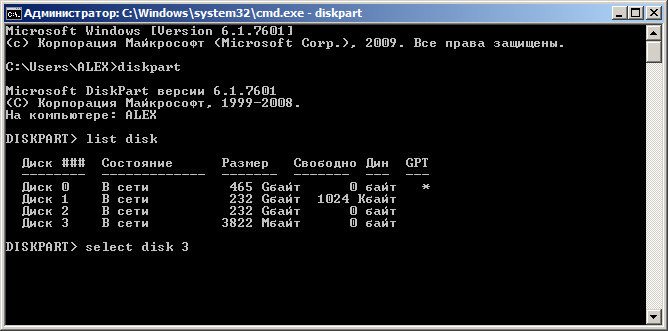
Программа выбирает нашу флешку
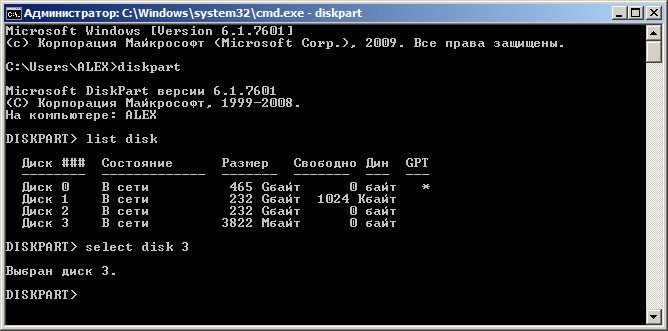
Далее команда clean, которая произведёт на нашей флешке полное удаление файлов, жмём Enter
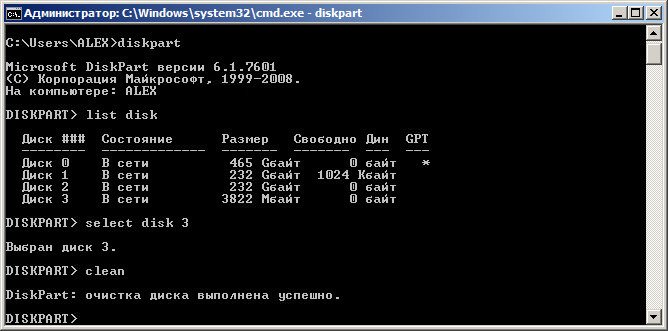
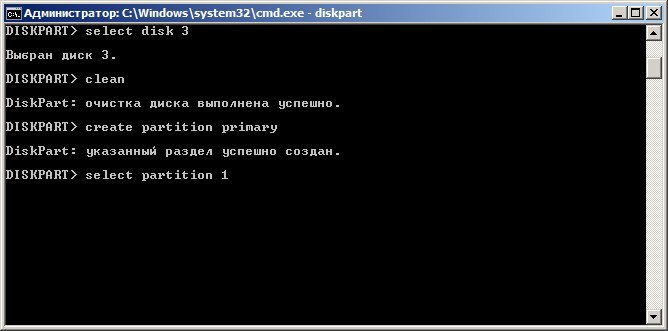
Следующая команда create partition primary и Enter
Раздел создан

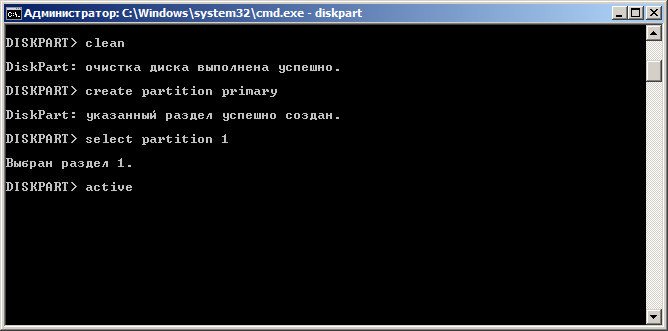
Далее команда select partition 1 и жмём Enter
Команда activeи нажимаем Enter:
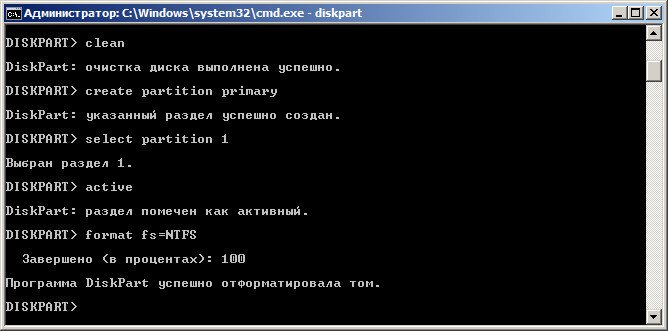
Далее мы с вами производим форматирование нашей флешки в формат NTFS командой format fs=NTFS и нажимаем Enter. Форматирование не должно быть долгим, но если ждать вы совсем не можете, воспользуйтесь командой для быстрого форматирования format fs=NTFS QUICK
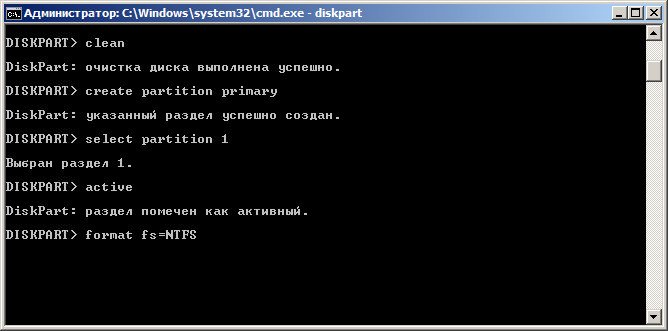
Ожидаем окончание форматирования
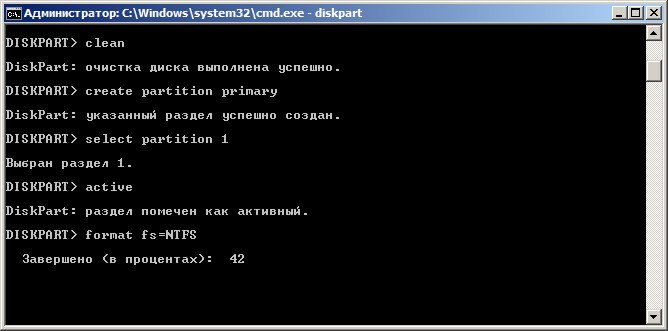
Завершено
Водим команду assign и флешке автоматически назначается буква, в нашем случае J
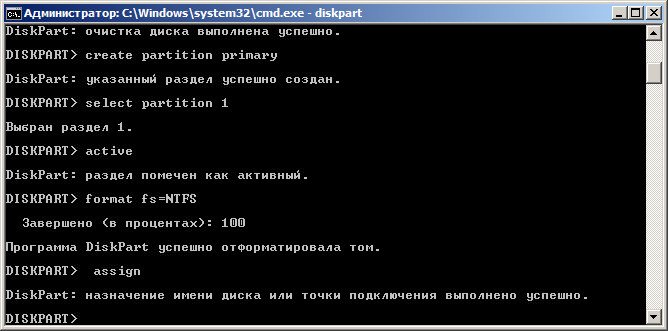
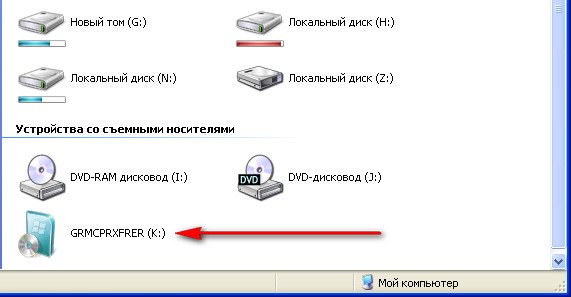
Появляется флешка
Выходим командой Exit
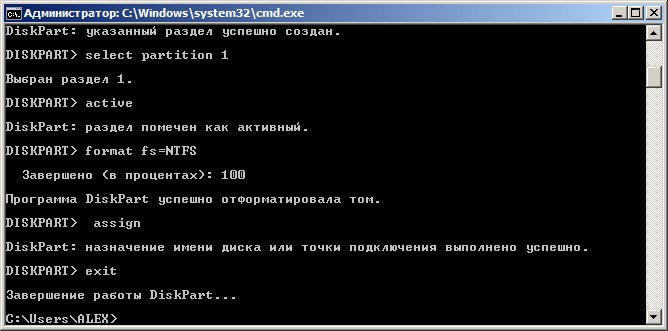
Теперь нам осталось просто скопировать файлы с диска дистрибутива операционной системы на нашу флешку и всё, она будет у нас загрузочная и мы сможем установить с неё Windows 7 куда угодно.
Статьи по этой теме: