Here is the working VirtualBox image of Windows 7; you can download and use it in minutes. It will work on most of the host Operating Systems like Windows 10/11 or Linux and macOS as long as you have the Oracle VirtualBox software.
Windows 7 is an outdated OS from Microsoft now. It is highly not recommended to use in the production environment. For any specific reasons, you still need to use it as a virtual machine; the below pre-installed image will make your life easy.
About this Windows 7 Pre-Installed VirtualBox Image:
- This image has Windows 7 ultimate OS type.
- You do not need to activate the Windows from the control panel.
- VirtualBox guest additionals are installed to provide better performance and multiple screen resolutions.
- The administrator account doesn’t have a password.
How to Use Windows 7 VirtualBox Image on Windows host
- Make sure your host computer has enough hardware resources. You should be able to allocate a minimum of 2GB RAM and 2 processor cores and have free disk space of 50GB.
- Download and install the latest Oracle VirtualBox.
- Download the pre-installed image of Windows 7 from our official link.
- You need to have the 7Zip program to extract the content. The downloaded zip file has the virtual hard disk file of the virtual machine. Since it doesn’t have the configuration file, we need to create a new VM and attach the extracted VDI file.
- Create a new virtual machine and select Windows 7 as the guest VM.
- In the disk creation screen, select the existing disk option and browse the extracted VDI file.
- Other steps are usual and straightforward in VirtualBox.
- Once you power on the VM, it should boot without any issues. The Windows 7 virtual machine will be ready in 2 minutes.
The above steps are identical if you are going to use this pre-installed image on Linux or macOS computers.
Read Also: Windows XP VirtualBox VDI Image
Important Settings/Steps
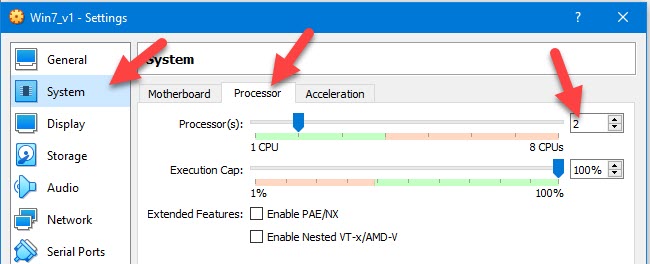
- If the virtual machine performs slow, you can increase the RAM and processor core numbers. It worked fine for me with 2GB RAM and 2 Processor cores.
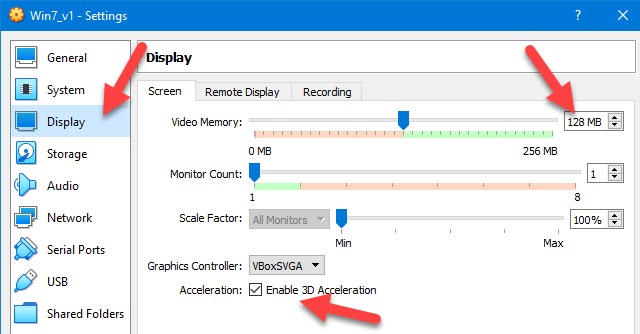
- To get the full screen and other display enhancements by VirtualBox guest additions, you need to increase the video memory (to 128MB) and enable 3D acceleration. By default, these settings are not enabled. You need to change them while the virtual machine is powered off.
- If required, you need to run the Windows update or install the specific Windows 7 updates. This image doesn’t have any Windows updates.
- Always take a snapshot before you make any significant changes.
- It is highly recommended to set the admin password.
- Since Windows 7 is officially not supported by Microsoft anymore, do not use it as your regular Operating System.
We believe this Windows 7 pre-installed VirtualBox image is helpful in some way to use for testing, development or running any legacy applications and games.
If any of the above solutions did not fix the Windows PC issues, we recommend downloading the below PC repair tool to identify and solve any PC Issues.
Dinesh is the founder of Sysprobs and written more than 400 articles. Enthusiast in Microsoft and cloud technologies with more than 15 years of IT experience.
Search “Windows 7 ISO file” and you will find tons of results. Visit any of them and download Windows 7. Soon you will find either Windows 7 setup files are either broken, corrupted, or infected.
To avoid any of those, you can use the given link below to download Windows 7 ISO for PC and laptop. You can also use Windows 7 ISO for VirtualBox and VMware too. From using Windows 7 for upgrading your system from earlier versions of Windows such as Windows XP to perform a clean installation on a PC, all of them can be done using the setup file of Windows 7.

Windows 7 is a great option for businesses and corporations. While Windows 7 is a great option to perform from basic to advanced work on the other hand the extended support for Windows 7 has been ended too.
Microsoft Windows 7 reached its end of life on January 14, 2020. Only reason now users are using Windows 7 is cause they are installing it on older hardware or want to perform virtualization.
While both of them require product keys for installation. Product keys can be accessed from retail stores or from sites online. Whereas downloading ISO files is quite a challenge, as you might get infected files with the system files of Windows 7.
Why should you download from us?
A few years ago, users who had Windows 7 product keys had the option to download the setup of Windows 7 in an ISO file from Microsoft’s official page.
However; now you can’t even download the ISO file from the official Microsoft page. The only way to get Windows 7 is to get it from third-party sites. While they provide the ISO files for free, you might also get:
- Corrupt Windows 7 system files.
- There is the possibility that the system files of Windows 7 can be missing.
- The setup file of Windows 7 can be infected by viruses, malware, or spyware.
So, use the links to download Windows 7; create a bootable USB, upgrade your Windows, perform a clean installation, or do virtualization. Or you can also Dual Boot Windows 11 and Windows 7
Windows 7 ISO Free Download for VirtualBox

Use a great OS with low spec requirements. Here you will use the direct link to download the original untouched ISO file full version of Windows 7. It is the offline installer of Windows 7 that can be used on 32-bit systems and 64-bit systems.
Microsoft Windows 7 was the successor of Windows XP and was later succeeded by Windows 8.1. The OS is great in terms of stability and performance. And on installing the OS, you will get tons of powerful tools.
The OS comes in different editions each for a specific purpose. So, here are all the editions of Windows 7 with links to download them too.
Related: Free Download Windows XP ISO for VirtualBox

Windows 7 Starter
The most basic edition of Windows 7. This edition was for users with low-spec PC. It was available for 32-bit CPU architectures PC only and was for basic uses. The edition lacked tons of features but was the most affordable edition of Windows 7.

Windows 7 Home Basic
Home basic was for home users. It was the edition with multi-media support. This edition of Windows 7 has an Aero theme with Aero visual graphic support. Windows has all the basic features and tools needed for a day-to-day user.

Windows 7 Home Premium
In Windows 7 Home Premium, you will find all the entertainment tools. Home Premium also has an Aero theme but also a clear glassy look. In this edition of Windows 7, Microsoft also added the Media Center too.

Windows 7 Professional
Professional edition was released for small businesses. This edition of Windows had all the networking tools required for a business. As a comparison to Home Premium, you will find Professional improved in terms of performance and number of features.

Windows 7 Enterprise
You will find Enterprise more appealing as compared to previous editions. This edition was released for large companies and organizations. It was suitable for both national and international firms. All the tools required for a big company are present in this edition with additional security.

Windows 7 Ultimate
Ultimate editions it the most powerful edition in Windows 7. You will find all the other features present in Ultimate. Features such as Home Group, Jump list, Snap, Windows Search, BitLocker, Windows Defender, Windows Firewall, and much more.
Windows 7 VirtualBox Image Download

Previously on Microsoft’s official site, an Image file of Windows 7 was available. You had the option to download Windows 7 ISO Image for VirtualBox or any other virtual machine.
The ISO IMAGE was provided with “.vbox” extension. Normally you would find them as “setup1.box” or “setup2.box” files.
All work needed was to download it and then directly use it on any Virtual Machine. However; now you won’t find the Windows 7 IMAGE.
And even if I will create one for you, still you can burn it on any device. You can’t create any sort of bootable device. As for just burning the IMAGE file, you will need to perform a great deal of work. Instead, you can download Windows 7 ISO file and use it on your virtual machine.
This way, you have the option to perform virtualization and to make a bootable device too.
How to download Windows 7 ISO Image for VirtualBox for free?
To download Windows 7 ISO Image for VirtualBox, you can visit iTechscreen. Here you can download all ISO Images of Windows, macOS, and Linux. Use the direct link to download Windows 7 ISO Image file for free and there is no need to create any sort of account.
Visit the site, and navigate to Windows 7 ISO. Select your Windows 7 edition and download the ISO file. Get the ISO file for free without any risk of malware, virus, or other threats.

Once you have downloaded the file then you can also use them on VirtualBox. Here are some examples of Windows installed on VirtualBox.
Related: How to Install Windows 11 on VirtualBox?
Related: How to install Windows 10 on VirtualBox?
Requirement for installing Windows 7
If you are having a VirtualBox then I am quite sure that you have all the specs to run Windows 7. However; these are the required minimum specs to run Windows 7 on any system.
- 1 GHz of Processor or above
- 32-bit or 64-bit supported processor
- 15 Gb Hard Disk Space for 32 bit or 20GB Space for 64bit
- DirectX 9 Graphics to use Windows Aero Feature
Use the downloaded Windows 7 ISO to create a bootable USB
Yes, you can use the downloaded Windows 7 file to create a bootable USB. Once you have created a bootable USB, then you can use it to perform a clean installation or to upgrade your system.
Is it legal to download Windows 7?
You can download Windows 7 setup file without any issue. However; you will need to purchase product keys to activate the OS. Using any sort of script file or activator to activate your Windows 7 is totally illegal.
How can I update my Windows 7?
Back in 2020, Windows reached its end of life. This means no more updates for Windows will be provided. The only way to update your Windows is to manually download the updated files. And to download the updated files, you will need to go to the Microsoft Windows catalog.
What is the best version of Windows 7?
In the entire Windows 7 series, Windows 7 Ultimate is probably the best one out there. Ultimate has all the tools and features other Windows editions have. Not only the performance is improved in this edition but the stability is also better. Out of all the Windows 7 editions, you are recommended to use Windwos7 Ultimate.
Where can I download the Genuine ISO file of Windows 7?
To download genuine untouched Windows 7 ISO files, you can visit iTechscreen. Here you can download all versions of Windows files that can be used to upgrade, for a clean installation, or for virtualization purposes. As there is the Windows 7 ISO file for VirtualBox.
Download Windows 7 IMAGE or ISO?
If you are confused between downloading the ISO or Image file of Windows 7 then you are recommended to download the ISO file. As you can perform a clean installation, upgrade your Windows, do virtualization or create a bootable USB with the ISO file. Whereas, Image files can be only used for virtualization only. On other hand to create a bootable device Image will take hours of work.
Item Preview

VirtualBox_Windows 7 Ultimate_14_08_2022_18_18_25.png
VirtualBox_Windows 7 Ultimate_14_08_2022_18_19_45.png
VirtualBox_Windows 7 Ultimate_14_08_2022_18_19_57.png
VirtualBox_Windows 7 Ultimate_14_08_2022_18_21_47.png
VirtualBox_Windows 7 Ultimate_14_08_2022_18_26_01.png
Windows 7 Accessories.png
Windows 7 DVD Maker.png
Windows 7 Desktop.png
Windows 7 Games.png
Windows 7 Google.png
Windows 7 Internet Explorer 8.png
Windows 7 Media Center.png
Windows 7 Media Player.png
Windows 7 More Games.png
Windows 7 Startup.png
50,485
Views
14
Favorites
7
Reviews
DOWNLOAD OPTIONS
Uploaded by
SunnyD Studios
on
SIMILAR ITEMS (based on metadata)
CONTENTS
- VirtualBox Images Umair 2021-08-22T11:16:13+02:00. We offer open-source (Linux/Unix) virtual machines (VDIs) for VirtualBox, we install and make them ready-to-use VirtualBox images for you. From here you can download and attach the VDI image to your VirtualBox and use it. We offer images for both architectures 32bit and 64bit, you can download.
- CentOS 7.1 (32bit/x86/i686) VM Image Available for VirtualBox and Vmware. Johny Hughes from CentOS community announced the public availability of CentOS 7.1 Linux for the 32bit/x86/i686 architecture: “We would like to announce the general availability of CentOS Linux 7 for the 32-bit x86 (i386) architecture. This is the first major release of.
Introduction
VirtualBox — Virtual Disk Images. Here is a list of virtual disk images available for VirtualBox: Windows 95 (‘C’ version) . Notes: If you get a protection error, make sure your RAM is set between 100-200 MB, and then reset the virtual machine by going to Machine Reset.
Here, we provide ready to use CentOS 7 VirtualBox and VMware images for urgent requirements. The VirtualBox and VMware images are created in such a way that they are less in size but contains all the standard packages required for instant run.
Download Links
Both VirtualBox and VMware support OVA & OVF image formats which means you can use VirtualBox image on VMware and vice versa. However, sometime you may face network issues due to interface naming, especially in Red Hat Enterprise Linux derivatives.
CentOS 7.9.2009
CentOS 7.9.2009 — Minimal Installation |
|---|
FASTER DOWNLOAD AD SUPPORTED — Read Why?REGULAR DOWNLOAD (LINKS SOON…)VirtualBox MD5 — 8064898c4c042c9e5f4b445b483eee56 VMware MD5 — 41a1a648187efce5d101e8c3de02a8b8 |
CentOS 7.9.2009 — Graphical Desktop Installation |
|---|
FASTER DOWNLOAD AD SUPPORTED — Read Why?REGULAR DOWNLOADVM images comes pre-installed with VirtualBox Guest Additions / Open VM Tools for better performance VirtualBox MD5 — 7ec0ec46ca288a3e74343a81bb63ddb1 VMware MD5 — ed5f9782d1feddf7643768eecdbd28e5 |
CentOS 7.8.2003
CentOS 7.8.2003 — Minimal Installation |
|---|
FASTER DOWNLOAD AD SUPPORTED — Read Why?REGULAR DOWNLOADVM images comes pre-installed with VirtualBox Guest Additions / Open VM Tools for better performance. |
CentOS 7.8.2003 — Graphical Desktop Installation |
|---|
FASTER DOWNLOAD AD SUPPORTED — Read Why?REGULAR DOWNLOADVM images comes pre-installed with VirtualBox Guest Additions / Open VM Tools for better performance |
CentOS 7.7.1908
CentOS 7.7.1908 — Minimal Installation |
|---|
REGULAR DOWNLOADVM images comes pre-installed with VirtualBox Guest Additions / Open VM Tools for better performance. |
CentOS 7.7.1908 — Graphical Desktop Installation |
|---|
REGULAR DOWNLOADVM images comes pre-installed with VirtualBox Guest Additions / Open VM Tools for better performance |
System Details & Password
| NOTES | |
| SYSTEM DETAILS | LOGIN DETAILS |
|
vCPU: 1 RAM: 2GB DISK: 1000GB /boot : 1GB swap : 4GB / : 890GB /home: 100GB Network: Bridged |
Username: centos Password : centos (to become root, use sudo su -) |
How To Use
You can visit our dedicated section on how to import virtual machine images on VirtualBox and VMware Workstation.
Conclusion
Thank you for downloading ready to use CentOS 7 VM images. Please feel free to share your feedback in the comments section.
Install Home Assistant Operating System

Download the appropriate image
-
VirtualBox (.vdi)
-
KVM (.qcow2)
-
Vmware Workstation (.vmdk)
-
Hyper-V (.vhdx)
Follow this guide if you already are running a supported virtual machine hypervisor. If you are not familiar with virtual machines we recommend installation Home Assistant OS directly on a Raspberry Pi or an ODROID.
Create the Virtual Machine
Load the appliance image into your virtual machine hypervisor. (Note: You are free to assign as much resources as you wish to the VM, please assign enough based on your add-on needs)
Minimum recommended assignments:
- 2GB RAM
- 32GB Storage
- 2vCPU
All these can be extended if your usage calls for more resources.
Hypervisor specific configuration
- Create a new virtual machine
- Select “Other Linux (64Bit)
- Select “Use an existing virtual hard disk file”, select the VDI file from above
- Edit the “Settings” of the VM and go “System” then Motherboard and Enable EFI
- Then “Network” “Adapter 1” Bridged and your adapter.
- Create a new virtual machine in
virt-manager - Select “Import existing disk image”, provide the path to the QCOW2 image above
- Choose “Generic Default” for the operating system
- Check the box for “Customize configuration before install”
- Select your bridge under “Network Selection”
- Under customization select “Overview” -> “Firmware” -> “UEFI x86_64: …”.****
- Create a new virtual machine
- Select “Custom”, make it compatible with the default of Workstation and ESX
- Choose “I will install the operating system later”, select “Linux” -> “Other Linux 5.x or later kernel 64-bit”
- Select “Use Bridged Networking”
- Select “Use an existing virtual disk” and select the VMDK file above,
Laptop Windows 7 32-bit
After creation of VM go to “Settings” and “Options” then “Advanced” and select “Firmware type” to “UEFI”.
- Create a new virtual machine
- Select “Generation 2”
- Select “Connection -> “Your Virtual Switch that is bridged”
- Select “Use an existing virtual hard disk” and select the VHDX file from above
After creation go to “Settings” -> “Security” and deselect “Enable Secure Boot”.
Start up your Virtual Machine
- Start the Virtual Machine
- Observe the boot process of Home Assistant Operating System
- Once completed you will be able to reach Home Assistant on homeassistant.local:8123. If you are running an older Windows version or have a stricter network configuration, you might need to access Home Assistant at homeassistant:8123 or
http://X.X.X.X:8123(replace X.X.X.X with your ’s IP address).
With the Home Assistant Operating System installed and accessible you can continue with onboarding.
Onboarding
Install Home Assistant Core
Install WSL
To install Home Assistant Core on Windows, you will need to use the Windows Subsystem for Linux (WSL). Follow the WSL installation instructions and install Ubuntu from the Windows Store.
Windows 7 32-bit Amazon
As an alternative, Home Assistant OS can be installed in a Linux guest VM. Running Home Assistant Core directly on Windows is not supported.
Prerequisites
This guide assumes that you already have an operating system setup and have installed Python 3.8 (including the package python3-dev) or newer.
Install dependencies
Before you start make sure your system is fully updated, all packages in this guide are installed with apt, if your OS does not have that, look for alternatives.
Install the dependencies:

Create an account
Add an account for Home Assistant Core called homeassistant.Since this account is only for running Home Assistant Core the extra arguments of -rm is added to create a system account and create a home directory.
Create the virtual environment
First we will create a directory for the installation of Home Assistant Core and change the owner to the homeassistant account.

Next up is to create and change to a virtual environment for Home Assistant Core. This will be done as the homeassistant account.
Once you have activated the virtual environment (notice the prompt change to (homeassistant) [email protected]:/srv/homeassistant $) you will need to run the following command to install a required Python package.
Once you have installed the required Python package it is now time to install Home Assistant Core!
Windows 7 32-bit Iso Bootable Usb
Start Home Assistant Core for the first time. This will complete the installation for you, automatically creating the .homeassistant configuration directory in the /home/homeassistant directory, and installing any basic dependencies.
You can now reach your installation via the web interface on http://homeassistant.local:8123.
If this address doesn’t work you may also try http://localhost:8123 or http://X.X.X.X:8123 (replace X.X.X.X with your machines’ IP address).
When you run the hass command for the first time, it will download, install and cache the necessary libraries/dependencies. This procedure may take anywhere between 5 to 10 minutes. During that time, you may get “site cannot be reached” error when accessing the web interface. This will only happen for the first time, and subsequent restarts will be much faster.
Windows 7 64 Bit Virtual Machine Download
Help us to improve our documentation
Suggest an edit to this page, or provide/view feedback for this page.
Привет друзья, буквально на днях я написал подробную статью Как скачать готовую виртуальную машину с Windows 10, судя по Вашим письмам данная тема всем показалась интересной и сегодня я её продолжу. Если Вы имели хоть раз в жизни дело с популярной виртуальной машиной VirtualBox, то знаете, что для работы сначала необходимо скачать и установить VirtualBox в операционную систему, затем настроить соответствующим образом саму виртуальную машину, потом найти в сети дистрибутив необходимой операционной системы Windows XP, Vista, 7, 8, 8.1, 10 и установить эту операционную систему на VirtualBox.
Сегодня мы сократим это приключение до минимума! Мы установим себе на компьютер VirtualBox, затем скачаем файл готовой виртуальной машины с Windows 7 и запустим его, запустится готовая виртуальная машина с уже установленной версией Windows 7.
Как скачать готовую виртуальную машину с Windows 7
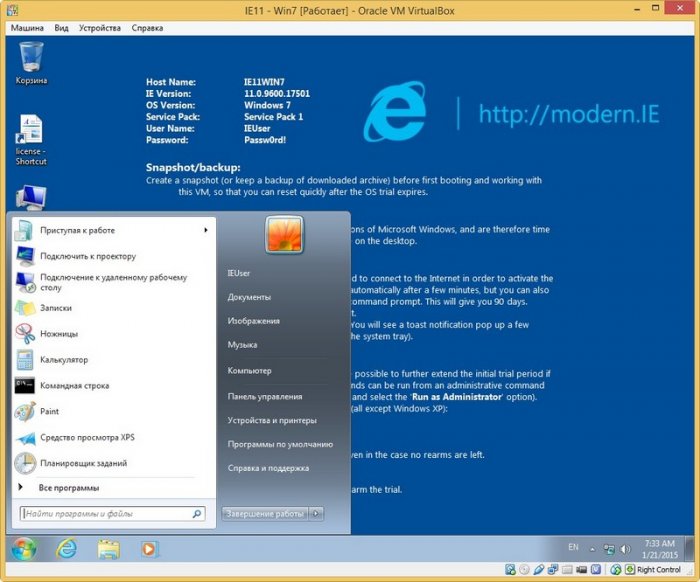
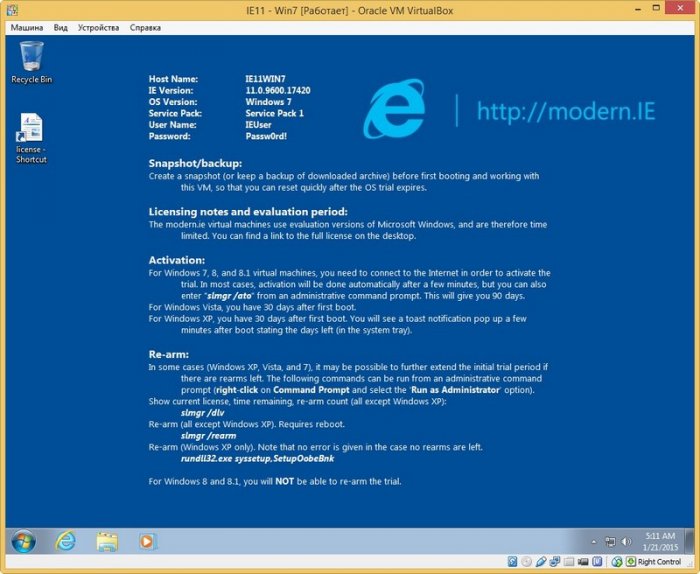
Переходим по ссылке на сайт — modern.ie, на нём можно скачать готовые виртуальные машины с Windows XP, Vista, 7, 8, 8.1, 10.
на английском:
Выбираем Windows 7.

Затем выбираем версию виртуальной машины VirtualBox и жмём на кнопку Download Zip Archive (single-file)

и файл готовой виртуальной машины с Windows 7 скачивается нам на компьютер в архиве.
Извлекаем файл виртуальной машины Windows 7 из архива.
Щёлкаем на нём правой мышью и выбираем Открыть с помощью
Продолжить использовать Oracle VM VirtualBox Manager
Указываем параметры импорта будущей виртуальной машины. Можно ничего не менять. Жмём Импорт

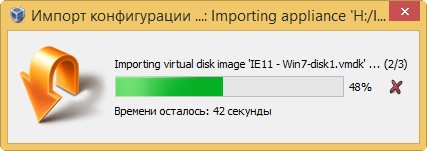
Происходит Импорт конфигурации
Проверить
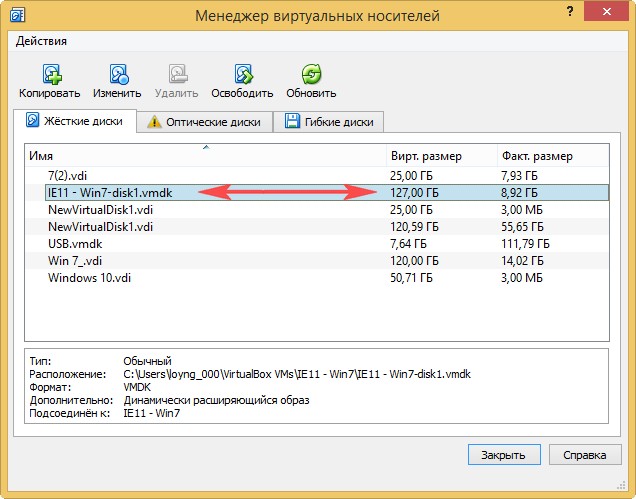
В менеджере виртуальных носителей появляется новый виртуальный жёсткий диск
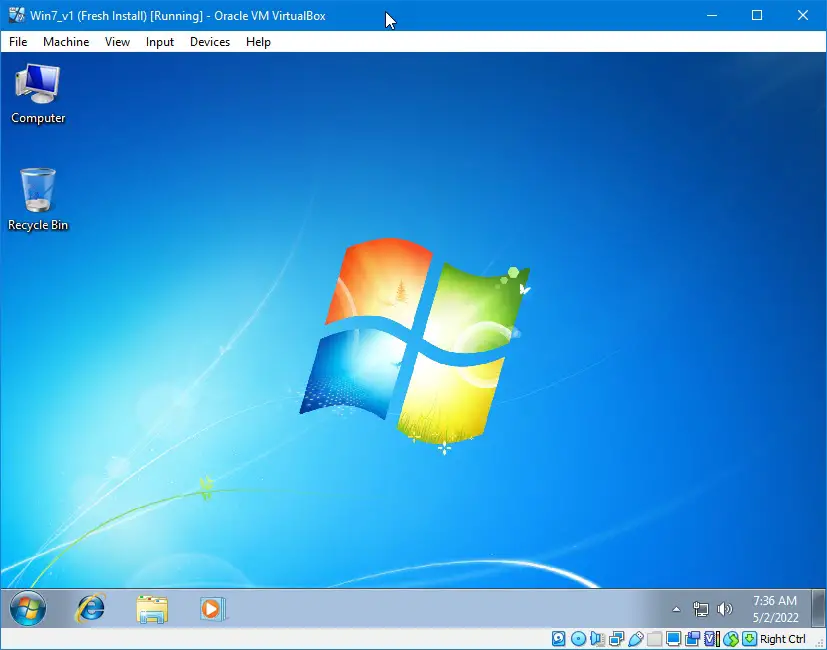
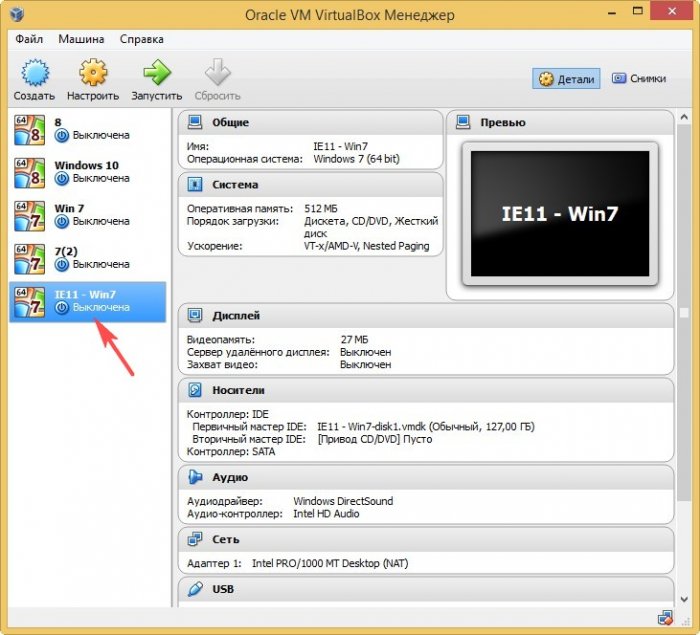
Запускаем новую виртуальную машину
Запускается Windows 7 на английском языке, который мы запросто можем сменить на русский. Во первых Вы можете русифицировать Windows 7 по этой статье, а во вторых сменить интерфейс Windows 7 можно с помощью Центра обновления Windows. Такой способ я Вам ни разу не показывал, так что смотрите, пригодится.
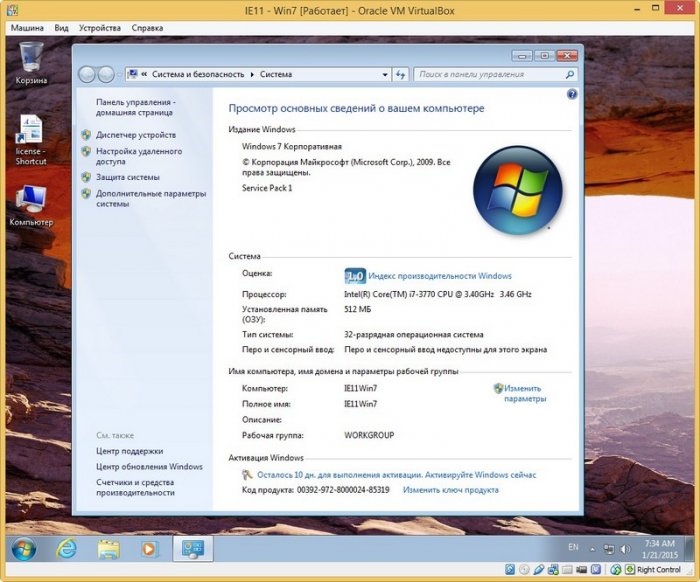
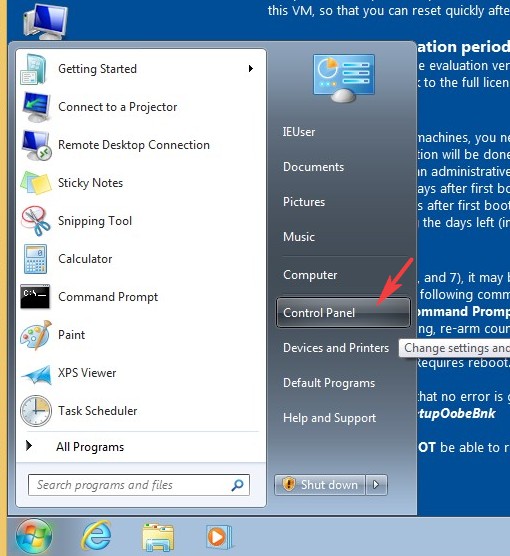
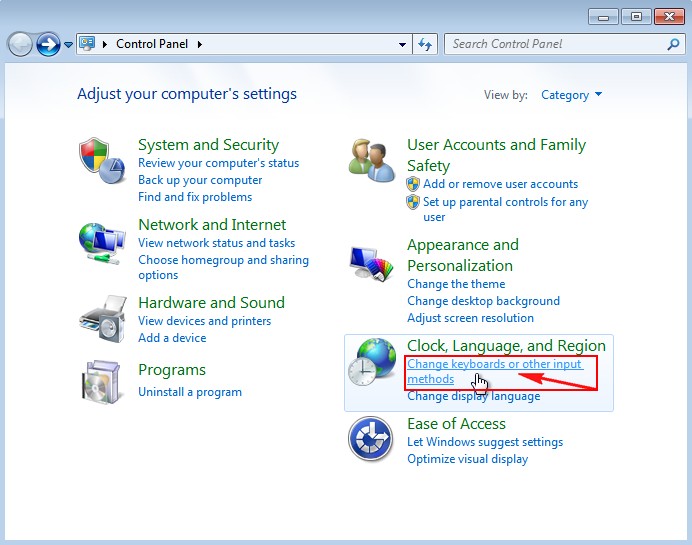
Щёлкаем на меню Пуск левой мышью и выбираем Control Panel
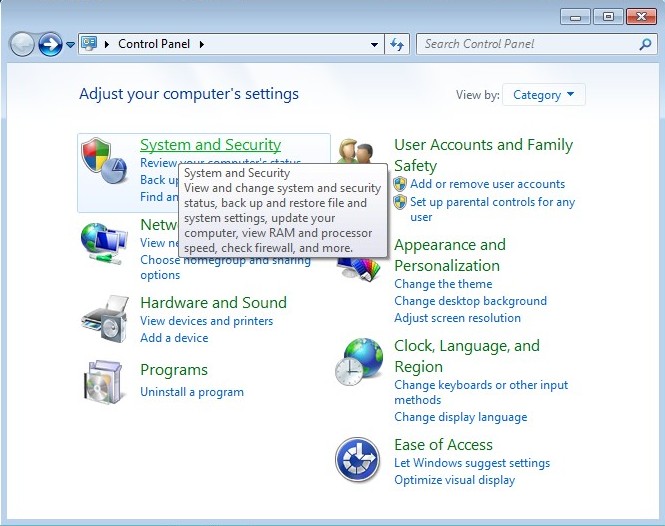
System and Security
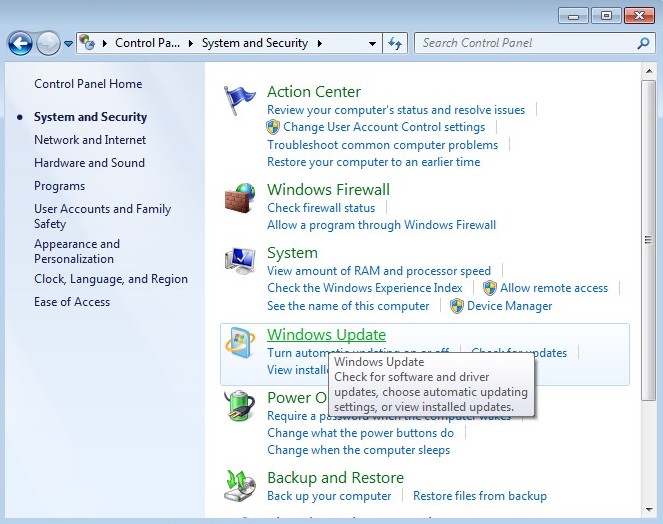
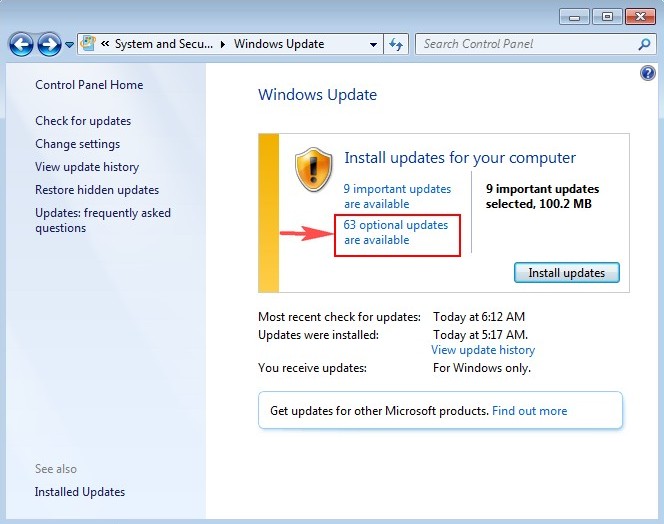
Windows Update
Щёлкните по надписи Необязательные обновления (Optional updates)
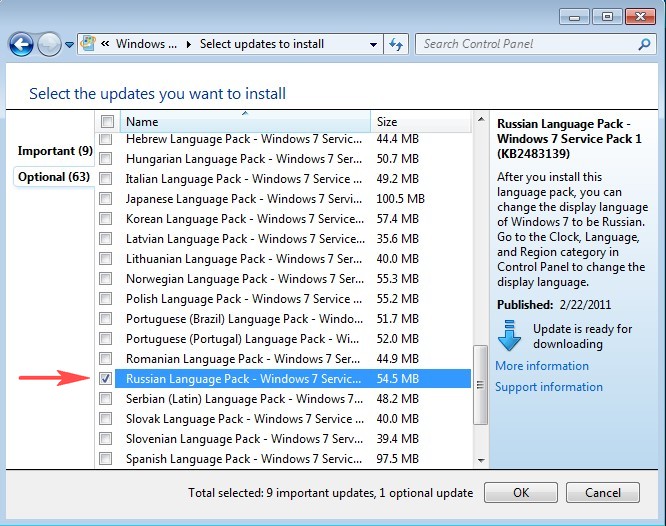
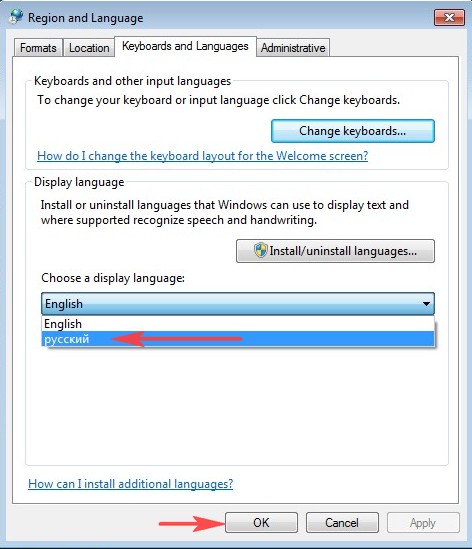
Возникает список Windows Languages Packs. Отмечаем галочкой Русский язык и жмём ОК
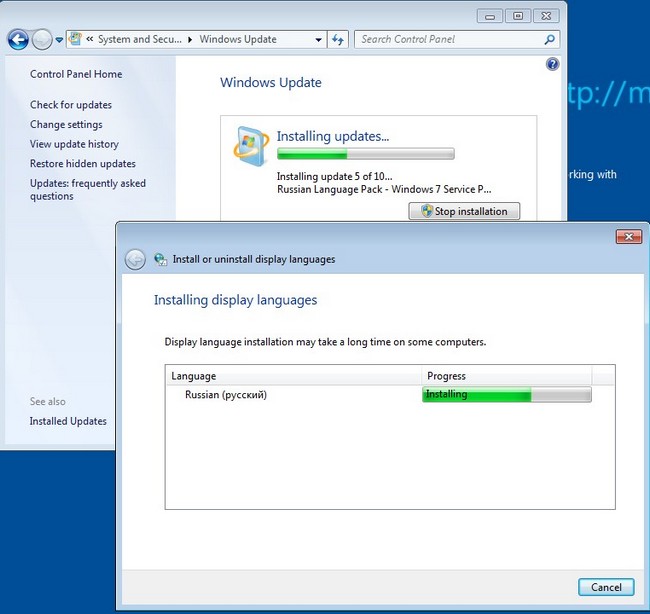
Нажмём кнопку Install updates (Начать установку) и Windows загрузит, а затем установит выбранный язык.

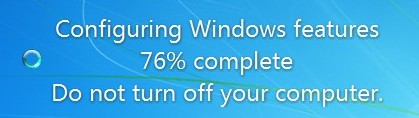
После скачивания обновлений компьютер перезагружается
После перезагрузки опять щёлкаем левой мышью на меню Пуск и выбираем Control Panel
Change keyboards or other input methods (Смена раскладки клавиатуры или других способов ввода)
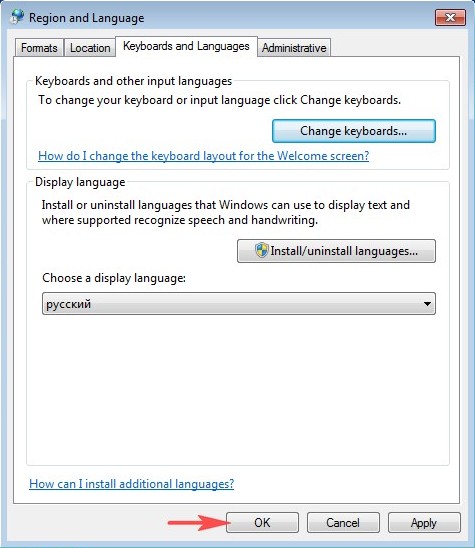
Выбираем Русский язык и жмём ОК.
Log off now
Вводим пароль Passw0rd!
0 это цифра.
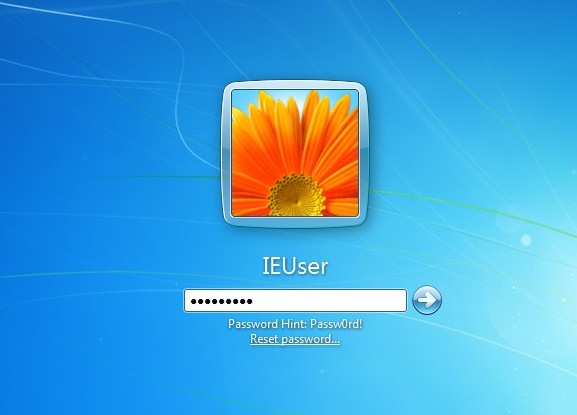
Windows 7 русифицирована.