
В предыдущей части статьи мы подготовили сервер-образец для клонирования: установили все необходимые драйверы, обновления (системные компоненты) и программное обеспечение. Сделали необходимые настройки — включили MPIO для ISCSI и SAS дисков, объединили интерфейсы в группы, создали логические интерфейсы в разных VLAN, изменили размер обрабатываемых пакетов Jumbo Frames (значение MTU выставили равным 9014<).
Теперь перейдем к настройке WDS (Windows Deployment Services — Службы развертывания Windows).
Установка этого компонента ОС Windows Server не вызовет никаких проблем, процедура стандартная. После установки открываем «Панель управления — Администрирование — Службы развертывания Windows». Монтируем ISO образ или подключаем виртуальный DVD-привод и в него вставляем образ ОС Windows Server 2012 R2, находим на нем файлы boot.wim (для добавления образа загрузки) и install.wim (для добавления образа установки ОС):

В детали вдаваться не будем, статья не об этом — хотим лишь отметить необходимые моменты настройки: для удобства управления, создавайте группы для образов загрузки\установки, а так же добавляйте необходимые драйверы сетевых адаптеров — это избавит вас от массы проблем!
разделение по группам помогает применять фильтры при добавлении драйверов (фильтр по вендорам или моделям, видам оборудования и пр.)


Опытным путем была выявлена сложность с загрузкой WinPE для снятия образа, без добавления драйверов сетевого адаптера и RAID-контроллера. Из каких-то соображений производитель не выкладывает драйверы в распакованном виде, только пакет установки. Хорошо, что необходимые драйверы можно найти на компьютере. где уже была произведена установка. Находятся они по следующему адресу: C:\Program Files\Intel

Следующий этап — создание образа записи:

Вводим имя образа записи и его описание (чтобы самим потом не путаться, в название добавляем слово Capture). Выбираем место где он будет сохранен. После создания, убедимся что образ добавлен на сервер (раздел «Образы загрузки»), выделяем его и вызываем контекстное меню, где нас интересует пункт «Добавить пакеты драйверов к образу». Соответственно — добавляем ранее созданную группу драйверов к образу…
Переходим к серверу образцу. Создадим файл
AutoUnattend.xml
следующего содержания:
<?xml version="1.0" encoding="utf-8"?>
<unattend xmlns="urn:schemas-microsoft-com:unattend">
<settings pass="generalize">
        <component name="Microsoft-Windows-PnpSysprep" processorArchitecture="amd64" publicKeyToken="31bf3856ad364e35" language="neutral"
versionScope="nonSxS" xmlns:wcm="http://schemas.microsoft.com/WMIConfig/2002/State" xmlns:xsi="http://www.w3.org/2001/XMLSchema-instance">
            <PersistAllDeviceInstalls>true</PersistAllDeviceInstalls>
        </component>
    </settings>
</unattend>
Сохраняем по следующему пути C:\Temp. Далее в командной строке запускаем утилиту sysprep:
%SystemRoot%\system32\sysprep\sysprep.exe /generalize /unattend:C:\Temp\AutoUnattend.xml

После выполнения sysprep и перезагрузки заходим в BIOS и выбираем загрузку по сети (PXE). Если у вас нормально настроен DHCP, — он передаст необходимые параметры (IP адрес PXE сервера и пр.) сетевому адаптеру, для загрузки WinPE и мы увидим строку загрузки для захвата образа:

жмем Enter и загружаем WinPE со всеми необходимыми инструментами для захвата:

выбираем раздел диска, с которого будет создан образ (на скриншоте он обозначен как D:\ — потому как он второй раздел на диске). если выбрать нечего — значит, что-то пошло не так с подготовкой системы утилитой sysprep или с добавлением необходимых драйверов, повторите эти этапы.

созданный образ можно загрузить на сервер WDS (но как показывает наш печальный опыт — эта загрузка проходит не оправдано долго и лучше его загрузить вручную позже):

для подключения используйте учетные данные записи доменного или локального администратора. при удачном подключении вы увидите группу образов для установки на сервере WDS

На этом с созданием образа все — можно разворачивать на оставшиеся серверы… Экономия по времени увеличивается с количеством серверов, на которые требуется установить систему. Кроме того, — в дальнейшем этот образ можно будет использовать для загрузки по iSCSI. Об этом мы расскажем в будущем.
Microsoft’s SCCM 2012R2 comes with WinPE5.0 by default and due to compatibility issues with Windows XP with that version I have proceeded to utilize WinPE3.1. To get WinPE 3.1’s image imported onto the SCCM2012R2 environment several steps had to be taken to extract the file and import the appropriate drivers before being able to re-import it back into SCCM.
These steps are commonly documented throughout various sites, but during my research I did not find many complete guides. My recommendation is to create a Windows 7 virtual machine whose only purpose will be to create and update WinPE boot images. We will start with the following steps as bare minimums:
Downloading & Installing WAIK 3.1
- Download and Install the WAIK 3.0 on this machine.
- Download and mount the supplementary WAIK 3.0 update
- If using virtual machine you can mount the ISO to the virtual CD/DVD drive.
- To install the WAIK 3.1 supplementary update, run command prompt in elevated mode and change directory onto the mounted CD/DVD drive with the following command assuming E: drive is where the CD/DVD was mounted.
- xcopy E:\ “C:\Program Files\Windows AIK\Tools\PETools” /ERDY
- There will be 1131 files that should be copied.
- Now you can launch the “Deployment Tools Command Prompt” as an administrator to begin the creation process.
Creating a Custom WinPE Image
- Once the “Deployment Tools Command Prompt” has been launched as an administrator run the following command:
- copype.cmd x86 c:\winpe_x86
- copype.cmd amd64 c:\winpe_amd64
Note: The copype.cmd batch will create a folder structure under the named destination above “c:\winpe_x86” and “c:\winpe_amd64” with appropriate sub-folders.
- Run the following commands to copy the WinPE base image:
- copy c:\winpe_x86\winpe.wim c:\winpe_x86\ISO\sources\WinPE3.1_boot_x86.wim
- copy c:\winpe_amd64\winpe.wim c:\winpe_amd64\ISO\sources\WinPe3.1_boot_amd64.wim
- Mount the base Windows PE image using the following command:
- Dism /Mount-Wim /WimFile:C:\winpe_x86\ISO\sources\WinPE3.1_boot_x86.wim /index:1 /MountDir:C:\winpe_x86\mount
- Add the appropriate packages to the WinPE image, we only need three but more are available. The required ones should be added with the following commands:
- Dism /image:C:\winpe_x86\mount /Add-Package /PackagePath:”C:\Program Files\<version>\Tools\PETools\<architecture>\WinPE_FPs\winpe-Scripting.cab”
- Dism /image:C:\winpe_x86\mount /Add-Package /PackagePath:”C:\Program Files\<version>\Tools\PETools\<architecture>\WinPE_FPs\winpe-WMI.cab”
- Dism /image:C:\winpe_x86\mount /Add-Package /PackagePath:”C:\Program Files\<version>\Tools\PETools\<architecture>\WinPE_FPs\winpe-WDS-Tools.cab”
- Verify that the packages were installed by running the following command:
- Dism /image:c:\winpe_x86\mount /Get-Packages
- Finally commit changes to the image by running the following command:
- Dism /unmount-Wim /MountDir:C:\winpe_x86\mount /Commit
Note: Keep track of the “boot.wim” files, name them accordingly to not get the x86 and amd64 mixed up. For example WinPE3.1_Boot_x86.wim and WinPE3.1_boot_amd64.wim will be used as reference from this point forward.
Adding Drivers to SCCM
Adding drivers to WinPE boot images outside of SCCM’s native format is a painstaking process. However, for our needs we needed to add drivers for at least 8 different models. I decided to leverage SCCM by importing each model’s drivers and organizing them through driver packages. This would let me have future usage of the drivers that may be needed in future OS deployments on newer versions of WinPE. If you already have a driver structure configured you may skip this section and go straight into injecting drivers into the WinPE boot image.
- Create a folder in an easily accessible location for SCCM where drivers will be dumped and be used as an import repository, for example:
- \\SERVERNAME\SHARENAME\OperatingSystems\Drivers\Imports\Manufacturer\Model\Model#\
- Create a folder in an easily accessible location for SCCM where driver packages will be stored and used by SCCM, for example:
- \\SERVERNAME\SHARENAME\OperatingSystems\Drivers\Packages\Manufacturer\Model\Model#\
- Launch the SCCM Console, within Software Library expand Operating Systems and right click under Drivers.
- Import the downloaded drivers to SCCM leveraging the newly create import repository as the source folder for each Model #.
- Assign the newly imported drivers to a category matching the model # for easier management.
- Create a driver package if it does not already exist and leverage the newly created driver packages repository, where SCCM will store the already processed drivers.

- Repeat this process for all the desired models that will need WinPE 3.1 drivers imported.
- Continue through and finish the wizard.

Adding Drivers to WinPE 3.1 Boot Image
Now that all the drivers have been added onto SCCM, I can maintain the driver’s folder structure where it can allow me to import all of the packaged drivers onto the WinPE 3.1 boot image. This is where I would bring back the Windows 7 VM that was used to create the base WinPE boot image and follow these steps:
- Create a folder on the root of C:\ called WinPE.
- Create three sub-directories called: Images, Offline and Drivers
- Copy the WinPE3.1_Boot_x86.wim file previously saved under C:\winpe_x86\ to the C:\WinPE\Images\ directory.
- Copy all of the processed drivers located under the driver packages directory’s top folder \\SERVERNAME\SHARENAME\OperatingSystems\Drivers\Packages\ to the C:\WinPE\Drivers\ directory.
- To get the WMI file information open a command prompt as an elevated administrator and type the following commands:
- Dism /Get-WimInfo /WimFile:C:\WinPE\Images\WinPE3.1_Boot_x86.wim
- Now mount the wim file and use the name provided from the previous command. It should be something like “Microsoft Windows PE (x86)”
- Dism /Mount-Wim /WimFile:C:\WinPE\Images\WinPE3.1_Boot_x86.wim /Name:” Microsoft Windows PE (x86)” /MountDir:C:\WinPE\Offline
- Inject the drivers to the newly mounted wim file with the following command:
- Dism /Image:C:\WinPE\Offline /Add-Driver /Driver:C:\WinPE\Drivers /Recurse
- Now wait as this process can take a fair amount of time based on the number of drivers.
- Finally get ready to finalize all the modifications and commit the changes
- Dism /Unmount-Wim /MountDir:C:\WinPE\Offline /Commit
- The modified file should reside under the C:\WinPE\ directory and is now ready to be imported as a boot image in SCCM.
Import a WinPE 3.1 Boot Image to SCCM
Finally we can import the modified WinPE 3.1 boot image into SCCM so it can be used for any type of OS deployment on the appropriate machines.
- Copy the WinPE3.1_Boot_x86.wim files to the share location where SCCM can access them in whatever structured mechanism works for you.
- Launch the SCCM Console, within Software Library expand Operating Systems and right click under Boot Images.
- Specify the UNC path for the custom wim file and click next
- Specify the name, version and comments.
- Review the summary and hit next and close.
- Distribute the boot image to distribution servers as needed.
Note: Custom wim files do not have a lot of the properties available to the default WinPE 5.0 boot image.
- OS Upgrade
- SCCM
- WinPE
Recently a customer wanted the ability to be able to rebuild Windows XP machines (!) via SCCM 2012 R2 by just adding machines into a rebuild collection.
This doesn’t work out of the box with the version of WinPE that ships with SCCM so to get it to work you need to create a custom Boot image based on WinPE 3.1, add it into ConfigMgr and associate it with the Windows XP Task Sequence – this allows WinPE to pre-stage onto the local disk and for the machine to successfully reboot into it.
The following code can be added into a Batch File and executed as an Administrator to automate the creation of the Boot Image and add the required components.
@echo off

echo:
echo # REMOVE DIRECTORY IF IT EXISTS
echo:

RD C:\TEMP\WinPE\LegacyWinPEx86 /S /Q

echo:
echo # CREATE X86 WINPE FOLDER STRUCTURE
echo:

CALL "C:\Program Files\Windows AIK\Tools\PETools\copype.cmd" x86 C:\TEMP\WinPE\LegacyWinPEx86

echo:
echo # COPY WIM FILE TO ISO\SOURCES DIRECTORY AND RENAME AS BOOT.WIM
echo:

COPY C:\TEMP\WinPE\LegacyWinPEx86\winpe.wim C:\TEMP\WinPE\LegacyWinPEx86\ISO\sources\boot.wim

echo:
echo # MOUNT THE BOOT.WIM FILE IN THE MOUNT DIRECTORY
echo:
Dism /Mount-Wim /WimFile:C:\TEMP\WinPE\LegacyWinPEx86\ISO\sources\boot.wim /index:1 /MountDir:C:\TEMP\WinPE\LegacyWinPEx86\mount

echo:
echo # ADD OPTIONAL COMPONENTS TO WINPE IMAGE
echo:

Dism /image:C:\TEMP\WinPE\LegacyWinPEx86\mount /Add-Package /PackagePath:"C:\Program Files\Windows AIK\Tools\PETools\x86\WinPE_FPs\winpe-wmi.cab"
Dism /image:C:\TEMP\WinPE\LegacyWinPEx86\mount /Add-Package /PackagePath:"C:\Program Files\Windows AIK\Tools\PETools\x86\WinPE_FPs\winpe-scripting.cab"
Dism /image:C:\TEMP\WinPE\LegacyWinPEx86\mount /Add-Package /PackagePath:"C:\Program Files\Windows AIK\Tools\PETools\x86\WinPE_FPs\winpe-wds-tools.cab"
Dism /image:C:\TEMP\WinPE\LegacyWinPEx86\mount /Add-Package /PackagePath:"C:\Program Files\Windows AIK\Tools\PETools\x86\WinPE_FPs\winpe-hta.cab"
Dism /image:C:\TEMP\WinPE\LegacyWinPEx86\mount /Add-Package /PackagePath:"C:\Program Files\Windows AIK\Tools\PETools\x86\WinPE_FPs\winpe-mdac.cab"

echo:
echo # SET SCRATCH SPACE TO 128MB
echo:

Dism /Set-ScratchSpace:128 /Image:C:\TEMP\WinPE\LegacyWinPEx86\mount

echo:
echo # ADD ANY REQUIRED DRIVERS TO THE IMAGE
echo:

Dism /Image:C:\TEMP\WinPE\LegacyWinPEx86\mount /Add-Driver /Driver:C:\TEMP\WinPE\Drivers /Recurse

echo:
echo # UNMOUNT IMAGE AND COMMIT CHANGES
echo:

Dism /Unmount-Wim /MountDir:C:\TEMP\WinPE\LegacyWinPEx86\mount /Commit
/ JC
Previously we configured a Windows 2012R2 Windows Deployment Services (WDS) Server to deploy Windows installations over the network. In case you missed it, have a read here to see what we did.
Next, we upgraded our WDS server setup to also deploy VMware ESXi. Again have a read here to see what we did next.
Now it’s time use our WDS server to allow us to quickly boot some diagnostic tools.
This time: Windows Preinstallation Environment (WinPE).
Overview
- Windows Preinstallation Environment Preamble
- Adding Win7PE to WDS Server
- Booting WinPE from WDS Server
- Fixing “The boot files for this architecture are not installed on the server” Error
Windows Preinstallation Environment Preamble
For those unfamiliar with it, Windows Preinstallation Environment (WinPE) is a lightweight version of Windows used for the deployment of PCs, workstations, and servers, or troubleshooting an operating system while it is offline. More info here.
For this, I’ll use my (now ancient) Windows 7 Preinstallation Environment (Win7PE) image I built with WinBuilder back in 2009. I’m not going to cover the creation of a Windows PE image here as there are plenty of guides out there that can show you how to create your own Win7PE image.
One such guide is here:
Although WinPE is described as being “lightweight” you can still end up with quite a hefty image to boot from. Certainly my old Win7PE ISO image weighs in at just over 370MB. Because of this, booting WinPE from CD/DVD is not quick.
Adding Win7PE to WDS Server
Lets speed up the time it takes for us to boot a Win7PE diagnostic CD/DVD.
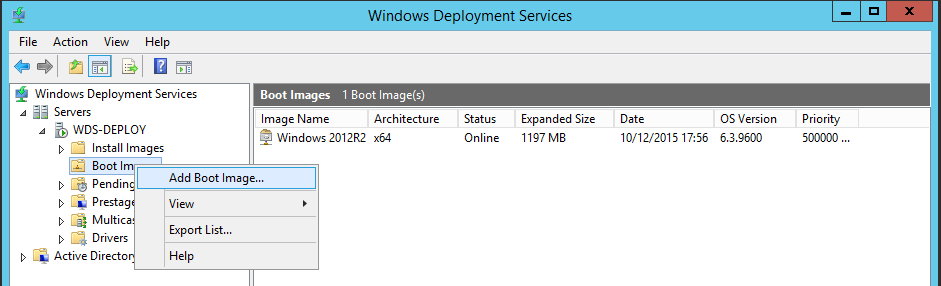
On you WDS Server, open Windows Deployment Services tool (Start > Administrative Tools > Windows Deployment Services), expand the tree, right click Boot Images and select “Add Boot Image”:
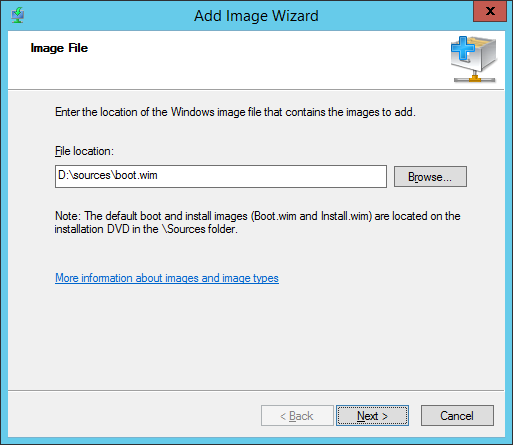
Insert / mount your Win7PE CD/DVD. Browse to the sources folder on the CD and click next:
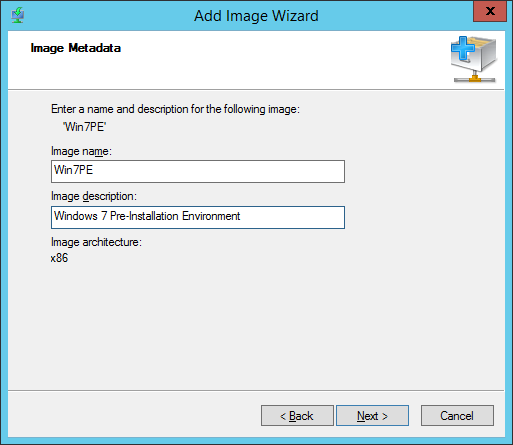
Enter a name and description for your Win7PE boot image:
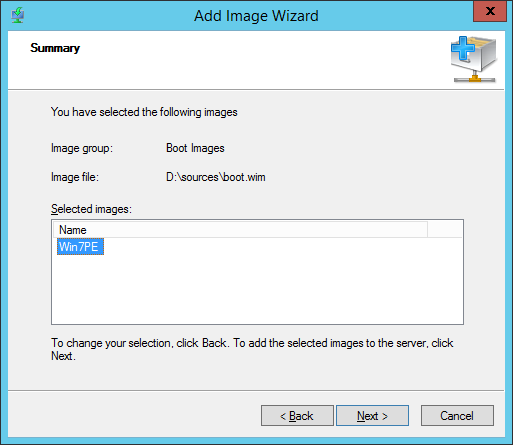
Click Next if all looks OK:
Ahh a problem…
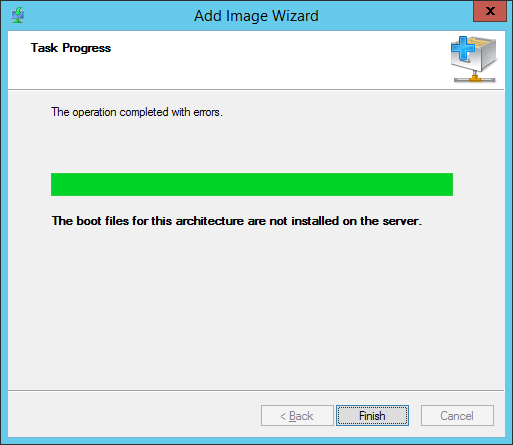
The fix for the error “The boot files for this architecture are not installed on the server” is detailed below.
Try again…
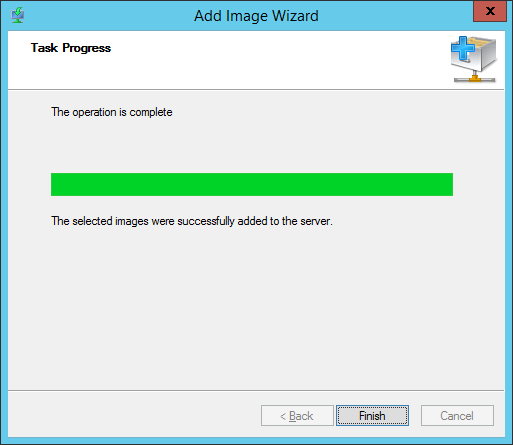
Done. A quick double check:
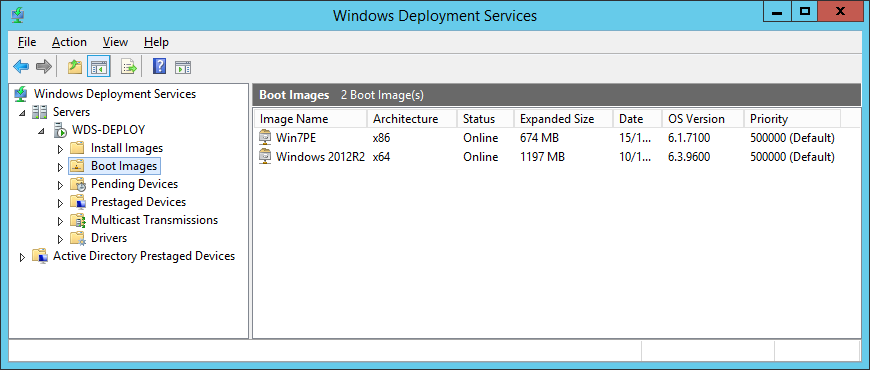
Looks good.
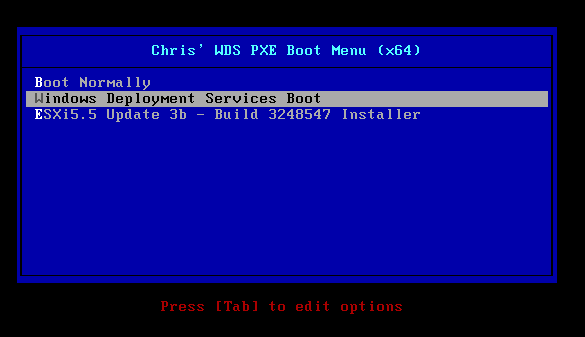
Booting WinPE from WDS Server
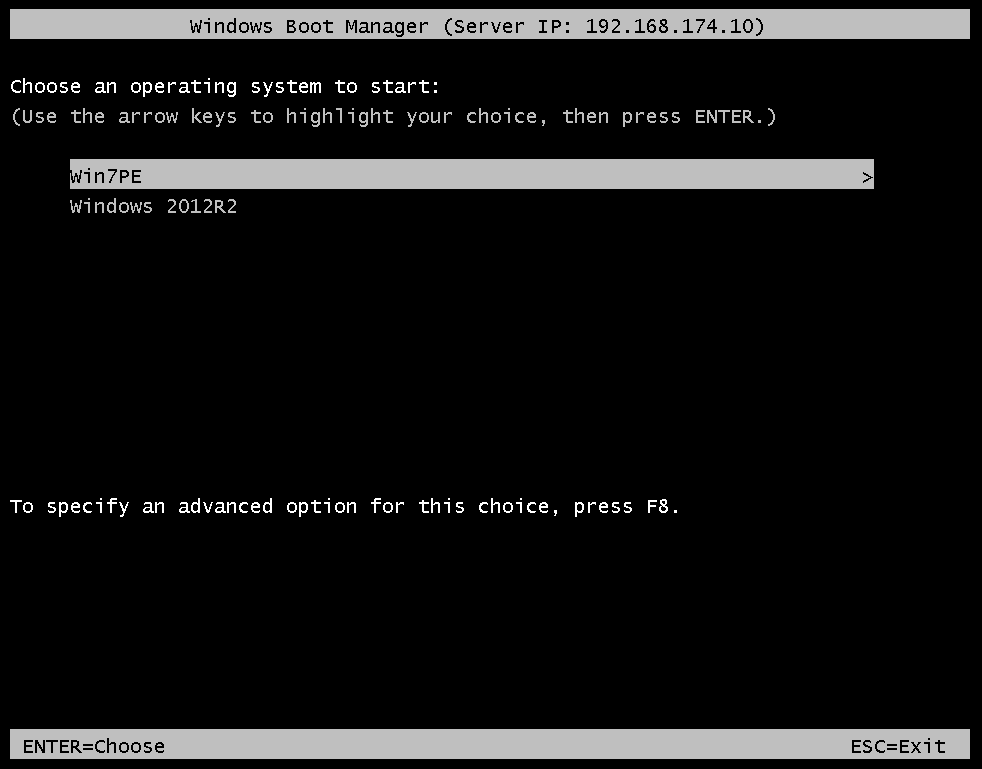
PXE boot your machine as normal. Choose “Windows Deployment Services Boot” (feel free change the menu item to something like “Windows Deployment Services / Windows Preinstallation Boot” if you like):
Select Win7PE:
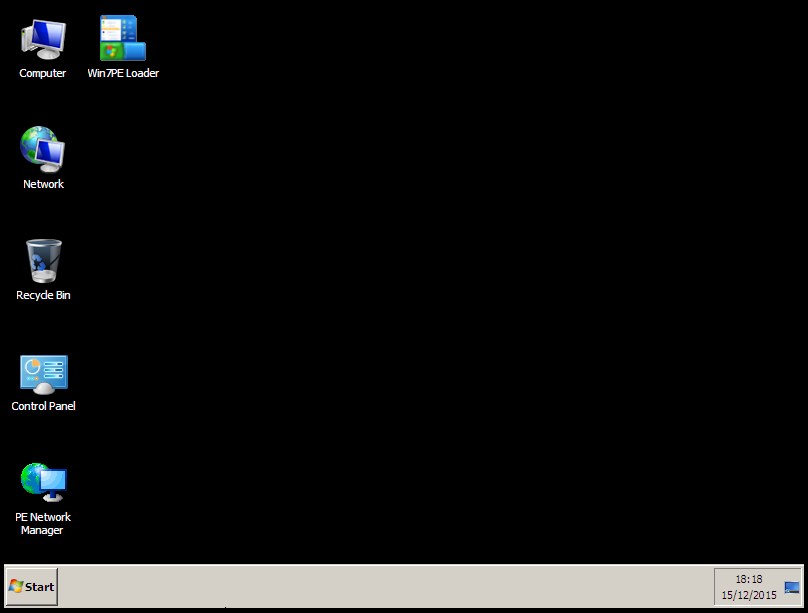
Give it a minute:

Job’s a good-un:
Well there you have it, network booting Windows Preinstallation Environment based diagnostics. Sooo much quicker to boot than a disc of spinning plastic! (CD/DVD etc)
Next time Acronis Disk Director and other tools.
-Chris
Fixing “The boot files for this architecture are not installed on the server” Error
What looks like quite a catastrophic error is actually quite easily fixed. Remember where we added our PXElinux files to our WDS sever here?
Well, we need to temporarily back the boot file change out thus allowing us to add boot images to our WDS server.
Open explorer and browse to C:\RemoteInstall\Boot\x86.
Find the file pxeboot.0 and copy it to a new file called pxeboot.n12.
Next run the following from an administrative command prompt:
wdsutil /set-server /bootprogram:boot\x86\pxeboot.n12 /architecture:x86
wdsutil /set-server /N12bootprogram:boot\x86\pxeboot.n12/architecture:x86
net stop wdsserver
net start wdsserver
Have another go at adding Win7PE to WDS
Once complete, don’t forget to swap the boot files back:
wdsutil /set-server /bootprogram:boot\x64\pxelinux.0 /architecture:x64
wdsutil /set-server /N12bootprogram:boot\x64\pxelinux.0 /architecture:x64
net stop wdsserver
net start wdsserverЕщё в Мае была объявлена доступность Service Pack 1 для System Center 2012 R2 Configuration Manager — Announcing the availability of System Center 2012 R2 Configuration Manager SP1 and System Center 2012 Configuration Manager SP2. Для тех, кто ещё не связывался с темой применения этого обновления могут возникнуть «непонятки» с именованием SP, как например здесь — Service Pack Madness (not). Чтобы расставить всё на свои места и понять, то что фактически System Center 2012 Configuration Manager SP2 и System Center 2012 R2 Configuration Manager SP1 это один и тот же набор файлов (единый дистрибутив), стоит почитать статью System Center 2012 Configuration Manager SP2 and System Center 2012 R2 Configuration Manager SP1: Frequently Asked Questions
Инсталлятор, пригодный как для обновления так и для новой установки SCCM 2012 R2 можно загрузить с веб-узла Microsoft Volume Licensing Service Center (в списке продуктов выбрать продукт System Center 2012 R2 Standard, затем System Center 2012 Configuration Manager and Endpoint Protection With Service Pack 2 Multilanguage (32/64 bit) 1158 MB). По этой ссылке доступен файл образа размером 1,13 GB с именем: SW_DVD5_Sys_Ctr_ConfigMgr_and_Endpnt_Prtctn_2012w_SP2_MultiLang_MLF_X20-21849.ISO
Что нового в SP1 можно узнать здесь: What’s New in System Center 2012 R2 Configuration Manager SP1. Из этого документа, в частности, мы узнаем, что теперь в SCCM поддерживается управление Windows 10, а для Operating System Deployment (OSD) поддерживается как Windows Assessment and Deployment Kit (Windows ADK) 8.1, так и Windows ADK 10.
Заметки к выпуску SP1 здесь: Release Notes for System Center 2012 R2 Configuration Manager SP1
Основные принципы обновления, как и ранее, описаны в статьях: Upgrade Configuration Manager to a New Service Pack и Planning to Upgrade System Center 2012 Configuration Manager.
В целом процесс обновления имеющейся инфраструктуры System Center 2012 R2 Configuration Manager до уровня SP1 схож с уже описанным ранее в заметках System Center 2012 Configuration Manager — Обновляемся до уровня SP1 и Обновляем System Center 2012 SP1 Configuration Manager до уровня System Center 2012 R2, поэтому описывать подробно все шаги обновления здесь я не буду. Сделаю лишь набольшую шпаргалку о том, как обновить загрузочные образы WinPE используемые в SCCM для OSD до уровня поддержки развёртывания Windows 10.
Нам потребуется скачать и установить Windows Assessment and Deployment Kit (ADK) for Windows 10. Перед установкой новой версии ADK нужно будет удалить старую версию (например если ранее была установлена Windows ADK for Windows 8.1).
Если я правильно понял, то автор заметки Brandon Linton — System Center and OS Deployment Blog — Windows 10 ADK Boot image updates for Configuration Manager говорит о том, что новые загрузочные образы появляются в SCCM автоматически если перед установкой SP1 предварительной обновить Windows ADK c 8.1 на 10 версию. Однако в моём случае такого чуда почему-то не произошло. Но это не криминально, так как мы можем выполнить этот процесс самостоятельно и вручную.
Из стартового меню запускаем ярлык с именем Deployment and Imaging Tools Environment (ярлык можно найти в папке C:\ProgramData\Microsoft\Windows\Start Menu\Programs\Windows Kits\Windows ADK)

В открывшейся консоли создаём 32-битный образ WinPE следующим набором команд:
mkdir C:\Temp\WinPE10x86\Mount
copy "C:\Program Files (x86)\Windows Kits\10\Assessment and Deployment Kit\Windows Preinstallation Environment\x86\en-us\winpe.wim" C:\Temp\WinPE10x86\boot.wim

dism /mount-wim /wimfile:C:\Temp\WinPE10x86\boot.wim /index:1 /mountdir:C:\Temp\WinPE10x86\Mount
dism /image:C:\Temp\WinPE10x86\Mount /add-package /packagepath:"C:\Program Files (x86)\Windows Kits\10\Assessment and Deployment Kit\Windows Preinstallation Environment\x86\WinPE_OCs\WinPE-WMI.cab"
dism /image:C:\Temp\WinPE10x86\Mount /add-package /packagepath:"C:\Program Files (x86)\Windows Kits\10\Assessment and Deployment Kit\Windows Preinstallation Environment\x86\WinPE_OCs\WinPE-Scripting.cab"
dism /image:C:\Temp\WinPE10x86\Mount /add-package /packagepath:"C:\Program Files (x86)\Windows Kits\10\Assessment and Deployment Kit\Windows Preinstallation Environment\x86\WinPE_OCs\WinPE-WDS-Tools.cab"

dism /unmount-wim /mountdir:C:\Temp\WinPE10x86\Mount /commit
Затем создаём 64-битный образ WinPE следующим набором команд:
mkdir C:\Temp\WinPE10x64\Mount
copy "C:\Program Files (x86)\Windows Kits\10\Assessment and Deployment Kit\Windows Preinstallation Environment\amd64\en-us\winpe.wim" C:\Temp\WinPE10x64\boot.wim

dism /mount-wim /wimfile:C:\Temp\WinPE10x64\boot.wim /index:1 /mountdir:C:\Temp\WinPE10x64\Mount
dism /image:C:\Temp\WinPE10x64\Mount /add-package /packagepath:"C:\Program Files (x86)\Windows Kits\10\Assessment and Deployment Kit\Windows Preinstallation Environment\amd64\WinPE_OCs\WinPE-WMI.cab"
dism /image:C:\Temp\WinPE10x64\Mount /add-package /packagepath:"C:\Program Files (x86)\Windows Kits\10\Assessment and Deployment Kit\Windows Preinstallation Environment\amd64\WinPE_OCs\WinPE-Scripting.cab"
dism /image:C:\Temp\WinPE10x64\Mount /add-package /packagepath:"C:\Program Files (x86)\Windows Kits\10\Assessment and Deployment Kit\Windows Preinstallation Environment\amd64\WinPE_OCs\WinPE-WDS-Tools.cab"

dism /unmount-wim /mountdir:C:\Temp\WinPE10x64\Mount /commit
Ещё один способ создания образов можно найти в заметке — SCCMentor – SCCM Tips and Fixes — Creating a boot.wim file for SCCM 2012 SP1 and R2 using Windows ADK
Теперь скопируем получившиеся WIM-файлы в сетевую папку и добавим их в SCCM в разделе консоли Software Library > Overview > Operating Systems > Boot Images выбрав действие Add Boot Image

В открывшемся мастере добавления загрузочных образов указываем путь к WIM-файлу который ранее мы разместили в сетевой папке, а также выбираем индекс образа, обнаруженного SCCM в указанном WIM-файле:

Заполняем информацию об имени и версии образа. Версия 10.0.10240.16384 соответствует версии Windows PE для Windows 10 RTM.

После того, как образ добавлен, откроем его свойства и на закладке Customization включим опцию поддержки командной строки в среде WinPE – Enable command support. Такая возможность может потребоваться при траблшутинге потенциальных проблем с OSD.

На закладке Data Source обязательно включим опцию Deploy this boot image from the PXE-enabled distribution point, чтобы данный образ мог загружаться с наших точек распространения.

Сохраним сделанные изменения и теперь нам только остается выполнить распространение нового загрузочного образа по нашим точкам распространения..

Дополнительные источники информации:
- System Center Dudes — Step-by-Step SCCM 2012 R2 SP1 Upgrade Guide
- System Center Configuration Manager Team Blog — Windows 10 ADK and Configuration Manager