
Installing a 64-bit operating system on virtualization applications has never been free of obstacles. In the initial days of virtual machines, this was in fact not even possible. In this post we will tell you how to install Windows Server 2008 R2 x64 on VMware 7.0. Note: These instructions can also help in the installation of the 32-bit version of Server 2008.
When I first attempted to install a 64-bit Server on VMware and Virtual Box, both of them gave me an error that the software was unable to recognize the hardware as 64-bit capable. After more than 9 hours of trial and error I was finally able to get the process right and install Server 2008 R2, as well as configure it according to my liking. While a significant part of my time was spent on being able to get VMware to recognize my hardware as 64-bit, another half was spent on getting other configurations right. Before installing the virtual machine, make sure that virtualization is turned on (from the bios) on your system. We performed testing on a HP G62 core i3 system. For enabling virtualization on this machine the steps are as follows: restart system, press Esc, select F10 and enable virtualization. Without configuring this option, VMware will not recognize your hardware as 64-bit capable. To get started, open VMware, click on the New Virtual machine option, select Custom (Advanced) and click Next.

In the hardware compatibility section select version 6.5-7.0. In the next step select an installation device (e.g. DVD ROM) or add a disk image.

When selecting a guest operating system choose Windows Server 2008 x64. Or select Windows Server 2008 in case you wish to install a 32 bit version.

In the easy installation section, add a product key, name and password. Note: you can leave the product key blank and proceed in case you wish to evaluate server 2008 or activate it later.

Specify a location to save your virtual machine. Make sure that the partition you use should have at least 20GB of free hard disk space.

Next Specify the number of cores to allot to the virtual machine, make sure that you do not allocate all the cores as that can led to system instability.

Select the amount of memory of virtual machine. I would recommend allotting not more than half of the system memory to avoid instability and crashes.

When configuring network settings, choose NAT or bridged networking to make sure that the virtual machine is able to connect to the internet. A bridged network is also more useful for emulating a domain environment to connect the server with virtual client operating systems. In the next step, create a new virtual hard disk, choose a hard disk type and allocate space. At least 20 GB should be allocated to avoid running out of disk space. Although the initial size requirement is about 5 GB, however, installation of updates, software and server components is likely to consume a lot more space.

After that, verify that all parameters are properly configured and click Finish. The operating system will normally boot automatically, however, if it does not, click any key to continue.

The rest of the installation will take place according to normal procedure within VMware.

You will be prompted to change password at first login after which you can start configuring and using Windows Server 2008 R2 x64. The same procedures more or less apply for installing a 32-bit version. However, unlike a 32-bit OS a 64-bit machine will not install without configuring the bios settings (as mentioned before).

After following the aforementioned procedure your will be successfully able to install a x64 or x86 version of Windows server 2008. A lot of people after installing server 2008 find the interface to be deprived of the eye-candy that the Aero effect provides. To learn how to enable the Windows Aero effect for Server 2008, check our guide here.


Installing a 64-bit operating system on VMware can be a bit tricky as it does not install unless virtualization is activated from the Bios settings. In this post I will tell you how to install Windows Server 2008 R2 x64 and x86 (32 bit) on VMware 7.
When I first attempted to install a 64-bit Server on VMware and Virtual Box I got an error that the software was unable to recognize the hardware as 64-bit. The problem was that virtualization was not enabled. Therefore, before installing server 2008, make sure that virtualization is turned on (from the bios) on your system. I performed testing on a HP G62 core i3 system. For enabling virtualization on this machine the steps are as follows: Restart system, Press Esc, Select F10 and enable virtualization. Without enabling this option, VMware will not recognize your hardware as a 64-bit capable.
To get started with the installation of Windows Server 2008 (x64 or x86), open VMware, click on the New Virtual Machine option, select Custom (Advanced) and click Next.
In the hardware compatibility section select version 6.5-7.0. In the next step select an installation device (e.g. DVD ROM or ISO image from the hard drive) and click Next. In this installation, I used an ISO image from my hard disk.
Normally, the system will be auto detected (e.g. Windows Server 2008 x64). In case it is not automatically detected, click on Windows and select Windows Server 2008 x64 from the drop down list. If it is auto detected (as shown below) then you will simply require selecting the version to install. Depending upon your Server 2008 edition, you will get the option to install a standard, datacenter enterprise or web edition.
In the easy installation section, add a product key, name and password. You can leave the product key blank if you like. Even the password can be left blank. It might useful to leave the key blank and activate the copy of you server once you are sure that all configurations have been correctly made. Having said that, it might not be the case for many people who use VMware for mere practice using trail versions.
Select a location to save your virtual machine. Make sure that the partition you use should have at least 20GB of free hard disk space. Virtual machines seldom need a lot of space and I have even made Server 2008 VMs for practice by allocating mere 8 GB space. But allocating more space is recommended as you will require installing a lot of other components and software later on.
Next Specify the number of cores to allot to the virtual machine, make sure that you do not allocate all the cores as that can led to system instability.
Select the amount of memory to allocate to the virtual machine. I would not recommend allotting not more than half of the system memory to avoid instability and crashes. You can even allocate as little as 800MB of memory, but in that case the Aero Glass Effect will not work. Nonetheless, its good for using the virtual machine on system with 2 GB memory. Of course, you can allocate more if your system has additional memory available.
When configuring network settings, choose NAT or bridged networking to make sure that the virtual machine is able to connect to the internet. A bridged network is useful for a domain environment to connect the server with virtual client operating systems. As it can be made to works as a replication of the physical network state.
In the next step, create a new virtual hard disk, choose a hard disk type and allocate space. At least 20 GB should be allocated to avoid running out of virtual disk space. Although the initial size requirement is about 5 GB, however, installation of updates, software and server components is likely to consume a lot more disk space.
Finally, verify that all settings are properly configured (from the list of configurations that will appear) and click Finish. The operating system will normally boot automatically, however, if it does not, click any key to continue with the installation.
The rest of the installation will be more or less automatic since you would have already specified the required conifurations for the virtual machine such as the username, password, etc.
You will be prompted to change password at first login after which you can start and using Windows Server 2008 on VMware 7.
After following this procedure you will be successfully able to install a x64 or x86 version of Windows server 2008. A lot of people after installing server 2008 find the interface to be deprived of the Aero effect, which is turned off by defaults. To learn how to enable the Windows Aero effect for Server 2008, check my post
How To Enable Aero Effect On Windows Server 2008 (Both x86 & x64).
Прочитано: 1 358
Прорабатываю установку на виртуальную машину под управление Windows Server 2008 R2 Ent установленную из образа SW_DVD5_Windows_Svr_DC_EE_SE_Web_2008_R2_64Bit_English_w_SP1_MLF_X17-22580.iso утилит VMware Tools на хосте ESXi 7.0 Update 3 (ESXi-7.0U3b-18905247-standard (VMware, Inc.)), т.к. при проверке есть ли на всех хостах гипервизора VMware Tools столкнулся, что на VM с осью внутри Windows Server 2008 R2 не установлен пакет VMware Tools, а при попытке его установке установка выходит в ошибку, странно что я не разобрал ранее как победить ошибку, но ничего, разберемся.
Через браузер подключаюсь к хосту srv-esxi03
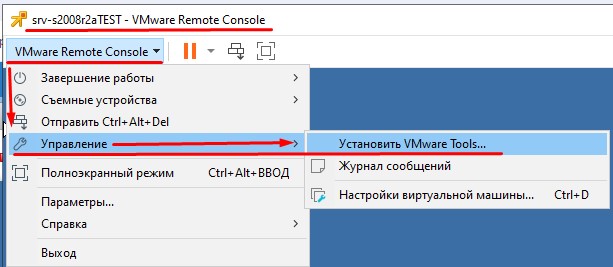
https://srv-esxi03 - Username&Password (root&712mbddr@) и нажимаю Log in - Virtual Machines – нахожу свою VM, т.е. VM=srv-s2008r2aTEST – перехожу в Console - Launch remote console, затем VMware Remote Console - Управление - Установить VMware Tools
после чего в "Computer" появляется подмонтированный образ:
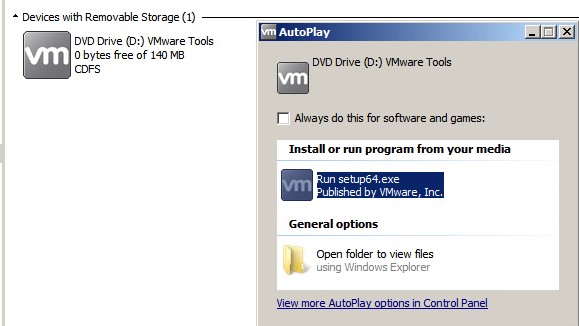
соглашаюсь с предложенным в окне, что нужно запустить setup64.exe, запускается мастер:
Welcome to the installation wizard for WMware Tools - 11.3.0.18090558
Нажимаю Next
Please select a setup type: выбираю Custom
и нажимаю Next
указываю что установить все компоненты
Toolbox
VMware Carbon Black HelperWMI Performance Logging
VMware Device Drivers
VMCI DriverAppDefenseNSX File Introspection DriverNSX Network Introspection Driver
Service DiscoveryDevice HelperShared Folders
SVGA DriverVMXNet3 NIC DriverParavirtual SCSIEFI Firmware UpdateMemory Control DriverPS2 Mouse DriverUSB Mouse DriverVMXNet NIC DriverAuto DriverVolume Shadow Copy Services Support
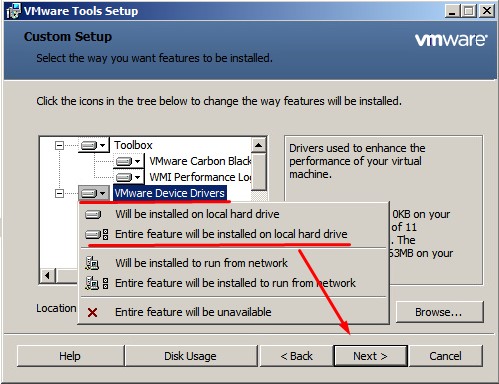
и нажимаю Next, Install
ожидаю
Install this driver software anyway: выбираю
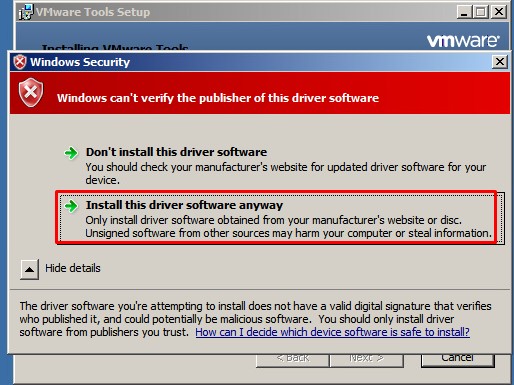
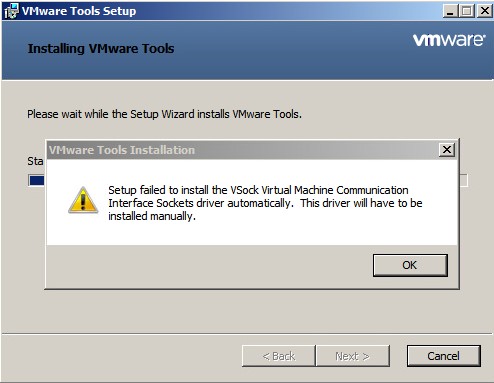
и получаю
Setup failed to install the VSock Virtual Machine Communication Interface Sockets driver automatically. This driver will have to be installed manually.
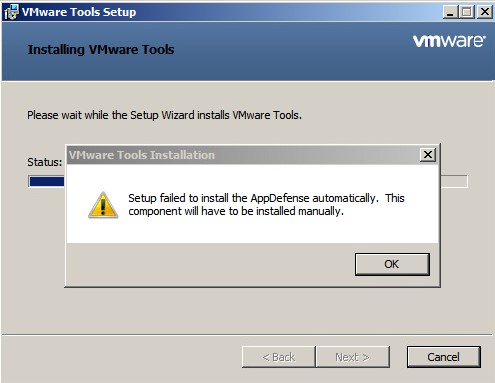
Setup failed to install the AppDefense automatically. This component will have to be installed manually.
VMware Tools Setup Wizard ended prematurely
WMware Tools Setup Wizard ended prematurely because of an error. Your system has not been modified. To install this program at a later time, run Setup Wizard again. Click the Finish button to exit the Setup Wizard.
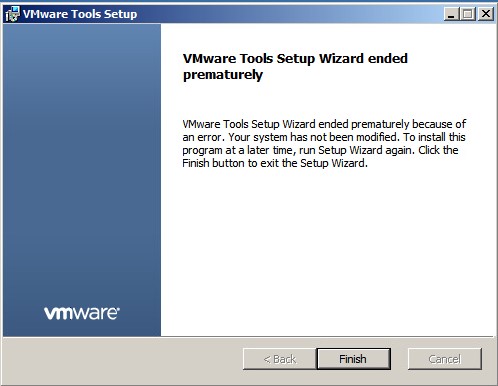
увы установка завершается ошибкой
Если при установке Vmware Tools на Windows Server 2008 R2 Ent у Вас такие же ошибки как у меня выше, значит в системе не хватает определенных пакетов KB, а именно:
KB4490628KB4474419
Скачиваем их с URL обращения: https://www.catalog.update.microsoft.com/search.aspx?q=kb4474419

На заметку: Скачать пакеты KB можно у меня: https://vpn.ekzorchik.ru/index.php/s/b6ptsIhElSqDSR0 - v7 - Server2008R2 – и внутри два msu файла.
и устанавливаем в систему с обязательной последующей перезагрузкой системы.
На заметку: чтобы установить данные пакеты служба Windows Update должна быть включена
После заново проходим по этапам выше по установки VMware tools и вот в этот раз установка завершается успешно:
Completed the VMware Tools Setup Wizard
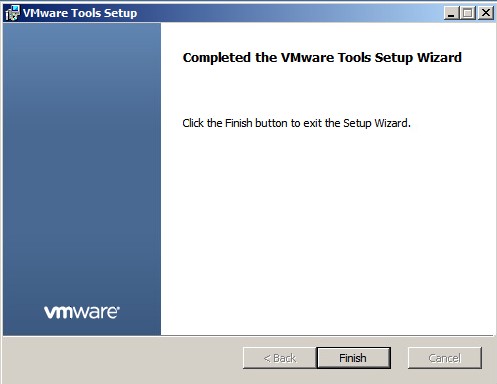
Нажимаю Finish и соглашаюсь что текущую систему для активации внесенных изменений нужно перезагрузить:
You must restart your system for the configuration changes made to VMware Tools to take effect. Click Yes to restart now or No if you plan to manually restart later.
Нажимаю Yes
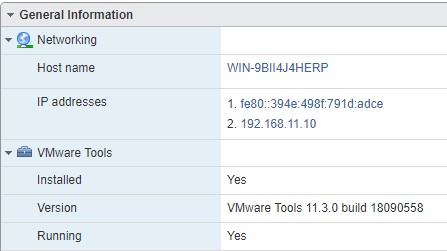
Теперь если при обращении через Web интерфейс к ESXi и последующему переходу в Virtual Machines - VM: srv-s2008r2aTEST я вижу IP адрес системы Windows Server 2008 R2 Ent и статус утилит VMware Tools
(Networking)
Host name: WIN-9BII4J4HERPIP address: fe80::394e:498f:791d:adce & 192.168.11.10
(VMware Tools)
Installed: YesVersion: VMware Tools 11.3.0 build 18090558Running Yes
Наличие VMware Tools даем мне возможность активировать AutoStart (Автозапуск) виртуальной машины после включения хоста если такое произошло, плюс понимание системой как работать в качестве виртуальной машины и многое другое.
На заметку: VMware Tools обязательно должны быть установлены и запущены на всех виртуальных машинах ESXi хоста.
На заметку: После установки KB пакетов службу Windows Updates можно выключить.
Итого: я столкнулся с проблемой и разобрал себе как ее решить в виде заметки где все указано от и до.
На этом прощаюсь, с уважением автор блога Олло Александр aka ekzorchik.
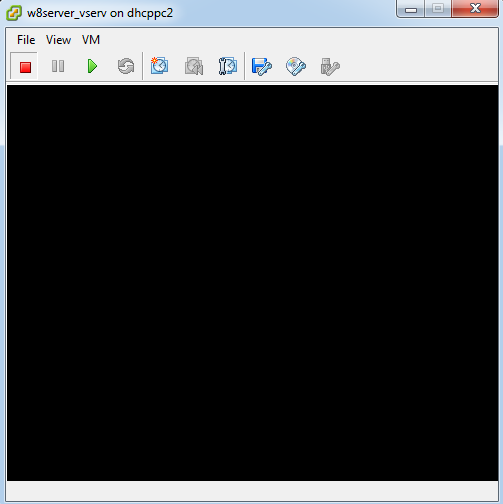
Будем устанавливать Windows 2008 R2 x64, на созданную в vmware esxi 5.1 виртуальную машину. Зайдем в консоль (Open Console), что бы визуально следить за происходящим.
Подключаем образ диска ОС. Connect to host device (Подключить устройство хост машины, например можно подключить CD ROM клиента), Connect to ISO image on datastore (Подключить образ ISO находящийся в хранилище гипервизора, предварительно надо его туда скопировать).
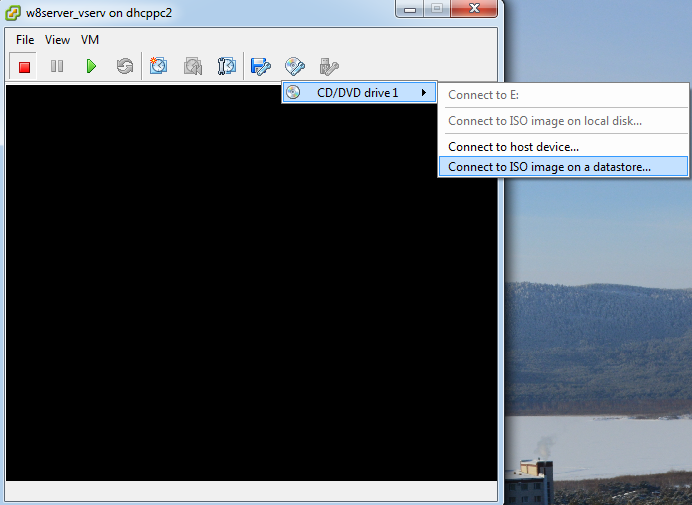
Непосредственно подключение:
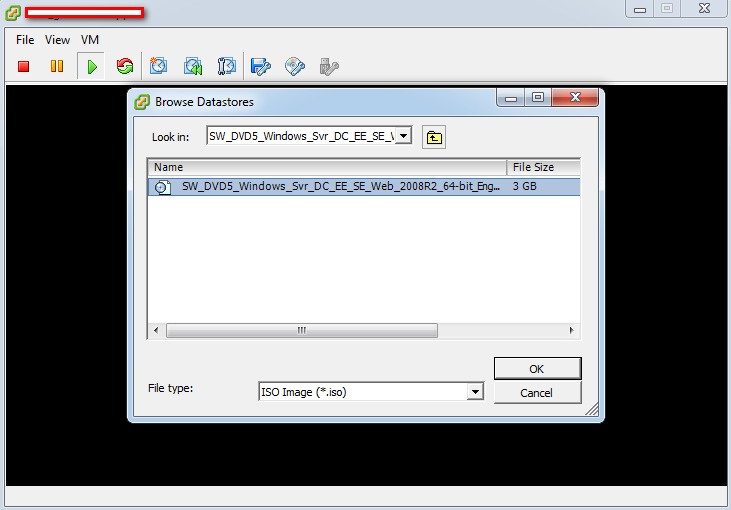
Чтение файлов установки с образа:
Установка…

VMware server is the free virtualization product from the VMware Inc. This how to is only for the installation of VMware server 2.0 on the windows platform. You can download it from the website. it require registration for downloading and also for getting the license key.
if you like know more about the VMware server go HERE. Before starting to install the VMware Server you need to have the machine with the proper requirement.
The requirement of the VMware server:
You can install the VMware Server software on a Windows or Linux server. You can store virtual machines on the server host or locate them on a network share.
- Standard x86‐compatible or x86‐64‐compatible server with up to 16 processors.Hosts with 32‐bit IA‐32 processors and IA‐32 processors with 64‐bit extensions are supported.
- 733MHz or faster CPU minimum.
- Minimum of 512MB of memory (2GB is recommended). The total amount of memory you can assign to all virtual machines running on a single host is limited only by the amount of memory on the host computer.
- IDE and SCSI hard drives are supported.
- At least 1.7GB free disk space is required for basic installation. You can delete the installer afterwards to reclaim approximately 600MB disk space.
- IDE and SCSI optical drives are supported. CD‐ROM and DVD‐ROM drives are supported. ISO disk image files are supported.
- Any Ethernet controller supported by the host operating system.
Windows Host Operating System Requirements:
You must use a Windows server operating system. 64‐bit host computers can run the following operating systems for 64‐bit extended
systems:
- Windows Server 2008 x64 Standard Edition
- Windows Server 2008 x64 Enterprise Edition
- Windows Server 2003 x64 Standard Edition, SP1, SP2, R2
- Windows Server 2003 x64 Web Edition, SP1, SP2
- Windows Server 2003 x64 Enterprise Edition, SP1, SP2, R2
32‐bit host computers can run the following operating systems:
- Windows Server 2008 Standard Edition
- Windows Server 2008 Enterprise Edition
NOTE Operating systems and service packs that are not listed are not supported for use as a host operating system for VMware Server.
NOTE Windows 2008 Server Core installations are not supported.
NOTE Windows 2008 Server Core installations are not supported.
- Windows Server 2003 Standard Edition, SP1, SP2, R2
- Windows Server 2003 Web Edition, SP1, SP2
- Windows Server 2003 Enterprise Edition, SP1, SP2, R2
- Windows Small Business Server 2003 Standard Edition, R2
- Windows Small Business Server 2003 Premium Edition, R2
- Windows 2000 Server SP3, SP4
- Windows 2000 Advanced Server, SP3, SP4.
If your machine meets the above requirement you can start to install VMware server.
Installation VMware Server on Windows Host:
Step 1: Download the VMware Server 2.0 from the website. Execute it by double clicking on the VMware-server-2.0.2-203138.exe file. you will get the following extracting window.

Step 2: Click Next on the VMware Server installation wizard.

Step 3: Click Yes, I accept the terms in the license agreement, then click Next to continue.

Step 4: Click Next on the Destination folder window.

Step 5: Click Next on the Server Configuration information window, just wait look the configuration one time. In my case all virtual machines virtual hard disk and other storage files will kept in the “D:\Virtual Machine\” directory. Look into the HTTP and HTTPS ports, you have to access the VMware server using the web browser only.
Web URL will be like this https://192.168.0.10:8222 or https://192.168.0.10:8333. if your machine ip address is 192.168.0.10.

Step 6: Click Next on the Configure Shortcuts.

Step 7: Click Install on the window to start the installation of VMware Server 2.0

Now the VMware server installation in under progress.

Step 9: Type your name, company and Serial No that you got during the download of VMware Server, then Click Enter.

Step 10: Click Finish.

Step 11: Open you IE or Mozilla and Type the URL like https://192.168.0.10:8222 or https://192.168.0.10:8333. if your machine ip address is 192.168.0.10.

Step 12: Type the Login Name and Password to access the VMware Server. The User Name & password are the login credential of the server where the VMware Server is installed. and The following image shows the Main Page of Vmware Server 2.0

That’s all! Now the VMware server is ready to install the guest operating system on it.