В этой статье будет описан порядок создания резервной копии (backup) сервера работающего под ОС Windows Server 2008 R2 штатными средствами и восстановление (restore) из полученного образа.
Все админы делятся на две категории: на тех, кто еще не делает бэкапы и тех, кто УЖЕ делает бэкапы
Backup
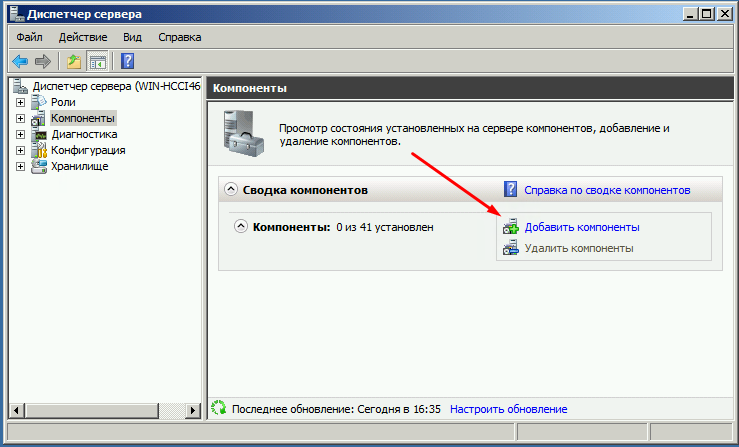
Для того что бы можно было создать образ нашего сервера сначала нужно установить компонент системы Система архивации данных Windows Server, для этого запускаем Диспетчер сервера, выбираем Компоненты, жмём Добавить компоненты
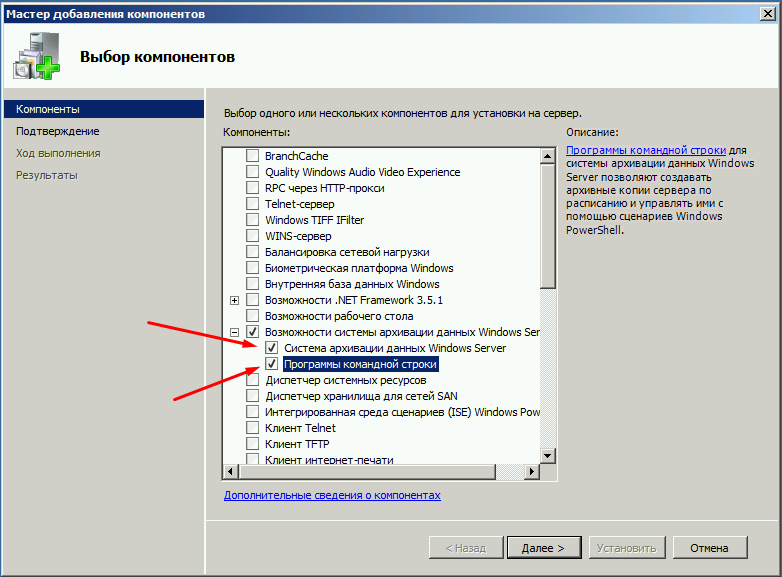
в появившемся окне ставим галочки напротив Система архивации данных Windows Server и Программы командной строки. Жмём далее, установить и дожидаемся окончания процесса установки.
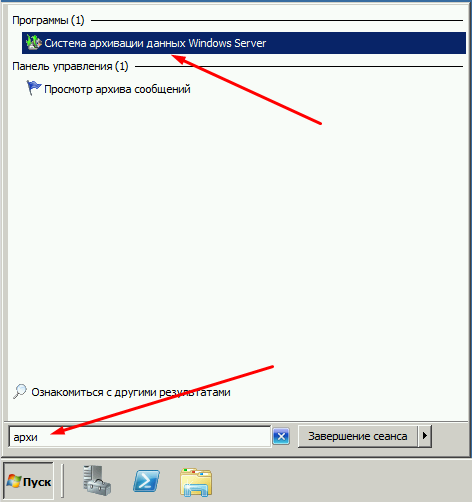
Теперь мы можем приступать к резервному копированию, для этого переходим в меню пуск и набираем в строке поиска «архив», затем выбираем Система архивации данных Windows Server.
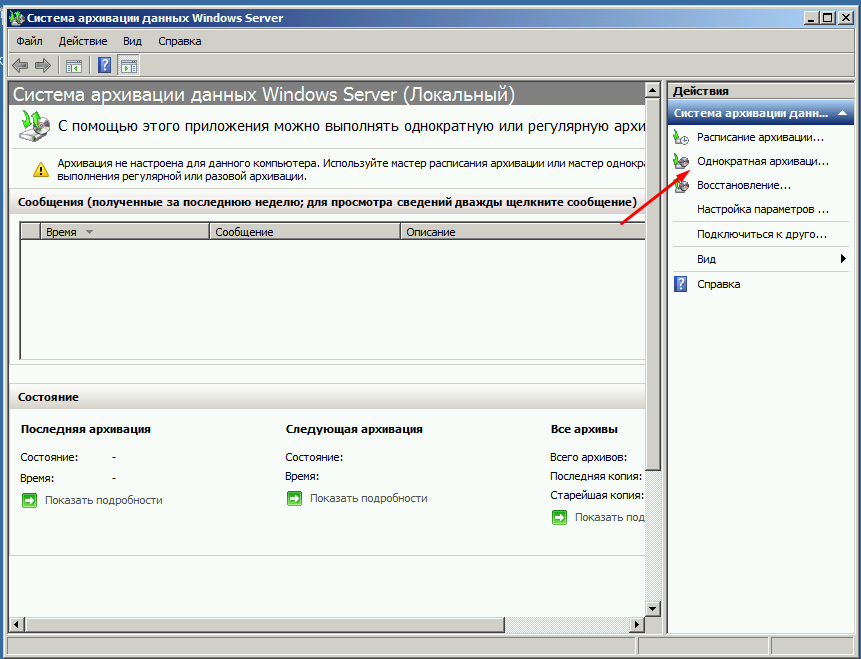
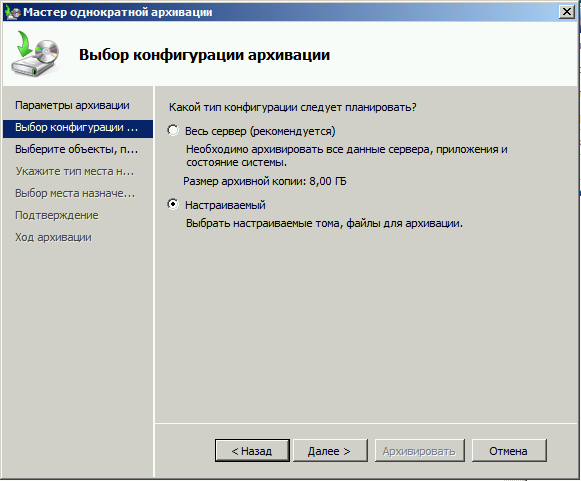
В этом окне собраны основные элементы управления системой архивации, в данном обзоре мы воспользуемся Однократной архивацией. В дальнейшем если у Вас есть например отдельный жёсткий диск для хранения образов, Вы можете создать расписание архивации.
Выбираем Настраиваемый, жмём далее
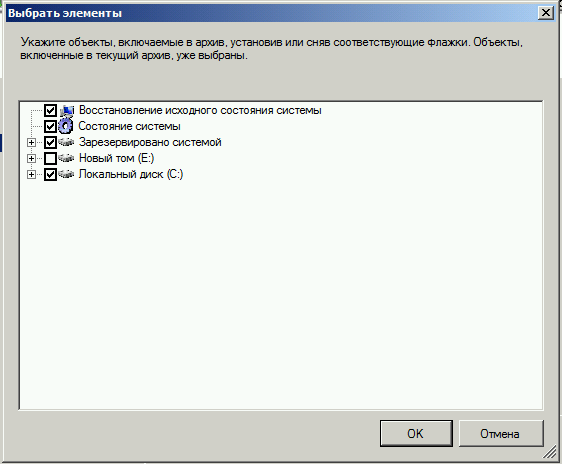
Жмём добавление элементов и ставим галочку Восстановление исходного состояния системы, возможно у Вас будут другие диски, которые не выберутся автоматически, но Вы хотите их включить в архив, можете смело ставить галку. Есть только одно но, нельзя ставить галку на том диске куда вы хотите сохранить архив.
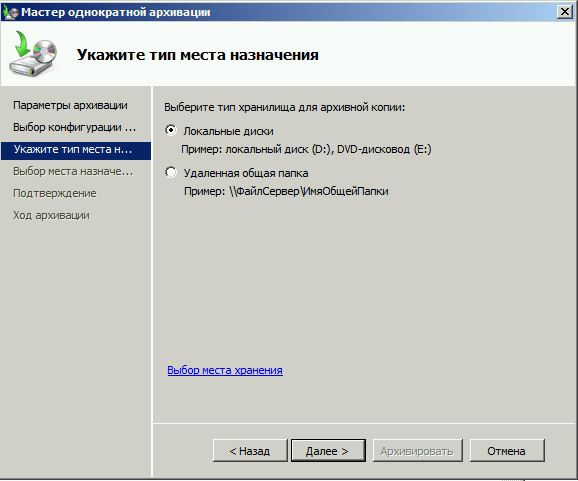
На следующем этапе необходимо выбрать куда мы будем сохранять данные, я буду сохранять на внешний USB диск, который у меня находится под буквой E: поэтому выбираю Локальные диски. Хотя система архивации позволяет сохранять образы системы так же по сети, в общую папку например.
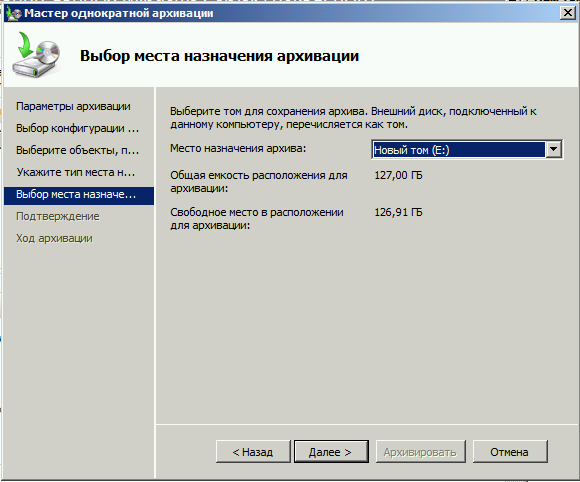
На следующем шаге система предлагает выбрать диск куда мы будем сохранять архив, в моём случае это E:
Жмём далее, затем Архивировать и ждём пока процесс архивации закончится.
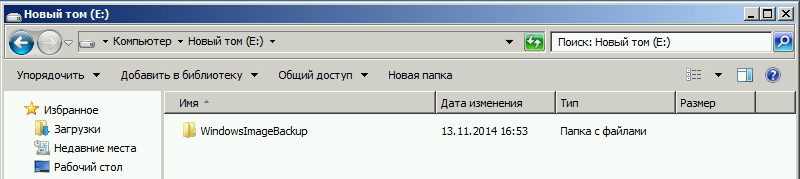
По завершению процесса архивации можем зайти на жёсткий диск и посмотреть, должна появится папка WindowsImageBackup.
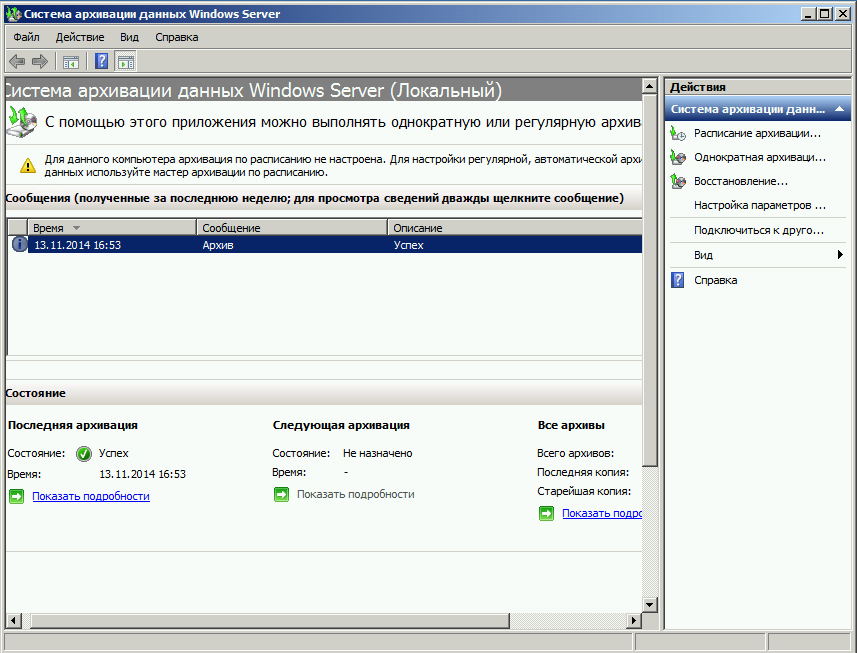
В окне Системы архивации в случае успешного завершения создания образа системы должна стоять отметка Успех. Дважды щёлкнув по строке мы можем увидеть подробности.
Restore
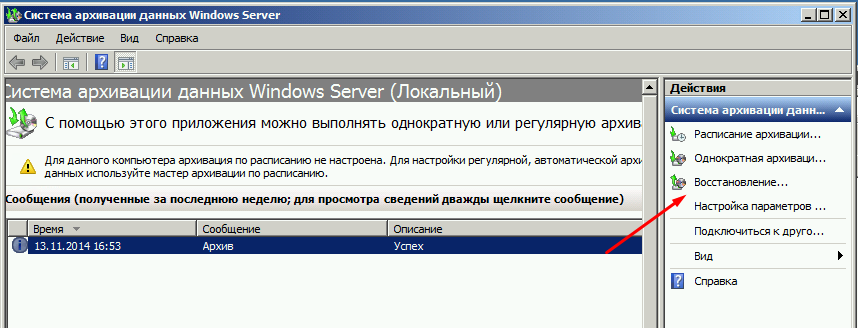
Для того что бы восстановится из этого образа есть два способа, первый из окна Системы архивации, подходит в том случае если наша система загружается. Для того что бы восстановится жмём кнопку Восстановление
Выбираем Этот сервер
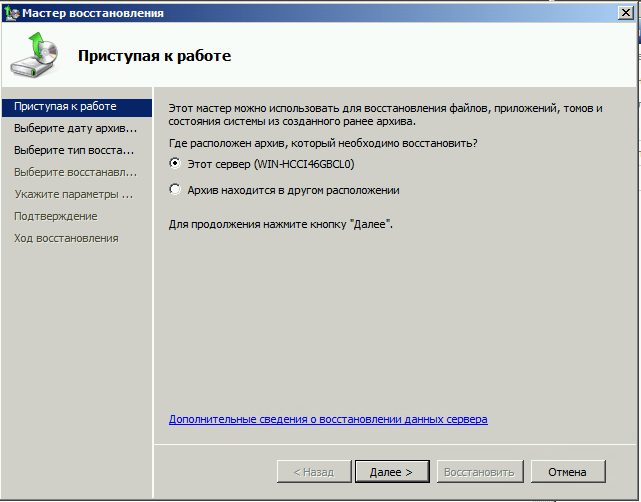
И выбираем дату, архива.
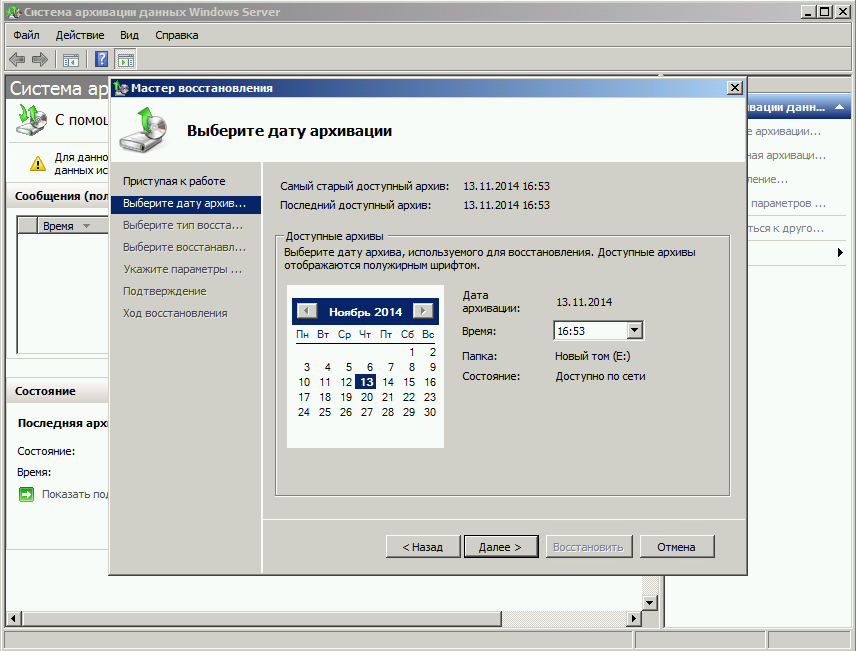
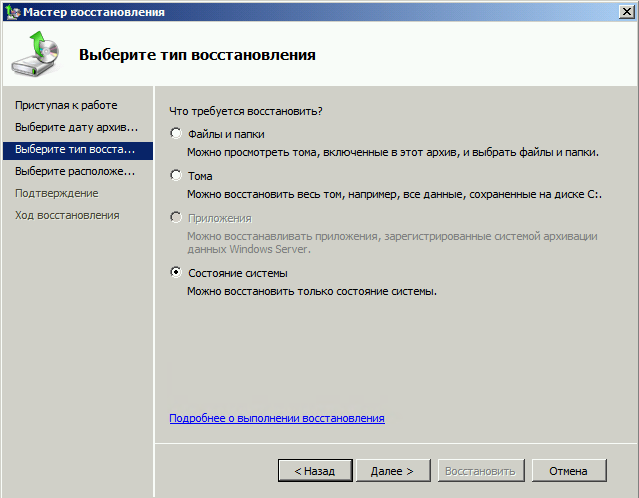
На следующем шаге мы можем выбрать нужные нам файлы и папки, или же выбрать восстановление состояния системы если хотим восстановить весь сервер.
И затем выбираем исходное размещение. И жмём кнопку восстановить.
Bare metal recovery
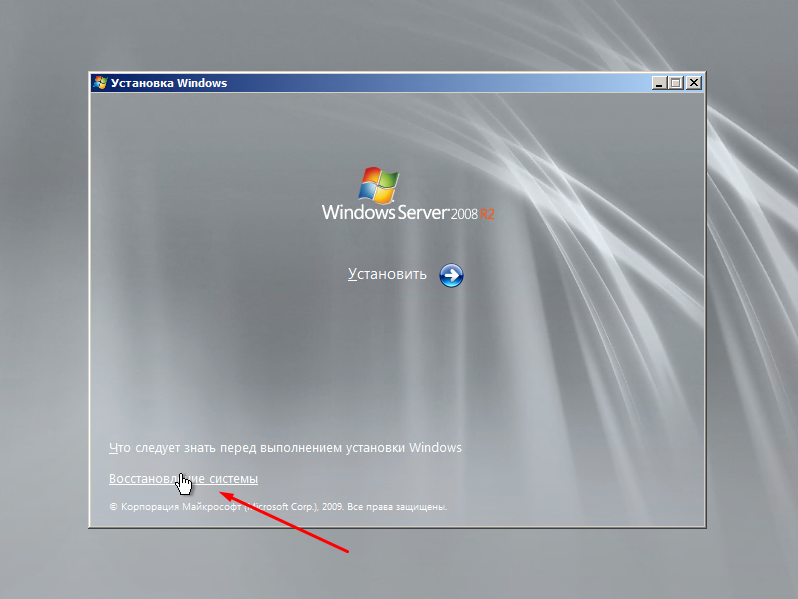
Так же, если наш сервер по какой-либо причине не загружается, или мы заменили его на новый мы можем воспользоваться установочным диском Windows Server для того чтобы восстановить состояние системы, для этого загружаемся с установочного диска и на втором экране установки выбираем восстановить
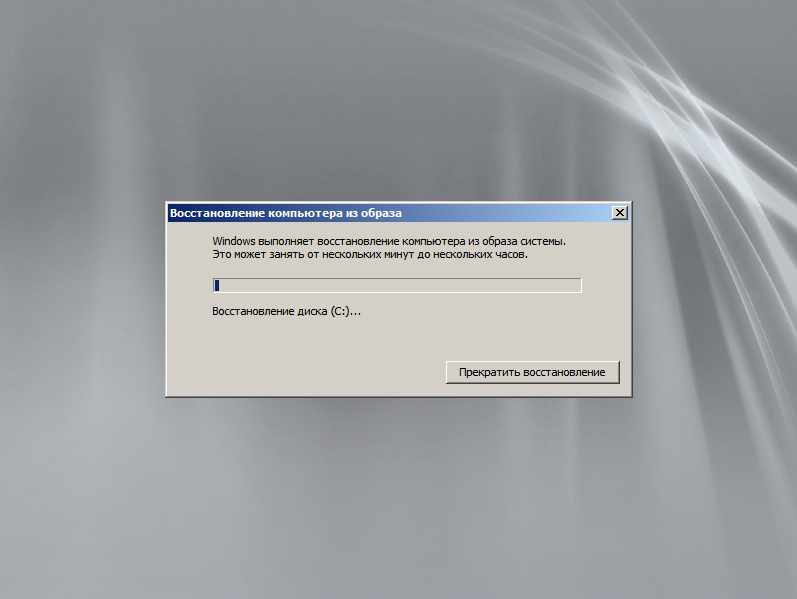
На следующем шаге выбираем Восстановление компьютера с помощью созданного ранее образа системы.
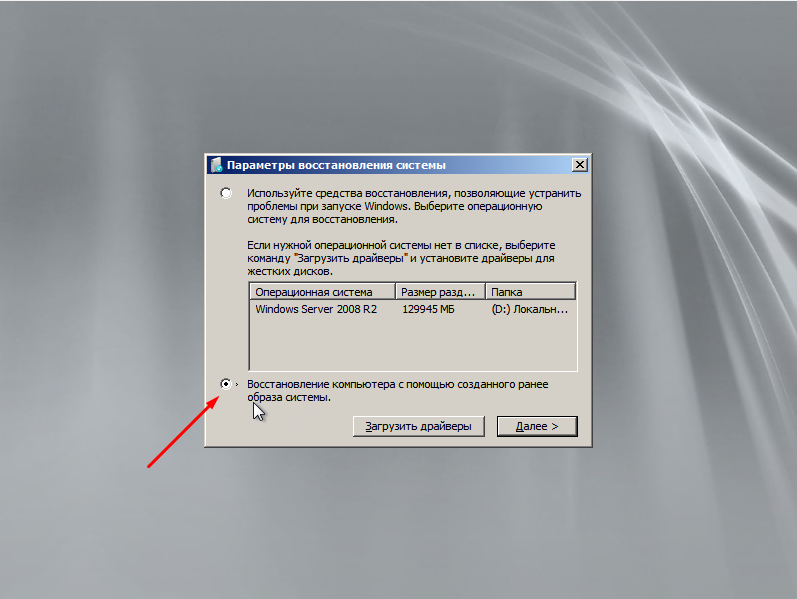
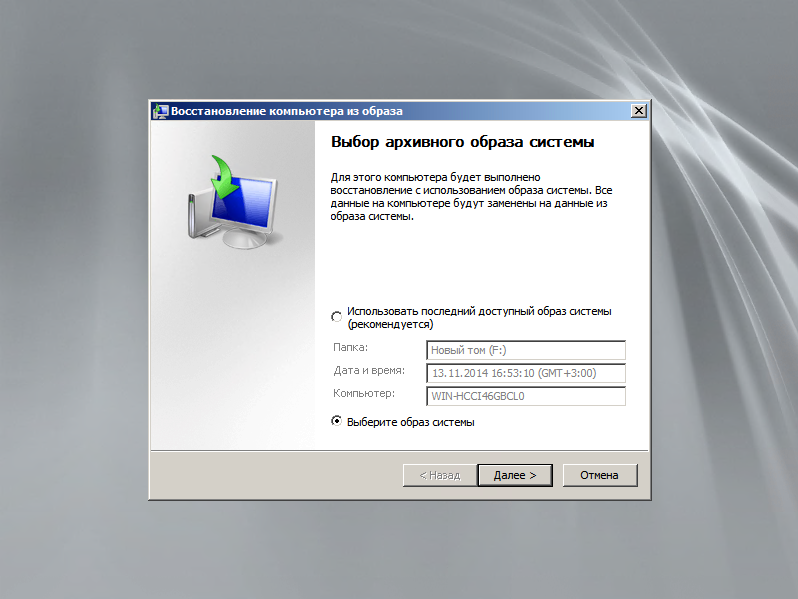
Далее нам предлагают либо использовать последний удачный, либо выбрать образ, попробуем выбрать.
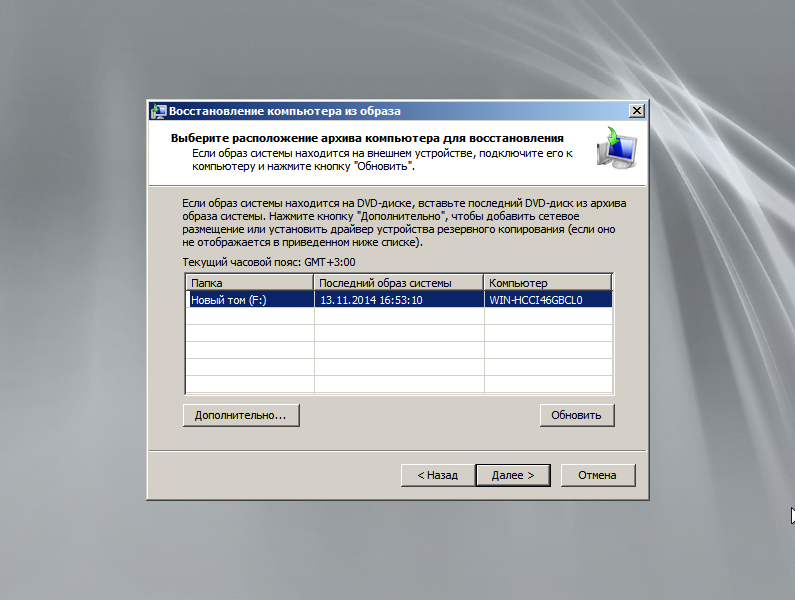
Система сама сканирует диски на наличие образа, есть возможность через кнопку дополнительно установить драйвер или выбрать сетевое расположение образа. Выбираем образ и жмём далее.
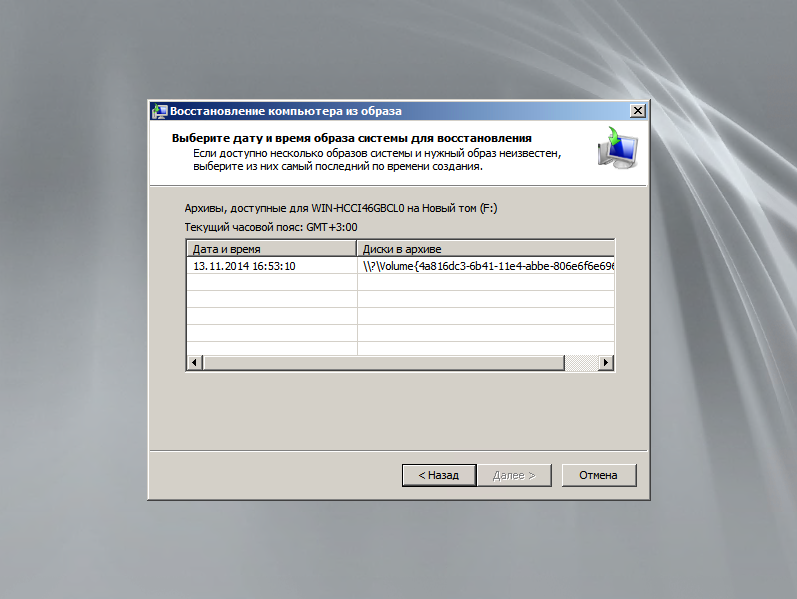
Выбираем нужный нам архив доступный в образе и так же, далее.
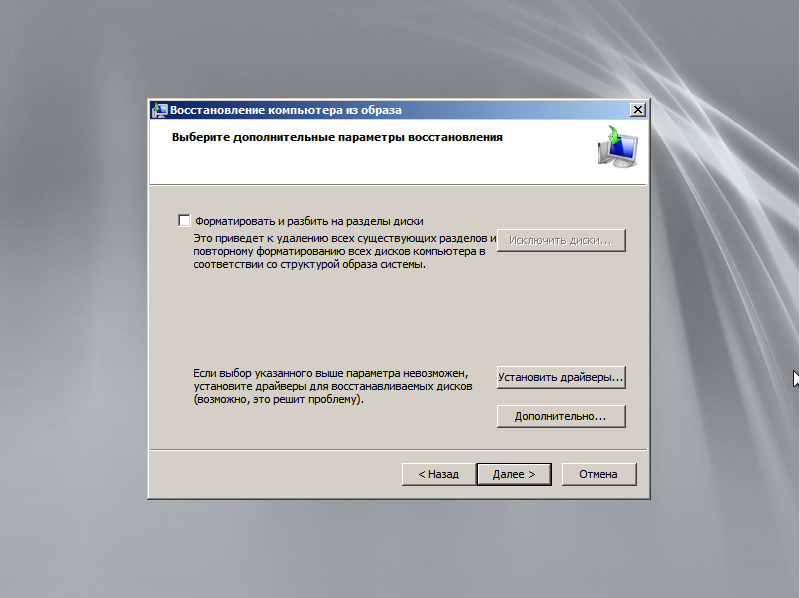
Если случилась такая неприятность и мы заменили диск, то стоит поставить галочку Форматировать и разбить на разделы диски. Если же установлен диск который разбит как надо то эту галочку можно не ставить. Затем жмём готово и ждём пока система восстановится.
Пожалуй на этом всё.
Как и прежде любые вопросы или пожелания можно оставлять в комментариях ниже, буду стараться по возможности ответить.
Creating an ISO image of a Windows Server 2008 R2 can be a useful skill to have, whether you need to back up your installation files or want to create a virtual machine. This process allows you to create an exact copy of your server’s installation media in a single file. In this blog post, we will explore several methods to create an ISO image of Windows Server 2008 R2, discussing each method in detail and providing step-by-step instructions. By the end of this article, you will be able to create an ISO image of your Windows Server 2008 R2 effortlessly.
Video Tutorial:
The Challenge of Creating an ISO Image of Windows Server 2008 R2
Creating an ISO image of Windows Server 2008 R2 may seem like a daunting task for some users. It can be challenging, especially for those who are not familiar with the technical aspects of server administration. However, with the right guidance and tools, anyone can successfully create an ISO image of their server’s installation files. In the following sections, we will outline the necessary preparations and provide step-by-step instructions for various methods to make this process easier and more accessible.
Things You Should Prepare for
Before you begin creating an ISO image of Windows Server 2008 R2, there are a few essential things you should prepare:
1. Windows Server 2008 R2 installation media: Ensure you have the original installation media, such as a DVD or a downloaded ISO file.
2. Computer with a DVD burner or virtual drive software: You will need either a physical DVD burner or virtual drive software to mount the installation media and create the ISO image file.
3. Sufficient storage space: Make sure you have enough storage space on your computer or external hard drive to save the ISO image file.
Method 1: Using Windows Disc Image Burner
Windows Disc Image Burner is a built-in tool in Windows operating systems that allows users to create ISO image files easily. Here’s how to use it:
1. Insert the Windows Server 2008 R2 installation DVD into your DVD drive.
2. Right-click on the DVD drive icon in File Explorer and select “Create image from disc.”
3. Choose a location on your computer or external storage device to save the ISO image file.
4. Click “Save” to start creating the ISO image. The process may take some time, depending on the size of the installation media.
Pros:
– Built-in tool, no additional software required.
– Simple and straightforward process.
Cons:
– Limited options and features compared to third-party tools.
– May not work on older versions of Windows.
Method 2: Using Free ISO Creator
Free ISO Creator is a third-party software that enables you to create ISO image files from various sources, including CDs, DVDs, and folders. Follow these steps to use Free ISO Creator:
1. Download and install Free ISO Creator from the official website.
2. Launch the software and select “Create ISO” from the main interface.
3. Choose the source of the ISO image. If you have the Windows Server 2008 R2 installation DVD, select “CD/DVD” and choose the DVD drive.
4. Select the destination folder where you want to save the ISO image file.
5. Click “Create ISO” to start the process. The software will create the ISO image file based on the source you selected.
Pros:
– Supports various sources for creating ISO image files.
– User-friendly interface.
Cons:
– Requires downloading and installing third-party software.
– May include additional bundled software during installation.
Method 3: Using PowerISO
PowerISO is a versatile software that allows you to create, edit, and mount ISO image files. Here’s how to use PowerISO to create an ISO image of Windows Server 2008 R2:
1. Download and install PowerISO from the official website.
2. Launch PowerISO and click on the “Copy” button in the toolbar.
3. Select the DVD drive with the Windows Server 2008 R2 installation media.
4. Choose the destination folder for the ISO image file.
5. Click on the “Copy” button to start creating the ISO image.
Pros:
– Powerful software with advanced features.
– Supports various image file formats.
Cons:
– Paid software, may require purchasing a license for full functionality.
– Interface may be overwhelming for beginners.
Method 4: Using ImgBurn
ImgBurn is a popular free software for creating various types of disc images, including ISO files. Follow these steps to create an ISO image of Windows Server 2008 R2 using ImgBurn:
1. Download and install ImgBurn from the official website.
2. Launch ImgBurn and click on the “Create image file from disc” option.
3. Select the DVD drive with the Windows Server 2008 R2 installation media.
4. Choose the destination folder for the ISO image file.
5. Click on the “Read” button to start creating the ISO image.
Pros:
– Free software with advanced features.
– Supports multiple image file formats.
Cons:
– May include additional bundled software during installation.
– Interface may be overwhelming for beginners.
Method 5: Using Rufus
Rufus is a lightweight utility that allows you to create bootable USB drives, but it can also be used to create ISO image files. Here’s how to use Rufus for creating an ISO image of Windows Server 2008 R2:
1. Download and install Rufus from the official website.
2. Launch Rufus and select your USB drive in the “Device” section.
3. Choose “Create a bootable disk using” and select “ISO Image” from the dropdown menu.
4. Click on the small disk icon next to the “ISO Image” dropdown menu and browse for the Windows Server 2008 R2 installation ISO file.
5. Click “Start” to create the ISO image file using Rufus.
Pros:
– Easy and fast process.
– Supports creating bootable USB drives.
Cons:
– Primarily designed for creating bootable drives, so additional steps are required to extract the ISO image file.
Creating an ISO image of Windows Server 2008 R2 may not always be possible due to various reasons. Here are a few common issues users may encounter:
1. Insufficient disk space: Make sure you have enough free space on your computer or external storage device to accommodate the ISO image file.
2. Corrupted installation media: If the Windows Server 2008 R2 installation DVD or ISO file is corrupted, the creation process may fail. Try using a different installation media.
3. Hardware or software incompatibility: Certain hardware configurations or software conflicts may prevent the creation of an ISO image. Ensure that your system meets the requirements for creating ISO images.
Fixes:
1. Free up disk space by deleting unnecessary files or moving them to an external storage device.
2. Obtain a new copy of the Windows Server 2008 R2 installation media from a reliable source.
3. Update your hardware drivers and ensure that your system meets the specifications for creating ISO images.
Additional Tips
Here are some additional tips to help you create an ISO image of Windows Server 2008 R2 more efficiently:
1. Validate the ISO image: After creating the ISO image, use an appropriate tool to validate its integrity and ensure it is an exact copy of the installation media.
2. Label the ISO image: It is essential to label the ISO image file properly, including the version and edition of Windows Server 2008 R2, to avoid confusion in the future.
3. Store the ISO image in a safe location: Keep the ISO image file in a secure location, preferably with the original installation media, to ensure easy access and backup.
FAQs about Creating an ISO Image of Windows Server 2008 R2
Q1: Can I use the created ISO image to install Windows Server 2008 R2 on multiple computers?
A: Yes, the ISO image you create can be used to install Windows Server 2008 R2 on multiple computers as long as you have the necessary licenses.
Q2: Can I create an ISO image of a running Windows Server 2008 R2 instance?
A: No, you cannot create an ISO image of a running Windows Server 2008 R2 instance. The ISO image is created from the installation media, not a running server.
Q3: Can I mount the ISO image on a virtual machine?
A: Yes, you can mount the ISO image on a virtual machine and use it to install Windows Server 2008 R2.
Q4: Can I create an ISO image of a customized Windows Server 2008 R2 installation?
A: Yes, you can create an ISO image of a customized Windows Server 2008 R2 installation by using tools like Windows Assessment and Deployment Kit (ADK).
Q5: Can I use third-party software to create a bootable ISO image of Windows Server 2008 R2?
A: Yes, many third-party software tools, such as Rufus and ImgBurn, support the creation of bootable ISO images.
In Conclusion
Creating an ISO image of Windows Server 2008 R2 may seem like a complex task, but with the right guidance and tools, it becomes a straightforward process. In this blog post, we discussed several methods to create an ISO image, including using built-in tools like Windows Disc Image Burner and third-party software like Free ISO Creator, PowerISO, ImgBurn, and Rufus. Each method has its pros and cons, so choose the one that suits your needs and preferences. With the ability to create an ISO image, you can easily back up your installation files or install Windows Server 2008 R2 on multiple computers efficiently.{“@context”:”https://schema.org”,”@type”:”FAQPage”,”mainEntity”:[{“@type”:”Question”,”name”:” Can I use the created ISO image to install Windows Server 2008 R2 on multiple computers?”,”acceptedAnswer”:{“@type”:”Answer”,”text”:” Yes, the ISO image you create can be used to install Windows Server 2008 R2 on multiple computers as long as you have the necessary licenses.”}},{“@type”:”Question”,”name”:” Can I create an ISO image of a running Windows Server 2008 R2 instance?”,”acceptedAnswer”:{“@type”:”Answer”,”text”:” No, you cannot create an ISO image of a running Windows Server 2008 R2 instance. The ISO image is created from the installation media, not a running server.”}},{“@type”:”Question”,”name”:” Can I mount the ISO image on a virtual machine?”,”acceptedAnswer”:{“@type”:”Answer”,”text”:” Yes, you can mount the ISO image on a virtual machine and use it to install Windows Server 2008 R2.”}},{“@type”:”Question”,”name”:” Can I create an ISO image of a customized Windows Server 2008 R2 installation?”,”acceptedAnswer”:{“@type”:”Answer”,”text”:” Yes, you can create an ISO image of a customized Windows Server 2008 R2 installation by using tools like Windows Assessment and Deployment Kit (ADK).”}},{“@type”:”Question”,”name”:” Can I use third-party software to create a bootable ISO image of Windows Server 2008 R2?”,”acceptedAnswer”:{“@type”:”Answer”,”text”:” Yes, many third-party software tools, such as Rufus and ImgBurn, support the creation of bootable ISO images.”}}]}
Продолжая цикл статей по автоматизации развёртывания системы Windows, сегодня мы займёмся созданием собственного инсталляционного дистрибутива системы Windows 7, с установленными обновлениями и базовым набором пользовательского ПО.
- Создание образа Windows PE 3.1
- Создание собственного образа дистрибутива Windows 7 или Windows Server 2008 R2
- Настройка Linux PXE сервера сетевой установки Windows 7 или Windows Server 2008 R2
Для сборки собственного дистрибутива Windows 7 или Windows Server 2008 R2, нам понадобится:
- Эталонная машина с Windows 7.
- Дистрибутив Windows PE.
Как я уже делал ранее в статье по подготовки образа Windows PE, все эксперименты по сборке и проверки работоспособности образов я буду проводить на виртуальных машинах VirtualBox и QUEMU/KVM.
Подготовка эталонного образа ОС Windows
Устанавливаем Windows на эталонную машину, и при появлении мастера, предлагающего нам ввести имя пользователя и имя компьютера, нажимаем сочетание клавиш CTRL+SHIFT+F3.
Машина перезагрузится, и войдёт в режим аудита со временной учётной записью «Administrator». Далее в появившемся приглашении SYSPREP подготовить систему, нажимаем «отмена», и приступаем к подготовке эталонной системы.
Устанавливаем все необходимые обновления.
17 мая 2016 года Майкрософт выпустила накопительный пакет обновлений для Windows 7 SP1 KB3125574 (https://support.microsoft.com/ru-ru/kb/3125574), включающий в себя обновления с момента выпуска SP1 и до апреля 2016, для уменьшения количества устанавливаемых обновлений, рекомендую скачать и установить обновление KB3125574 в ручную. Важный момент! Для его установки потребуется обновление KB3020369 (https://support.microsoft.com/ru-ru/kb/3020369).
После того, как всё необходимое ПО уже установлено, а система обновлена до актуального состояния, необходимо удалить все лишние файлы, которые не должны попасть в образ системы, это могут быть папки с дистрибутивами драйверов, ПО и выполнить полную очистку системы с помощью мастера очистки диска Windows 7 — Windows Cleanup Tool.
Запускаем командную строку от имени администратора:
cleanmgr.exe
Устанавливаем все галочки и очищаем всё.
Теперь наша система готова к снятию с неё образа. В командной строке вводим
c:\Windows\system32\sysprep\sysprep /oobe /generalize /shutdown
Снятие образа эталонной системы
Теперь определимся, куда мы будем копировать образ системы. Можно это делать на отдельный раздел, на флешку или в сеть.
Загружаемся с подготовленного нами ранее образа Windows PE, подключаем диск, куда будем копировать образ нашей эталонной системы.
Подключить сетевой диск можно командой:
net use * \\server\share\ /user=DOMAIN\USER
И начинаем снимать образ эталонной системы с помощью утилиты imagex:
e:\imagex /capture d: Z:\Win7x86\install.wim «Win7_Pro_x86» /compress maximum /boot /verify
Уровень компрессии (maximum, fast, none) влияет только на скорость снятия образа. На распаковку образа это практически никак не влияет.
Так же может возникнуть ситуация, когда ваш образ системы может быть более 3 Гб, в таком случае, полученный вами install.wim необходимо разделить на несколько частей с помощью аргумента /split. Подробнее об этом можно почитать в руководстве по imagex или набрав команду:
imagex /?
Подготовка установочного образа системы
Теперь берём установочный диск с Windows 7 x86 и копируем его содержимое в удобную для нас папку (например C:\Win7\x86\dist):
mkdir C:\Win7\x86\mount
mkdir C:\Win7\x86\dist
xcopy E:\* C:\Win7\x86\dist\
За загрузку среды предустановки отвечает файл, C:\Win7\x86\dist\sources\boot.wim в его установочный образ необходимо добавить драйверы контроллера при установке на не стандартные контроллеры. Сам образ устанавливаемой системы, находится в файле C:\Win7\x86\dist\sources\install.wim, в этот образ как раз нужно установить как можно больше драйверов, чтобы их установка происходила автоматически, при первой инициализации системы. Делать мы это будем, так же, как и при сборке системы Windows PE.
Подключаем загрузочный образ:
dism /mount-wim /wimfile:C:\Win7\x86\dist\sources\boot.wim /index:2 /mountdir:C:\Win7\x86\dist\mount
Указываем параметр «/index:2», т.к. «/index:1» в образе boot.wim из дистрибутива на самом деле является образом Windows PE, и загрузка с автоматическим запуском setup.exe происходит именно с образа 2.
Устанавливаем драйверы в загрузочный образ:
dism /image:C:\Win7\x86\dist\mount /add-driver /driver:»C:\Drv\KVM_Win7_x86\viostor\w7\x86\viostor.sys» /forceunsigned
Устанавливать вообще все драйверы в этот образ не имеет никакого смысла, более того, лучше сохранить как можно меньший размер этого образа, поэтому устанавливайте сюда только драйверы контроллеров жёсткого диска.
Сохраняем и отключаем загрузочный образ:
dism /unmount-wim /mountdir:C:\Win7\x86\dist\mount /commit
Если вы допустили где-то ошибку, то можно отключить образ без сохранения изменений, в таком случае замените команду /commit на /discard.
Устанавливаем все необходимые драйверы в установочный образ.
Подключаем установочный установочный образ:
dism /mount-wim /wimfile:C:\Win7\x86\dist\sources\install.wim /index:1 /mountdir:C:\Win7\x86\dist\mount
Устанавливаем драйверы в установочный образ:
dism /image:C:\Win7\x86\dist\mount /add-driver /driver:»C:\Drv\KVM_Win7_x86″ /recurse /forceunsigned
dism /image:C:\Win7\x86\dist\mount /add-driver /driver:»C:\Drv\VirtualBox_x86″ /recurse /forceunsigned
Сохраняем и отключаем установочный образ:
dism /unmount-wim /mountdir:C:\Win7\x86\dist\mount /commit
Записываем образ системы в ISO-файл:
oscdimg -u2 -m -o -lWIN7PROSP1X86RU -bC:\WinPE\x86\etfsboot.com c:\WinPE\x86\dist\ «c:\WinPE\x86\Windows 7 Professional SP1 x86 custom.iso»
Теперь вставляем iso-образ в виртуальный привод нашей тестовой виртуальной машины, и пробуем установить систему. Система должна нормально устанавливаться и благодаря интеграции в дистрибутив драйверов, все устройства должны работать сразу после загрузки.
Вы настроиили новенький, чистенький сервачёк с Windows 2008 server R2, настроили программы, службы, всё отлично и хорошо работает. Сразу же становится вопрос: Чем лучше всего сделать бэкап Windows 2008 server R2, чтобы в случае непредвиденных обстоятельств развернуть из резервной копии » всё как было»?
По сравнению с windows 2003 в Windows 2008 server R2 значительно улучшен алгоритм создания резервных копий и расширен набор команд. Однако я почему то никогда не полагаюсь на встроенные средства винды. Один раз я восстанавливал систему из подобного бэкапа. Всё получилось и прошло хорошо, однако значительно дольше чем тем же акронисом. Это от части обьясняется тем что нужно смотреть в мануал или вспоминать команды. Ну а если серваки падают у вас не часто, вряд ли вы запомните всё раз и навсегда и вспомните по памяти всё быстро. Ну, пользоваться или нет, дело сугубо личное…
И так, вернёмся в тему… большинство людей пользуются старым добрым и проверенным временем продуктом: Acronis true image home для десктопов и версии Enterprise Server для серверов
Для серверов под управлением windows 2003 Acronis Enterprise Server был актуален, но с выходом windows 2008 server он перестал работать. Даже относительно новая версия Enterprise Server 9.7
Для создания бэкапов Windows 2008 server R2 существует новая версия Acronis Backup & Recovery 11 . Найти можно тут. Вообщем всё так же просто как и раньше. Добавилась возможность централизованного резервного копирования. Тоисть устанавливается сервер, на нужные машины ставим агентов, вбиваем параметры запуска задач и место куда ложатся бэкапы. Для любителей халявы: для установки агентов на машины в сети требуются отдельные лицензии коих нигде нет.
Но поставить Acronis Backup & Recovery 11 на каждую машину или точнее сервер и делать бэкапы локально можно запросто.
Лично мне нравится этот вариант. Поставил, проверил, развернул бэкап за пару минут на другой машине, всё отлично работает.
Просмотров: 34 375
Solutions provider takeaway: This chapter excerpt provides information on Windows server backup in Windows Server 2008 R2. You will learn how to configure backup settings, back up specific files and perform system state and bare-metal backups.
Manage Backup and Recovery
Now that you have seen some of the tools for backups and recovery, it is time to put them to use. When you perform backups traditionally, you want to have the backups on a schedule so you are sure they are happening at regular intervals. This will make finding the right media for recovery easy. Even though Backup and Recovery are performed separately, they are joined together in form and function. The type of backup you perform will always dictate the recovery options available to you. In reality, the backup strategy is determined by your recovery requirements and what your service-level agreement is with your users and business. Is it OK if a user has to wait 24 hours to recover a file? What if the user is the CEO? Is it OK to turn off a server during work hours? What if the server is mission critical to your organization? These are all key questions, among many others, that you need to address when defining your policies and procedures and determining the best way to handle the needs of your organization.
Whether you choose to perform backup and recovery tasks with the GUI, command-line tool, or the PowerShell cmdlets, you are essentially performing the same task. In this section, you will learn how to use the backup and recovery tools to perform your daily tasks. Not that to perform either backup or recovery, you do need to be a member of the Backup Operators or Administrators groups.
Back Up Your Server
After you have determined your backup strategy, it is time to back up the server. When you back up your server, you want to make sure you schedule your backup times to not impact your network or your users. Try to schedule the backups after-hours, when the system is being used the least. You also want to make sure your backups complete in a timely manner; this is where knowing the difference between full and incremental backups can offer value to you and your organization.
Configure Backup Settings
Before you perform your backup, you may need to define your backup settings. You have only a few selections to make to configure your backup. Specifically, you need to determine whether you want to perform a full/normal backup, an incremental backup, or a custom combination of both of these methods. To configure your server, perform the following steps:
- Start Windows Server Backup by selecting Start ⇒ Administrative Tools ⇒ Windows Server Backup.
- In the right Actions task pane, click Configure Performance Settings; you will see a screen similar to Figure 8.7.
-
Figure 8.7: Backup performance settings
The three options listed determine how the backup will be performed. It is important for you to know the choices you make here will not be applied if you are backing up only system state.
- Normal Backup Performance is the default method for Windows Server Backup, and this method will perform a normal backup.
- Faster Backup Performance will perform an incremental backup for your system.
- Custom will allow you to choose a combination of the previous two options for your drives. For example, you could perform a full backup on your data volume but only an incremental backup on your system drive.
- Select the setting for your system, and click OK.
Back Up Your Server
After you have installed the backup tools, it is now just a matter of setting up the tasks to begin protecting your system. When you are ready to perform the backup and you know what files and folders you want to protect, you are ready to set up the backup test and schedule.
The first time you load the tool, you will see a message telling you no backup has been configured and you need to either set up a backup schedule or set up a backup once to begin protecting your system. Whether you choose to create a backup schedule or perform a backup once, the choices in the wizard are the same, with the exception of configuring the schedule:
- Start Windows Server Backup by selecting Start ⇒ Administrative Tools ⇒ Windows Server Backup.
- To launch the backup wizard, in the Actions pane on the right, select Backup Schedule to create a regular backup task, or select Backup Once if you just want to perform an immediate backup. For this set of tasks, you will see the Backup Schedule choice.
- Review the Getting Started screen, and click Next to see a screen similar to Figure 8.8.
-
Figure 8.8: Configuring the backup
- Select Full Server (Recommended), and click Next.
- Set your schedule; the default is once a day at 9 p.m. You can also configure multiple times a day to perform the backup. After you set your schedule, click Next.
- On the Specify Destination Type screen, as shown in Figure 8.9, you’ll see two new choices in Windows Server 2008 R2; these allow you to store your backup to another volume and to a network share. These methods provide flexibility for your backup process that did not exist in prior versions of Windows servers. However, make sure you make note of the performance costs to your additional volume or network. You will have to decide what the right balance is for you and your organization. After you make your selection, click Next.
-
Note: The first time you run the backup wizard, you may be asked to format the destination drive. When you select the default choice of Backup To Hard Disk That Is Dedicated For Backups, it will reformat the selected disk before the backup process begins. Make sure you have saved any necessary data off the drive. The format of the drive has to be NTFS; also, make sure you have at least 1½ times the free drive space compared to what you are backing up.
Figure 8.9 : Backup destinations
- On the Select Destination Disk page, select where you want to store your backups. For a scheduled backup, this can be another hard drive or a network share. It cannot be an optical drive or removable media. However, you can use optical drives or removable media for backup-once backups, and these media choices provide a great choice for bare-metal backups. After you make your selection, click Next.
- If you are presented with a warning to format the disk and you are positive you want to use the selected disk, click Yes. Otherwise, click No, and select another drive to store your backup.
- Review the Confirmation screen, and click Finish to create the scheduled task for backup and format the volume (if this is your first time using Windows Server Backup). If you chose Backup Once, you will click Backup to immediately perform the backup.
- Review your Summary screen, and click Close.
Note: After you have run the backup wizard the first time, the next time you run it you will see a screen similar to Figure 8.10. This allows you to modify the existing backup or stop the backup process. You can still configure the backup once if you need to create new backups for different files or needs, like bare-metal recovery.
Figure 8.10: Modifying the existing backup schedule
Back Up Specific Files
In Windows Server Backup in Windows Server 2008, you had to back up the entire volume. In Windows Server 2008 R2, you now can include or exclude folders or individual files. You can also exclude files based on the file types with filters. For this purpose, you will see how to modify an existing backup schedule.
- Start Windows Server Backup by selecting Start ⇒ Administrative Tools ⇒ Windows Server Backup.
- To launch the backup wizard, in the Actions pane on the right, select Backup Schedule.
- On the Modify Backup Schedules screen, verify that Modify Backup is selected, and click Next.
- Select Custom, and click Next.
- On the Select Items For Backup screen, you will see what you are currently backing up. If want to add or remove from the backup, click Add Items, and you will see a screen similar to Figure 8.11.
-
Figure 8.11: Backup item selection
- Select the items you want to add to or remove from the backup by selecting or deselecting the check boxes next to the items. If you want to select specific folders, click the + sign next to your listed hard drives to expand the directory tree and then make your folder selections. When you are done selecting items to back up, click OK.
- If you want to exclude certain files from your backup, such as temporary files (*.tmp) or music files (.wmv, .mp3, and so on), click the Advanced Settings button.
- Click Add Exclusion to select the drive or folders you want to apply your exclusions.
- Select the drive you want to use. Typically you will want your full volumes to have the exclusion applied. However, you can select individual folders or files to exclude directly. When you’re done selecting your locations, click OK.
- To exclude certain files, click in the File Type column, and type in your exclusion. You can also specify whether you want apply the filter to the subfolders. For example, if you wanted to exclude .tmp files from your backup, type *.tmp. Your screen would look similar to Figure 8.12.
-
Figure 8.12: Backup exclusions
If you want to add more exclusions, click Add Exclusion, and repeat the process. Likewise, if you want to remove the exclusion, you can select it and click Remove Exclusion.
- When you are finished creating exclusions, click OK to proceed through the rest of the wizard.
- Set or modify your schedule, and click Next.
- Select your destination type, and click Next.
- Select the destination disk, and click Next.
- If you are presented with a warning to format the disk and you are positive you want to use the selected disk, click Yes. Otherwise, click No, and select another drive to store your backup.
- Review the Confirmation screen, and click Finish to create the scheduled task for backup and format the volume (if this is your first time using Windows Server Backup). If you chose Backup Once, you will click Backup to immediately perform the backup.
- Review your Summary screen, and click Close.
Perform a System State Backup
When you back up the system state, you are backing up a majority of the system configuration information. In Windows Server 2008 R2, you can perform the system state backup inside the Windows Server Backup Tool, and you do not have to solely use wbadmin.exe. Also, if you have installed additional roles on the Windows Server 2008 R2 server, your system state will contain more data. By default, on a server with no additional roles, the system state backup always contains the following components:
- Registry
- COM+ class registration database
- Boot files, including system files
- System files under Windows File Protection
If the system is a domain controller in addition to the default system state data, system state will contain the following:
- Active Directory service
- SYSVOL directory
|
|||
If you have installed clustering on the server, the system state data will contain the clustering services information.
If you have installed a certificate services server, the system state data will contain the certificate services database.
If you have installed IIS, the system state data will contain the IIS metadirectory.
- Start Windows Server Backup by selecting Start ⇒ Administrative Tools ⇒ Windows Server Backup.
- To launch the backup wizard, in the Actions pane on the right, select Backup Schedule to create a regular backup task, or select Backup Once if you just want to perform an immediate backup. For this set of tasks, you will see the Backup Schedule choice.
- Review the Getting Started screen, and click Next.
- Select Custom, and click Next.
- On the Select Items For Backup screen, click Add Items.
- Click System State, click OK, and then click Next.
- If presented with a scheduling window, set or modify your schedule, and click Next.
- Select your destination type, and click Next.
- Select the destination disk, and click Next.
- If you are presented with a warning to format the disk and you are positive you want to use the selected disk, click Yes. Otherwise, click No, and select another drive to store your backup.
- Review the Confirmation screen, and click Finish to create the scheduled task for backup and format the volume (if this is your first time using Windows Server Backup). If you chose Backup Once, you will click Backup to immediately perform the backup.
- Review your Summary screen, and click Close.
Perform a Bare-Metal Backup
Another backup option that will provide you with a great option in case of a catastrophic failure is a bare-metal backup. The bare-metal backup will back up your system state, your system volume, and the system reserved data. This backup set is also unique in that you will need the Windows Server 2008 R2 installation media available during recovery.
This is a good time to use a USB drive or another portable media to store this backup. The main reason is because to perform the restore, you need to boot the system into the Windows Recovery Environment using a Windows Server 2008 R2 installation DVD.
- Start Windows Server Backup by selecting Start ⇒ Administrative Tools ⇒ Windows Server Backup.
- To launch the backup wizard, in the Actions pane on the right, select Backup Schedule to create a regular backup task, or select Backup Once if you just want to perform an immediate backup. For this set of tasks, you will see the Backup Schedule choice.
- Review the Getting Started screen, and click Next.
- Select Custom, and click Next.
- On the Select Items For Backup step, click Add Items.
- Click Bare Metal Recovery, and click OK; then click Next.
- If presented with a scheduling window, set or modify your schedule, and click Next.
- Select your destination type, and click Next.
- Select the destination disk, and click Next.
- If you are presented with a warning to format the disk and you are positive you want to use the selected disk, click Yes. Otherwise, click No, and select another drive to store your backup.
- Review the Confirmation screen, and click Finish to create the scheduled task for backup and format the volume (if this is your first time using Windows Server Backup). If you chose Backup Once, you will click Backup to immediately perform the backup.
- Review your Summary screen, and click Close.
Look at the Scheduled Tasks
Whenever you create a backup schedule, you may be wondering where the task is stored. The task is stored in the Task Scheduler tool, and you can view your backup tasks there. You can also run the task directly from the Task Scheduler. The tasks in the Task Scheduler have several properties you can modify, as shown in Table 8.2.
Table 8.2: Task Property Tabs
|
Property Tab |
Definition |
| General | Contains the description, author, and what account will be used to run the command. |
| Triggers | Determines when the task will be performed. In the case of a backup, the trigger is date and time. |
| Actions | Determines what programs or commands will be run. |
| Conditions | Specifies additional options, combined with the triggers, that determine whether the task should run. |
| Settings | Controls additional behaviors of the task. An important setting here is Allow Task To Be Run On Demand. If you want to be able to run your tasks directly from the Task Scheduler, you have to select this setting to turn it on. |
| History | Shows the past history of the task when it was run. |
Property Tab Definition
- Click Start ⇒ Administrative Tools ⇒ Task Scheduler.
- Expand the tree to view the backup tasks. Click the + to expand Task Scheduler Library ⇒ Microsoft ⇒ Windows, and then click Backup.
- Double-click the task to view the properties of the backup task, and you will see a screen similar to Figure 8.13.
Figure 8.13: Backup task
You can also view the status of your backups and get more details on the main console page of the Windows Server Backup window, as shown in Figure 8.14.
Figure 8.14: Windows Server Backup
From the main console window, you can view the details, status, and next schedule for your backups and recovery processes. The Windows Server Backup Tool will show all the events with your backups and restores in this main console window.
Backing Up and Recovering Your Server
Windows server backup in Windows Server 2008 R2
Bare-metal, system state recovery in Windows Server 2008 R2
Printed with permission from Wiley Publishing Inc. Copyright 2010. Microsoft Windows Server 2008 R2 Administration Instant Reference by Matthew Hester and Chris Henley. For more information about this title and other similar books, please visit Wiley Publishing Inc.
Dig Deeper on MSP business strategy
-

Troubleshooting the most common issues with Windows 11
By: Brien Posey
-
Windows Server backup to the cloud: A step-by-step guide
By: Brien Posey
-
How to use the Windows Server Backup tool
By: Damon Garn
-
How to create a local admin account with Microsoft Intune
By: Brien Posey