
Even though the latest Linux distributions are user-friendly, students and scholars tend to use Windows since they are only familiar with Windows operating system and will find it difficult to install Linux natively for doing their research simulations. Further, often they mistakenly crash their Windows machine while trying to dual-boot the system with Linux. and that may lead to severe data loss.
There are different ways to use a Linux application on windows. The popular methods are:
- Using Cygwin Environment
- Using MinGW/MinGW-64 Environment
- Using MSYS2 Environment
- Using Virtual Machines such as VirtualBox
- Using Windows Subsystem for Linux
Compiling the latest Linux-based applications/simulation tools such as ns-3 and OMNet++ using the first three methods (Cygwin, MinGW and MSYS2) will be a challenging task. Of course, some people successfully made it work but the rest of the people may fail to make it work because of various reasons.
But, using different virtualisation solutions such as Microsoft Virtual PC, Microsoft Hyper-V, VMWare, VirtualBox, Windows Subsystem for Linux etc., one can successfully install and use any Linux-based application under Windows. Among these, Windows Subsystem for Linux is the best and most efficient way of running a Linux-based application under Windows.
The Windows Subsystem for Linux (WSL)
The Windows Subsystem for Linux (WSL) lets developers run a GNU/Linux environment — including most command-line tools, utilities, and applications — directly on Windows, unmodified, without the overhead of a traditional virtual machine or dual-boot setup[1]. Particularly, by using the latest version of WSL2 under Windows 11 one can effortlessly run any Linux-based application including GUI applications under Windows 11.
Using WSL2, can install
(1) ns-2 and nam under Windows 11
(2) ns-3, NetAnim and NetSimulyzer under Windows 11
(3) OMNet++ with IDE under Windows 11
(4) SUMO with sumo-gui under Windows 11
There are countless possibilities for using WSL2 for a Linux-based research
One may find a detailed installation procedure for installing WSL2 under Windows 11 and using GUI based Linux application in[2]
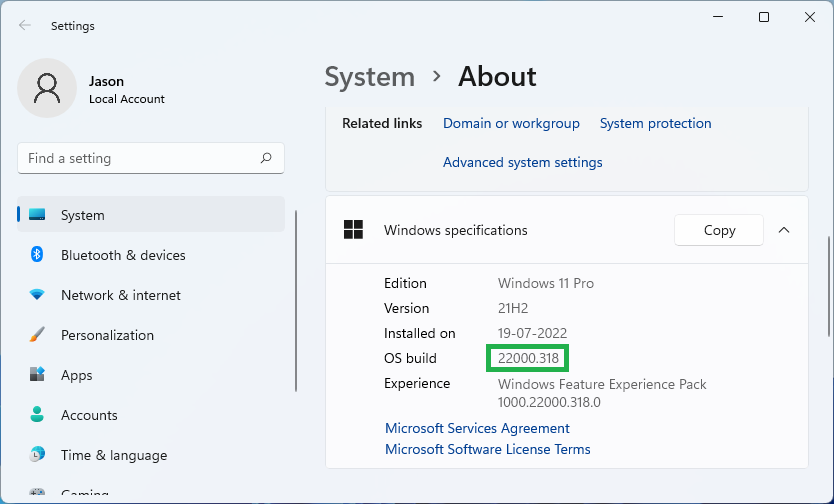
Step 1: Check the Windows ll Version
For running WSL2 with Linux GUI application support, we should use a suitable version of Windows 11. The OS build number of the Windows 11 must be higher than 22000. You may check it in System->About->Windows specifications section
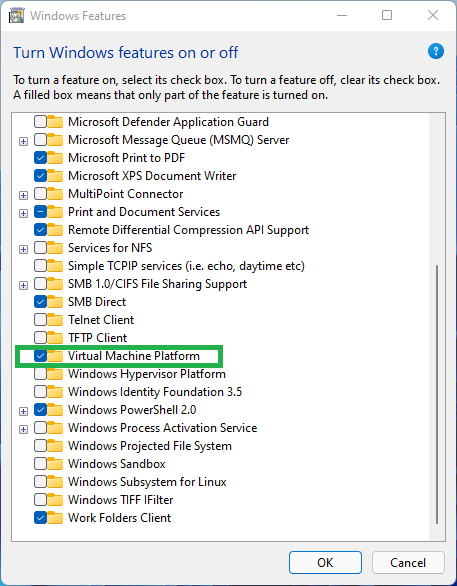
Step 2: Enable the Windows features “Virtual Machine Platform”
Open the “Turn Windows features on or off” window and enable the “Virtual Machine Platform” feature
Now we can install WSL2 support and suitable a Linux in it
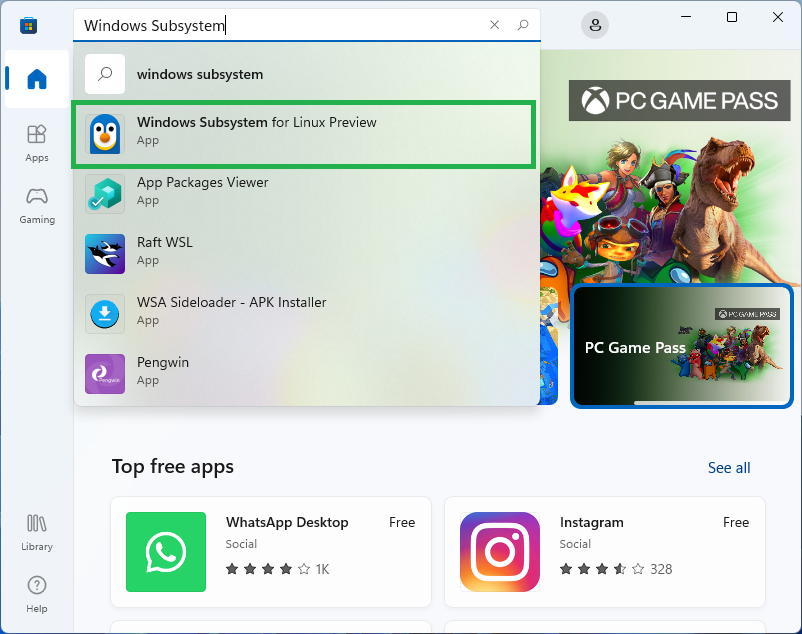
Step 3: Install Windows Subsystem for Linux Preview
We can install “Windows Subsystem for Linux Preview” from the Microsoft Store. We may search for it in the search box and can find it and install it from here.
In fact, this preview version of WSL2 only supports running the Linux GUI application out of the box without any additional Xserver component. (it means, the X-server components are already buit-in with this WSL2 package)
After the successful installation of “Windows Subsystem for Linux Preview” , we can run the command ‘wsl’ from the “Windows PowerShell” – but it will not contain the Linux system installed in it. So, before running ‘wsl’ command, we have to install a suitable version of Linux from the Microsoft Store.
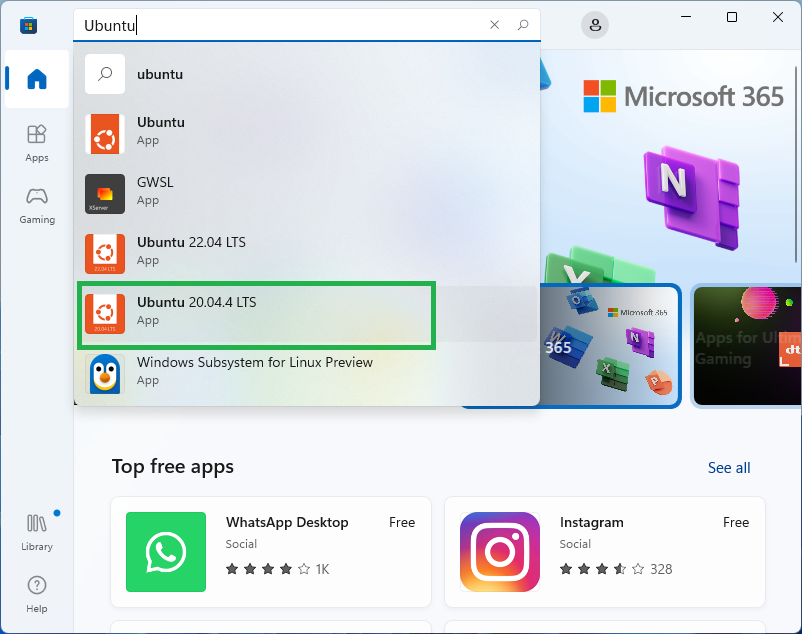
Step 4: Installing a Suitable Linux version from Microsoft Store.
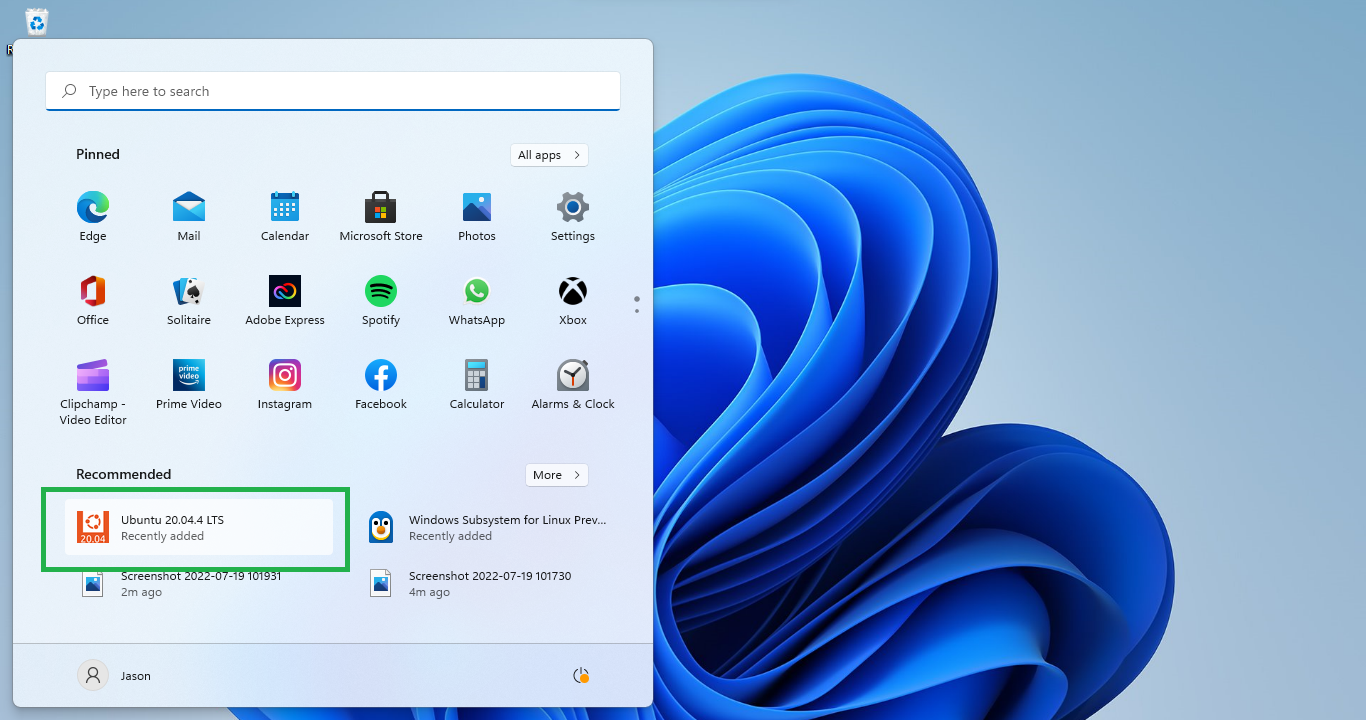
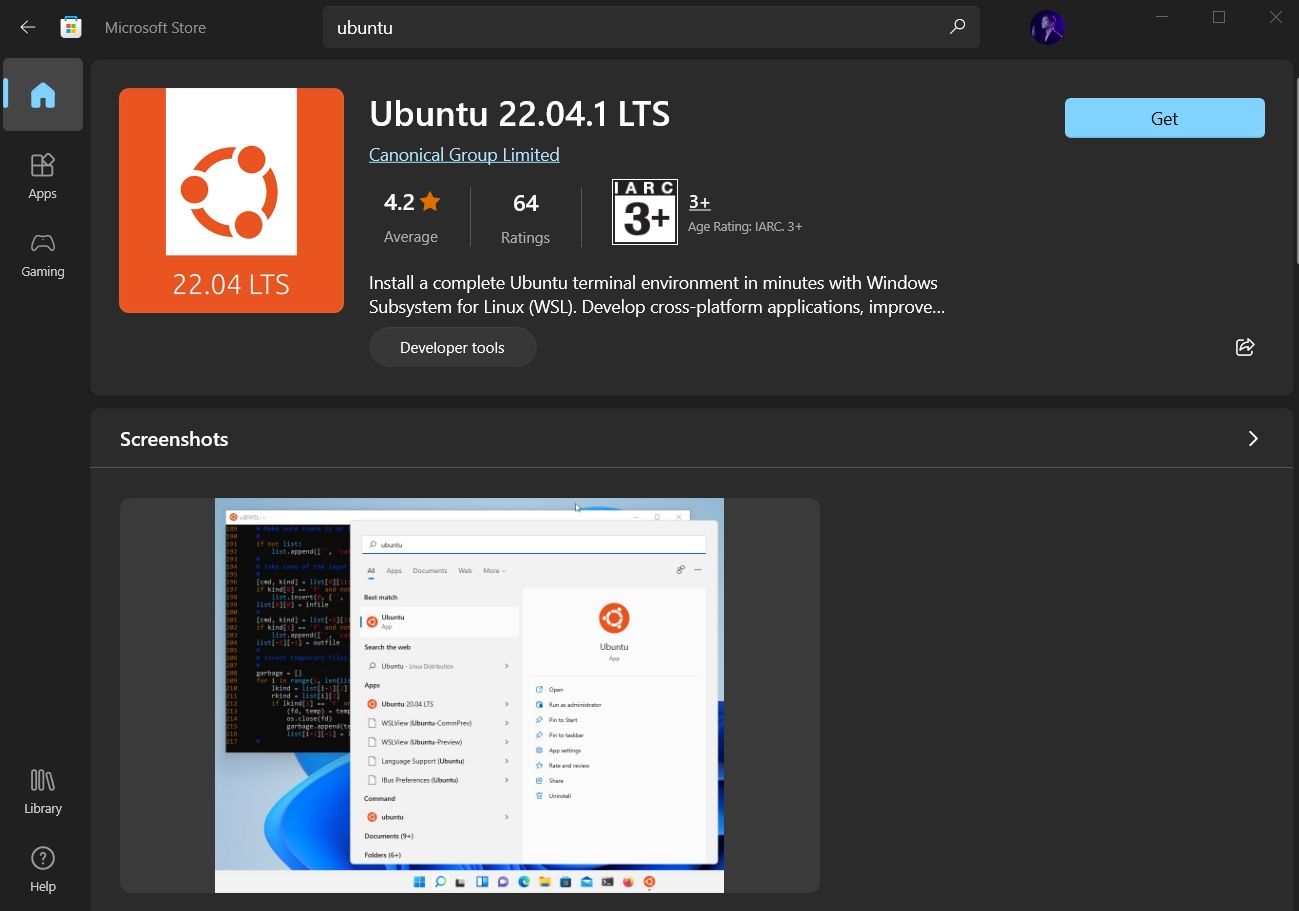
We can install a suitable version of “Ubuntu” from the Microsoft Store. We may search for it in the search box and can find it and install it. Here we are installing Ubuntu 20.04.4 LTS version.
Step 5: Running Ubuntu
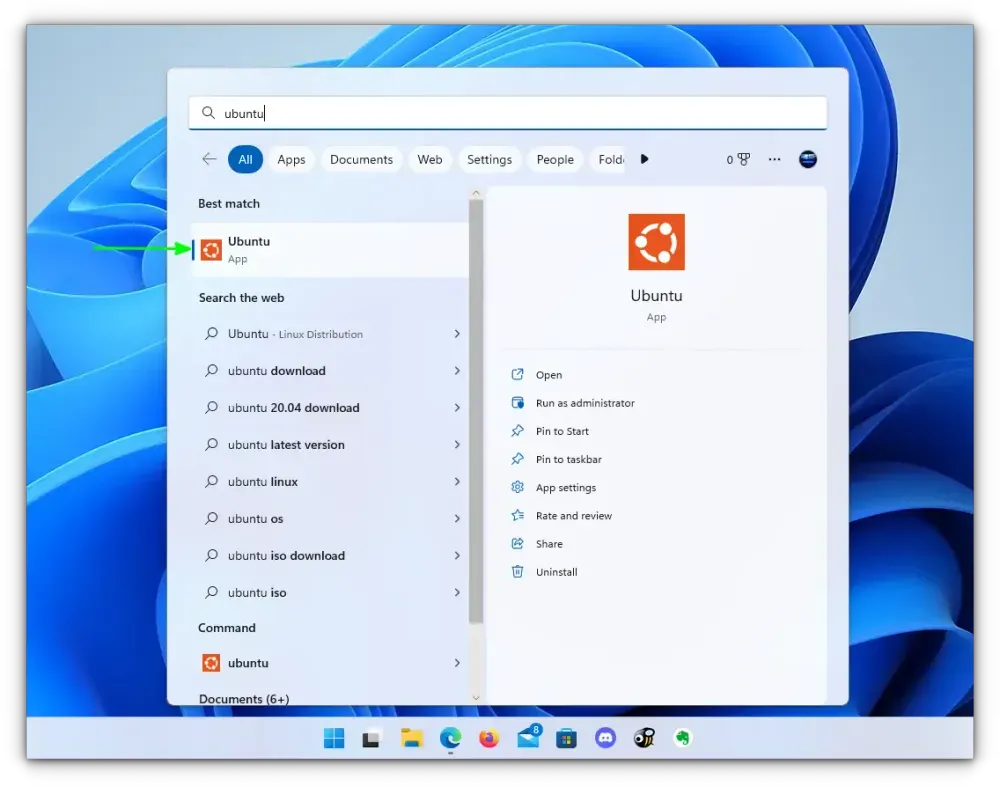
Now we can run the newly installed Ubuntu from the menu itself.
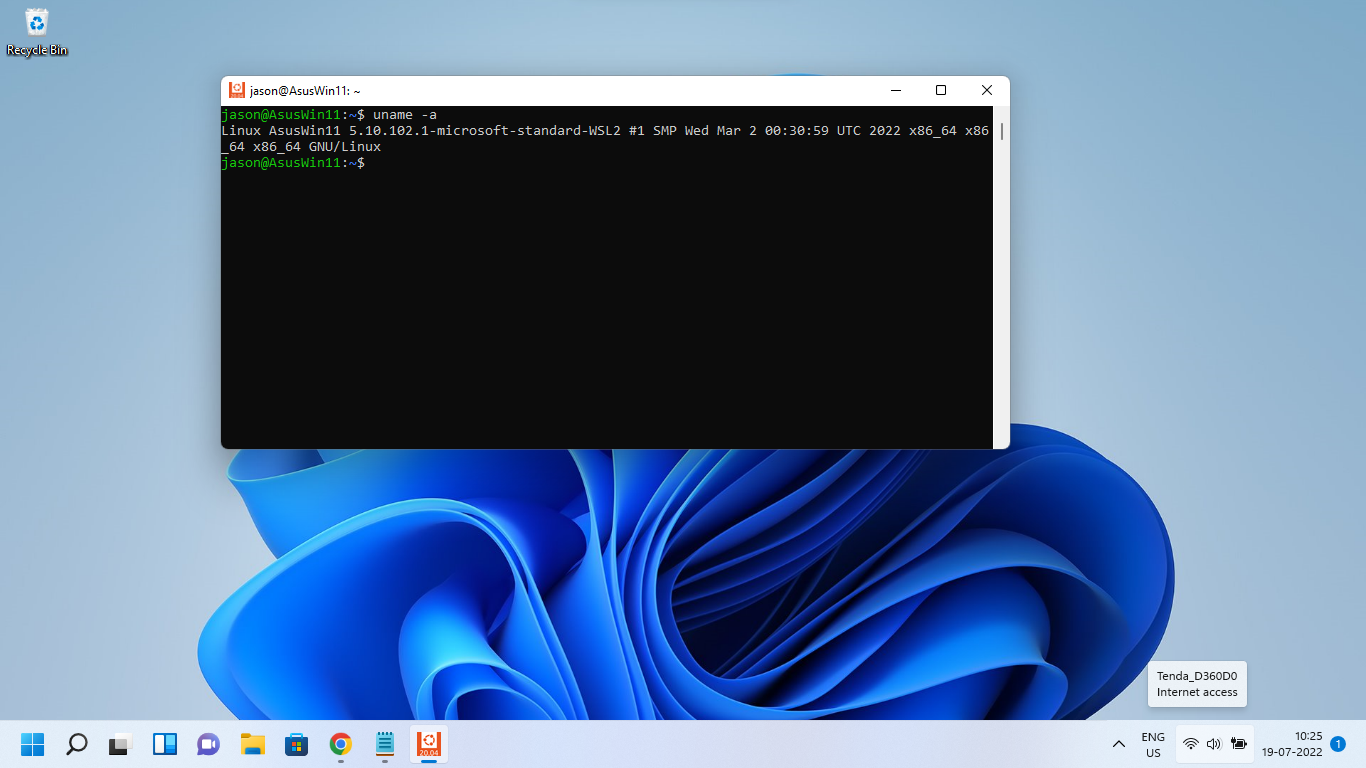
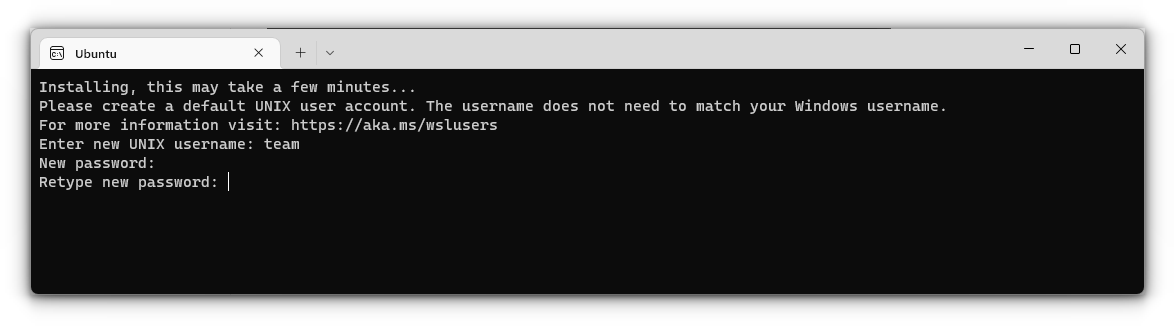
During the first run, it will ask and set a Linux user name and password. After that, it will directly run the terminal without asking username/password.
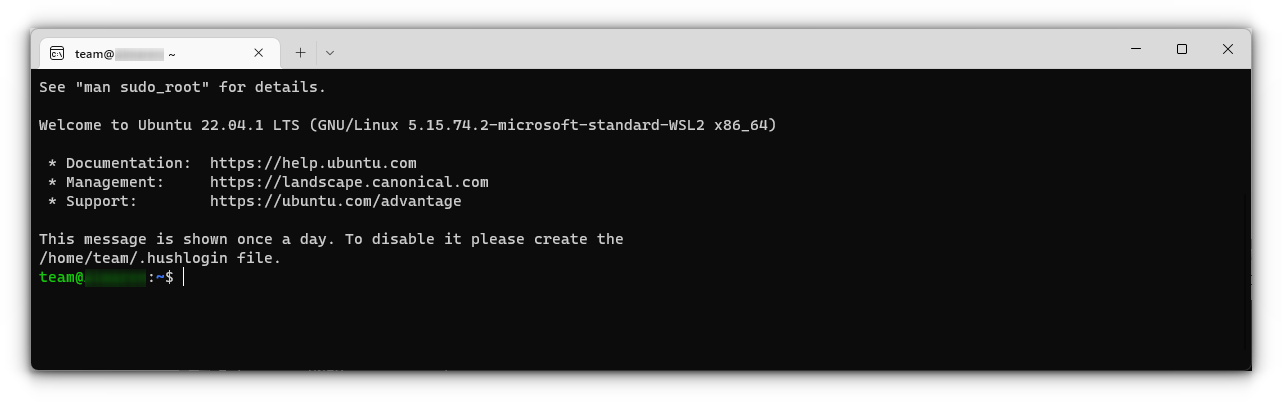
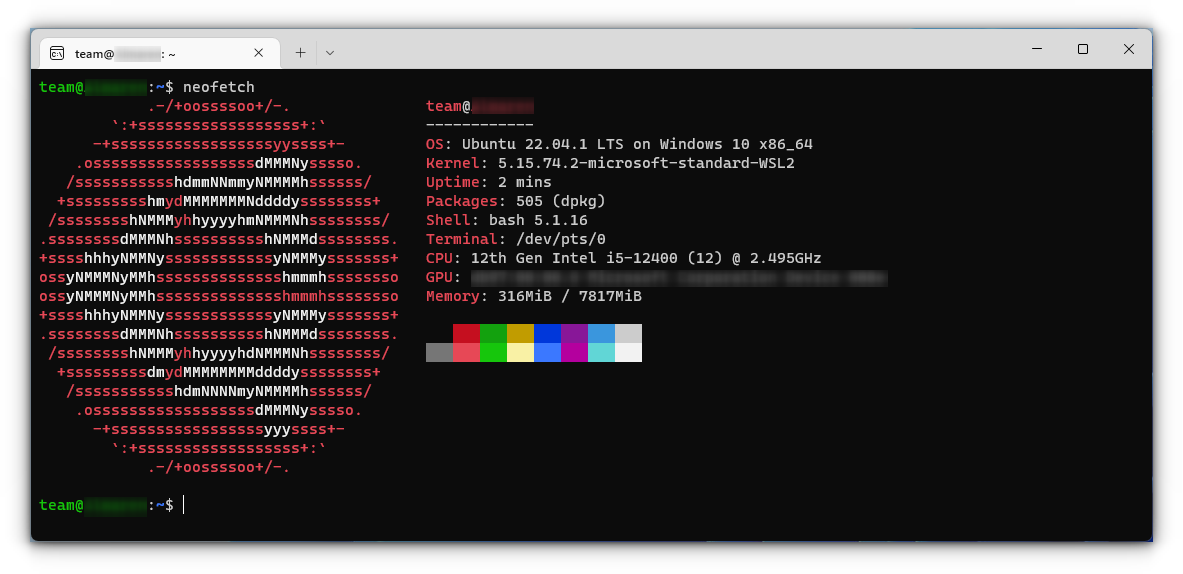
The following output shows the Ubuntu Terminal window which is running on WSL2. Here we may run any text-based and GUI-based Linux commands and applications.
Step 6: Installing some x11-based applications
On the latest Windows 11, WSL2 comes with WSLg (the graphical support) enabled by default. WSLg allows you to run graphical linux applications. So, now we can install some simple x11-based GUI applications and test the working of Linux GUI applications on Windows 11.
First, update the Ubuntu package repository.
$ sudo apt update
(After that, if necessary, we can upgrade the entire system with the latest modifications)
Now, to test the GUI application support, we can install some basic X11 applications as follows:
$ sudo apt install x11-apps
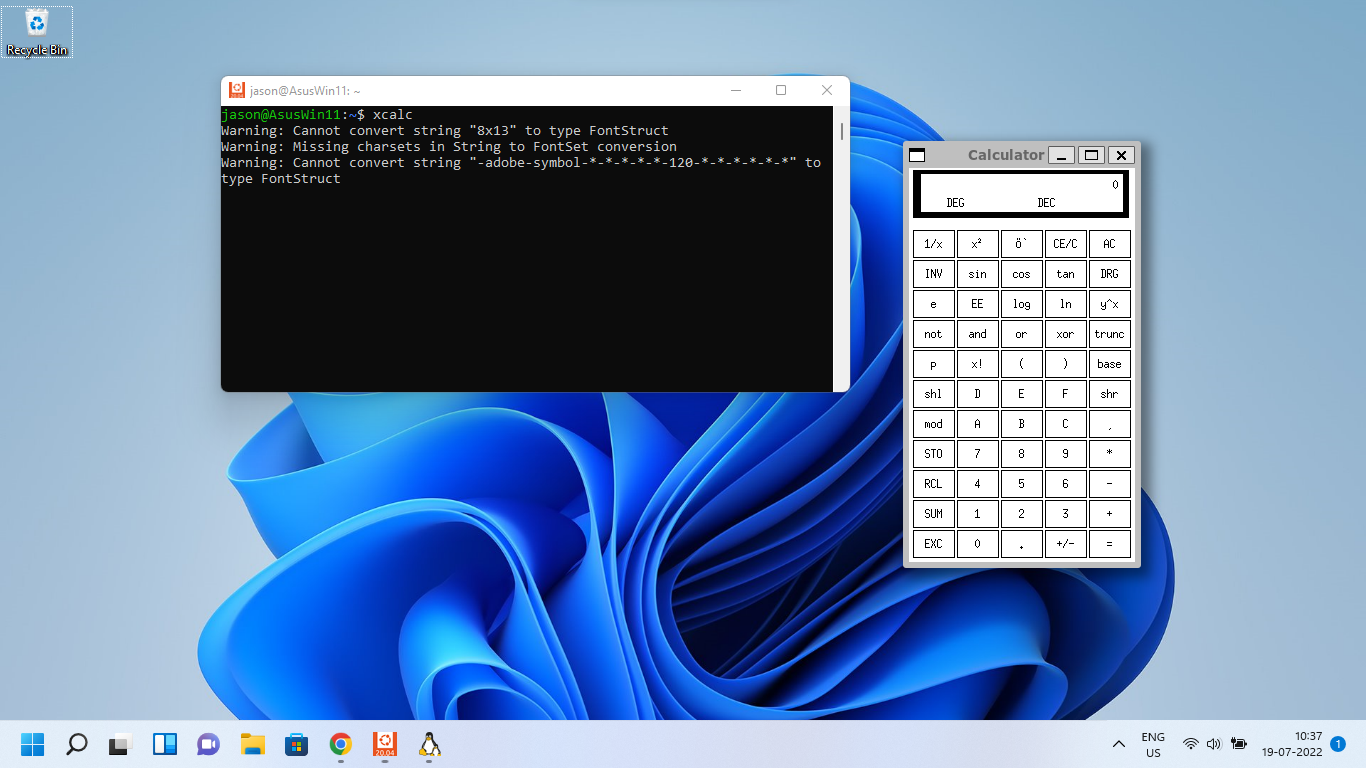
Step 6: Running a sample GUI application
In the following example, we are running a Linux GUI application called “xcalc”. If you notice that, the new Linux GUI application which is running under WSL2 Linux environment is getting displaying its “window” on the host (Windows 11) desktop itself
Conclusion
With the latest Windows 11 and its WSL2 support, we can run any GUI-based Linux applications under windows. The future version of WSL may even have excellent support for applications that may use 3D graphics subsystem.
Now we can install any text-based as well as GUI-based Linux application under this Ubuntu which is running under WSL2. So, now it is possible to install ns-3 with ‘NetAnim‘ (GUI) or ns-2 with the ‘nam‘ (GUI) OMNet++ with its ‘IDE’ (GUI), SUMO (GUI).
Note : But, you can not get good performance in terms of speed if you are comparing it with a native Linux installation on the same hardware. Even WSL may perform poor than some other virtualization solutions such as Virtual box (where it is possible to use a minimal, stripped version of Linux for better performance). So, if you are going to do some serious research work, I will advice using a simulator such as ns-3, only under a native Linux operating system and on native hardware.
The following Procedure explains the installation of ns-3 and NetAnim Under Windows 11 with WSL2 :
Installing ns-3 and NetAnim Under New Windows 11 Using WSL2
The following Procedure explains the installation of OMNet++ IDE Under Windows 11 with WSL2 :
Installing OMNet++ IDE Under new Windows11 Version Using WSL
Meantime, one may try the following installation procedures under WSL2.
Installing Aquasim & Aqua3D on an old Linux under VirtualBox
Installing Aquasim & Aqua3D on an old Linux under VirtualBox
References
- https://docs.microsoft.com/en-us/windows/wsl/about
- https://ubuntu.com/tutorials/install-ubuntu-on-wsl2-on-windows-11-with-gui-support#1-overview
Are you interested in running Kali Linux with a graphical user interface on your Windows 11 computer without having to use a virtual machine or VMware? If so, you’re in luck because with WSL 2 & WSLg, you can install Kali Linux 2023 on Windows 11 easily and for free.
In this post, I’m going to show you how to install Kali Linux 2023 with a desktop environment on Windows 11 using WSL.
What is WSL2?
WSL2 stands for Windows Subsystem for Linux version 2. It’s essentially a Linux environment with a kernel compiled by Microsoft that’s optimized for Linux distros. This means you can run Ubuntu, Kali Linux, OpenSUSE, and more inside Windows 11 as part of the application.
With the help of WSLg, you can even run Linux GUI apps and desktop environments inside Windows 11. Compared to VirtualBox or VMware, WSL2 is much faster and quicker.
System Requirements
Before we start, please ensure that your computer meets the following requirements:
- You’re running the latest version of Windows 11.
- Your computer supports hardware virtualization, which is enabled by default on modern computers. If it’s disabled, make sure to enable it from the BIOS.
WSL Setup
To set up WSL, follow these steps:
- Open Windows PowerShell or Command Prompt as administrator.
- Type the command
wsl --installand press Enter. This command will download and install a WSL2 kernel, GUI support, and the Ubuntu image automatically.
- Restart your computer.
- After rebooting, you’ll see a command prompt busy wrapping up the Linux installation. You can go ahead and set up a username and password for Ubuntu.
- If you notice, Ubuntu is available as an app on Windows 11 and can be accessed from the Start menu.
Installing Kali Linux 2023
To install Kali Linux 2023, follow these steps:
- Open Windows PowerShell or Command Prompt as administrator.
- Type the command
wsl -l -vto list out the installed Linux distributions.
- Type the command
wsl --list --onlineto see the available Linux distributions. You’ll see Kali Linux, which is available to install.
- To install Kali Linux, type the command
wsl --install -d kali-linux. This will download and install Kali Linux 2023 on Windows 11.
- After that, you will enter into Kali Shell Environment. Go head and update the repository list by typing:
sudo apt update
- If you want to install the full edition of Kali, which includes many useful tools, type the command
sudo apt install kali-linux-large. Please ensure you have at least 20GB of free space left on your drive before running this command.
Basic WSL Commands
Here are some basic WSL commands you can use:
- Type
exitto get out of the Linux shell and go back to the Windows PowerShell or Command Prompt.
- To see the list of installed distributions, type
wsl --list.
- To change the default distribution to Kali Linux, type
wsl --set-default kali-linux.
- To see the running status of Linux distributions, type
wsl -l -v.
- To shut down the lightweight virtual machine, type
wsl --shutdown.
Installing XFCE Desktop
To install the XFCE desktop environment for Kali Linux, follow these steps:
- Open Kali Linux Terminal by typing “
wsl” on Windows PowerShell or Command Prompt, or run Kali Linux from the Start menu.
- Update the repositories of Kali Linux by typing
sudo apt update.
- Install the XFCE desktop environment by typing
sudo apt install kali-win-kex. This will download and install XFCE for Kali Linux.
- Type
kex --win -sand press Enter to connect to the VNC server.
- Set a password and choose whether to set a view-only password.
NOTE: To exit the VNC server, press F8 to bring up the context menu and select “Disconnect from the server“. If you want to run Linux GUI apps on Windows 11, follow these steps:
Running Linux GUI Apps
If you want to run Linux GUI apps on Windows 11, follow these steps:
- Open the Kali Linux Terminal.
- Install an app like Blender by typing the command
sudo apt install blender
- Now, you can run Linux GUI apps like Blender within Windows 11.
Conclusion
Congratulations! You’ve successfully installed Kali Linux 2023 with a graphical user interface on Windows 11 using WSL.
Feel free to leave your thoughts and comments below. If you want to learn more about WSL usage, you can run the command wsl --help.
Sign Up for Our Newsletters
Don’t miss any updates.
By checking this box, you confirm that you have read and are agreeing to our terms of use regarding the storage of the data submitted through this form.
When Microsoft released WSL first, it was revolutionary as it allowed to run Linux commands on Windows.
A few years later, Microsoft took it to the next level by releasing WSL 2. The new version of WSL allowed running GUI Linux apps on Windows.
It’s not that Windows has a dearth of GUI apps. But when working in the Linux environment inside WSL, using the GUI apps could come in handy.
For example, you have to edit a config file and are uncomfortable with the command line text editors like Nano. You use Gedit GUI text editor to make the changes. It simplifies the life of Windows users who have to use Linux for their work.
Wondering how to run Linux GUI apps on Windows? There are the main steps for that:
- Enable WSL 2 and install a Linux distribution with it
- Install appropriate graphics driver for WSL
- Install and use GUI Linux apps
Let’s see about the steps in detail.
Requirements
As stated above, running Linux GUI applications is not available for all Windows versions. To do this, your system should be:
- For x64 systems: Version 1903 or later, with Build 18362 or later.
- For ARM64 systems: Version 2004 or later, with Build 19041 or later.
- The installed Linux distribution should use WSL2
Remember that, the requirements above are solely for running Linux GUI apps. WSL is supported for some of the Windows 10 versions also. Please refer to the dedicated article detailing how to install WSL in Windows for more about WSL and its uses.
Step1: Installing Linux Distribution with WSL 2
This is a lot easier on Windows 11 which comes with built-in support for WSL 2.
On Windows 11
You can use the Microsoft Store but I find it easier to use the command line.
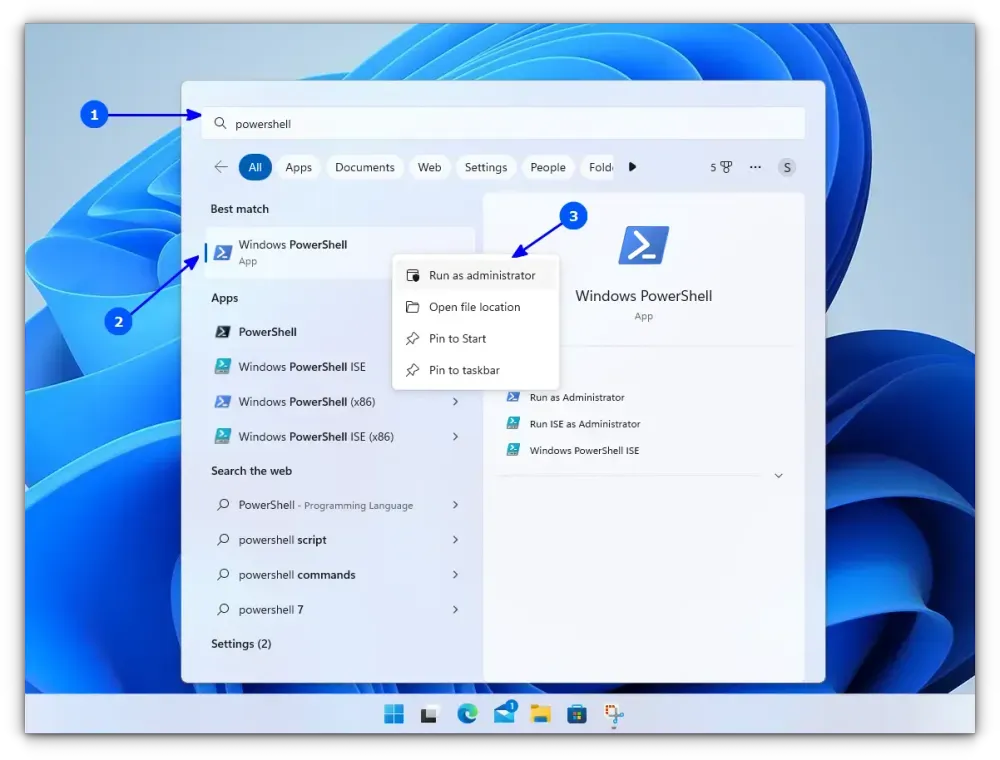
You need to open PowerShell with admin privileges. For this, search for Powershell in the start menu, right-click on Powershell and select Run as Administrator.
Enter the following command to install WSL.
wsl --installBy default, Ubuntu will be installed as the Linux distribution. If you want to install any other distribution, use the command below:
wsl --list --onlineThis will list all the available Linux distributions. Once you decide on the distribution, use the below command to install it.
wsl --install <Distribution Name>Once finished downloading and installing, you need to reboot to apply the changes.
On Windows 10
This is a bit complicated and takes some time and effort to run WSL version 2 on Windows 10.
Ensure that the Windows Subsystem for Linux feature is turned on. Execute the following command in Powershell with admin rights:
dism.exe /online /enable-feature /featurename:Microsoft-Windows-Subsystem-Linux /all /norestartReboot the device once the command is completed.
After this, you need to enable the Virtual Machine Platform feature. Open the Powershell with admin privileges and enter the following command:
dism.exe /online /enable-feature /featurename:VirtualMachinePlatform /all /norestartOnce again, restart the device to complete the WSL install and update to WSL 2.
Now, download the Linux Kernel Update Package for x64 machines from the official website. If you are using ARM64 devices, use this link to download the latest kernel update package.
If you are not sure about the device architecture, enter the command below in Powershell to get the type:
systeminfo | find "System Type"When the file is downloaded, double-click on it and finish the installation of the Kernel update package. Now, open PowerShell and run this command to set WSL 2 as the default version when installing a new Linux distribution:
wsl --set-default-version 2Once WSL2 is set as the default version, you can now install the Linux distribution of your choice.
Go to Windows Store and install Ubuntu.
🛠️ Configure the newly installed Ubuntu
Whether you installed WSL and Ubuntu using the Microsoft Store or the command line, you need to configure it.
Here’s how it is done:
Once you rebooted after installing Ubuntu, search for Ubuntu in Start Menu and open it.
It will ask you to enter a UNIX Username and Password. Enter these details and press enter key.
You will now be inside the terminal window of Ubuntu.
Once logged in, you need to update the installed Ubuntu. For this, enter the following commands one by one:
sudo apt update
sudo apt full-upgrade
After completing the update, you are good to go with Ubuntu in WSL.
Step 2: Installing GUI Applications
Once you are all set with the Linux distribution inside WSL, now is the time to install the Linux GUI application. It is done in two parts as described below.
Download and Install Graphics drivers
To run GUI apps, you need to install appropriate graphics drivers. You can use the following link to download the drivers according to your provider.
- Intel GPU Driver for WSL
- AMD GPU Driver for WSL
- NVIDIA GPU Driver for WSL
Once installed, you are all done.
Install some GUI Apps
Now, go to your Ubuntu app and install any GUI app using the APT package manager. You should note that running apps from other sources like flatpak are problematic within WSL.
For this article, I installed the Gedit text editor using the following command:
sudo apt install gedit -yThis will install several MB of packages including required libraries. Once completed, you can run the following command to start the GUI Gedit app in Windows:
gedit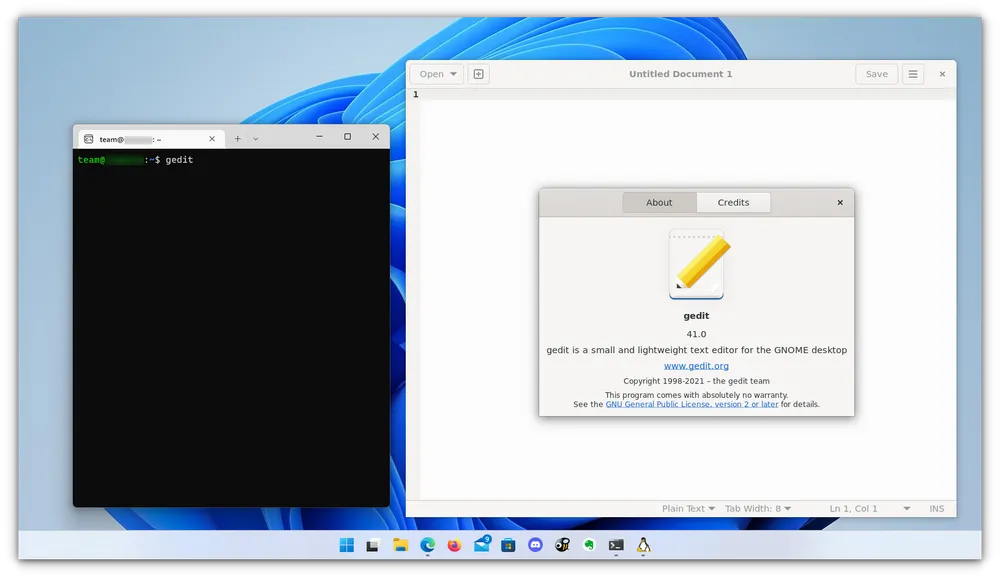
Similarly, you can install all the popular applications available to Linux, including Nautilus file manager, GIMP, etc. You can refer to the official documentation for more about running GUI applications in WSL.
Wrapping Up
With WSL, Microsoft has provided a comfortable way of using Linux within Windows. It keeps on improving with each major version. Running GUI Linux apps on Windows feature is proof of the same.
As you can see, it is rather simple to use WSL 2 on Windows 11. Running it on Windows 10 takes some effort.
I hope you find this tutorial helpful. Let me know if you face any difficulties.
Loading
Welcome to WSLg
WSLg is short for Windows Subsystem for Linux GUI and the purpose of the project is to enable support for running Linux GUI applications (X11 and Wayland) on Windows in a fully integrated desktop experience.
WSLg provides an integrated experience for developers, scientists or enthusiasts that prefer or need to run Windows on their PC but also need the ability to run tools or applications which work best, or exclusively, in a Linux environment. While users can accomplish this today using a multiple system setup, with individual PC dedicated to Windows and Linux, virtual machine hosting either Windows or Linux, or an XServer running on Windows and projected into WSL, WSLg provides a more integrated, user friendly and productive alternative.
WSLg strives to make Linux GUI applications feel native and natural to use on Windows. From integration into the Start Menu for launch to appearing in the task bar, alt-tab experience to enabling cut/paste across Windows and Linux applications, WSLg enables a seamless desktop experience and workflow leveraging Windows and Linux applications.

Installing WSLg
Pre-requisites
-
WSLg is supported on both Windows 11 and Windows 10. Windows 10 users must ensure their Windows 10 installation is fully up to date by visiting Windows Update and installing all available updates.
-
WSLg is available both as part of the Windows 11 WSL inbox support as well as through the Windows Subsystem for Linux from the Microsoft Store. It is highly recommended to use the Microsoft Store version of WSL, which supports both Windows 10 and Windows 11, and contains the most up to date version of WSL and WSLg.
-
Make sure to update your graphics driver to the latest driver available from your GPU manufacturer’s website to benefit from GPU acceleration in your WSL environment.
Install instructions (Fresh Install — no prior WSL installation)
From a command prompt with administrator privileges, run the command wsl --install -d Ubuntu, then reboot if prompted.
After reboot the installation will continue. You’ll be asked to enter a username and password. These will be your Linux credentials, they can be anything you want and don’t have to match your Windows credentials.
Voilà! WSL and WSLg are installed and ready to be used!
Install instructions (Existing WSL install)
If you have an existing WSL installation without WSLg and want to update to the latest version of WSL which includes WSLg, run the command wsl --update from an elevated command prompt.
Please note that WSLg is only compatible with WSL 2 and will not work for WSL distribution configured to work in WSL 1 mode. Verify that your Linux distro is configured for running in WSL 2 mode, if not switch to WSL 2. While you can continue to run Linux distro in WSL 1 mode after installing WSLg if you so desired, a distro configured to run in WSL 1 mode will not be able to communicate with WSLg and will not be able to run GUI applications.
You can list your currently installed distro and the version of WSL they are configured for using the following command from an elevated command prompt.
If running in version 1 mode, switch to version 2. This can take a while.
wsl --set-version _distro_name_ 2
Restart WSL by running this command from an elevated command prompt, make sure to save any pending work first:
Updating WSL + WSLg
To update to the latest version of WSL and WSLg released for preview, simply run wsl --update from an elevated command prompt or powershell.
You’ll need to restart WSL for the changes to take effect. You can restart WSL by running wsl --shutdown from an elevated command prompt. If WSL was currently running, it will shutdown, make sure to first save any in progress work! WSL will be automatically restarted the next time you launch a WSL application or terminal.
First Launch
If you have installed the Ubuntu Linux distro per these instructions, you’ll find an Ubuntu icon in your start menu, launch it. This will launch the WSL 2 VM, launch the Ubuntu WSL distro in that VM and give you a terminal to interact with it. Voilà! You’re running Linux on Windows!
If you would like to explore additional Linux distributions built for WSL, you can use the wsl --list --online command from an elevated command prompt to enumerate the list of available distributions for your system. You can have multiple Linux distributions installed within WSL and they will happily coexist side-by-side, so don’t be scared to experiment and try things out.
Congrats you are done and ready to use GUI apps!
Install and run GUI apps
If you want to get started with some GUI apps, you can run the following commands from your Linux terminal to download and install some popular applications. If you are using a different distribution than Ubuntu, it may be using a different package manager.
## Update list of available packages
sudo apt update

## Gedit
sudo apt install gedit -y

## GIMP
sudo apt install gimp -y

## Nautilus
sudo apt install nautilus -y

## VLC
sudo apt install vlc -y

## X11 apps
sudo apt install x11-apps -y

## Google Chrome
cd /tmp
sudo wget https://dl.google.com/linux/direct/google-chrome-stable_current_amd64.deb
sudo dpkg -i google-chrome-stable_current_amd64.deb
sudo apt install --fix-broken -y
sudo dpkg -i google-chrome-stable_current_amd64.deb

## Microsoft Teams
cd /tmp
sudo curl -L -o "./teams.deb" "https://teams.microsoft.com/downloads/desktopurl?env=production&plat=linux&arch=x64&download=true&linuxArchiveType=deb"
sudo apt install ./teams.deb -y

## Microsoft Edge Dev Browser
sudo curl https://packages.microsoft.com/repos/edge/pool/main/m/microsoft-edge-dev/microsoft-edge-dev_118.0.2060.1-1_amd64.deb -o /tmp/edge.deb
sudo apt install /tmp/edge.deb -y
Once these applications are installed, you’ll find them in your start menu under the distro name. For example Ubuntu -> Microsoft Edge. You can also launch these from your terminal window using the commands:
xcalc,xclock,xeyesgimpgedit ~/.bashrcnautilusvlcgoogle-chrometeamsmicrosoft-edge
WSLg Architecture Overview

User Distro
The user distro is essentially the WSL distribution you are using for your Linux work. You can use the command wsl --list --online from an elevated Windows command prompt to list the WSL distributions available on your system. You can run multiple user distros side-by-side and they will peacefully coexist, so don’t be afraid of trying out new distro. Each user distro will be paired with a unique instance of the system distro, but you can still interact across GUI applications running in different user distro seamlessly, such as cut/paste between them. The underlying containerization of the various userspace should be invisible to you.
All user and system distros for a particular Windows user run within the same WSL virtual machine against a single instance of the Linux kernel. Different Windows users on a PC have their own VM and instance of WSL. Your Linux environment is guaranteed to always be your own and not shared with other Windows users on the same PC.
WSLg System Distro
The system distro is where all of the magic happens. The system distro is a containerized Linux environment where the WSLg XServer, Wayland server and Pulse Audio server are running. Communication socket for each of these servers are projected into the user distro so client applications can connect to them. We preconfigure the user distro environment variables DISPLAY, WAYLAND_DISPLAY and PULSE_SERVER to refer these servers by default so WSLg lights up out of the box.
Users wanting to use different servers than the one provided by WSLg can change these environment variables. User can also choose to turn off the system distro entirely by adding the following entry in their .wslconfig file (located at c:\users\MyUser\.wslconfig). This will turn off support for GUI applications in WSL.
[wsl2]
guiApplications=false
The system distro is based on the Microsoft CBL-Mariner Linux. This is a minimal Linux environment, just enough to run the various pieces of WSLg. For details on how to build and deploy a private system distro please see our build instructions.
Every WSL 2 user distro is paired with its own instance of the system distro. The system distro runs partially isolated from the user distro to which it is paired, in its own NS/PID/UTS namespace but shares other namespaces such as IPC, to allow for shared memory optimization across the boundary.
While a user can get a terminal into the system distro, the system distro is not meant to be used directly by users. Every instance of the system distro is loaded read-only from its backing VHD. Any modifications, made to the in-memory instance of the system distro (such as installing new packages or creating a new file), are effectively discarded when WSL is restarted. The reason we do this is to enable a servicing model for the system distro where we replace the old one with the new one without having to worry about migrating any user data contained within. We use a read-only mapping such that the user gets a well known discard behavior on any changes, every time WSL is restarted, instead of getting a surprise when WSL is serviced.
Although the Microsoft published WSLg system distro as read-only, we do want to encourage folks to tinker with it and experiment. Although we expect very few folks to actually need or want to do that, we’ve shared detailed instruction on our contributing page on how to both build and deploy a private version of the system distro. Most users who just want to use GUI applications in WSL don’t need to worry about those details.
WSLGd
WSLGd is the first process to launch after init. WSLGd launches Weston (with XWayland), PulseAudio and establishes the RDP connection by launching mstsc.exe on the host in silent mode. The RDP connection will remain active and ready to show a new GUI applications being launch on a moment’s notice, without any connection establishment delays. WSLGd then monitors these processes and if they exit by error (say as a result of a crash), it automatically restarts them.
Weston
Weston is the Wayland project reference compositor and the heart of WSLg. For WSLg, we’ve extended the existing RDP backend of libweston to teach it how to remote applications rather than monitor/desktop. We’ve also added various functionality to it, such as support for multi-monitor, cut/paste, audio in/out, etc…
The application integration is achieved through an RDP technology called RAIL (Remote Application Integrated Locally) and VAIL (Virtualized Application Integrated Locally). The main difference between RAIL and VAIL is how pixels are transported across from the RDP server to the RDP client. In RAIL, it is assumed that the Server and Client are running on different physical systems communicating over the network and thus pixels need to be copied over the RDP transport. In VAIL, it is understood that the Server and Client are on the same physical system and can share memory across the Guest/Host VM boundary. We’ve added support for both RAIL and VAIL to the libweston RDP backend, although for WSLg only the VAIL support is effectively used. While building WSLg, we first implemented RAIL while the necessary pieces enabling the switch to VAIL were being developed in parallel. We decided to keep that support in as it could reuse in other interesting scenarios outside of WSLg, for example for remoting application from a Pi running Linux. To share memory between the Linux guest and Windows host we use virtio-fs.
RAIL-Shell
Weston is modular and has various shells today, such as the desktop shell, fullscreen shell (aka kiosk), and automative shell. For WSLg we introduced a new shell called the RAIL Shell. The purpose of the RAIL Shell is to help with the remoting of individual windows from Linux to Windows, as such the shell is very simplistic and doesn’t involve any actual widgets or shell owned pixels.
FreeRDP
Weston leverages FreeRDP to implement its backend RDP Server. FreeRDP is used to encode all communications going from the RDP Server (in Weston) to the RDP Client (mstsc on Windows) according to the RDP protocol specifications. It is also used to decode all traffic coming from the RDP Client into the RDP server.
Pulse Audio Plugin
For audio in (microphone) and out (speakers/headphone) WSLg runs a PulseAudio server. WSLg uses a sink plugin for audio out, and a source plugin for audio in. These plugins effectively transfer audio samples between the PulseServer and the Weston RDP Server. The audio streams are merged by the Weston RDP Server onto the RDP transport, effectively enabling audio in/out in the Weston RDP backend across all scenarios (Desktop/RAIL/VAIL style remoting), including WSLg.
WSL Dynamic Virtual Channel Plugin (WSLDVCPlugin)
WSLg makes use of a custom RDP virtual channel between the Weston RDP Server and the mstsc RDP Client running on the Windows host. This channel is used by Weston to enumerate all Linux GUI applications (i.e. applications which have a desktop file entry of type gui) along with their launch command line and icon. The open source WSLDVCPlugin processes the list of Linux GUI applications sent over this channel and creates links for them in the Windows start menu.
OpenGL accelerated rendering in WSLg
While WSLg works with or without virtual GPU support, if you intend to run graphics intensive applications such as Blender or Gazebo, it is best to be running on a system with a GPU and driver that can support WSL. An overview of our vGPU architecture and how we make it possible for Linux applications to access the GPU in WSL is available at our DirectX blog.
Support for OpenGL accelerated rendering is made possible through the work our D3D team has done with Collabora and the Mesa community on creating a d3d12 Gallium driver.
Support for Linux, including support for WSLg, has been upstream and part of the Mesa 21.0 release. To take advantage of this acceleration, you’ll need to update the version of Mesa installed in your user distro. It also requires that your distro vendor chose to build and publish the new d3d12 Gallium driver to their package repository. We’re working with the various WSL distro publishers to inform them of these changes.
Please note that for the first release of WSLg, vGPU interops with the Weston compositor through system memory. If running on a discrete GPU, this effectively means that the rendered data is copied from VRAM to system memory before being presented to the compositor within WSLg, and uploaded onto the GPU again on the Windows side. As a result, there is a performance penalty proportionate to the presentation rate. At very high frame rates such as 600fps on a discrete GPU, that overhead can be as high as 50%. At lower frame rate or on integrated GPU, performance much closer to native can be achieved depending on the workload. Using a vGPU still provides a very significant performance and experience improvement over using a software renderer despite this v1 limitation.
WSLg Code Flow
WSLg builds on the great work of the Linux community and makes use of a large number of open source projects. Most components are used as-is from their upstream version and didn’t require any changes to light up in WSLg. Some components at the heart of WSLg, in particular Weston, FreeRDP and PulseAudio, required changes to enable the rich WSLg integration. These changes aren’t yet upstream. Microsoft is working with the community to share these contributions back with each project such that, over time, WSLg can be built from upstream component directly, without the need for any WSLg specific modifications.
All of these in-flight contributions are kept in Microsoft mirror repos. We keep these mirrors up to date with upstream releases and stage our WSLg changes in those repos. WSLg pulls and builds code from these mirror repos as part of our Insider WSLg Preview releases. These mirrors are public and accessible to everyone. Curious developers can take a peek at early stages of our contribution by looking at code in those mirrors, keeping in mind that the final version of the code will likely look different once the contribution reaches the upstream project and is adapted based on the feedback receives by the various project owners. All of our mirrors follow the same model. There is a main branch which correspond to the upstream branch at our last synchronization point. We update the main branch from time to time to pick update from the upstream project. There is also a working branch that contains all of our in-flight changes. WSLg is built using the working branch from each of the mirror projects.
The projects that WSLg maintains mirrors for will change over time as in-flight contributions evolve. Once some contributions are upstream, it may no longer be necessary to maintain a mirror, at which point it will be removed and WSLg will start to leverage the upstream version of the component directly. As we light up new functionality in WSLg, new mirrors may be introduced to stage contributions to new components. As such, expect the list of mirrors to change overtime.
At this point in time, we have the following project mirrors for currently in-flight contributions.
| Project | Upstream Repo | WSLg Mirror |
|---|---|---|
| Weston | https://github.com/wayland-project/weston | https://github.com/microsoft/Weston-mirror |
| FreeRDP | https://github.com/FreeRDP/FreeRDP | https://github.com/microsoft/FreeRDP-mirror |
| PulseAudio | https://github.com/pulseaudio/pulseaudio | https://github.com/microsoft/PulseAudio-mirror |
The following is a high level overview of the currently in-flight contributions to each project contained within these mirrors.
Weston
WSLg leverages Weston as the Wayland compositor bridging the Linux and Windows worlds using RDP technology to remote application content between them. Weston already had an RDP backend, but it was limited to single-monitor-desktop remoting. We’ve greatly enhanced that RDP backend to include advanced functionality, such as multi-monitor support, clipboard integration for copy/paste, and audio in/out. We’ve enabled new remoting modes called RAIL (Remote Application Integrated Locally) and VAIL (Virtualized Application Integrated Locally), where individual applications, rather than desktops/monitors, are remoted. These changes are not specific to WSLg; they add functionality to the existing RDP backend and are reusable in other scenarios as well (i.e. using the new Weston RDP backend to remote application running on a Raspberry Pi to another device running an RDP client).
To enable rich integration in WSLg, we’ve also added a small plugin to the RDP backend specific to WSLg. In Weston, the plugin is responsible for attaching to the user distro and searching for installed applications (aka the desktop file). The plugin sends the Windows host a list of all applications found along with their launch commands and icons. On the Windows host, an open source mstsc plugin part of the WSLg project uses that information to create shortcuts for these Linux applications to the Windows Start Menu.
We’ve also fixed several bugs impacting various applications. Generally, these were problems that impacted Weston in all modes and were not specific to WSLg.
FreeRDP
Weston currently uses FreeRDP for its RDP Backend. WSLg continues to leverage FreeRDP and we have added support for a new RDP Protocol/Channel to enable VAIL optimized scenario as well as support for the WSLg plugin. We’ve also fixed various bugs that were impacting interops with mstsc or causing instability.
PulseAudio
For PulseAudio, our contributions focused on a sink and a source plugin that shuffle audio data between PulseAudio and the Weston RDP backend such that the audio data can be integrated over the RDP connection back to the host. There are no changes to the core of PulseAudio outside of adding these new plugins.
Contributing
If you would like to tinker with or contribute to WSLg, please see our CONTRIBUTING page for details, including how to build and run private a version of WSLg.
Reporting a non-security issues
For non-security related issues, such as reporting a bug or making a suggestion for a new feature, please use this project’s issues tracker.
Reporting security issues
To report security issues with WSLg or any other Microsoft products, please follow the instructions detailed here.
Trademarks
This project may contain trademarks or logos for projects, products, or services. Authorized use of Microsoft trademarks or logos is subject to and must follow Microsoft’s Trademark & Brand Guidelines. Use of Microsoft trademarks or logos in modified versions of this project must not cause confusion or imply Microsoft sponsorship. Any use of third-party trademarks or logos are subject to those third-party’s policies.