
Обратите внимание! На момент написания настоящей статьи в ОС Windows 11 отсутствует возможность автоматической смены темы, если под этим подразумевается именно переход со светлого оформления интерфейса на темное и/или обратно. Однако решить данную задачу можно с помощью сторонних приложений, что мы и рассмотрим далее.
Вариант 1: Смена темы
Оптимальным на сегодняшний день способом автоматической смены темы будет использование приложения от сторонних разработчиков Auto Dark Mode. С его помощью можно сделать так, чтобы оформление переключалось со светлого на темное и обратно по собственноручно заданному расписанию или от заката до рассвета. Также имеется множество других полезных функций, заслуживающих отдельного внимания.
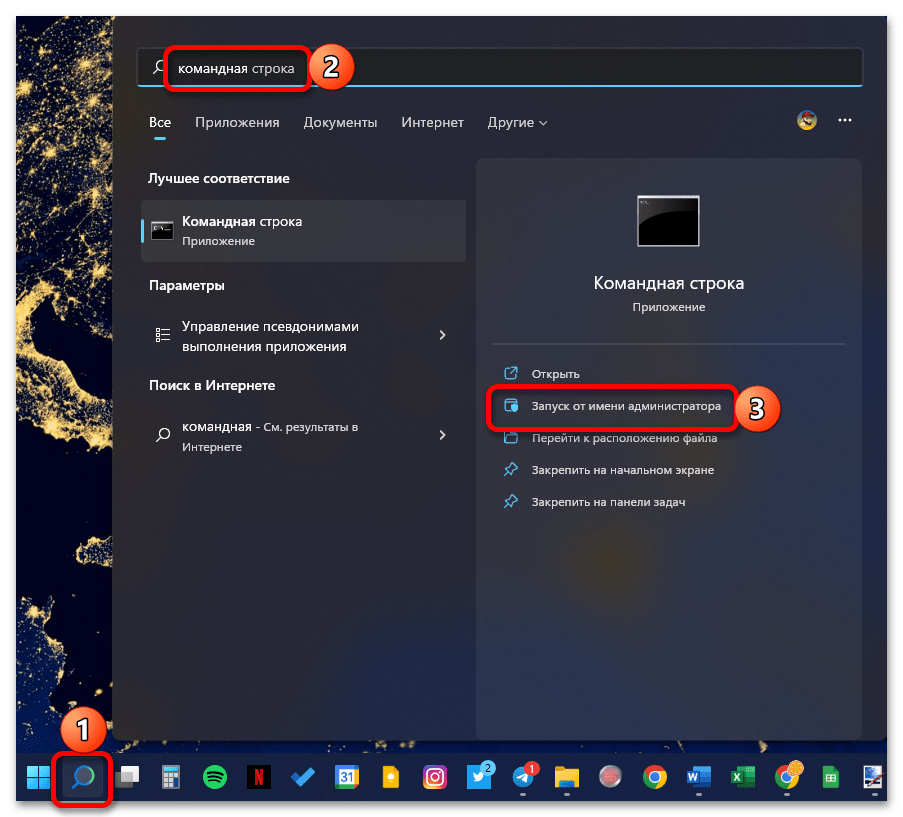
- Запустите «Командную строку» от имени администратора. Проще всего это сделать через поиск по системе, но есть и другие способы.

Читайте также: Как запустить «Командную строку» от имени администратора в Виндовс 11
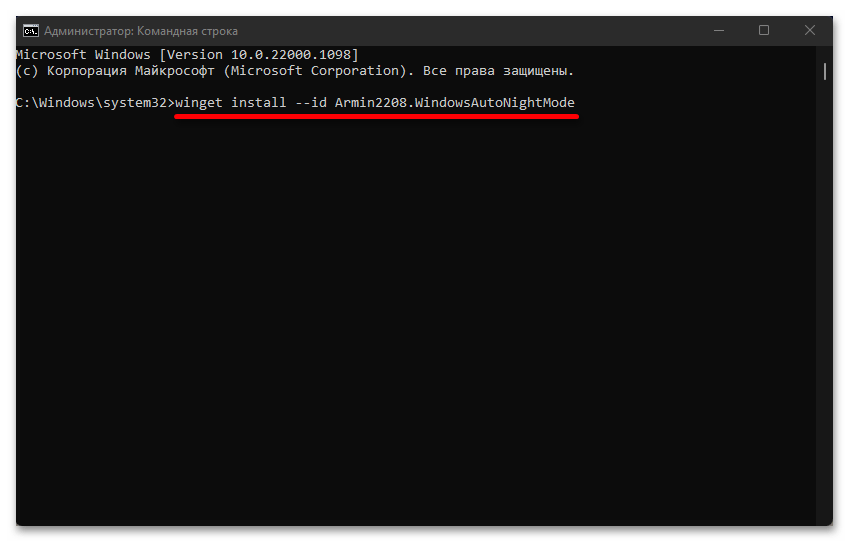
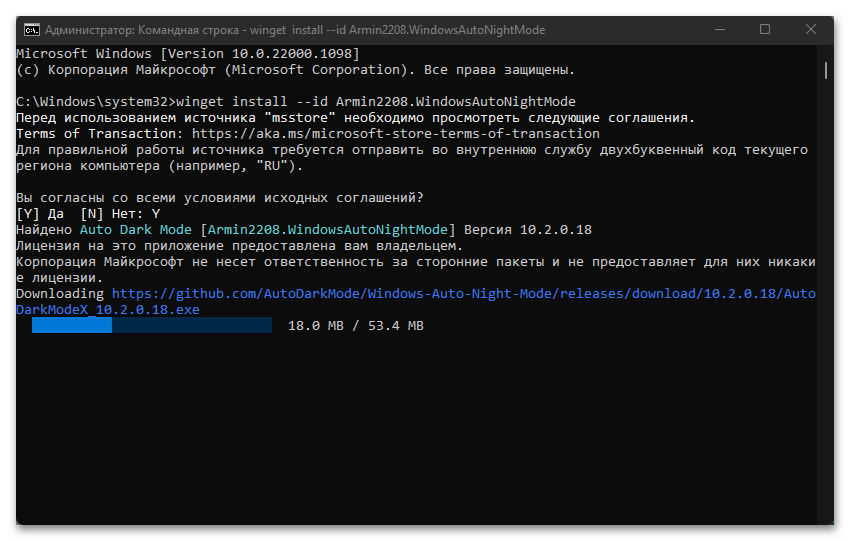
- Введите указанную ниже команду и нажмите «Enter» для ее выполнения.
winget install --id Armin2208.WindowsAutoNightMode
Будет начато скачивание Auto Dark Mode из репозитория.
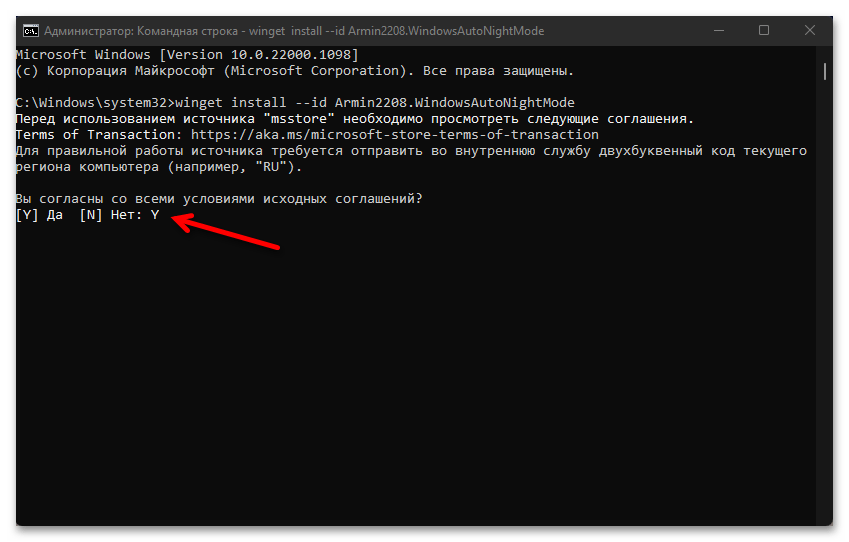
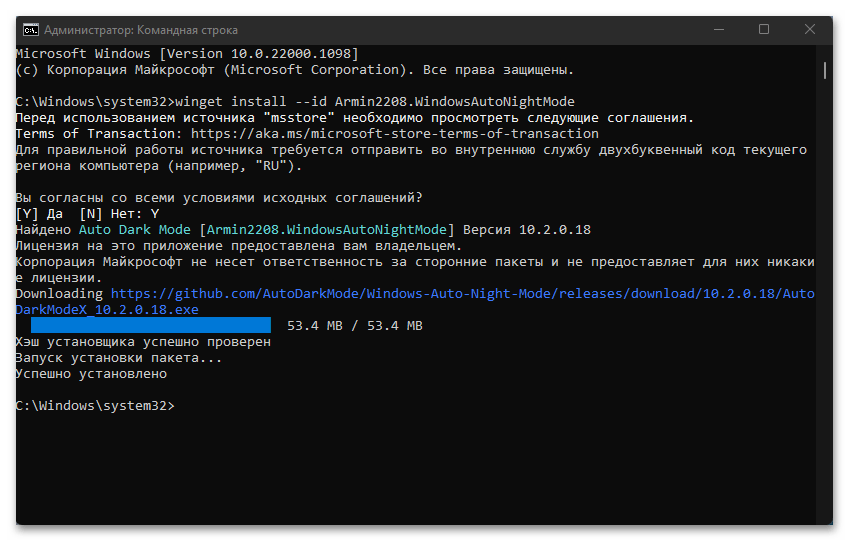
- Подтвердите свое согласие на инсталляцию. Для этого в консоли необходимо ввести букву
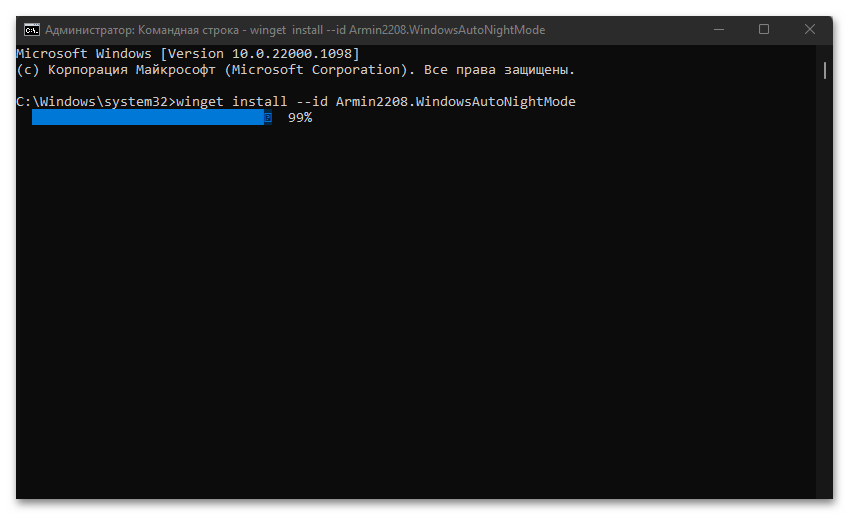
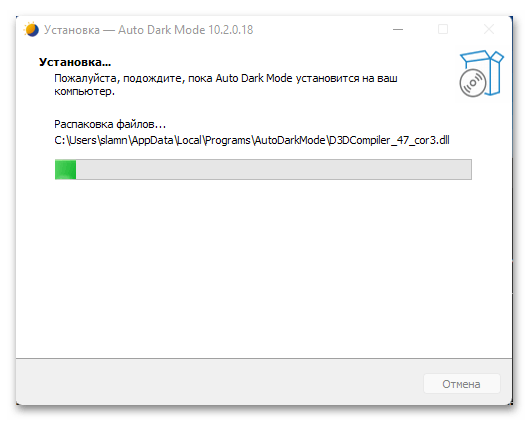
Yи нажать «Enter». - Ожидайте,

пока будет выполнена установка.

Она протекает в несколько этапов,

после чего в «Командной строке» появится соответствующее уведомление и ее можно будет закрыть.
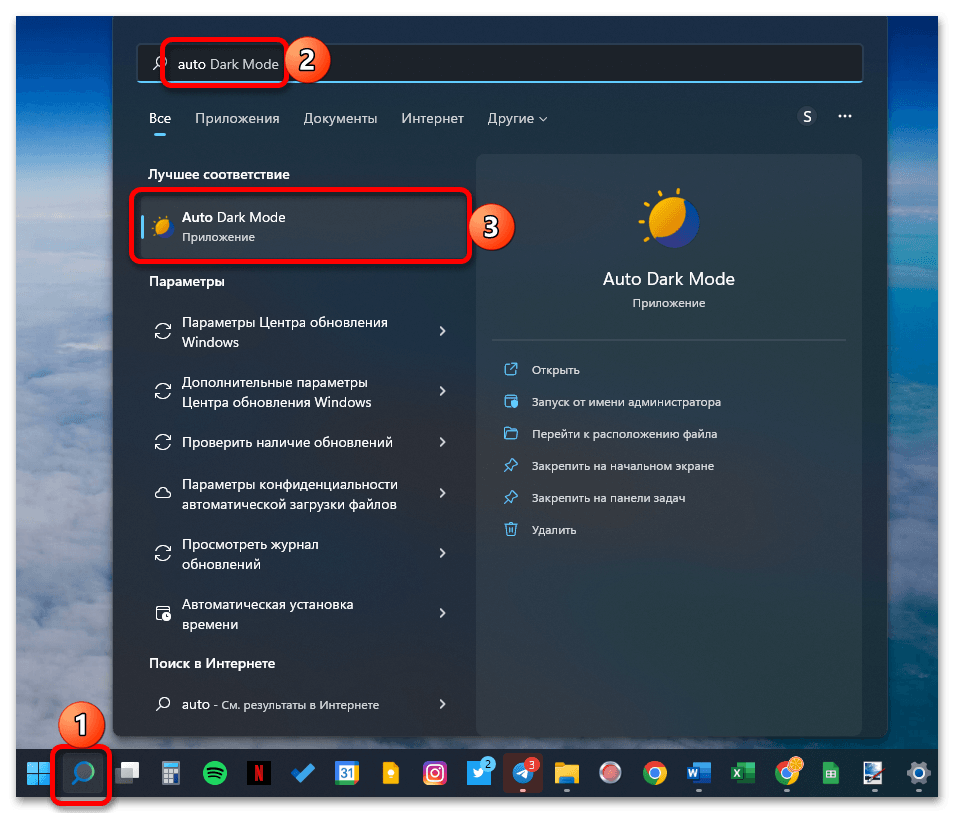
- Откройте окно поиска на панели задач, введите запрос «Auto Dark Mode» и запустите только что установленное приложение.
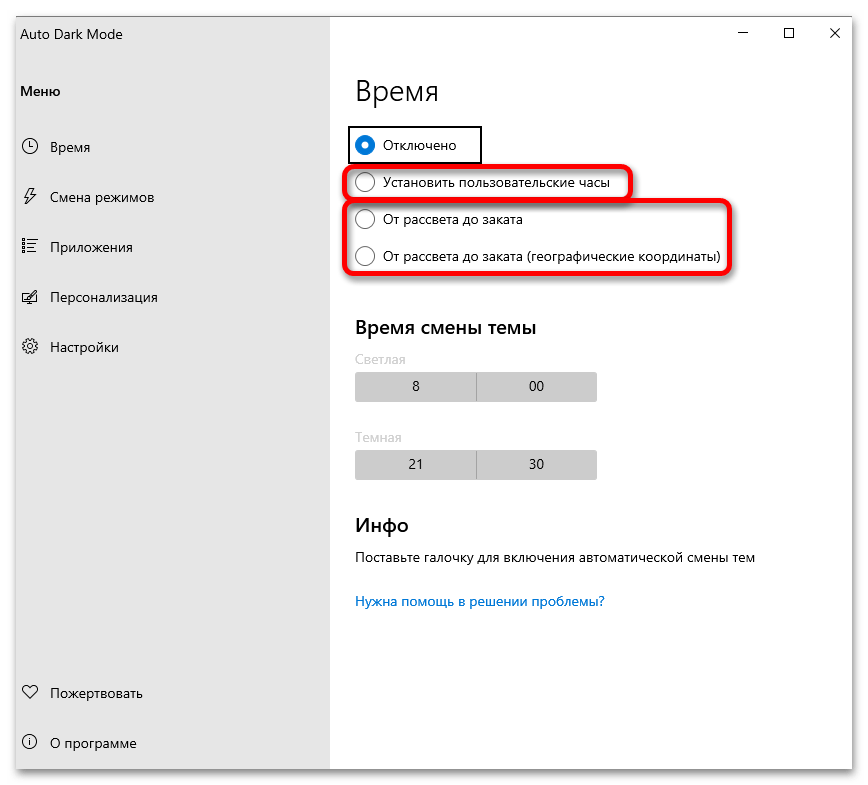
- Находясь во вкладке «Время», которая будет открыта по умолчанию, выберите то, как будет меняться тема:

После того как вы внесете желаемые изменения и сохраните их, смена тем оформления со светлой на темную будет происходить автоматически исходя из заданного расписания или региональных особенностей.
- Далее кратко рассмотрим дополнительные возможности Auto Dark Mode.
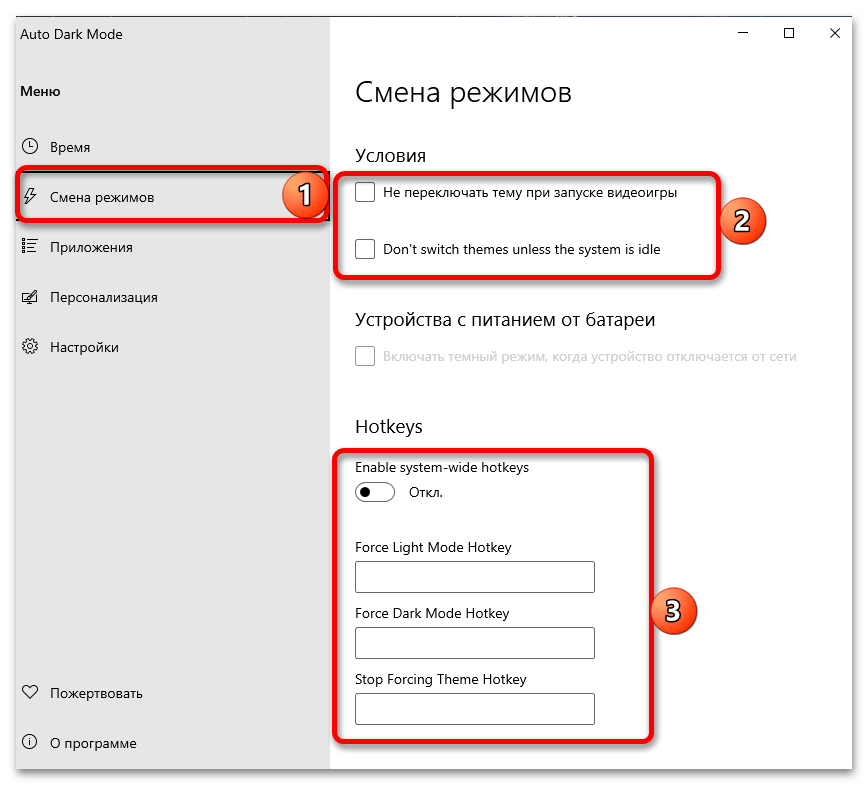
Так, во вкладке «Смена режимов» можно задать определенные исключения и назначить сочетания клавиш для принудительного переключения тем.
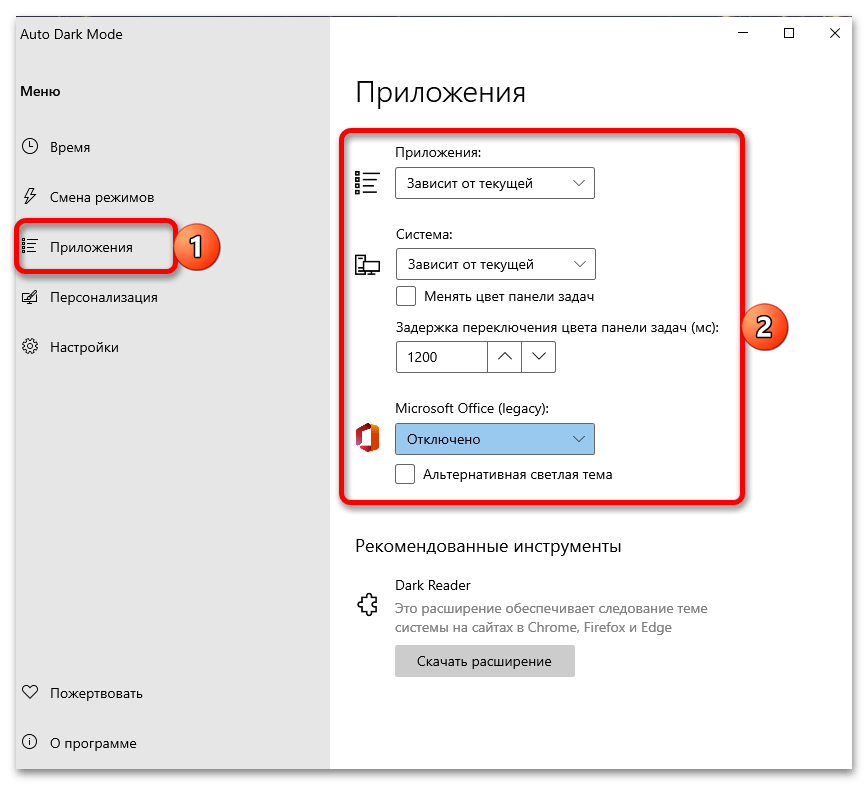
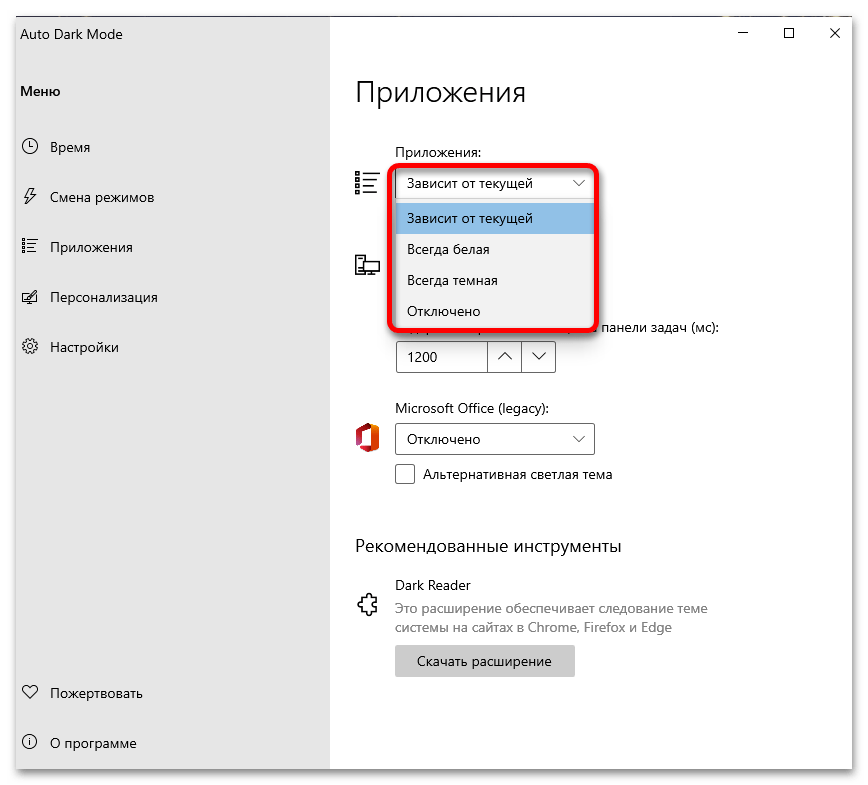
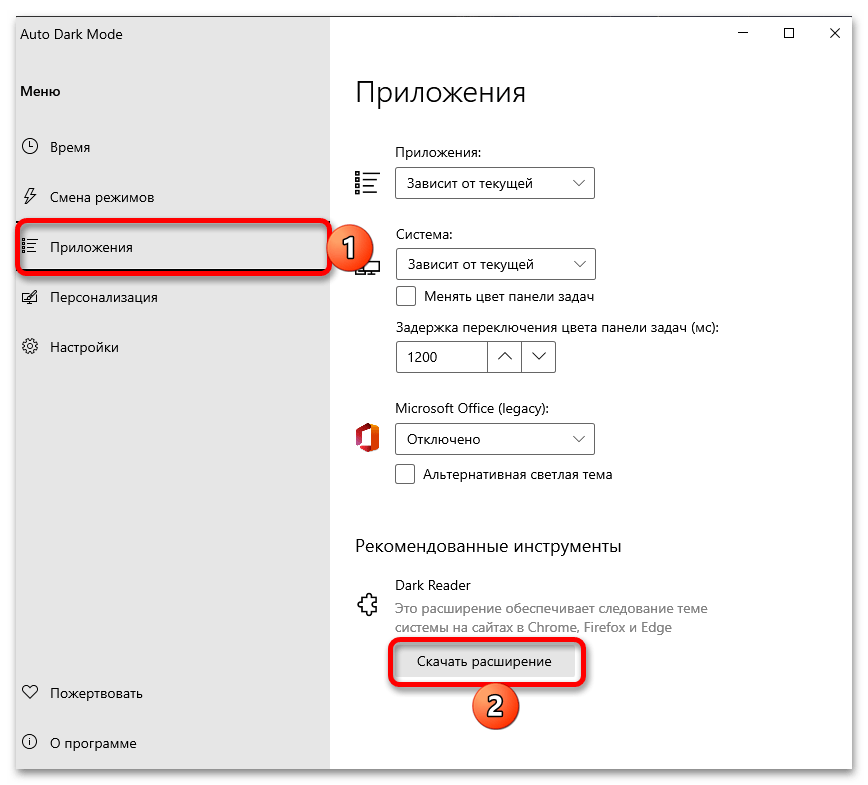
Во вкладке «Приложения» определяется то, как заданные на 6 шаге текущей инструкции параметры будут применяться отдельно к операционной системе и приложениям —
как первая, так и вторые, могут «окрашиваться» исходя из настроек Auto Dark Mode, всегда оставаться белыми или темными либо же в принципе не реагировать на эти изменения.
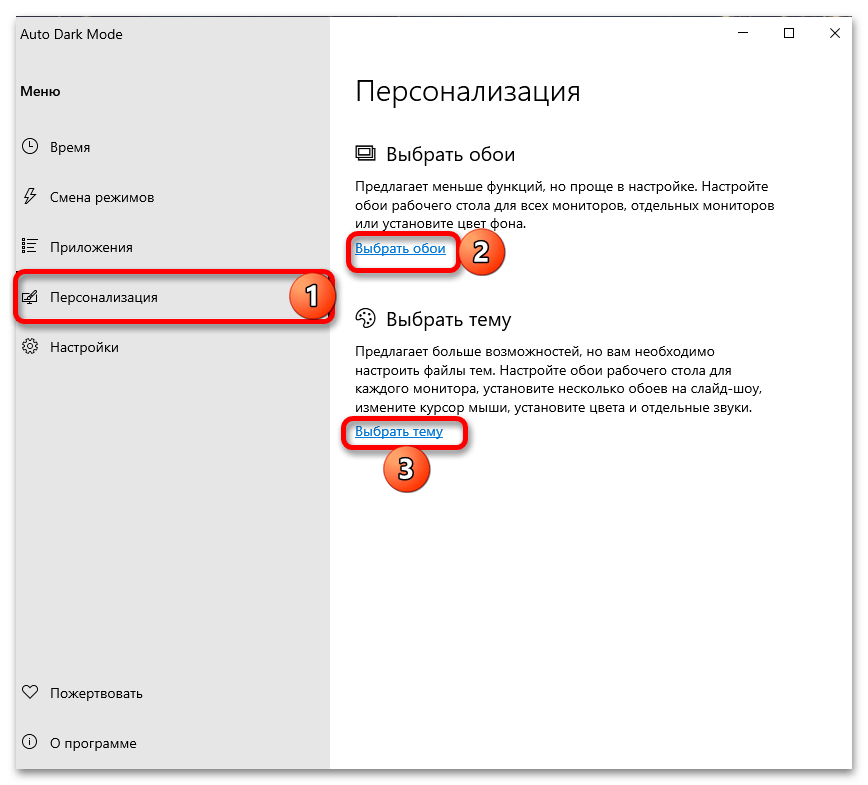
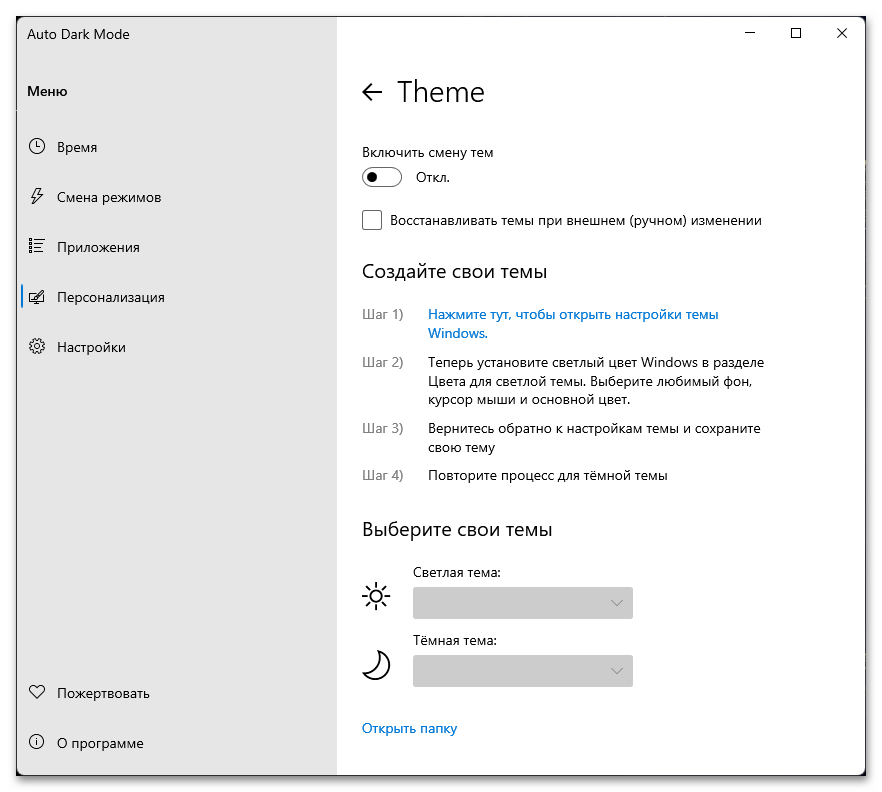
Во вкладке «Персонализация» вы можете выбрать и/или настроить свои обои и темы,
а по сути, — задать предпочтительный вариант оформления в «Параметрах» ОС Windows 11, по необходимости установив дополнительные решения из Microsoft Store, и затем сделать так, чтобы Auto Dark Mode работало именно с ними.
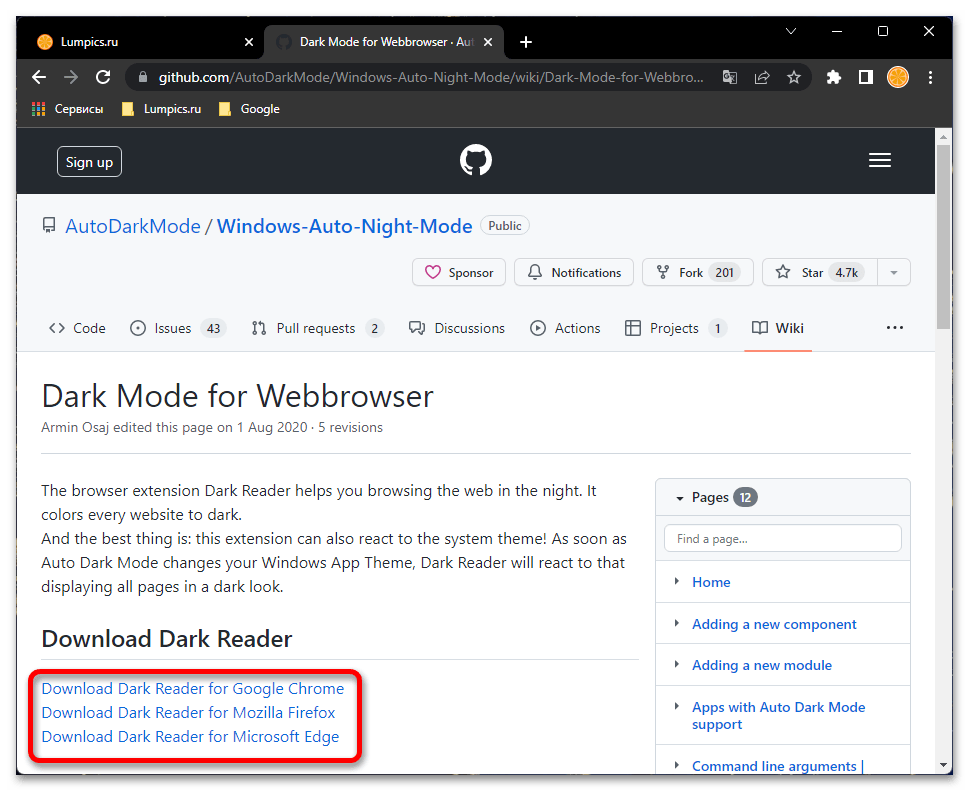
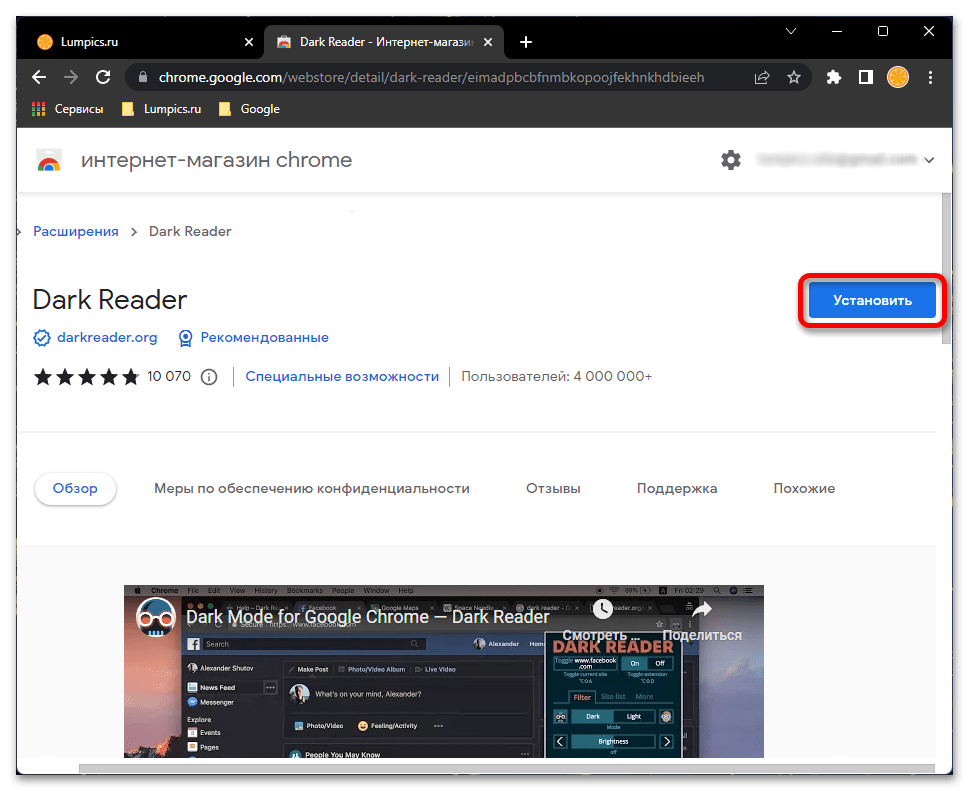
- Отдельным пунктом отметим возможность установки браузерного расширения «Dark Mode», доступного во вкладке «Приложения».
Оно представлено в версиях для Google Chrome, Mozilla Firefox и Microsoft Edge,

и может быть установлено из соответствующего фирменного магазина.
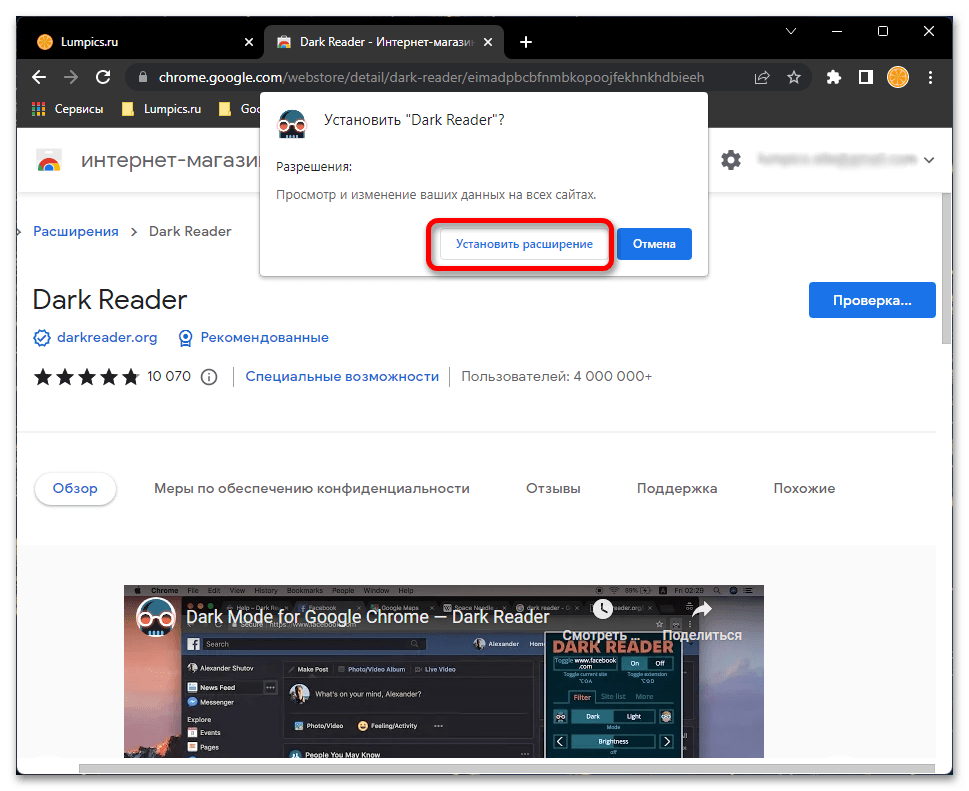
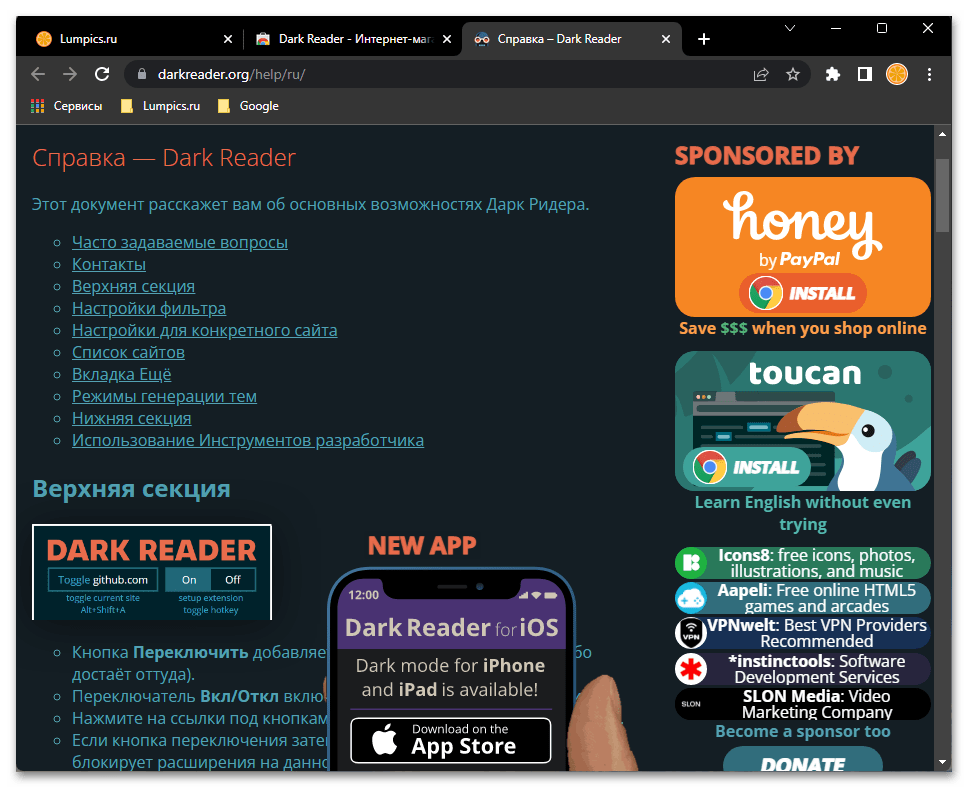
После того как вы это сделаете,
сайты в браузере окрасятся в темный цвет,

но предпочтительный вариант оформления можно настраивать вручную в каждом отдельном случае.

Обратите внимание! Абсолютное большинство приложений от сторонних разработчиков, предоставляющих возможность смены темы оформления, по умолчанию будут применять именно тот вариант, который установлен в операционной системе. Однако в некоторых из них (например, Telegram) данная опция является независимой и задается отдельно.
Вариант 2: Смена обоев
Если же под сменой темы оформления ОС Виндовс 11 вы подразумеваете исключительно рабочий стол, то есть переключение обоев на них по предварительно заданному расписанию, придерживайтесь следующего алгоритма:
Примечание: Прежде чем приступить к выполнению дальнейшей инструкции желательно подготовить фоновые изображения, которые будут использоваться в качестве слайд-шоу на рабочем столе, и поместить их в отдельную папку на диске ПК.
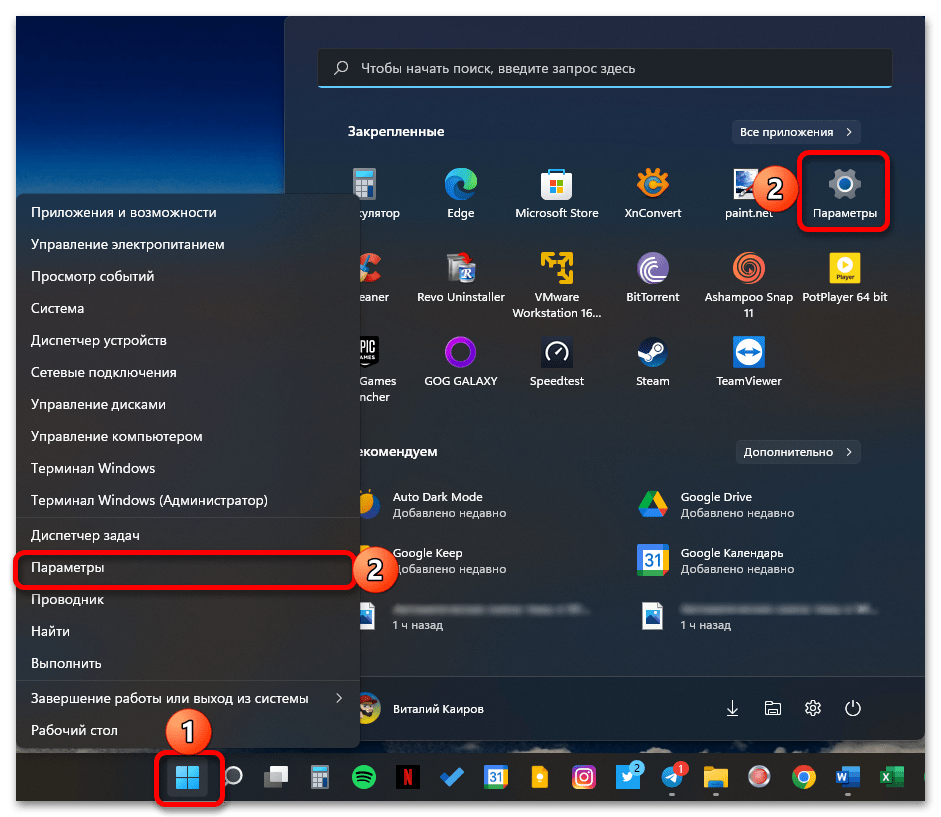
- Откройте «Параметры» операционной системы. Для этого можете воспользоваться меню «Пуск» или горячими клавишами «Win+I».
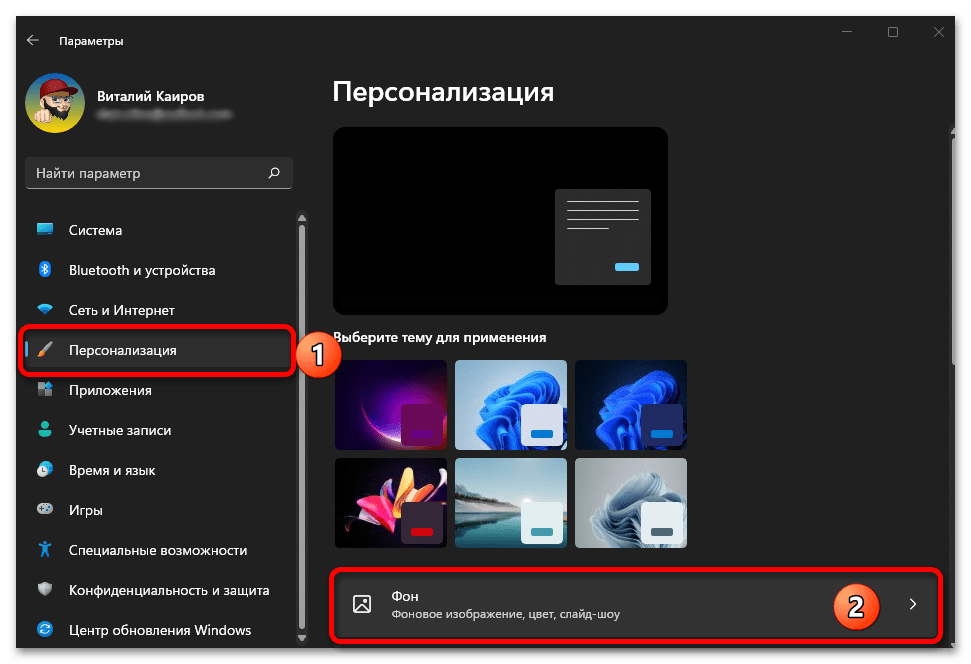
- На расположенной слева панели перейдите во вкладку «Персонализация», после чего справа разверните подраздел «Фон».
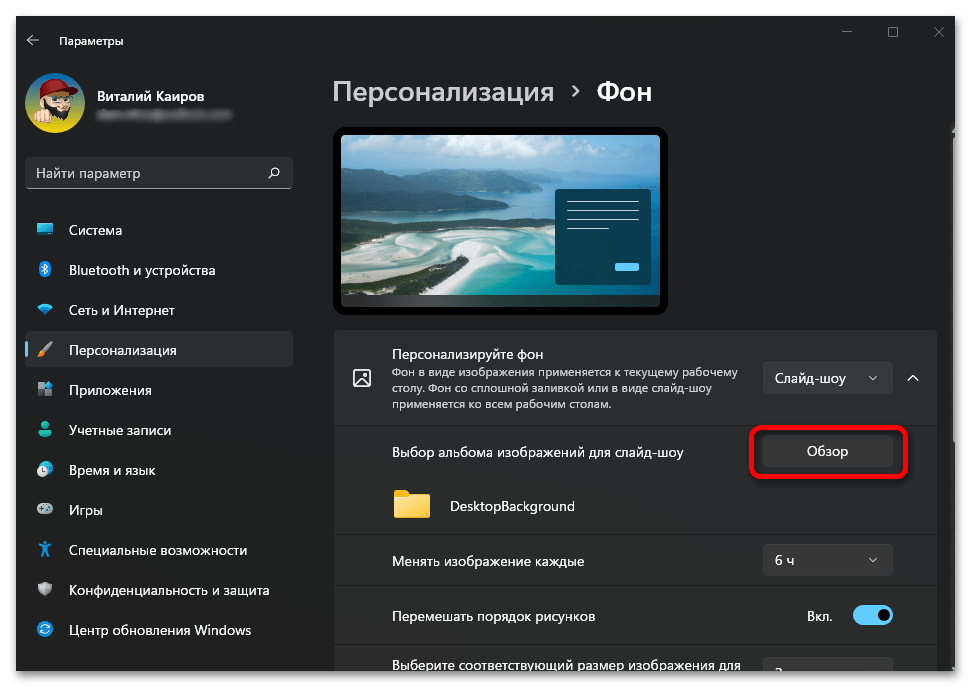
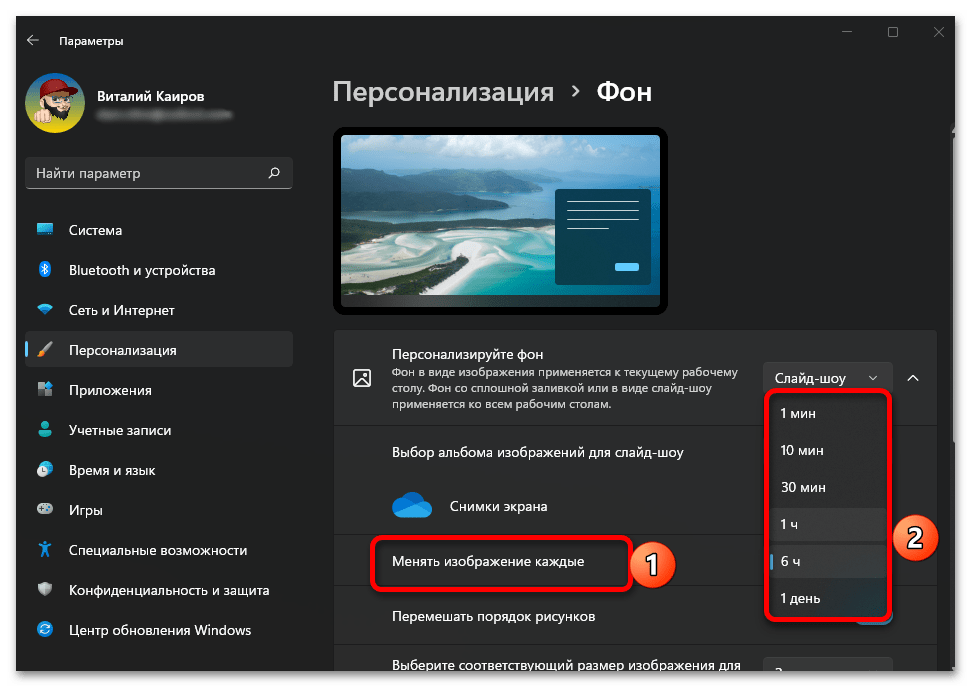
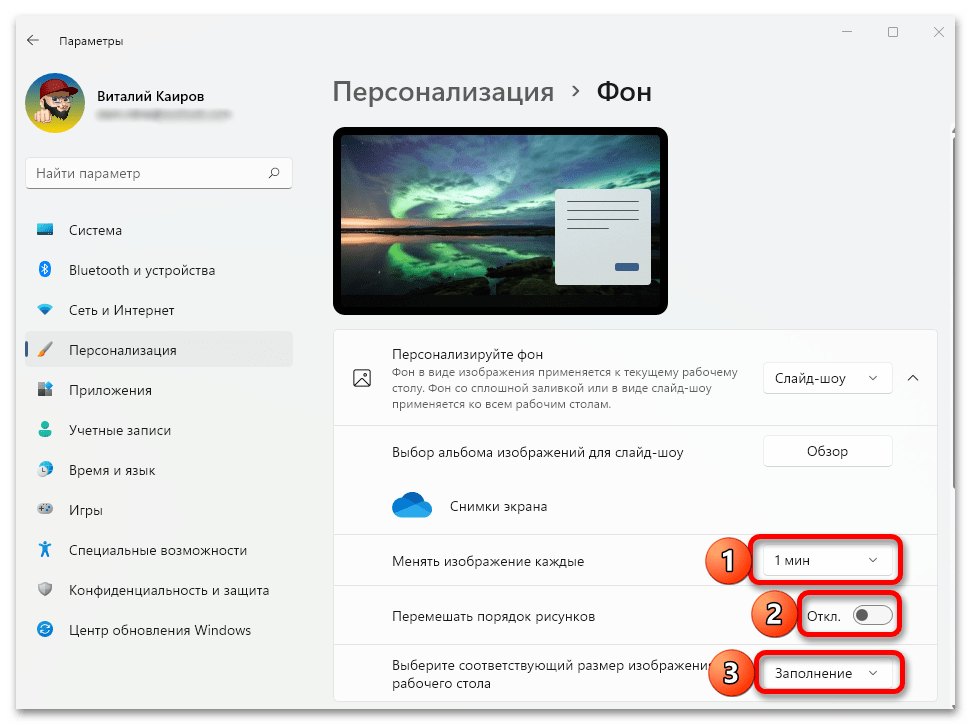
- В выпадающем списке напротив опции «Персонализируйте фон» выберите пункт «Слайд-шоу».
- Далее нажмите на кнопку «Обзор»

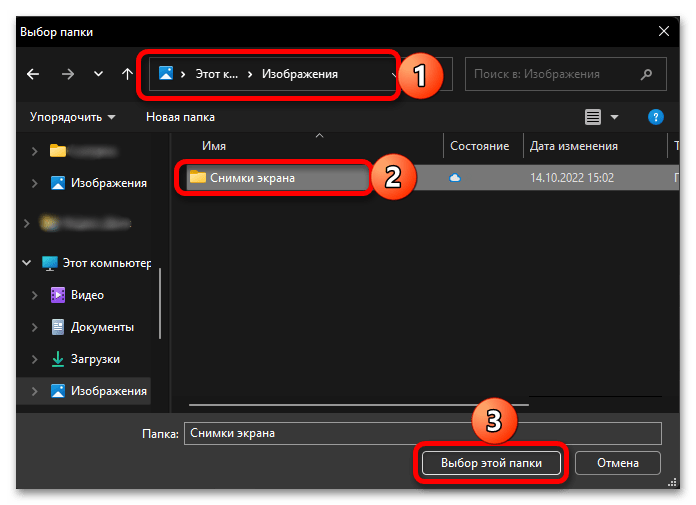
перейдите к расположению папки с заранее подготовленными изображениями обоев в открывшемся «Проводнике», выделите ее и нажмите «Открыть».
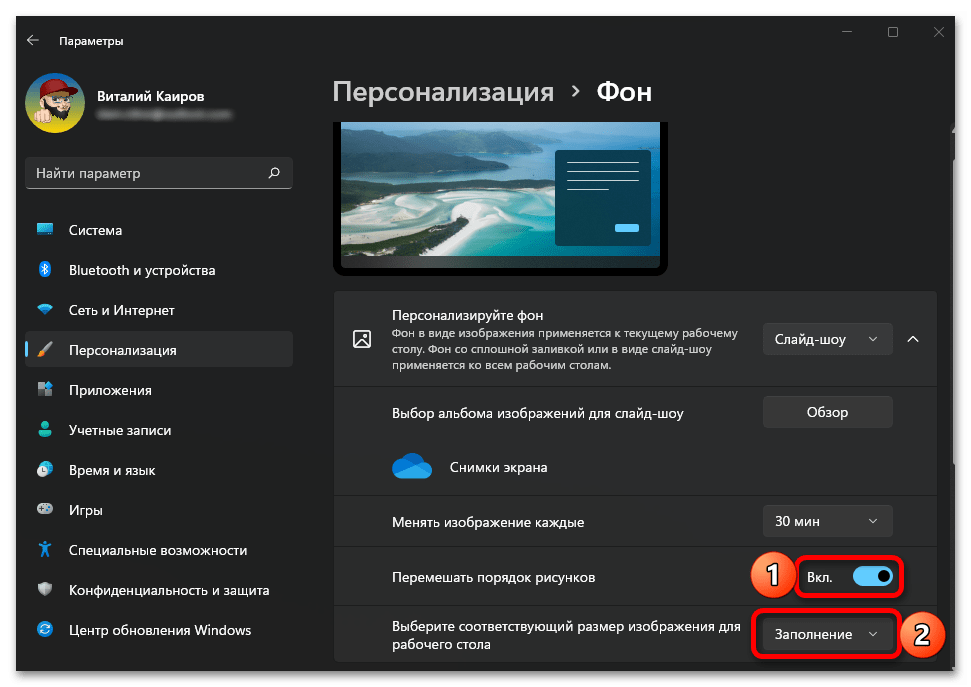
- Определите временной интервал, по истечении которого требуется менять установленные фоновые изображения,
по необходимости активируйте перемешивание их порядка, а также то, как будет масштабироваться их размер.

Вместо собственных обоев рабочего стола можно использовать доступные в Магазине приложений Майкрософт темы оформления, обычно содержащие наборы фонов. Для этого:
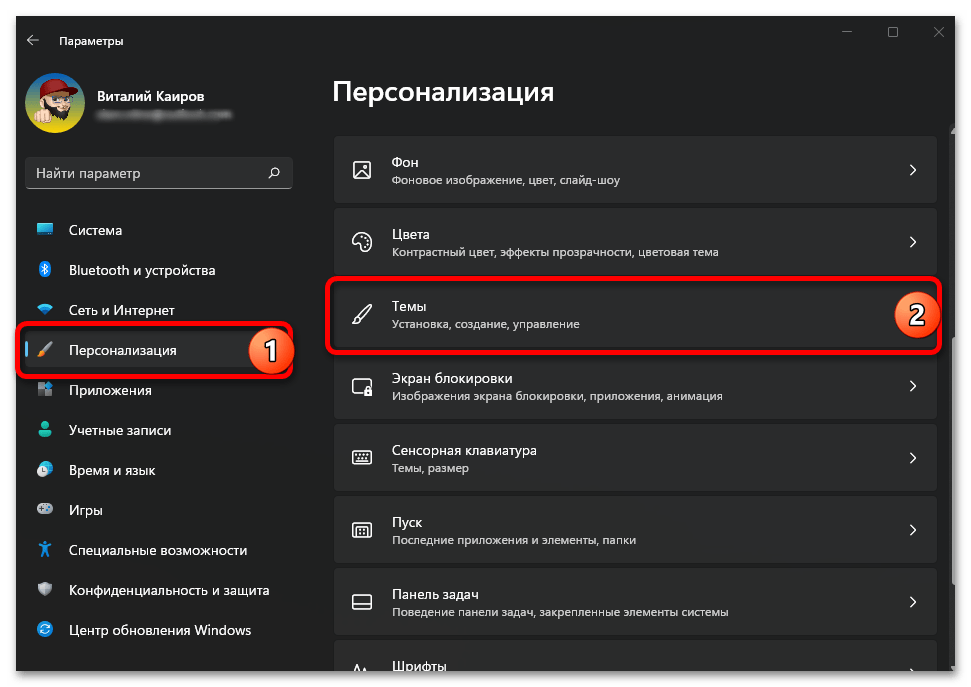
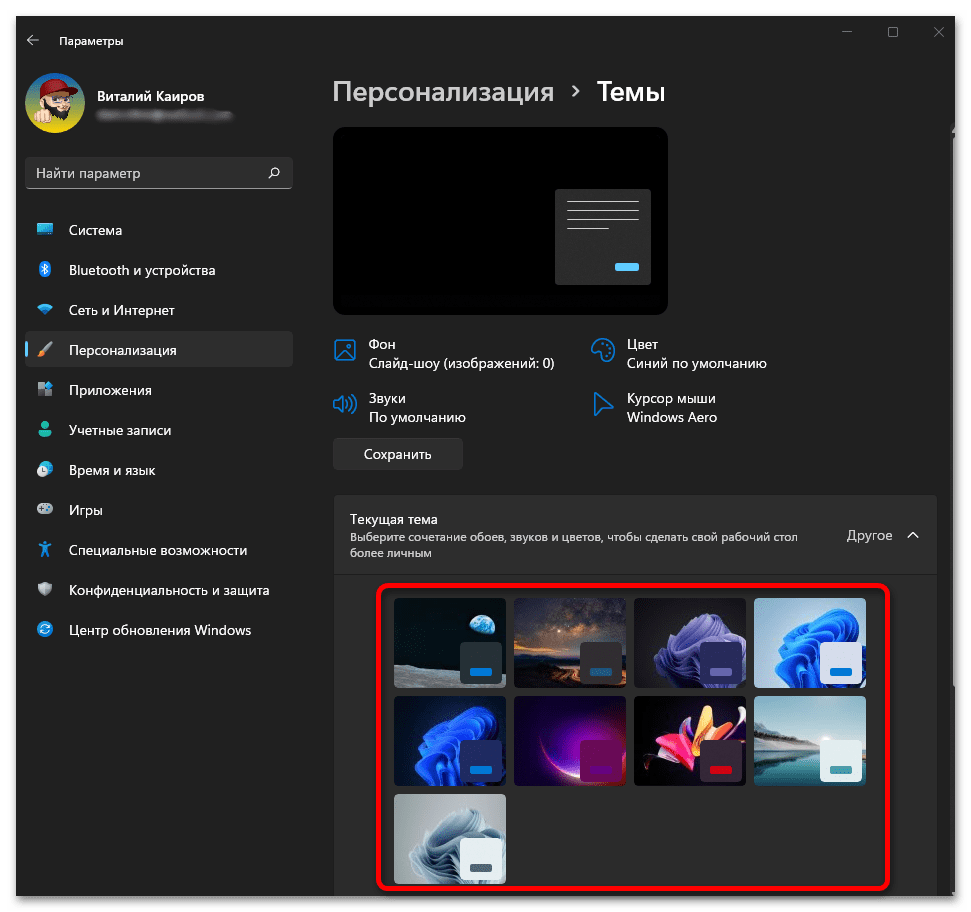
- В «Параметрах» операционной системы перейдите во вкладку «Персонализация», а из нее – к подразделу «Темы».
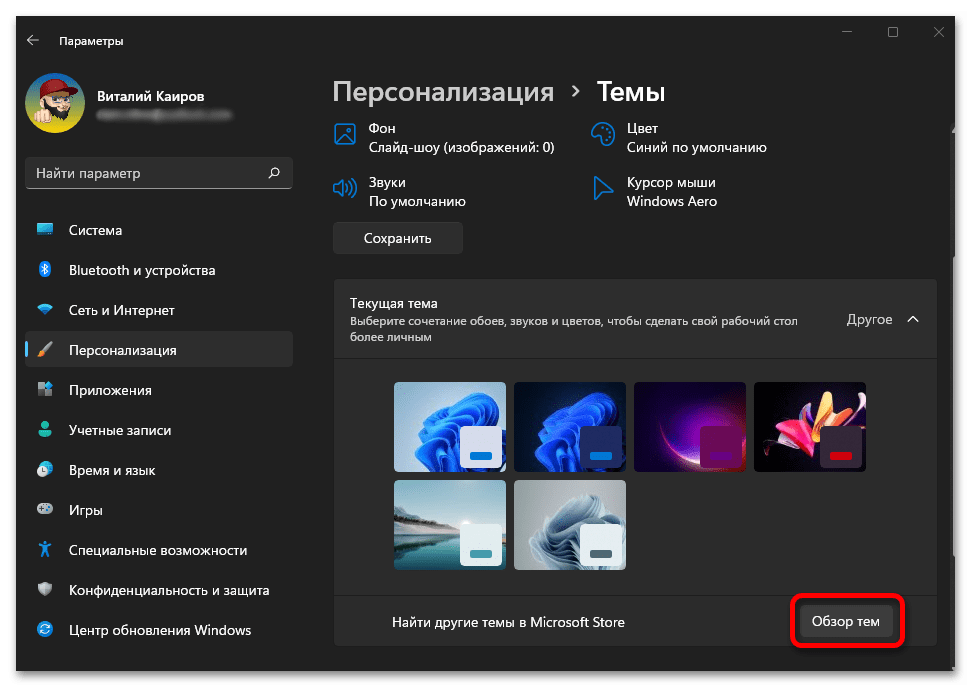
- Нажмите на кнопку «Обзор тем», расположенную напротив пункта «Найти другие темы в Microsoft Store».
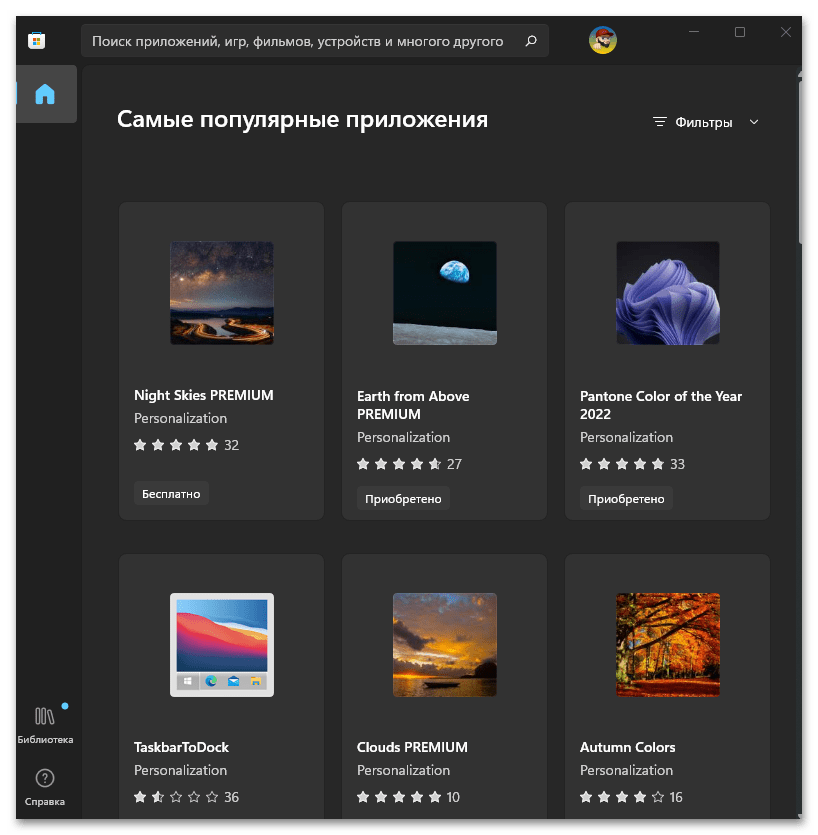
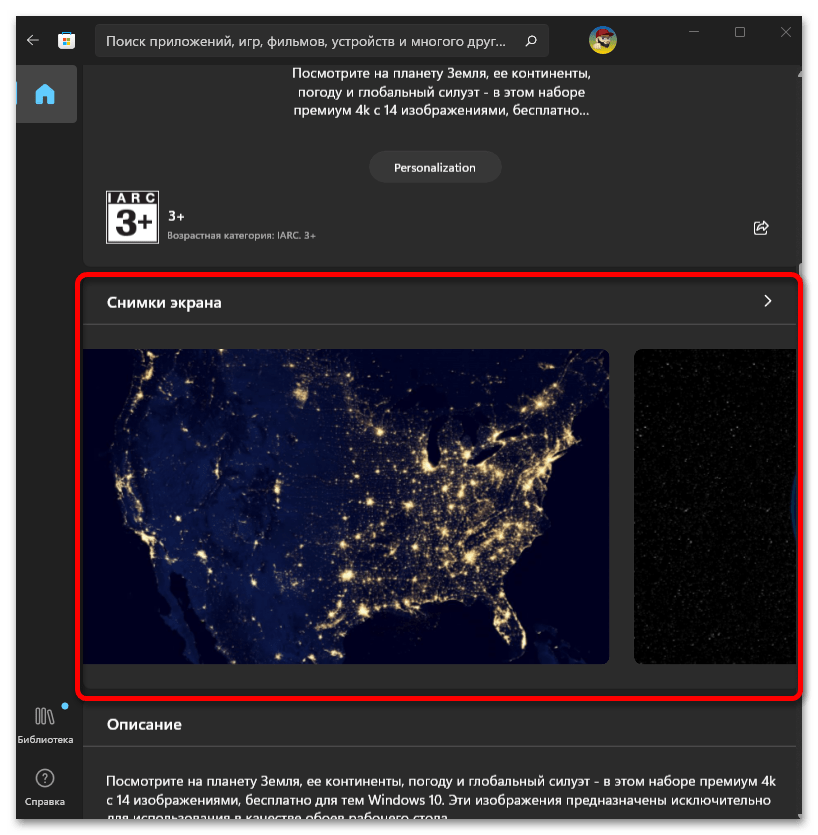
- Ознакомьтесь со списком доступных вариантов оформления, открывая для этого их страницы в Магазине

и просматривая блок «Снимки экрана».
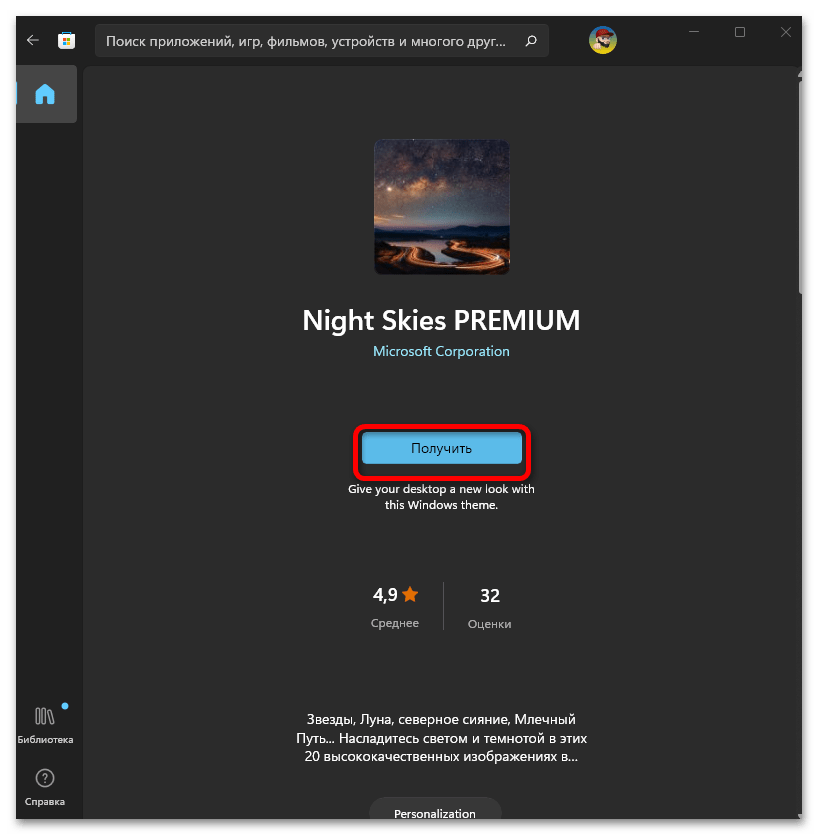
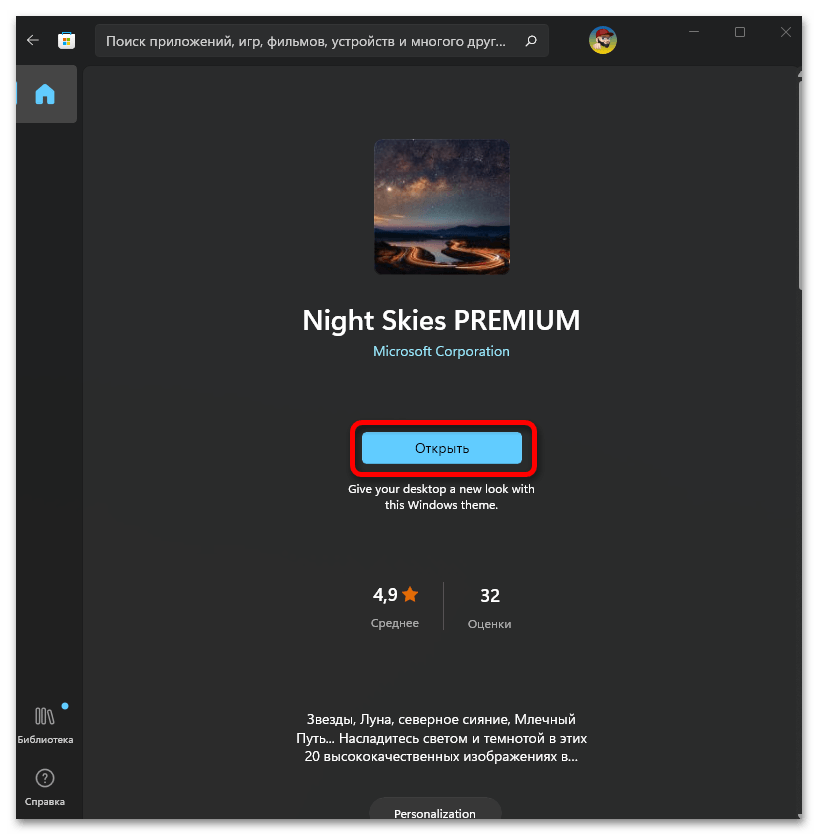
- Определившись с выбором темы, нажмите на кнопку «Получить»
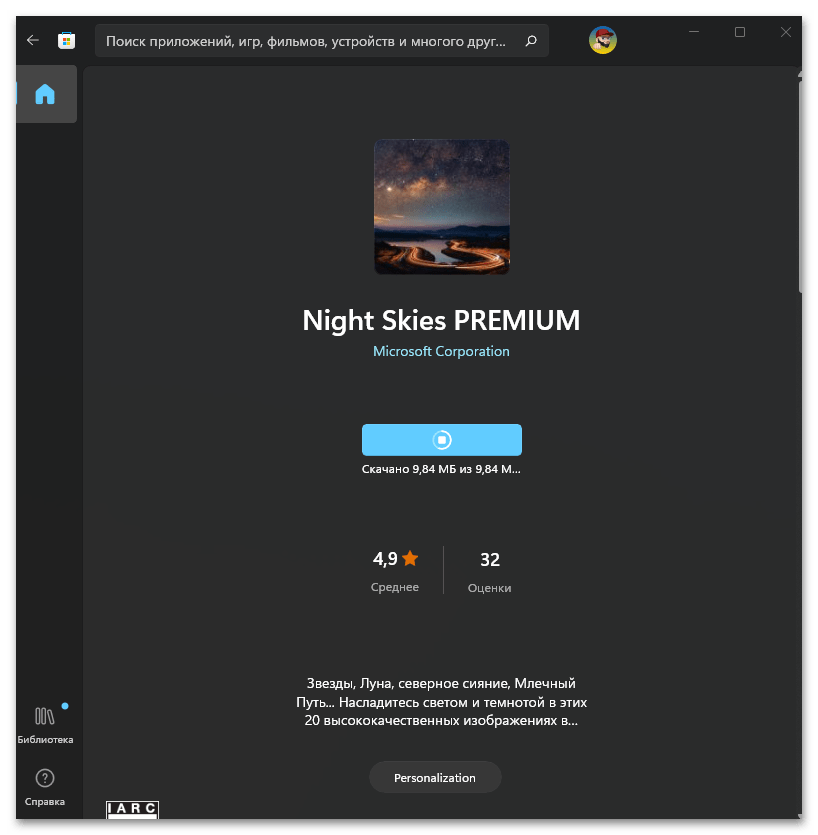
и ожидайте,
пока будет выполнено скачивание и установка,
после чего вы сможете ее «Открыть».
- На деле же после нажатия указанной выше кнопки будет открыт раздел с доступными темами в системных «Параметрах». Кликните по той из них, которую хотите применить в качестве основной. Внесенные изменения вступят в силу практически мгновенно, и в зависимости от особенностей темы оформление интерфейса может смениться на темное или светлое.
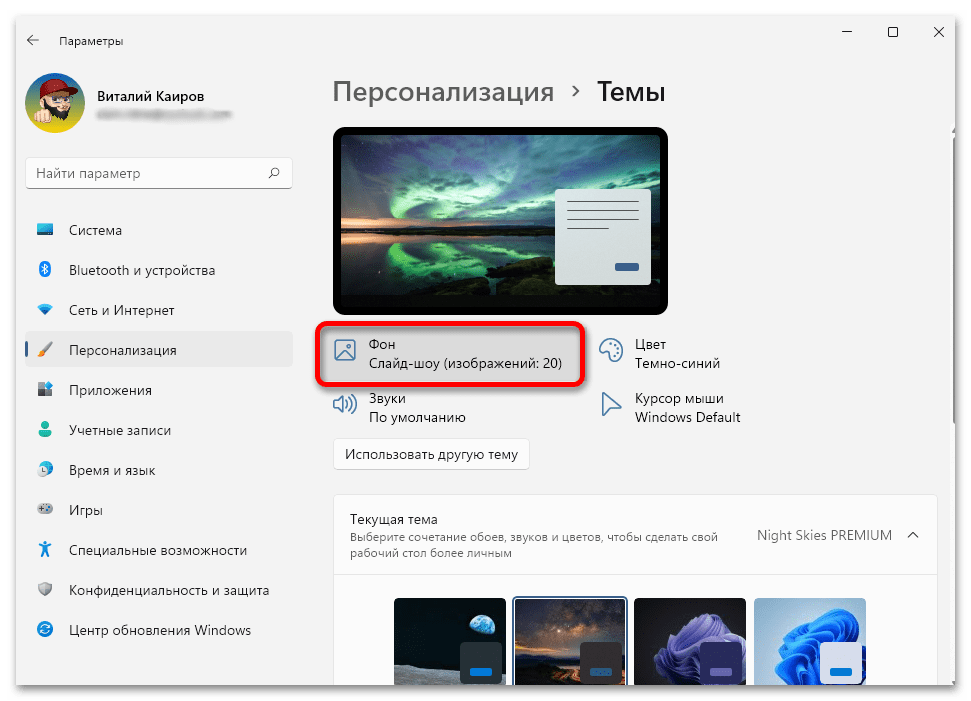
- Нажмите на расположенную выше кнопку «Фон» и повторите действия из последнего пункта предыдущей инструкции в данной части статьи,

то есть определите то, как часто будут меняться доступные в наборе фоновые изображения, требуется ли их перемешать, и как следует масштабировать их размер.

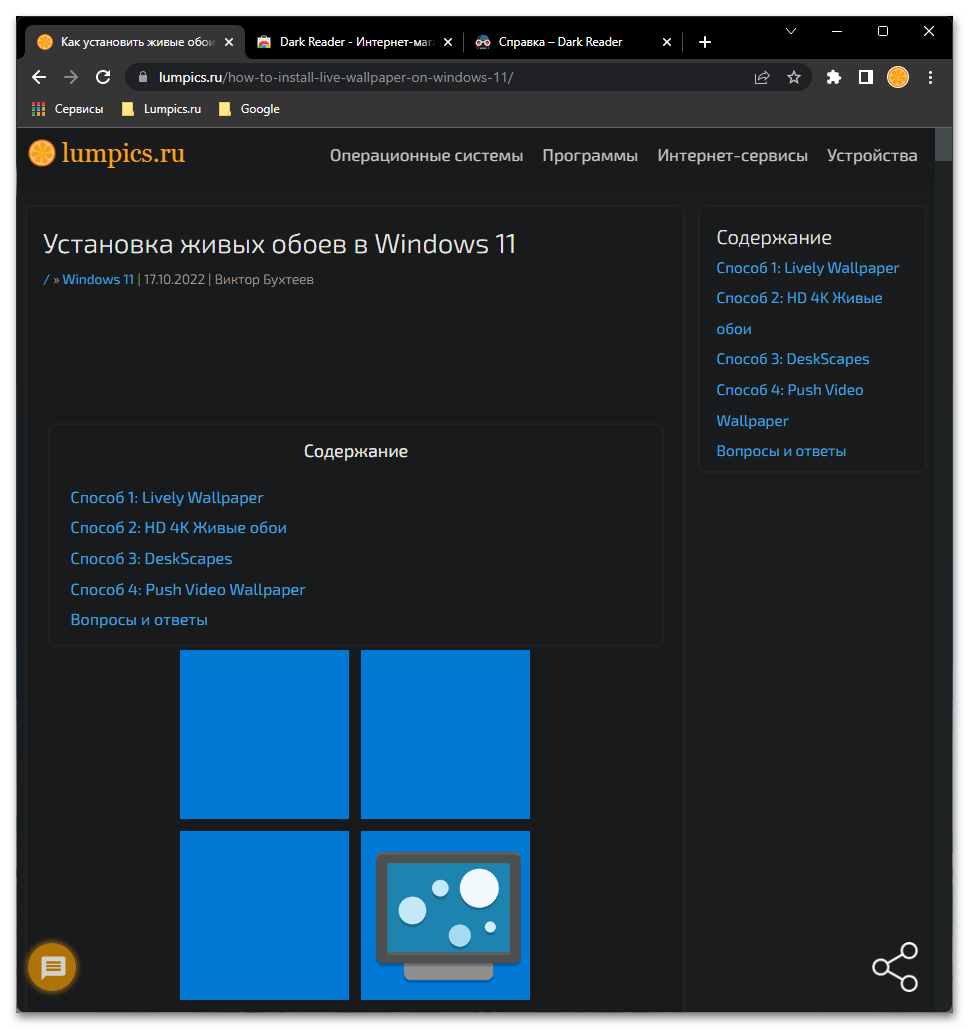
Обратите внимание! Помимо статичных обоев, которые можно установить в качестве слайд-шоу и задать временной интервал для их автоматической смены, в Windows 11 имеется возможность установки на рабочий стол живых обоев, о чем мы ранее рассказывали в отдельной статье.
Подробнее: Установка живых обоев в Виндовс 11
Наша группа в TelegramПолезные советы и помощь
Windows Auto Dark Mode

Switches between the dark and light theme of Windows at scheduled times.
Overview • Features • Download • Release Notes • Wiki • Telegram Group
Overview

Tired of looking at dark content while the sun is shining brightly? But at night everything is suddenly too bright? Auto Dark Mode is the solution for you!
Android, iOS and MacOS already offer the possibility of changing the system design based on the time of the day. We’re bringing this feature to Windows on a larger scale.
Auto Dark Mode helps you to be more productive. Because you shouldn’t care about changing Windows settings several times a day. As soon as the sun goes down, we’ll take care of your eyes.
Because a simple design change would be too boring, Auto Dark Mode is packed with useful functions. For example, we can also change your desktop wallpaper or run custom scripts.
Features

- Compatible with Windows 10* and Windows 11.
- Theme switch based on sunrise and sunset.
- Desktop wallpaper switch.
- Mouse cursor switch.
- Accent color switch.
- Office theme switch.
- Windows .theme file switch.
- Keyboard shortcuts.
- Support for turning on/off accent color on the Taskbar and title bars.
- Auto Dark Mode can enable the grayscale color filter of Windows.
- Suitable for gamers: Doesn’t switch while playing games to avoid stuttering.
- Run custom scripts.
- Postpone or delay the next switch as you like.
- Automatic updates.
- Lightweight with clean uninstall. No admin rights needed.
*Windows 10 versions 21H1 and older are considered legacy, not all features may work
Download
Download from Microsoft Store
Download from GitHub
Click here to download the newest version of Auto Dark Mode!
Even more download options
Click to expand
Via WinGet
Download Auto Dark Mode from WinGet.
winget install --id Armin2208.WindowsAutoNightMode
Via Chocolatey
Download Auto Dark Mode from Chocolatey (unofficial entry).
choco install auto-dark-mode
Via Scoop
Download Auto Dark Mode from Scoop (unofficial entry).
- Via portable
scoop bucket add dorado https://github.com/chawyehsu/dorado
scoop install autodarkmode
- Via non-portable
scoop bucket add nonportable
scoop install auto-dark-mode-np
Installation
Installation is pretty easy, as you only need to run the setup file provided as .exe. If you want to deploy Auto Dark Mode on multiple machines, you can use the argument /allusers /verysilent to skip the installer window.
Sometimes Windows or web browsers will show a security notice while downloading Auto Dark Mode. This is due to our lack of a developer license. You can ignore these messages.
Translations
We use Weblate’s cool free Libre plan that supports open source software projects!
You can find our project here: https://hosted.weblate.org/projects/auto-dark-mode/app/

Alternatively, you can manually edit the translation files in AutoDarkModeLib/Properties/Resources.
More information
You still have open questions? Check out our wiki!
Windows 11 allows you to use both light and dark modes to improve overall screen experience and reduce eye strain. Though enabling dark mode in Windows 11 is an easy task, it will be applied throughout the day which does not make any sense. It will be annoying to look at the dark black screen during bright afternoon time. Unfortunately, you need to manually toggle light and dark modes whenever needed as there are no options for automatic scheduling. In this article, we will explain alternate options available for automatically scheduling dark and light modes in Windows 11.
If you are aware of macOS, it offers an “Auto” appearance option. This helps to automatically change the mode in Mac based on the sunrise and set times. You can either use a third-party app to do the similar stuff in Windows or manually schedule a task with Task Scheduler.
1. Install Auto Dark Mode X
Auto Dark Mode X is a free application available on GitHub which automatically switches between dark and light modes in Windows 11. This app configures modes based on your geographical coordinates. Go to the official GitHub website and download the executable file of Auto Dark Mode X.

- Open the downloaded file and then select “Install for me only (recommended)” button. Follow the instructions and install Auto Dark Mode X app like any other app in your system.
The app has different sections as you can see in the sidebar. Let’s go through each section to show how you can customize.
Customizing the Mode Timing
Go to “Time” tab where you can set the timer for switching light and dark modes.
- Disabled – disable the mode switching.
- Set custom hours – select this option to set custom start timing to automatically start light or dark mode.

- From sunset to sunrise – as mentioned this is an ideal option to switch the modes based on the sunset/sunrise times for your location. The app will automatically get the location data from your system and use it here. If required, you can also set offset timing in minutes here.

- From sunset to sunrise (geographic coordinates) – this is a same option as above with a difference that you need to manually provide the longitude and the latitude of your location. If you do not know the coordinates, click “Find geo coordinates for your location” link to open a website where you can type the city and find the details. You need to enter the found coordinates and then click “Apply Coordinates” button.

- Follow Windows night light – this the last option which will follow the system’s night light mode timing. Click “Open night light settings” button to open Windows Settings and turn on “Schedule night light” option. You can either choose sunset to sunrise time or setup custom hours.
Setting Switching Conditions
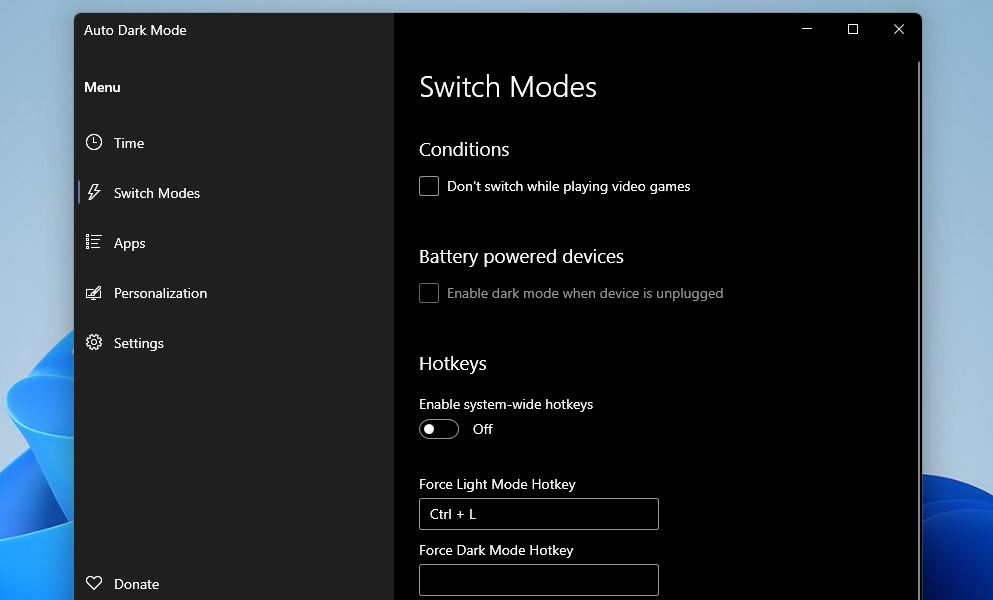
As mentioned, sometimes it will be annoying to use light or dark mode as per the schedule. Go to “Switch Modes” section where you get different options including Conditions, Battery power devices, and Hotkeys.
- Conditions – enable these options to stop switching modes while playing games or when the system is busy. You can also get a notification before the theme switch.
- Battery powered devices – choose whether you want to only enable dark mode when the device is not plugged in.
- Hotkeys – enable this option and setup hotkeys for forcing light or dark mode. Using the set shortcut keys, you can overrule the default setting and change the mode when you need.

Other App Settings
Under the “Apps” section, you can set the option for using dark and light mode for the apps. Finally, under “Personalization” section you can setup a wallpaper or custom theme.
The easy way to use the app is to enable sunset to sunrise time and use hotkeys to force toggle the modes when you need.
2. Use Task Scheduler
Using the Task Scheduler is another option to schedule dark and light mode in Windows 11. This is a built-in Windows app for automating tasks on a fixed schedule. This is a lengthy process and you need to create two tasks one for light and another for dark mode.
Schedule Task for Dark Mode
- First, open the Task Scheduler app using Windows Search from Taskbar.

- Go to “Action” menu and select “Create Task…” option.

- Under “General” section, give a name for your task something like “switch_dark_theme”. Select “Run only when the user is logged in or not” and tick the “Do not store password” option.

- Go to the “Triggers” tab and click the “New” button.

- Select “On a schedule” for beginning the task and select “Daily” option. Set the time from when you want to start the dark mode and click “OK”. Also, make the “Recur every” option as 1 day so that the task will repeat every day.

- Next, select the “Actions” tab and then click on the “New” option. Type “reg” in the “Program/script” option and then type the following in “Add arguments” option and press OK.
add HKCU\SOFTWARE\Microsoft\Windows\CurrentVersion\Themes\Personalize /v AppsUseLightTheme /t REG_DWORD /d 0 /f- Repeat the step and but this time add the following command:
add HKCU\SOFTWARE\Microsoft\Windows\CurrentVersion\Themes\Personalize /v SystemUsesLightTheme /t REG_DWORD /d 1 /f- It should look like below in the app.

- Go to “Settings” tab and tick the items as shown in the below picture:

- Go to “Conditions” tab and uncheck the “Start the task only if the computer is on AC power” and then click OK.

- You will find the newly created task name is listed under “Task Scheduler library” and right-click on it, then select “Run” to start the task.

Schedule Task for Light Mode
For scheduling a light mode task, you need to repeat the same above steps with little bit of changes.
- Go to “Actions > Create task” and name it “switch_light_mode”. Select the same settings as before for this task also.

- Now go to the “Triggers” tab, click on “New” and set a different time schedule. Make sure this is not overlapping with dark mode task.
- Now open the “Actions” tab and click on the “New” button. This time you need to add different Arguments than before but for the same Program/Script “Reg”. The first one is:
add HKCU\SOFTWARE\Microsoft\Windows\CurrentVersion\Themes\Personalize /v AppsUseLightTheme /t REG_DWORD /d 1 /f and then click on OK.And the second one is:
add HKCU\SOFTWARE\Microsoft\Windows\CurrentVersion\Themes\Personalize /v SystemUsesLightTheme /t REG_DWORD /d 1 /f and click on OK.
- Repeat the same steps for the “Settings” and “Conditions” tabs. Then find the newly created task and click on “Run”.

Final Words
These are the two popular and easy methods that you can use to schedule dark and light mode in Windows 11. As you can see, Auto Dark Mode X is a more user-friendly and easy method to schedule and switch the modes. However, if you do not want to install a third-party app, then you can follow the above instructions to setup tasks using Task Scheduler app.
Как запланировать переключение на темную тему Windows 11 ночью без дополнительного ПО?
В операционной системе Windows 11, как и в Windows 10 имеется возможность включения темного режима, но нет никакой настройки, которая автоматически включает этот режим ночью, а в дневное время обратно переключает на светлый режим. Это какое то упущение со стороны Microsoft, но хорошая новость в том, что есть способ исправить эту проблему без установки дополнительного программного обеспечения.
Настройка для тёмного режима
Для настройки переключения режимов мы будем использовать встроенное приложение Windows 11 «Планировщик заданий», в котором необходимо будет создать отдельные задачи для темного и светлого режима.
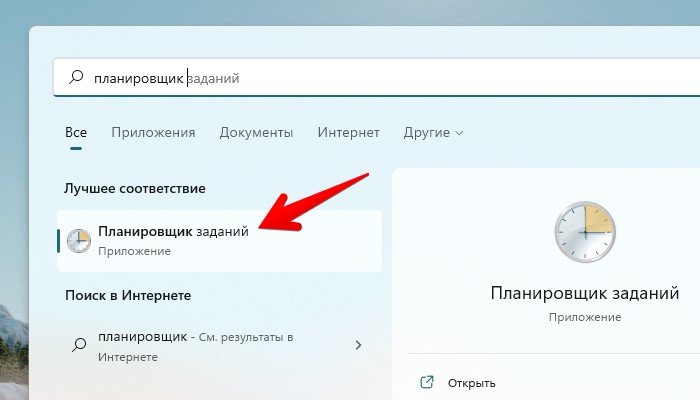
Сначала создадим задачу для тёмного режима, для этого открываем планировщик заданий из меню «Пуск», выполнив поиск приложения.
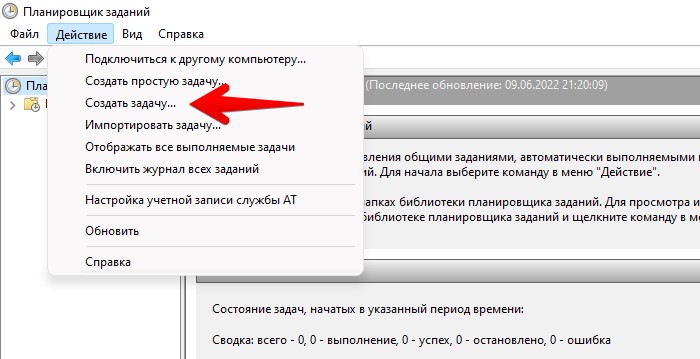
В окне «Планировщик заданий» на верхней панели нажимаем «Действие», а во всплывающем контекстном меню выбираем пункт «Создать задачу…».
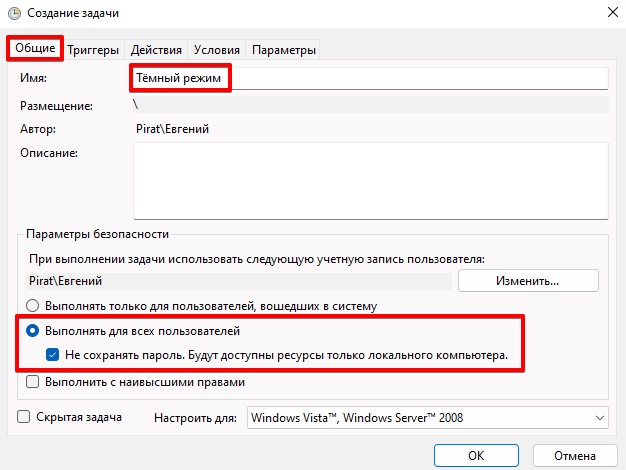
В окне «Создание задачи» во вкладке «Общие» в поле «Имя» задаем имя задачи. Затем в разделе «Параметры безопасности» выбираем пункт «Выполнять для всех пользователей» и отмечаем галочкой «Не сохранять пароль. Будут доступны ресурсы только локального компьютера.».
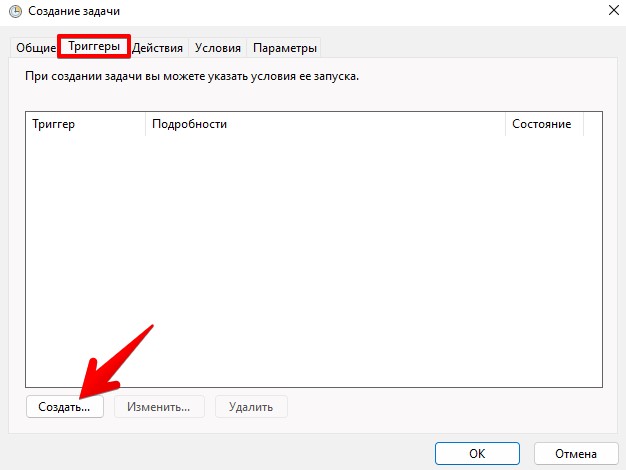
Далее переходим во вкладку «Триггеры» и нажимаем кнопку «Создать…».
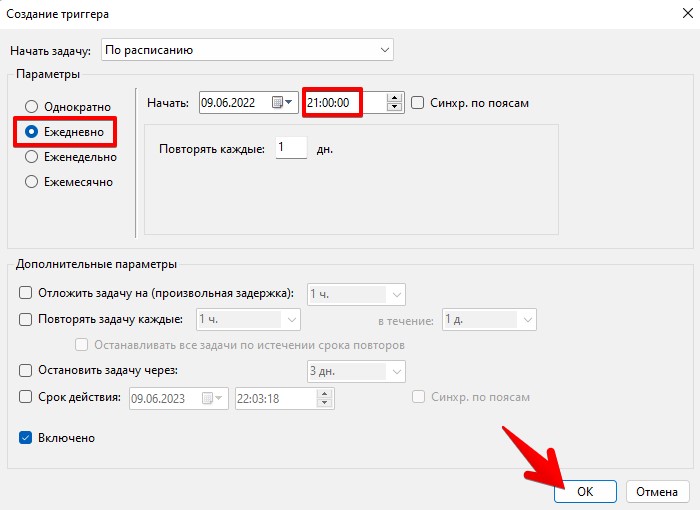
Появиться окно «Создание триггера», в котором выбираем пункт «Ежедневно» и устанавливаем время, когда будет включаться тёмный режим. Сохраняем настройку, нажав на кнопку «Ок».
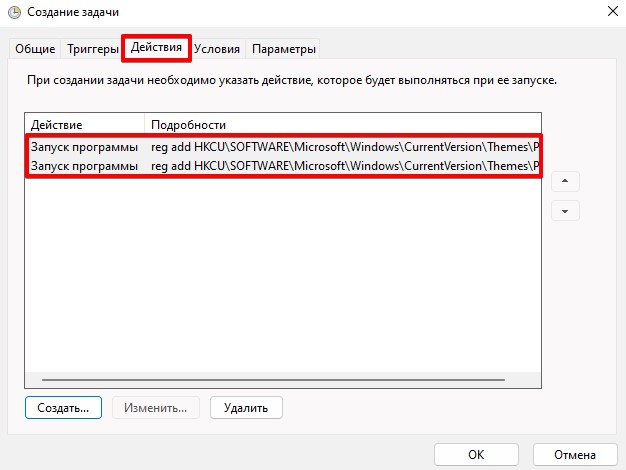
Продолжаем настройку задачи. Переходим во вкладку «Действия» и нажимаем кнопку «Создать…».
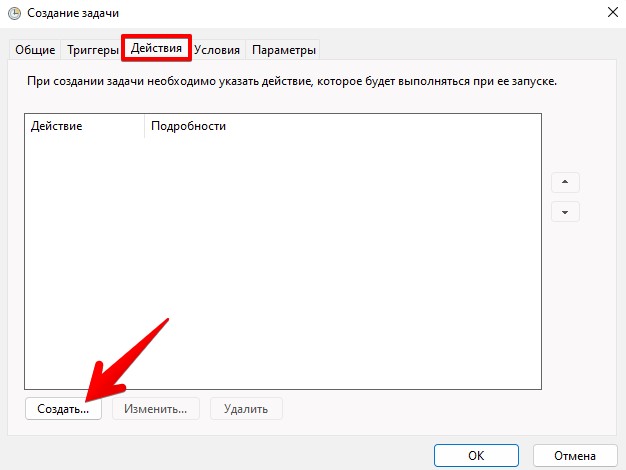
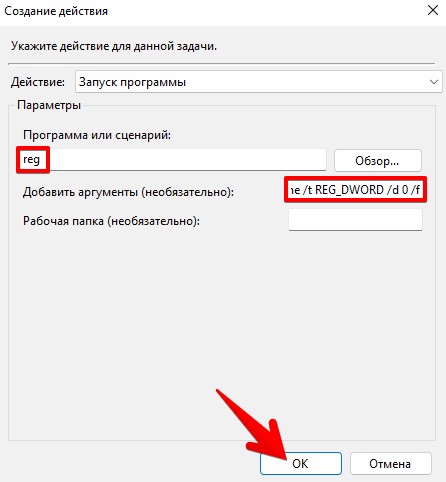
В окне «Создание действия» в разделе «Параметры» в поле «Программа или сценарий» указываем значение «reg», а в поле «Добавить аргументы (необязательно)» указываем значение:
add HKCU\SOFTWARE\Microsoft\Windows\CurrentVersion\Themes\Personalize /v AppsUseLightTheme /t REG_DWORD /d 0 /f
Для сохранения параметров нажимаем кнопку «Ок».
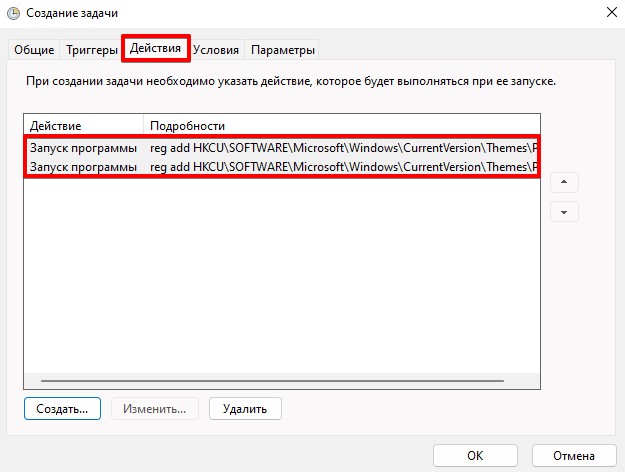
Таким же образом создаем еще одно действие со значением:
add HKCU\SOFTWARE\Microsoft\Windows\CurrentVersion\Themes\Personalize /v SystemUsesLightTheme /t REG_DWORD /d 1 /f
Во вкладке «Действия» в итоге мы должны увидеть два действия.
Далее переходим во вкладку «Условия» и в разделе «Питание» убираем галочку «Запускать только при питании от электросети».

Переходим в финальную вкладку «Параметры», в которой отмечаем галочки «Немедленно запускать задачу, если пропущен плановый запуск» и «При сбое выполнения перезапускать через», после этого нажимаем кнопку «ОК» для создания задачи.

Теперь для запуска задачи «Тёмный режим», щелкаем по ней правой кнопкой мыши и выбираем пункт «Выполнить» в контекстном меню.

Теперь, каждый раз при наступлении девяти часов вечера у нас будет включаться темный режим.

Осталось настроить задачу для переключения на светлый режим.
Настройка для светлого режима
Выполняем аналогичные действия как и для тёмного режима, создаем задачу, указываем имя, редактируем раздел «Параметры безопасности».

Указываем время переключения на светлый режим, например, 9:00 утра.

Так же создаем два действия со значениями:
add HKCU\SOFTWARE\Microsoft\Windows\CurrentVersion\Themes\Personalize /v AppsUseLightTheme /t REG_DWORD /d 1 /f
и
add HKCU\SOFTWARE\Microsoft\Windows\CurrentVersion\Themes\Personalize /v SystemUsesLightTheme /t REG_DWORD /d 1 /f
В поле «Программы или сценарий» указываем значение «reg».

Как и с тёмными режимом, во вкладке «Действия» должно отображаться два действия. Также аналогично предыдущим шагам настраиваем вкладки «Условия» и «Параметры«, после чего нажимаем кнопку «ОК«.
Запускаем задачу «Светлый режим«.

На этом все настройки закончены и задачи должны работать.
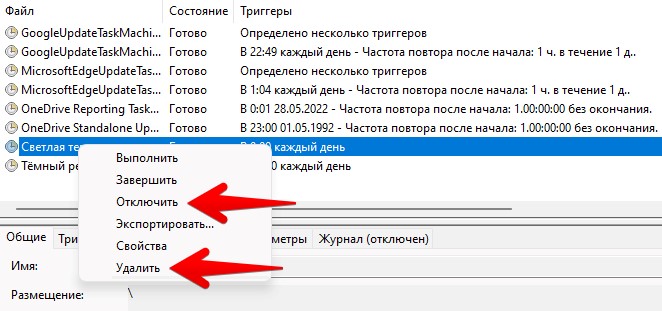
Как удалить запланированные задачи
Если требуется отключить автоматизацию смены режимов, заходим в приложение «Планировщик заданий» и отключаем и удаляем каждую из задач.
Ну вот и все, пока это лучшее решение в настоящий момент. Компания Microsoft, к сожалению, не позаботилась упростить данную возможность в одной настройке, как это реализовано, например, на ОС Android. Как вы увидели в данной статье, возможность, конечно, есть, просто она не легкодоступна.
Sign in to your MUO account
Just like Windows 10, Windows 11 includes light and dark modes to suit your preferences. If you go for dark, the platform’s windows will be black. Selecting light turns the window colors white.
These settings permanently apply their color schemes until you manually change to the other one. Windows 11 doesn’t include any additional options that enable you to schedule times for dark and light modes to automatically come on. Nevertheless, you can still configure dark/light mode to automatically change with the Auto Dark Mode app.
Set Dark and Light Mode Times With Auto Dark Mode
Auto Dark Mode is a nifty piece of freeware software that lets you schedule dark and light mode. For example, you can use Auto Dark Mode to change to light mode at 9 AM and back to dark mode at 6 PM. The app gives you full control over the times, so you can set it to your heart’s content.
Here is how you can set dark and light mode times with Auto Dark Mode:
- Open Auto Dark Mode’s GitHub download page within a browser.
- Click AutoDarkModeX_10.1.10.exe to download Auto Dark Mode’s installer.
- Bring up File Explorer’s window (you can press the Win + E hotkey to open it).
- Open the folder you saved the installer in.
- Double-click the AutoDarkModeX_10.1.0.10.exe to open its setup wizard and install the software.
- Auto Dark Mode should automatically launch after installation. If, however, it doesn’t for some reason, enter Auto Dark Mode in Windows 11’s search box to find and open it.
-
Select Auto Dark Mode’s Time tab shown directly below.

- Then click the Set custom hours radio button.
-
Click the Light clock setting to choose a time for the mode. You’ll need to click the up/down arrows on the time selector and the tick button to choose and apply a time.

- To set a time for the dark mode to come on, click the Dark clock setting. Then select a time for that mode to start, and click the tick button.
- Thereafter, wait for the times you chose for the light and dark modes to start at.


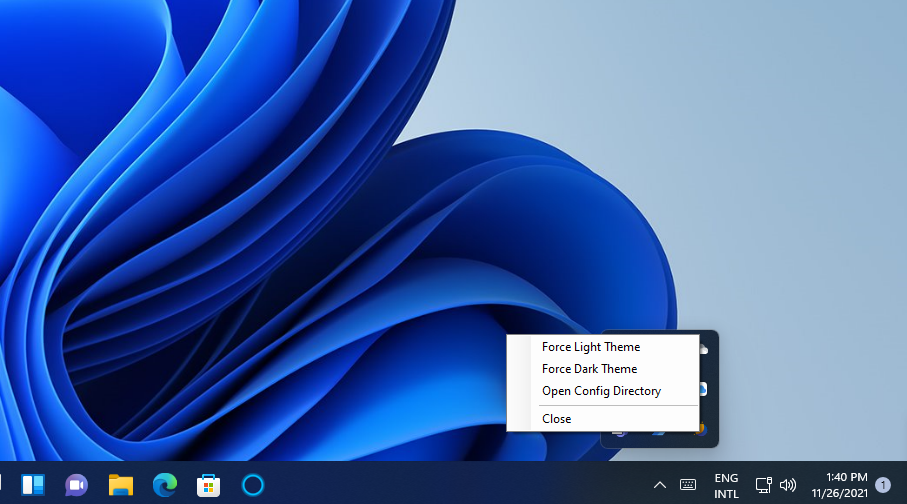
The program will still be running after you close its window, so you don’t need to minimize it. To close Auto Dark Mode, right-click the app’s system tray icon and select Close.
Other Auto Dark Mode Settings
Auto Dark Mode also has quite a few other settings on different tabs. For example, you can set up dark and light mode hotkeys. To do so, click in the Force Light Mode Hotkey or Force Dark Mode Hotkey boxes on the Switch Modes tab. Then press a hotkey like Ctrl + L or Ctrl + D for your chosen mode. To apply the hotkeys, turn on the Enable system-wide hotkeys option.
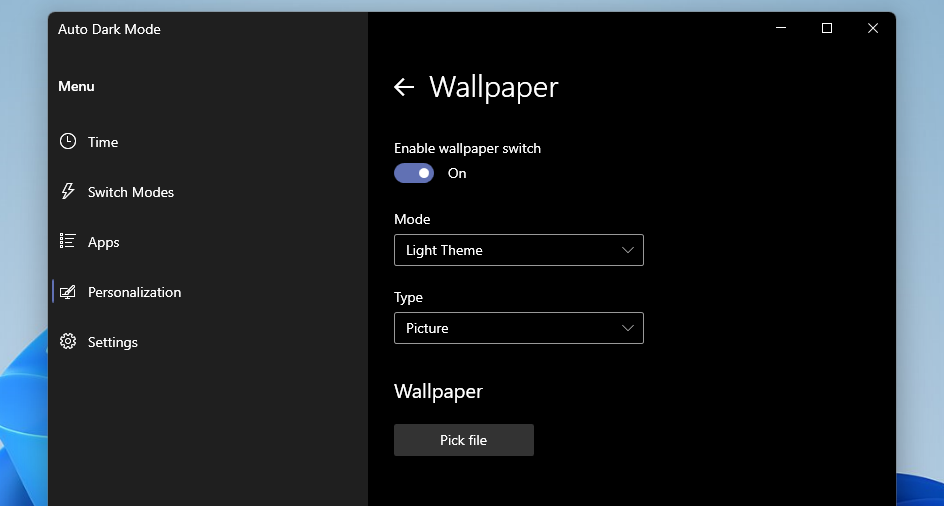
You can select different desktop wallpapers for light and dark modes. To do that, click the Pick a wallpaper option on the Personalization tab.
Turn on the Enable wallpaper switch setting, and select a mode in Mode drop-down menu. Select the Picture option on the Type drop-down menu, and select Pick a file to choose a wallpaper. Then the desktop wallpaper will change to your chosen background when light or dark mode comes on.
Auto Dark Mode Is a Great Freeware App
An option for setting dark and light mode times in Windows 11 is something Microsoft should have added to its latest desktop platform. Who knows, maybe one day Microsoft might add such a feature to Windows 11 with an update. For now, you can configure dark/light mode times with Auto Dark Mode.
Overall, Auto Dark Mode is a decent app for configuring and customizing Windows 11’s dark and light modes. With its Set custom hours option, you can get the best of both the dark and light mode worlds by setting start times for them. Auto Dark Mode’s hotkey and wallpaper customization settings are also good additional options for the color modes.