
Skip to content
Windows 11 SkinPack
Ads


Transform Windows 7/10 to Windows 11

Download from kofi for $4.99
Download from gumroad for $4.99
Windows 11 Dark SkinPack Win10
Windows SkinPack Collections
Best work on 100% scale and layout size, you need to set it from display setting, Also for enable start menu and taskbar skin you need to install startisback from startisback.com
Note: if you have problem with taskbar, start button or start menu then set taskbarx, start button and start menu setting like this:
Credits Report DMCA
Password: skinpacks.com
Malware/virus warning? Read the FAQ.
Windows 10 [X86_X64]
Note: Please unistall old or other version of skin packs before install new one. if your theme not changed or its like classic windows you need to install uxtheme patcher from here and after restart select new theme from personalization.
Use it at your own risk! Because skin packs will change file system (imageres.dll) to change icons so anti virus give warning, please disable temporary if you’re using anti virus. If you do not want this, you can not use SkinPack, sorry! all theme have been fully tested, once purchase has been completed no refund will be available, however we will try to provide all possible technical assistants as required.
You’re advised to Create a System Restore Point before installing skinpack.If you have problem with install or uninstall skinpack, please check our help page.
Ads
Leave A Comment
-
KIM JI SOO
January 21, 2025 at 2:26 am — ReplyHello, I bought it, but how can I download it?
-
[…] sedan ner SkinPack. När du har laddat ned, gå till nedladdningsmappen och klicka på 11.sfx körbar fil. Jag ber om […]
-
[…] версия Windows 11. Для этого вы можете использовать Windows 11 Skinpack […]
-
[…] ditt gamle Windows OS til å se ut som den nyeste versjonen av Windows 11. For dette kan du bruke Windows 11 Skinpack […]
-
[…] będzie wyglądał jak najnowsza wersja systemu Windows 11. W tym celu możesz użyć pakietu Windows 11 Skinpack […]
-
[…] 是的。你可以。有多種主題和工具可讓您的舊 Windows 作業系統看起來像最新版本的 Windows 11。 […]
-
[…] phiên bản Windows 11 mới nhất. Để làm được điều này, bạn có thể sử dụng Windows 11 Skinpack […]
-
[…] версія Windows 11. Для цього ви можете використовувати Windows 11 Skinpack […]
Page load link
main menu
Go to Top
Как поставить оформление Windows 7
- Скачайте и распакуйте архив windows11light_theme_for_windows7.rar с помощью WinRar.
- Если Вы ставите тему первый раз: предварительно пропатчите систему с помощью Universal Theme Patcher.
- Переместите файлы *.theme, а также папку с содержанием ресурсов *.msstyles по адресу: C:\Windows\Resources\Themes.
- Нажмите в пустой области на рабочем столе и выберите пункт «Персонализация» в контекстном меню.
- Примените тему.
Список файлов
- Windows 11 light
- Cursors
- aero_arrow.cur133.4 Kb
- aero_busy.ani543.27 Kb
- aero_ew.cur133.4 Kb
- aero_helpsel.cur133.4 Kb
- aero_link.cur133.4 Kb
- aero_move.cur133.4 Kb
- aero_nesw.cur133.4 Kb
- aero_ns.cur133.4 Kb
- aero_nwse.cur133.4 Kb
- aero_pen.cur133.4 Kb
- …
- explorer.exe
- 6801.png1.5 Kb
- 6805 oculto.png3.98 Kb
- 6805.png1.5 Kb
- 6809.png1.5 Kb
- explorerframe.dll
- 280.png1.92 Kb
- 288.png606 b
- 295.png605 b
- 296.png696 b
- 34560.png16.85 Kb
- 34561.png16.85 Kb
- 34562.png16.85 Kb
- 577.png3.24 Kb
- 578.png2.84 Kb
- 579.png3.38 Kb
- …
- ICONS
- 109.ico77.57 Kb
- 123.ico68.69 Kb
- 25.ico86.06 Kb
- 54.ico82.83 Kb
- 55.ico80.1 Kb
- Media
- Desktop.ini2.98 Kb
- Windows Background.wav241.82 Kb
- Windows Balloon.wav174.04 Kb
- Windows Battery Critical.wav209.79 Kb
- Windows Battery Low.wav175.29 Kb
- Windows Critical Stop.wav155.54 Kb
- Windows Default.wav70.92 Kb
- Windows Ding.wav187.29 Kb
- Windows Error.wav167.54 Kb
- Windows Exclamation.wav234.65 Kb
- …
- Shell
- NormalColor
- shellstyle.dll342.5 Kb
- NormalColor
- Shell32.dll
- 16757.ico7.7 Kb
- 16758.ico7.7 Kb
- 16806.ico68.36 Kb
- 24.ico14.73 Kb
- 263.ico173.21 Kb
- 62998.ico44.74 Kb
- 62999.ico45.51 Kb
- 63000.ico45.12 Kb
- 63001.ico44.72 Kb
- 63008.ico44.82 Kb
- …
- Wallpaper
- ThemeA
- Desktop.ini83 b
- img20.jpg807.36 Kb
- img21.jpg814.31 Kb
- img22.jpg742.92 Kb
- img23.jpg885.85 Kb
- ThemeB
- Desktop.ini83 b
- img24.jpg1.1 Mb
- img25.jpg995.97 Kb
- img26.jpg962.77 Kb
- img27.jpg1.01 Mb
- ThemeC
- Desktop.ini83 b
- img28.jpg1.06 Mb
- img29.jpg1.17 Mb
- img30.jpg1.02 Mb
- img31.jpg1.1 Mb
- ThemeD
- Desktop.ini83 b
- img32.jpg1.03 Mb
- img33.jpg1.03 Mb
- img34.jpg966.12 Kb
- img35.jpg1.04 Mb
- Windows
- img0.jpg1.53 Mb
- ThemeA
- Windows 11 light v2.msstyles629 Kb
- Windows 11 light.msstyles617 Kb
- Cursors
- Windows11light.theme4.72 Kb
- Windows11lightV2.theme4.73 Kb
Установить наше приложение
Пользователи рекомендуют
Despite being a few generations old now, Windows 7 is still used by thousands across the globe.
However, in comparison to modern operating systems, the design aesthetics of Windows 7 might look a bit outdated.
Luckily using Themes, Skin Packs, and Visual Styles you can drastically enhance the visual appearance of Windows 7.
In this article, we have shared some of the best Skin Packs For Windows 7 that are fully customizable and will breathe new life into your Windows 7 Desktop or Laptop.
Table Of Contents
- 10 Beautiful Windows 7 Skins To Download Free
- 1. Dark Skin Pack For Windows 7
- 2. macOS Ventura Skin Pack For Windows 7
- 3. Windows 11 Skin Pack For Windows 7
- 4. Glass Skin Pack For Windows 7
- 5. Minimal White Skin Pack For Windows 7
- 6. Ubuntu Skin Pack For Windows 7
- 7. Tonic Skin Pack For Windows 7
- 8. Clean VS Skin Pack For Windows 7
- 9. TransLucent Skin Pack For Windows 7
- 10. Windows 10 Skin Pack For Windows 7
- How To Install Windows 7 Skin Pack?
10 Beautiful Windows 7 Skins To Download Free
1. Dark Skin Pack For Windows 7
While completely usable during the day, at night using the Windows 7 OS with White-Coloured Interface can be a bit troublesome. Unlike the newer versions of Windows i.e. Windows 10 and Windows 11, Windows 7 doesn’t offer a native dark mode.
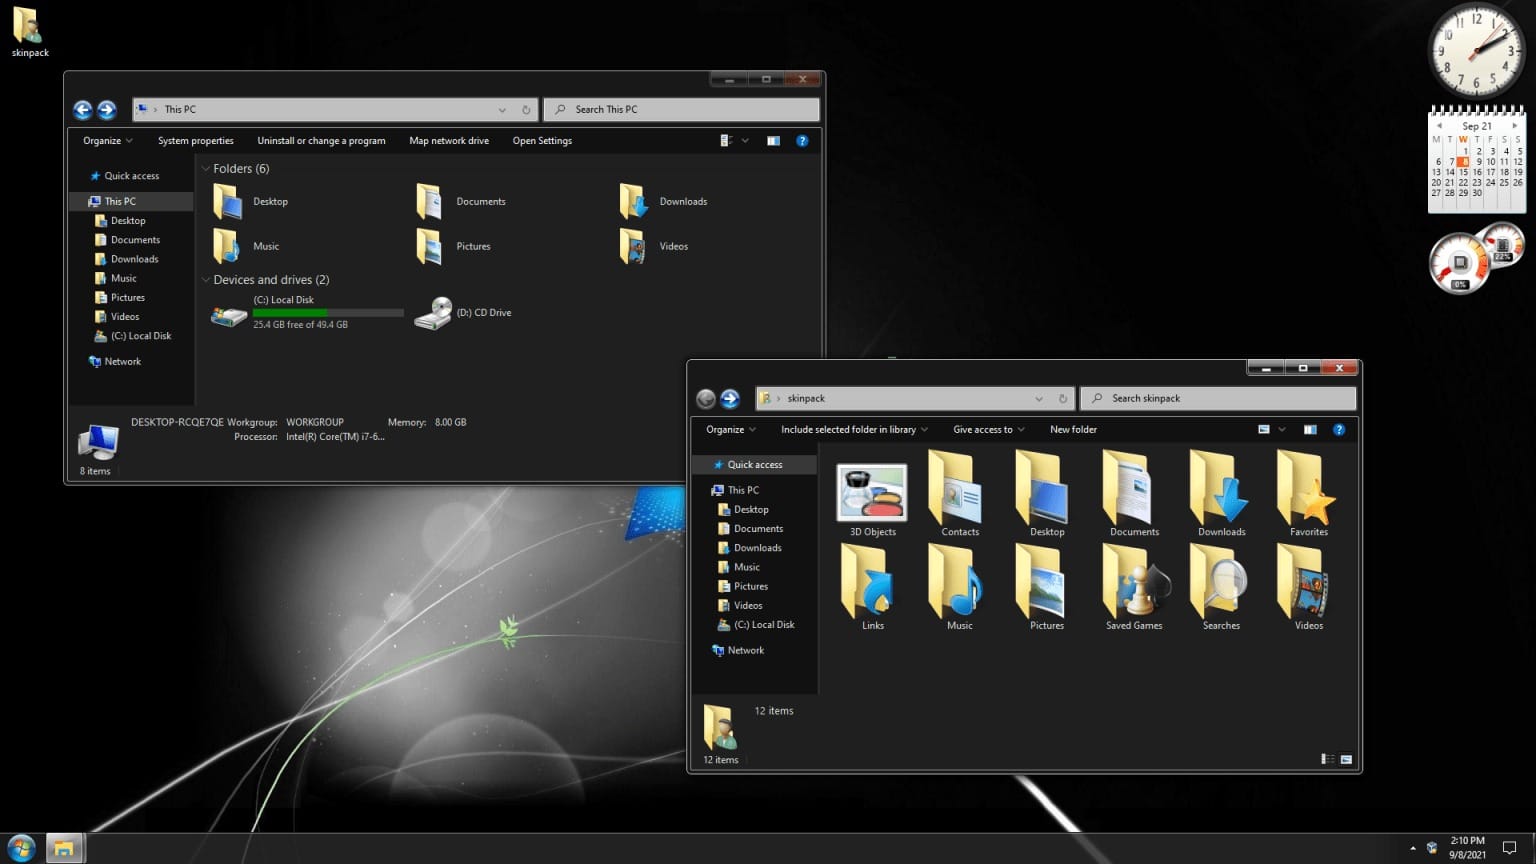
Well, that’s when the Dark Skin Pack For Windows 7 comes to light.
As you might have guessed by the name, this Windows 7 Skin Pack transforms most UI elements from white to grey-over-black shades coupled with hints of red. It’s clean and reduces the strain on eyes in dark environments.
2. macOS Ventura Skin Pack For Windows 7
macOS Skin Pack completely and instantly transforms your Windows 7 PC into a macOS Catalina machine. With this Skin Pack, everything from the cursor to app icons and program windows resembles a macOS device.
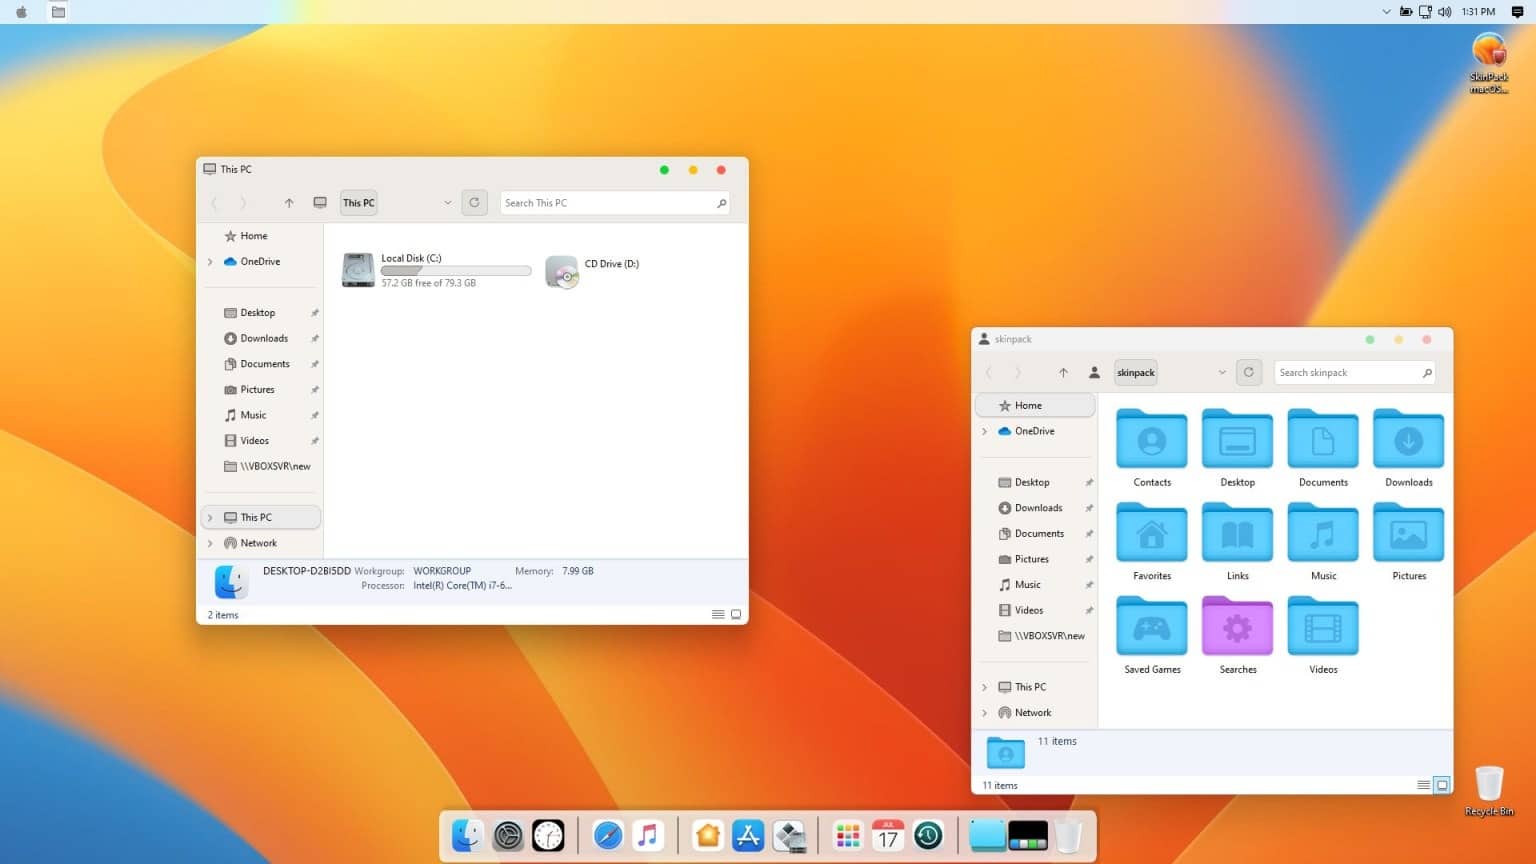
You also get access to a fully functioning and iconic Dock with this macOS Skin Pack.
It’s worth noting that, the macOS Skin Pack For Windows 7 is updated regularly so keep an eye out for the latest version when you download this skin pack.
3. Windows 11 Skin Pack For Windows 7
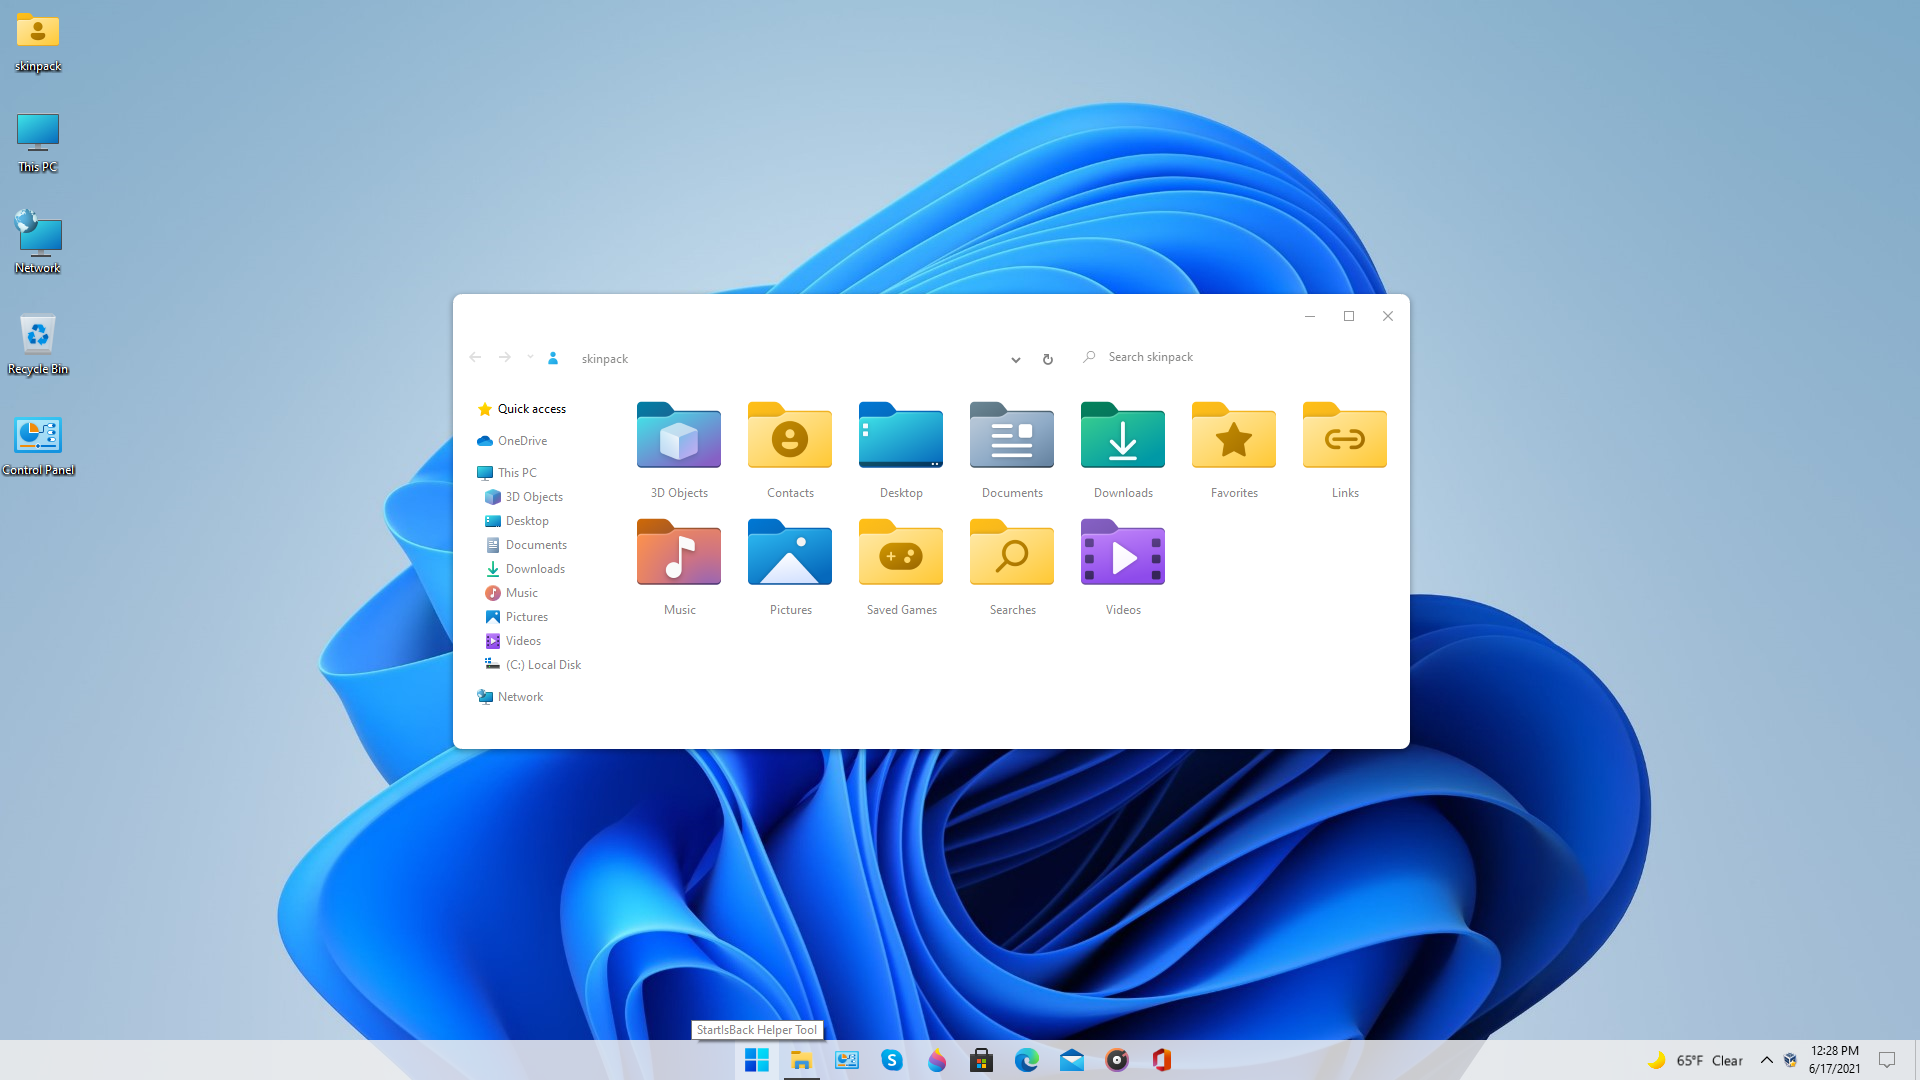
Once again the name says it all, if you want to experience the latest Windows 11 on your Windows 7 PC then the Free Windows 11 Skin Pack is possibly the best way to do so.
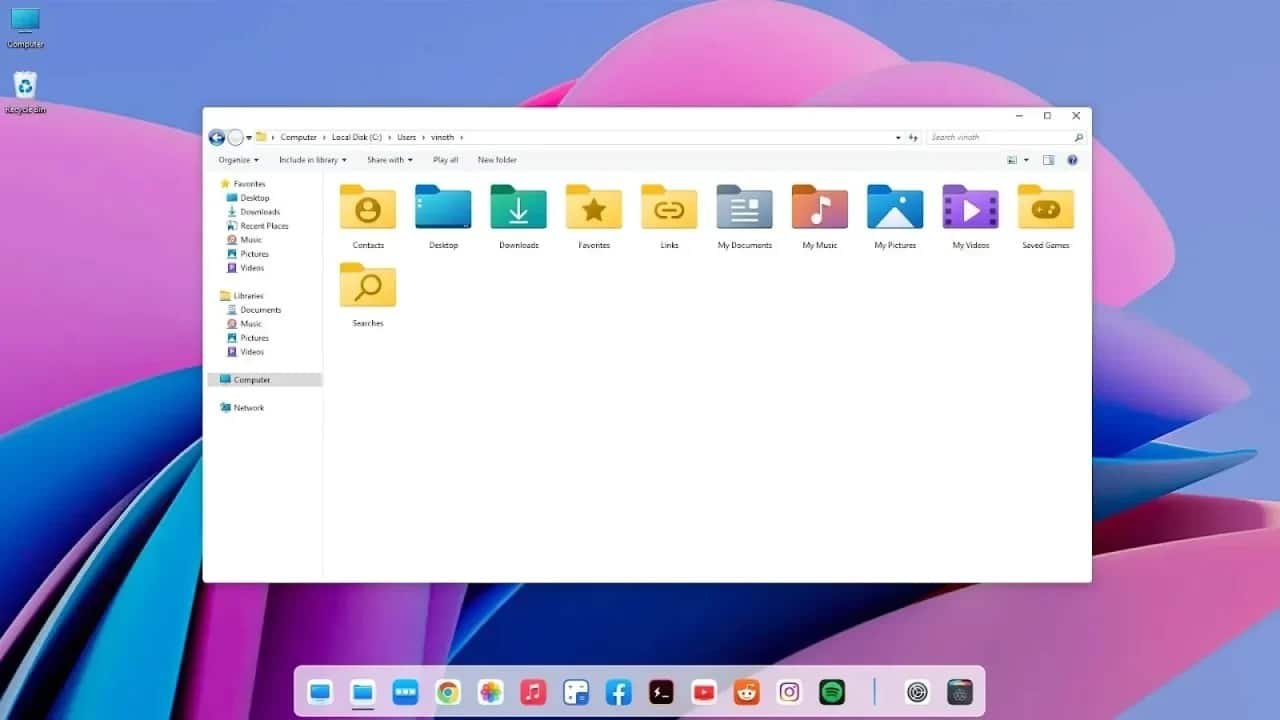
Similar to Windows 11, you will get access to round corners, white-colored explorer, and modern app icons while using this Skin Pack.
Since the Skin Pack is quite lightweight it doesn’t consume many system resources for its proper functioning and you can easily use it on low-powered laptops or aging desktops.
4. Glass Skin Pack For Windows 7
Fan of transparent program windows and UI elements? Well, the Glass Skin Pack should be the skin pack you should try out.
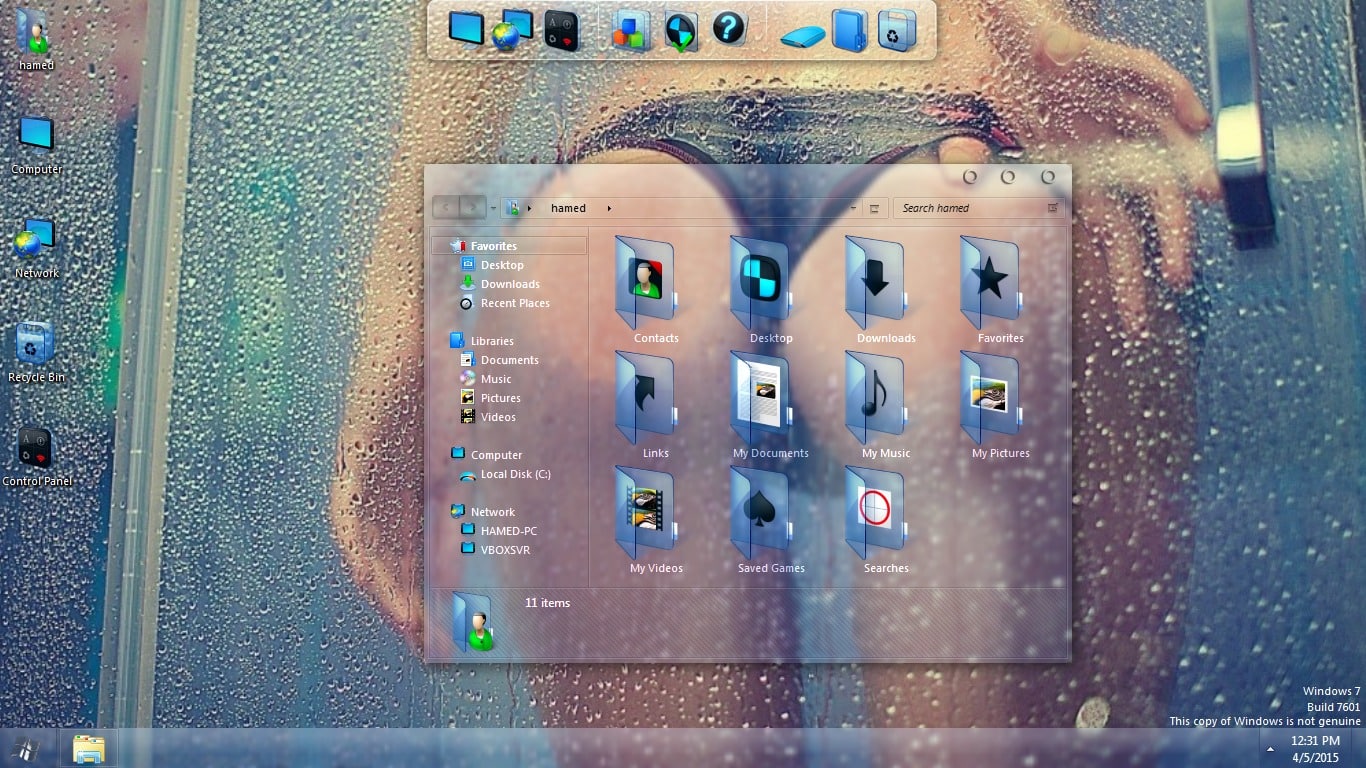
Glass Skin Pack has white-colored Minimize/Maximize/Close buttons. You can customize the taskbar size, app icons, and the transparency amount based on your preference.
The Skin Pack is bundled with a soft blue gradient background that looks clean and minimal.
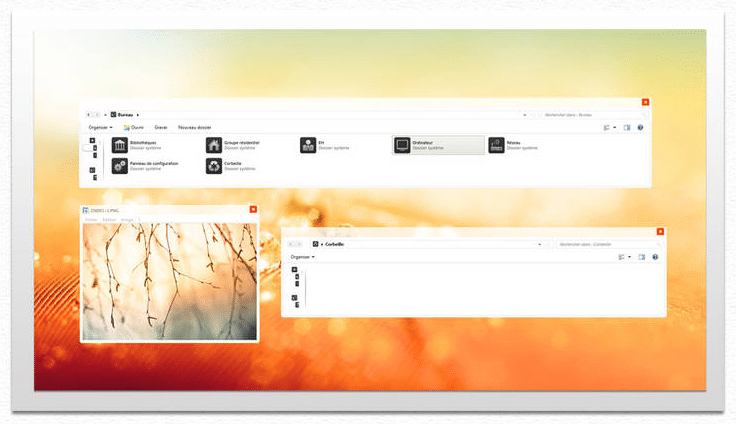
5. Minimal White Skin Pack For Windows 7
Minimal White Skin Pack is quite clean and has very nicely designed UI elements. The Skin Pack is bundled with minimal desktop widgets.
This Skin Pack primarily focuses on removing the distractions from your desktop so that you can focus on work.
To apply this theme copy the downloaded content to C:\Windows\Resources\Themes. In addition to White, there’s also a dark version of Minimal White Skin Pack For Windows 7.
6. Ubuntu Skin Pack For Windows 7
Ubuntu Skin Pack does exactly as its name suggests, it transforms your Windows 7 Desktop into an Ubuntu Desktop.
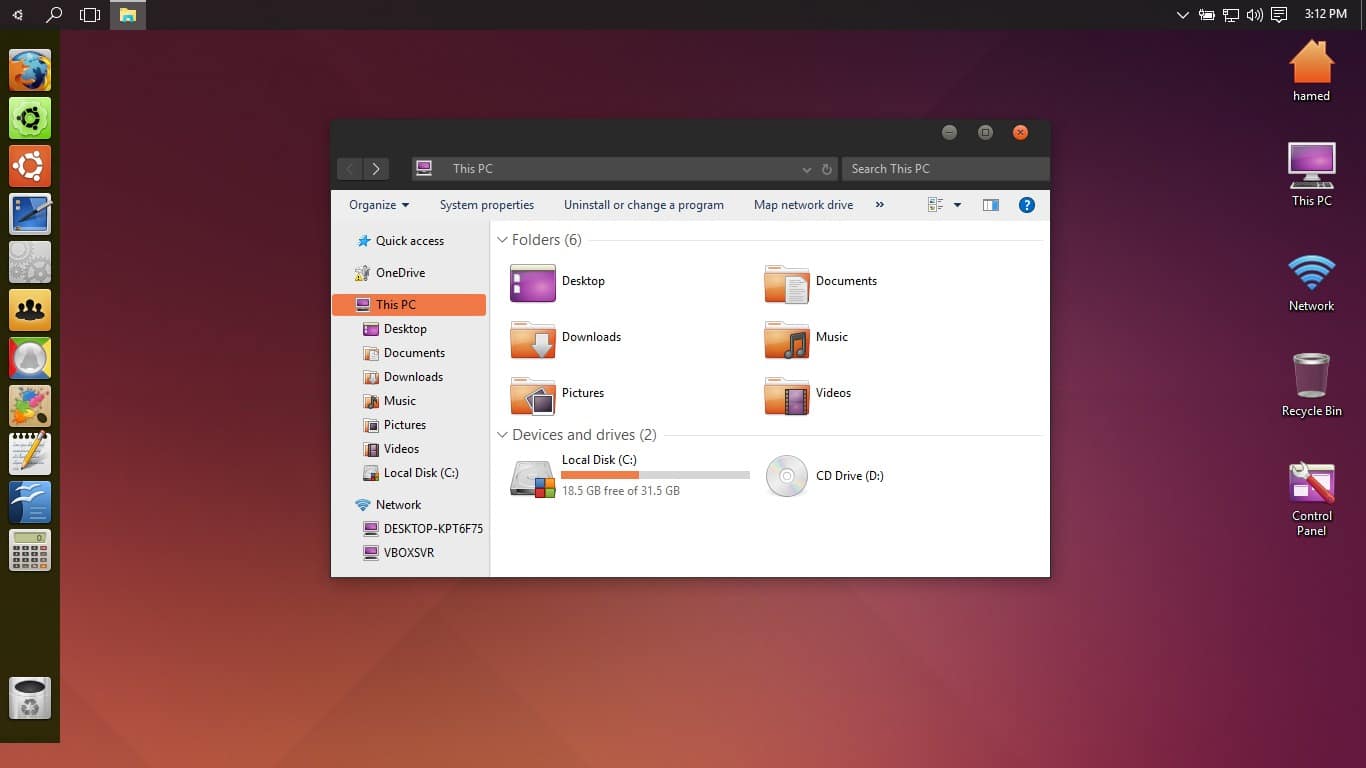
If you are a fan of orange and white-themed skin packs you will enjoy the Ubuntu Skin Pack. In addition to the default Windows Taskbar, the skin pack offers an additional taskbar to help you access programs and tools with ease.
In addition to Windows 7, you can also use the Ubuntu Skin Pack on Windows 8.1 and 10.
7. Tonic Skin Pack For Windows 7
Another great skin pack for Windows 7 that’s worth checking out is Tonic. Available in both White and Dark color options this skin pack has a clean and easy-to-navigate interface.
Similar to the Minimal White Skin Pack, Tonic focuses on making your desktop clean and less distracting.
On the download page of this skin pack, you can find links for both icons and wallpapers that go well with this skin pack.
8. Clean VS Skin Pack For Windows 7
Clean VS is a minimum and distraction-free Windows 7 Skin Pack that once paired with a high-quality wallpaper can make your desktop look modern.
The custom app icons bundled along with Clean VS Skin Pack bring a sense of uniformity to your PC. Additionally, since the theme is highly customizable you can add or remove UI elements as per your preference.
On the download page of this Skin Pack, you can find a dedicated guide on How To Install And Apply Clean VS Skin Pack.
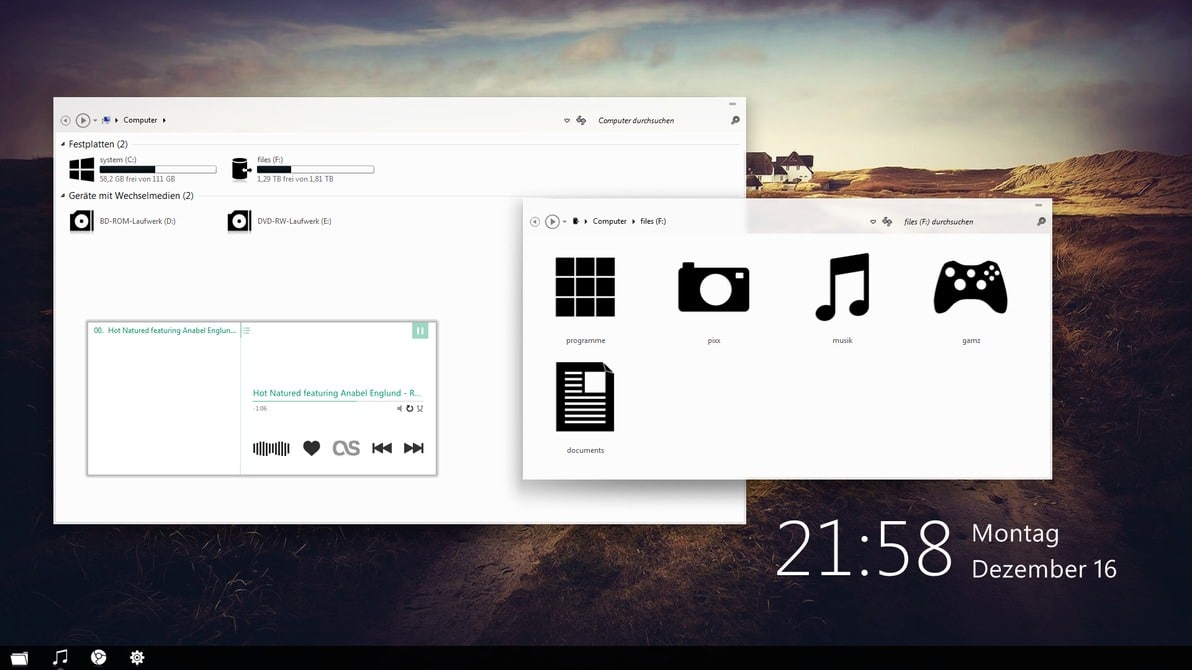
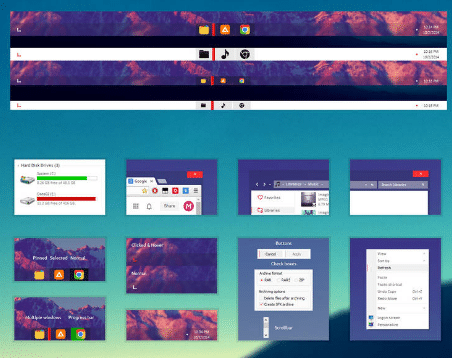
9. TransLucent Skin Pack For Windows 7
The name says it all, TransLucent Skin Pack makes your windows, programs, UI elements, and other aspects of your PC look translucent and minimal.
The Skin Pack attempts to clean up the interface and offer some extra working space by reducing the size of icons, fonts, and the taskbar. Some visual cues of this skin pack feel like a perfect blend of Windows Vista and macOS.
Translucent Skin Pack consumes negligible system resources for its proper functioning and while using it you might experience a slight increment in performance.
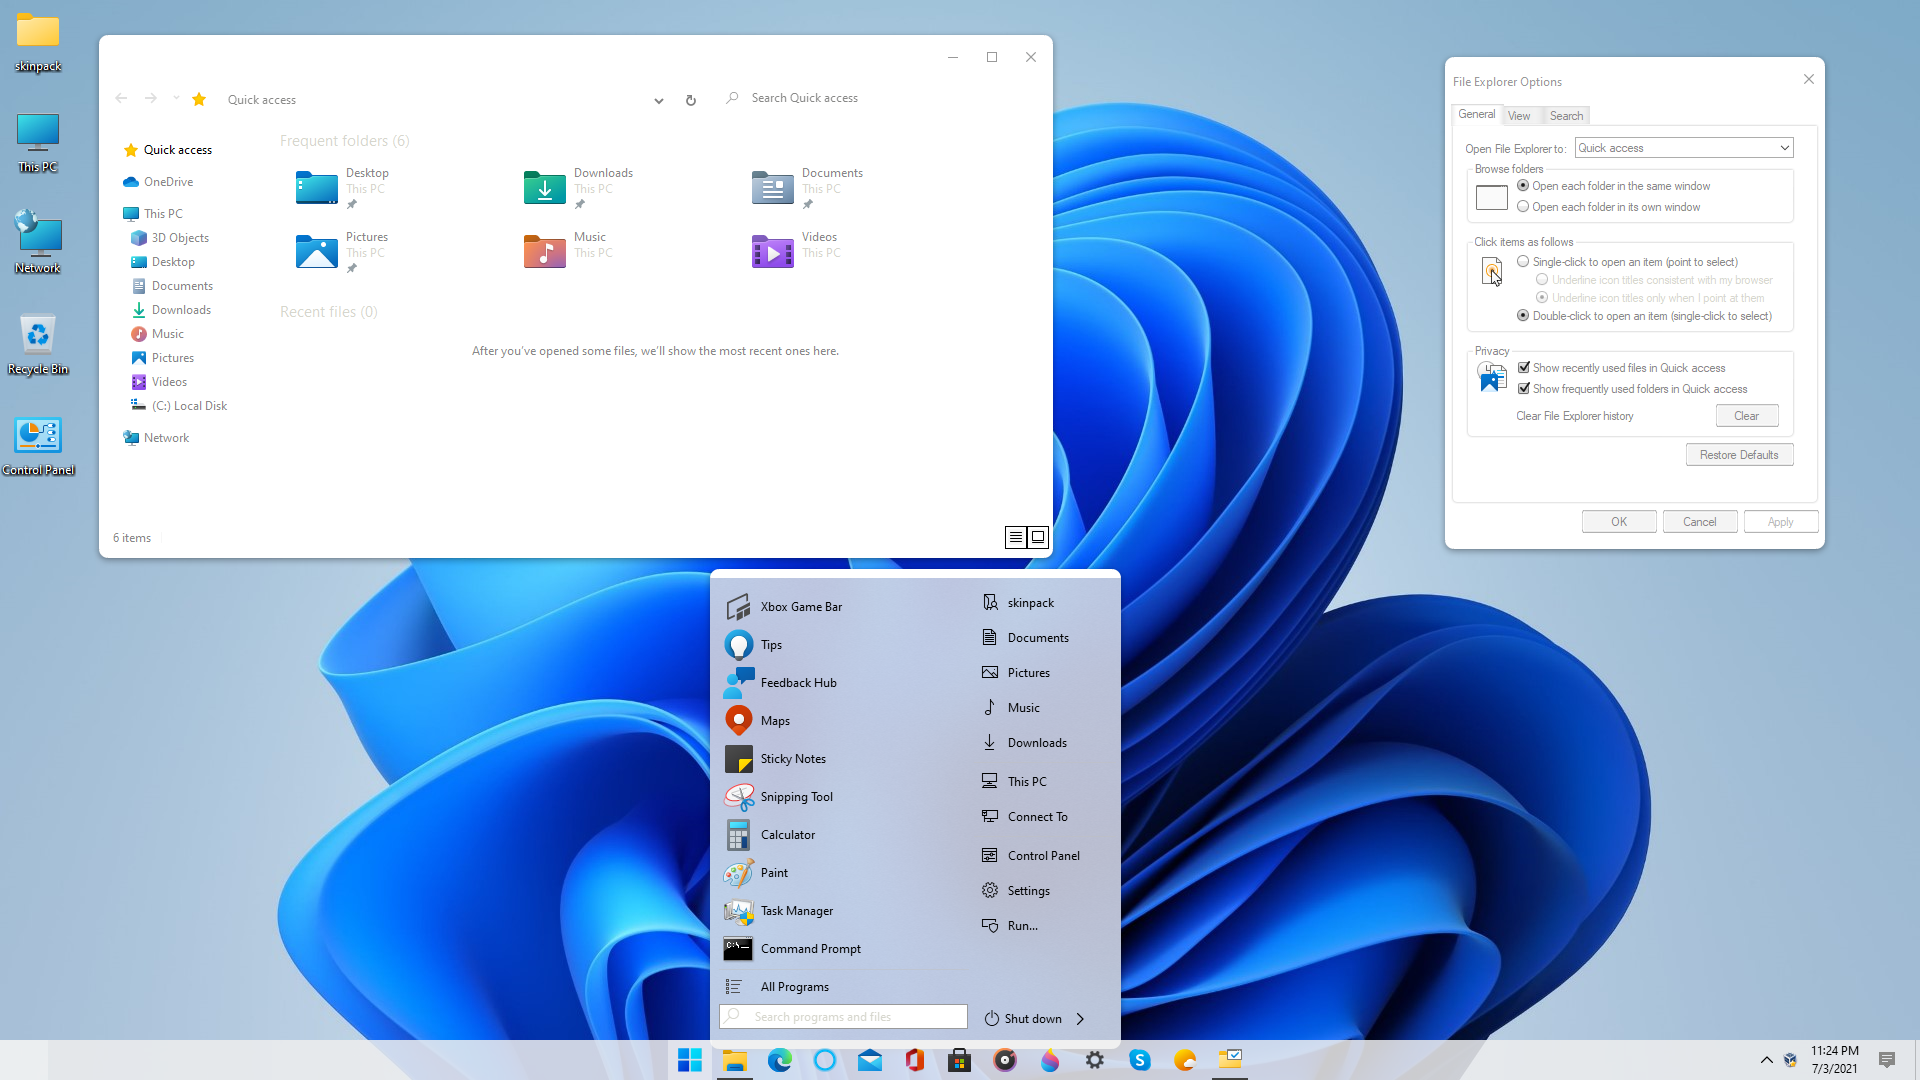
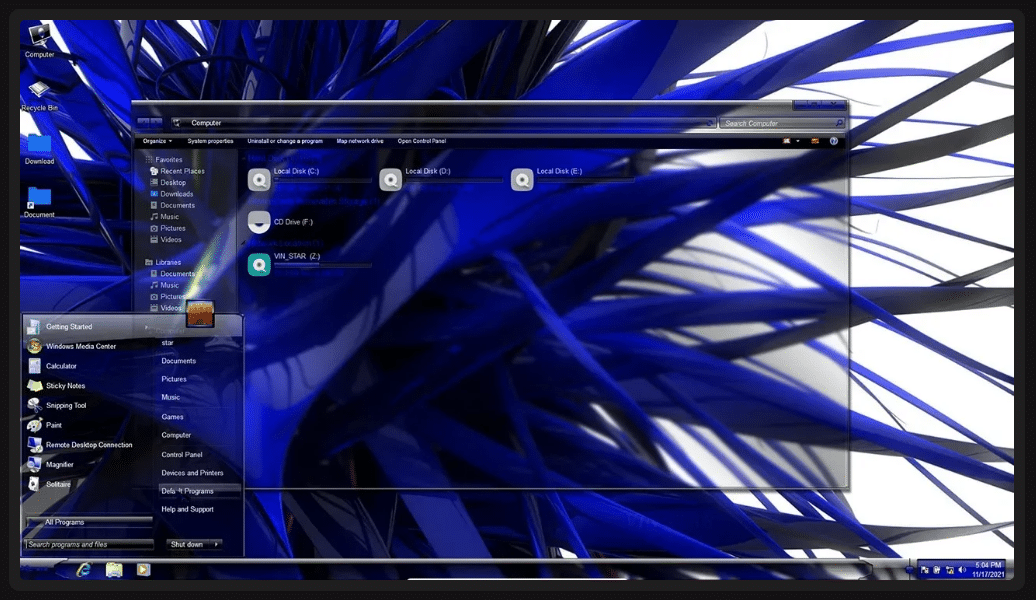
10. Windows 10 Skin Pack For Windows 7
If you have ever wanted to experience Windows 10 on a Windows 7 PC, then the Windows 10 Skin Pack might impress you.
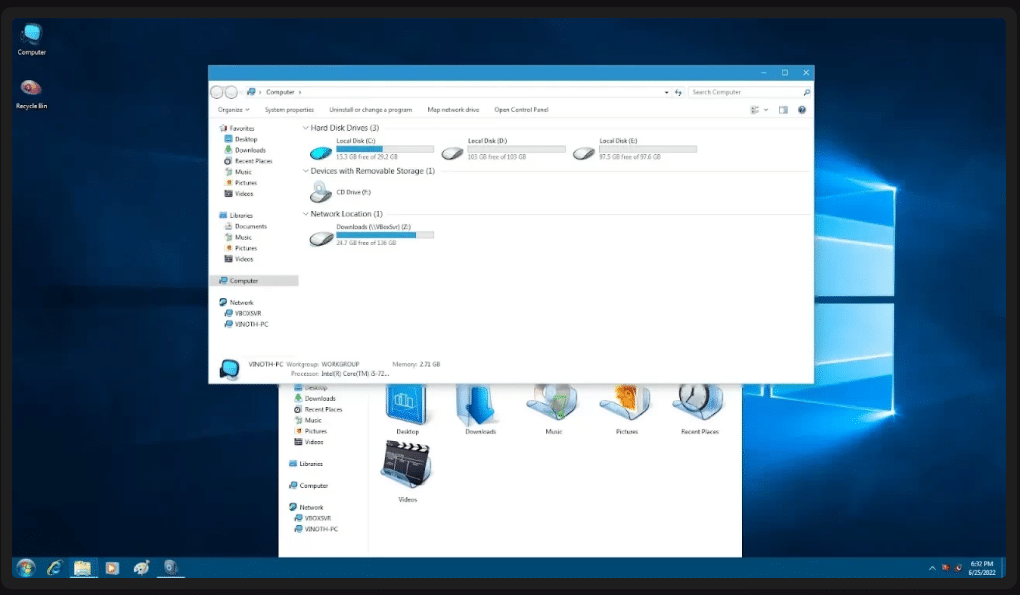
As the name suggests, this skin pack makes your Windows 7 System look, feel, and function like a Windows 10 Device. Basic elements like the Start Menu, File Explorer, and Taskbar in Windows 10 Skin Pack are almost similar to the actual Windows 10 OS.
Feel free to try out this Win 10 Skin Pack if you’ve been planning to make a jump to Windows 10 and want to get an experience of how the upgrade would feel like.
How To Install Windows 7 Skin Pack?
Installing a Windows 7 Skin Pack is similar to installing any other Windows Program. Once you have the download package of the skin pack or the theme, double-click on the package and it will install automatically.
To customize or apply a different skin pack right click on the desktop and select Personalization.
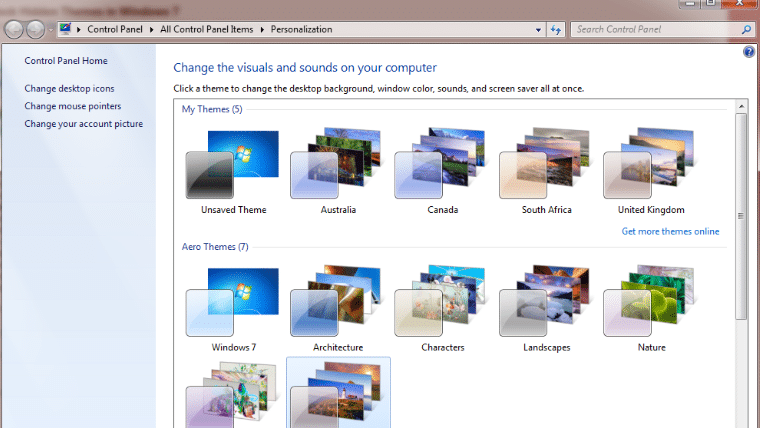
Furthermore, some of the aforementioned skin packs require a Theme Patcher for their proper functioning.
CONCLUSION
So those were the Top 10 Free Windows 7 Skin Packs worth checking out.

Anubhav Tyagi
Just a normal guy who listen to lots of music, but apart from that I love Tech!
Windows 10 is the latest iteration of the legendary operating system from Microsoft. However, we have been hearing about their plans to release the next version for quite some time. What if you want to transform your Windows 10 into Windows 11? You will learn how to transform your Windows 10 or Windows 8.1 or Windows 7 computer to Windows 11 with few tweaks. Also don’t forget to look at this cool Windows 11 online simulator.
Don’t worry! You can do that. We are here with the best Windows 11 themes, skins, and icons for Windows 10. Even if your device doesn’t support the latest version for some reason, you can enjoy the new experience through this method. Don’t forget to check our article about 21 free and best Windows 10 skins and themes.
Check: Beautiful Windows 10 Icon Packs
Best Windows 11 Themes, Skins and Icons for Windows 10
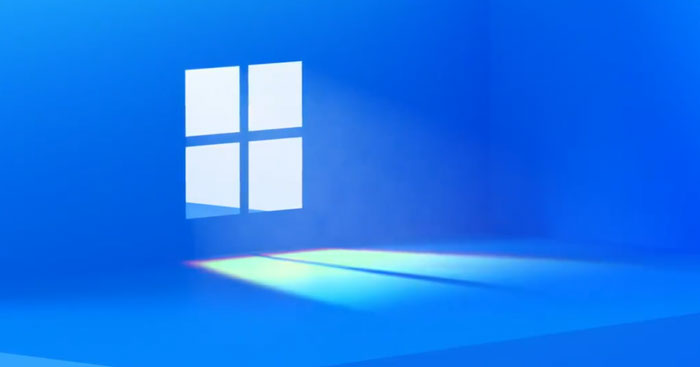
Unlike what happened with the previous iterations, Windows 11 has been leaked. Yeah, you heard it right. A full-blown version of the OS has come out way before Microsoft announced its arrival. So that gave us a clear idea of what’s in the store. Before we jump into the theme section, let’s have a look at the features of Windows 11.
Check our latest guide about how to transform your Windows to Mac with Themes.
Windows 11; What’s Changed?
From the initial impression, we perceive that not many have changed. However, there are some aesthetic changes and design improvements.
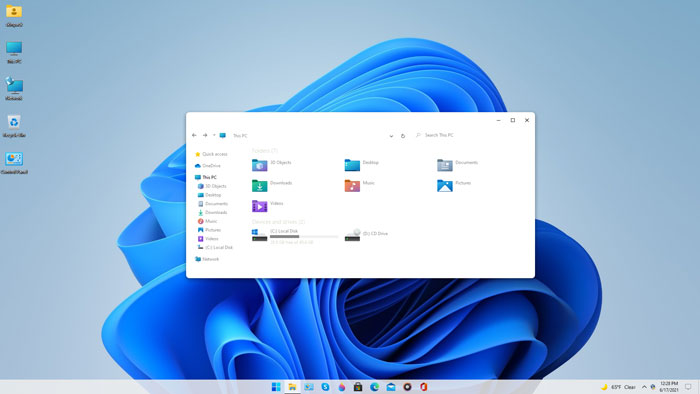
The evident change is the taskbar revamp. Now, the start menu stays at the centre. And, you have the option to align it to the left. The search and start menu have been separated into two sections. Similar to Windows 10, you can still access the search from the start menu.
Well, the live tiles are gone, which we were not a fan of. Hence, no hard feelings there. Are you going to miss it? No, we don’t think so. Looking at the bottom of the start menu, you will realise that there is a new section called Recommended files. Plus, all the windows now have rounded corners.
The file explorer has new icons. Still, nothing else has undergone a transformation per se. Who knows, they may have some surprises when the official build comes out. Other native apps remain the same (Edge browser for example).
The dark mode is available (sort of mandatory, you know!). Moreover, when you hover over the maximise button, you get different split-view options to work with. Meaning, you don’t have to go through a series of steps to do that now.
Want to turn your PC into Android? Check Our article : Best Android OS for PC : Install Android on PC
How to Make Your Windows 10 Machine Look Like Windows 11?
- Easiest way = Installing ready to install theme pack from SkinPack.
- A bit Harder way => Installing things by yourself (Benefits: customizable)
That’s exactly what we are trying to do here. In case you are interested in trying out the leaked version, you can get the file from the web. It’s now circling all around the internet.
Our recommendation? Don’t do that! Just don’t, especially on your daily driver. Considering it’s an early build, you will come across hiccups and minor issues, which in turn affect your work or maybe, test your patience too.
Below, you can see the step by step method to turn your Windows 10 computer to Windows 11. Don’t expect too much though. On the foundation level, it’s still the previous version. We are only trying to change the outlook.
The Easiest Way:
Caution:- If you think you may mess up the whole process, have a look at this article to create a system restore point as a rescue mission.
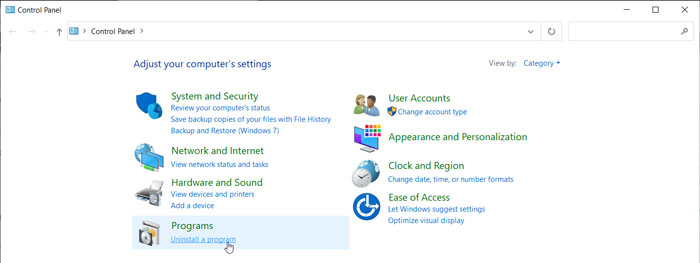
Step 1: First, you have to ensure no other skin pack or theme is present on your device. In case you have, visit the Control panel to uninstall it.
Step 2: Now you need the new pack. Use this link to latch on to it. You will have to go through a couple of pages to finally download the required theme file.
Step 3: What you get is an executable file with the name SkinPack Windows 11.sfx. They have protected the file with a password. So, when you try to open it up for the first time, you have to enter skinpacks.com into the text field.
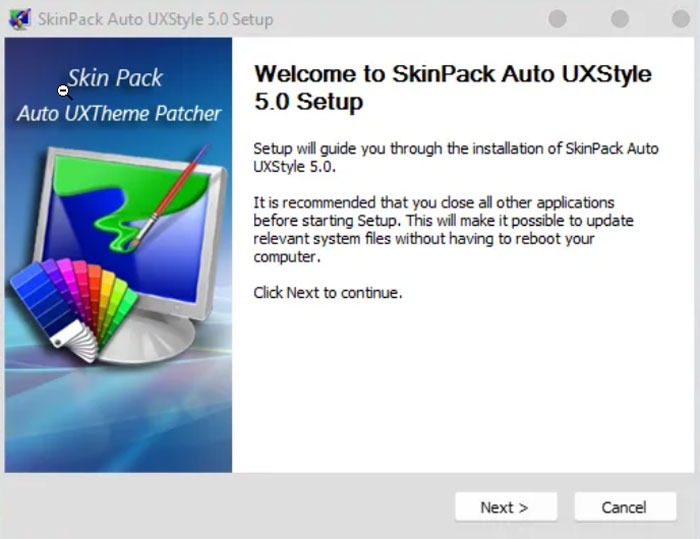
Step 4: On extracting the archive file, you will get another executable program, which is the final installer. Open it up and get on with the installation. (We hope you are not alien to the standard Windows installation procedure).
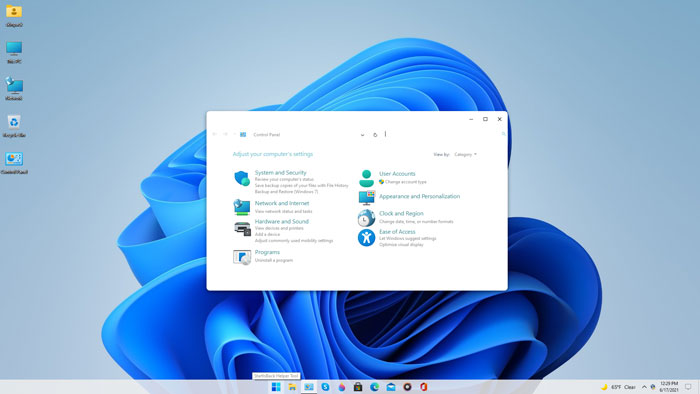
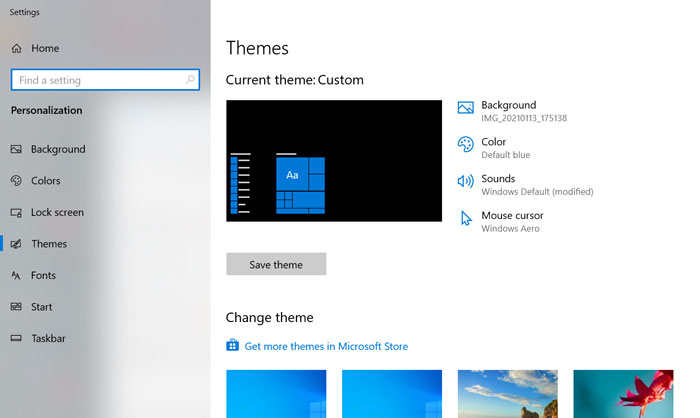
Step 5: By the time you reach this step, you have the theme installed on your computer. In order to apply it, follow Start menu>> Settings>> Personalisation>> Themes and click on the one you just installed.
Step 6: Wondering why the taskbar hasn’t changed? First, pin the programs to the taskbar and hide start button from Taskbarx. Yeah, it’s a third-party application you should download (don’t panic, Taskbarx is a simple app that doesn’t need a learning curve to use).
Hooray! You just transformed your Windows 10 into the all-new Windows 11.
Theme not Changed/ Turns to Classic Windows Theme?
Don’t worry! It’s quite common among users to have this issue. When you try to apply a new theme, it doesn’t activate. Or sometimes, the appearance turns to classic Windows theme all of a sudden.
If you find yourself in a similar situation, you need to download a program called UX Theme Patcher. In layman’s terms, it modifies the system configuration to help you activate third-party themes.
Once you download the file, go on with the installation. Don’t forget to restart the machine and once you do, give it some time to get to the new phase. There you go! And now, you can return to step 5.
Download Windows 11 Wallpapers
As you read in the beginning, Windows 10 initial build is all over the web. People now know what to expect out of it. Moreover, we got to see a few wallpapers as well. Do you want all the wallpapers to fiddle with?
You can use this link to download them in a full suite. The theme along with these wallpapers help you live the true experience of Windows 11.
Manual Way:
Windows 11 has the following things that we need to change:
1) Wallpapers
2) Theme
3) The icons
4) Taskbar
We will change it step by step.
1) Wallpapers: We don’t need to change it right now because themes that we are going to use already have them. Let’s skip this step
2) Theme:
Due to the non-compatibility of Windows 10 to use third party themes we are going to use an app to patch our new themes. There are few tools for that, such as SecureUxThemem, UltraUXThemePatcher etc … We have already seen a tutorial about UltraUXThemePatcher in above section. For this we will use SecureUxThemem.
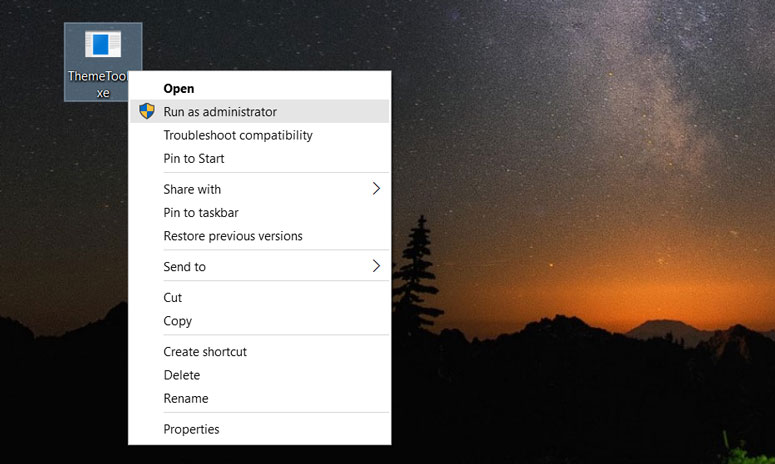
i) Download SecureUxThemem from here and run it as Administrator in your Windows 10.
ii) Click yes, if you click on it will open the terms and conditions page. After clicking yes you will get a view like this.
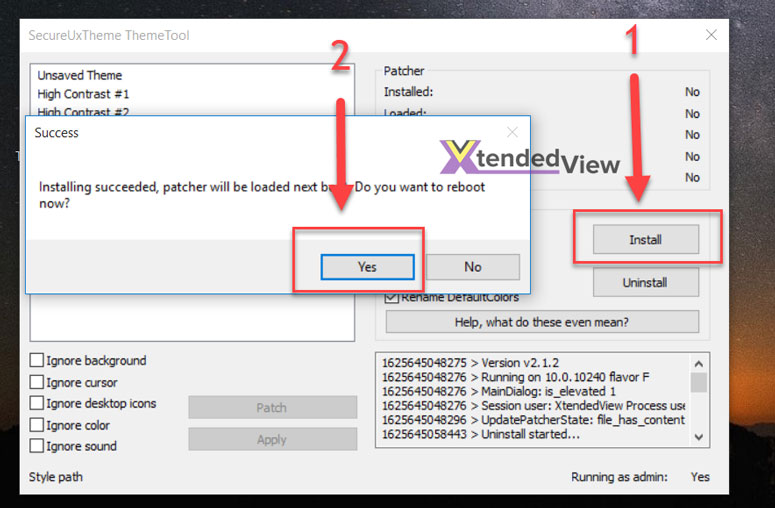
First, click Install and then Yes. After that, your PC will be rebooted.
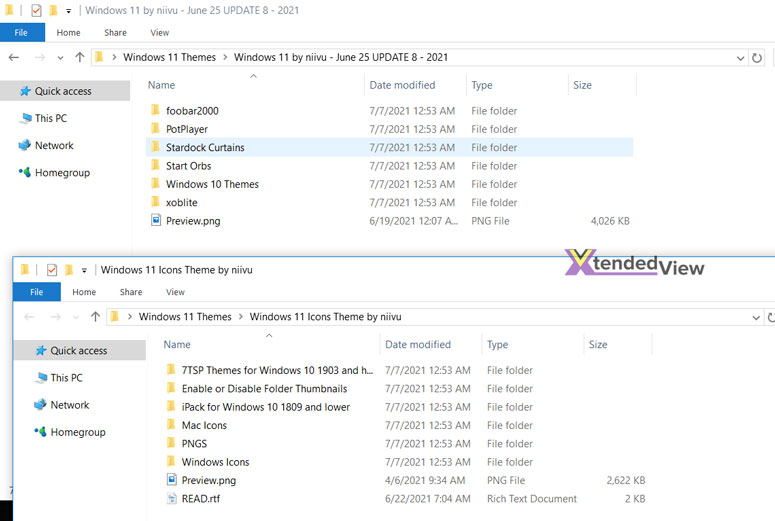
iii) Now you need to create a free account on deviantart.com and download Windows 11 for Windows 10 and Windows 11 Icon Theme from deviantart.com. You will get the following files and folder when you extract it.
iv) In one of those folders you will find two themes. Regular and thick taskbar. For example, I am showing about the Regular theme.
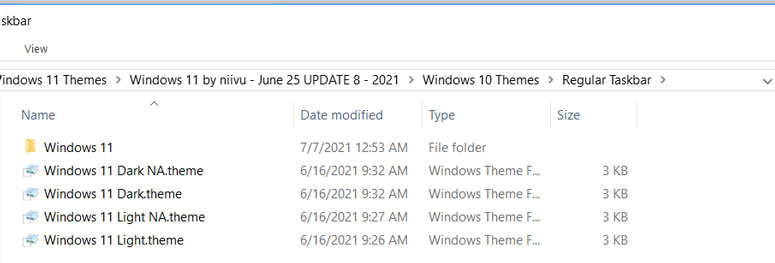
Simply copy all this content to C:\Windows\Resources\Themes
v) Now open SecureUxThemem and run it as administrator. Now you can see the themes that we have pasted in the Themes folder.
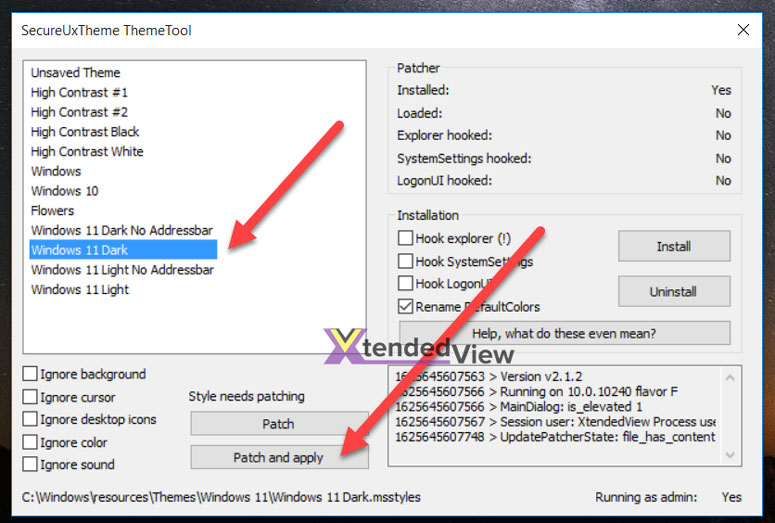
No simply select the theme and click on Patch and Apply.
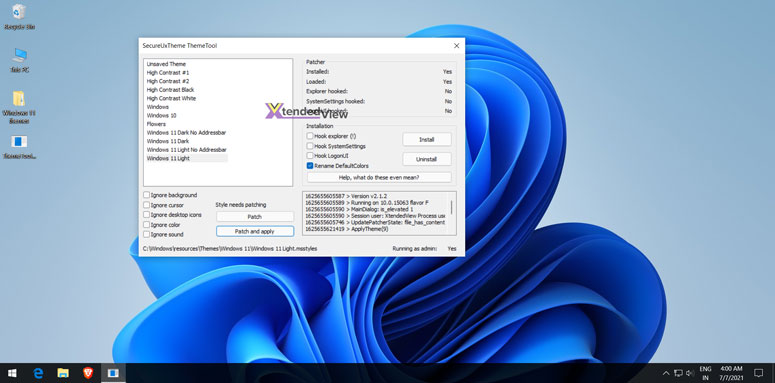
You will get that theme active. You will get something like the look.
2) The Icons:
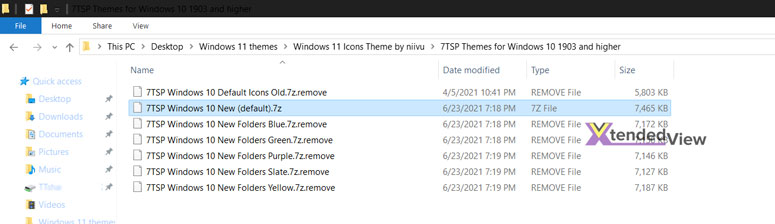
i) Download and install 7TSP (Seven Theme Source Patcher). Due to Deviantart policy they are not allowing to upload direct exe or theme files there. So you need to rename the extracted file to .exe, see the image below.
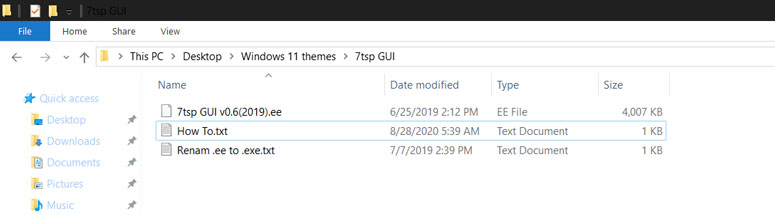
ii) Also rename earlier downloaded and extracted files (Windows 11 Icon Theme from deviantart.com) to .7z see image below to understand it.
iii) Now open 7TSP and select the theme icon file by clicking Add a Custom Pack button. Then click on Start Patching.
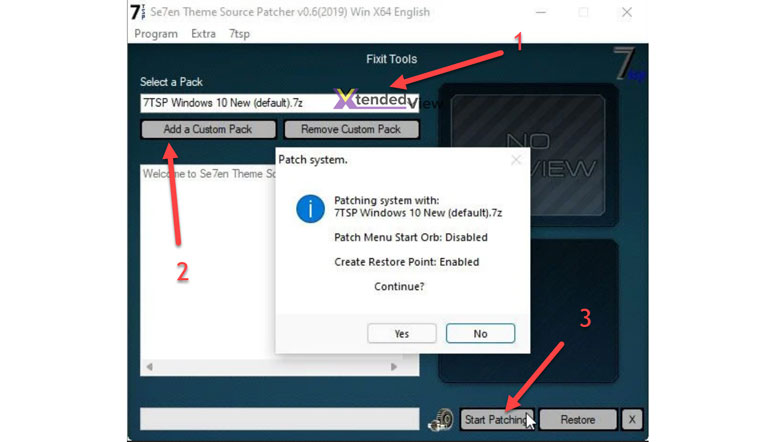
Once this complete, your icons and overall look will change that is very similar to Windows 11.
4) Taskbar:
To change the look of Taskbar i.e. brining it to the centre we will use another app named TaskbarX.
i) Please download the older version 1.6.9.0 of from here. It is a non-installable file.

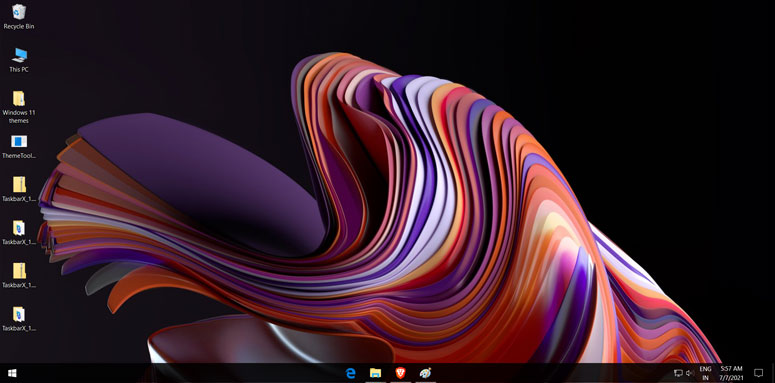
ii) Click on Apply and it will change your task buttons to centre.
The final look will be something like this:
Can I Get the Leaked ISO File?
Windows operating system is a sole property of Microsoft Corporation. They have an official tool to upgrade to Windows 11. So for obvious reasons, we can’t share the file here. You can upgrade it for free of cost from Windows 10 to Windows 11 if you have a supporting hardware.
Parting Words
Don’t be disappointed to have not got the ISO file. It’s just an early build probably with a few bugs. You should wait for the final release. Better yet, download the Windows 11 theme and wallpapers we shared, to transform your Windows 10 device to look like the latest version. Have you got any other Windows 11 skin pack? Don’t forget to share it with us in the comment section down below.
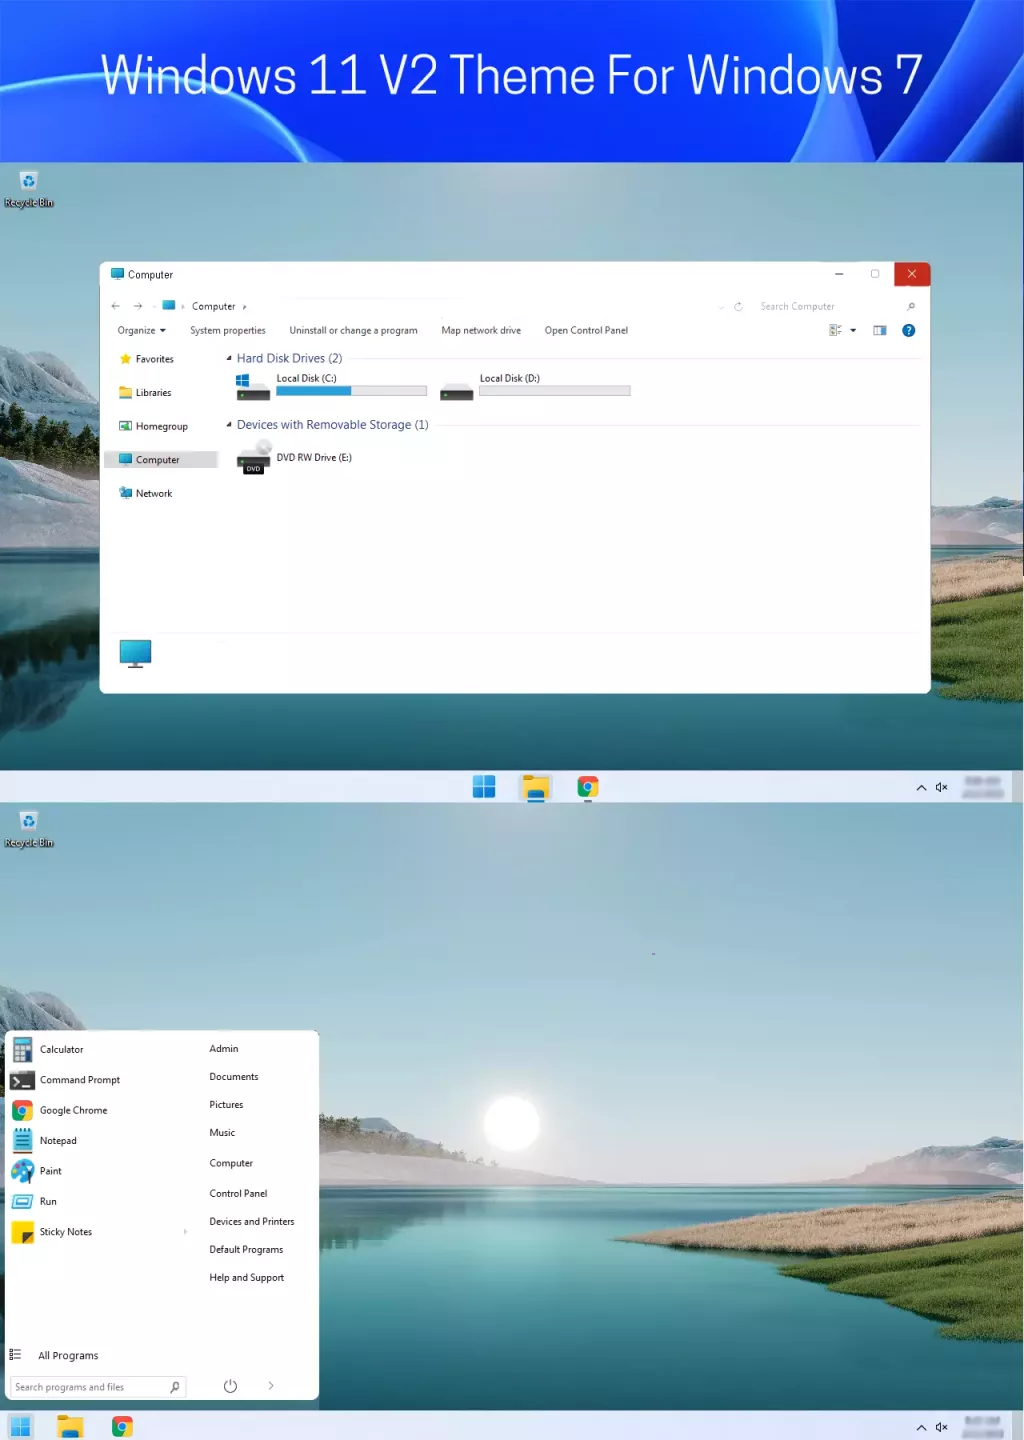
Windows 11 has been released by Microsoft and most users are highly impressed by the Windows 11 GUI (Graphical User Interface). The hardware requirements for running Windows 11 are a bit high for the users who have an old computer which can run only Windows 7. However, such users can enjoy the GUI of Windows 11 on their existing low-power computer by installing the Windows 11 theme. In this tutorial, we will describe in simple steps how to download Windows 11 theme for Windows 7 and then how to set Windows 11 theme so that you can enjoy its user-friendly interface.
Benefits & Risks of Installing Windows 11 Theme
When you install Windows 11 theme on your computer, then you get certain benefits, but you also expose your computer to certain risks. Therefore, you must know about both these factors before starting the installation of Windows 11 theme on Windows 10, 8, 7 operating systems.
A) Benefits
- Low Risk Install: The foremost benefit of installing Windows 11 theme is that you can enjoy its user interface on your computer without taking the risk of installing Windows 11. Maybe your computer doesn’t support Windows 11 or your data may get damaged while installing the new OS. However, you can save yourself from these situations by installing only the Windows 11 theme.
- Saves Time: The installation of Windows 11 theme gets completed in just a few minutes. While installing the new Windows 11 OS can take a lot of time depending upon the operating system which you are upgrading from.
- Hardware Doesn’t Matter: The minimum hardware requirements for Windows 11 are quite high for users who are running low-power computers. However, when you install Windows 11 theme, then your computer is basically running the old OS, but only its GUI has been altered.
B) Risks
- Install Carefully: While following the installation procedure, make sure that you follow the steps in the right order. Otherwise, the original GUI of your OS may be damaged. However, you can easily counter this problem by creating a restore point before starting the installation of the Windows 11 theme.
Now that you know the benefits and risks involved with the installation of Windows 11 theme on Windows 7, 8, 10 operating systems. It’s time to learn about the whole process.
Create System Restore Point before start
You must create a system restore point before installing the Windows 11 theme. This step is extremely important because if the Windows 11 theme installation goes bad, then you can easily restore the original settings and start using your computer normally. Follow the steps given below to create a system restore point in the Windows 7 OS. You can follow the same steps for the other versions of the Windows operating system as well.
- Click the ‘Start’ button, in the search box type ‘create a restore’ and choose ‘Create a restore point’ from the search results.
- In the System Properties window, choose ‘C’ drive and click on the ‘Configure’ button.
- In the Configure window, make sure under Restore Settings the ‘Restore system settings and previous versions of files’ option is selected, then click on the ‘OK’ button.
- Click on the ‘Create’ button to proceed.
- In the Create a restore point window, type a name for the restore point, we typed ‘create’, then click on the ‘Create’ button.
- Wait for the creation of the restore point.
- When the restore point is created successfully, then click on the ‘Close’ button.
- Click on the ‘OK’ button on the System Properties window.
That’s it, you have successfully created a system restore point. Now you can start the installation of the Windows 11 theme and if something goes wrong, then you can always use the recently created restore point to get back to the present state.
The complete process to install the new Windows 11 theme is a multi-stage operation. You will have to complete the process using multiple applications, which you can download by using the links provided below. We have described the steps for Windows 7 operating system, but you can follow the same steps for Windows 8 and Windows 10 OS as well.
At any stage, if you feel something is wrong, then you can use the previously created Restore Point to reset your Windows to its normal condition.
1) Install Windows Theme Patcher
You should start the Windows 11 theme installation by patching your Windows OS theme. Before patching your Windows OS theme, you must download the Windows 7 theme patcher application. Follow the steps given below.
- Download the Windows 7 Theme Patcher zip file from this link and save the zip file on your Windows desktop.
- Right click the Windows 7 Theme Patcher zip file and select ‘Extract files’ from the options.
- In the Extraction window, make sure that the extraction folder will be on Windows desktop, then click on the ‘OK’ button.
- Go into ‘Windows 7 Theme Patcher’ folder and double click the ‘Windows 7 Theme Patcher’ folder inside it.
- Locate and double click the ‘Theme resource changer’ folder.
- Inside the Theme resource changer folder, you will find two files one for x64 OS and the other for the x86 OS. Choose and right click the file which suits your OS type, then select ‘Run as administrator’ from the options.

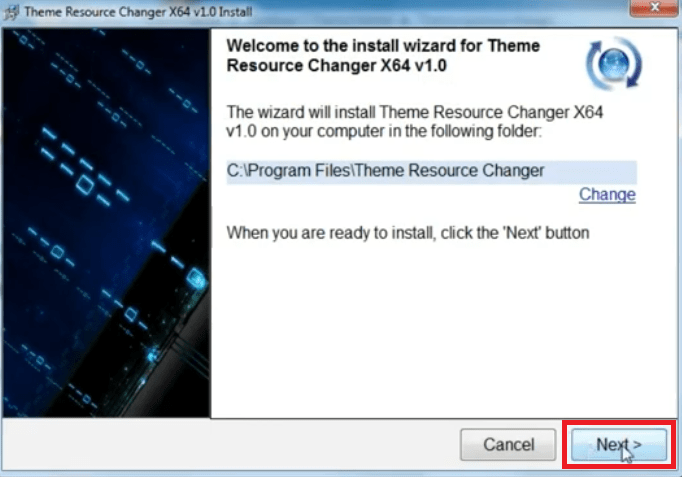
- In the Theme Resource Changer application, click on the ‘Next’ button to proceed.

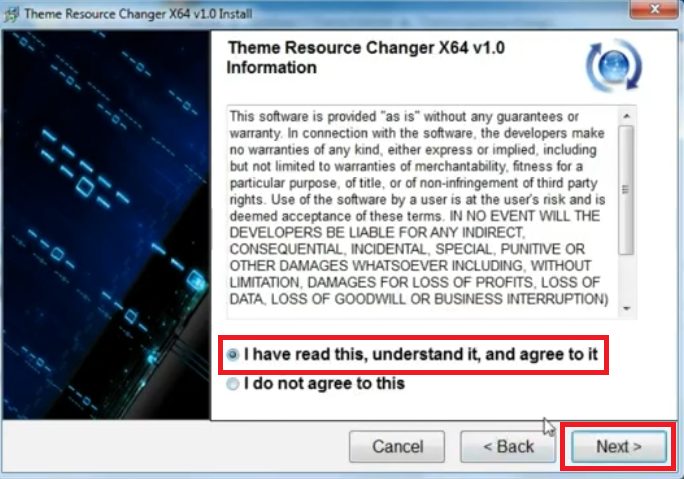
- Accept the agreement by clicking on the ‘I have read this, understand it, and agree to it’ option, then click on the ‘Next’ button.

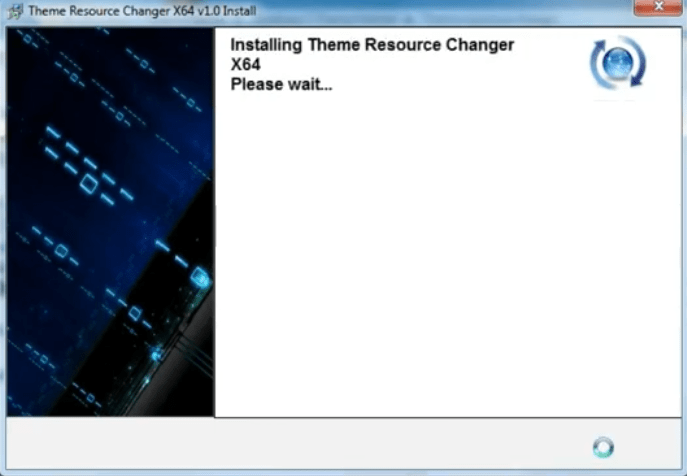
- Wait for the installation of the Theme Resource Changer on your computer.

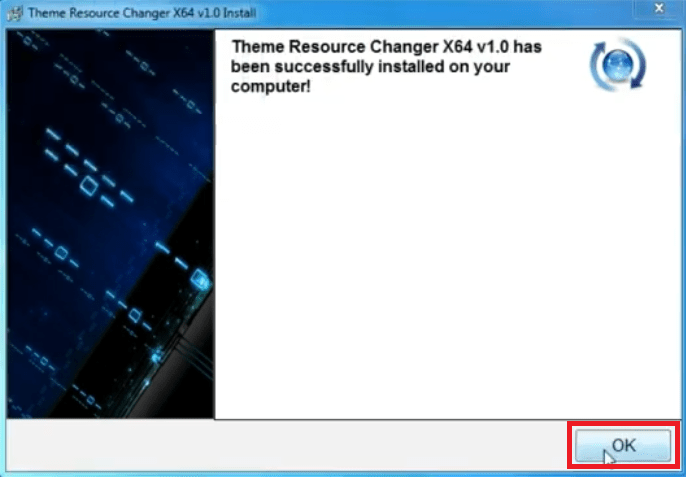
- When you see the message that the installation is successful, then click on the ‘OK’ button to close the application.


That’s it, you have installed Theme Resource Changer on your computer. Now, you need to patch the relevant DLL files on your Windows.
2) Run Universal Theme Patcher
Follow the steps given below to patch the DLL files which are necessary for the alteration of the default theme on your Windows operating system.
- Open the ‘Windows 7 Theme Patcher’ folder on your desktop, then, inside it, double-click to open the ‘Windows 7 Theme Patcher‘ folder.
- In the Windows 7 Theme Patcher folder, locate and double click the ‘Universal Theme Patcher’ folder.
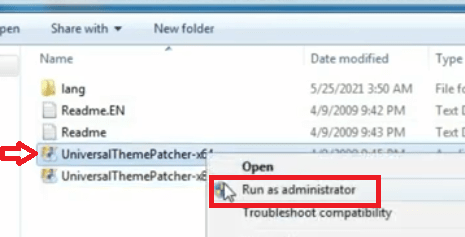
- Inside the Universal Theme Patcher folder, you will find two files, named the ‘UniversalThemePatcher-x64’ and the ‘UniversalThemePatcher-x86’. Choose and right click the file which is related to your OS version, then select ‘Run as administrator’ from the options.

- In the Dialog box, choose your preferred language, then click on the ‘OK’ button.
- Click on the ‘Yes’ button to proceed.
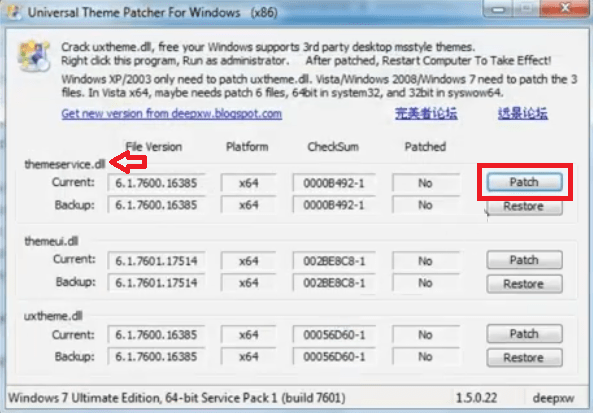
- In the Universal Theme Patcher application, patch the ‘themeservice.dll’ file by clicking on the ‘Patch’ button associated with it.

- Click on the ‘OK’ button to confirm the patch is successful.
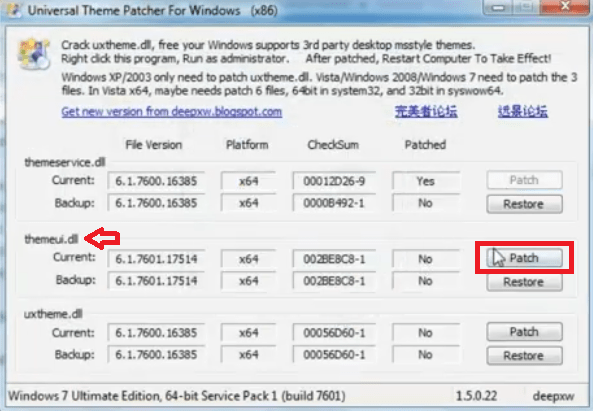
- Patch the ‘themeui.dll’ file by clicking on the ‘Patch’ button related to it.

- Click on the ‘OK’ button to confirm the patch.
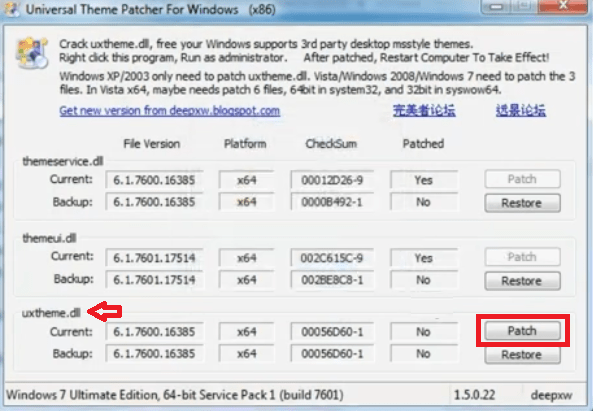
- Patch the ‘uxtheme.dll’ file by clicking on the ‘Patch’ button associated with it.

- Click on the ‘OK’ button to confirm the patch.
- Click on the ‘Yes’ button to restart your computer so that the changes can take effect.
That’s it, you have successfully patched the Windows theme on your Windows computer.
3) Install Windows 11 New Theme
Now that you have successfully patched your Windows theme, it’s time to install the new theme. Follow the steps given below.
- Download the Mac OS X Theme file from this link and save the zip file on the desktop of your Windows.
- Right click on the Mac OS X Theme zip file and choose “Extract files” from the options.
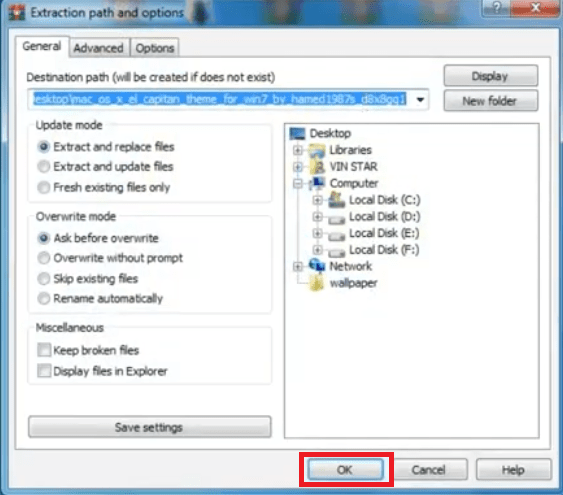
- In the Extraction window, make sure that the extraction folder is on Windows desktop, then click on the ‘OK’ button to proceed.

- Go into ‘mac os x el capitan’ folder on your desktop and double click the ‘theme’ folder inside it.
- Inside the Theme folder, select and right click the ‘El Capitan’ folder and the ‘El Capitan’ theme file, then choose ‘Copy’ from the options.
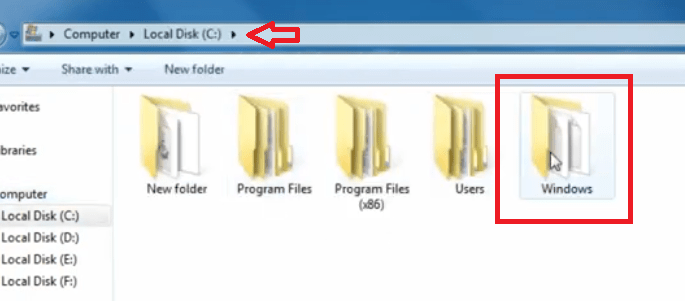
- In the Windows Explorer, go inside the ‘C’ drive and double click to enter ‘Windows’ folder.

- Inside the Windows folder, locate and double click to enter the ‘Resources’ folder.
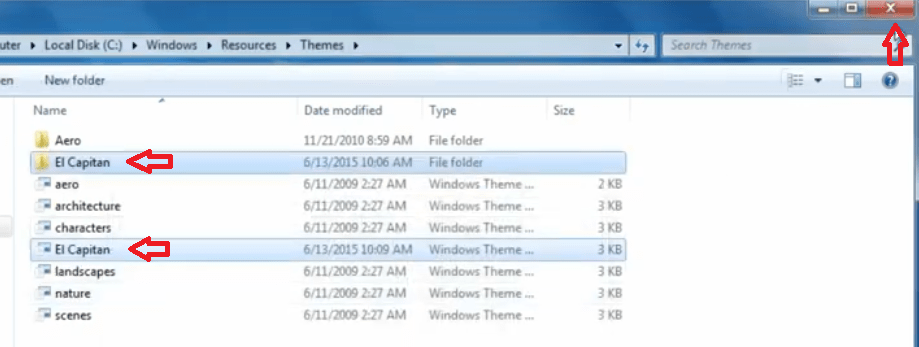
- Inside the Resources folder, double click to enter the ‘Themes’ folder.
- Inside the Themes folder, right click and select ‘Paste’ from the options to paste the files copied in Step 5.
- Click on the ‘Continue’ button to confirm the action.
- When you see that the El Capitan folder and file have been copied into the Themes folder, then ‘Close’ the Themes folder.

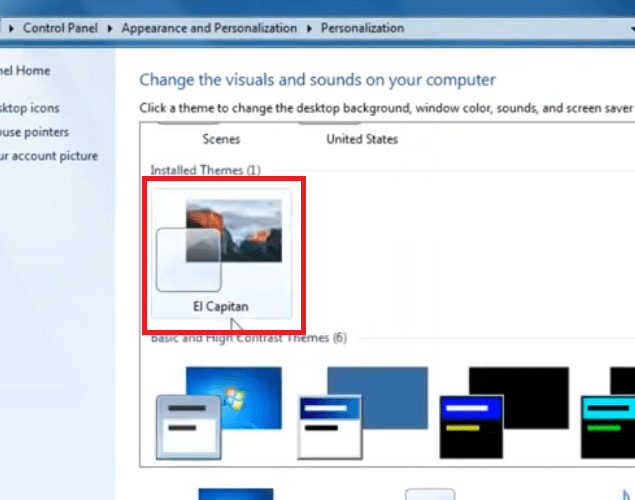
- Now is the time to apply the new theme you just now copied in the Theme folder. To do this, right click on the Windows desktop and choose ‘Personalize’ from the options.
- In the Personalization folder, scroll to the ‘Installed Themes‘ section, then locate and select the ‘El Capitan’ theme.

- Wait for the theme to apply.
- When the theme has been successfully applied, then click on the ‘Close’ button to close the Personalization window.
That’s it, you have successfully installed a new Windows theme. This theme may look like Mac OS, but you need to make some other changes to make this new theme look exactly like the Windows 11 GUI.
4) Install Windows Icons Pack
Although you have installed a new theme that looks very similar to the Windows 11 theme, but there are some important details that doesn’t match with the Windows 11 GUI. One such detail is the icons used in this theme. Therefore, we should first change the icons before moving to other steps.
- Download the Windows 11 Icon Theme file from this link and save the zip file on your Windows desktop.
- Right click on the Windows 11 Icon Theme zip file and choose ‘Extract files’ from the options.
- In the Extraction window, make sure that the extraction folder is on the Windows desktop, then click on the ‘OK’ button to proceed.
- Wait for the files to extract in the designated folder.
- Go into ‘windows 11 icon theme’ folder on your desktop and double click the ‘Windows 11 Icons Theme’ folder inside it.
- In the Windows 11 Icons Theme folder, double click to open ‘iPack for Windows 10 1809 and lower’ folder.
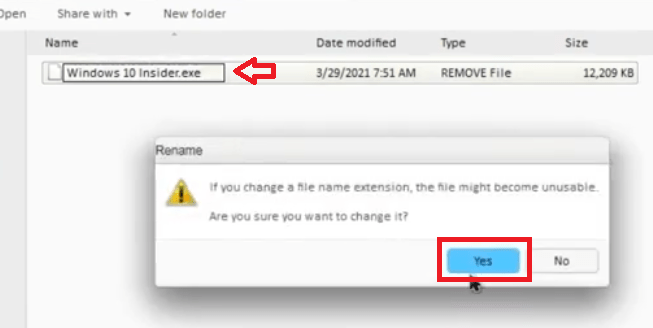
- Right click the file inside the folder and choose ‘Rename’ from the options.
- Rename the file to ‘Windows 10 Insider.exe’, then click on the ‘Yes’ button to confirm the new name.

- Double click the ‘Windows 10 Insider’ file to run it.
- Wait for its files to extract on your computer.
- In the Welcome screen, choose the ‘I accept the agreement’ option, then click on the ‘Next’ button.
- Select the option ‘Patch all files’, then click on the ‘Next’ button to proceed.
- Click on the ‘Yes’ button to create the restore point.
- Wait for the creation of the restore point.
- Wait as the application to complete its operation.
- When the operation is finished, then click on the ‘Finish’ button to restart your computer.
That’s it, you have successfully patched the Windows icons on your computer and they are ready to be replaced. Now is the time to update the wallpaper, then we will replace the old icons with the new ones.
5) Set up Windows 11 Wallpaper
Windows 11 uses a unique set of wallpapers which gives a distinct look to the OS. Follow the steps given below to arrange and update these wallpapers.
- Visit this link and you will find ‘img0’ and ‘img19’ files, which are similar to Windows 11 generic wallpapers. Select, copy, and save these wallpapers in the “wallpaper” folder on your Windows desktop. You may download Windows 11 wallpaper as well.
- Double-click the “wallpaper” folder on the desktop.
- Select and right click the ‘img0’ file and choose ‘Set as desktop background’ from the options.
That’s it, you have changed your default Windows wallpaper to the Windows 11 wallpaper.
6) Execute Windows 11 theme Setup
Now that you have changed your Windows wallpaper, it’s time to makes some other minor changes which are necessary to create a look which is exactly like Windows 11. Follow the steps given below.
- Download the Windows 11 Setup file and save the zip file on your Windows desktop.
- Right click the Windows 11 Setup zip file and choose ‘Extract files’ from the options.
- In the Extraction window, ensure that the extraction folder is on the Windows desktop, then click on the ‘OK’ button to proceed.
- Go into ‘Windows 11 Setup’ folder on your desktop and double click the ‘Windows 11 Setup’ folder inside it.
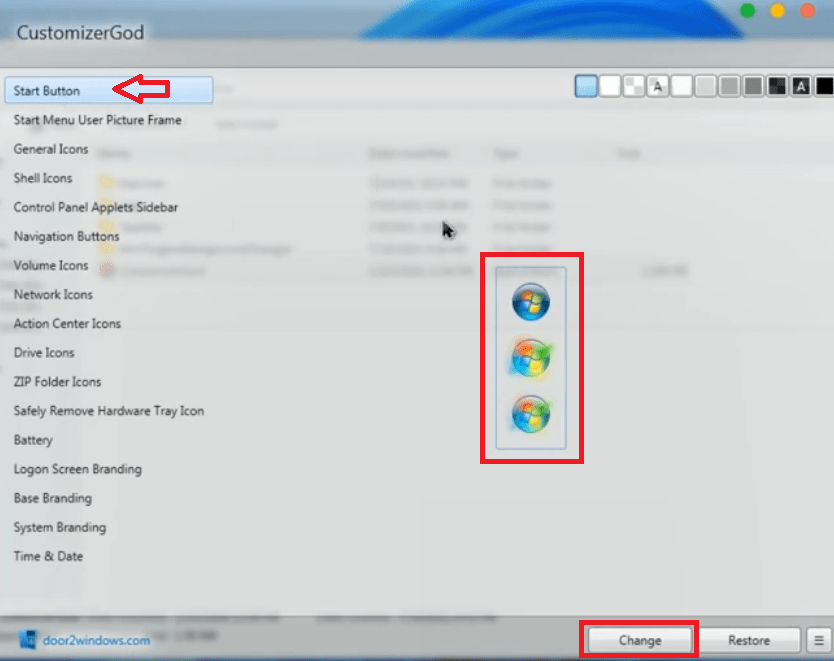
- In the Windows 11 Setup folder, double click to run the ‘CustomizerGod’ application file.
- In the CustomizerGod window, choose the ‘Start Button’ option, select ‘start button‘ icons, then click on the ‘Change’ button.

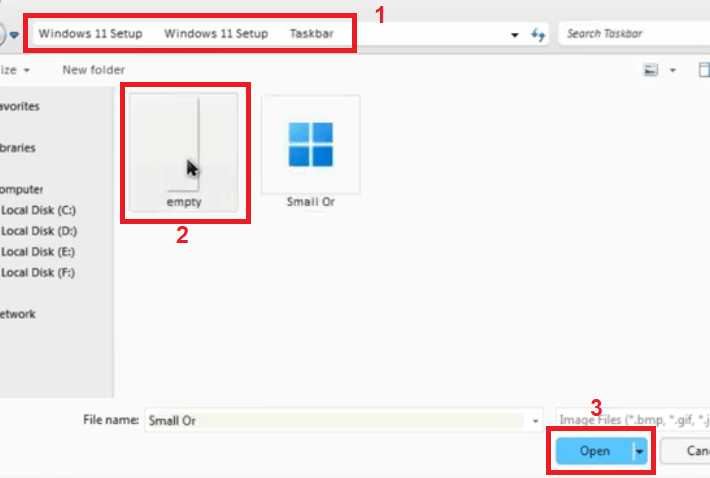
- In the Browse window, go to ‘Windows 11 Setup\Windows 11 Setup\Taskbar’ folder, then click to select ‘empty’ file. Finally, click on the ‘Open’ button.

- You will see that the ‘Start button icon’ will be removed from your Windows Taskbar, just like in Windows 11.
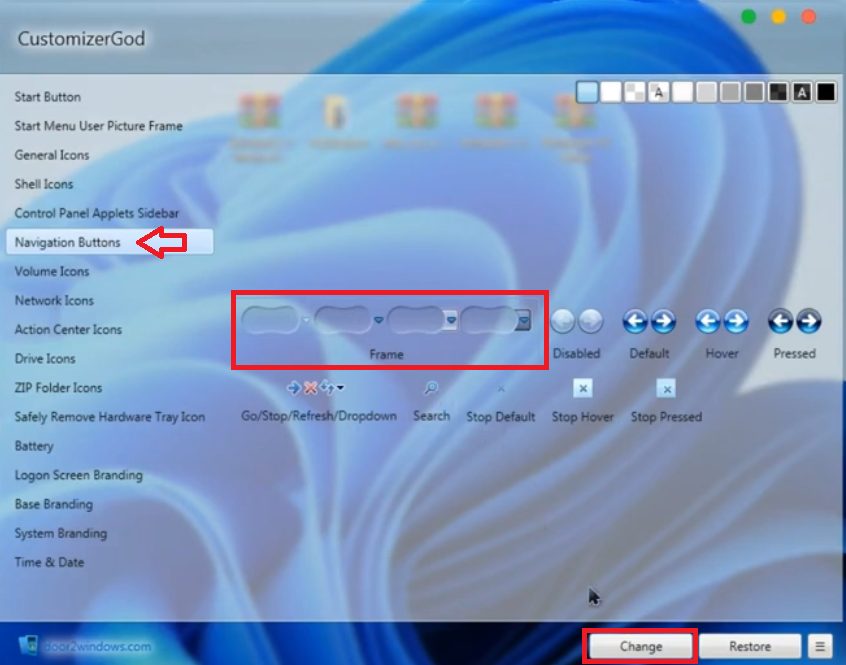
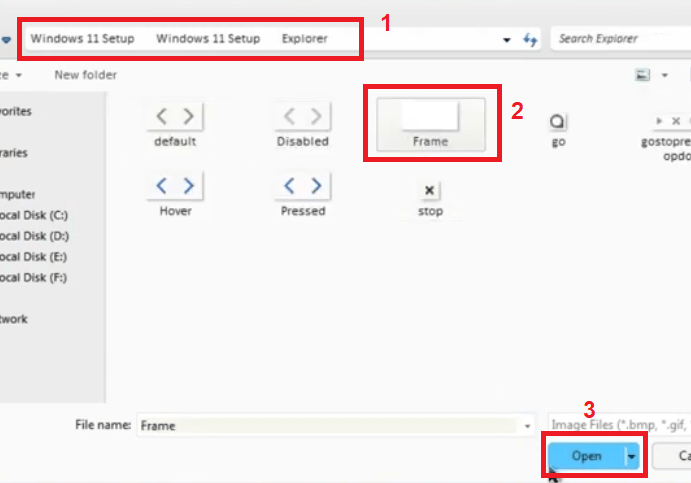
- In the CustomizerGod window, choose the ‘Navigation Buttons’ option, select ‘Frame’ icon, then click on the ‘Change’ button.

- In the Browse window, go to ‘Windows 11 Setup\Windows 11 Setup\Explorer’ folder, then click to select ‘Frame’ file. Finally, click on the ‘Open’ button.

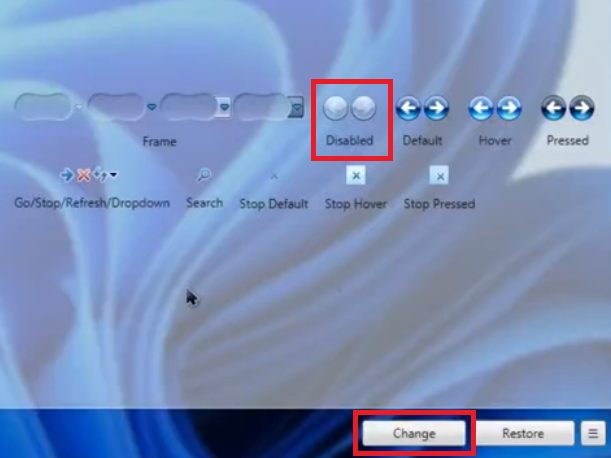
- Under Navigation Buttons option, choose ‘Disabled’ icon, then click on the ‘Change’ button.

- Under ‘Windows 11 Setup\Windows 11 Setup\Explorer’ folder, select ‘Disabled’ file, then click on the ‘Open’ button.
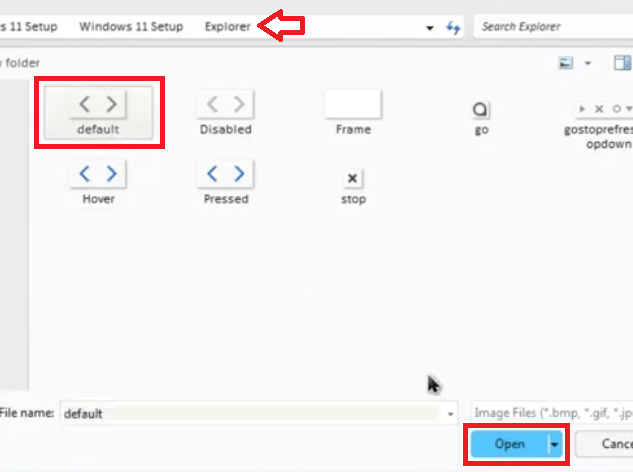
- Under Navigation Buttons option, choose ‘default’ icon, then click on the ‘Change’ button.
- Under ‘Windows 11 Setup\Windows 11 Setup\Explorer’ folder, select ‘default’ file, then click on the ‘Open’ button.

- Under Navigation Buttons option, choose ‘Hover’ icon, then click on the ‘Change’ button.
- Under ‘Windows 11 Setup\Windows 11 Setup\Explorer’ folder, select ‘Hover’ file, then click on the ‘Open’ button.
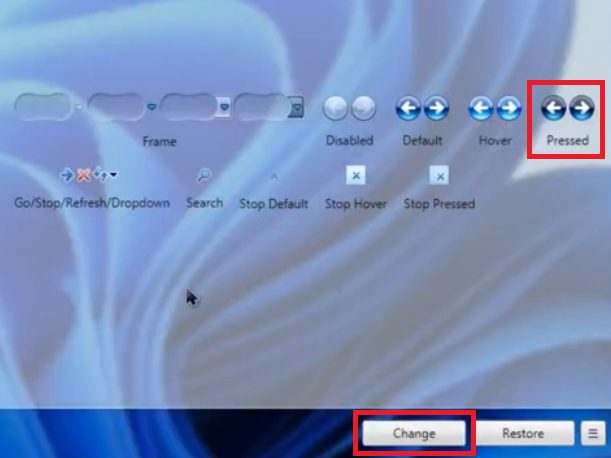
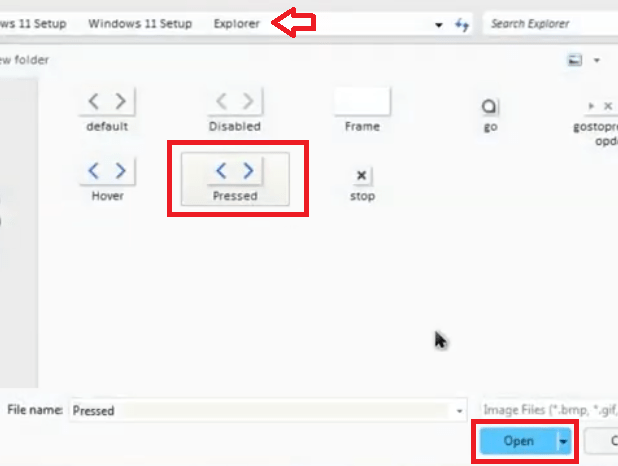
- Under Navigation Buttons option, choose ‘Pressed’ icon, then click on the ‘Change’ button.

- Under ‘Windows 11 Setup\Windows 11 Setup\Explorer’ folder, select ‘Pressed’ file, then click on the ‘Open’ button.

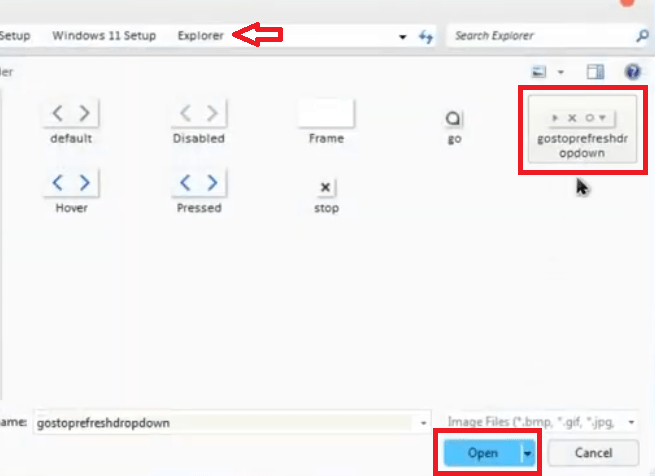
- Under Navigation Buttons option, choose ‘Go/Stop/Refresh/Dropdown’ icon, then click on the ‘Change’ button.
- Under ‘Windows 11 Setup\Windows 11 Setup\Explorer’ folder, select ‘gostoprefreshdropdown’ file, then click on the ‘Open’ button.

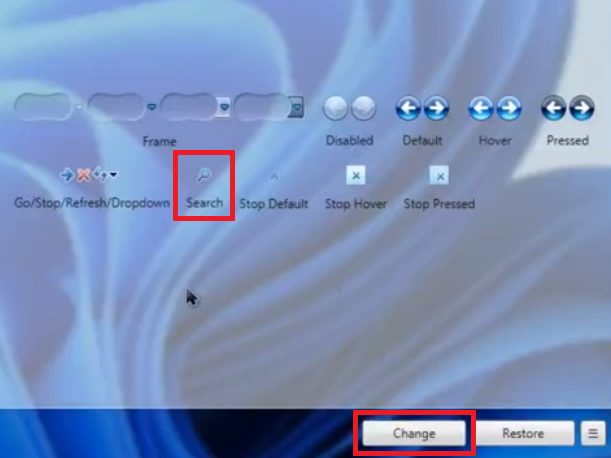
- Under Navigation Buttons option, choose ‘Search’ icon, then click on the ‘Change’ button.

- Under ‘Windows 11 Setup\Windows 11 Setup\Explorer’ folder, select ‘go’ file, then click on the ‘Open’ button.
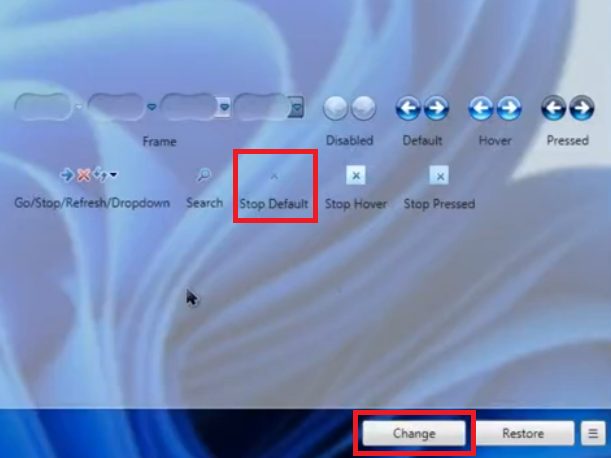
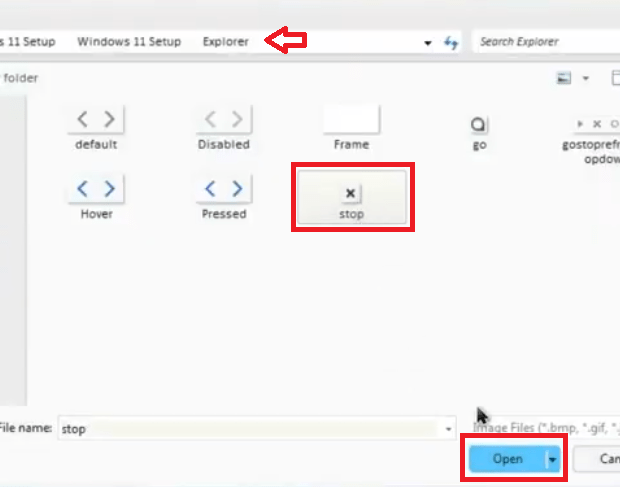
- Under Navigation Buttons option, choose ‘Stop Default’ icon, then click on the ‘Change’ button.

- Under ‘Windows 11 Setup\Windows 11 Setup\Explorer’ folder, select ‘stop’ file, then click on the ‘Open’ button.

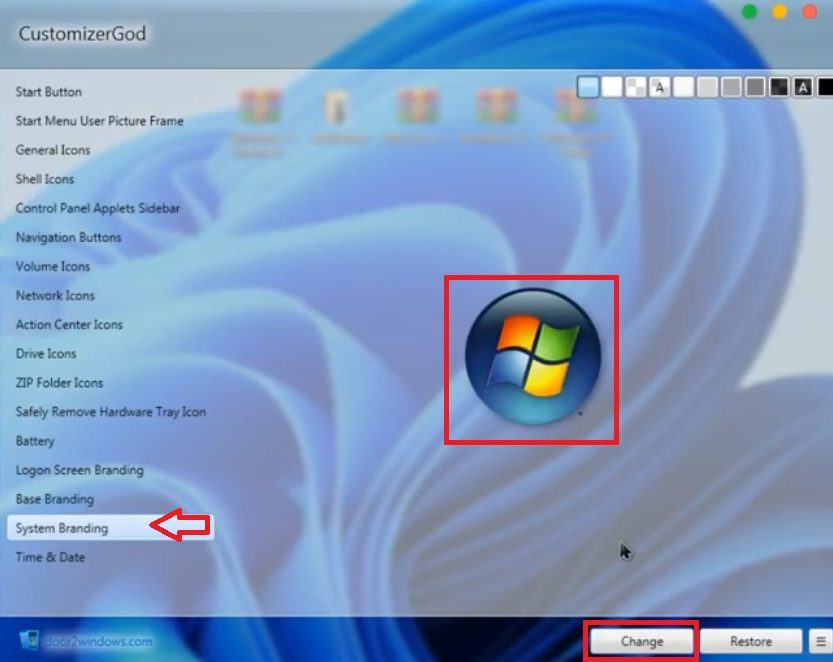
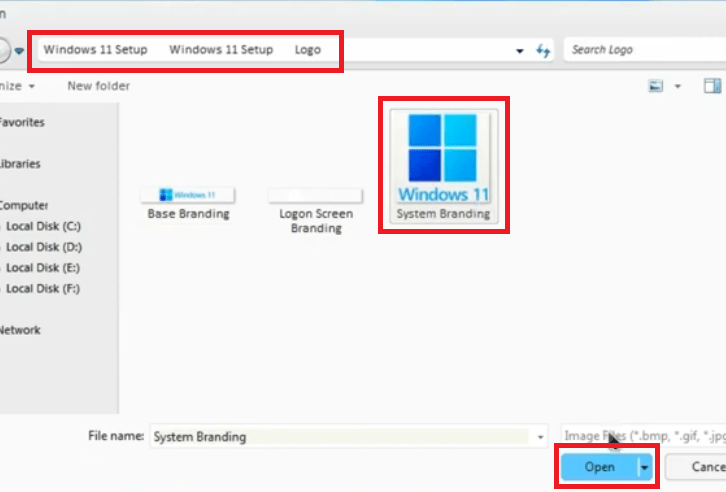
- In the CustomizerGod window, choose the ‘System Branding’ option, select ‘Windows Logo’ icon, then click on the ‘Change’ button.

- In the Browse window, go to ‘Windows 11 Setup\Windows 11 Setup\Logo’ folder, then click to select ‘System Branding’ file. Finally, click on the ‘Open’ button.

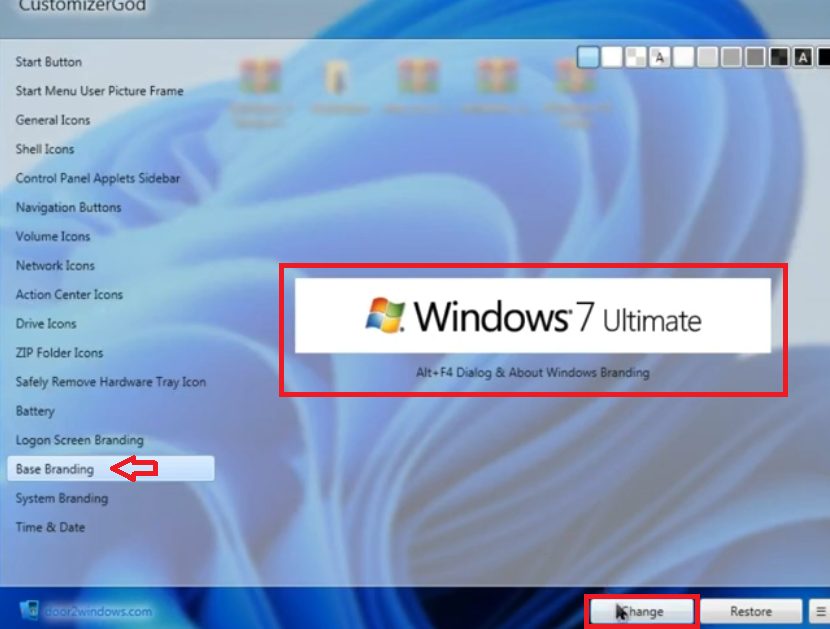
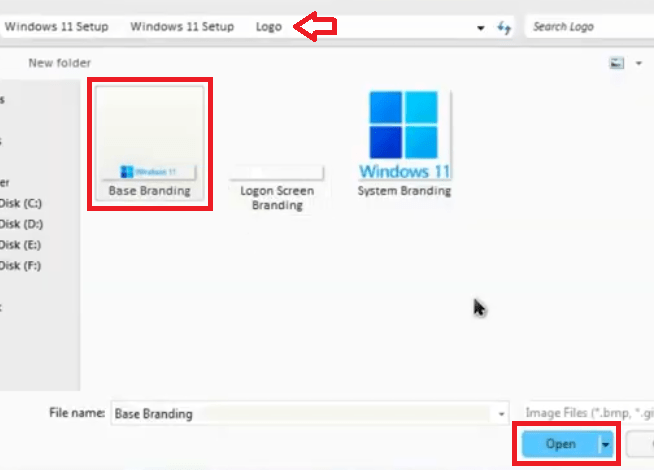
- In the CustomizerGod window, choose the ‘Base Branding’ option, select ‘Windows Branding’ icon, then click on the ‘Change’ button.

- Under ‘Windows 11 Setup\Windows 11 Setup\Logo’ folder, choose the ‘Base Branding’ file, then click on the ‘Open’ button.

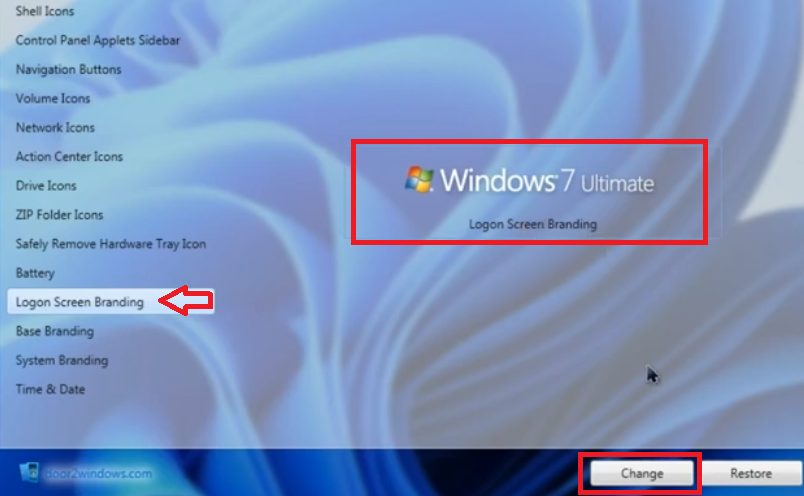
- In the CustomizerGod window, choose the ‘Logon Screen Branding’ option, select ‘Windows Logon’ icon, then click on the ‘Change’ button.

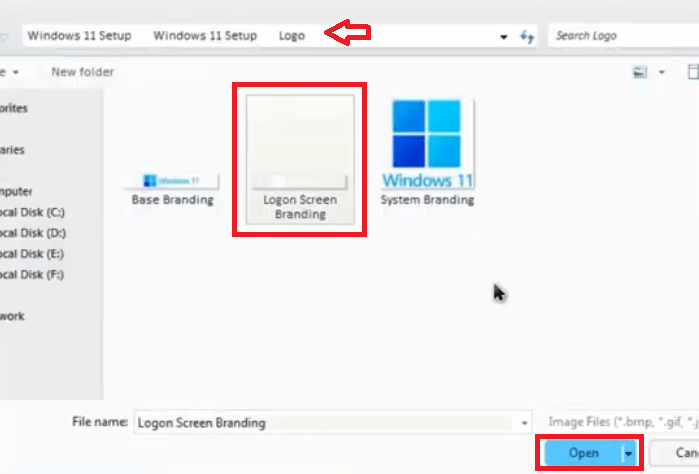
- Under the ‘Windows 11 Setup\Windows 11 Setup\Logo’ folder, choose the ‘Logon Screen Branding’ file, then click on the ‘Open’ button.

- Finally, click on the ‘Close’ button to close the CustiomizerGod application.
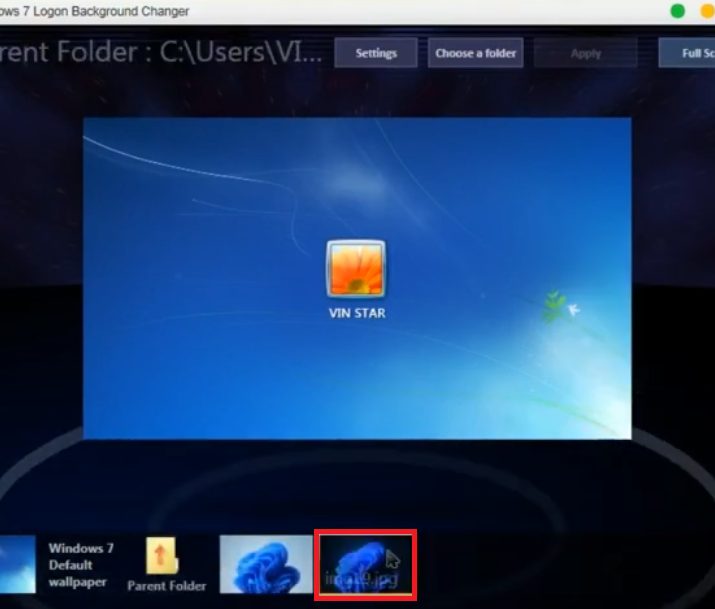
- Go inside ‘Windows 11 Setup\Windows 11 Setup’ folder on the desktop, then double click to enter the ‘Win7LogonBackgroundChanger’ folder.
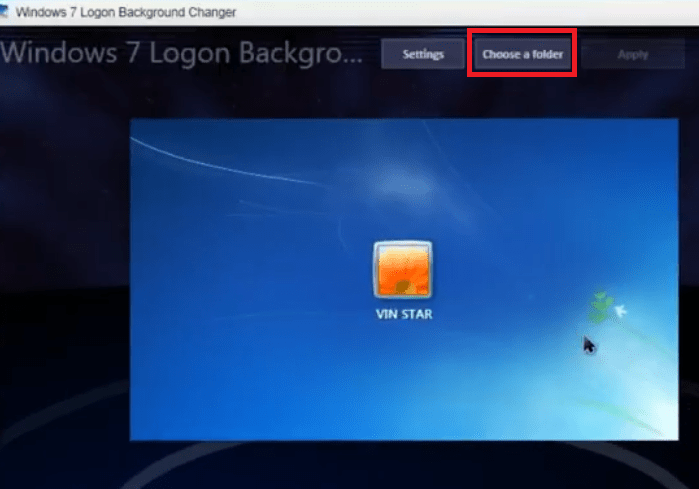
- Double click to run the ‘Win7LogonBackgroundChanger’ file.
- In the Windows 7 Logon Background Changer application, click on the ‘Choose a folder’ button.

- In the Browse window, browse to ‘wallpaper’ folder on your desktop where you saved Windows 11 wallpapers, then click on the ‘OK’ button.
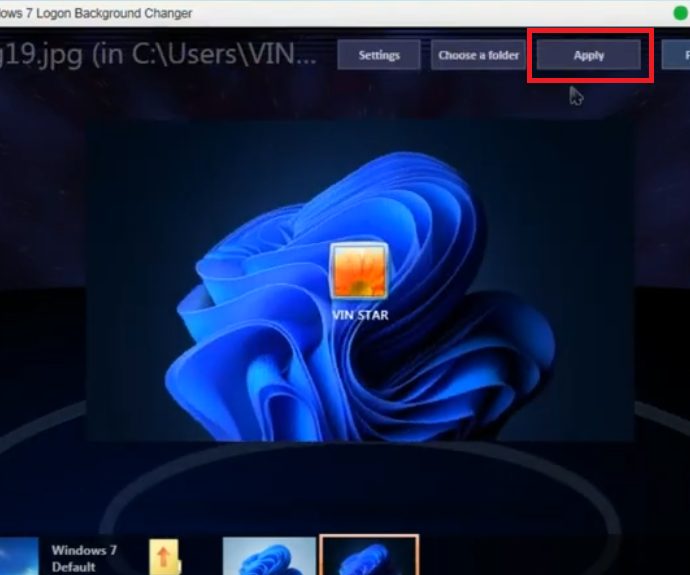
- Select the ‘img19’ file.

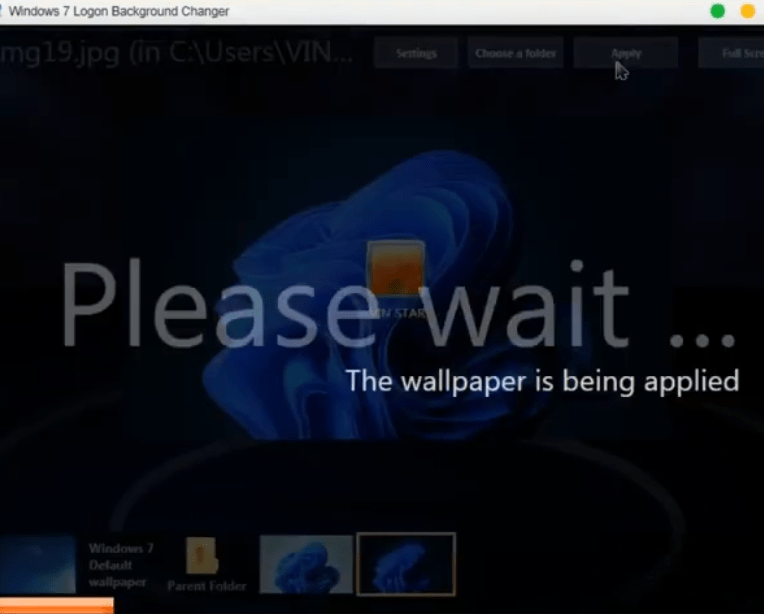
- Click on the ‘Apply’ button.

- Wait for the wallpaper to apply.

- Finally, close the application by clicking on the ‘Close’ button.
That’s it, you have successfully changed all the icons, logos and wallpapers on your Windows 7 to the ones which are identical to the Windows 11 interface. Now is the time to make the Windows Taskbar look exactly as in the Windows 11.
7) Set your Taskbar as like Windows 11
In the Windows 11, the Start button is at the center of the Taskbar along with other quick launch icons, which gives a distinct look to the Windows Desktop. Follow the steps given below to make your Taskbar look like that.
- Right-click on the Windows Taskbar, click on ‘Toolbars’ and select ‘Links’ from the options.
- Right click on the Windows Taskbar, select ‘Lock the Taskbar’ from the options.
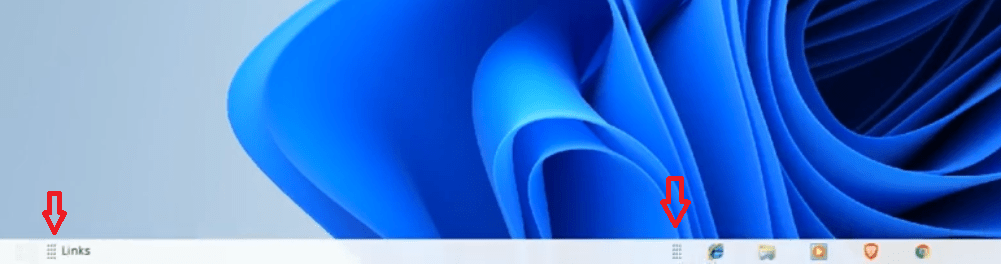
- Click, press and hold the ‘Links’ on the Taskbar and drag it to the right side towards the Quick Launch icons.
- Now, click, press and hold the ‘Quick Launch’ on the Taskbar and drag it to the left side towards Links, until it crosses over to the left side of the Links.
- Make sure that Quick Launch icons are placed in the middle of the Windows Taskbar and on the left side of the Links.

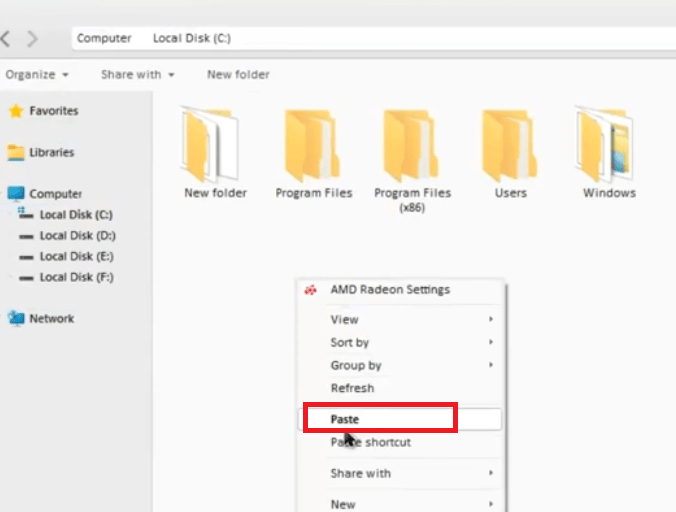
- Go inside ‘Windows 11 Setup\Windows 11 Setup’ folder on the desktop, then locate and right click the ‘Taskbar’ folder and choose ‘Copy’ from the options.
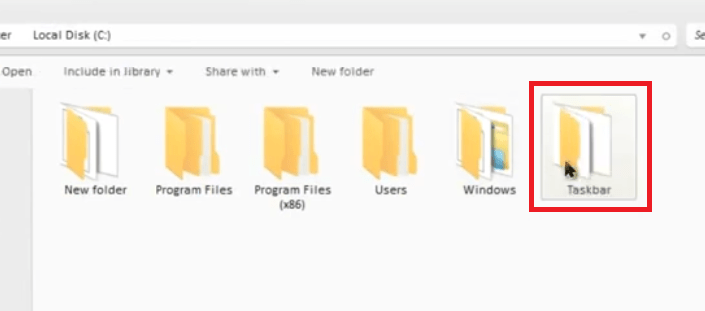
- In the Windows Explorer, go to the ‘C’ drive, right click and select ‘Paste’ from the options.

- Double click the newly copied ‘Taskbar’ folder to open it.

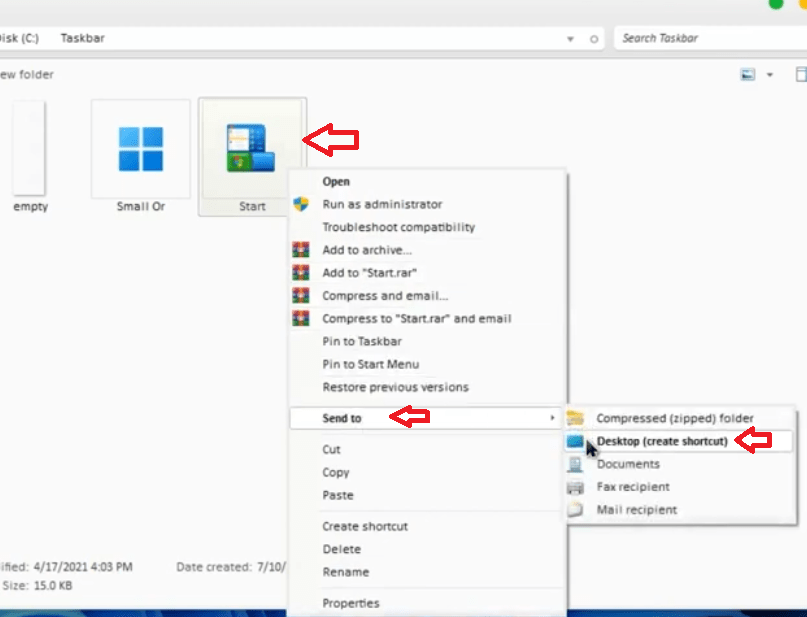
- Locate and right click the ‘Start’ file, choose ‘Send to’ option, then click on the ‘Desktop (create shortcut)’ option. This will create a Start Shortcut on your Windows Desktop.

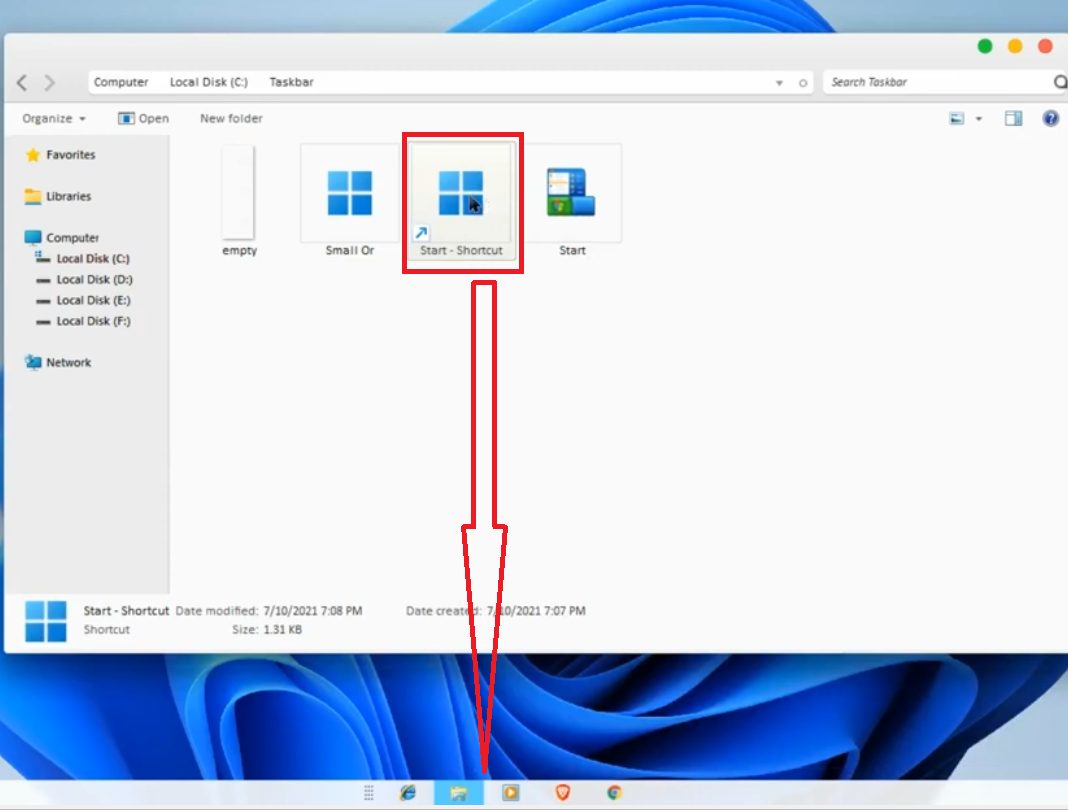
- Copy and Paste the ‘Start – Shortcut’ from your Windows Desktop into the Taskbar folder.
- Right click the ‘Start – Shortcut’ file and choose ‘Properties’ from the options.
- In the Properties window, under the ‘Shortcut’ tab, click on the ‘Change Icon’ button.
- In the Change Icon window, click on the ‘Browse’ button.
- Browse to ‘C:\Taskbar’ folder and choose ‘Small Or’ icon, then click on the ‘Open’ button.
- Click on the ‘OK’ button to proceed.
- In the Properties window, click on the ‘OK’ button to apply the changes.
- Now, you can see that the Start icon logo has changed to Windows 11 Start logo. Next, you should click, hold and drag the ‘Start – Shortcut’ to the middle of the Quick Launch on your Windows Taskbar.

- Right click the Windows Taskbar and choose ‘Show title’ from the options. Doing this will remove ‘Links’ tag from your Taskbar.
- Again right click the Windows Taskbar and choose ‘Lock the taskbar’ from the options.
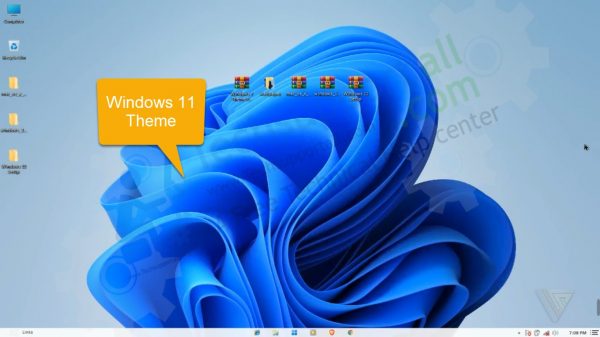
- You will now see the Windows Start logo is right in the middle of the Windows Taskbar just as in Windows 11.

That’s it, you have completely transformed your Windows 7 theme to Windows 11 theme.
If you want to set a Windows 10 theme on your Windows 7 computer then you can download Windows 10 theme for Windows 7 here.
There are many users who want to experience the GUI of Windows 11 without installing it on their computer. For all such users,, we have shared the complete process to download Windows 11 theme for Windows 10, 8, 7 operating systems. Although the steps mentioned above may seem complicated and lengthy, if you perform them in the order they have been mentioned, then you will get the desired results.