
Некоторые пользователи могут столкнуться с ситуацией, когда встроенные приложения Windows, а также приложения, скачанные из Microsoft Store, вдруг приобретают английский язык интерфейса несмотря на то, что сама система — русскоязычная, при этом в самих приложениях переключение языка обычно не предусмотрено.
В этой инструкции подробно о том, почему приложения Windows 11 или Windows 10 стали на английском языке и как это исправить, а также дополнительная информация, которая может пригодиться.
Изменение языка встроенных приложений и приложений Microsoft Store в Windows 11/10

Язык встроенных приложений и других приложений из Microsoft Store, поддерживающих несколько языков интерфейса зависит не от того, в какой версии Windows они установлены, а от установленного приоритета языков ввода. Если первым в списке языков окажется английский, то и приложения будут на английском.
Самый простой метод вернуть нужный язык интерфейса — изменить соответствующий порядок языков, для этого:
- Зайдите в Параметры — Время и язык — «Язык и регион» в Windows 11 или «Язык» в Windows 10
- Вы увидите список языков. Приложения будут отображаться на том языке, который стоит первым в списке. Чтобы переместить язык на другое место в Windows 11 перетащите его мышью в нужную позицию с помощью точек слева.

- В Windows 10 для изменения порядка языков, нажмите по какому-либо языку, а затем используйте кнопку со стрелкой для изменения его позиции.


Сразу после того, как нужный, например — русский, язык оказался на первой позиции, достаточно перезапустить приложения и они также будут запущены на русском языке, при условии, что он поддерживается приложением.
Изменение порядка языков ввода без изменения языка приложений
Если вам требуется, чтобы приложения были на русском языке, при этом первым языком ввода был английский, достичь этого можно следующим образом:
- Зайдите в Параметры — Время и язык — Ввод — Дополнительные параметры клавиатуры.
- В поле «Переопределение метода ввода по умолчанию» измените опцию «Использовать список языков» на нужный вам язык.


Эти действия изменят язык ввода по умолчанию без влияния на язык интерфейса приложений.
POCO, ACE, Loki и другие продвинутые C++ библиотеки
NullReferenced 13.05.2025
В C++ разработки существует такое обилие библиотек, что порой кажется, будто ты заблудился в дремучем лесу. И среди этого многообразия POCO (Portable Components) – как маяк для тех, кто ищет. . .
Паттерны проектирования GoF на C#
UnmanagedCoder 13.05.2025
Вы наверняка сталкивались с ситуациями, когда код разрастается до неприличных размеров, а его поддержка становится настоящим испытанием. Именно в такие моменты на помощь приходят паттерны Gang of. . .
Создаем CLI приложение на Python с Prompt Toolkit
py-thonny 13.05.2025
Современные командные интерфейсы давно перестали быть черно-белыми текстовыми программами, которые многие помнят по старым операционным системам. CLI сегодня – это мощные, интуитивные и даже. . .
Конвейеры ETL с Apache Airflow и Python
AI_Generated 13.05.2025
ETL-конвейеры – это набор процессов, отвечающих за извлечение данных из различных источников (Extract), их преобразование в нужный формат (Transform) и загрузку в целевое хранилище (Load). . . .
Выполнение асинхронных задач в Python с asyncio
py-thonny 12.05.2025
Современный мир программирования похож на оживлённый мегаполис – тысячи процессов одновременно требуют внимания, ресурсов и времени. В этих джунглях операций возникают ситуации, когда программа. . .
Работа с gRPC сервисами на C#
UnmanagedCoder 12.05.2025
gRPC (Google Remote Procedure Call) — открытый высокопроизводительный RPC-фреймворк, изначально разработанный компанией Google. Он отличается от традиционых REST-сервисов как минимум тем, что. . .
CQRS (Command Query Responsibility Segregation) на Java
Javaican 12.05.2025
CQRS — Command Query Responsibility Segregation, или разделение ответственности команд и запросов. Суть этого архитектурного паттерна проста: операции чтения данных (запросы) отделяются от операций. . .
Шаблоны и приёмы реализации DDD на C#
stackOverflow 12.05.2025
Когда я впервые погрузился в мир Domain-Driven Design, мне показалось, что это очередная модная методология, которая скоро канет в лету. Однако годы практики убедили меня в обратном. DDD — не просто. . .
Исследование рантаймов контейнеров Docker, containerd и rkt
Mr. Docker 11.05.2025
Когда мы говорим о контейнерных рантаймах, мы обсуждаем программные компоненты, отвечающие за исполнение контейнеризованных приложений. Это тот слой, который берет образ контейнера и превращает его в. . .
Micronaut и GraalVM — будущее микросервисов на Java?
Javaican 11.05.2025
Облачные вычисления безжалостно обнажили ахиллесову пяту Java — прожорливость к ресурсам и медлительный старт приложений. Традиционные фреймворки, годами радовавшие корпоративных разработчиков своей. . .
Microsoft Defender is an essential security tool preinstalled on the Windows 11 operating system. The security suite is fully baked into the operating system to protect your system from malware, but not everyone likes it. Would you prefer to install an alternative antivirus/antispyware to kick Microsoft Defender to the curb? We have two options: temporarily disable the real-time scanning component of the security suite or disable the entire suite long-term in favor of a competing app.
Temporarily Disable Microsoft Defender Real-time Antivirus Protection
If you want a relatively easy way to disable Microsoft Defender’s real-time scanning engine, we have you covered with the following steps:
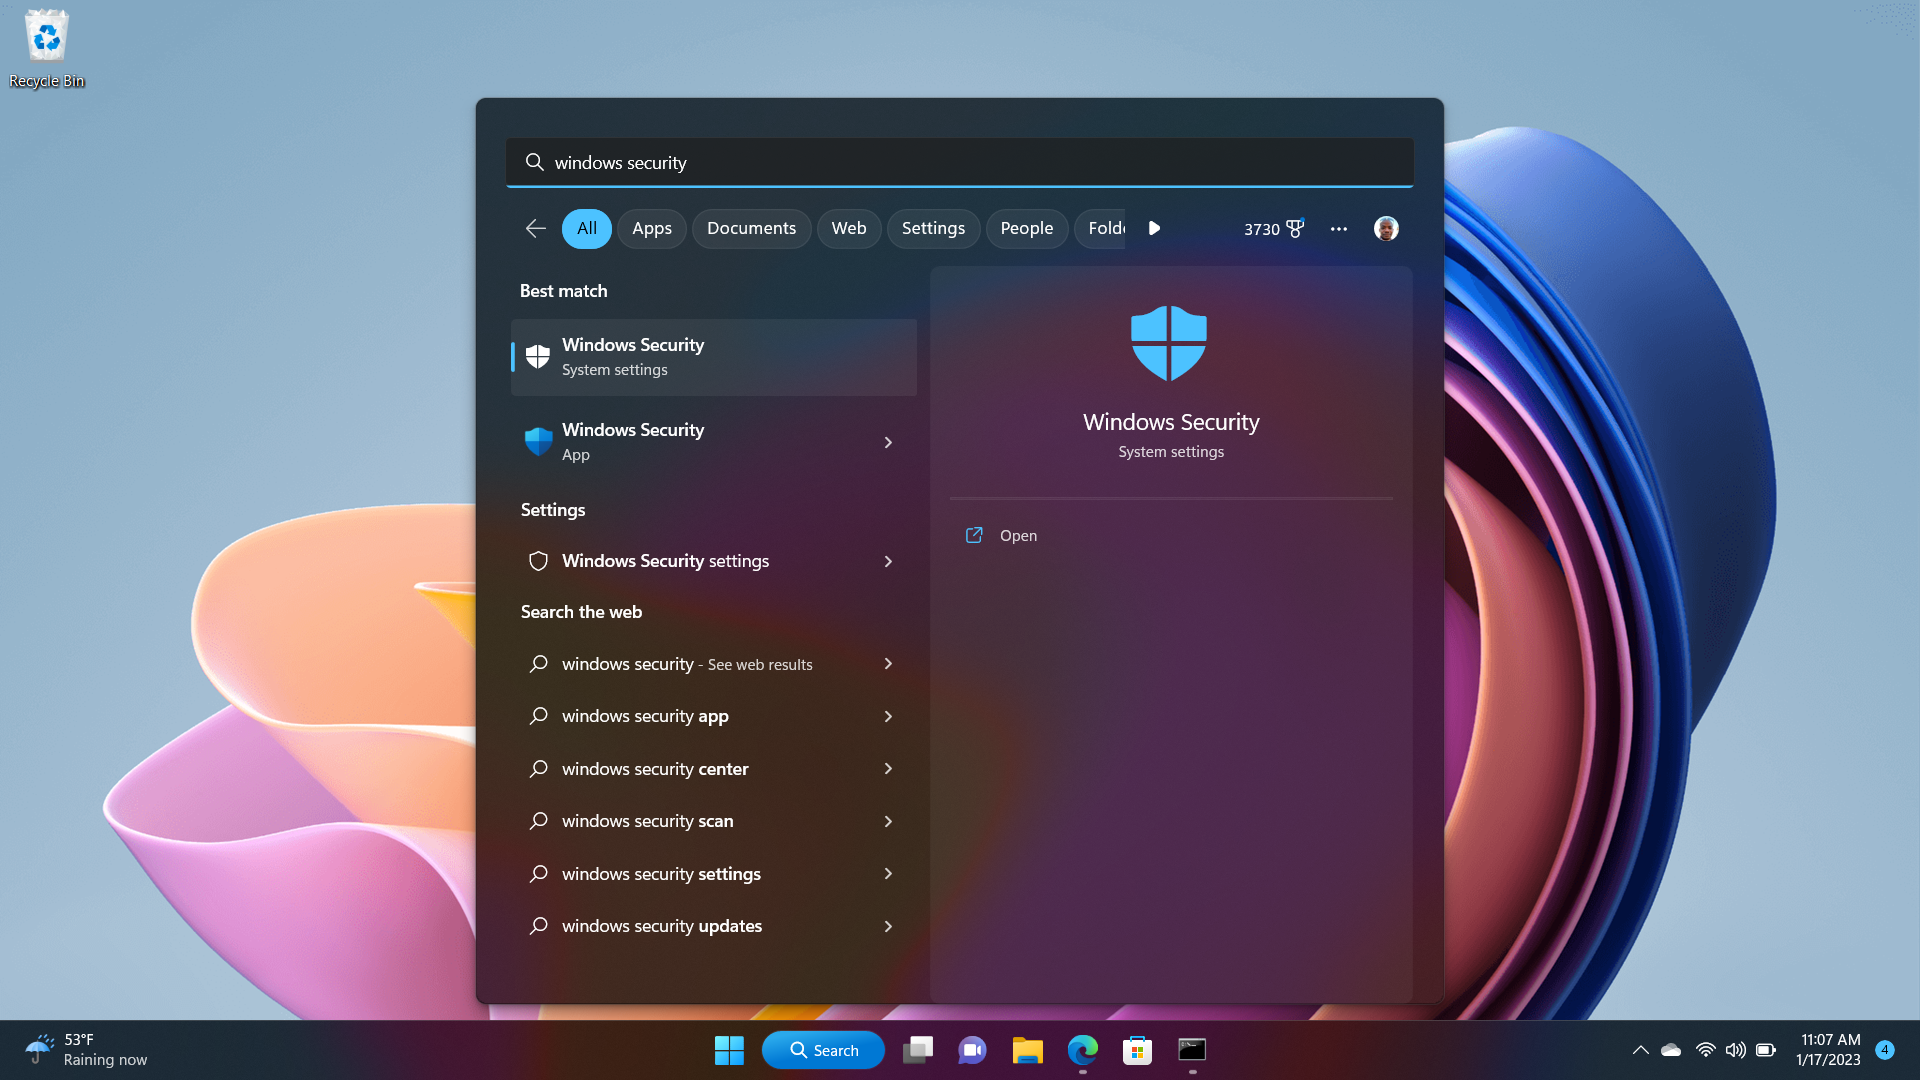
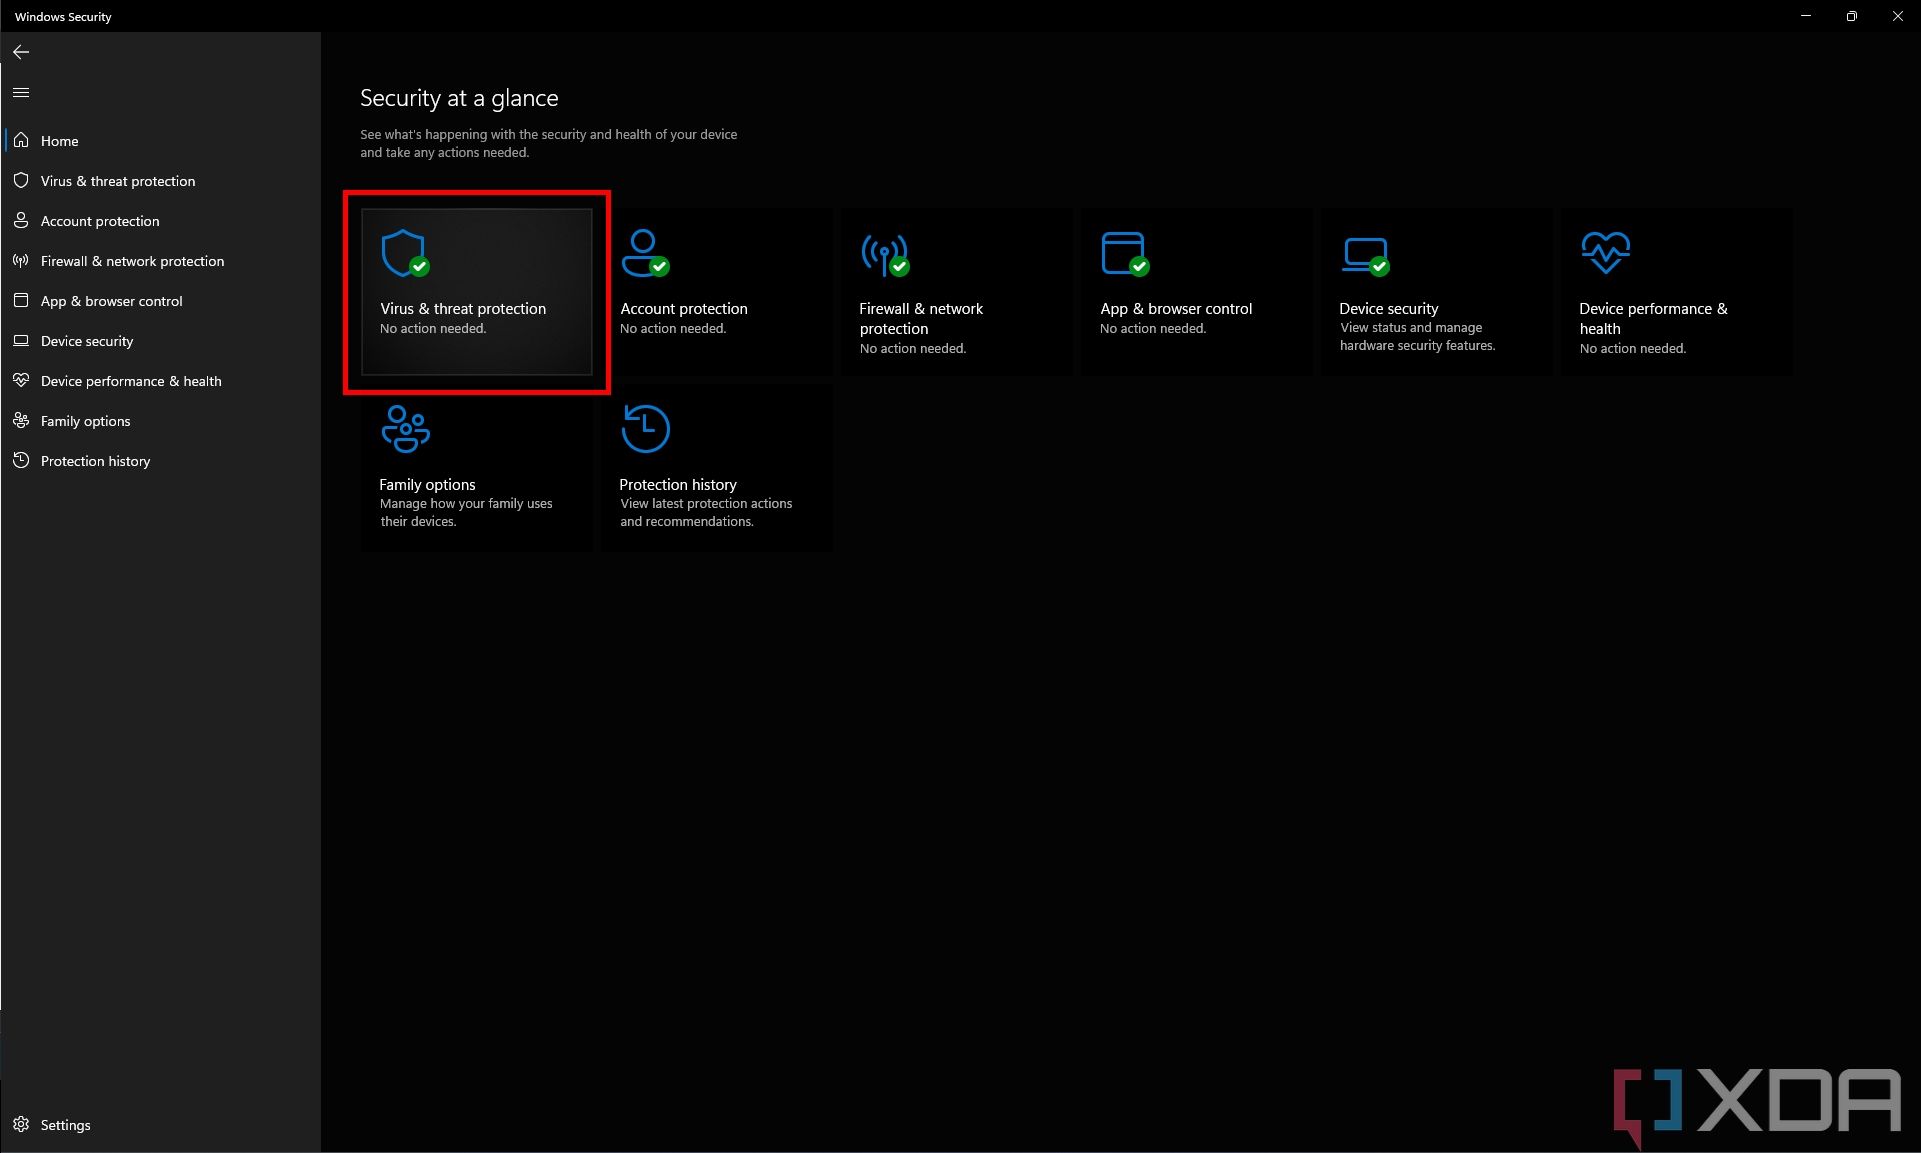
1. Click on the Start menu and search for the Windows Security app.
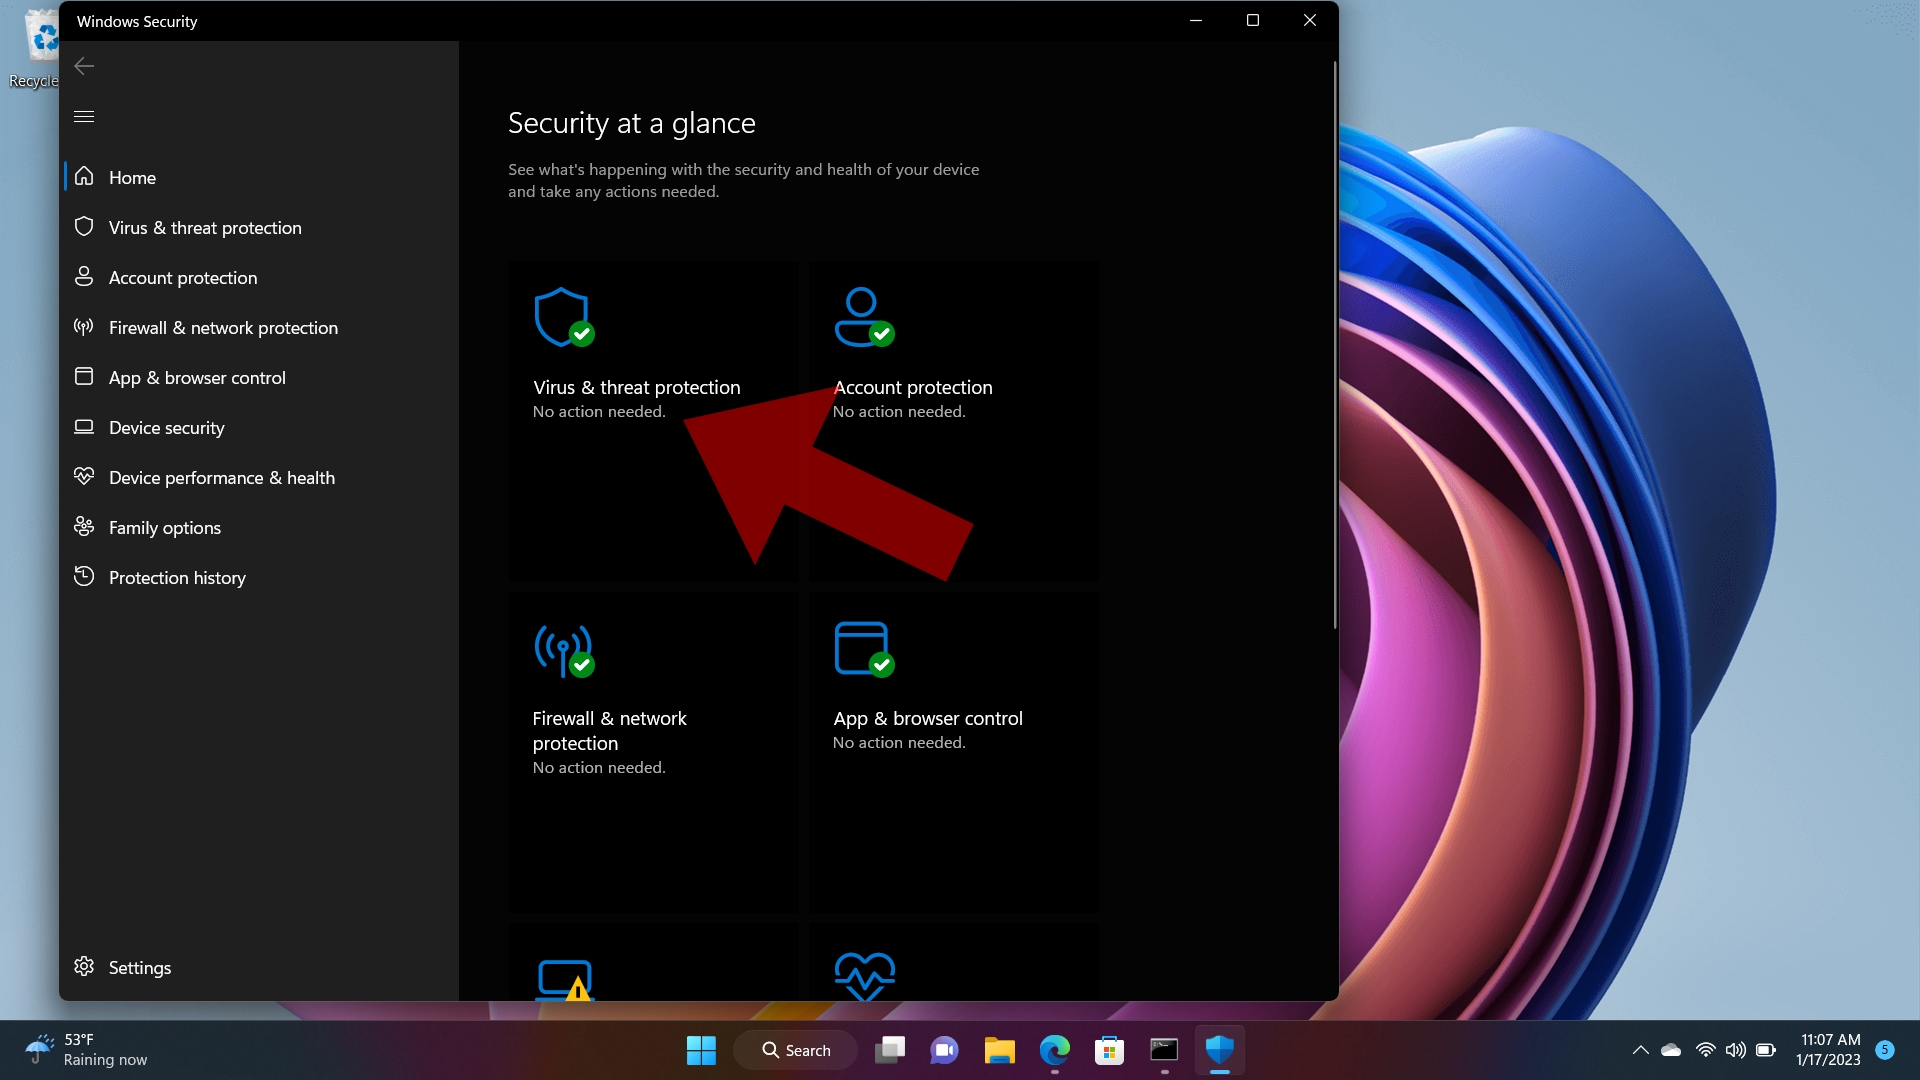
2. Once in the Windows Security app, click on Virus & threat protection.
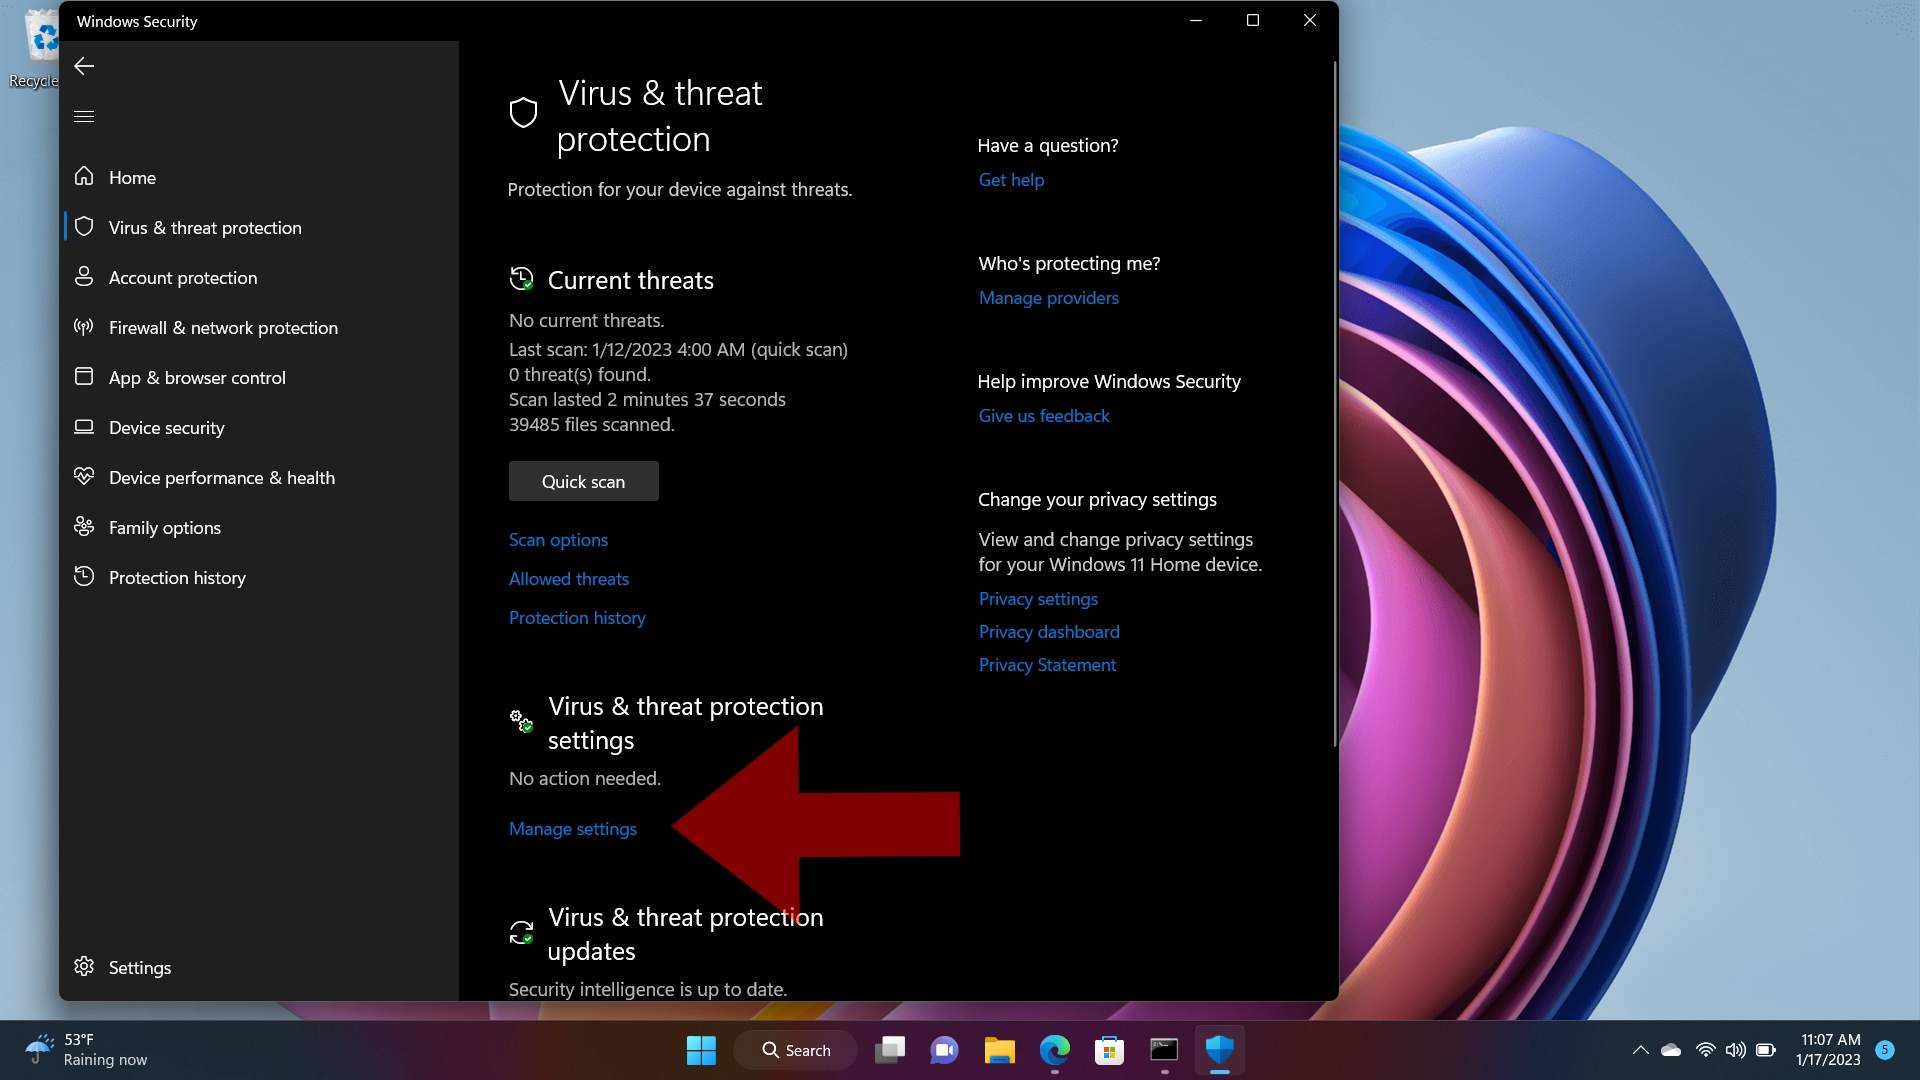
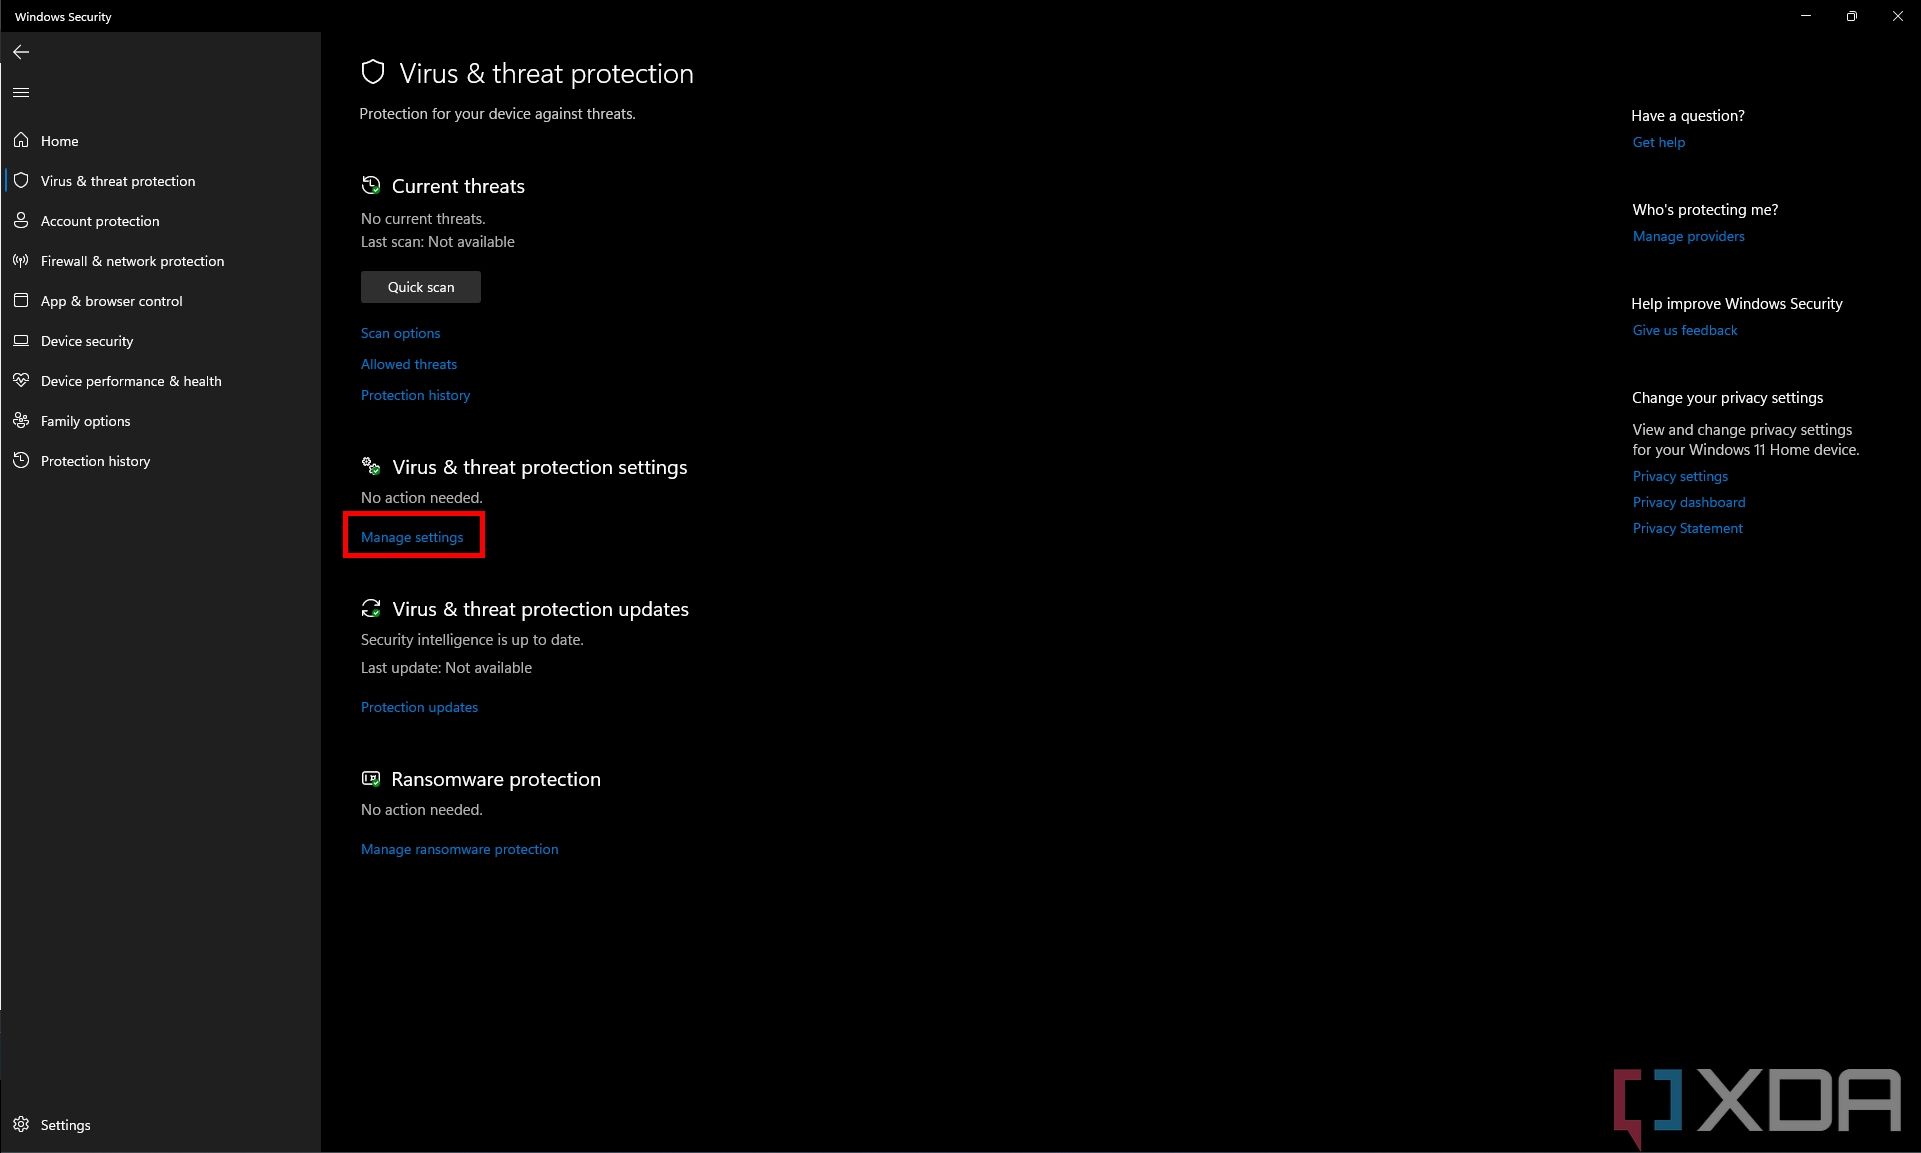
3. Select Manage settings under Virus & threat and protection settings.
4. You’ll see a button for Real-time protection; turn it off.
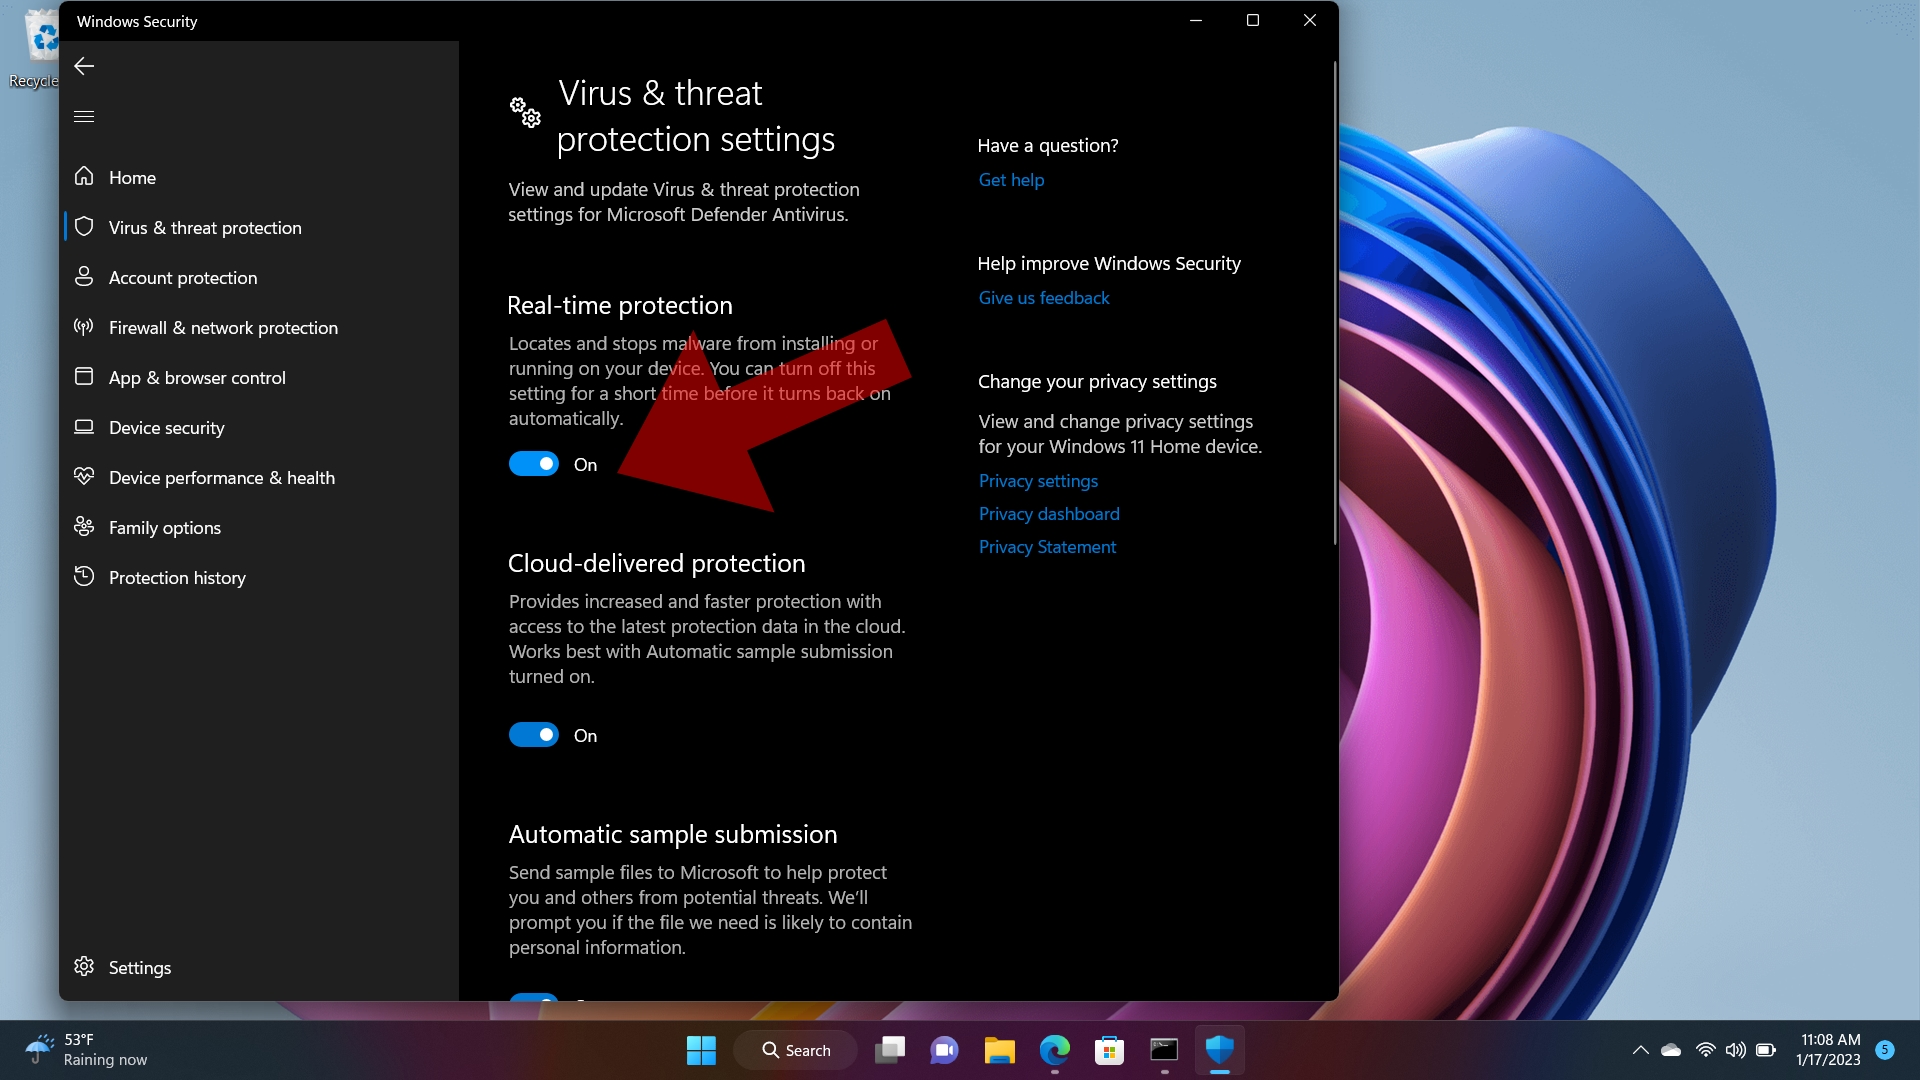
5. Turning off Real-time protection will present a red X and a warning message about your computer being vulnerable to attacks.
Get Tom’s Hardware’s best news and in-depth reviews, straight to your inbox.
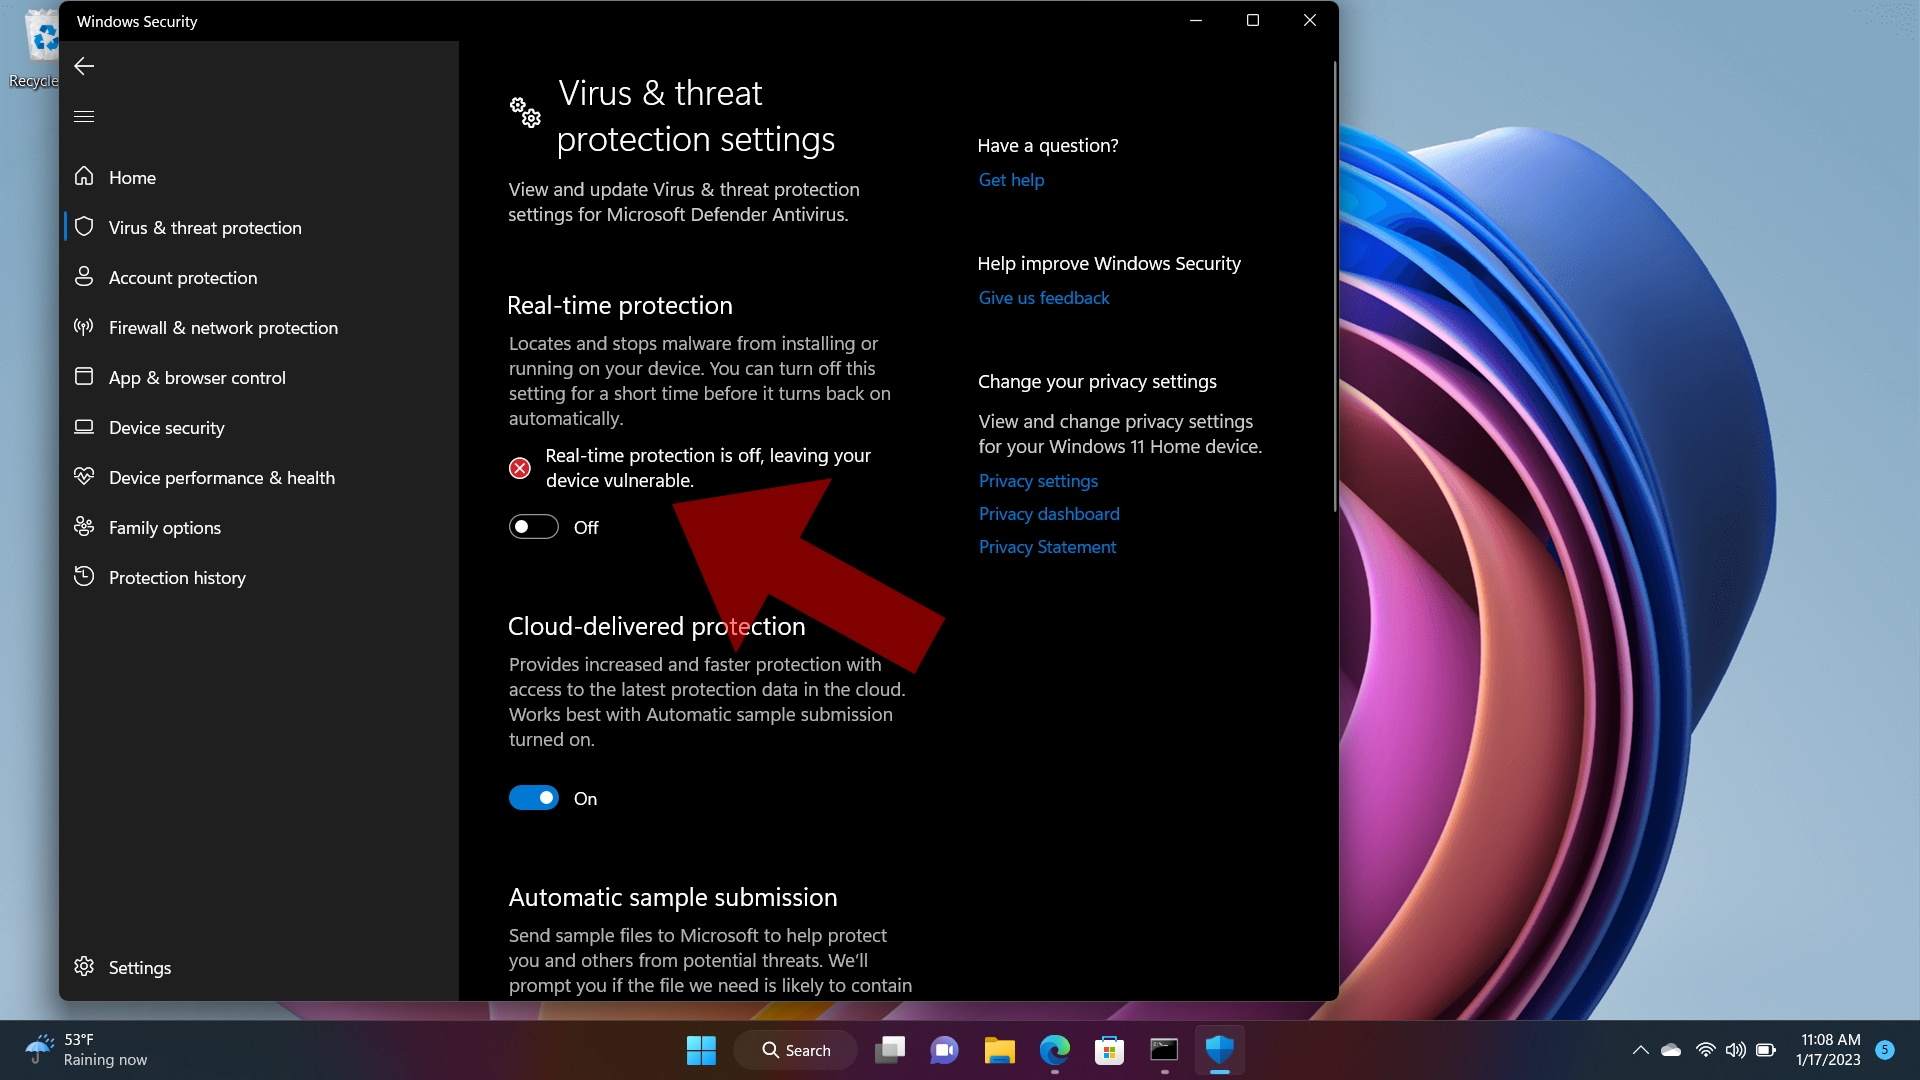
Remember, this only temporarily disables real-time antivirus protection. Microsoft warns that potentially harmful apps and files downloaded from the Internet are not scanned when real-time protection is disabled. However, scans already scheduled for your system will continue unabated.
Disable Microsoft Defender by Installing Another Antivirus Program
There’s another way to disable Microsoft Defender once and for all, and not just the real-time antivirus function. Installing a third-party antivirus security suite will automatically put Microsoft Defender on the back burner.
Let’s use AVG Antivirus Free as an example. It’s a free, no-frills Microsoft Defender alternative that has been around for two decades. Although our example uses AVG Antivirus Free, installing any credible antivirus program will have the same effect in disabling Microsoft Defender.
1. Install your preferred antivirus software (in this case, AVG Antivirus Free). This action will automatically disable Microsoft Defender.
2. Once your software is installed, open the Windows Security app.
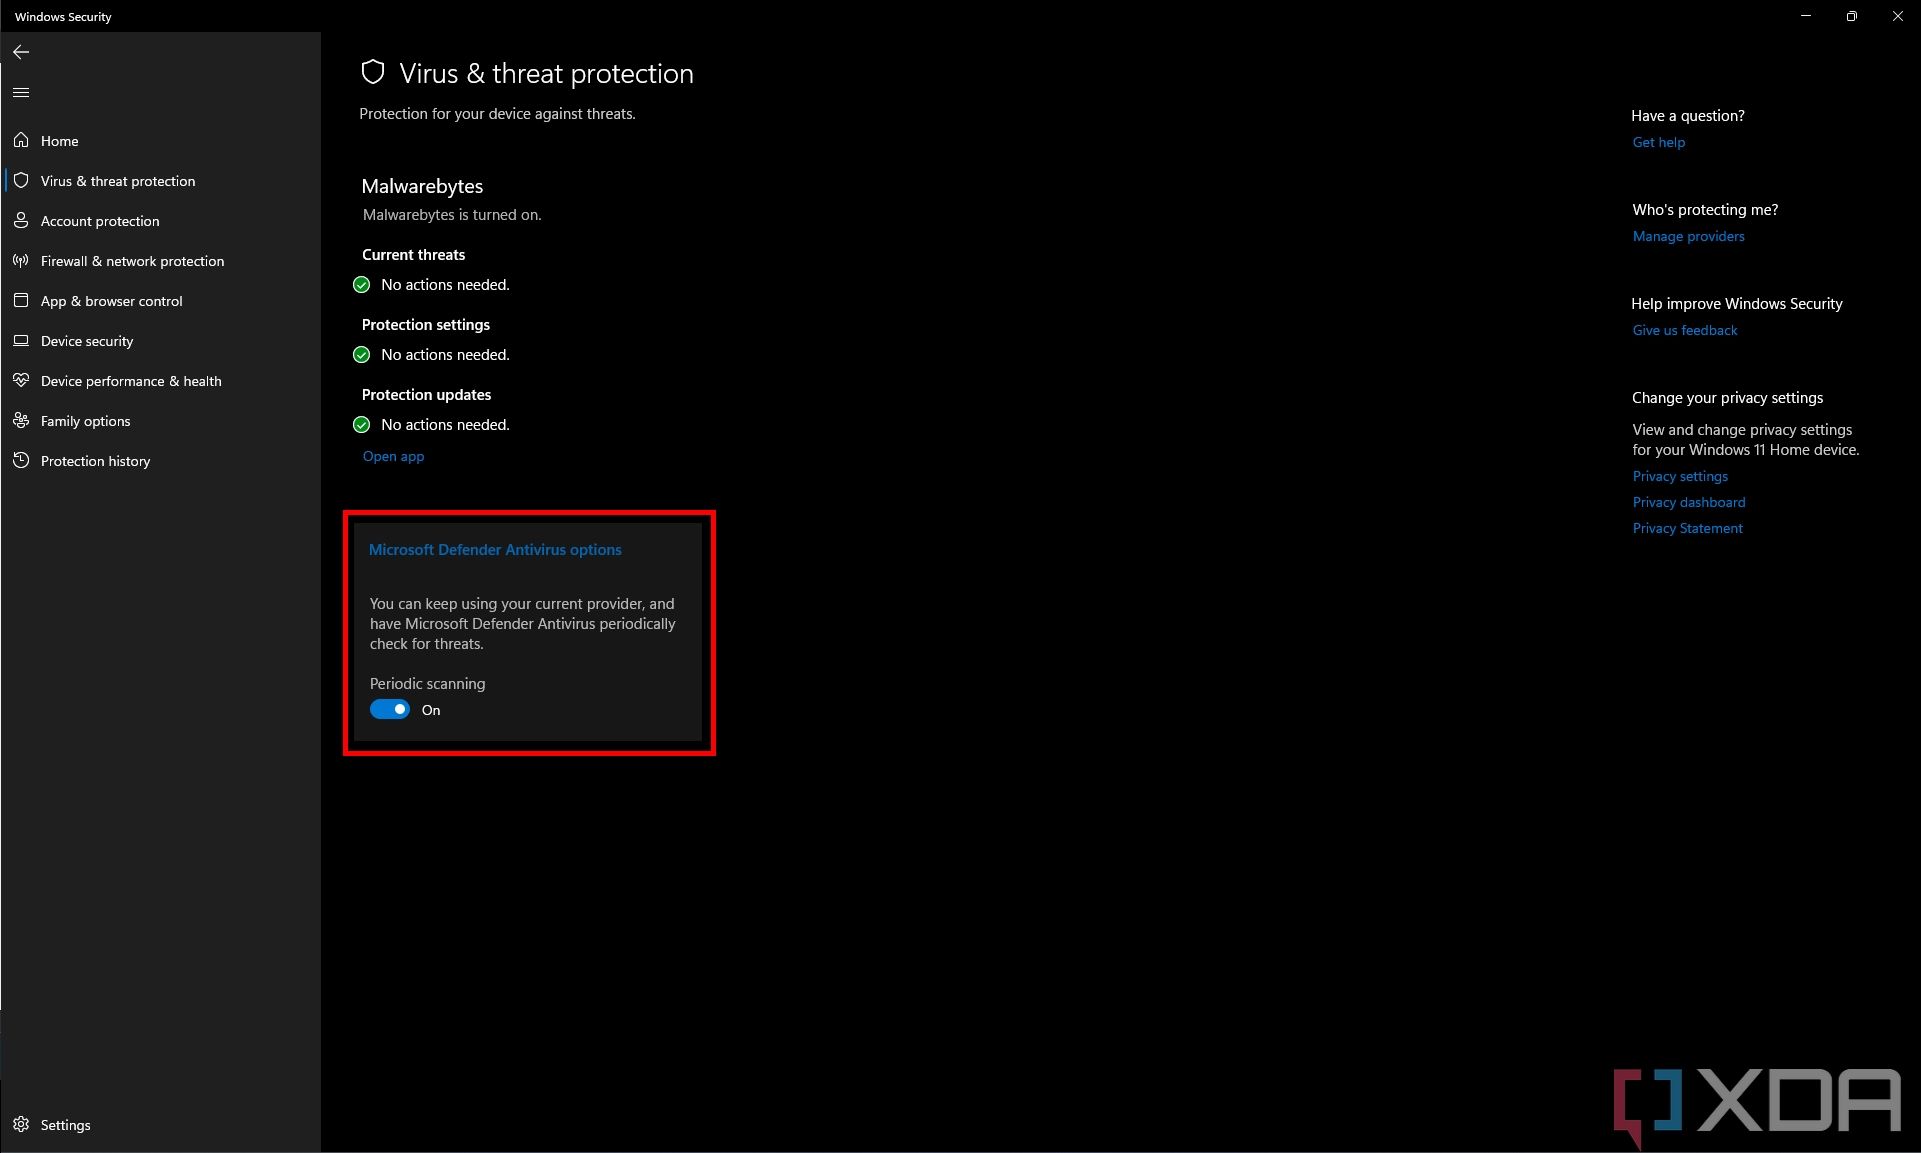
You should now see that Windows 11 now recognizes AVG Antivirus (or your preferred antivirus app) protecting your computer.
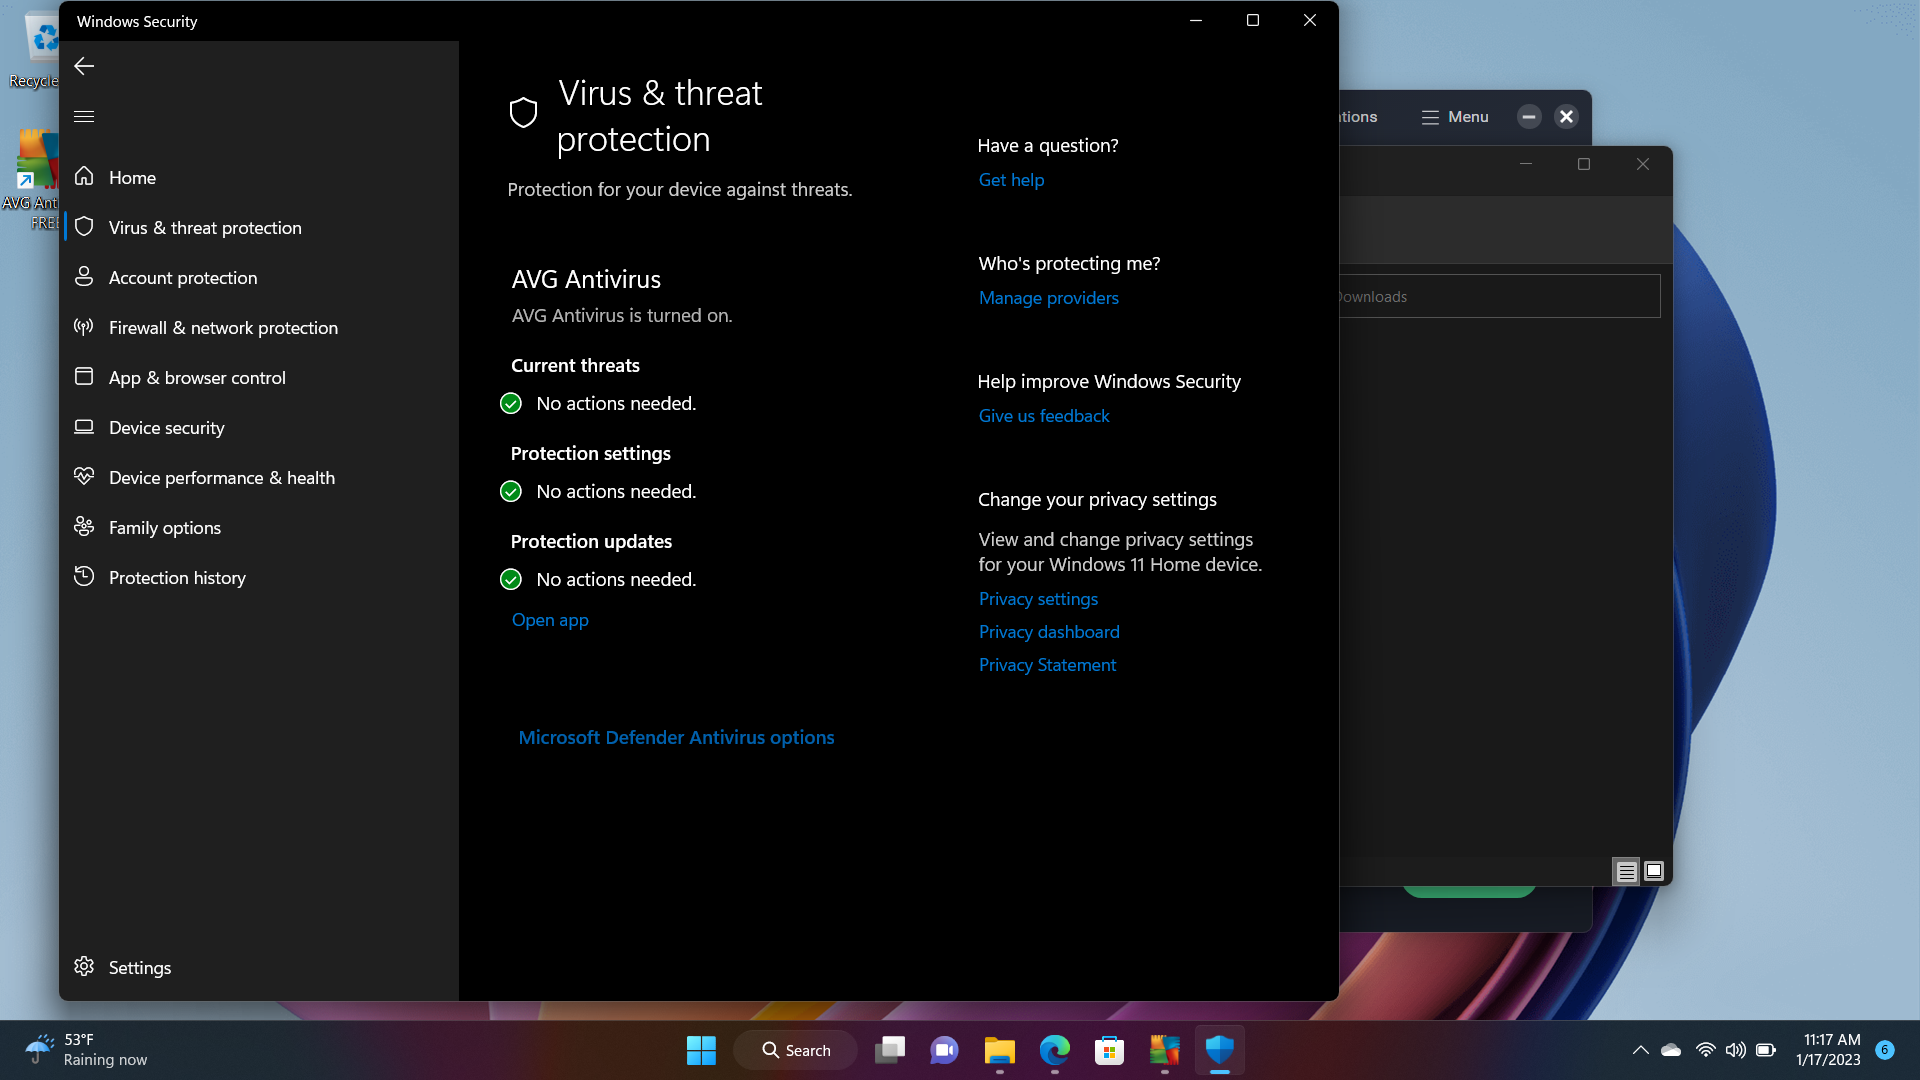
At this point, your installed antivirus software has complete control over real-time scanning and manual scans of your computer with no intervention from Microsoft Defender. However, if you want increased protection, you can click on Microsoft Defender Antivirus options.
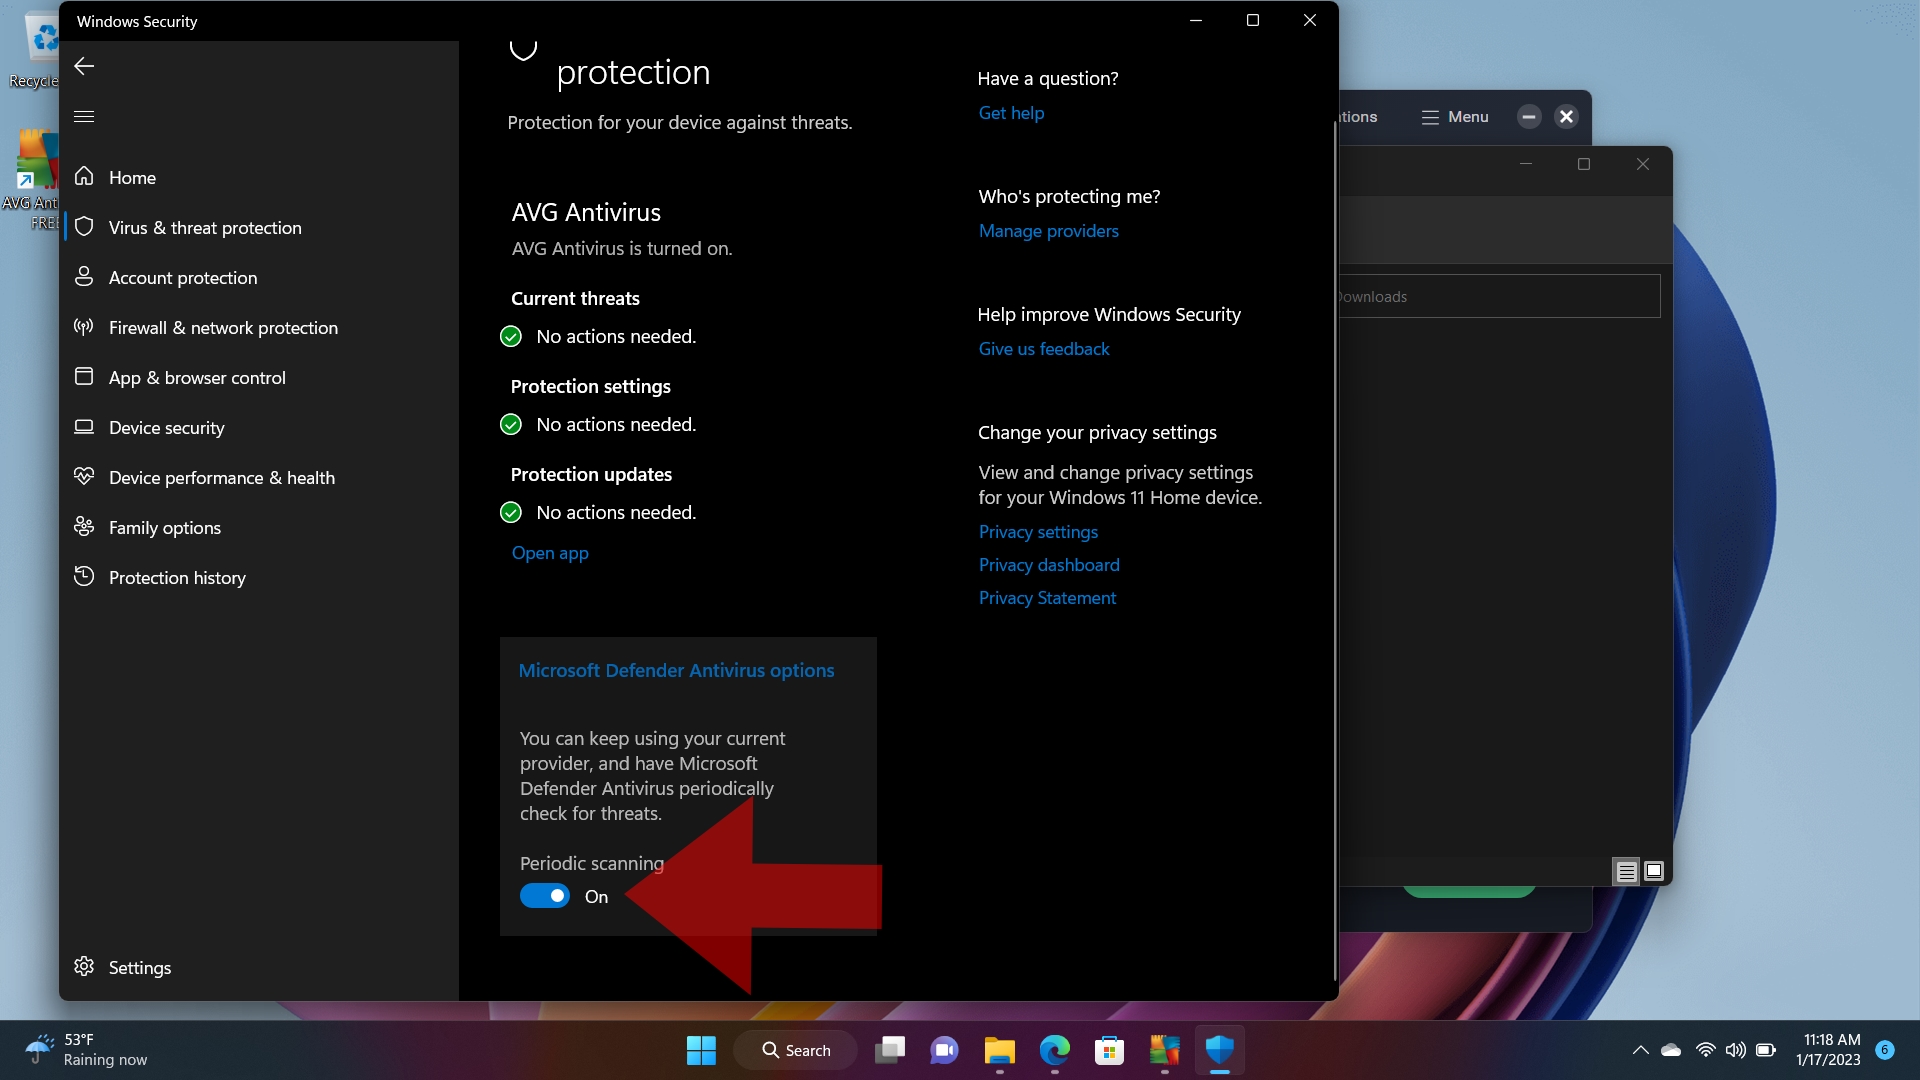
Here, you can turn on Periodic scanning to have the software occasionally scan for threats in the background.
We should caution that, while it is possible to disable Microsoft Defender in varying degrees, it is not advisable (in most instances) to run without real-time protection on an internet-connected computer for an extended period.
-
Home
-
News
- Fixed: Windows Security Shows Unknown in Windows 11/10
By Shirley | Follow |
Last Updated
Windows Security shows unknown? Virus and threat protection shows unknown? In this post from MiniTool, we will walk you through a couple of feasible solutions to this Windows Defender unknown issue in Windows 11/10.
Windows Security Shows Unknown
Windows Security (Windows Defender) is an antivirus software that’s included in Windows. It can help to protect your computer from viruses, malware, and other threats. However, sometimes it can run into some errors. For example, you may encounter the problems of “Windows Defender exclusions not working” and “protection history not showing”.
Today we are going to show you another Windows Security error – Windows Security shows unknown. Let’s see a real example first.
I noticed this today but not sure if it started today or earlier. My Windows Defender Security icon in the taskbar had a yellow caution indicator and when I opened it all protection was marked as Unknown. I performed a check for protection updates and the system downloaded an update after which all protection was marked as No Action Needed. After about an hour or so the caution indicator showed up again and this time checking for an update did not change the settings. They are all still showing as Unknown. I do not have any other anti-virus or security providers installed on this system.
What’s wrong and how can I correct it? Thanks very much.
answers.microsoft.com
When Windows Defender shows unknown, try the methods below to fix it.
How to Fix the Windows Defender Unknown Issue
Fix 1. Restart/Refresh the Windows Security Service
When the Windows Security Service is disabled, Windows Defender shows unknown. In this situation, enabling or refreshing the Windows Security Service is the easiest way to fix the Windows Defender unknown issue. Follow the steps below to complete the necessary actions.
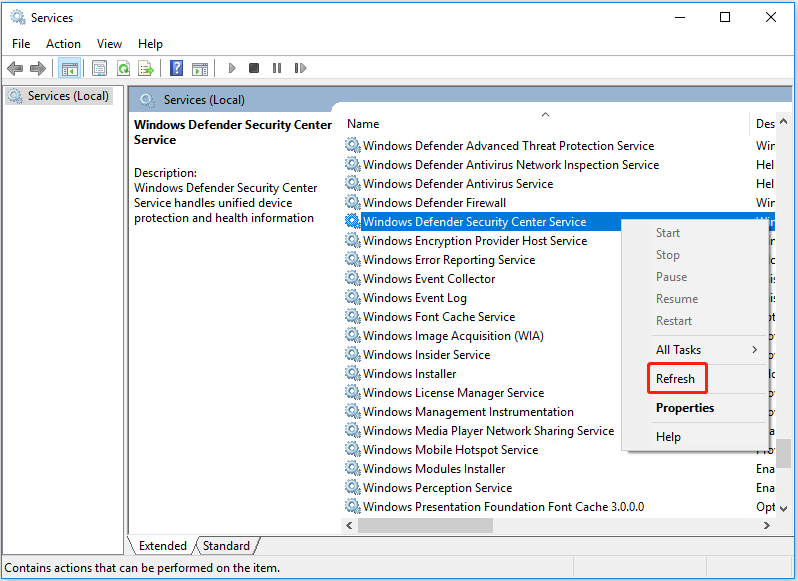
Step 1. Type service in the Windows search box and select Services from the best match result.
Step 2. In the services window, scroll down to find and right-click Windows Security Service. if it is already enabled, you need to choose Refresh from the context menu. If it is not running, you are supposed to choose Restart.
If you are using Windows 10 earlier versions, you need to refresh or restart Windows Defender services like Windows Defender Security Center Service.
Click to Tweet
Fix 2. Repair or Reinstall Windows Defender
If restarting Windows Security services did not fix the unknown issue, you can perform a Windows Defender repair.
Step 1. Type Windows PowerShell in the Windows search box and right-click it to select Run as administrator.
Step 2. In the User Account Control window, select the Yes button.
Step 3. In the command line window, copy and paste the following command line and press Enter.
Get-AppXPackage | Foreach {Add-AppxPackage -DisableDevelopmentMode -Register “$($_.InstallLocation)\AppXManifest.xml”}
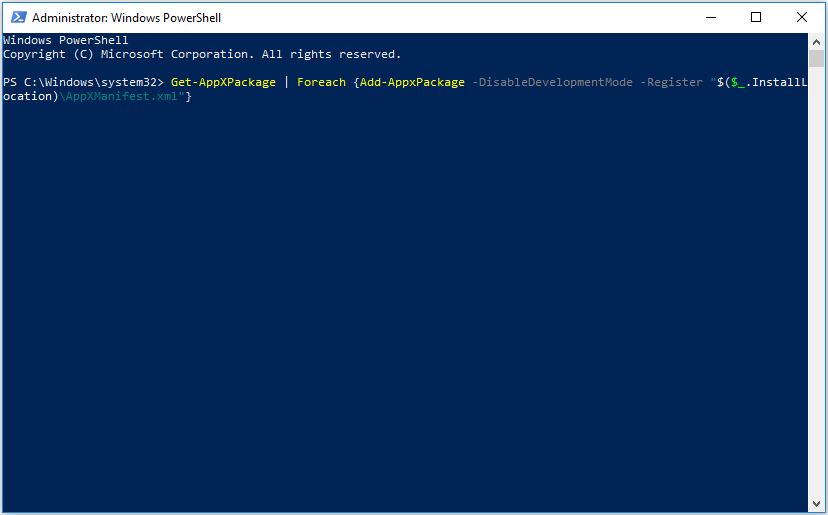
Wait for the process to complete and then restart your computer. After that, check whether the Windows Defender unknown issue has been resolved. If not, you can uninstall and reinstall Windows Defender.
Fix 3. Disable Third-Party Antivirus
Third-party antivirus may conflict with Windows Defender causing Windows Security shows unknown. So, to remove the unknown error, you are supposed to disable or uninstall other antivirus programs from Control Panel or Windows Settings.
Fix 4. Uninstall Recent Windows Updates
A large number of users suffer from the Windows Defender unknown issue after updating Windows. Therefore, uninstalling Windows updates is also an effective solution to the unknown error.
Bonus Time
If your files are lost after a Windows update or downgrade, you can use free data recovery software – MiniTool Power Data Recovery, to recover deleted files.
MiniTool Power Data Recovery can recover files (documents, pictures, videos, audio, emails, etc.) lost in multiple data loss situations, such as recovering lost files after MBR to GPT conversion.
Click the following button to free download MiniTool Power Data Recovery and give it a try.
MiniTool Power Data Recovery FreeClick to Download100%Clean & Safe
Wrapping Things Up
Reading here, you should know what can you do when Windows Security shows unknown. Try to restart Windows Security service, repair/reinstall Windows Defender, turn off third-party antiviruses, and uninstall Windows updates.
Should you come across any problems when using MiniTool Power Data Recovery, please feel free to send an email to [email protected].
About The Author
Position: Columnist
Shirley graduated from English major and is currently an editor of MiniTool Team. She likes browsing and writing IT-related articles, and is committed to becoming a professional IT problem solver. The topic of her articles are generally about data recovery, data backup, and computer disk management, as well as other IT issues. In spare time, she likes watching movies, hiking and fishing.
Microsoft Defender is an essential part of Windows 11 that helps keep your computer safe from all kinds of threats. It’s a firewall and antivirus, and contrary to what used to be said a few years ago, it’s more than good enough for most people. If you don’t want it at all, though, you might be looking to disable it.
It’s worth noting that the Windows Security app offers many layers of protection on top of Microsoft Defender itself. We won’t dive into each of those options here. If you want to disable Microsoft Defender, though, here’s how.

Related
Is Microsoft Defender good enough in 2024?
Back in the day, you absolutely needed an anti-virus. Is Microsoft Defender good enough now, though?
Temporarily disable real-time protection
Disabling Windows Defender permanently on Windows 11 is not recommended, and somewhat challenging. However, you can temporarily turn off real-time protection if it’s blocking you from doing something. Here’s how:
- Open the Windows Security app.
-
Click Virus & threat protection on the main menu or the left-side pane.

-
Under Virus & threat protection settings, click Manage settings.
-
Switch the toggle under Real-time protection to Off.
- If Microsoft Defender prevented you from running a program before, you should be able to do it now.

Do note that, after a while, real-time protection will turn itself back on to make sure your device stays protected from actual threats. Temporarily disabling real-time protection can help if you’re facing issues such as some software being incorrectly detected as malware and blocked from running, but it’s not usually a good idea to leave this option turned off.
Replace Microsoft Defender with another antivirus software
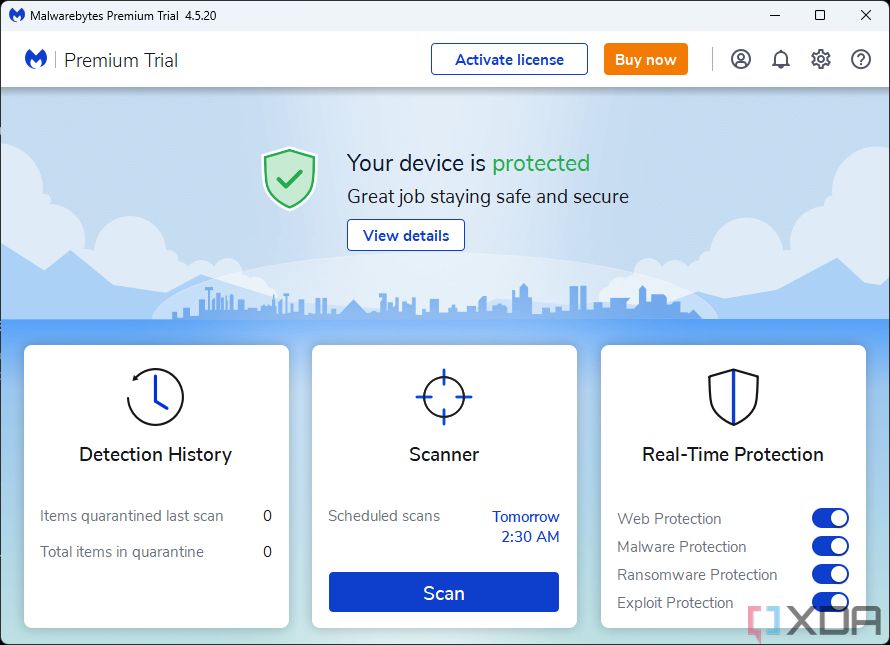
If you want to disable Microsoft Defender’s built-in antivirus permanently, your best bet is to install another antivirus software that can take over for Microsoft Defender. To do this, simply download and install any other antivirus you trust. There are plenty of options out there, including Malwarebytes if you want a free option. Many paid options also exist, like Bitdefender, Webroot, and more.
Simply download and install the antivirus of your choice, and Microsoft Defender’s malware protection will be disabled. This means you can remain protected without relying on Microsoft’s software, but do keep in mind that Microsoft Defender will be re-enabled if you uninstall your other antivirus. You won’t normally be allowed to have no anti-malware program on your PC.
Related
Best antivirus for Windows 11
Protecting your data is always important, and when the built-in Windows security fails, these antivirus programs are your best bet.
Even if you use a third-party anti-malware program, you can still have Microsoft Defender run periodic malware scans to get even more coverage against threats.
Disabling the firewall in Microsoft Defender
Something else you might want to disable in Microsoft Defender is firewall protection. This monitors your network for potentially dangerous requests and blocks any threats it detects. This is a separate setting from malware protection, and it’s not actually disabled when you install another anti-malware software. Here’s how to disable it:
- Open the Windows Security app.
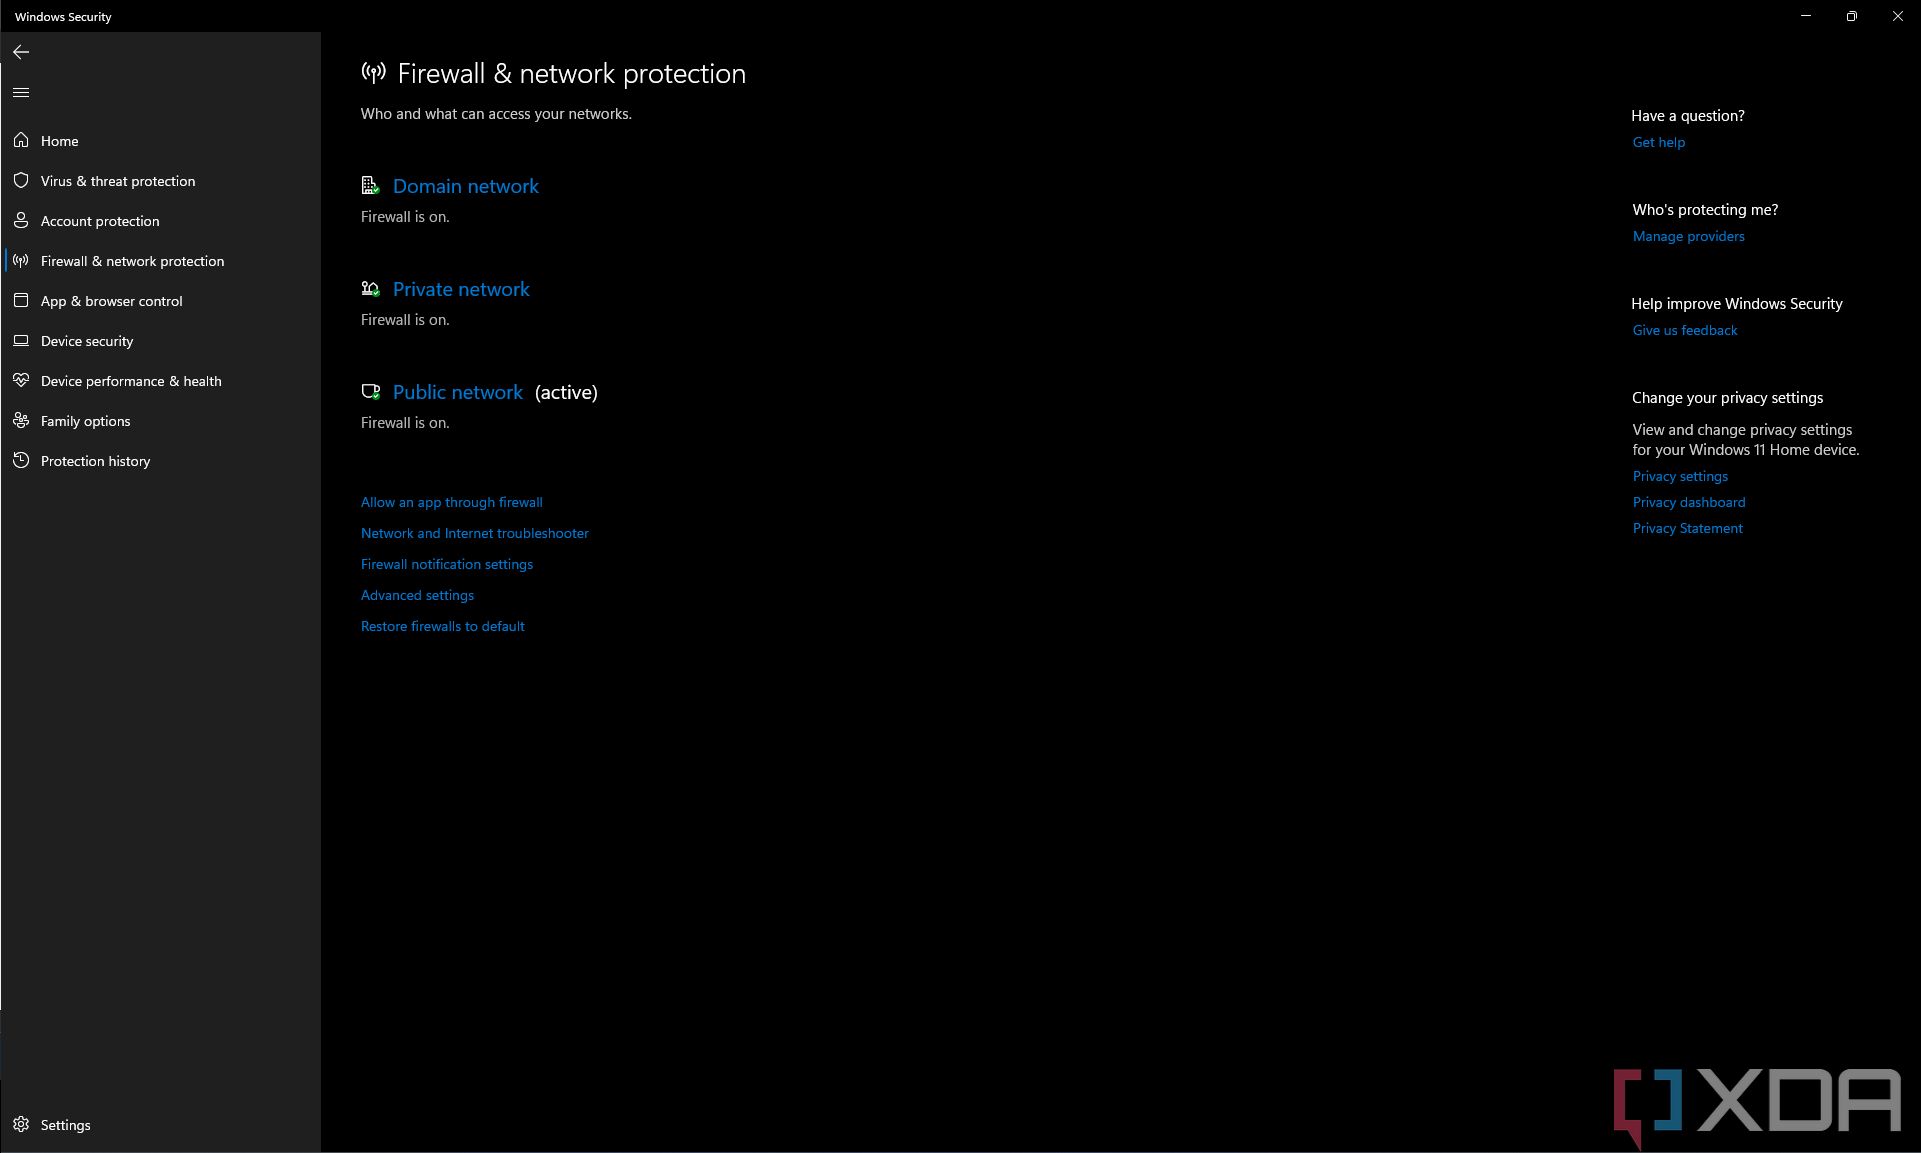
- Click Firewall & network protection in the main menu or the left-side pane.
-
You can choose firewall settings for domain networks, private networks, and public networks separately. Click the appropriate option, though we don’t recommend disabling the firewall for public networks.
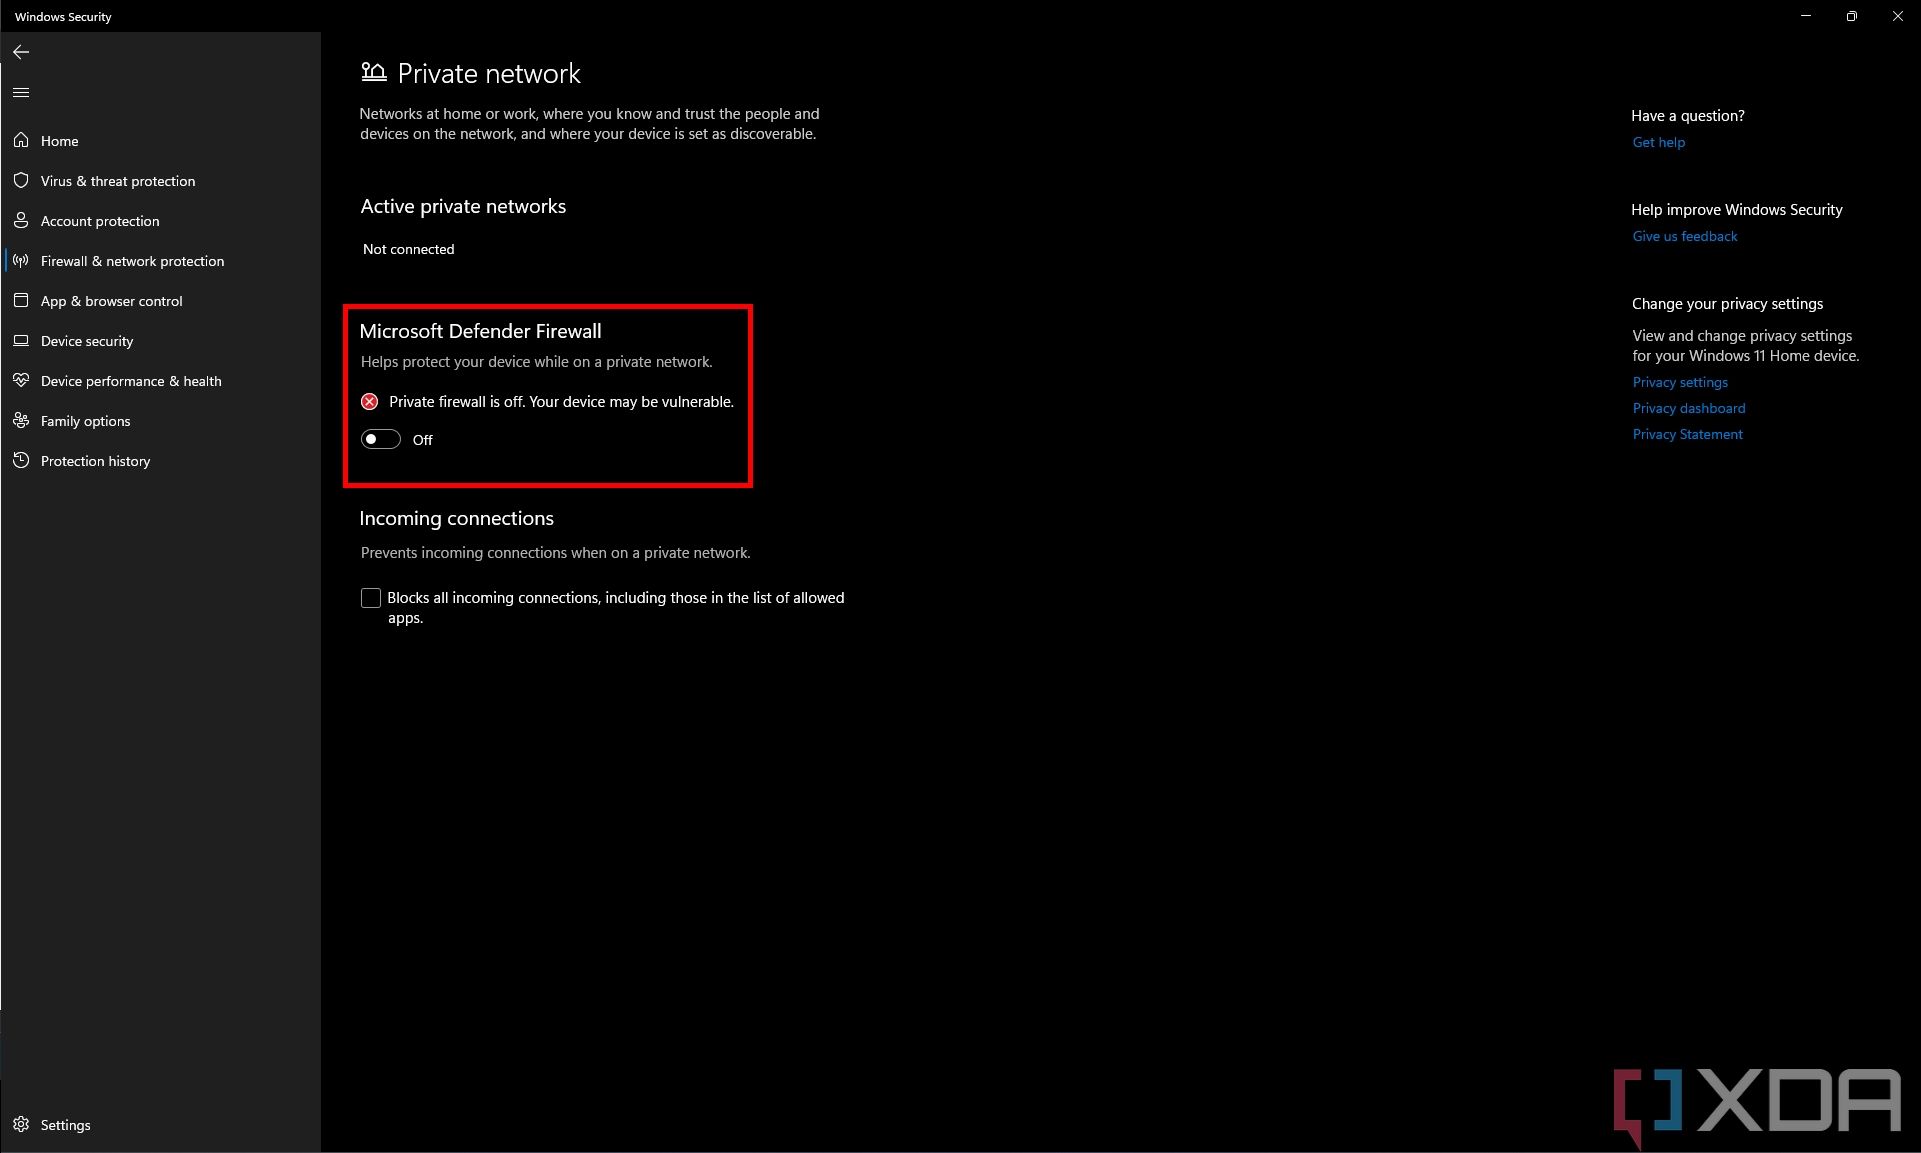
-
Set the toggle under Microsoft Defender Firewall to Off.
- Repeat this for other network types if necessary.
How to permanently disable Microsoft Defender
So far, we’ve covered methods for disabling parts of Windows Defender that may be replaced by a different app, or simply disabling it temporarily. That’s because disabling Microsoft Defender permanently is dangerous and not recommended whatsoever. However, if you understand the risks and still want to move forward with this, we have written the necessary steps below.
Disabling Microsoft Defender without replacing it can leave your computer severely unprotected against online attacks, potentially resulting in loss of sensitive data or even rendering your computer unusable. Don’t disable it unless you know what you’re doing.
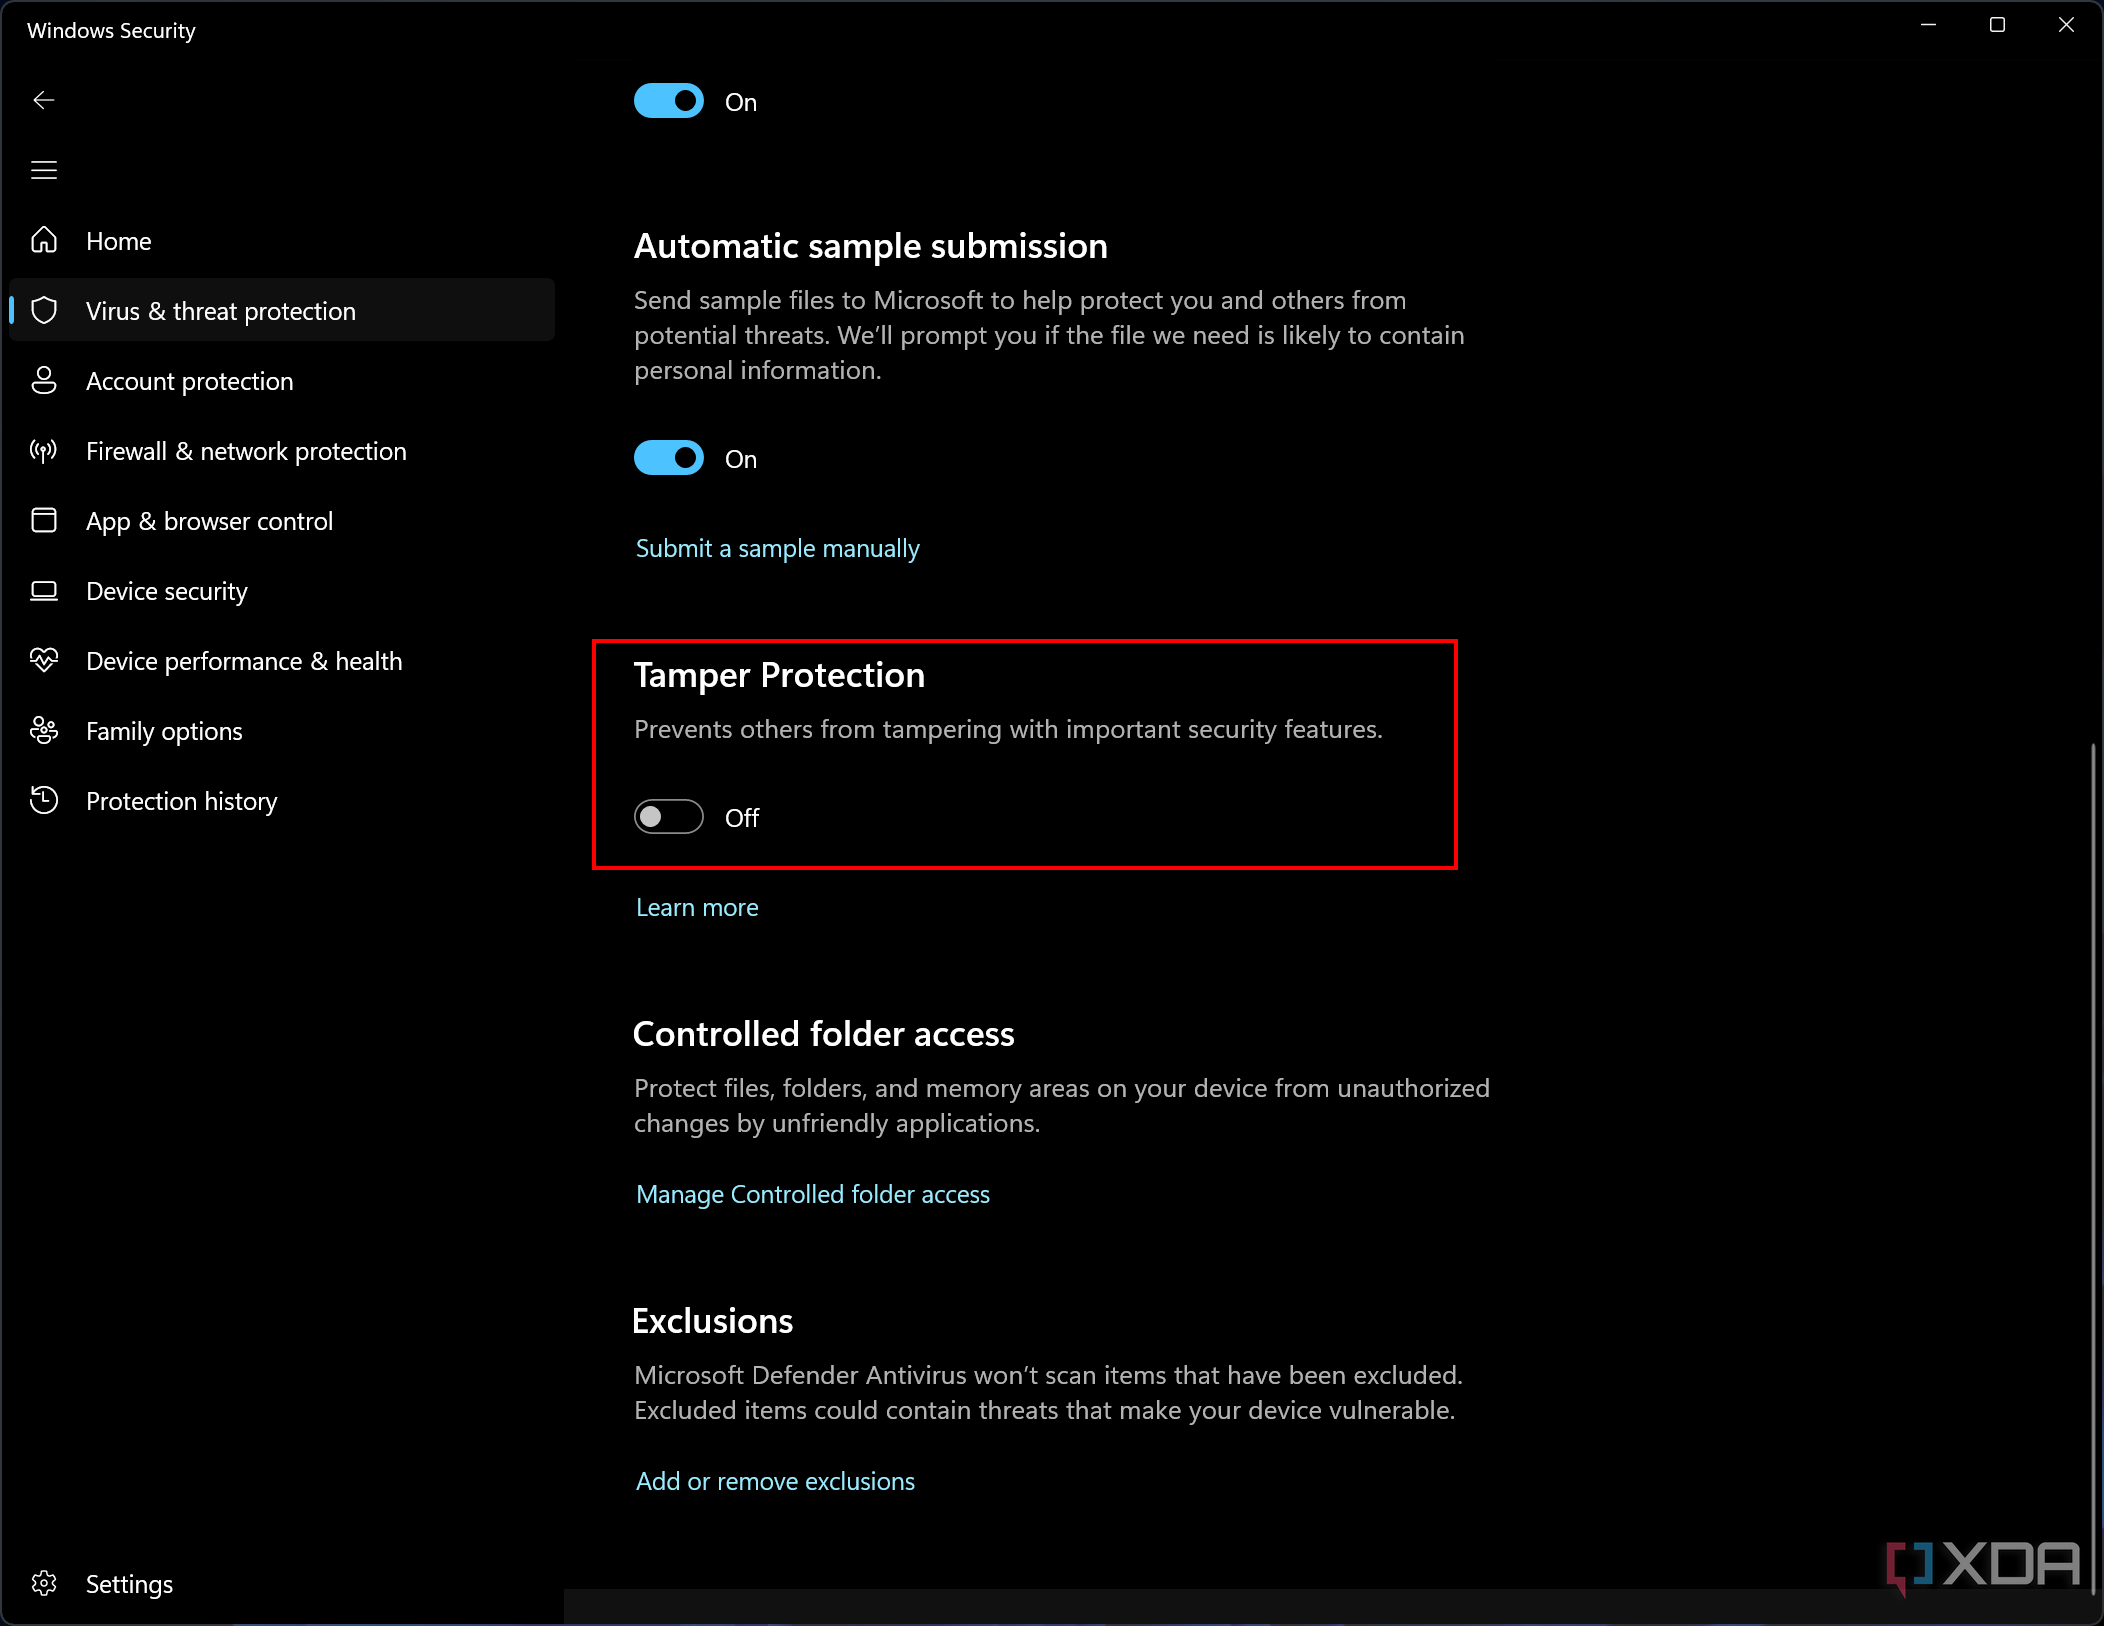
- Open the Windows Security app.
- Click Virus & threat protection.
- Under Virus & threat protection settings, click Manage settings.
-
Scroll down to Tamper protection and set the toggle to off.

- Additionally, you may want to turn off real-time protection as described at the beginning of this article.
This will allow you to turn off Microsoft Defender using one of the following methods.
1:18
Related
Windows 11 Home vs Windows 11 Pro: What’s the difference?
Trying to choose between Windows 11 Home vs Pro? These are the main differences between the two editions you should be aware of.
Option 1: Disable Microsoft Defender using the Group Policy Editor
One way to disable Microsoft Defender is to use the Group Policy Editor, which is only available on Windows 11 Pro editions of higher. If you have Windows 11 Home, you can’t follow these steps.
- Press Windows + R on your keyboard to open the Run dialog.
- Type in gpedit.msc and press Enter to launch the Group Policy Editor.
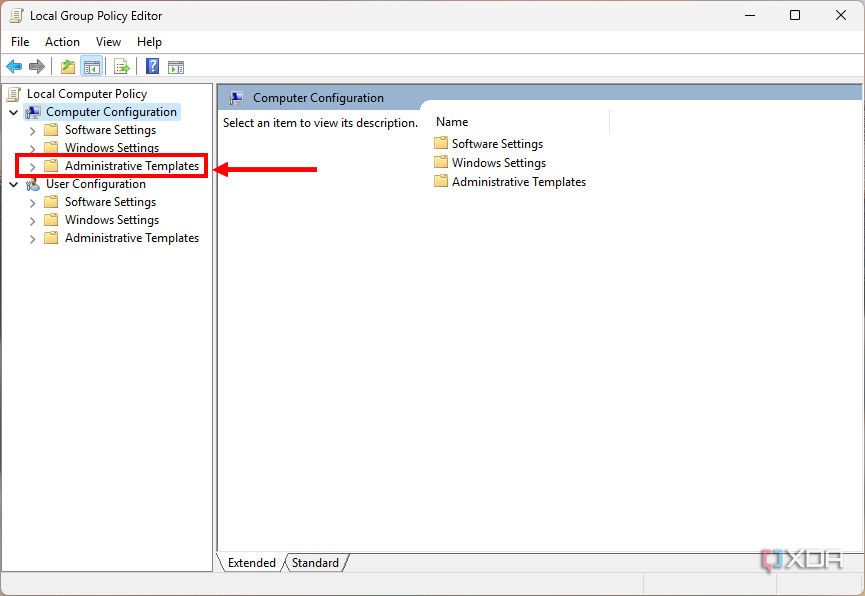
-
Under Computer Configuration on the left pane, choose Administrative Templates.

- Choose Windows Components.
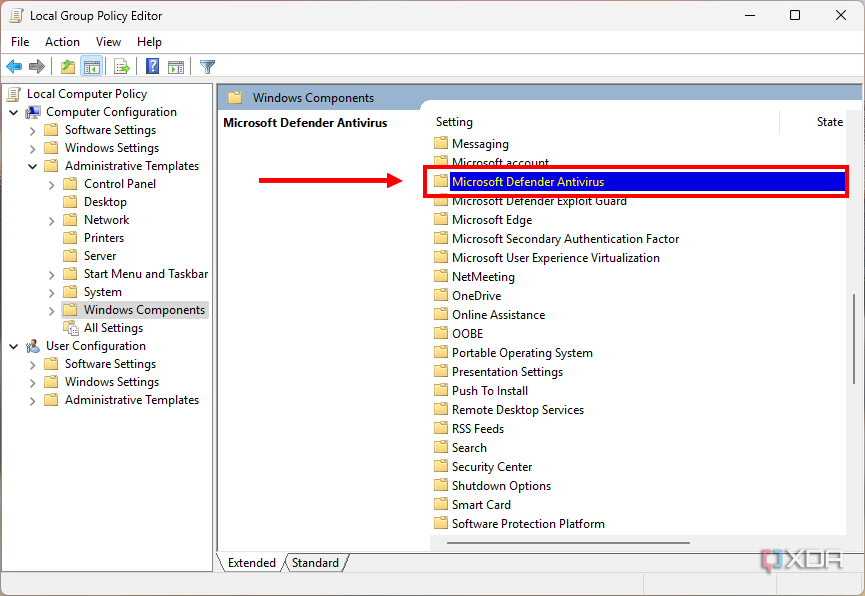
-
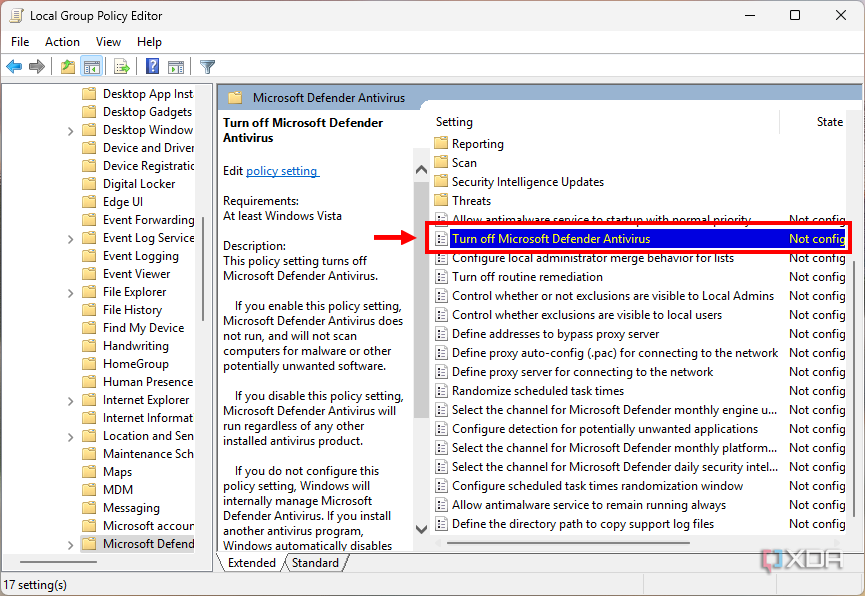
Find and open the Microsoft Defender Antivirus folder.
-
Double-click the option called Turn off Microsoft Defender Antivirus.
-
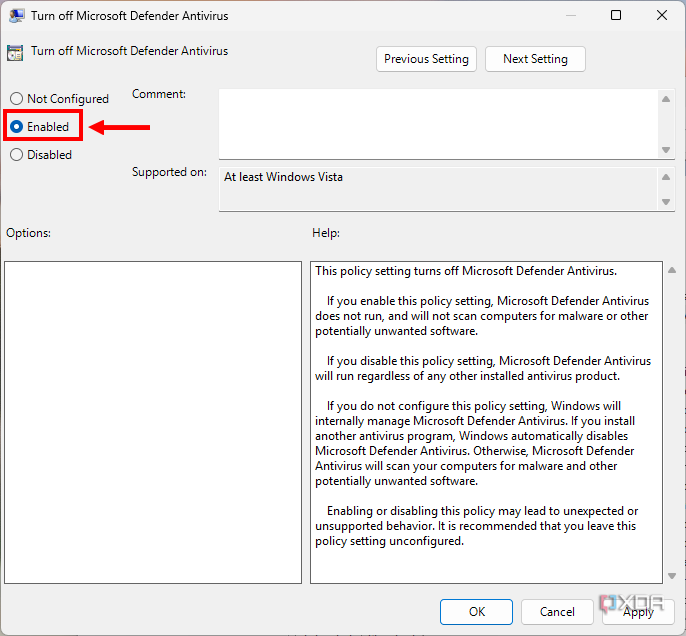
In the dialog that appears, choose the Enabled option and then click OK.

- Restart your computer to finish applying the settings.
Microsoft Defender will now be disabled, which you can verify in the Windows Security app, as settings for virus and threat protection won’t load properly.
Option 2: Disable Microsoft Defender with the Registry Editor
Another route for disabling Microsoft Defender on Windows 11 is using the Registry Editor, which is available on all editions of Windows 11. Here’s how to disable Microsoft Defender:
- Open the Start menu and search for regedit. In the search results, click Run as administrator under Registry Editor on the right pane. Click Yes to confirm.
-
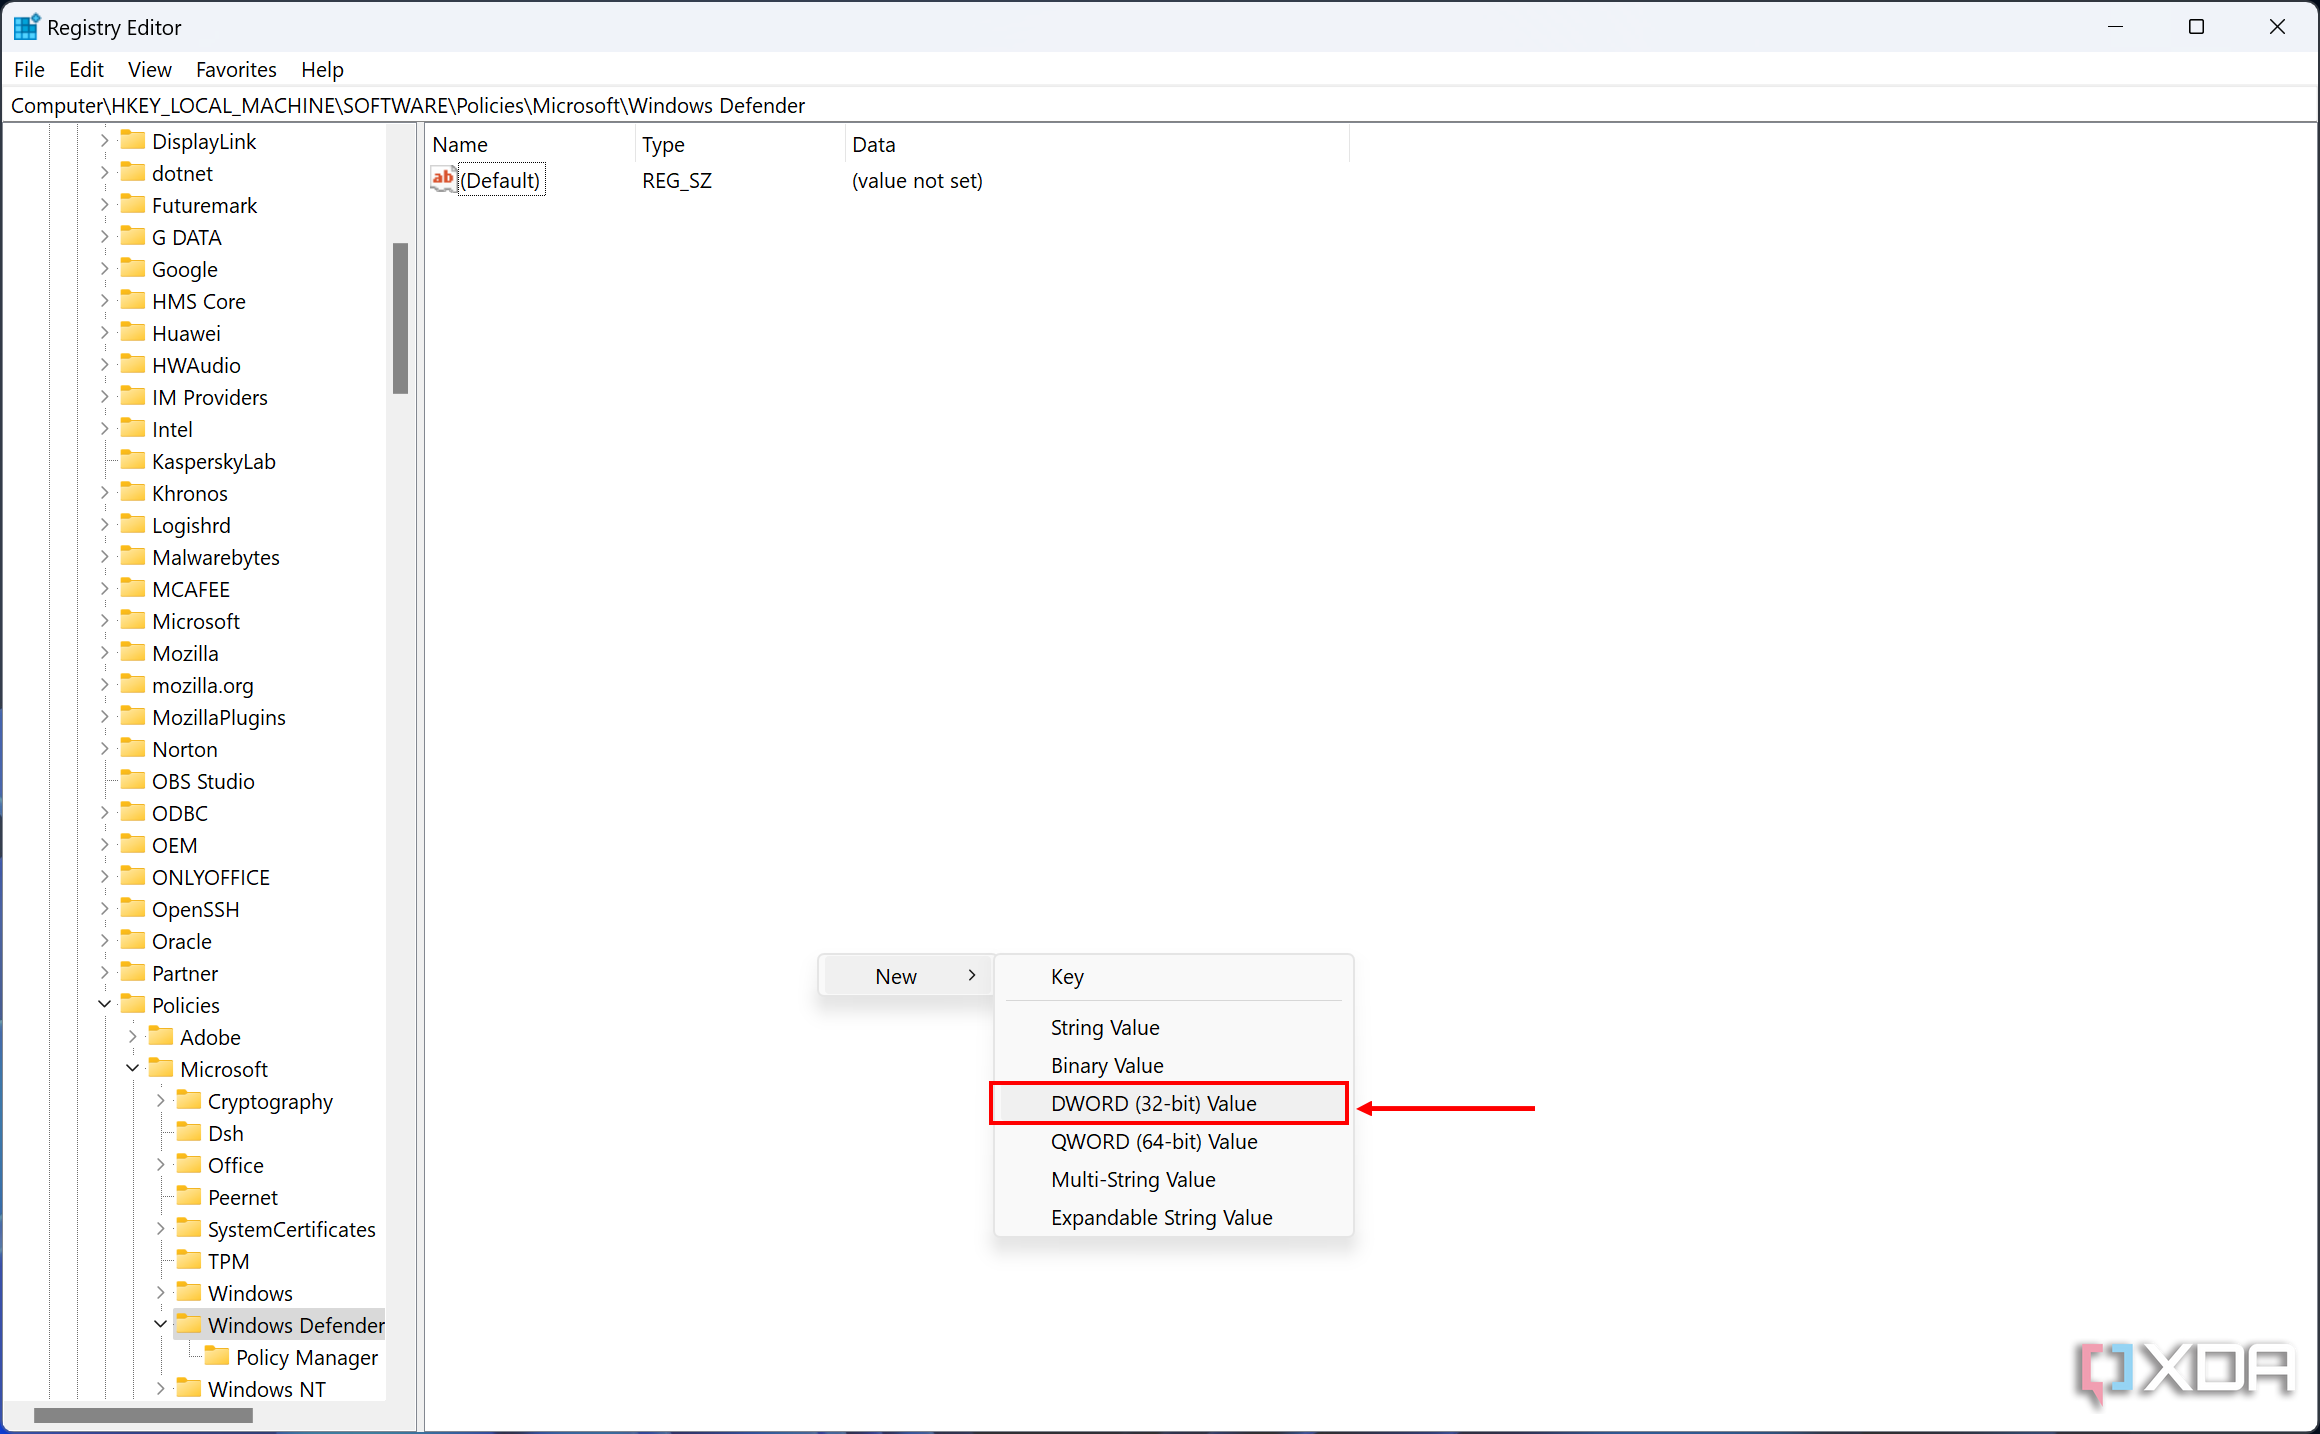
Navigate to the following path in Registry Editor (you can copy and paste it in the address bar):
Computer\HKEY_LOCAL_MACHINE\SOFTWARE\Policies\Microsoft\Windows Defender
-
Right-click an empty area of the main pane and choose New > DWORD (32-bit) Value.

- Change the value’s name to DisableAntiSpyware, then press Enter.
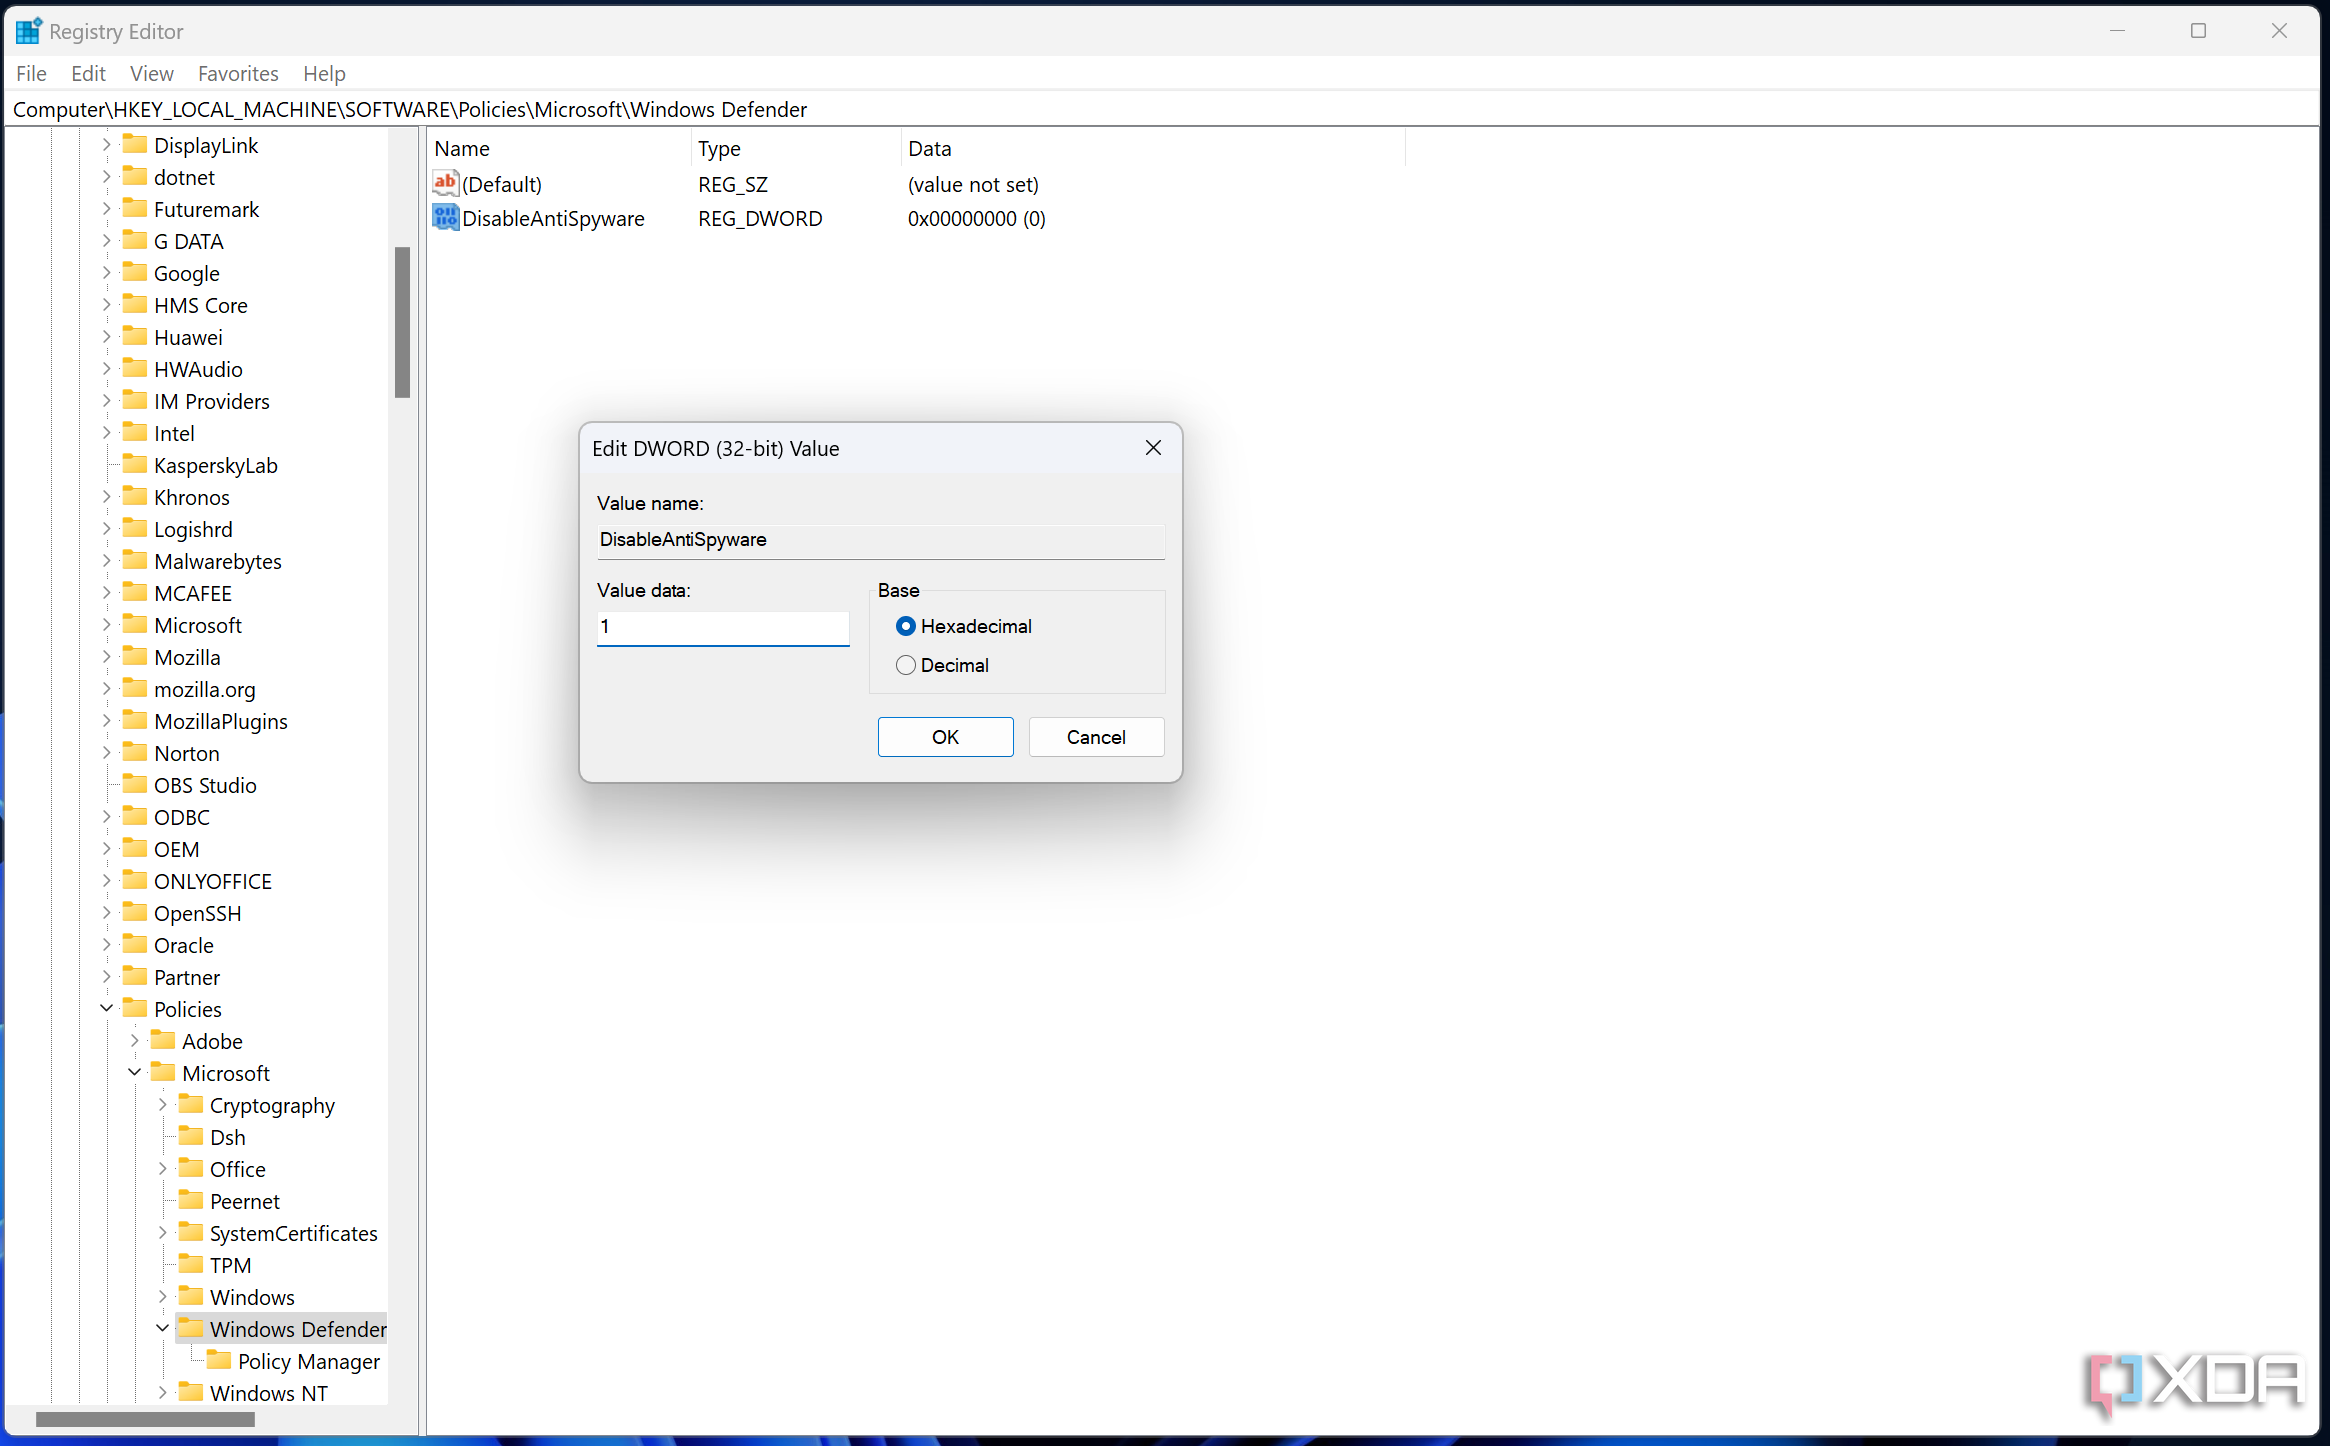
- Double-click the value to change its properties.
-
Set the Value data to 1. The base should be Hexadecimal. Click OK.

- Close Registry Editor and restart your PC to apply the changes.
If you ever want to undo this, simply navigate to the same path in Registry Editor and delete the value you created.
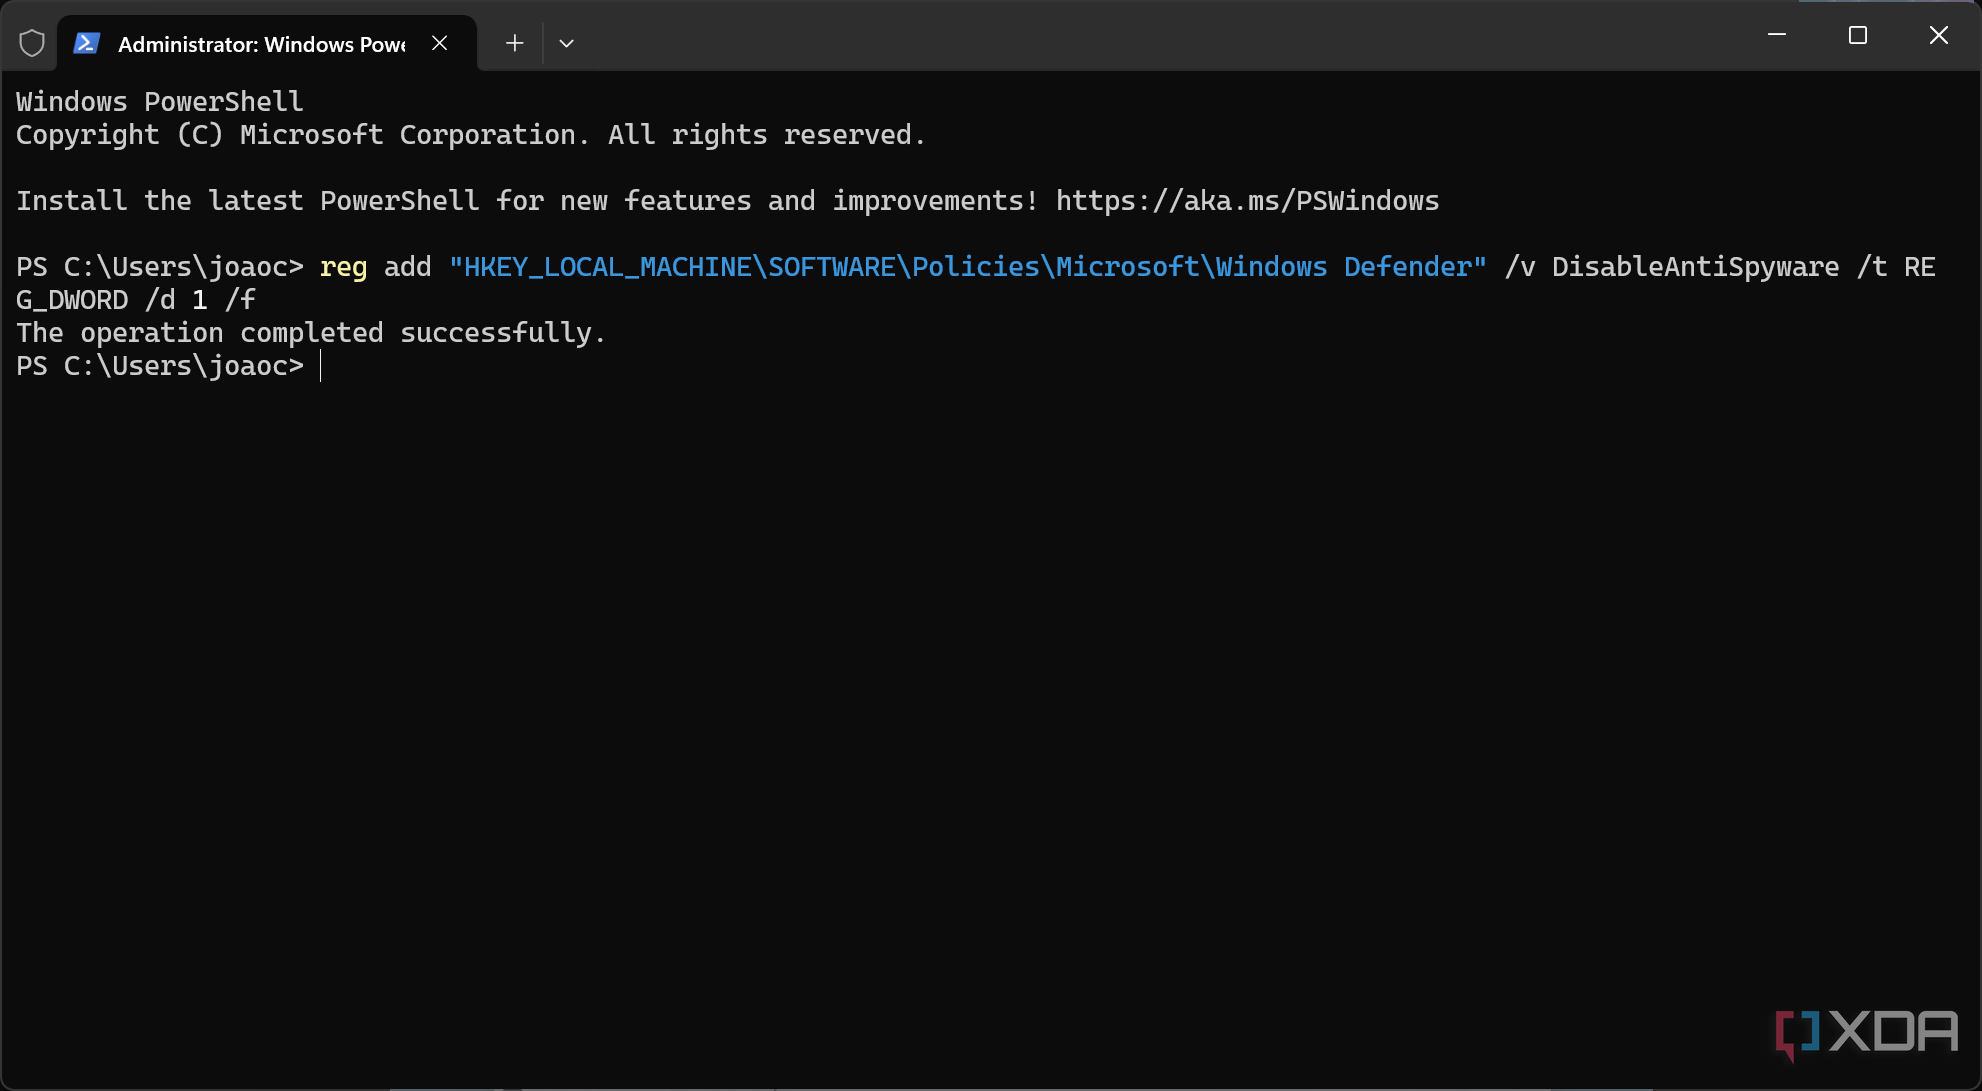
Using the Command prompt (Windows Terminal)
If you’d rather use a command-line interface for changing these settings, you can use Command Prompt or Windows Terminal to add the registry value to disable Microsoft Defender. To do this, simply follow these steps:
- Press Windows + X and choose Terminal (Admin) from the menu.
-
Copy and paste the following command into Windows Terminal, then press Enter:
reg add "HKEY_LOCAL_MACHINE\SOFTWARE\Policies\Microsoft\Windows Defender" /v DisableAntiSpyware /t REG_DWORD /d 1 /f

- You’ll see a confirmation message. Close Windows Terminal and restart the computer for the changes to take effect.
To revert this process and delete the value you created, you can use this command to remove the registry key:
reg delete "HKEY_LOCAL_MACHINE\SOFTWARE\Policies\Microsoft\Windows Defender" /v DisableAntiSpyware /f
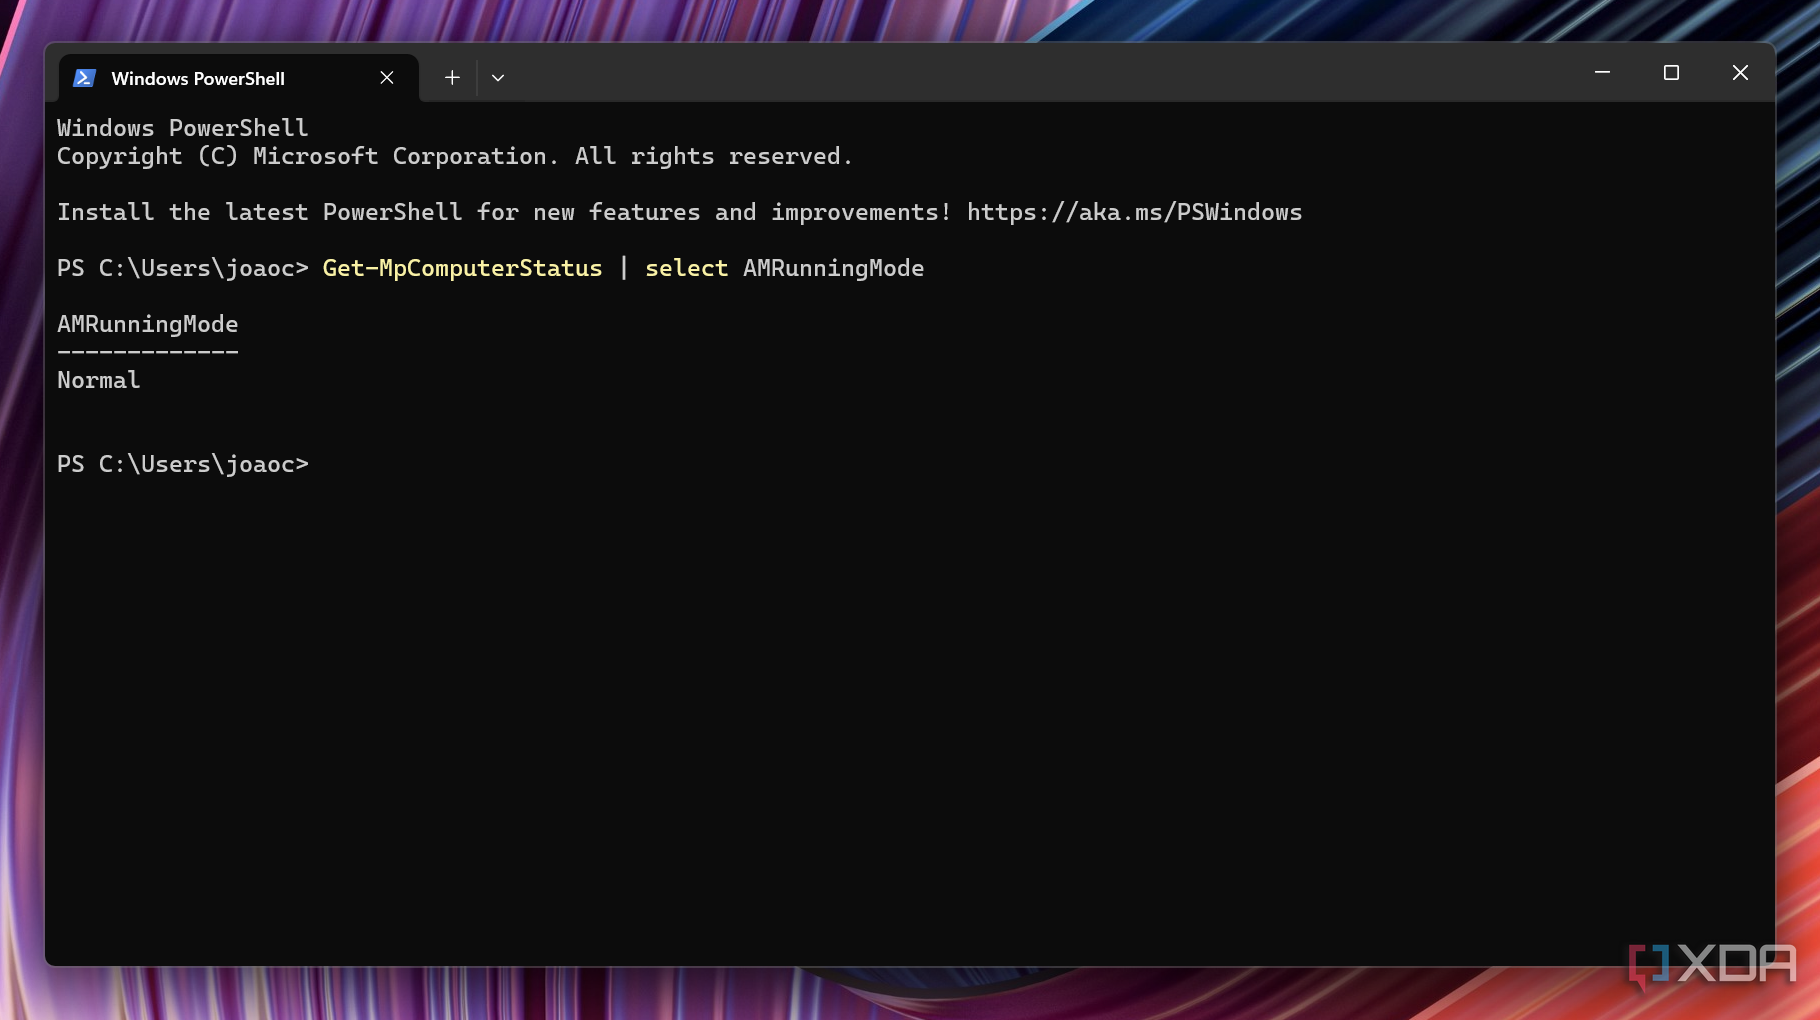
How to check if Microsoft Defender is enabled
If you’ve followed these steps and you want to make sure Microsoft Defender is still disabled, just follow these steps:
- Press Windows + X or right-click the Windows icon on the taskbar and choose Terminal.
-
Enter the following command:
Get-MpComputerStatus | select AMRunningMode
-
Check whether the table says Not Running. In the example below, you can see the service is still active, because it says Normal:

Disabling Microsoft Defender is dangerous
These steps are all you need to know if you want to disable Microsoft Defender on Windows, but again, this isn’t something we recommend doing. There’s a reason Microsoft makes it so hard to disable Microsoft Defender, and if you really just don’t trust it, your best bet is using a third-party solution to replace it. Otherwise, we don’t recommend following these steps.
Related