
Quick Links
-
Step One: Create a New Update Download Folder
-
Step Two: Stop the Windows Update Service
-
Step Three: Rename the Old Download Folder
-
Step Four: Create a Symbolic Link to the New Folder
-
Step Five: Start the Windows Update Service Again
To update your system to the latest release, there must be enough space on your hard drive for the update files. Windows will automatically try to use a different drive if your system drive is full, but with a few steps, you can also force Windows to download updates somewhere else.
By default, Windows will store any update downloads on to your main drive, this is where Windows is installed, in the C:\Windows\SoftwareDistribution folder. If the system drive is too full and you have a different drive with enough space, Windows will often try to use that space if it can. Windows takes care of removing update files at some point after they’ve been installed, but often—especially in the case of major updates like the October 2018 Update—it keeps those files around for a while in case you want to uninstall the updates or roll back your version of Windows.
Since these updates can often take up a lot of space—16-20 GB in some cases—you might want Windows to download them to a different drive, especially if you’re using something like a solid state drive where disk space is at a premium. You’ll have to jump through a few hoops to make it work. We’ll be shutting down the update service, using the Command Prompt to create a symlink (a virtual link to a new folder so Windows still thinks it’s using the original folder), and then restarting the update service. It’s not complicated, though, and we’ll walk you through the steps.
Note: Before going any further, you should back up your computer just in case anything goes wrong while altering things in system folders. (You really should be backing up regularly, anyway.) It’s a pretty safe process, but better being safe than sorry.
Step One: Create a New Update Download Folder
The first thing you’ll do is to create a new folder for the downloads on a different drive. This is where Windows will store any future update downloads.
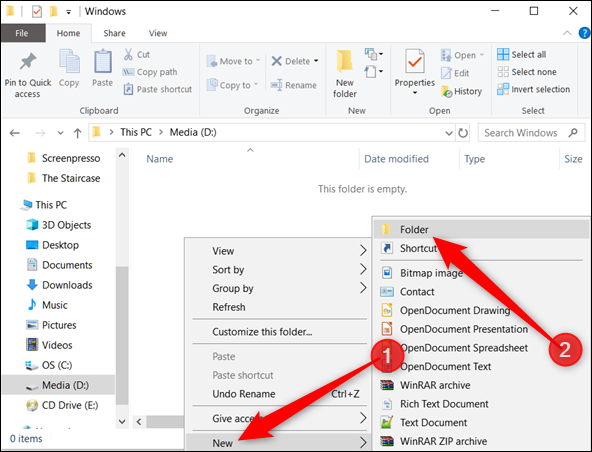
In File Explorer, find the location you want to use, right-click anywhere, point to the «New» submenu, and then click the «Folder» command.
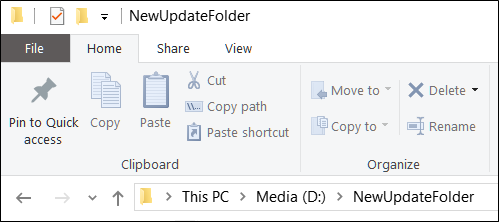
Next, name the folder to whatever you want. We’ve named ours «NewUpdateFolder,» and it’s located on the D:\ drive.
Step Two: Stop the Windows Update Service
Next, you have to stop the Windows Update service to prevent it from updating anything while you change things around and because in the next step, you’ll be renaming the old update folder. The Windows Update service won’t let you do that if it’s running.
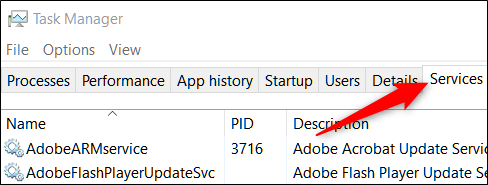
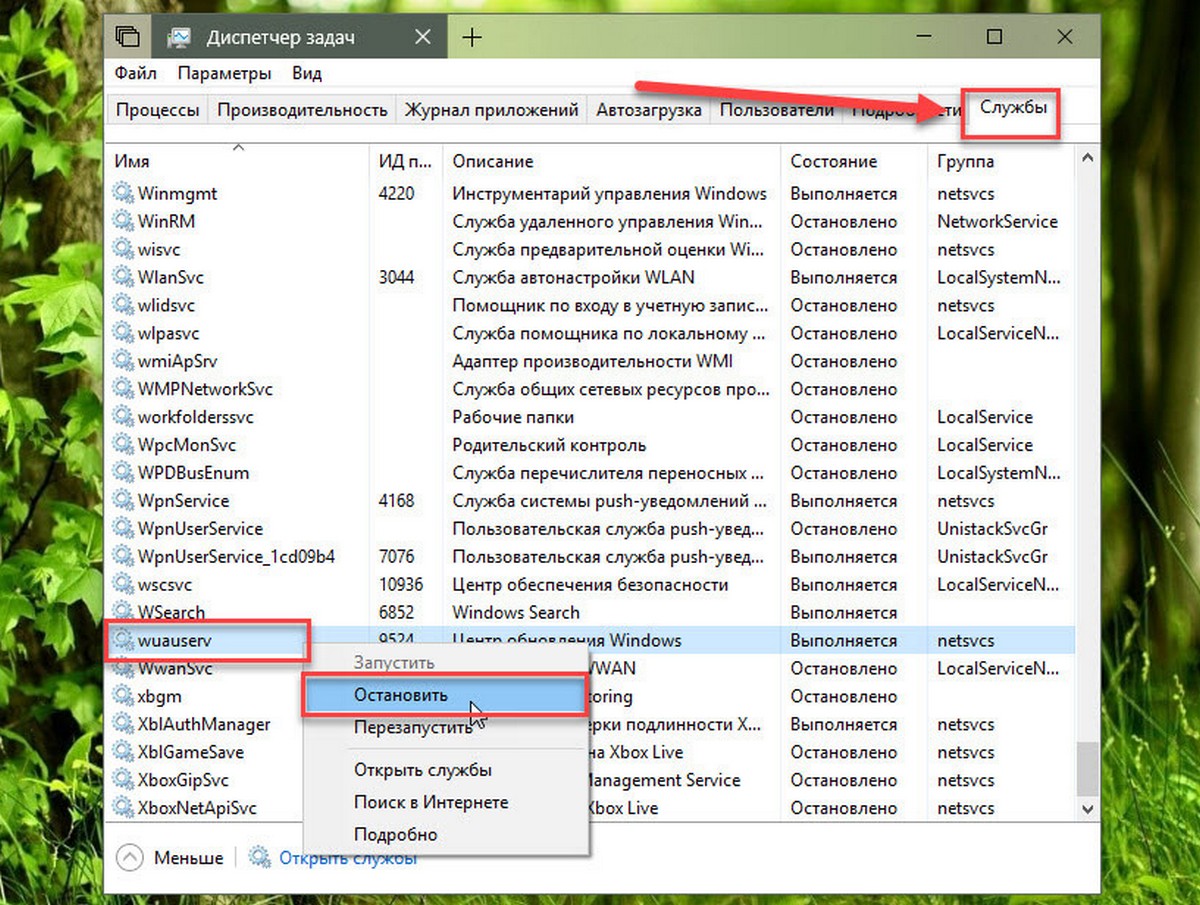
Press Ctrl+Shift+Esc to open the Task Manager and click the «Services» tab.
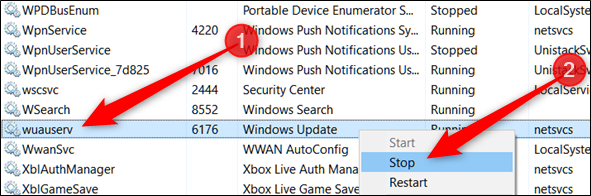
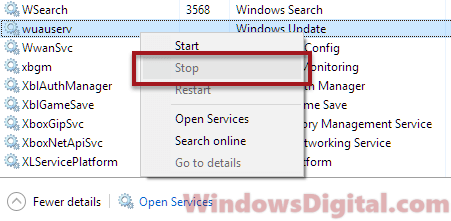
Scroll down until you find the wuauserv service near the bottom of the list. Right-click it and then click «Stop.»
Step Three: Rename the Old Download Folder
Now, you’ll need to rename the existing folder to something different. That’s because you’ll be creating a new symlink folder and Windows doesn’t let you have two folders of the same name, even though one is only pointing to the new folder you created in step one.
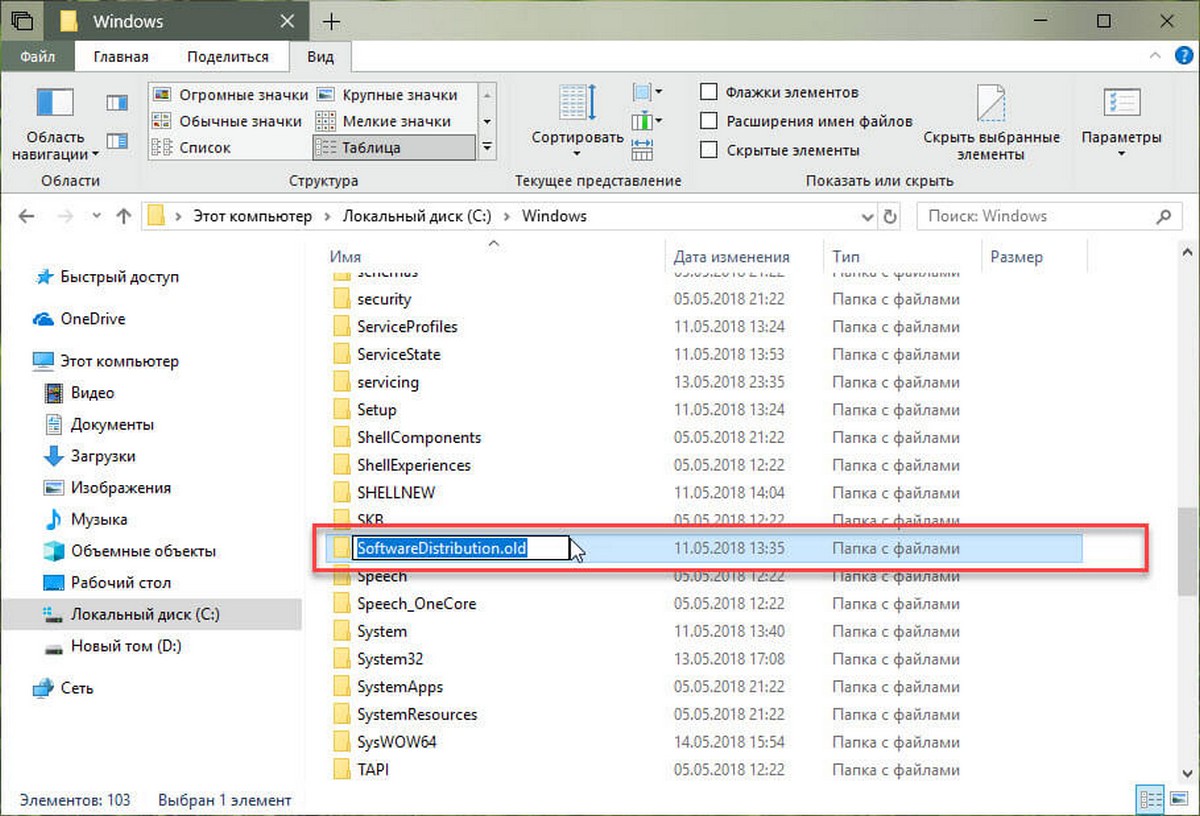
In File Explorer, browse to C:\Windows . Right-click the «SoftwareDistribution» folder there and then click the «Rename» command. You’ll be prompted for permission to do this; click «Yes.»
The easiest thing to do is to just stick «Old» at the front or back to signify this isn’t the current folder we’ll be working with. If prompted for permission again, click «Yes.»
Step Four: Create a Symbolic Link to the New Folder
Now that you’ve created the new folder you want the downloads to go and renamed the old «SoftwareDistribution» folder to get it out of the way, you need to show Windows how to find the new folder. To do this, we use what’s called a Symbolic Link, or symlink. These act much the same way a shortcut does; they point to a real folder somewhere else on your computer.
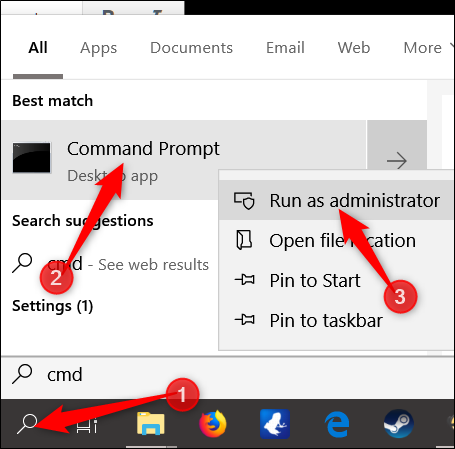
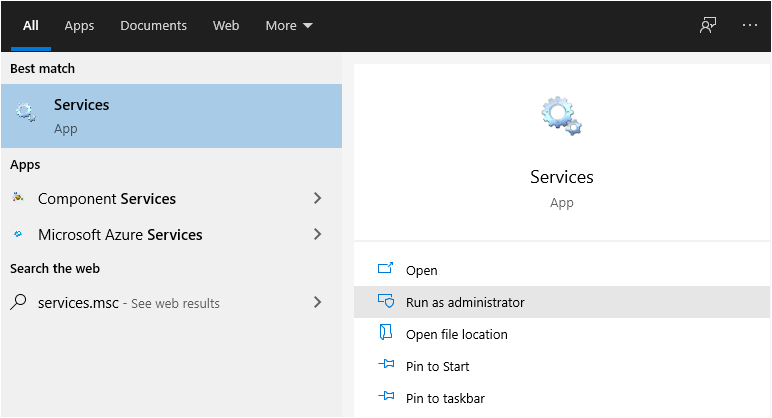
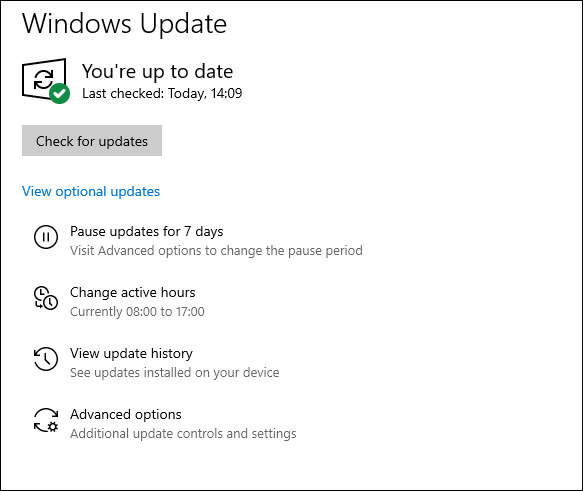
First, run Command Prompt as an administrator. Clicking Start, type «cmd» into the search box, right-click on the «Command Prompt» result, and then select the «Run As Administrator» command.
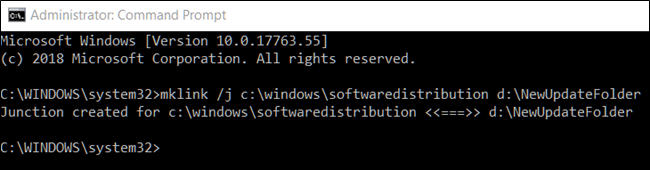
At the prompt, type the following command (replacing «d:\NewUpdateFolder» with the full path to the folder you created in step one).
mklink /j c:\windows\SoftwareDistribution d:\NewUpdateFolder
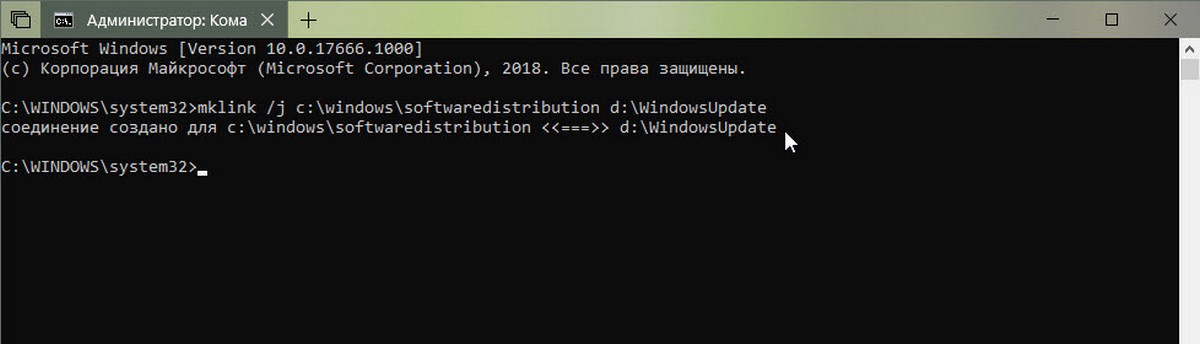
After you run the command, you should see a reply stating «Junction Created For» followed by the paths you specified.
A new «SoftwareDistribution» item with a shortcut icon is added to the C:\Windows folder.
Note: If the mklink command didn’t work or you received an error, try restarting your computer into Safe Mode and repeating the previous steps.
Now, copy the contents of the old «SoftwareDistribution» folder (the one you renamed in step three) into the newly created symbolic link. This will prevent Windows from re-downloading any updates.
We suggest copying instead of moving the contents for now just in case something doesn’t work. Once you’ve made sure everything is functioning, you can always come back and delete the old folder later.
Step Five: Start the Windows Update Service Again
The final step is to start the Windows Update Service back up.
Open Task Manager by pressing Ctrl+Shift+Esc and switch to the «Services» tab.
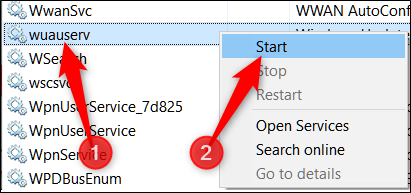
Scroll down until you find the wuauserv service near the bottom of the list, right-click it, and then click the «Start» command.
From now on whenever Windows Update downloads files, they should be stored in the newly created folder.
Running out of storage space is nothing new. Most of us have access to the internet and keep downloading stuff. Then there are games which can occupy a lot of storage space. The biggest problem arrives when you run out of storage space on your Windows Installation drive, usually the C drive, and the updates stop downloading. Windows OS doesn’t offer you an option to change the download location of the updates. In this post, we will learn to change the Windows 11/10 Updates download location.
Can you change Windows download location?
Yes, you can change the Windows 11/10 download location for Updates. First, prepare a new directory for reserving the updates. Then, use Command Prompt to create a symlink in the Start Menu. Finally, restart the Windows Update service on your computer.
Before you begin, you should know that you must have administrator privileges to complete this. If you have a regular account, it’s a good idea to contact the person who set up your PC and ask for his help.
The default location of Windows Update is C:\Windows\SoftwareDistribution. The SoftwareDistribution folder is where everything gets downloaded and later installed.
Prepare a new directory for the system to download the Windows Update
Create a target directory in a drive other than C drive. It can be named as WindowsUpdateDownload for easy reference. Let’s assume that the path is D:\WindowsUpdateDownload
Next, use Ctrl+Alt+Delete to launch the Task Manager and switch to Services tab, and then right-click on wuauserv, and stop it.
Now rename C:\Windows\SoftwareDistribution to C:\Windows\SoftwareDistribution.old

Create Symlink
To create a symlink, in the start menu, search for CMD or command prompt. Right-click on it, and run it as administrator. Then type the below-mentioned command then hit Enter:
mklink /j c:\windows\softwaredistribution d:\WindowsUpdateDownload
This will make Windows Update start the downloading files from zero to this new location.
In case it doesn’t work, you can try to boot Windows in Safe Mode to get this done.
Restart Windows Update Service
After this, you need to start the Windows Update Service. You can either use the Task Manager to start it like we did above or execute the following command in CMD:
net start wuauservCheck if Windows Update is working
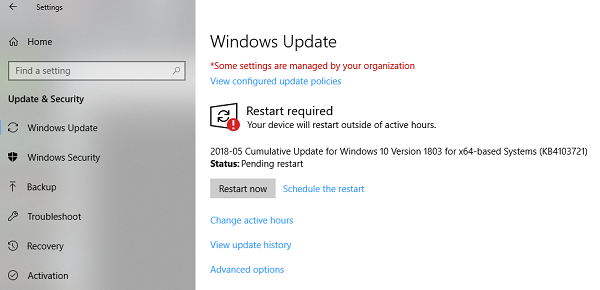
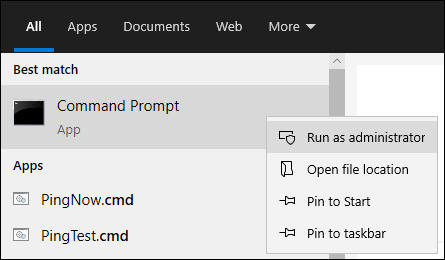
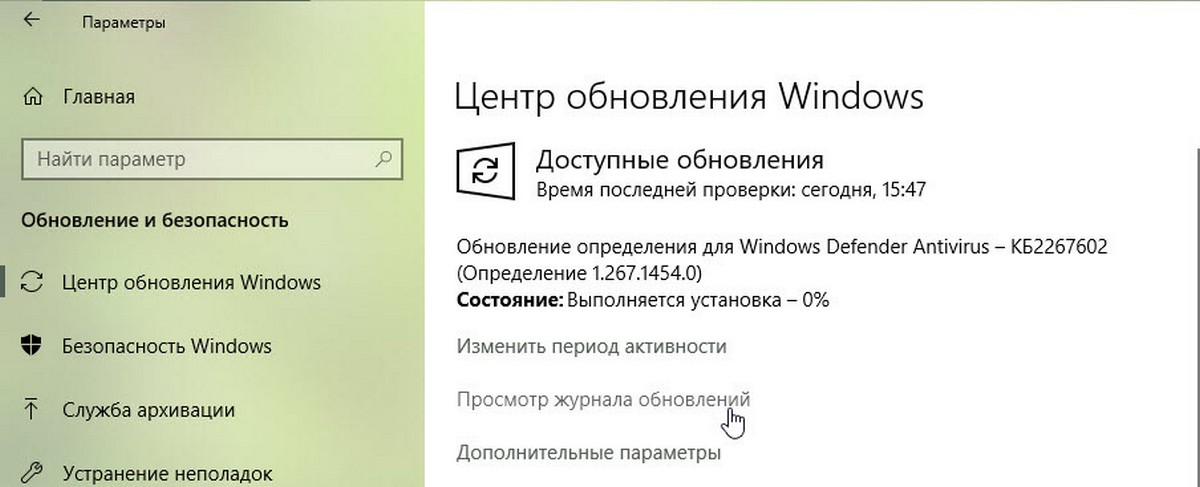
Go to Settings > Update and Security > Windows Update > Check for Update. If it starts downloading an update or does not throw any error, you are all set.
Here is an interesting fact: After downloading the Windows Update, the OS unpacks it in the drive with the freest space available and installs from there. Windows will clear the content of this directory from time to time.
We recommend using a storage space that usually remains empty. While you can choose an SD card (NTFS format) or an external drive, we recommend not doing so unless it always stays connected to the PC.
That’s all! I hope it helped.
How do I change the download location in Windows?
It is possible to change the download location in Windows 11/10. Whether you want to change the download location for browser downloads or Windows Updates, you can do both without any problem. Depending on the browser, you need to open the settings panel and choose a new folder to store all the downloaded files. However, if you want to change the Windows 11/10 Updates download location, follow this tutorial here.
Where are Windows Update downloads stored?
Windows Update downloads are stored in the C:\WINDOWS\SoftwareDistribution\Download directory. If you cannot see the files, enable viewing of hidden files by clicking on View, then Options, and selecting Change folder and search options.
If your computers C: drive is running low on free disk space and you don’t feel that you have anything you can delete on your local drive, this tip might help you.
If your computer is running low on free disk space on the local C: drive, but you have a D: drive with plenty of free disk space this tricks might be a good solution for you. This often happens if you have a small SSD drive with a capacity on maybe 128 or 256 GB. Now you might experience that your get warnings that your are running low on disk space and maybe you are not able to install new updates to your Windows 10 installation. When you computer run low on free diskspace is begins to run slow. With this trick we can move the Windows 10 updates download folder to another location. Even that your D: drive is not very fast it does not matter much. Windows download often happens in the background while you are doing other stuff, so it doesn’t matter much how long it takes to download these updates.
Step 1: Create a new folder on the D-Drive
First you will have to create the folder in the new location on your secondary drive. E.g. D:\WindowsUpdate\ This will be the new location for files downloaded by the Windows Update Service.
Step 2: Stop the Windows 10 Update Service
Now you will have to stop the Windows Update service in order to change the location. It is not possible to change the download location while the Windows Update service is running. In order to be able to stop the service you will have to be an administrator on your computer.

Step 3: Rename the old Download Folder
Next step is to rename the current Windows Update download folder. The default location is: C:\Windows\SoftwareDistribution\ you can rename the folder to e.g. C:\Windows\Old_SoftwareDistribution. The name is not that important, because we will delete the folder in step 7.

Step 4: Create a Symbolic link to the new location
In the next step we will create a Symbolic link to the new download folder we created in the alternative location: D:\WindowsUpdate. A symbolic link is a kind of redirection of a folder location. To make the symbolic link we will need to start a command prompt as administrator.
From the command prompt we will type:
mklink /j c:\windows\SoftwareDistribution D:\WindowsUpdate
Where D:\WindowsUpdate is the new location where we want to download files from Windows Update in the future. This will create a Symbolic link from c:\windows\SoftwareDistribution to D:\WindowsUpdate
Step 5: Start Windows 10 Update Service again
Now it is time to start the Windows Update service again. Just liked when we stopped the service: Start the services console with an administrator account and start the services as show below:

Step 6: Test Windows Update to make sure the new location is used
If the service started successfully in the step above it is time to test that Windows Update is working correct after we moved the download location.
Go to Settings -> Update & Security and click on “Check for updates”. If there is no error, we can continue to step 7.
Step 7: Delete the older Windows Update Folder
No that we know that the operation was successful. We can go ahead and delete the old folder on the C: drive that we in my example, renamed to: C:\Windows\Old_SoftwareDistribution. Remember that this operation also requires administrator rights.
Conclusion on changing Windows Update location
How much free disk space on your C: drive this tips will release is hard to say. The size of the Windows Download folders will be variable depending on how many updates is pending for download. When there is a major upgrade for Windows 10 twice a year this folder will take up many gigabytes of storage.
This example on how to release disk space from the system drive on your computer, is just one out of many things you can do. If you are using cloud services, like OneDrive, Dropbox or Google Drive you might also want to change the default storage location away from your C: Drive. Depending on your configuration these services store cached files to your local hard drive. There can be many GB to spare on your local system drive by moving these files to another drive.
Нехватка свободного места для загрузки обновлений системы это не новая проблема. У большинства из нас есть доступ к Интернету и, конечно же, мы все загружаем разные файлы. У нас установлены игры и другие программы, которые могут занимать много места на жёстком диске. Самая большая проблема возникает при загрузке обновлений на системный диск Windows, обычно это диск C, поскольку на диске нет или мало свободного места, обновления перестают загружаться. Windows не предложит вам изменить местоположение загрузки обновлений.
В этом инструкции мы рассмотрим, как переместить папку для загрузки обновлений Windows 10 на другой диск. Прежде чем начать, вы должны знать, что для этого вам понадобятся права администратора.
Изменить расположение папки загрузки обновлений Windows 10.
По умолчанию Центр обновления Windows использует папку C:\Windows\SoftwareDistribution. То есть все загружаемые файлы находятся в папке SoftwareDistribution и позже устанавливается системой.
Шаг 1. Поскольку наша цель заставить систему загружать обновления на другой диск, создайте для этого новую папку на диске D. Данную папку можете назвать как вам угодно, для примера назовем новую папку WindowsUpdate. Предположим, что путь к ней — D:\WindowsUpdate

Шаг 2. Затем используя клавиши Ctrl + Alt + Delete, откройте «Диспетчер задач».
Шаг 3. В диспетчере, переключитесь на вкладку «Службы», а затем найдите и кликните правой кнопкой мыши по службе wuauserv и остановите ее. (см. картинку)
Шаг 4. Теперь переименуйте C:\Windows\SoftwareDistribution в C:\Windows\SoftwareDistribution.old
Шаг 5. Создайте символическую ссылку (Symlink).
Чтобы создать символическую ссылку, откройте командную строку. В меню «Пуск» начните печатать CMD в результатах поиска кликните правой кнопкой мыши на Командная строка и запустите ее от имени администратора. Затем введите следующую команду и нажмите Enter:
mklink /j c:\windows\softwaredistribution d:\WindowsUpdate
Теперь вы можете скопировать все файлы из C:\Windows\SoftwareDistribution.old в новую папку загрузки. Это гарантирует, что загрузка будет продолжена; иначе она начнется с начала.
Шаг 6. Перезапустите службу обновления Windows
После этого вам нужно запустить службу Центр обновления Windows — wuauserv. Вы можете использовать Диспетчер задач, чтобы запустить ее, как мы делали выше, или выполнить следующую команду в CMD:
net start wuauserv

Шаг 7. Проверьте, работает ли Центр Обновления Windows:
Откройте «Параметры» → «Обновление и безопасность» → «Центр обновления Windows» → «Проверка наличия обновлений». Если система начнет \ продолжит загрузку обновлений и не вызывает ошибки, вы все сделали верно.
Мы рекомендуем использовать диск для загрузки обновлений системы, который имеет достаточно свободного места. Хотя вы можете выбрать SD-карту (формат NTFS) или внешний диск, мы советуем делать это, только если он всегда остается подключенным к вашему ПК.
Все, надеюсь информация пригодится!
Читайте также: 16 Cпособов освободить место на диске в Windows 10
Having a hard time updating your computer to Windows 10 or Windows 11 because you’re running out of space? Don’t worry, it’s a super common problem for users with low disk space on their computers. The update process needs room to download and store files, which can be a tight squeeze if your hard drive is nearly full. But there’s a workaround: changing where Windows Update files download can solve the space issue.
In this guide, we’ll show you how to change the Windows Update download location, possibly to another drive with more disk space, using a technique called Symlink. This way, you can update your PC without worrying about available empty space anymore. In addition, we’ll make sure all the screenshots and steps are applicable to Windows 11 too.
Also see: How to delete Windows Update files in Windows 11
Why change the download location for Windows Update?
When updating Windows 11 or 10, it first downloads files to your primary hard drive, usually the C:\ drive. But if this drive is full, especially during a big update, you might meet an issue because there’s no room for the installation files. To fix this, we’ll show you how to change the download location to a drive with more space, so the updates can continue.
Steps to change the Windows Update download location
Step 1: Stop the Windows Update service
Firstly, you need to stop the Windows Update service so that it will not interfere with the changes and can recognize it later when you restart the service.
- Right-click on your taskbar and pick “Task Manager”.
- Head to the “Services” tab.
- Find the service named “wuauserv”.
- You might want to sort by name to find it easier.
- Right-click on “wuauserv” and choose “Stop”.
Step 2: Change the old path and create a new Windows update download location
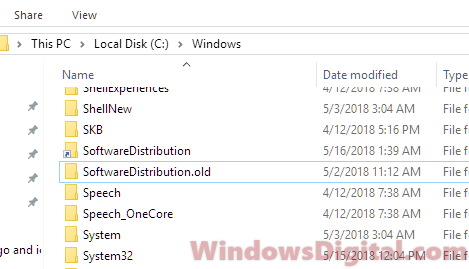
- Rename the place where Windows 11 or 10 keeps its update files from
C:\Windows\SoftwareDistributiontoC:\Windows\SoftwareDistribution_old. - Make a new folder on a drive with more room for the updates, like
E:\NewWindowsUpdateLocation, or whatever you prefer.
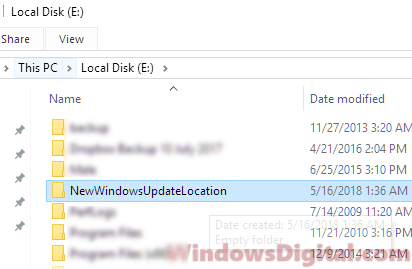
Step 3: Create a symlink to connect the two paths
- Open Command Prompt as admin by searching for it and choosing “Run as administrator”.
- Type in this command:
mklink /j C:\Windows\SoftwareDistribution E:\NewWindowsUpdateLocation
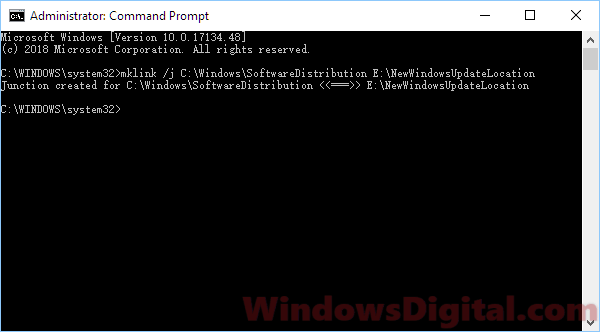
When you see “Junction created,” it means the new symlink is ready. It might look like updates still go to the old place, but they’re actually saving to the new location you created.
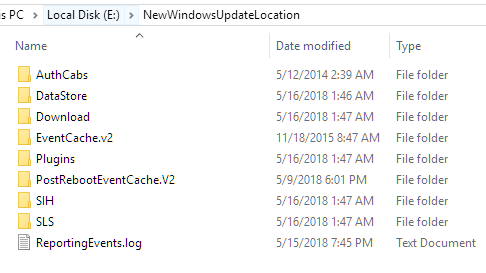
Optionally, you can move all the old update files to your new location so Windows doesn’t re-download them. Or, if you prefer, you can delete them from the old spot if they’re not needed anymore.
Step 4: Restart the Windows Update service
Follow the steps below to restart the WU service:
- Go back to Task Manager, click the “Services” tab.
- Find “wuauserv“, right-click it, and hit “Start”.
You can now try to run Windows Update again by going to Settings > Update and Security > Windows Update. Then, click on “Check for Updates.”
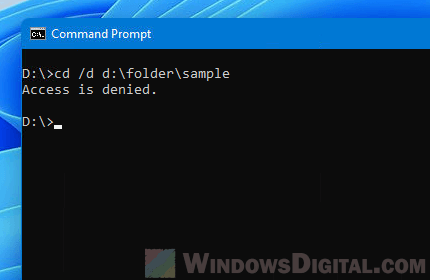
If you see an “Access is Denied” error when you enter the command in CMD, even if you run the Command Prompt as an administrator, or if you can’t rename the Software Distribution folder in C:\Windows, boot your Windows into safe mode and repeat the steps again. This should help if Windows Update can’t be stopped in the previous session or if you have a problem with your admin privileges in Windows 11 or 10.
Common issue after changing the download location
After you change where Windows Update downloads stuff, you might hit a snag. Even if you think you’ve got it all set up perfectly, sometimes Windows Update acts like it doesn’t know about the new spot and won’t start downloading updates. It can be annoying, but this usually happens if the symlink wasn’t done right or Windows still thinks it should be looking at the old location.
To sort this out, go over the symlink command you used and check that it really points from the old update folder to the new one. Also, it’s smart to restart your computer after you set up the symlink. Doing this gives Windows a clean slate to notice the new update path.