
In this article, we are going to discuss Registry Hacks for Start Menu and Taskbar in Windows 10. Microsoft always tries to bring out the best features and in this consequence the old are replaced by modern ones. Few users don’t like the changes and want to enable the previous look for a help like Registry Editor.
In addition, you can supersede the Windows Settings and Control panel options through registry hacks. This way lets you make some useful changes in Windows 10 even sometimes as a lifesaver.
Microsoft keeps few features hidden from the users and you can easily enable or disable those via Registry key manipulations. Let’s see how you can reverse their status by using these superb registry hacks for Start Menu and Taskbar in Windows 10.
But before starting we warn you for 2 things – 1. Go with the methods if you have a proper knowledge for the modifications, and 2. make sure to backup. You may take help from the instructions here – How to Import and Export Registry Editor on Windows 10.
Registry Hacks for Start Menu and Taskbar in Windows 10
Registry Hacks for Start Menu in Windows 10
Lots of people complained about the inability to customize Start Menu in various ways. Actually, Microsoft did not provide any built-in options to manage most of the settings of Start Menu. However, Registry Hacks for Start Menu and Taskbar will allow you to handle plenty of important things.
You can do some changes in Start Menu such as disable “Windows Live Tiles” permanently, remove “recently added apps” group, etc. Here, we will derive about all these.
Disable Windows 10 Live Tiles Permanently
Windows 10 provides Live tiles in the Start Menu that changes after every few seconds in order to show relevant information such as latest news, weather and so on. Moreover, the Photos tile also displays a slideshow of images.
The “Start Menu” of Windows 10 gives you a provision to disable Live Tiles feature. But a substantial number of users prefer to disable all the Live Tiles permanently in one go.
Step-1: At first press the Windows Key and start typing regedit. When the same command is visible on the top, click on it.
You can also Create a Keyboard Shortcut to Registry Editor in Windows 10.
Step-2: Once Registry Editor opens up, look out for the below path.
HKEY_CURRENT_USER\SOFTWARE\Microsoft\Windows\CurrentVersion\PushNotificationsStep-3: Right-click on PushNotifications and hover the cursor over New. Select DWORD (32-bit) Value and give the identification name as NoTileApplicationNotification.
Step-4: Double-click the newly created DWORD and set its Value as 1.
Doing this will disable the push notifications. However, to experience this, ensure to restart Explorer from Task Manager.
Read: How to Restart File Explorer Using Task Manager in Windows 10.
Remove Recently added Apps on Start Menu
Another interesting Registry Hack for Start Menu and Taskbar is to remove recently added apps list. Windows 10 Start Menu is continuously developing with various new features. One such amazing feature is its Recently Added apps section on the top left. The list displays Store as well as classic apps you have installed in the Start Menu.
The good thing is that the OS provides you various ways to disable this feature. Most users do not prefer the Start Menu to display the new applications that were recently installed in the system.
At first, open the Registry Editor using any of your preferred methods. However, executing the regedit command on Run will fetch you the tool pretty easily.
Navigate to the following key:
HKEY_LOCAL_MACHINE\SOFTWARE\Policies\Microsoft\Windows\ExplorerNote: If you don’t see Explorer key, just create a new one. Simply, make a right-click on Windows and choose New followed by Key. Name this as Explorer.
Now, switch to the right-pane of Explorer, right-click somewhere on an empty space. Select New, pick up DWORD (32-bit) Value and name it as HideRecentlyAddedApps.
It doesn’t matter whether you are using a 32-bit system or 64-bit system. In both cases, you should go ahead with DWORD (32-bit).
Do a double-click on HideRecentlyAddedApps and set its value as 1.
Finally, restart Explorer to disable Recently added apps section in the Start Menu.
Note: If you prefer to revert back to the original settings, simply delete the newly created DWORD HideRecentlyAddedApps.
Just restart your PC to experience the changes.
Disable context menu in Start Menu in Windows 10
Usually start menu apps come with a unique feature that allows users to perform different activities like “Uninstall”, “Pin to taskbar” etc. Whenever you perform a right-click on any app or tile, you get to see a context menu. Here, we will tell you the procedure to disable “context menu” feature of Start Menu in the latest version of Windows 10.
• Open Registry Editor by typing regedit on Cortana.
• Next, browse to the below-given path:
HKEY_LOCAL_MACHINE\SOFTWARE\Policies\Microsoft\Windows\Explorer• Right click on Explorer and create a new “DWORD (32-bit) Value”. Name it as DisableContextMenusInStart.
• Make a double-click on DisableContextMenusInStart and set the value to “1” from “0” to disable the context menu.
• Finally, either Restart your PC or the Explorer to see the changes.
Note: If you wish to revert back the changes made so far, all you have to do is to either set the value to “0” or just delete the entire DWORD.
Here, you may like to read How to Open Right-Click Menu for Icons on Taskbar in Windows 10.
Remove All Programs List from Start Menu
This is a simple Registry Hacks for Start Menu and Taskbar. You will clear out all the programs that Start Menu displays on the left side by applying the procedure. However, not preferable by everyone, but still, most of them choose to do so.
Launch Registry Editor and navigate to the given paths one after another on the left-hand side.
HKEY_CURRENT_USER\Software\Microsoft\Windows\CurrentVersion\Policies\ExplorerHKEY_LOCAL_MACHINE\SOFTWARE\Microsoft\Windows\CurrentVersion\Policies\ExplorerOn the corresponding right pane of Explorer on both the paths, generate a new DWORD with a name NoStartMenuMorePrograms.
Right-click on it and select Modify. Now, input its value data as 1 and click OK.
As the last step, restart Windows Explorer on “Task Manager” and then open Start Menu. You will no more see the list of programs on the left side.
Collapse Windows 10 Start Menu
When you collapse Windows 10 Start Menu, only one portion will be visible to you. You can either view all programs or choose to display the Live Tiles only.
After collapsing the Start Menu, you will see two icons – Pinned tiles and All Apps on the extreme top left. So, let us now see how to make this option possible through Registry.
Get access to the Registry Editor and head to the below-given paths one after another.
HKEY_CURRENT_USER\Software\Microsoft\Windows\CurrentVersion\Policies\ExplorerHKEY_LOCAL_MACHINE\SOFTWARE\Microsoft\Windows\CurrentVersion\Policies\ExplorerNow, shift to the adjacent right pane of Explorer on both the paths and create a new DWORD with a name NoStartMenuMorePrograms.
Make a double-click on it and assign its value as 2. Click OK to save the changes and restart Explorer to see the collapsable Start Menu.
Registry Hacks for Taskbar in Windows 10
By dint of Registry Hacks for Start Menu and Taskbar, you can choose not to display custom toolbars, seconds display in the Clock, taskbar previews as well as make it completely Black.
Enable Seconds in Taskbar Clock
One of the Registry Hacks for Taskbar in Windows 10 is to enable seconds display in the Clock located in the notification area. Here is the procedure:
Make a joint press of “Win+R” to open Run dialog box in Windows 10.
To access Registry Editor, type Regedit in the provided text field of Run and press Enter. A UAC popup will appear, click Yes to continue.
When Registry Editor comes into the view, go to the following address on the left-hand side.
HKEY_CURRENT_USER\SOFTWARE\Microsoft\Windows\CurrentVersion\Explorer\AdvancedShift to the corresponding pane and make a right-click in empty space and select DWORD (32-bit) Value. Name it as ShowSecondsInSystemClock and hit Enter to save it.
Perform a double-click on the newly formed ShowSecondsInSystemClock DWORD and when its edit box will appear, set its value to 1.
Click OK to implement the changes. Finally, Restart Explorer to make the modifications visible.
Now you will see seconds in Taskbar Clock. If you don’t like it, simply delete the DWORD ShowSecondsInSystemClock from Registry Editor to disable it again.
For more ways, follow our article to Add Seconds to Taskbar Clock Hours and Minutes in Windows 10.
Remove People App Icon from the Taskbar
Windows 10 taskbar displays People icon which facilitates users to easily view their contacts. However, many users do not find this icon to be useful in Taskbar and thus prefers to remove it. So, let us explore the registry way to remove People app icon from the taskbar.
Launch Cortana search box and write regedit here.
Pressing Enter will guide you to the Registry Editor. Now navigate to the following path:
HKEY_CURRENT_USER\SOFTWARE\Microsoft\Windows\CurrentVersion\Explorer\Advanced\PeopleMove aside to the right side and perform a right click on void space. Hover the cursor over New and select DWORD (32-bit) Value. Give this DWORD a name PeopleBand.
Double-click on PeopleBand and set its Value data to 0.
In the end, Restart File Explorer. It will save the changes you just made.
By following this Registry Hacks for Taskbar in Windows 10, you can pretty easily Remove People App icon from the taskbar. Moreover, if you want to bring back the People icon, set 1 as the value of DWORD PeopleBand.
For reference, you may like to read How to Show and Hide My People Pops in Windows 10.
Disable Thumbnail Preview in the Taskbar
Whenever you place your cursor over any running folder or program in the taskbar, it shows a “thumbnail preview”. If you don’t find any use of this feature, you can disable it by the following Registry tweak.
Make a combined press of “WIN+R” to launch Run dialog. Type in regedit in the dialog box and hit Enter to continue.
Once the Registry Editor appears, browse through this given path
HKEY_CURRENT_USER\Software\Microsoft\Windows\CurrentVersion\Explorer\AdvancedOn the adjacent right pane, conduct a right-click on a vacant area. Hover over New, pick up “DWORD (32-bit) Value” and name it as ‘ExtendedUIHoverTime’.
Perform double click on it and thereafter set the value to 10000. Here 10000 refer to milliseconds which mean it will stop the thumbnail for long period of time.
Finally, restart Explorer and then hover the cursor over an active program on the taskbar. You will no longer see the thumbnail preview of those programs.
Read How to Show Thumbnail instead of icons on Windows 10, 8 Desktop.
Increase Size of Preview Thumbnail on the Taskbar
You can also Increase Size of Preview thumbnail on the taskbar with a simple registry hack. Let’s see how:
Launch Start Menu, type regedit and click the same command when it appears as the Best match.
Upon opening the Registry Editor, reach out to the following path:
HKEY_CURRENT_USER\SOFTWARE\Microsoft\Windows\CurrentVersion\Explorer\TaskbandMove to the right side, create a new DWORD and name it “MinThumbSizePx”. Next, perform a double click on it and set the value under 500. For example – 300.
Note – The maximum value to increase the size of thumbnail preview is 500.
This time you will see that the thumbnails size has been changed. However, don’t forget to Restart Explorer to view the changes.
Remove System Tray from the Taskbar
• Type regedit in Cortana box and when the same displays as the final result, click on it to open Registry Editor.
• Go to the following path on the left column of the Registry –
HKEY_CURRENT_USER\Software\Microsoft\Windows\CurrentVersion\Policies\Explorer• Shift aside to the right pane and make a new DWORD called “NoTrayItemsDisplay”. Double-tap on the new DWORD and set the value to 1.
This tweak will Remove system tray from the taskbar and if you wish you bring it back, delete the DWORD NoTrayItemsDisplay.
Do not Display Custom Toolbar on Taskbar
This is applicable for the users who prefer to keep their system tray neat and clean. Moreover, who also like to prevent others from adding a custom toolbar on the taskbar.
Go to Registry Editor using any of your convenient methods.
On its left column, browse to the given below path:
Computer\HKEY_CURRENT_USER\Software\Microsoft\Windows\CurrentVersion\Policies\ExplorerSwitch to the other side of Explorer key and generate a DWORD with a name NoToolbarsOnTaskbar.
Double-click on it, input its value as 1. Click OK, restart Explorer and then the custom toolbar will not appear on the taskbar anymore.
That’s all for today and hopefully, with these Registry Hacks for Start Menu and Taskbar in Windows 10, you can customize your PC accordingly.
Today in this tutorial, we are going to share 2 Registry tweaks for customizing appearance of Windows 10 Taskbar context menu (right-click menu).
Please note that these Registry tweaks will only work if you use our exclusive tool “Windows 10 Taskbar Context Menu Tweaker“.
The Registry tweaks mentioned in this topic will help you in:
- Showing icons in Taskbar context menu
- Adding your name or any other desired text string in Taskbar context menu
If you want to customize Taskbar context menu in Windows 10, following easy steps will help you:
By default the Taskbar context menu doesn’t show any icons but this Registry tweak can show a few icons such as show desktop, task manager and properties as shown in following image:
If you want to show icons in Taskbar context menu, follow these simple steps:
1. Press WIN+R keys together to launch RUN dialog box. Now type regedit in RUN and press Enter. It’ll open Registry Editor.
2. Now go to following key:
HKEY_CURRENT_USER\SOFTWARE\Microsoft\Windows\CurrentVersion\Explorer
3. In right-side pane, you’ll see ContextMenuConfig DWORD which was created by our “Windows 10 Taskbar Context Menu Tweaker” tool.
Its value would be set to any of the following:
- 0 – to show classic context menu in Taskbar
- 1 – to show dark modern (immersive) context menu in Taskbar
4. To show icons in Taskbar context menu, double-click on ContextMenuConfig DWORD and set its value to 2
Now right-click on Taskbar and you’ll see icons in context menu.
5. If you want to show classic context menu without icons in Taskbar, again change value of ContextMenuConfig DWORD to 0 or set its value to 1 to show default dark modern context menu.
This is an interesting Registry tweak. Actually “Windows 10 Taskbar Context Menu Tweaker” tool adds a new option “Use immersive menu” in Taskbar context menu to toggle between classic and dark modern context menu quickly and easily.
Now the new version of our “Windows 10 Taskbar Context Menu Tweaker” tool comes with a new Registry tweak to customize the label of this “Use immersive menu” option. With the help of this Registry tweak you can change the label of “Use immersive menu” option in Taskbar context menu to any desired text string. Actually this Registry tweak was implemented for users having non-English operating system so that they can set the label of this option in their own display language.
But you can use this Registry tweak to set its label to any desired text string. You can set the label to your name, your website URL or any other text string as shown in following image:

If you want to add your name or other text string in Taskbar context menu in Windows 10, check out following steps:
1. Press WIN+R keys together to launch RUN dialog box. Now type regedit in RUN and press Enter. It’ll open Registry Editor.
2. Now go to following key:
HKEY_CURRENT_USER\SOFTWARE\Microsoft\Windows\CurrentVersion\Explorer
3. In right-side pane, create a new String ToggleMenuTitle and set its value to your desired text string which you want to show in Taskbar context menu.

That’s it. Right-click on Taskbar and get ready to see your text string in the context menu.
4. To show the default label again, delete the ToggleMenuTitle String from Registry.
Lets remind you again that these Registry tweaks will only work if you use our “Windows 10 Taskbar Context Menu Tweaker” tool because these tweaks are a part of the tool.
Also Check:
How to Add Your Name in Desktop Context Menu in Windows 7 and Later?
How to Add Your Name in Desktop Context Menu in Windows XP?
You are here: Home » Windows 10 » Registry Tweaks for Customizing Windows 10 Taskbar Context Menu
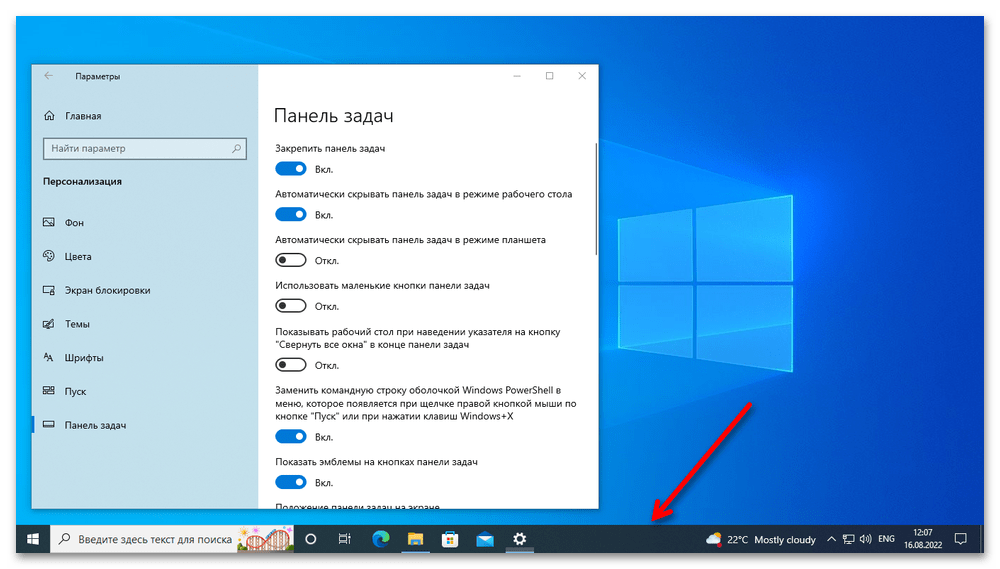
Способ 1: «Параметры персонализации»
В Windows 10 буквально в пару кликов можно сделать так, чтобы панель задач (ПЗ) была скрытой по умолчанию. После внесения соответствующих изменений в параметры операционной системы отображаться она будет только тогда, когда вы наведете курсор мышки на ее расположение по умолчанию (обычно это нижняя часть экрана).
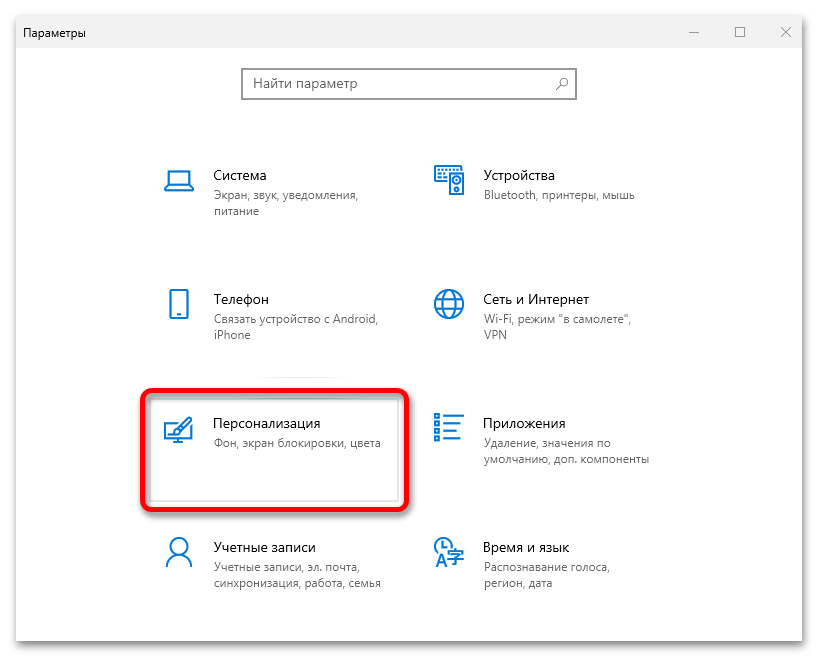
- Воспользовавшись комбинацией клавиш «Win+I» или любым другим удобным способом, запустите «Параметры» операционной системы и перейдите к разделу «Персонализация».

Читайте также: Как открыть «Параметры» в Виндовс 10
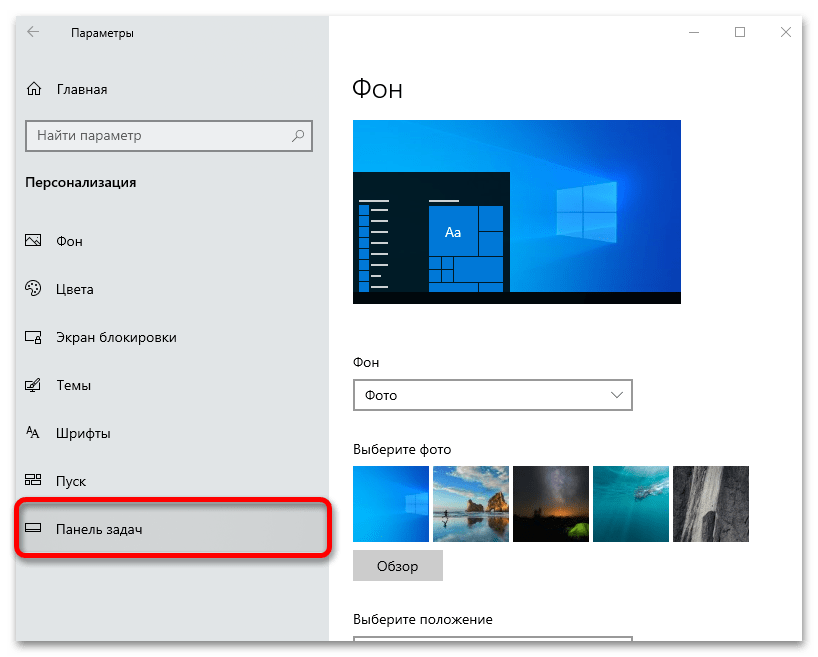
- Откройте вкладку «Панель задач».
Читайте также: Параметры персонализации Windows 10
- Переведите в активное положение тумблер, расположенный около второго пункта – «Автоматически скрывать панель задач в режиме рабочего стола».
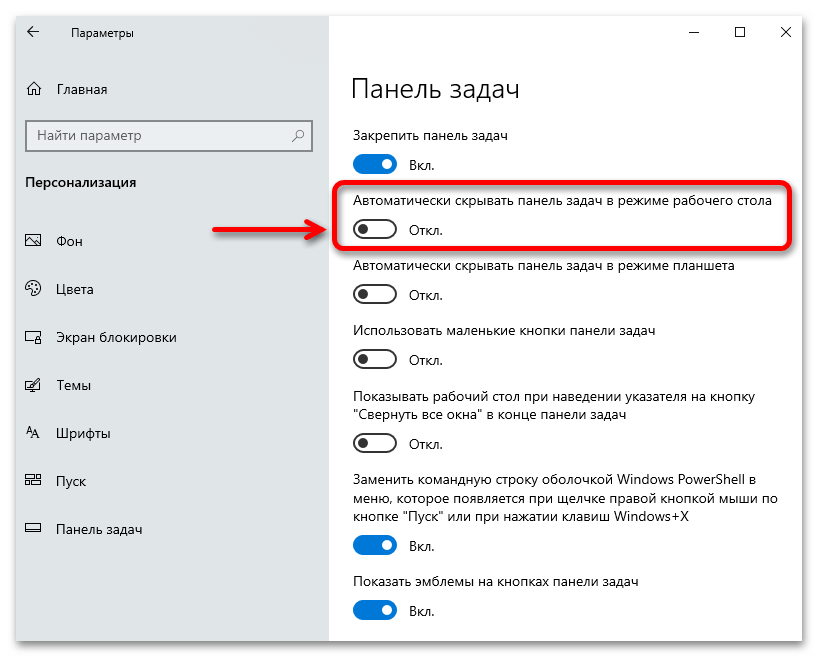
С этого момента ПЗ будет скрыта всегда, кроме тех случаев,
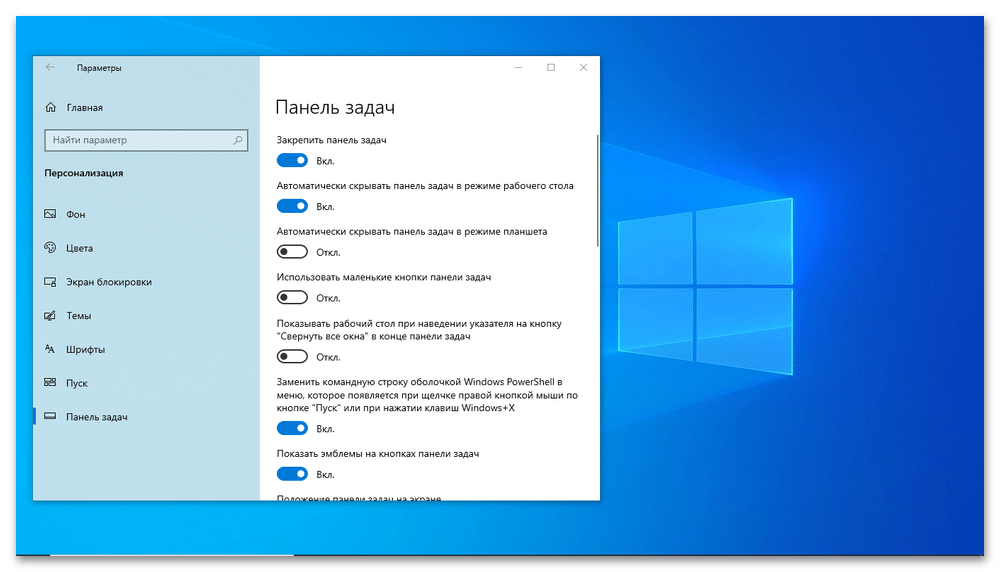
когда вы наведете указатель мышки на ее привычное расположение.
Читайте также: Как настроить панель задач в Виндовс 10
Способ 2: «Редактор реестра»
Несколько более сложной и ориентированной на опытных пользователей альтернативой предложенному выше решению является редактирование одного из параметров в системном реестре. Действовать в данном случае нужно предельно осторожно.
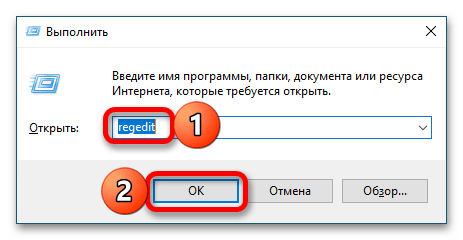
- Откройте «Редактор реестра». Для этого можно воспользоваться системной функцией поиска или оснасткой «Выполнить» (вызывается клавишами «Win+R»), в которую следует ввести команду
regedit, а затем нажать «ОК» или «Enter» для ее выполнения.
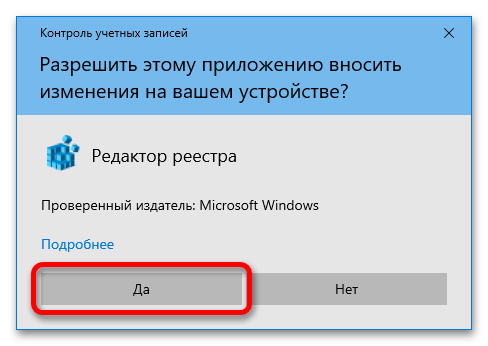
Подтвердите запуск системной оснастки, нажав «Да» в окне с вопросом.

Читайте также: Как открыть оснастку «Выполнить» в Windows 10
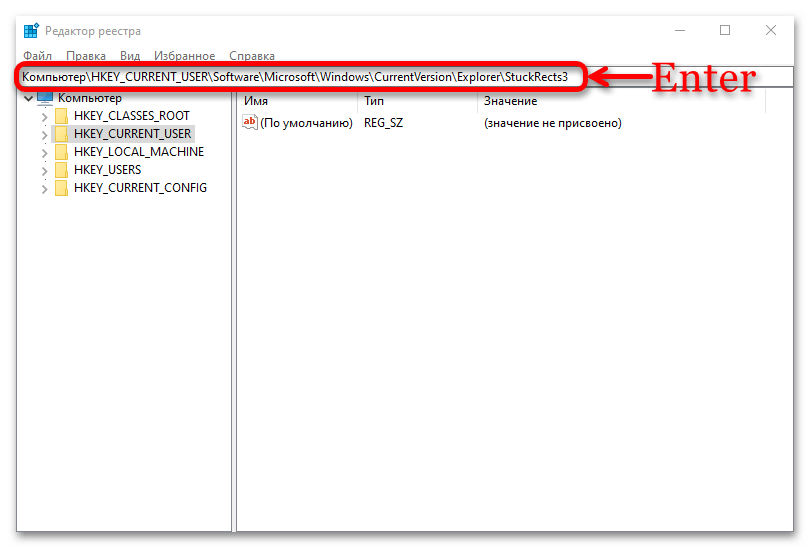
- Скопируйте указанный ниже путь, вставьте его в адресную строку запустившегося окна редактора и воспользуйтесь клавишей «Enter» для перехода к заданному расположению.
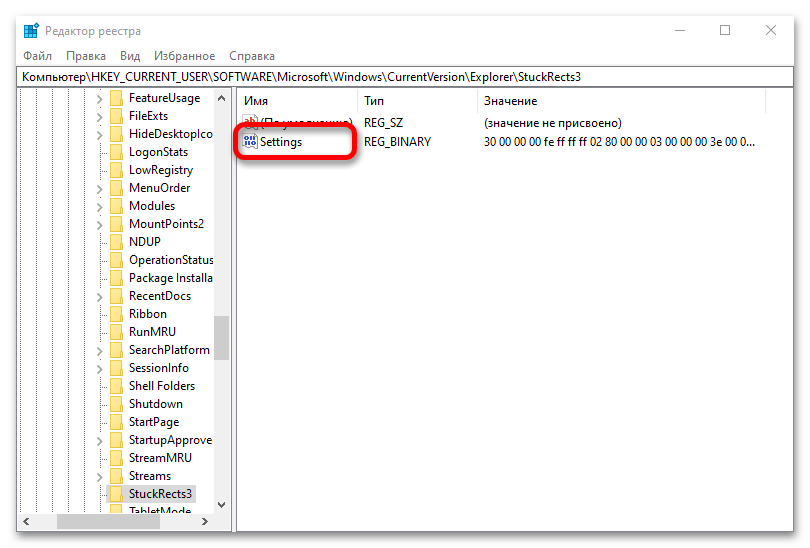
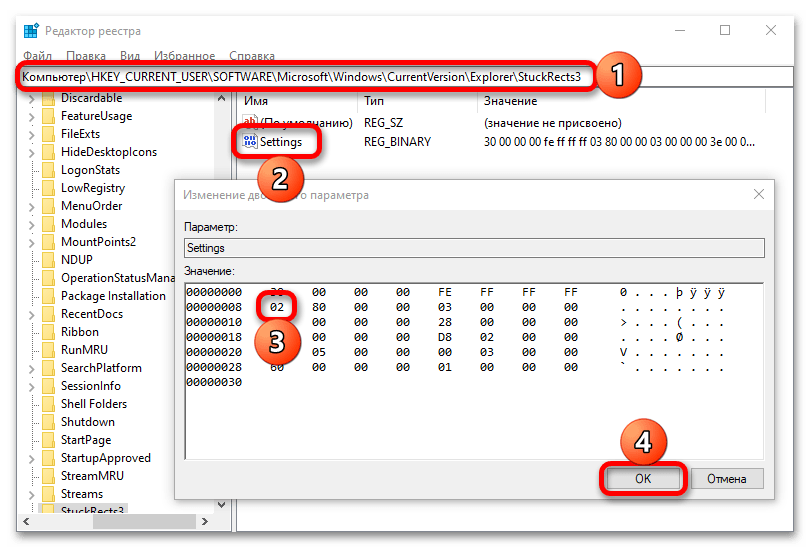
Компьютер\HKEY_CURRENT_USER\Software\Microsoft\Windows\CurrentVersion\Explorer\StuckRects3
Читайте также: Запуск «Редактора реестра» в Виндовс 10
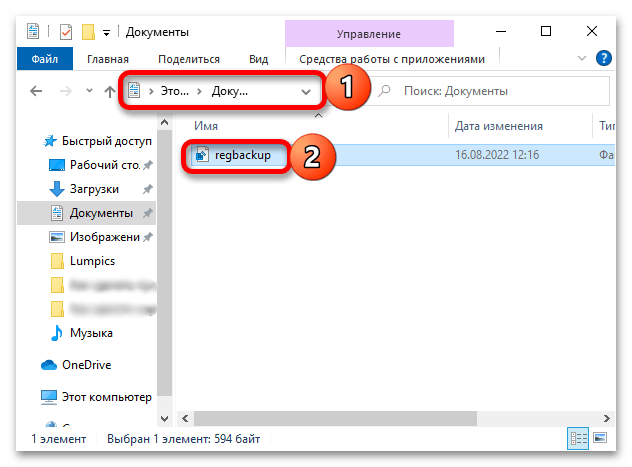
- Чтобы восстановить значения по умолчанию, если после внесения изменений в систему возникнут проблемы, рекомендуется создать резервную копию редактируемых файлов реестра.

- Дважды кликните по параметру «Settings» для его открытия.
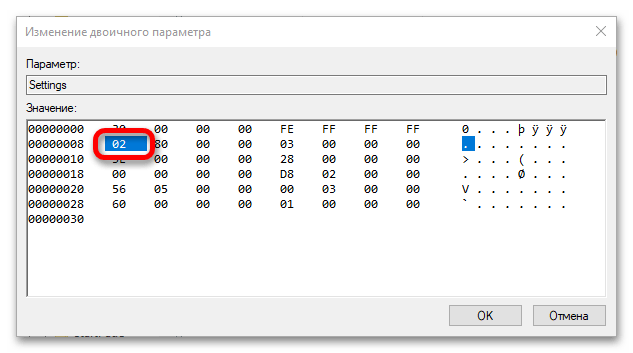
- Во второй строчке второго столбца дважды кликните по значению «02» (следующее за «00000008») для его выделения,

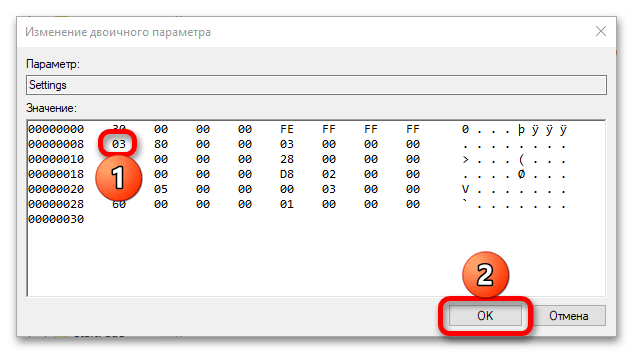
введите «03» (без кавычек) и нажмите «ОК» для сохранения.
Закройте системный реестр.
- Далее потребуется перезапустить системный «Проводник». Для этого:
- Откройте его, если он еще не запущен (клавиши «Win+E» или соответствующий ярлык на панели задач);
Читайте также: Как открыть «Проводник» в Windows 10
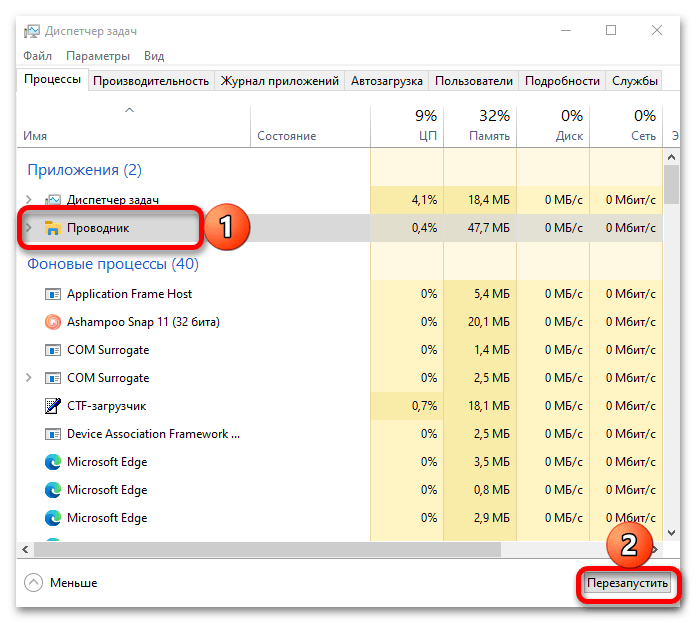
- Вызовите «Диспетчер задач» (клавиши «Ctrl+Shift+Esc» или пункт в контекстном меню ПЗ);
Читайте также: Как открыть «Диспетчер задач» в Виндовс 10
- В списке активных процессов выделите «Проводник» и воспользуйтесь расположенной в правом нижнем углу оснастки кнопкой «Перезапустить».

Читайте также: Как перезапустить «Проводник» в Windows 10
- Откройте его, если он еще не запущен (клавиши «Win+E» или соответствующий ярлык на панели задач);

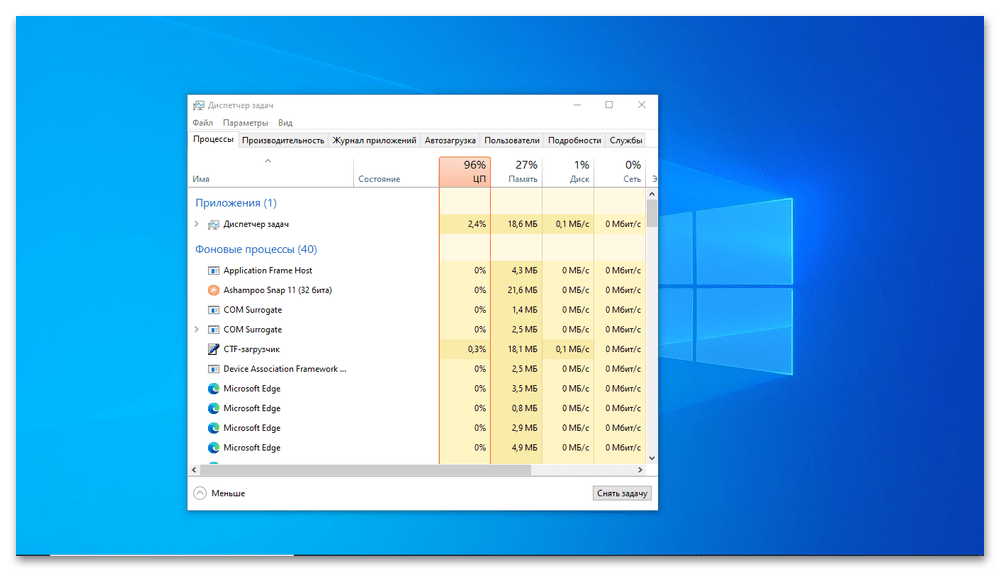
Теперь панель задач будет скрыта всегда, кроме тех случаев, когда вы наведете на место ее расположения курсор мышки.
Для того чтобы вернуть панели ее прежний вид, то есть отменить скрытие, выполните действия, обратные рассмотренным в пункте №5 текущей инструкции – замените в параметре «Settings» значение «03» на «02», подтвердите внесение изменений и перезапустите «Проводник».
Читайте также: Как сделать панель задач прозрачной в Виндовс 10
Наша группа в TelegramПолезные советы и помощь

Making your Windows 10 taskbar completely transparent can give your desktop a cleaner and more minimalist look. This guide will show you how to achieve this effect without needing to install any additional software. The steps are simple and quick, but make sure your Windows is activated before starting. Unfortunately, this method is only confirmed to work on Windows 10.
Key Takeaways
- You’ll need to access the Windows Registry to make the taskbar transparent.
- This method does not require any third-party software, but it only works on activated Windows 10 systems.
- Make sure Transparency Effects and Dark Mode are enabled before starting.
IMPORTANT NOTE BEFORE FOLLOWING THIS GUIDE
Transparency Effects and Dark Mode must be enabled for this method to work properly. Here’s how to do it:
- Right-click on the desktop and select “Personalize.”
- Click on the “Colors” tab in the left pane.
- Under “Choose Your Color,” select “Dark.”
- Turn on “Transparency Effects” just below the color selection.
- (Optional) Select the checkbox for “Automatically pick an accent color from my background.”
Once that’s done, you’re ready to move forward with the steps in this guide.
Step 1: Access the Windows Registry

To begin, you need to open the Registry Editor on your Windows 10 system:
- Press the Windows key + R on your keyboard to open the Run box.
- In the Run box, type
regeditand press Enter. This will launch the Registry Editor.
Step 2: Navigate to the Required Registry Path

In the Registry Editor, you’ll need to navigate to a specific path. You can do this manually by expanding the folders or simply copying and pasting the following path into the Registry Editor’s address bar:
HKEY_LOCAL_MACHINE\SOFTWARE\Microsoft\Windows\CurrentVersion\Explorer\Advanced
Step 3: Create a New Registry Entry

Once you’ve navigated to the correct path:
- Right-click on any empty space in the right-hand pane.
- Select New > DWORD (32-bit) Value.
- Name the new value
TaskbarAcrylicOpacity. It’s crucial that you type this exactly as shown, as it is case-sensitive.
Step 4: Set the Value to Zero

After creating the new registry entry:
- Double-click on the
TaskbarAcrylicOpacityentry to open it. - Make sure the value is set to
0. - Click OK to save your changes.
Step 5: Restart Windows Explorer

For the changes to take effect, you’ll need to restart Windows Explorer:
- Right-click on any empty space on your taskbar and select Task Manager.
- In Task Manager, go to the Processes tab.
- Scroll down and find the Windows Explorer process. (You can press the “W” key to jump to it.)
- Once found, select Restart.

After restarting Windows Explorer, your taskbar should now be completely transparent.
Conclusion
And there you have it—your Windows 10 taskbar should now be completely transparent without using any external software. This simple registry tweak offers a sleek and minimalistic look for your desktop. If you found this guide helpful, don’t forget to like the video and subscribe for more tutorials!
FAQs
1. Can I make my taskbar transparent on Windows 11 using this method?
No, this method has only been confirmed to work on Windows 10. It has not been successful on Windows 11 in testing.
2. Does this method require any third-party software?
No, you can achieve full transparency of your taskbar without any additional software by following this guide.
3. What should I do if my taskbar is still not transparent?
Ensure that Dark Mode and Transparency Effects are enabled in your personalization settings. Also, make sure your Windows is activated.
4. Will this method harm my computer?
Editing the Windows Registry can potentially cause issues if done incorrectly. Always follow the instructions precisely, and consider backing up your registry before making changes.
5. Can I reverse this change?
Yes, simply delete the TaskbarAcrylicOpacity entry you created in the Registry Editor and restart Windows Explorer.
How to Increase the Transparency of Your Windows 10 Taskbar!
Windows 10 has a lot of customization options for the desktop interface and we’ve previously discussed the options that allow users with compatible hardware to enable or disable a slight transparency effect for certain elements of the user interface. However, this technique has only a minimal effect on the actual visual impact of your taskbar, providing very little real translucency. This means that it is not very effective for revealing the user’s wallpaper or apps positioned beneath the taskbar. However, there are some options that allow you to increase the translucency of the taskbar past the normal built in settings. In this article I will show you two basic approaches to doing this.
How Do I Increase The Transparency Of My Taskbar In Windows 10?
There are multiple ways to change the transparency of your taskbar, including going into your registry or using other programs. We’ve picked the most straightforward ways to do this. The first thing to try is within the confines of Windows 10 itself. To do this, you can go though the “Personalize” tab and use the settings there, but when you turn the transparency on it makes very little noticeable difference.
If you want your taskbar to be noticeably transparent, follow the directions for our alternate methods below.
Change Taskbar Transparency Using The Registry
Windows 10, like all previous versions of Windows, relies on a database called the “Registry” to configure tens of thousands (if not more) low-level configuration options for Windows and its many software applications. Because the registry is so critical to the proper function of Windows 10, it is vitally important to be very very careful when editing it as you can easily brick your system with an ill-advised registry change. Don’t make registry changes suggested by websites you don’t trust, and be cautious even when making any changes that you DO trust. We suggest that before making major changes it is in your best interest to set a restore point within Windows 10 and make a system backup just in case.
Editing the registry itself is a deceptively simple process. Click on the start button, or click in the search bar, and type “regedit.” The Registry Editor will appear in the list of results; click on it to launch the utility.
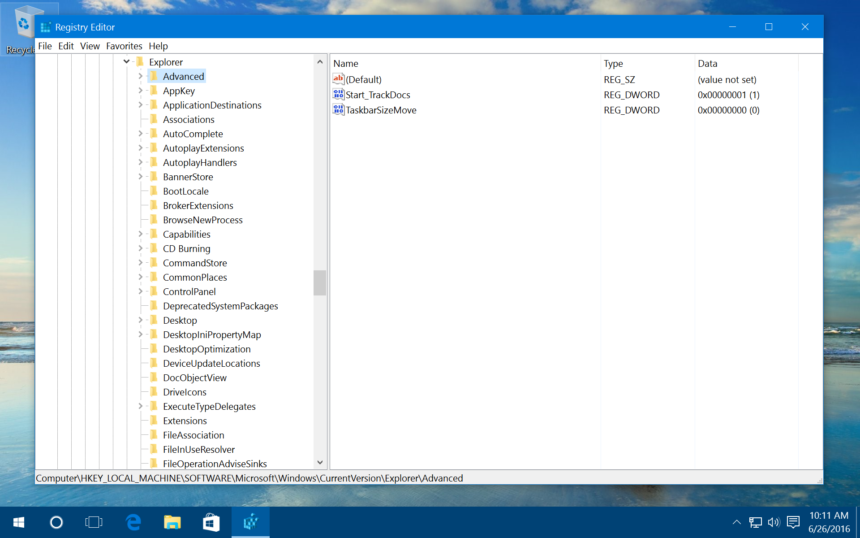
From the Windows Registry Editor, use the hierarchical list on the left side of the window to navigate to:
HKEY_LOCAL_MACHINE\SOFTWAR\EMicrosoft\Windows\CurrentVersion\Explorer\Advanced
Once you’ve selected the “Advanced” key on the left of the window, right-click in an empty portion of the right side of the window and select “New > DWORD (32-bit)” value and name it “UseOLEDTaskbarTransparency”.
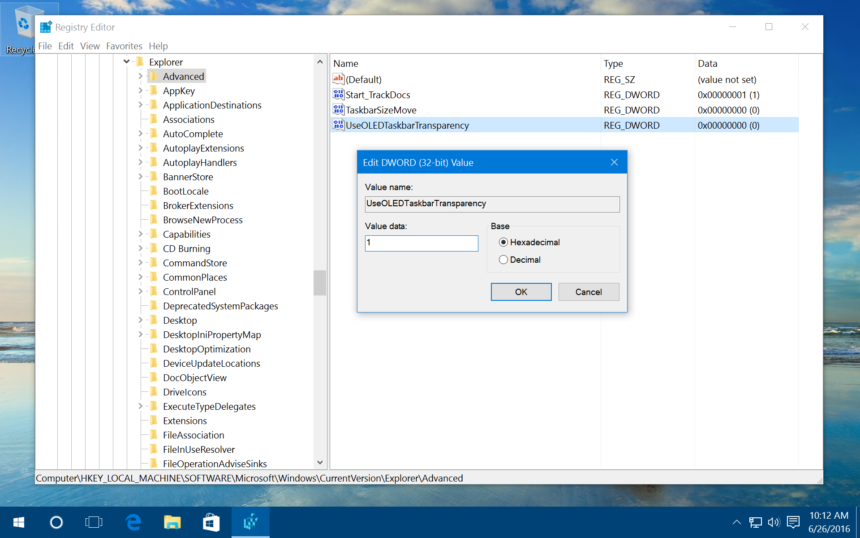
Next, double-click on your new DWORD value and, in the box that appears, set its Value Data field to the number one (“1”). Click OK to close the value editor and then quit the Registry Editor.
Return to your Windows 10 desktop, right-click on an empty space and select Personalize. Alternatively, you can click Start > Settings > Personalization. From the Personalization section of Settings, click Colors. From the Colors window, enable “Transparency Effects”. If this option was already enabled, then quickly toggle it by disabling and re-enabling it for the change to take effect.
The result of the increased taskbar transparency will vary depending on your accent color choice and desktop wallpaper image, but you should see a small but noticeable decrease in opacity, removing a potential visual distraction for some users and allowing you to more clearly enjoy your desktop wallpaper image from edge to edge of your display.
If you don’t like this new “high transparency” look, just head back to the same Registry Editor location identified above, double-click on the UseOLEDTaskbarTransparency entry, and change the “1” (one) back to the default “0” (zero). Then toggle the “Transparency Effects” setting again and your Windows 10 taskbar will return to its default level of translucency.
Change Taskbar Transparency Using Classic Shell
The steps above involve using built-in Windows settings to increase the translucency of the taskbar, but if you want more control over the exact level of translucency, or if you’d like to make the taskbar completely transparent, you can turn to a free third party tool called Classic Shell.
Classic Shell is a great utility with hundreds of useful options for customizing the look and feel of Windows, but one of its many customizations is the ability to not only switch between a transparent and opaque taskbar but to set the exact percent of transparency you desire for the taskbar as well. Just download and install Classic Shell using the link provided, launch the included Classic Start Menu module, and click on the “Windows 10 Settings” tab.
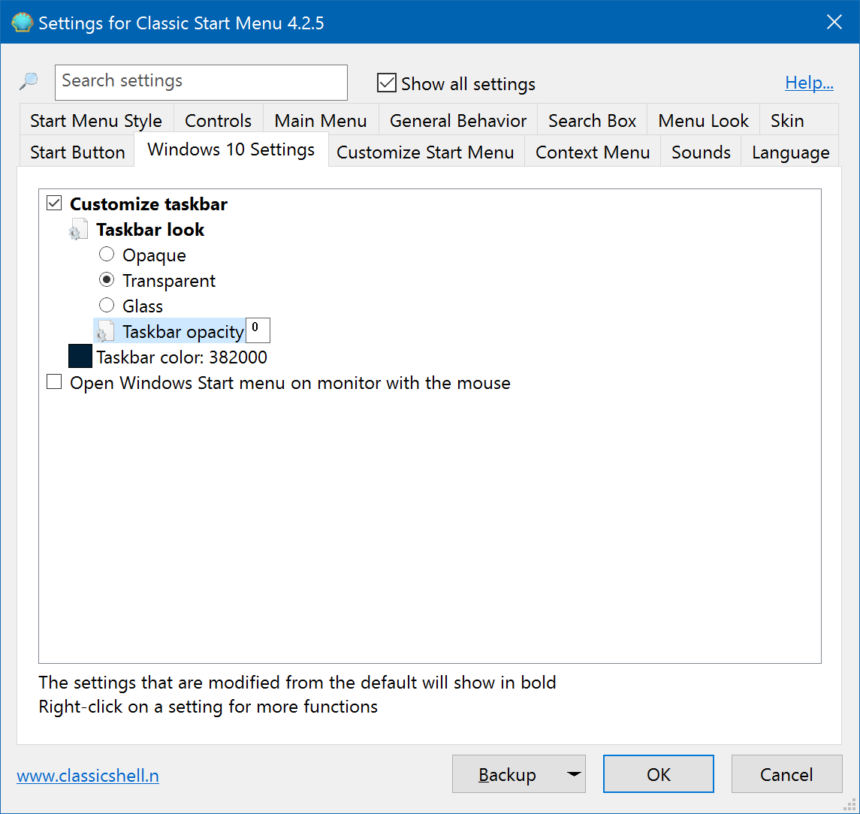
Here, you’ll see several options for enabling or disabling taskbar transparency altogether, setting a custom color value and, most importantly for our current purposes, a percentage value for “Taskbar Opacity”. To change this value, first check the box labeled “Customize Taskbar” and then choose Transparent.
How Do I Make My Taskbar 100% Transparent?
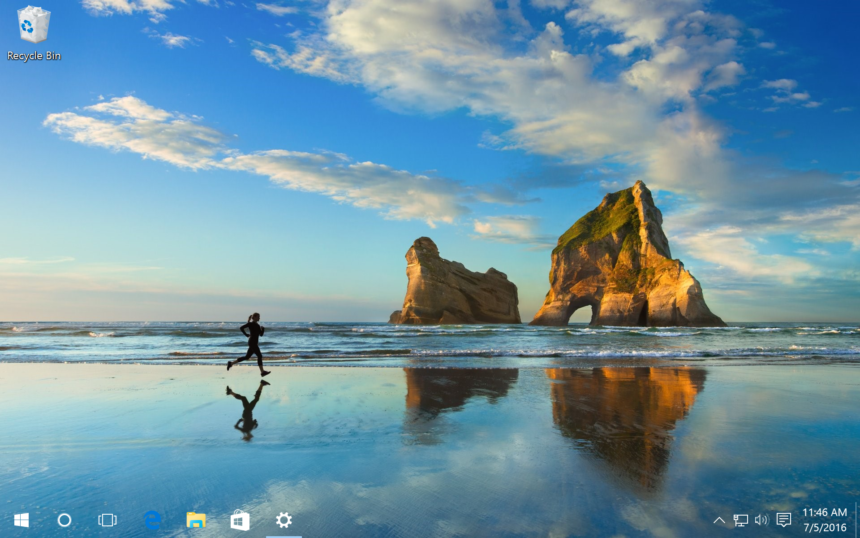
Set the value in the “Taskbar Opacity” box to between 0 and 100, with 0 representing a completely transparent taskbar and 100 representing a completely opaque taskbar. Once you’ve made your change, click “OK” and you’ll see your taskbar transparency change immediately. In the example screenshot above, we set the opacity value to zero, resulting in a completely transparent taskbar.
Is There An Easier Way To Make The Taskbar 100% Transparent?
Unfortunately, no. Updates may come in the future that will make it possible to make your taskbar completely transparent without all of this registry editing or need for external resources. Until then, you’ll have to go the long way around.