
,
If your Start menu is not working in your Windows 10/11 device, continue reading below to fix the problem. Windows 10/11 devices are known for their efficiency and improved features. This is a huge upgrade from the Windows 8.1 operating system, which has not stood the test of time. Despite this, Windows 11/10 has its own drawbacks that include glitches and unresponsive features and buttons.
For example, the Start menu, one of the most important buttons in Windows, can stop working or crash as soon as it is opened. Some users have also reported that the Start menu is not always responsive when clicked, or freezes immediately after it opens.
As you understand, the above mentioned issues with the Start menu are frustrating and can affect user productivity and performance.
In this guide we have compiled several methods for fixing the following Windows 11/10 Start menu issues:
- Windows Start menu button not working in Windows 10/11.
- After installing updates the Start menu does not work.
- Start menu is freezing or becomes unresponsive.
How to FIX: Windows 10/11 Start Menu problems.
- Install all Windows Updates.
- Restart Windows Explorer process.
- End the «Start Menu Experience Host: Task.
- Scan and Repair System files.
- Re-register the Start menu.
- Fix Start Menu problems with Registry.
- Create a New User account.
Method 1. Install all Windows Updates
Making sure your device is up to date is one way to fix glitches in the Windows Start menu, because in some cases installing pending updates can fix the unresponsive Start menu in Windows 10/11 OS.
To install all available updates if the Start menu does not work:
1. Press the Ctrl + Shift + Esc keys to open Task Manager.
2. Click the File tab from the Task Manager window, then select Run new task.

3. In the Run window, type the following command and hit OK.
- ms-settings:windowsupdate

4. Click Check for updates and wait Windows to scan for available updates. When this done, click Install now. *
* Note: If a feature update is also available, then download and install it as well.

5. When all updates are installed, select Restart.
6. As soon as the PC reboots, check if the Start menu is working.
Method 2. Restart Windows Explorer
Restarting Windows Explorer process in task manager is another way to fix Start menu. See steps below:
1. Press the Ctrl + Shift + Esc keys to open Task Manager.
2. Under the Processes tab, right-click on Windows Explorer and select Restart.

3. You will notice that the icons on the taskbar will disappear for few seconds, don’t panic they will resurface. Now check if the Start menu is working.
Method 3. Kill the Start Menu Experience Host task
The «Start Menu Experience Host» task is responsible for the Start menu. Sometimes ending it may cause Start menu to work again.
1. Press the Ctrl + Shift + Esc keys to open Task Manager.
2. Under the Details tab, right-click at StartMenuExperienceHost.exe and select End Task.

3. Now click the Start menu and check if the problem is fixed.
Method 4. Scan and Repair Corrupted System files.
If the Windows system files on the device are damaged or corrupted, the Start menu may stop working. To repair the damaged system files:
1. Press the Ctrl + Shift + Esc keys to open Task Manager.
2. From the File menu, select Run new task.
3. In the ‘Create new task’ window, type cmd, check Create this task with administrative privileges, then click OK.

4. In the command prompt window, type the command below and press Enter:
- DISM /Online /Cleanup-Image /RestoreHealth
5. Once the operation is completed, enter the command below and press Enter:
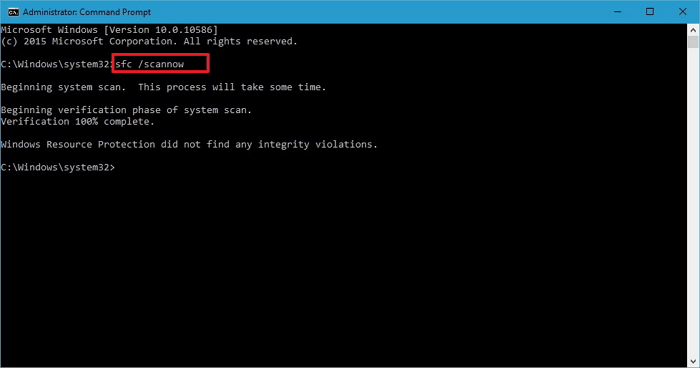
- sfc /scannow

6. Wait until the process is completed.
7. Finally, press CTRL + ALT + DEL and press the Power button (at the bottom right), to restart the computer.

8. After, restarting check that the Start menu is working.
Method 5. Re-register the Start menu.
To re-register or restore all the built-in apps and Start menu in Windows, Use the command below on Powershell.
1. Press the Ctrl + Shift + Esc keys to open Task Manager.
2. Click the File tab and select Run new task.
3. In the new task window, type powershell, check Create this task with administrative privileges and click OK.

4. Copy and paste the command below in PowerShell and press Enter.
- Get-appxpackage -all shellexperience -packagetype bundle |% {add-appxpackage -register -disabledevelopmentmode ($_.installlocation + «\appxmetadata\appxbundlemanifest.xml»)}

5. Once it is completed, close PowerShell window and the issue should be resolved.
Method 6. FIX Start menu not working issue using Registry.
Modifying the registry editor as described below is another solution to restore the functionality of the Start menu. However, it is important to carefully follow the steps below to resolve the problem.
1. Press the Ctrl + Shift + Esc keys to open Task Manager.
2. Click the File tab and select Run new task.
3. In the new task window type regedit, check Create this task with administrative privileges, then click OK.

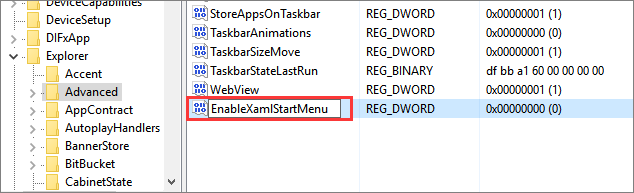
4. In the Registry editor window, navigate to the location below:
- HKEY_CURRENT_USER\SOFTWARE\Microsoft\Windows\CurrentVersion\Explorer\Advanced
5. Right-click on Advanced, click on New and select DWORD (32-bit) Value.

6. Type EnableXamlStartMenu as the name of the new value. Leave the Data value as 0 and close the registry editor. *
* Note: If the «EnableXamlStartMenu» REG_DWORD value already exists double-click on it and change the value data to 0.

7. Finally press CTRL + ALT + DEL and press the Power button (at the bottom right), to restart the computer.
Method 7. Create a User Account.
If the current user’s profile is corrupted this may also affect the Start menu. In this case try creating a new user account and see if that solves the problem with the Start menu.
1. Press the Ctrl + Shift + Esc keys to open Task Manager.
2. From the File menu, select Run new task.
3. In the ‘Create new task’ window, type cmd, check Create this task with administrative privileges, then click OK.

4. In the command prompt window, type the following command where USERNAME is name for the new user and PASSWORD is its password. When done, press Enter: *
- net user USERNAME PASSWORD /add
* For example: To create a new user with name «wintips» and password «WIN1234», type:
- net user wintips WIN1234 /add
5. Now grant the new account administrative rights, by giving the below command (where USERNAME is the name of the new user). *
- net localgroup administrators USERNAME /add
* For example: To add the user with name «wintips» to administrators group, type this command:
- net localgroup administrators wintips /add

6. Press CTRL + ALT + DEL and press the Power button (at the bottom right), to restart the computer.
7. On the login screen, click on the new account to sign in to it.
8. Check if the Start menu is working on the new account and if yes, transfer all your files and settings from your old account to the new one. *
* Note: If you still face problems with the Start menu, resetting or reinstalling Windows 10 may be the last solution to fix them.
That’s it! Which method worked for you?
Let me know if this guide has helped you by leaving your comment about your experience. Please like and share this guide to help others.
If this article was useful for you, please consider supporting us by making a donation. Even $1 can a make a huge difference for us in our effort to continue to help others while keeping this site free:
- Author
- Recent Posts
Konstantinos is the founder and administrator of Wintips.org. Since 1995 he works and provides IT support as a computer and network expert to individuals and large companies. He is specialized in solving problems related to Windows or other Microsoft products (Windows Server, Office, Microsoft 365, etc.).
После обновления до Windows 10 многие (судя по комментариям) столкнулись с проблемой, заключающейся в том, что новое меню Пуск не открывается, также не работают и некоторые другие элементы системы (например, окно «Все параметры»). Что делать в этом случае?
В этой статье я собрал способы, которые могут помочь если у вас не работает кнопка Пуск после обновления до Windows 10 или установки системы. Надеюсь, они помогут решить возникшую проблему.
Обновление (июнь 2016): Майкрософт выпустила официальную утилиту для исправления работы меню Пуск, рекомендую начать именно с неё, а если не поможет, вернуться к этой инструкции: Утилита исправления меню Пуск Windows 10.
Перезапуск explorer.exe
Первый способ, которые иногда помогает — простой перезапуск процесса explorer.exe на компьютере. Чтобы проделать это, сначала нажмите клавиши Ctrl+Shift+Esc чтобы открыть диспетчер задач, а затем нажмите кнопку «Подробнее» внизу (при условии, что она там есть).
На вкладке «Процессы» найдите процесс «Проводник» (Windows Explorer), кликните по нему правой кнопкой мыши и нажмите «Перезапустить».
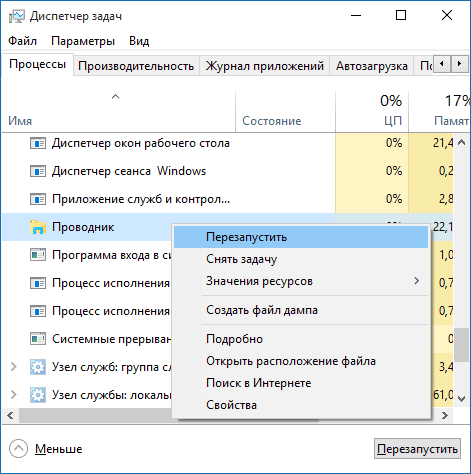
Возможно, после перезапуска меню Пуск заработает. Но срабатывает это далеко не всегда (только в тех случаях, когда особой проблемы на самом деле нет).
Заставляем меню Пуск открываться с помощью PowerShell
Внимание: этот способ одновременно помогает в большинстве случаев при проблемах с меню пуск, но так же может нарушить работу приложений из магазина Windows 10, учитывайте это. Рекомендую сначала использовать следующий вариант исправить работу меню Пуск, а если он не поможет, вернуться к этому.
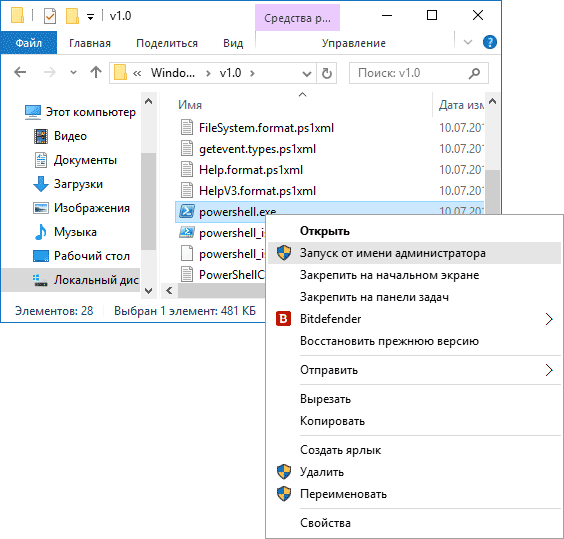
Во втором способе будем использовать PowerShell. Поскольку Пуск и, вероятно, поиск у нас не работают, для того, чтобы запустить Windows PowerShell, зайдите в папку Windows\ System32\ WindowsPowerShell\ v1.0
В этой папке найдите файл powershell.exe, кликните по нему правой кнопкой мыши и выберите запуск от имени Администратора.
Примечание: еще один способ запустить Windows PowerShell от имени Администратора — кликнуть правой кнопкой мыши по кнопке «Пуск», выбрать «Командная строка (администратор)», а в командной строке набрать «powershell» (при этом отдельное окно не откроется, команды можно вводить прямо в командной строке).
После этого, запустите следующую команду в PowerShell:
Get-AppXPackage -AllUsers | Foreach {Add-AppxPackage -DisableDevelopmentMode -Register “$($_.InstallLocation)\AppXManifest.xml”}
По завершении ее выполнения, проверьте, получается ли открыть меню Пуск теперь.
Еще два способа исправить проблему, когда Пуск не работает
В комментариях также были предложены следующие решения (они могут помочь, в случае если после исправления проблемы одним из первых двух способов, после перезагрузки кнопка Пуск снова не работает). Первое из них — использование редактора реестра Windows 10, для его запуска, нажмите клавиши Win+R на клавиатуре и введите regedit затем выполните следующие шаги:
- Зайдите в раздел HKEY_CURRENT_USER\ Software\ Microsoft\ Windows\ CurrentVersion\ Explorer\ Advanced
- Кликните в правой части правой кнопкой мыши — Создать — DWORD и задайте имя параметра EnableXAMLStartMenu (если только этот параметр уже не присуствует).
- Дважды кликните по данному параметру, задайте значение 0 (ноль для него).
Также, по имеющейся информации, проблема может быть вызвана русским именем папки пользователя Windows 10. Тут поможет инструкия Как переименовать папку пользователя Windows 10.
И еще один способ из комментариев от Алексея, по отзывам тоже у многих срабатывающий:
Была подобная проблема (меню Пуск — это сторонняя программа которая требует часть производительности для своей работы). решил проблему просто: свойства компьютера, снизу слева безопасность и обслуживание, по центру экрана «обслуживание», и выбрать начать. через полчаса все проблемы которые были у Windows 10 были исчезли. Примечание: чтобы зайти быстро в свойства компьютера можно нажать правой кнопкой по Пуск и выбрать пункт «Система».
Создание нового пользователя
Если ничто из описанного выше не помогло, вы можете также попробовать создать нового пользователя Windows 10, через панель управления (Win+R, затем ввести Control, чтобы попасть в нее) или командную строку (net user Имя_пользователя /add).
Обычно, для вновь созданного пользователя меню пуск, настройки и рабочий стол работают как положено. Если вы использовали этот способ, то в дальнейшем вы можете перенести файлы предыдущего пользователя в новую учетную запись и удалить «старый» аккаунт.
Что делать, если указанные способы не помогают
Если ни один из описанных способов не решил проблемы, то могу предложить лишь воспользоваться одним из методов восстановления Windows 10 (возврат в исходное состояние), либо, если вы недавно обновились — выполнить откат до предыдущей версии ОС.
Updated on Apr 28, 2025
The start button is one of the most important components of a Windows computer. This guide shows you how to fix Windows 10 start menu not working issue in various ways.
| Workable Solutions | Step-by-step Troubleshooting |
|---|---|
| 1. Sign out and sign in account | The start menu won’t work if there’s a problem with your user account. Sign out of your account…Full steps |
| 2. Restart Windows Explorer | Windows Explorer is the application used to view your programs and files. Restart Windows Explorer…Full steps |
| 3. Run SFC scanner | Windows has a system file checker that fixes corrupted system files and fixes start menu freezing…Full steps |
| 4. Use the DISM tool | If the SFC method fails, you can use a different command — DISM to repair the damaged system file to fix…Full steps |
| More effective solutions | Fix Windows 10 start menu not working issue by checking Windows update, creating new values in Registry…Full steps |
Since its first release in 2015, Windows 10 has more and more users. Up to now, the proportion of Win10 users has been close to 80%. Each update brings a lot of new features that delight users. However, users will also encounter various problems in the use of Windows 10.
And Windows 10 start menu not working or not opening is one of the common issues that bother many users. Sometimes, the start menu will crash and not respond, and sometimes it won’t open at all when you click the start menu button.
In this post, we are going to talk about why Windows 10 start menu not working won’t open and freeze, and how to fix this issue effectively.
Before we jump to the fixes, we should have a brief understanding of the causes of the Windows 10 start menu not opening. The main reasons include:
- Some operating system files related to the start menu are corrupted
- Cortana temporary files are corrupted
- An unspecific Windows update bugs cause the start menu to freeze
- The start menu under a specific Windows account crashed
- Windows Explorer on your system is expired or contains corrupted files
How to Fix Windows 10 Start Menu Not Working — 7 Fixes
Now that we know these factors may cause these start menu not working problem, we can take the methods below to troubleshoot. And if you think this passage is useful in fixing Windows 10 start menu not working, click the social buttons to share.
Note: You should back up your important files before trying any of the following solutions. None of us can afford to lose essential data.
Way 1. Sign Out and Sign in Your Account
If there is a problem with your user account, the start menu will be is crashing or missing. In this case, you can try fixing the problem by signing out and signing into your user account.
Note: Signing out your account will close all the documents and applications you are running. Remember to save your files before logging out.
Step 1. Press Ctrl + Alt + Delete keys at the same time. Click «Sign out».
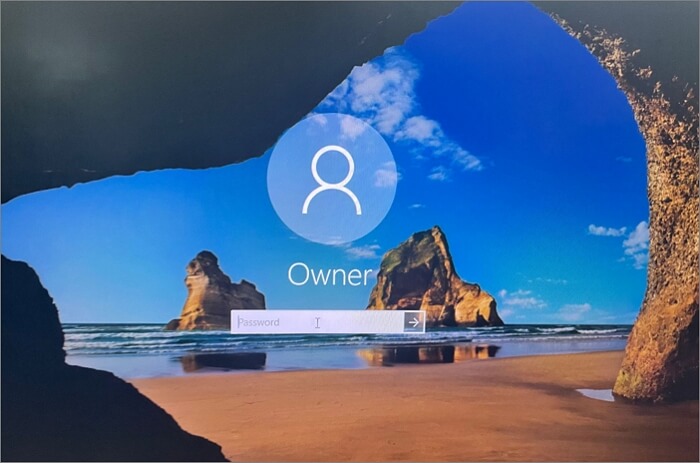
Step 2. Wait for a few moments. Then, you will be on the login screen again.
Step 3. Type your password to sign back into your account. Check if the start menu works properly. If not, try other methods below.
Way 2. Restart Windows Explorer
File Explorer controls and serves the start menu, taskbar, and other applications. If it fails and doesn’t work correctly, you may have the Windows 10 start menu not opening issue. To solve the problem, you can try to restart the File Explorer in Task Manager.
Step 1. Press Ctrl + Alt + Delete keys and click «Task Manager».
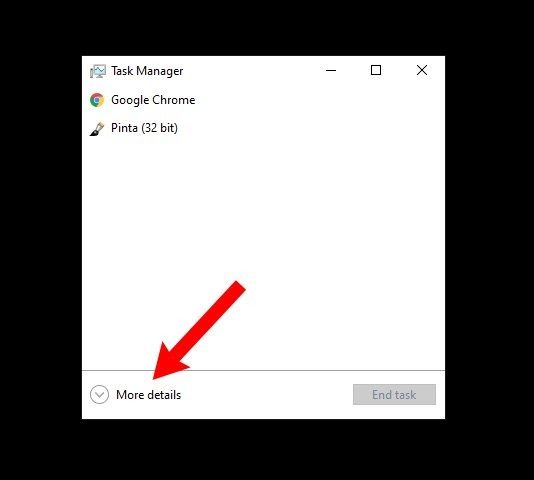
Step 2. Click «More details» to see a full list of open programs and background processes you’re running on Windows 10.
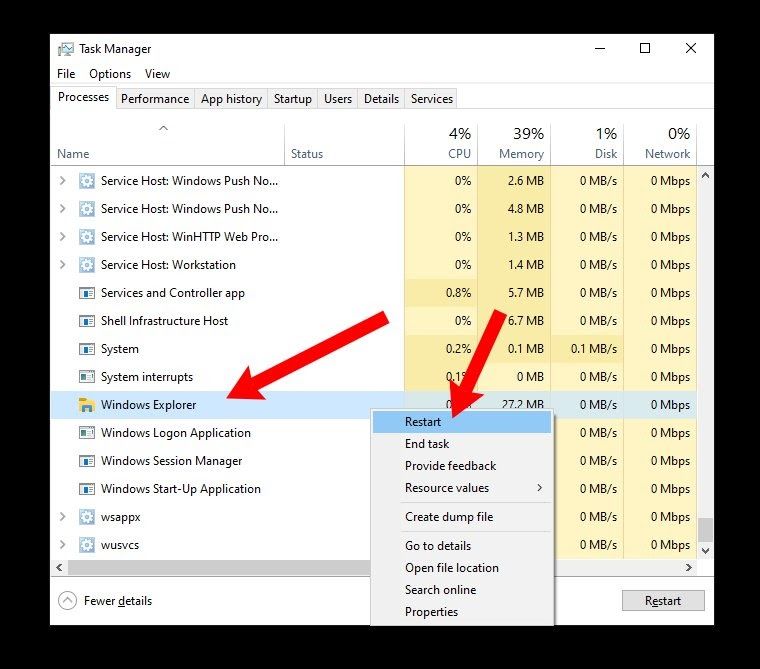
Step 3. Scroll through the list to find «Windows Explorer». Right-click it and choose «Restart».
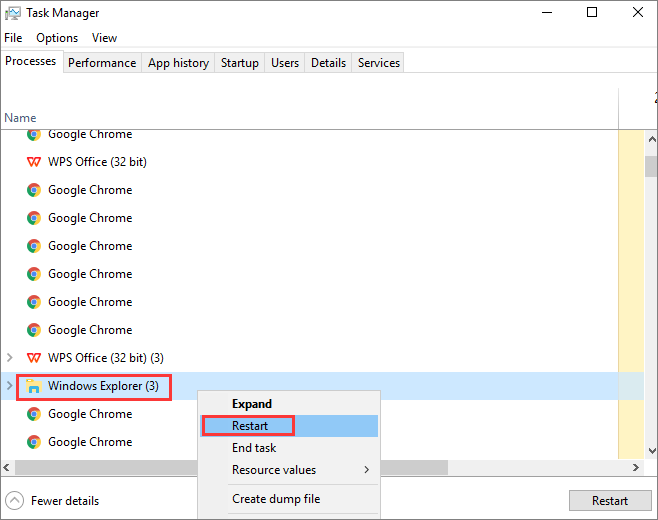
Wait for the process to finish. After Windows Explorer restarting, click and open the start menu and see if it works. If the start menu is still not working normally, move to the next method.
Way 3. Run SFC Scanner for Corrupt System Files
Corrupted system files can make Windows misbehave, including the start menu not working. You can use the Windows built-in SFC scanner to scan and repair the system file to solve the problem.
Step 1. Right-click the «Start» button and select «Command Prompt (Admin)».
Step 2. Type sfc /scannow and press Enter to run a full system scan.
Read Also: SFC scannow There is a system repair pending
Way 4. Use DISM Tool
If the SFC tool is not useful, don’t fret, continue using the DISM tool to scan and repair your system to fix Windows 10 start menu freezing issue.
Step 1. Press Win + R to open Run dialog and type: cmd to open «Command Prompt».
Step 2. Type the following command and hit «Enter».
Dism /Online /Cleanup-Image /RestoreHealth
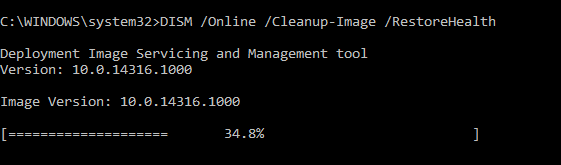
Step 3. Wait for the process to complete. Then, restart your computer and check if the start menu opens correctly.
Way 5. Check for Windows Updates
If the Windows 10 start menu not working problem is related to system bugs or defects, then you can fix the problem by upgrading your system to the latest version.
Microsoft is constantly improving its Windows 10 operating system, so keeping your system up to date is a good idea.
Step 1. Press Windows + I to open Windows Settings.
Step 2. Click «Update & Security» and select «Check for updates» under Windows Update.
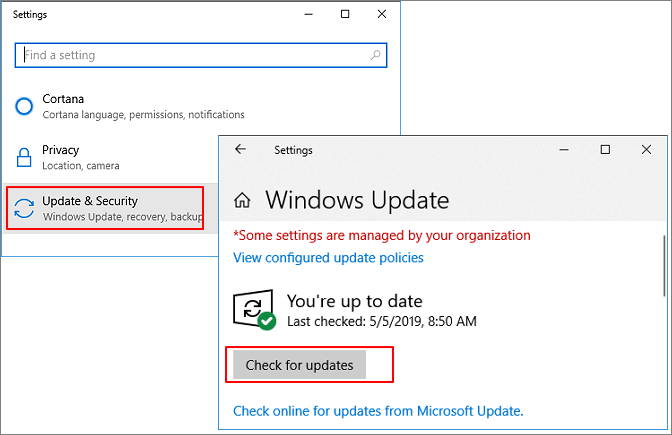
Step 3. If there a new Windows update, click «Install Now» and follow the instructions to upgrade to the latest Windows 10 version.
Way 6. Create New Xaml Start Menu Values in Registry
The Windows 10 start menu not opening issue may also have something to do with your registry.
When Microsoft switches to the new Windows 10 Start Menu, it includes starting the XAML process that runs the menu. Ensure the Xaml Start Menu is enabled to creating and setting the EnableXamlStartMenu in the Windows registry.
Some users report that they have managed to solve this problem by creating new value in the registry. Try this solution as demonstrated below.
Step 1. Press Win + R keys to open the Run box. Type regedit to start the Registry Editor.
Step 2. Navigate to: Computer/HKEY_CURRENT_USER/Software/Microsoft/Windows/CurrentVersion/Explorer/Advanced.
Step 3. In the right panel, right-click the empty space and choose «New > DWORD (32-bit) value».
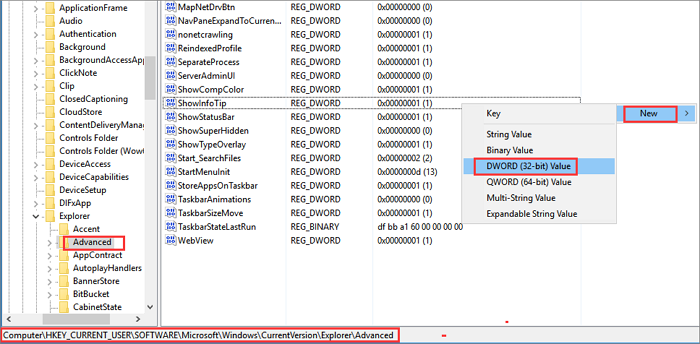
Step 4. Type EnableXamlStartMenu as the name of the new DWORD. Then, exit Registry Editor and restart Windows Explorer. In this way, the start menu should work again.
Way 7. Improve System Performance
To make all the utilities of Windows 10 work well, including the start menu, you need to ensure that the operating system is running in a good environment, for example, the system disk needs to be large enough, and the system disk is SSD.
If your system drive (C drive) is out of space, Windows 10 can’t run properly and you’ll have a lot of problems. To extend the C drive easily, you can apply EaseUS Partition Master, which can allocate free space from other drives to the system drive without losing any data.
Free download this Windows 10 disk management tool to increase your C drive with the step-by-step guides below. If you want to upgrade your system disk from HDD to SSD and migrate OS to SSD, EaseUS Partition Master can help you out.
Extend System C drive with unallocated space
- 1. Right-click on the System C: drive and select «Resize/Move».
- 2. Drag the system partition end into the unallocated space so to add it to the C: drive. And click «OK».
- 3. Click «Execute Task» and «Apply» to execute the operations and extend the C drive.
To Sum Up
Windows 10 start menu not working or not opening can be very annoying as you can’t access the apps and settings there. There are multiples ways to resolve this issue. For example, you can check and repair corrupted system files with SFC and DISM tools, restart Windows Explorer, upgrade Windows 10 to the latest version, and more.
Hopefully one of the methods in this article can solve Windows 10 start menu freezing problem and you can use it normally.
Windows 10 has come a long way since it was first launched in 2015. Each update brings a lot of new features, and Microsoft has embraced the open source community in a way that was once thought impossible.
Still, like with any operating system, there are bugs. And one of the more common bugs people running Windows 10 have faced is that the Start Menu suddenly stops working.
Sometimes the open Start Menu freezes up and is unresponsive, and other times it won’t open at all when you click the Start Menu button.
Whatever specific issue you’re having with the Windows 10 Start Menu, we’ll go over some quick and not so quick fixes in this article.
How to restart Windows Explorer
Windows Explorer, which is now called File Explorer, is the application you use to browse your file system and open programs and files. But it also controls things like the Start Menu, the taskbar, and other applications.
If you have an issue with the Start Menu, the first thing you can try to do is restart the “Windows Explorer” process in the Task Manager.
To open the Task Manager, press Ctrl + Alt + Delete, then click the “Task Manager” button.
Click “More details” to see a full list of open programs and background processes you’re running:
Scroll through the list until you find the “Windows Explorer” process. Then right click on “Windows Explorer” and select “Restart”:
There will be a brief flash while Windows restarts Windows Explorer/Finder, along with the taskbar and Start Menu.
After that, try to open the Start Menu. If it’s still not working normally, try one of the other fixes below.
How to repair corrupt or missing Windows system files
Sometimes an update goes awry, or you accidentally deleted an important file while digging around the filesystem.
If the Start Menu is still giving you trouble, or other core Windows apps are crashing, then you can try to restore any missing or corrupt Windows system files.
To do this, you’ll need to open the Windows Command Prompt as an administrator and run the System File Checker program.
Once you open Command Prompt as an administrator, run the command sfc /scannow:
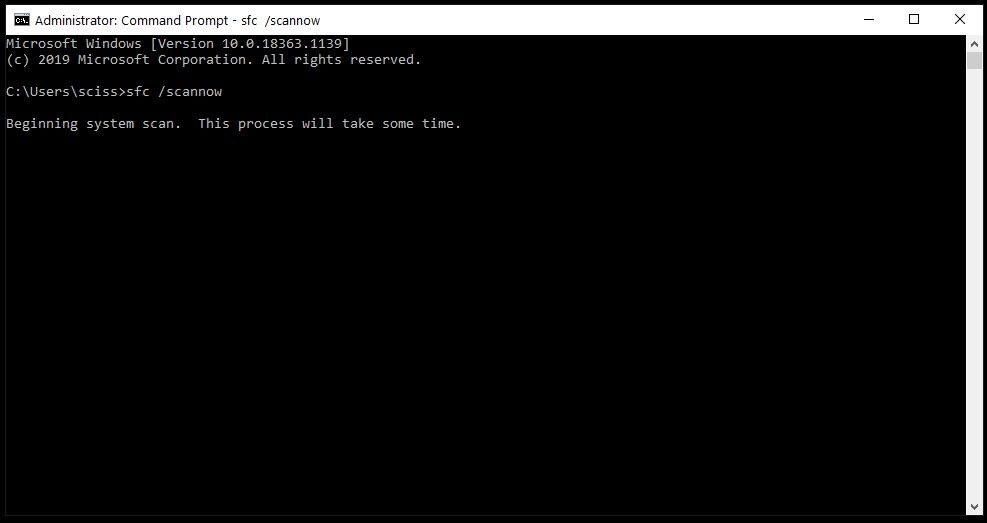
System File Checker will start going through all your system files and replace any corrupt or missing files with a cached copy.
This process can take a little while, so feel free to do something else for 5-10 minutes. Just be careful not to close the window while sfc is doing its thing.
Once System File Checker is finished, you’ll either see a report of all the files it replaced, or if everything was fine, you’ll see a message like this:
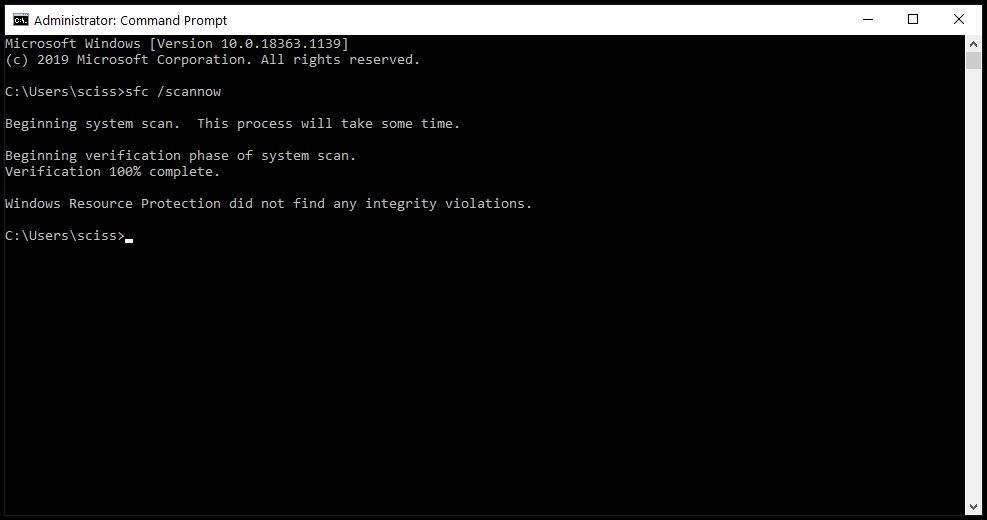
If System File Checker replaced any corrupt or missing system files, save all of your open work and restart your computer. Once you log back in, try to open the Start Menu to see if that fixed your issues.
Note: You could also use Powershell to run the sfc /scannow command, but remember that you’ll need to open an elevated Powershell terminal.
The next thing you can try is to reset the Start Menu entirely, along will all the Windows 10 apps that were preinstalled or installed from the Microsoft Store.
To do this, you’ll need to open PowerShell as an administrator – Command Prompt won’t work for the command you’ll run.
There are many ways to open PowerShell, but one of the fastest ways is to use the Run program.
Use the shortcut Windows Key + R to open the Run program, enter «powershell», then hold down «Ctrl + Shift» and click the «OK» button:
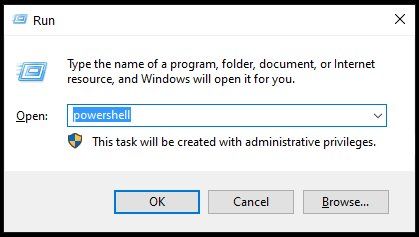
This should open up a PowerShell terminal with administrative privileges.
In the PowerShell terminal, run the following command:
Get-AppXPackage -AllUsers | Foreach {Add-AppxPackage -DisableDevelopmentMode -Register "$($_.InstallLocation)\AppXManifest.xml"}
The Get-AppXPackage command will attempt to reinstall all the default Windows apps, including the Start Menu and search bar.
It will also register a manifest file for each program it reinstalls. You don’t need to worry about the manifest files, though – it’s just something Windows needs to run each program.
Give it 5-10 minutes, and make sure you don’t close the PowerShell window until it’s finished.
Note: You may see some scary looking errors pop up as the Get-AppXPackage command is running. Don’t worry about them – most are just warnings about why a program can’t be reinstalled:
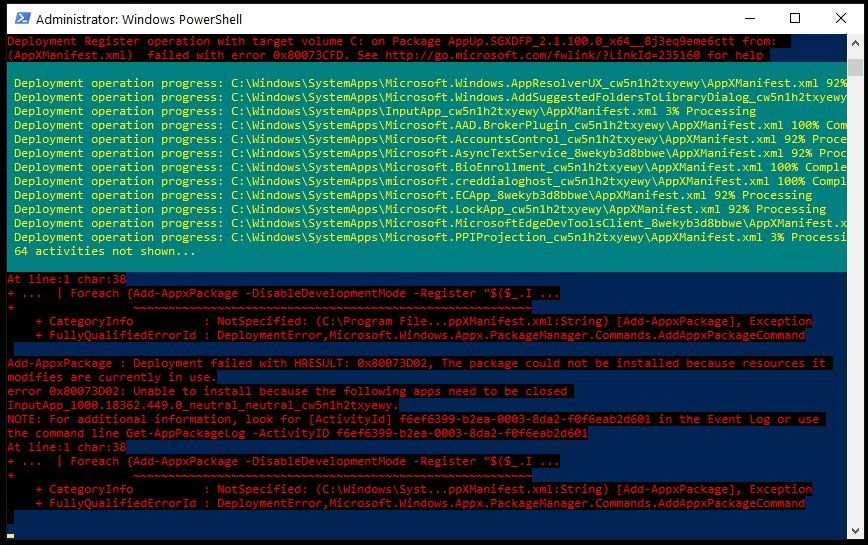
When the Get-AppXPackage command is finished, restart your computer, log in, and try to open the Start Menu.
How to reset your Windows 10 installation
If none of the above methods fixed the Start Menu, the last thing you can try is to do a factory reset of your Windows 10 installation. But keep in mind that this is an «almost-scorched-earth» method, and should only be used as a last resort.
Resetting your Windows 10 installation should keep all of your personal files intact (documents, pictures, videos, and so on), but will uninstall all the other drivers and programs you’ve installed. Basically this resets your computer to the state it was in when you first turned it on.
Before going any further, make backups of all your important files using a flash drive, external HDD/SSD, and/or an online file host like Google Drive or Dropbox.
In fact, make two backups. You probably won’t need them, but it doesn’t hurt.
When you’ve finished backing up all your files, open a PowerShell terminal – use the shortcut Windows Key + R, enter «powershell», then click the «OK» button.
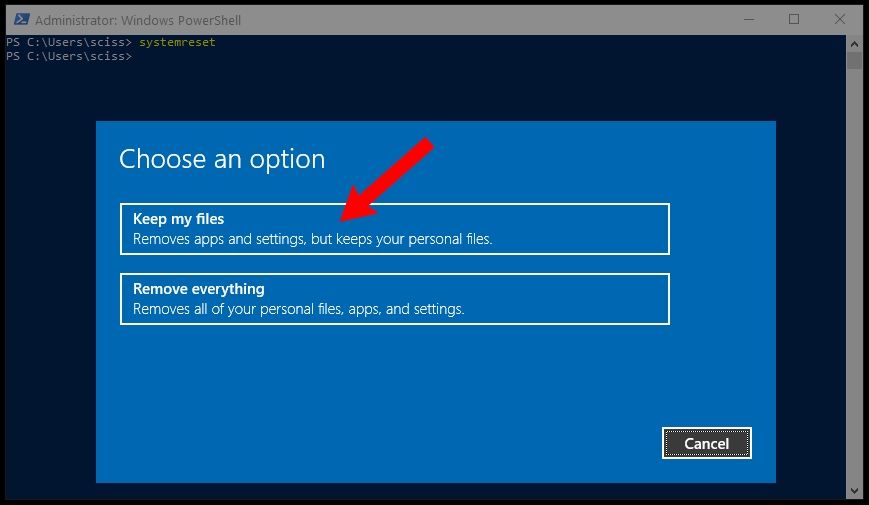
In the PowerShell terminal, run the command systemreset to bring up the Windows reset wizard.
Next, click the «Keep my files» button:
Wait a moment while the wizard analyzes your system. Then, you’ll see a list of all the programs that’ll be removed:
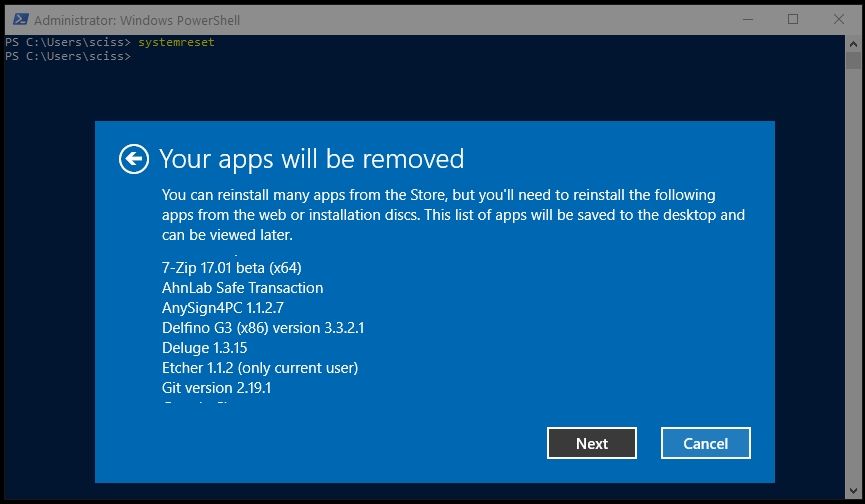
Click the «Next» button, and follow the instructions to reset your Windows 10 installation.
Once you’re finished resetting Windows and creating a new user, the Start Menu should be working again.
So those are all the ways to fix the Windows 10 Start Menu, listed from easiest to hardest.
Did any of these methods work for you? Is there another way to open the Start Menu that I missed? Let me know about it on Twitter.
Learn to code for free. freeCodeCamp’s open source curriculum has helped more than 40,000 people get jobs as developers. Get started
If you have recently updated or upgraded to Windows 10, then chances are your Start Menu may not work properly, making it impossible for users to navigate around Windows 10. Users are experiencing various issues with Start Menu such as Start Menu does not open, Start Button is not working, or Start Menu freezes etc. If your Start Menu isn’t working then don’t worry as today we will see a way to fix this issue.

This exact cause is different for different users because each user has a different system configuration and environment. But the problem can be related to anything like corrupted user account or drivers, damaged system files, etc. So without wasting any time, let’s see How to Fix Start Menu Not Working in Windows 10 with the help of the below-listed tutorial.
Table of Contents
Make sure to create a restore point just in case something goes wrong.
To run Command Prompt as an administrator, press Ctrl + Shift + Esc to open Task Manager. Then click on File then select Run new task. Type cmd.exe and checkmark “Create this task with administrative privileges” then click OK. Similarly, to open PowerShell, type powershell.exe and again checkmark the above field then hit Enter.

Method 1: Restart Windows Explorer
1. Press Ctrl + Shift + Esc keys together to launch the Task Manager.
2. Find explorer.exe in the list then right-click on it and select End Task.

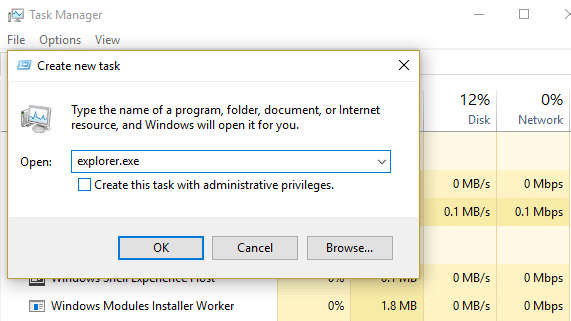
3. Now, this will close the Explorer and to rerun it, click File > Run new task.

4. Type explorer.exe and hit OK to restart the Explorer.
5. Exit Task Manager and see if you’re able to Fix Start Menu Not Working in Windows 10.
6. If you’re still facing the issue, then log out from your account and re-login.
7. Press Ctrl + Shift + Del key at the same time and click on Signout.
8. Type in your password to login to Windows and see if you’re able to fix the issue.
Method 2: Create a new local administrator account
If you’re signed with your Microsoft account, then first remove the link to that account by:
1. Press Windows Key + R then type “ms-settings:” (without quotes) and hit Enter.
2. Select Account > Sign in with a local account instead.

3. Type in your Microsoft account password and click Next.

4. Choose a new account name and password, and then select Finish and sign out.
#1. Create the new administrator account:
1. Press Windows Key + I to open Settings and then click Accounts.
2. Then navigate to Family & other people.
3. Under Other people click on “Add someone else to this PC.”

4. Next, provide a name for the user and a password then select Next.

5. Set a username and password, then select Next > Finish.
#2. Next, make the new account an administrator account:
1. Again open Windows Settings and click on Account.

2. Go to the Family & other people tab.
3. Other people choose the account you just created and then selected a Change account type.

4. Under Account type, select Administrator then click OK.

#3. If the issue persists try deleting the old administrator account:
1. Again go to Windows Settings then Account > Family & other people.
2. Under Other users, select the old administrator account, click Remove, and select Delete account and data.

3. If you were using a Microsoft account to sign in before, you can associate it with the new administrator by following the next step.
4. In Windows Settings > Accounts, select Sign in with a Microsoft account instead and enter your account info.
Finally, you should be able to Fix Start Menu Not Working in Windows 10 as this step seems to fix the issue in most cases.
Method 3: Run Start Menu Troubleshooter
If you continue to experience Start Menu’s issue, it’s recommended to download and run Start Menu Troubleshooter.
1. Download and run Start Menu Troubleshooter.
2. Double click on the downloaded file and then click Next.

3. Let it finds and automatically Fixes Start Menu Not Working in Windows 10.
Method 4: Run System File Checker (SFC) and Check Disk
1. Open Command Prompt. The user can perform this step by searching for ‘cmd’ and then press Enter.

2. Now type the following in the cmd and hit enter:
Sfc /scannow
sfc /scannow /offbootdir=c:\ /offwindir=c:\windows

3. Wait for the above process to finish and once done, restart your PC.
4. Next, run CHKDSK from Fix File System Errors with Check Disk Utility(CHKDSK).
5. Let the above process complete and again reboot your PC to save changes.
Method 5: Force Cortana to Rebuild Settings
Open Command Prompt with administrative rights then type the following one by one and hit Enter after each command:
CD /d "%LOCALAPPDATA%\Packages\Microsoft.Windows.Cortana_cw5n1h2txyewy"
Taskkill /F /IM SearchUI.exe
RD /S /Q Settings

This will force Cortana to rebuild the settings and will Fix Start Menu and Cortana Not Working in Windows 10.
If the issue is still not resolved, follow this guide to fix any issues related to Cortana.
Method 6: Re-Register Windows App
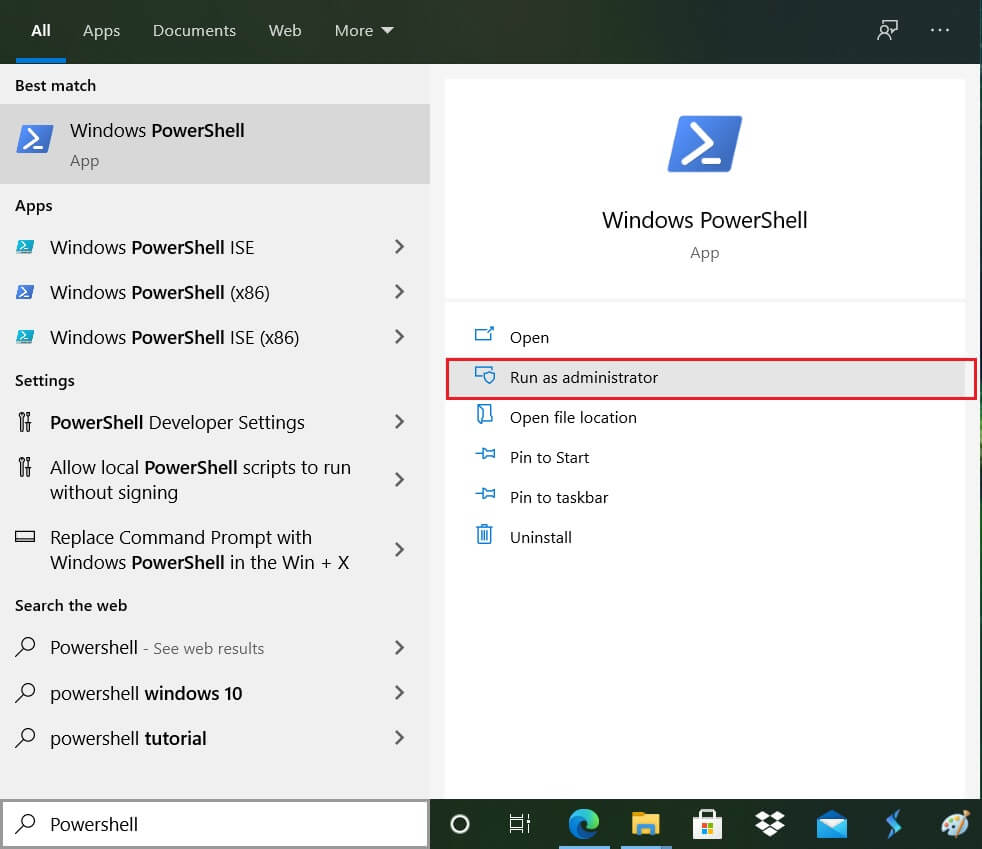
1. Type PowerShell in Windows Search then right-click on PowerShell and select Run as Administrator.
2. Now type the following command into PowerShell window:
Get-AppXPackage -AllUsers | Foreach {Add-AppxPackage -DisableDevelopmentMode -Register "$($_.InstallLocation)\AppXManifest.xml"}

3. Wait for the Powershell to execute the above command and ignore the few errors which may come along.
4. Reboot your PC to save changes.
Method 7: Registry Fix
1. Press Ctrl + Shift + Esc to open Task Manager then click on File and select Run new task.
2. Type regedit and checkmark “Create this task with administrative privileges” then click OK.

3. Now navigate to the following registry key in the Registry Editor:
Computer\HKEY_LOCAL_MACHINE\SYSTEM\CurrentControlSet\Services\WpnUserService
4. Make sure to select WpnUserService then in the right window double-click on the Start DWORD.

5. Change its value to 4 then click OK.
6. Reboot your PC to save changes.
Method 8: Refresh or Reset Windows 10
Note: If you can’t access your PC, restart your PC a few times until you start Automatic Repair. Then navigate to Troubleshoot > Reset this PC > Remove everything.
1. Press Windows Key + I to open Settings then click on Update & Security icon.
2. From the left-hand menu select Recovery.
3. Under Reset this PC, click on the “Get Started” button.

4. Select the option to Keep my files.

5. For the next step, you might be asked to insert Windows 10 installation media, so ensure you have it ready.
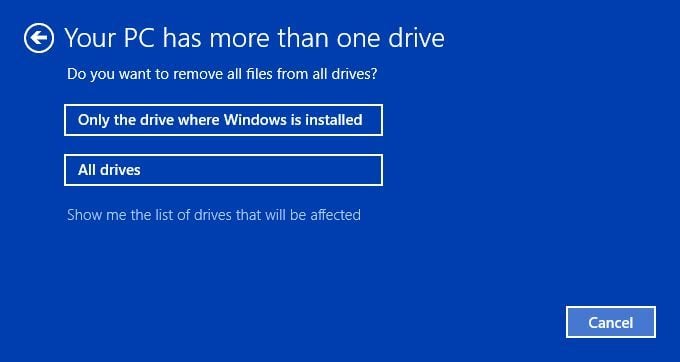
6. Now, select your Windows version and click on only the drive where Windows is installed > remove my files.
5. Click on the Reset button.
6. Follow the instructions on the screen to complete the reset.
Recommended:
- Fix Realtek High Definition Audio Driver Issue
- Rebuild Font Cache in Windows 10
- Enable Enhanced Anti-Spoofing for Windows Hello Face Authentication
- Fix Bluetooth can’t turn off on Windows 10
That’s it you have successfully Fix Start Menu Not Working in Windows 10 but if you still have any queries regarding this tutorial then feel free to ask them in the comment’s section.