
Переключитесь на Microsoft Edge, чтобы использовать эти функции.
Боковая панель
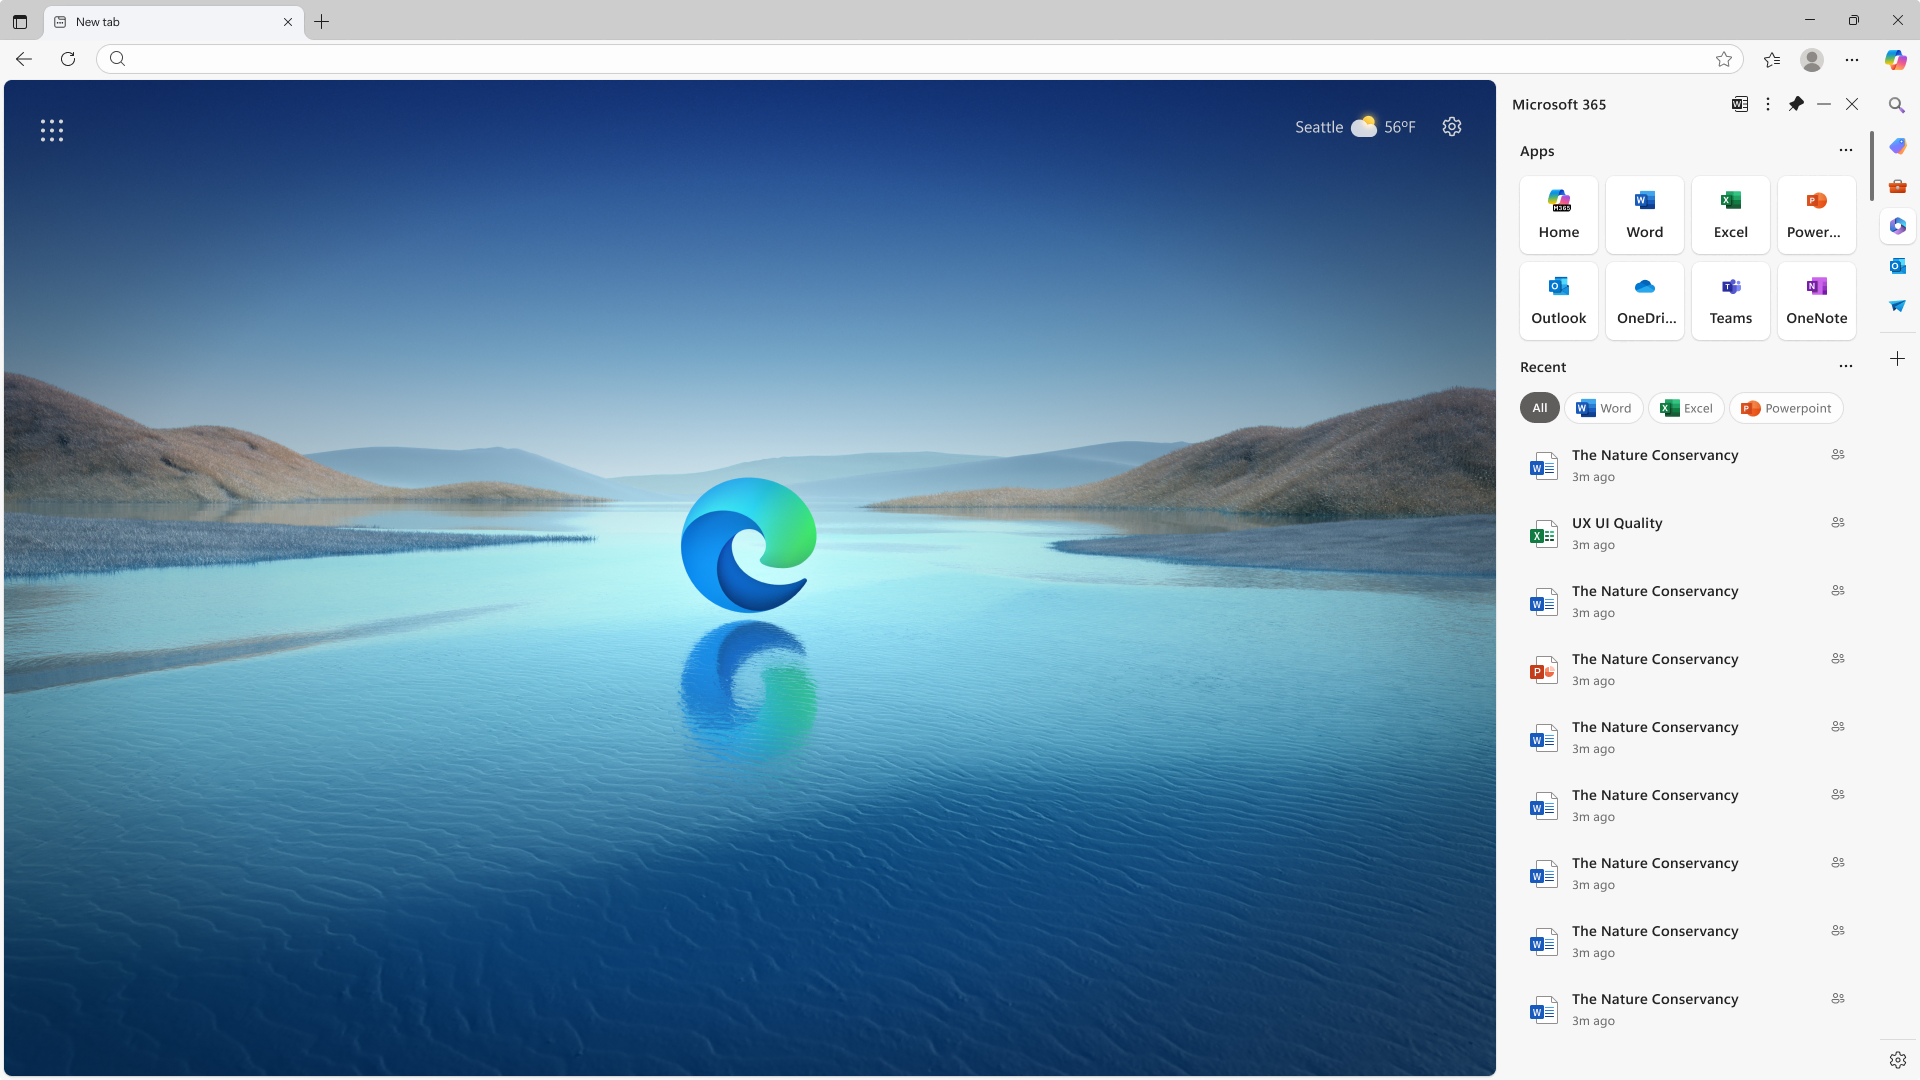
Многозадачность в Интернете с боковой панелью в Microsoft Edge. Получите быстрый доступ к инструментам, приложениям и многому другому на текущей вкладке, не нарушая поток.
Боковая панель
Многозадачность в Интернете с боковой панелью в Microsoft Edge. Получите быстрый доступ к инструментам, приложениям и многому другому на текущей вкладке, не нарушая поток.
Советы и рекомендации
- * Доступность и возможности функций зависят от типа устройства, рынка и версии браузера.
Windows Vista and 7 incorporated sidebars for its gadgets along the right side of the desktop area. However, Microsoft has scrapped sidebars in Windows since then. Sure, the big M might have partly re-established limited gadgetry with a widget panel, but that’s not a sidebar.
A sidebar can be a useful addition to the Windows desktop for many things, such as adding shortcuts. Would you like to restore a sidebar in Microsoft’s more recent desktop platforms? If so, try adding one of these third-party software sidebars to Windows 11 or 10.
MetroSidebar is freeware sidebar software that incorporates metro-style live tiles for widgets. The publisher originally released MetroSidebar to add a matching metro-themed sidebar to Windows 8. It includes 11 default widgets users can select to add and remove from the bar. This is how you can add the MetroSidebar to the desktop in Windows 11 and 10:
- Open the MetroSidebar page on Softpedia.
- Select Download Now for MetroSidebar.
- Click Softpedia Secure Download (US) to start the MetroSidebar download.
- Open the Downloads tab in your web browser and double-click MetroSide_setup.msi to open it from there.
- Install the application and restart your PC.
-
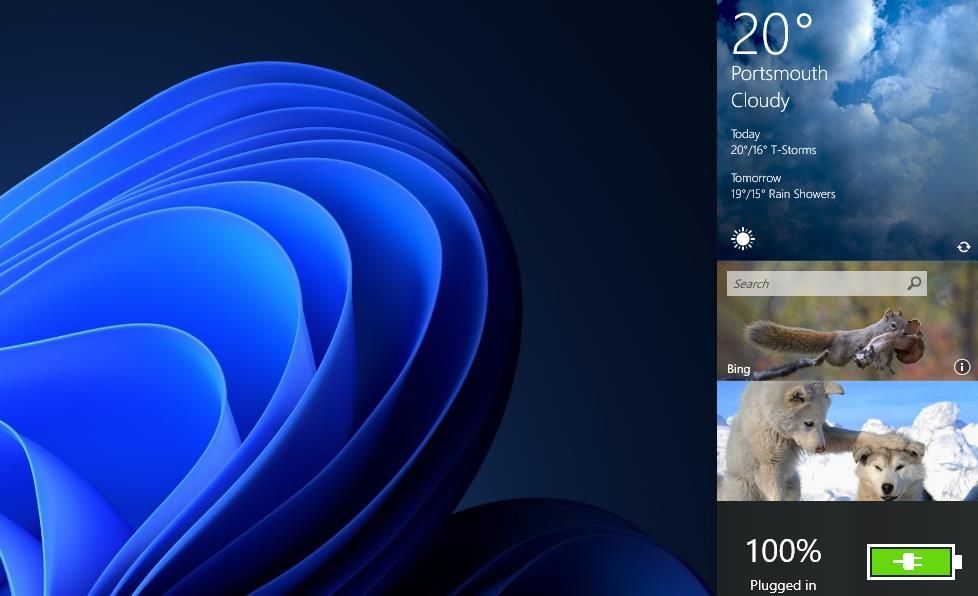
If MetroSidebar doesn’t automatically start after the restart, select to run it from your Start menu. Then you’ll see a new sidebar on the right side of your desktop.

-
To add tiles to the sidebar, click the … button at the bottom right of the sidebar. Select a tile to add, and click the Plus button for it.


You’ll notice the Tiles window has a Tile Store tab. However, that store is seemingly no longer available since its tab displays a “Connection problem” message. So, you’ll have to make do with the default 11 tile widgets that come with the sidebar.
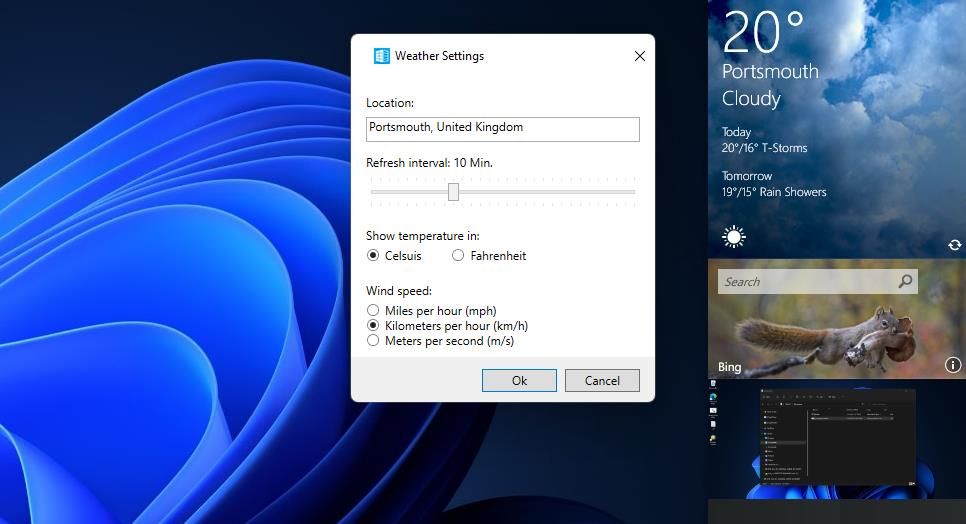
However, MetroSidebar’s default tile widgets should be enough to satisfy most users. The software includes weather, battery meter, Bing search, clock, media player, pictures (for slideshows), and alarm tiles among others. Each widget has customization options you can configure by right-clicking it and selecting Tile settings.
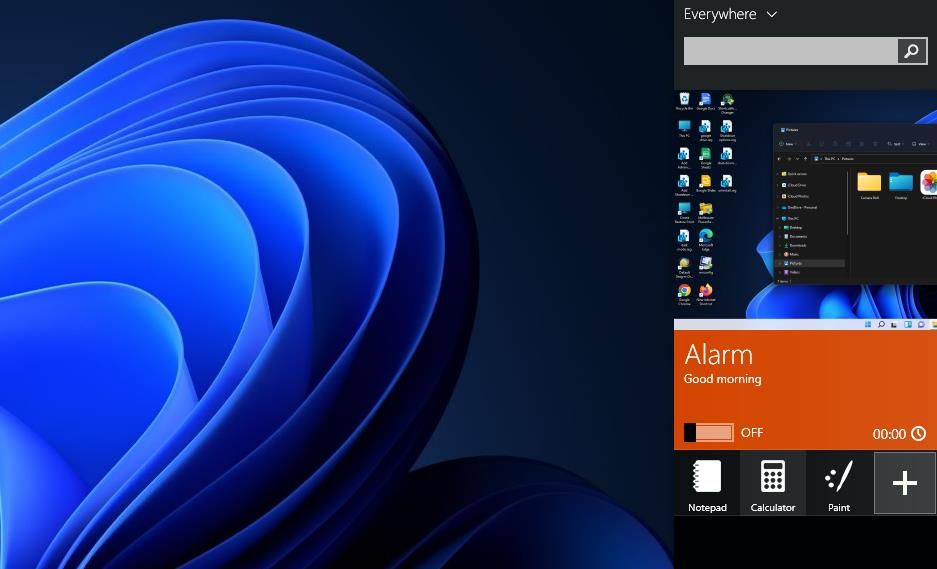
If you want to add software shortcuts to this sidebar, select to include its Launcher tile. That tile includes shortcuts for opening Control Panel, Paint, Notepad, Calculator, Paint, Recycle Bin, and Computer. You can add more programs to it by clicking the + New Shortcuts button (left-click the tile and drag left to scroll to that option). Then select software to add to the widget and click Open.
To access sidebar options in MetroSidebar, click the … button at the bottom of the bar and select Settings. You can select whether the sidebar automatically opens by clicking Start with Windows in the MetroSidebar settings. Select Always on top if you prefer to keep the sidebar always visible over open windows.
SideBar is software designed for creating software, website, and file shortcuts. You can’t add any kind of gadgets to that sidebar, but it’s the best choice for setting up shortcuts. It enables you to create groups of shortcuts accessible on a desktop sidebar. You can add a shortcuts sidebar to Windows with that software like this:
- Open the website for SideBar.
- Click the Sidebar version 2.0.7.4 link to download the software.
- Double-click Sidebar.exe in your browser’s Downloads tab to bring up the installer for that software.
- Click Next twice and Install in the Sidebar for Windows setup wizard.
- Select Finish to exit the setup wizard and start the software.
Once you have Sidebar running:
- Click the SideBar system tray icon to bring up the sidebar directly below.
-
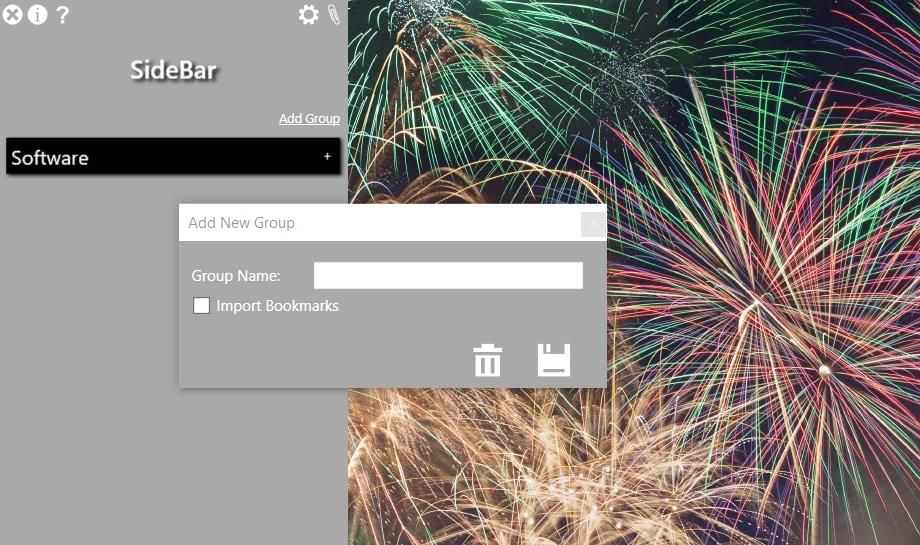
Select the Add Group option.

- Enter a title for a group in the text box, and select the Click to save option.
-
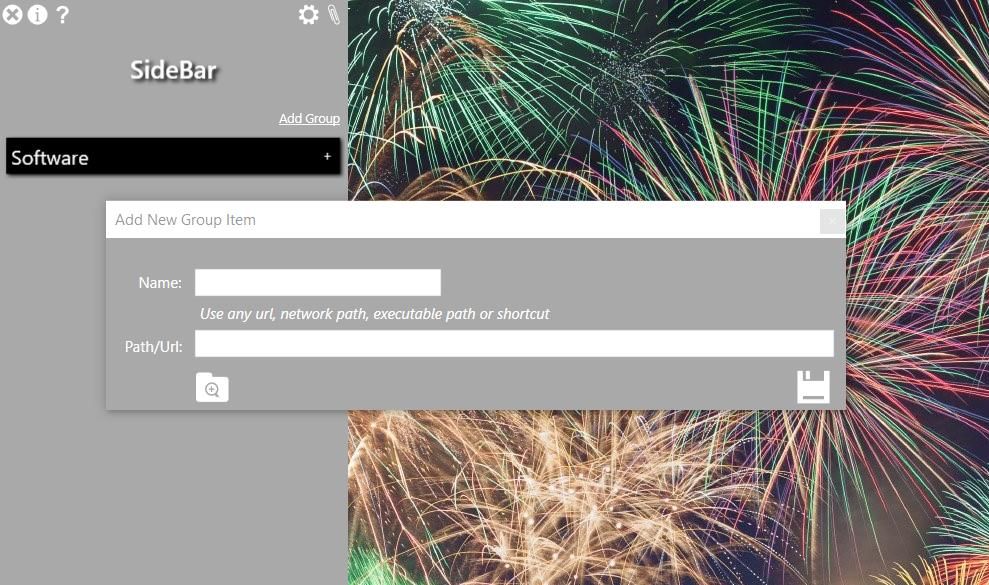
Then you can add some shortcuts by clicking + on the newly added group.
- Input a title for the shortcut in the Name box.
-
Select the Click to browse option to choose software or user file for the shortcut to open. If you want to set up a website shortcut, input a URL in the Path box.

- Press the Click to save button.
- Repeat the above steps to add as many shortcuts as you wish to the sidebar.
You can change the sidebar’s position on the desktop from its system tray context menu. Right-click the sidebar’s system tray icon to select Dock Location and Left or Right. Add transparency to the sidebar by dragging the slider for the Set opacity bar setting on the menu to the left. You can also keep the sidebar over software windows by selecting Always on top.
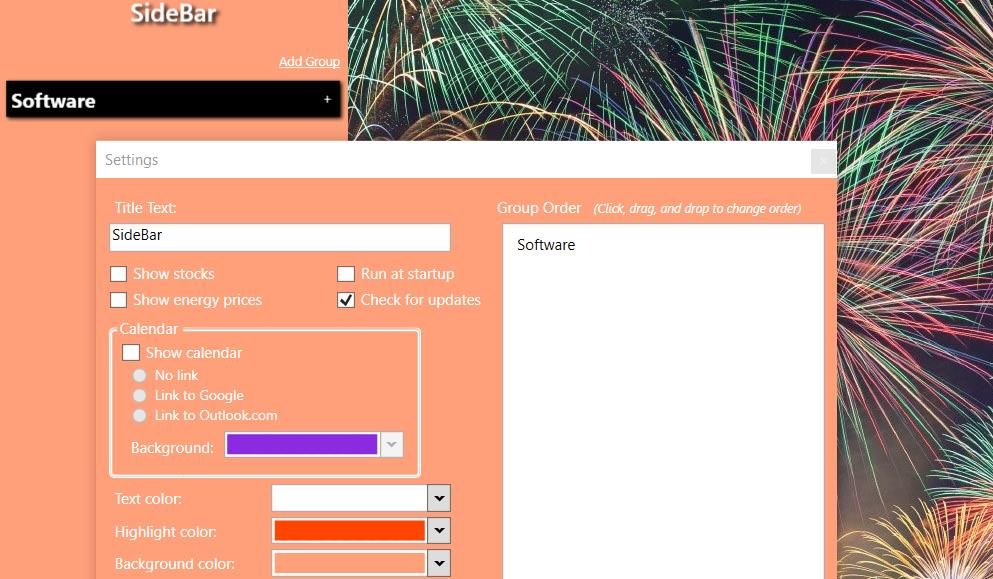
To customize the sidebar, press its Click to change settings (cog) button at the top. Then you can change the bar’s color with the Highlight, Text, Background, and Group Background color drop-down menus. You can also rearrange the groups by dragging them within the Group Order box.
Desktop Sidebar is old software, but you can still add a sidebar to Windows 11 or 10 with it. This sidebar incorporates panels that are much the same as widgets with different functions. Unlike MetroSidebar and SideBar, it includes different skin themes you can choose for the sidebar. This is how to add a customizable sidebar to Windows with that software:
- Open the Softpedia page for downloading Desktop Sidebar.
- Click Download Now and select the US mirror option.
- Bring up your web browser’s Downloads tab (press Ctrl + J in Chrome). Click sidebarb116.exe to open the setup wizard for Desktop Sidebar.
- Then go through the setup wizard by clicking Next three times to install Desktop Sidebar at the default path.
-
Open Desktop Sidebar to bring up the sidebar shown directly below.

-
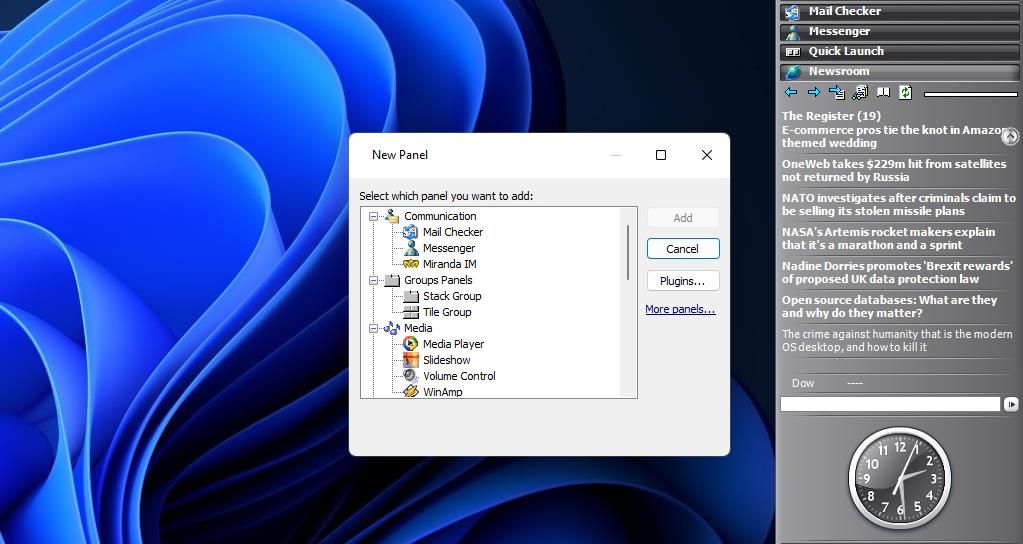
The sidebar includes numerous default panels. However, you can add more by right-clicking the sidebar and selecting Add panel.

- Select news, media, system, communication, or panel type in the window; and click the Add button.
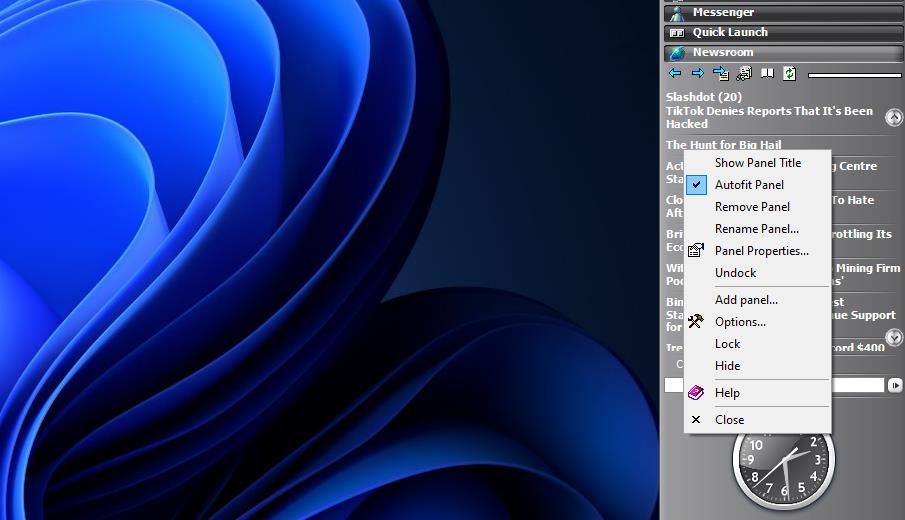
You can customize panels on the sidebar by right-clicking their titles to bring up context menu options. Select Move Up and Move Down to reposition them. Click Rename to change a panel’s title. To change specific widget options, select the Panel Properties option.
Quick Launch is the panel on which you can add software, file, and folder shortcuts. To do so, double-click Quick Launch on the sidebar to expand. Then you can drag-and-drop shortcuts from the desktop and files and folders in Explorer onto that panel for quick access.
To change the sidebar’s skin, select Options on the software’s context menu and click Appearance. Then you can choose a different theme on the Skin drop-down menu. The Appearance tab also includes settings for repositioning the sidebar, auto-hiding it when not used, and applying transparency. Press Apply to save any options you’ve changed.
If you need any help utilizing Desktop Sidebar, check out the software’s manual. Right-click the sidebar and select Help on the menu. The Overview and Panels sections there provide further details for Desktop Sidebar’s options and panels.
All those freely available third-party sidebars provide invaluable new places to stick shortcuts for opening software in Windows 11 and 10. Instead of cluttering the desktop and taskbar with shortcuts, add them to your installed sidebar. Then you’ll have an altogether tidier Windows desktop area.
Users who miss the gadget sidebar from Vista will also appreciate the additional widget tiles and panels included in MetroSidebar and Desktop Sidebar. They restore the gadgets in Windows 10 and provide more widgets in Windows 11.
Add a new Sidebar to Windows 10
It would be great if Windows 10 had a customizable sidebar on the desktop. That would be ideal for shortcuts and widgets. However, except for the gadget bar in Vista Microsoft has not really incorporated any sidebar into Windows. Microsoft removed the gadget bar, and has not replaced it with anything else. But there are a few sidebars you can add to Windows 10 with third-party software.
The 8GadgetPack Sidebar
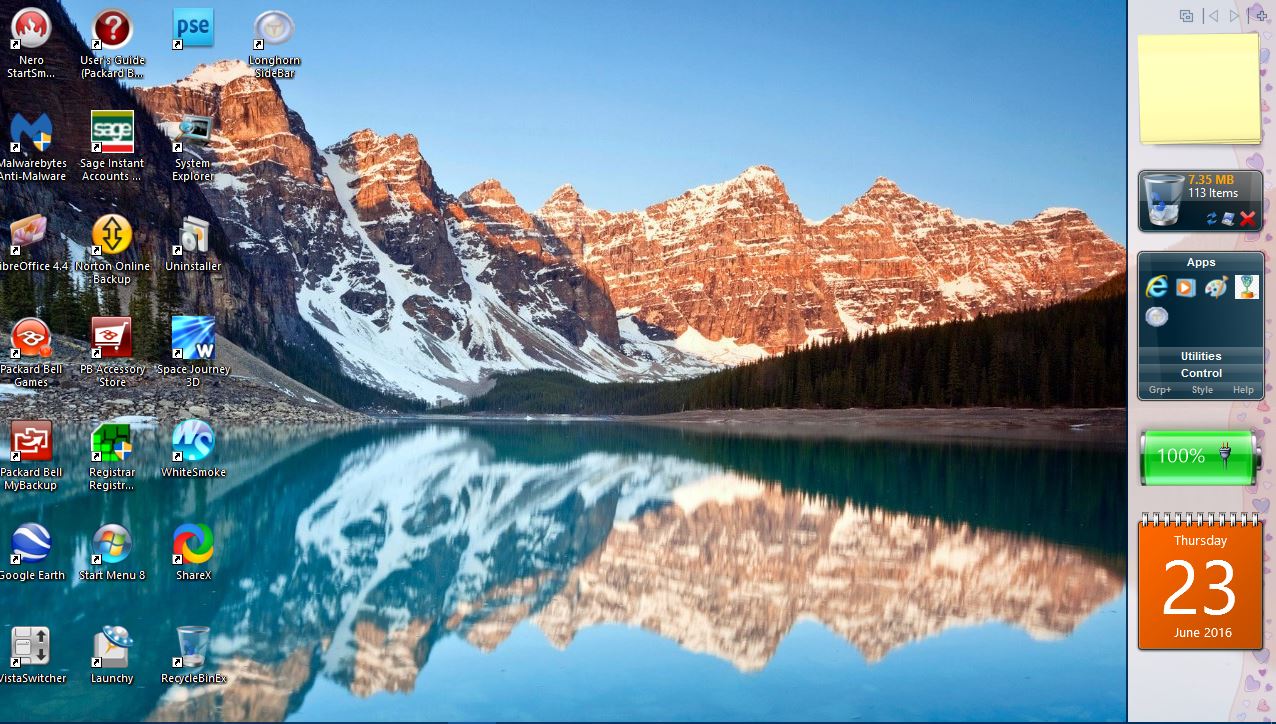
Firstly, check out the 8GadgetPack sidebar for Windows 10, 8 and 7. This program effectively restores the former gadget bar and its widgets in Windows 10. Click the Download Now button on its Softpedia page to save its setup and install the software. Then enter ‘8GadgetPack’ into the Cortana search box to open the 8Gadget Pack Tools window below.
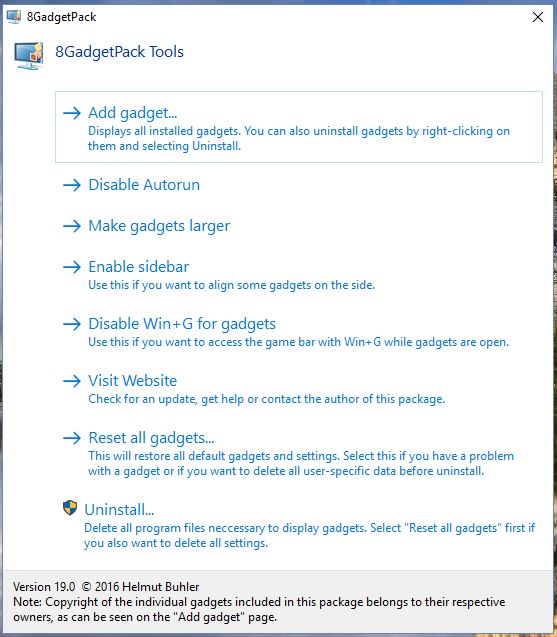
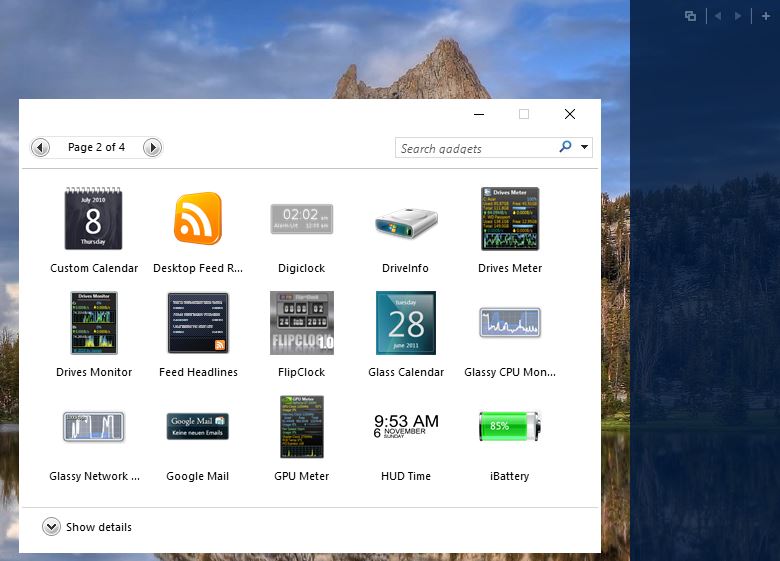
Click the Enable Sidebar option on that window to add a new, blank sidebar to the right of the desktop. Then add some gadgets to the sidebar. Select Add gadget to open the window directly below that includes 49 widgets for you to add to the sidebar. They include clocks, calendars, notes, image slideshows, app launchers and more besides.
Now double-click a gadget on that window to add it to the sidebar. You can probably fit at least five or six gadgets on the sidebar as shown in the snapshot below. To customize a gadget, you can right-click it and select options to open additional settings for it.
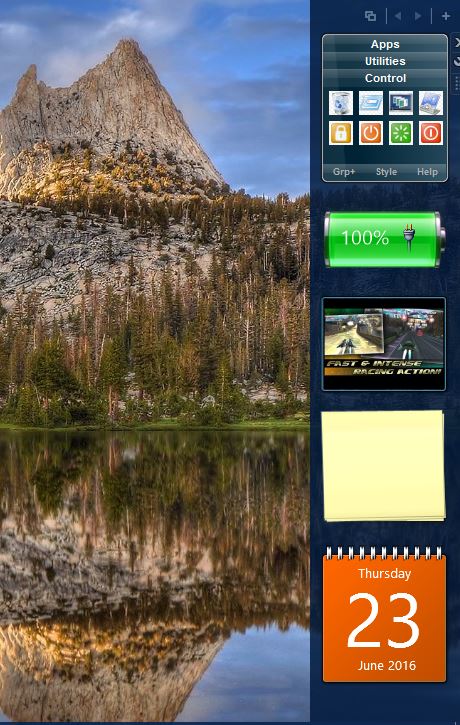
My favorite gadget for the 8GadgetPack sidebar is Launch Control. Add program shortcuts to that gadget by dragging them from the desktop onto the Apps section of Launch Control. It also includes utility and system shortcuts such as Recycle Bin, Run and the Shutdown button.
This sidebar also includes thumbnail previews of open software windows on the taskbar. Click the Window-Manager button at the top of the bar. That shows you thumbnail previews of the windows as in the shot directly below.
You can keep this sidebar on top of other open windows. To do so, you should right-click the sidebar and select Always on top from the context menu. Then the sidebar will remain on top of other software windows as shown directly below.
To customize the gadget bar, right-click the sidebar and select Options. Then click the View tab on the window to open the options below. There you can choose a variety of alternative skins for the sidebar by pressing the buttons. Select Color and Theme Color to further customize the colors of the skins. Click Enable transparency to add a transparent effect to the sidebar.

Desktop Sidebar
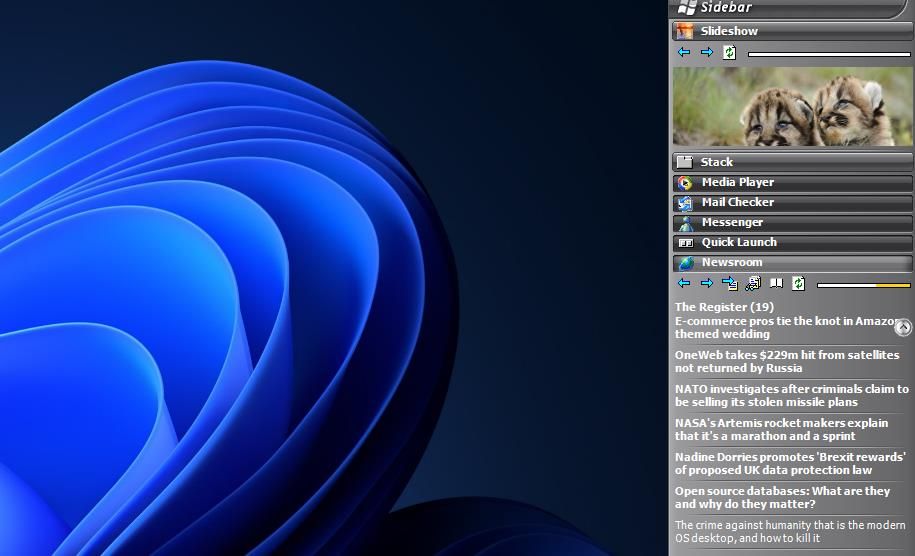
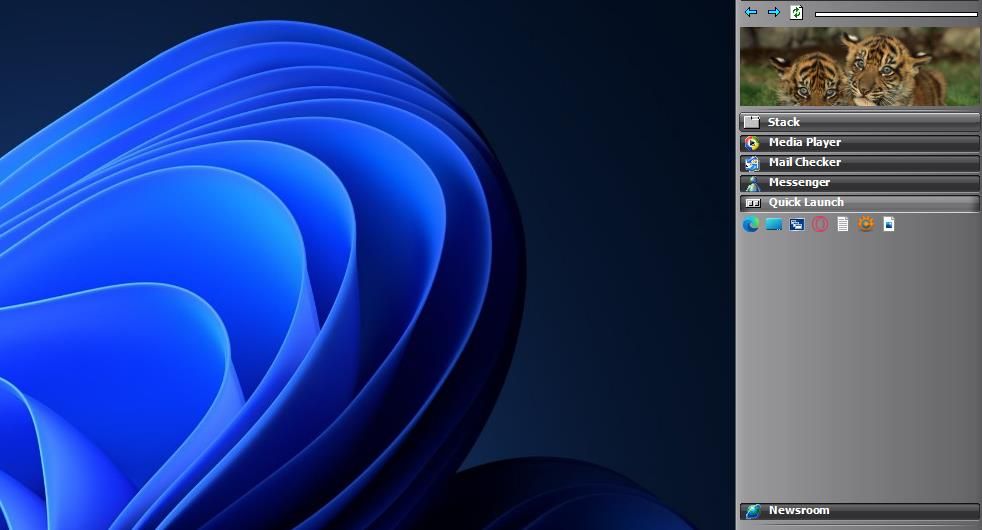
Desktop Sidebar is a sidebar with a lot packed into it. Open this Softpedia page to add this program to Windows 10. When you run the software, the new sidebar opens on the right of your desktop as shown below.
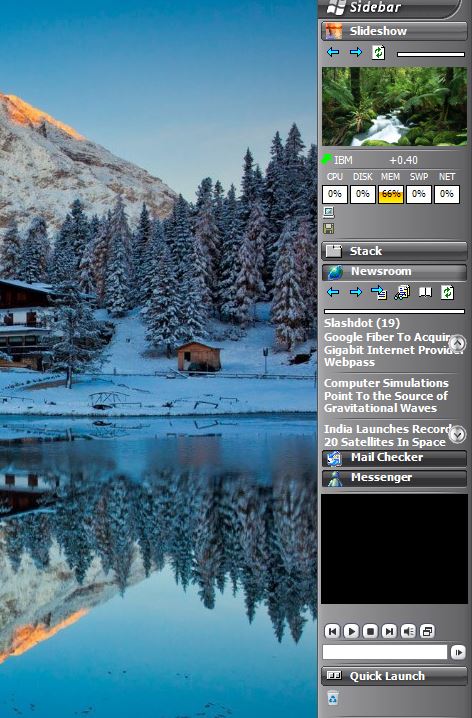
This sidebar is made up of panels. Among the default panels it includes are an image slideshow, quick launch, mail checker and media player. You can add new panels by right-clicking the sidebar and selecting Add panel to open the window directly below. Select a new panel from there and press the Add button to include it in the sidebar. To delete a panel, you can right-click it on the sidebar and select Remove Panel.
You can add program shortcuts to the Quick Launch panel on the sidebar. Drag a shortcut from the desktop onto the QL sidebar panel. So you can open software, document and photo files from there.
The sidebar also has a slideshow panel that’s ideal for showcasing photos. You can right-click Slideshow and select Panel Properties to choose a new image folder. Then select the folder path on General tab and select Edit. Click the … button to choose a new photo folder for the slideshow, and press Apply and OK to save settings close the window.
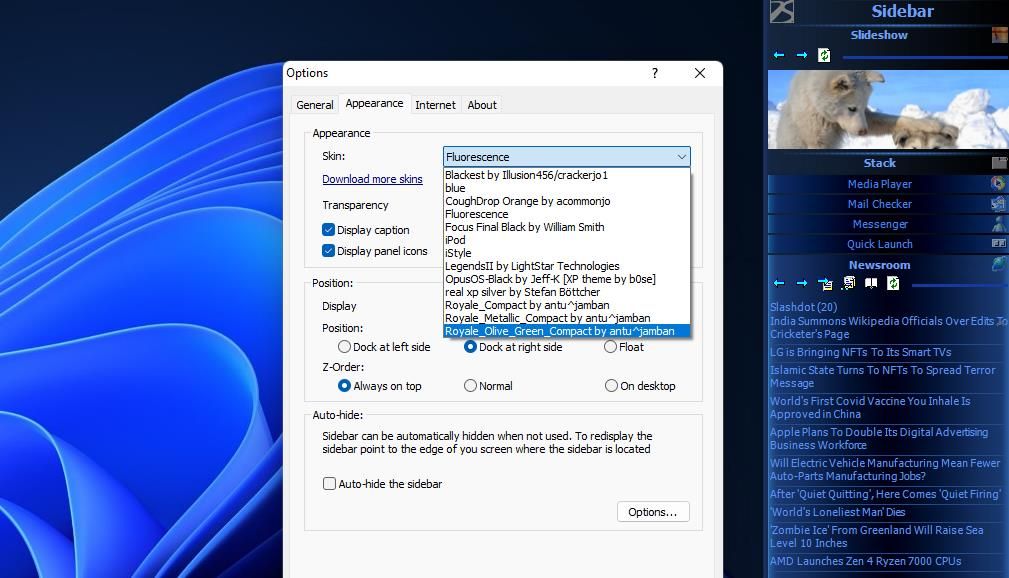
You can customize the sidebar by right-clicking it and selecting Options. Click the Appearance tab and choose a new theme for from the Skin drop-down menu. There’s also a Transparency bar you can drag further right to add a transparent effect to the sidebar. In addition, you can select Dock at left side or Float options to alter the sidebar’s position. Click Apply to confirm the new settings.
Longhorn SideBar
Longhorn SideBar, which is compatible with most Windows platforms, is a slightly more basic sidebar than the others. You can’t add anything to it, so its customization options are a little more limited. Save its Zip to Windows 10 by clicking the Download Now button on this page. Then extract the compressed file, by pressing Extract all in File Explorer, and run through the setup to open the sidebar directly below.
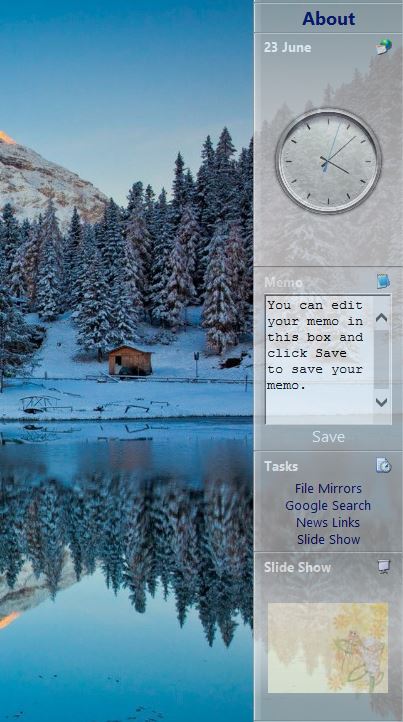
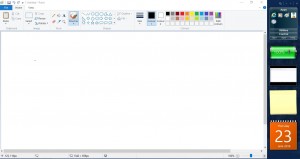
This sidebar includes a clock, notepad, image slideshow and a few other extra options. The Memo text box is handy addition to the sidebar where you can take notes. Click Save to save your notes.
There’s a clock at the top you can customize by right-clicking it and selecting Clocks. Then choose an alternative one from there.
To add your photos to the slideshow, select Preferences from the sidebar’s context menu. Click Manage Slideshow on the Preferences window to open the slideshow’s folder in File Explorer. Then you drag and drop more photos into that folder to add them to the slideshow. Open the Notes document in the Slide folder for further details.
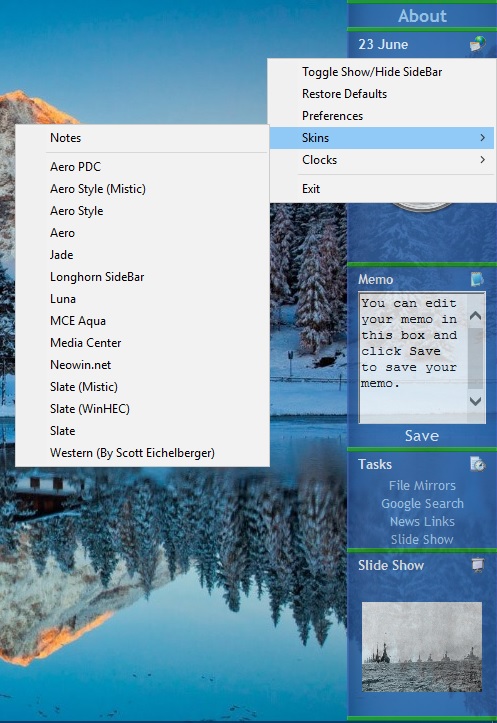
To select new backgrounds and colors for the sidebar, you can right-click it and select Skins. That opens a submenu with a variety of skins to choose from. There aren’t many more customization options, but you can also adjust the sidebar’s transparency by entering alternative values in the Transparency level box on the Preferences window.
The W8 Sidebar
To add some handy system tools to Windows 10, 8 or 7 check out the W8 Sidebar. Click Download Now on this Softpedia page to save its Zip, extract the compressed Zip and then open the sidebar from the extracted folder as in the shot below. Note this is not exactly a sidebar, but more of a dock you can drag around the desktop. Nevertheless, you can still place it at the top right of the desktop as a sidebar.
This sidebar shows you a variety of system resource details with its RAM, CPU and disk storage bars. So it’s comparable to Sidebar Diagnostics covered in this article. You can customize those bars by pressing the W8 Sidebar Settings button on the sidebar. That opens the window below that includes Choose Color buttons for you to customize the resource bar colors with.
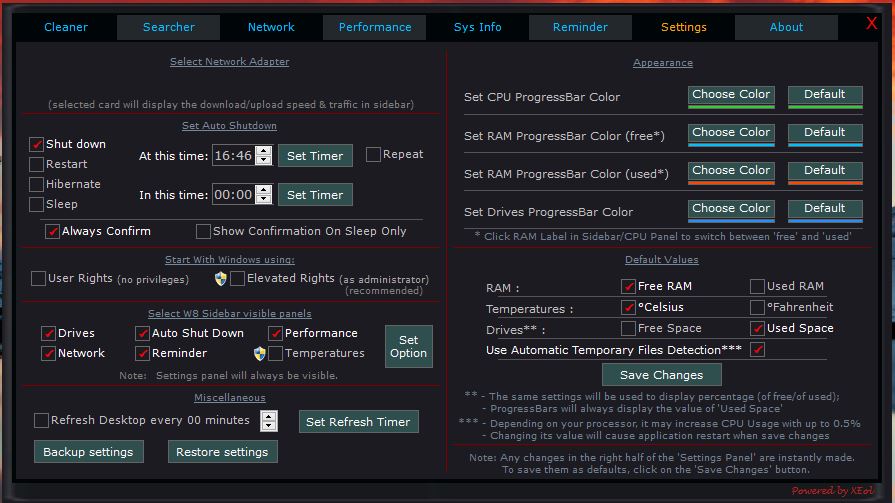
Below the system resource details, there are a few buttons on the W8 Sidebar that open tools for searching files, erasing junk files and the Recycle Bin. Just below those there are shutdown options. You can select to shut down, restart or log off Windows with those buttons.
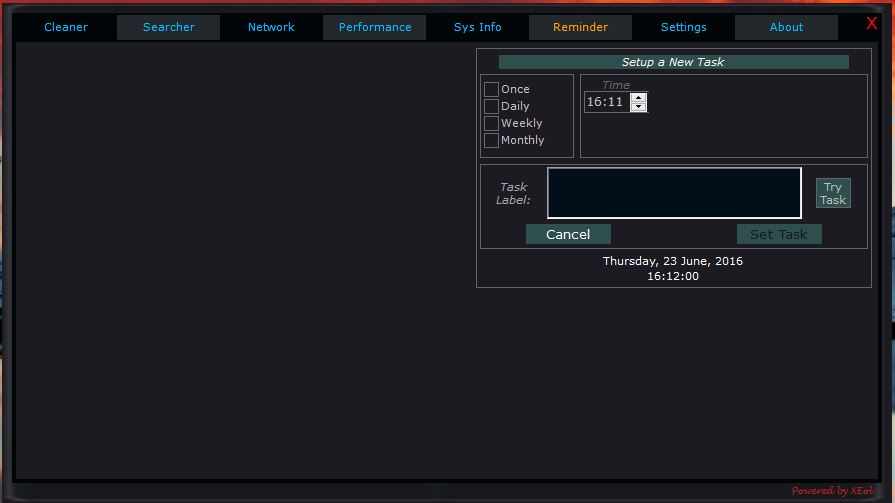
W8 Sidebar also has its own task scheduler. Click Reminder on the sidebar to open that. With that you can schedule software to run or a notification alarm to go off at a set time. You can click Create New Task on the Reminder tab and the Once check box to schedule a program to run. Set a time and date for the software to open at, and click the Browse button to choose a program to run. Enter a label for it and then click Set Task.
Those are four programs that add a sidebar to Windows 10. The sidebars add plenty of handy gadgets and tools to your desktop. Desktop Sidebar and 8GadgetPack are the best of those as you can add program and system shortcuts to them and they have a wider variety of customization options.
Отличный виджет для XWidget который может послужить как боковая панель рабочего стола. Вид виджета создан в строго в стиле Metro, с классическими разноцветными плитками. Большой плюс, что функционал имеет гибкую настройку, можно выбрать цвет плитки, изменить иконку и прочее. Кроме того предоставляется 4 варианта стиля подложки, и 2 режима работы — статический или скрытый (показ виджета при наведении курсора).
Автор: Jimking
Смотрите еще
3 комментария
Порядок вывода комментариев:
0
Yurasoff
(Пользователь)
24.12.2016 в 19:55
№ 3
Алёу! Подскажите, кто-нибудь, плиз!
0
Yurasoff
(Пользователь)
11.12.2016 в 16:04
№ 2
Салют. Подскажите пожалуйста, как сменить картинку в информации о пользователе? (User Account Info)
+2
fgff
(Пользователь)
03.09.2016 в 14:33
№ 1
Просто супер!!! Автору респект
Windows Sidebar – это Windows приложение для добавления виджетов на рабочий стол своего ноутбука либо персонального компьютера. В наличии обширная коллекция разнообразных виджетов, включая календарь и прогноз погоды. Имеется возможность регулировать прозрачность окон и иные параметры внешнего вида.
Начало использования
Первым делом человеку потребуется установить утилиту на своё устройство. После этого останется открыть компьютерную программу и приступить к выбору желаемых виджетов. Интерфейс переведён на русский язык, поэтому трудностей в использовании приложения возникнуть не должно.
Виджеты
Программа была создана для предоставления возможности добавлять на рабочий стол различные виджеты. К примеру, пользователь может установить миниатюрное окно с отображением текущей даты и времени, сведений о погоде и так далее. В том числе позволяется добавлять виджеты с показом состояния различных компонентов ноутбука или ПК, включая температуру центрального процессора и загруженность оперативной памяти.
С помощью компьютерной программы юзер может добавлять на экран и более необычные виджеты. Например, пользователю позволяется добавить небольшое окно для игры в шахматы против искусственного интеллекта. Также имеется возможность вынести на рабочий стол заметки с перечнем дел и другими записями. При желании юзер может добавить на экран виджет для управления своим устройством. Благодаря этому появится возможность быстро перезагружать ПК или ноутбук, не открывая меню пуска.
Пользователю разрешается персонализировать доступные в коллекции виджеты. В том числе регулировать их прозрачность, размер и многое другое. При желании можно пополнить каталог программы, скачав из интернета новые виджеты.
Особенности
- Бесплатная программа с коллекцией виджетов;
- Поддержка актуальных версий Windows;
- Возможность персонализации окон;
- Позволяется добавлять в каталог новые виджеты из интернета.