
Одна из распространенных проблем пользователей Windows 10 — не показываются эскизы или миниатюры изображений (фото и картинок), а также видео в папках проводника, или же вместо них показываются черные квадраты.
В этой инструкции — способы исправить эту проблему и вернуть показ миниатюр (эскизов) для предварительного просмотра в проводнике Windows 10 вместо иконок файлов или тех самых черных квадратов.
- Включение показа эскизов в настройках
- Сброс кэша эскизов Windows 10
- Дополнительные способы включить показ миниатюр
- Видео инструкция
Примечание: отображение миниатюр не доступно, если в параметрах папки (правый клик в пустом месте внутри папки — Вид) включены «Мелкие значки», отображение в виде списка или таблицы. Также миниатюры могут не отображаться для специфичных форматов изображений, не поддерживаемых самой ОС и для видео, для которого не установлены кодеки в системе (также подобное случается, если установленный вами плеер устанавливает свои иконки на видео файлы).
Включение показа миниатюр (эскизов) вместо значков в настройках
В большинстве случаев, для того чтобы включить отображение картинок вместо иконок в папках, достаточно просто изменить соответствующие настройки в Windows 10 (они присутствуют в двух местах). Сделать это просто. Примечание: если какие-то из указанных ниже опций оказались недоступны или не меняются, обратите внимание на последний раздел этого руководства.
Для начала проверьте, включен ли показ миниатюр в параметрах проводника.
- Откройте проводник, нажмите в меню «Файл» — «Изменить параметры папок и поиска» (также можно зайти через панель управления — параметры проводника).
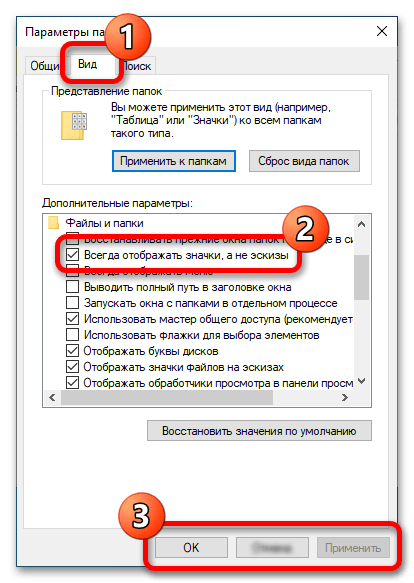
- На вкладке «Вид» посмотрите, не включен ли пункт «Всегда отображать значки, а не эскизы».
- Если включен, снимите отметку с него и примените настройки.
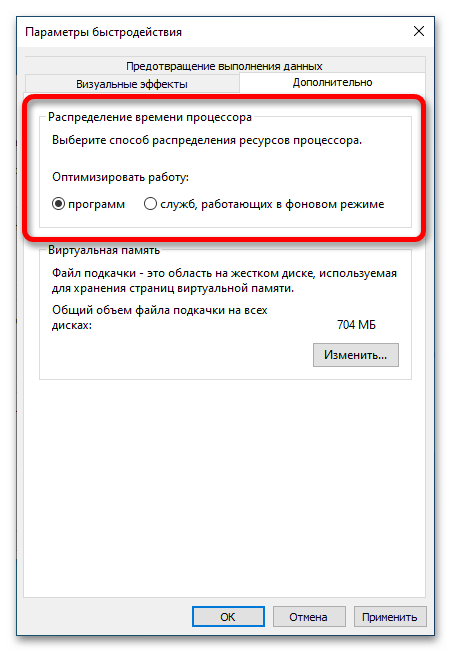
Также настройки отображения эскизов картинок присутствуют в параметрах быстродействия системы. Добраться до них можно следующим образом.
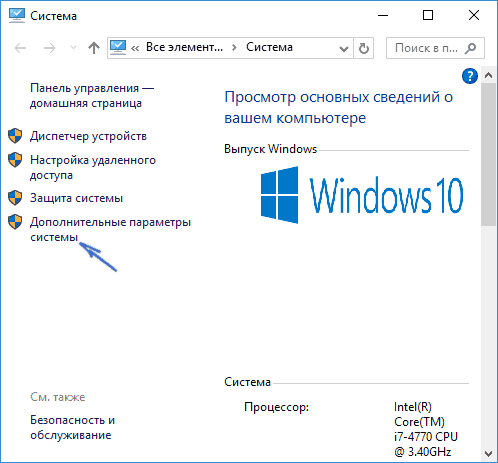
- Кликните правой кнопкой мыши по кнопке «Пуск» и выберите пункт меню «Система».
- Слева выберите «Дополнительные параметры системы»

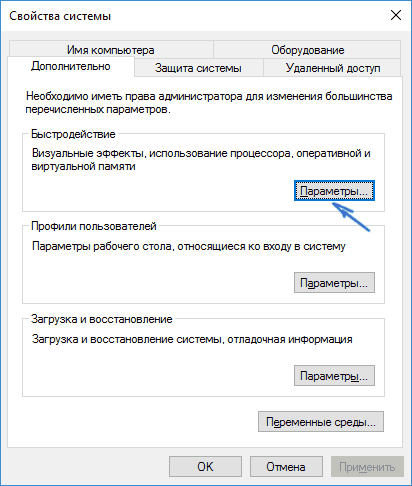
- На вкладке «Дополнительно» в разделе «Быстродействие» нажмите «Параметры».

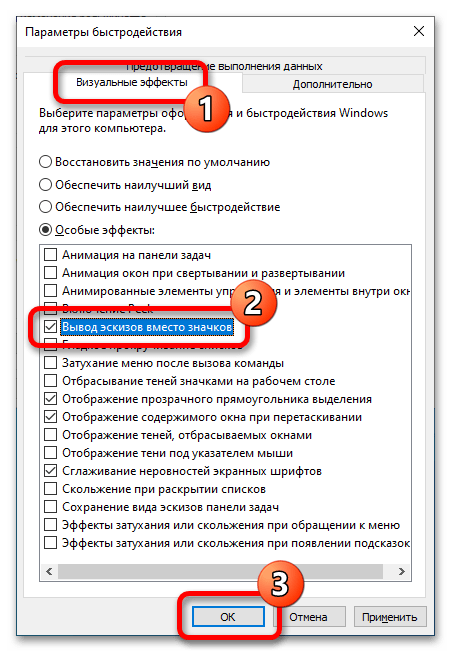
- На вкладке «Визуальные эффекты» отметьте пункт «Вывод эскизов вместо значков». И примените настройки.


Примените сделанные настройки и проверьте, была ли решена проблема с отображением миниатюр.
Сброс кэша эскизов в Windows 10
Этот способ может помочь, если вместо миниатюр в проводнике стали отображаться черные квадраты или что-то еще, не типичное. Здесь можно попробовать сначала удалить кэш эскизов с тем, чтобы Windows 10 создала его заново.
Для очистки эскизов выполните следующие действия:
- Нажмите клавиши Win+R на клавиатуре (Win — клавиша с эмблемой ОС).
- В окно «Выполнить» введите cleanmgr и нажмите Enter.
- Если появится выбор диска, выберите ваш системный диск.
- В окне очистки диска, внизу, отметьте пункт «Эскизы».
- Нажмите «Ок» и дождитесь, когда будет завершена очистка эскизов.
После этого можете проверить, стали ли отображаться миниатюры (они будут созданы заново).
Дополнительные способы включить показ миниатюр
Если в вашем случае не отображаются миниатюры только в случае, если в параметрах «Вид» вы устанавливаете крупные или огромные значки, проверьте, чтобы в разделе реестра
HKEY_LOCAL_MACHINE\SOFTWARE\Microsoft\Windows NT\CurrentVersion\Windows
Были следующие параметры со следующими значениями, при их отсутствии или отличающихся значениях, измените их:
"IconServiceLib"="IconCodecService.dll"
"DdeSendTimeout"=dword:00000000
"DesktopHeapLogging"=dword:00000001
"GDIProcessHandleQuota"=dword:00002710
"ShutdownWarningDialogTimeout"=dword:ffffffff
"USERNestedWindowLimit"=dword:00000032
"USERPostMessageLimit"=dword:00002710
"USERProcessHandleQuota"=dword:00002710
@="mnmsrvc"
"DeviceNotSelectedTimeout"="15"
"Spooler"="yes"
"TransmissionRetryTimeout"="90"
А в разделе реестра
HKEY_LOCAL_MACHINE\SOFTWARE\Wow6432Node\Microsoft\Windows NT\CurrentVersion\Windows
следующие параметры
"IconServiceLib"="IconCodecService.dll"
"DdeSendTimeout"=dword:00000000
"DesktopHeapLogging"=dword:00000001
"GDIProcessHandleQuota"=dword:00002710
"ShutdownWarningDialogTimeout"=dword:ffffffff
"USERNestedWindowLimit"=dword:00000032
"USERPostMessageLimit"=dword:00002710
"USERProcessHandleQuota"=dword:00002710
@="mnmsrvc"
"DeviceNotSelectedTimeout"="15"
"Spooler"="yes"
"TransmissionRetryTimeout"="90"
А если в этих разделах есть параметры LoadAppInit_DLLs и AppInit_DLLs то первый должен быть равен 0, а второй — пустым.
И на всякий случай еще два способа включить отображение миниатюр в проводнике — с помощью редактора реестра и редактора локальной групповой политики Windows 10. По сути, это один способ, только разные его реализации.
Для включения миниатюр в редакторе реестра, проделайте следующее:
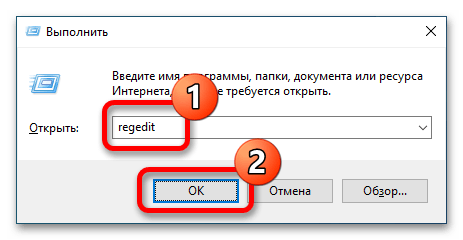
- Откройте редактор реестра: Win+R и ввести regedit
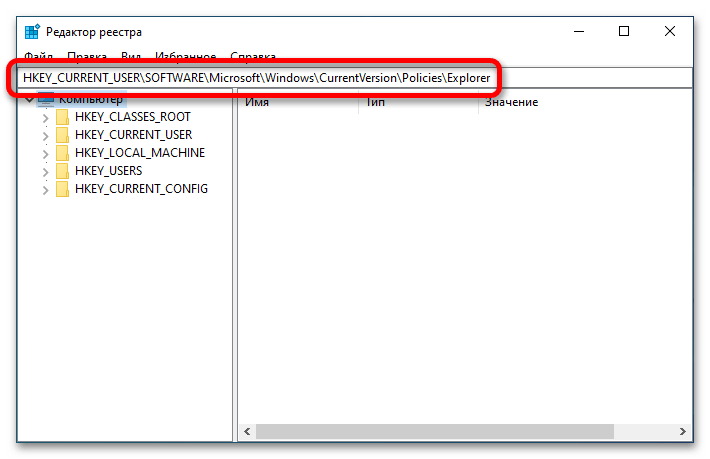
- Зайдите в раздел (папки слева)
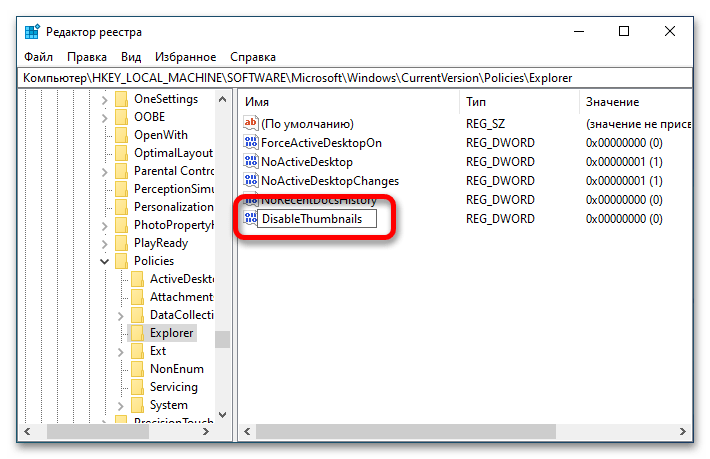
HKEY_CURRENT_USER\SOFTWARE\Microsoft\Windows\CurrentVersion\Policies\Explorer
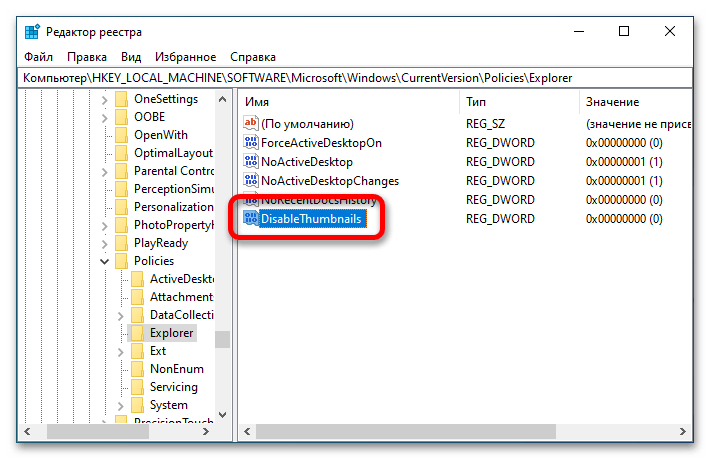
- Если в правой части вы увидите значение с именем DisableThumbnails, кликните по нему дважды и установите значение 0 (ноль), чтобы включить показ иконок.
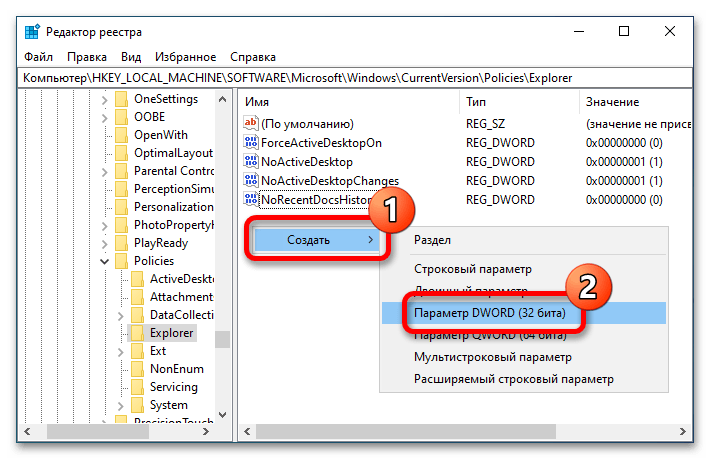
- Если такого значение нет, можно его создать (правый клик в пустой области справа — создать — DWORD32, даже для систем x64) и установить для него значение 0.
- Повторите шаги 2-4 для раздела
HKEY_LOCAL_MACHINE\SOFTWARE\Microsoft\Windows\CurrentVersion\Policies\Explorer
Закройте редактор реестра. Изменения должны вступить в силу сразу после изменений, но если этого не произошло — попробуйте перезапустить explorer.exe или перезагрузить компьютер.
То же самое с помощью редактора локальной групповой политики (доступно только в Windows 10 Pro и выше):
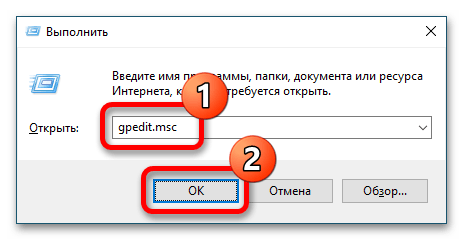
- Нажать Win+R, ввести gpedit.msc
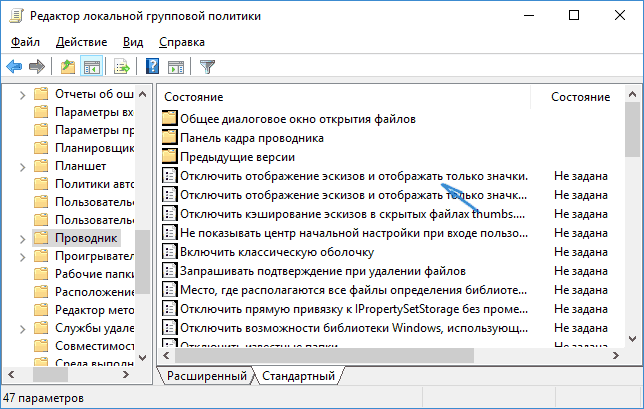
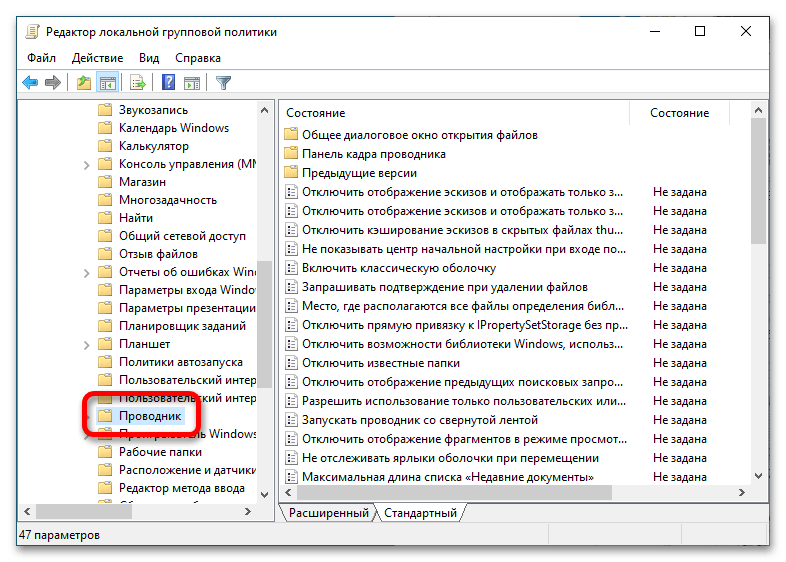
- Перейдите к разделу «Конфигурация пользователя» — «Административные шаблоны» — «Компоненты Windows» — «Проводник»
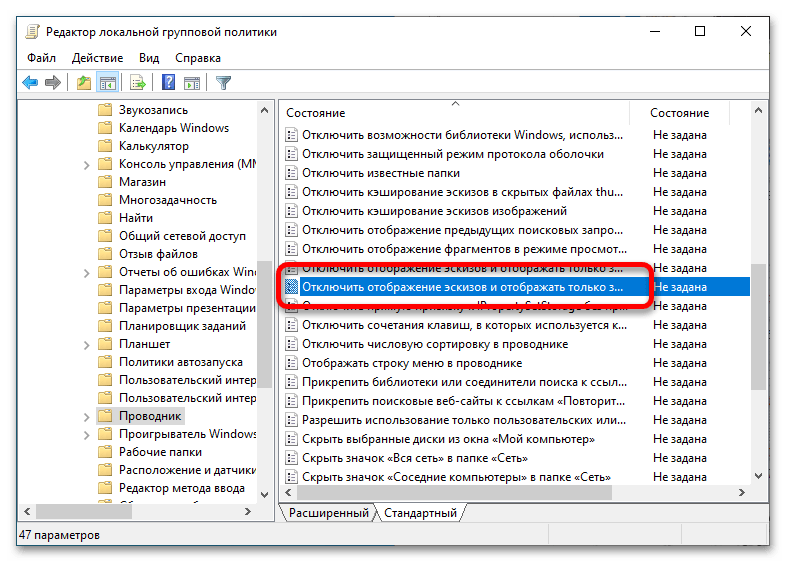
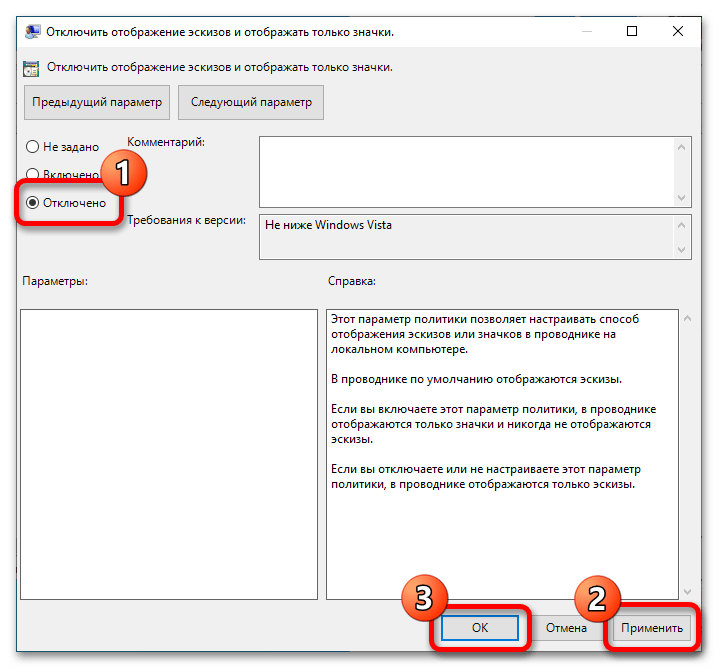
- Дважды кликните по значению «Отключить отображение эскизов и отображать только значки».

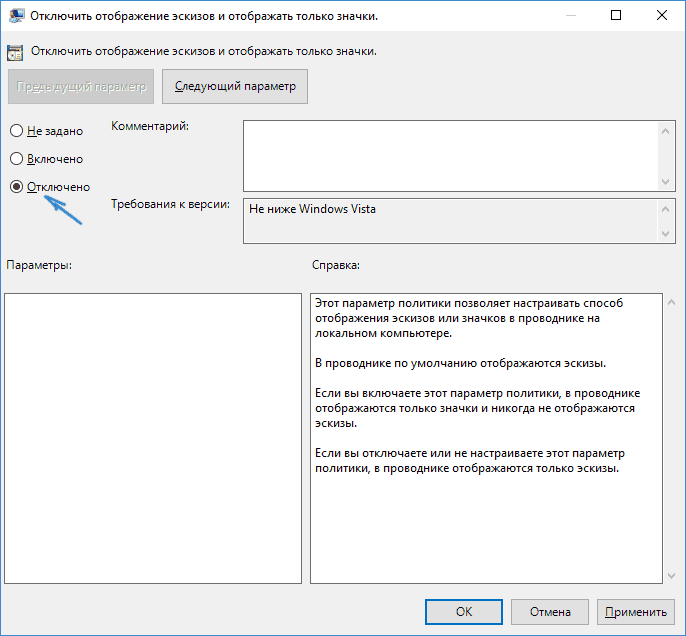
- Установите для него «Отключено» и примените настройки.

После этого изображения предварительного просмотра в проводнике должны будут показываться. Также обратите внимание: если проблема появилась недавно, а у вас есть точки восстановления системы, они могут помочь. Также существует бесплатная программа Icaros, специально предназначенная для показа эскизов разных типов файлов в Windows.
Что делать, если не отображаются эскизы в Windows 10 — видео инструкция
Ну а если ни один из описанных вариантов не сработал или же проблема со значками отличается от описанной — задавайте вопросы, постараюсь помочь. При этом учитывайте, что если речь идет не о стандартных форматах файлов, которые Windows 10 поддерживает по умолчанию, включить отображение миниатюр описанными методами не получится, однако, после установки соответствующих просмотрщиков (например: Лучшие бесплатные программы для просмотра фото и изображений), редакторов или проигрывателей, миниатюры для этих форматов могут появляться.
Все способы:
- Способ 1: «Параметры быстродействия»
- Способ 2: «Параметры папок»
- Способ 3: «Редактор реестра»
- Способ 4: «Редактор локальных групповых политик»
- Способ 5: Сброс кэша эскизов
- Вопросы и ответы: 4
Способ 1: «Параметры быстродействия»
Отображение эскизов изображений в файловом менеджере потребляет ресурсы компьютера, поэтому данная функция была помещена разработчиками в параметры быстродействия операционной системы. Соответственно, включить ее можно там:
-
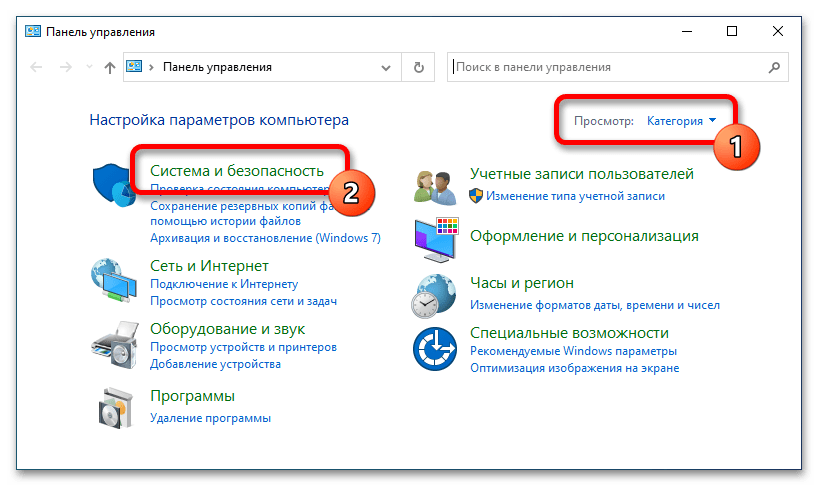
Откройте «Панель управления» любым доступным способом. Например, сделать это можно через меню «Пуск». Кликните по соответствующей кнопке на панели задач, а затем в списке всех установленных приложений найдите папку «Служебные — Windows» и разверните ее. Нажмите по пункту «Панель управления».

Читайте также: Как открыть «Панель управления» в Windows 10
- Убедитесь в том, что в открывшемся окне выбран режим отображения иконок «Категория». При необходимости измените этот параметр на нужный в верхнем правом углу. Затем перейдите в раздел «Система и безопасность».
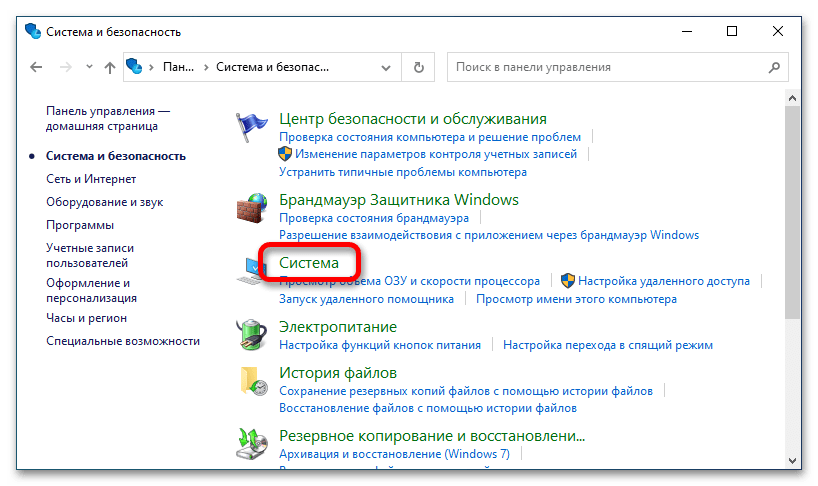
- Откройте меню параметров системы, кликнув левой кнопкой мыши по соответствующей строке, показанной на изображении ниже.
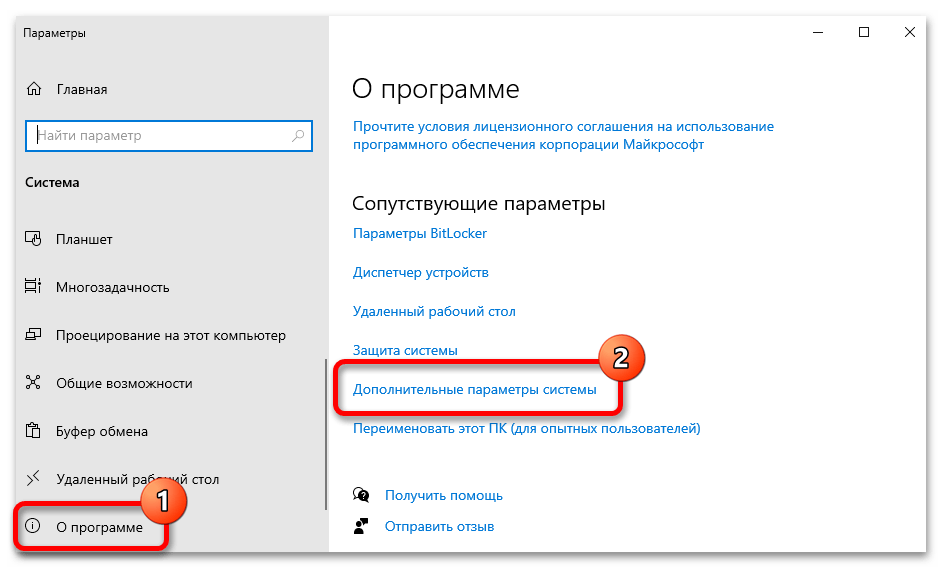
- Находясь на вкладке «О программе», проследуйте по ссылке «Дополнительные параметры системы», расположенной в блоке «Сопутствующие параметры».
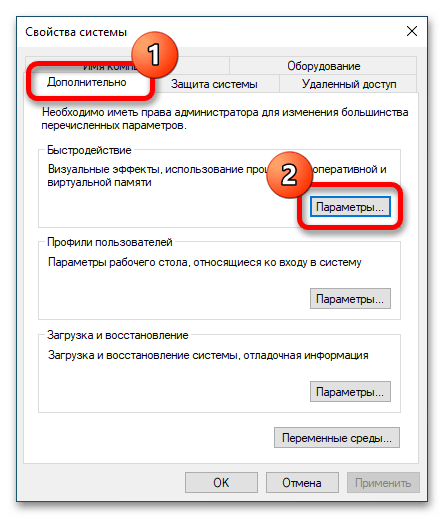
- Откройте окно «Параметров быстродействия». Для этого перейдите на вкладку «Дополнительно» и кликните по кнопке «Параметры», находящейся в блоке «Быстродействие».
- Включите отображение эскизов вместо значков. Для этого перейдите во вкладку «Визуальные эффекты», установите переключатель в положение «Особые эффекты», а затем поставьте отметку напротив пункта «Вывод эскизов вместо значков» и нажмите «ОК», чтобы сохранить внесенные изменения.

После этого все изображения в файловом менеджере будут отображаться сразу без открытия. В этом можно убедиться, перейдя в любую директорию «Проводника», где есть фотографии, и выбрав режим отображения «Крупные значки».
Обратите внимание! В меню «Параметров быстродействия» есть множество других функций, которые позволят улучшить внешний вид операционной системы или повысить производительность компьютера. При необходимости можете ознакомиться со всеми доступными возможностями, перейдя по ссылке ниже на тематическую статью.
Подробнее: Обзор «Параметров быстродействия» в Windows 10
Способ 2: «Параметры папок»
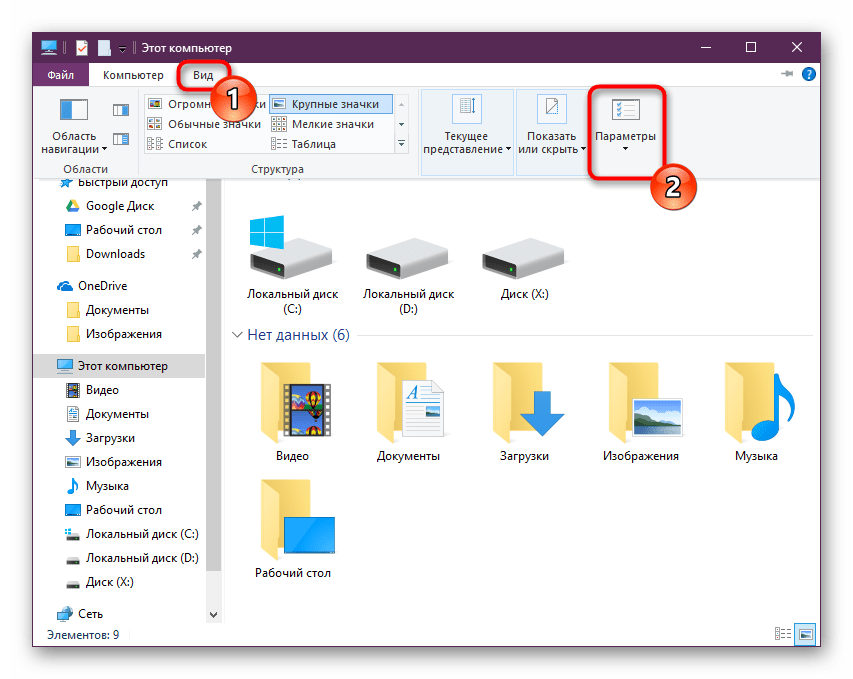
Настроить отображение эскизов вместо значков можно в «Параметрах папок». Для того чтобы перейти к данному разделу, можете открыть окно файлового менеджера, развернуть вкладку «Вид» и щелкнуть по кнопке «Параметры». Но на нашем сайте есть отдельная статья, в которой подробно рассматриваются все возможные методы выполнения поставленной задачи.
Подробнее: Как открыть «Параметры папок» в Windows 10
В появившемся окне «Параметров папок» перейдите во вкладку «Вид», а затем в списке «Дополнительные параметры» уберите отметку напротив пункта «Всегда отображать значки, а не эскизы», который находится в разделе «Файлы и папки». Сохраните внесенные изменения, щелкнув по кнопке «Применить», а затем «ОК».
Способ 3: «Редактор реестра»
Соответствующий параметр, отвечающий за отображение эскизов изображений, есть и в реестре операционной системы. Настроить эту функцию можно путем внесения правок в конфигурационный файл:
-
Откройте «Редактор реестра» любым доступным способом Проще всего это сделать через окно «Выполнить». Для этого зажмите на клавиатуре сочетание Win + R, а затем в появившемся интерфейсе введите приведенную ниже команду и нажмите по кнопке «ОК».
regedit
Читайте также: Запуск «Редактора реестра» в Windows 10
-
Воспользовавшись навигацией в левой части открывшегося окна, проследуйте по приведенному ниже пути. Также можете вставить его в адресную строку, расположенную в верхней части интерфейса. Точное ее местонахождение продемонстрировано на изображении ниже.
HKEY_LOCAL_MACHINE\SOFTWARE\Microsoft\Windows\CurrentVersion\Policies\Explorer - В основной части окна найдите файл «DisableThumbnails» и откройте его свойства. Для этого дважды кликните по названию левой кнопкой мыши.
- В открывшемся окне задайте в поле «Значение» параметр «0» (ноль). Затем сохраните изменения, щелкнув по кнопке «ОК».
Примечание! Для надежности рекомендуется проделать такие же манипуляции с аналогичным файлом, расположенным по следующему пути:
HKEY_CURRENT_USER\SOFTWARE\Microsoft\Windows\CurrentVersion\Policies\Explorer
Если файла «DisableThumbnails» в целевой папке нет, его необходимо создать вручную. Для этого щелкните на пустом пространстве правой кнопкой мыши и в появившемся меню выберите опцию «Создать» → «Параметр DWORD (32 бита)».
Затем впишите название «DisableThumbnails» в отобразившееся поле для ввода. В завершение нажмите клавишу Enter. После останется только открыть свойства файла и задать значение «0» (ноль).
Способ 4: «Редактор локальных групповых политик»
Настроить отображение эскизов можно через «Редактор локальных групповых политик». В этом случае следует найти нужный параметр и внести в него правки.
Важно! Воспользоваться этим способом выполнения поставленной задачи можно только в том случае, если вы являетесь пользователем редакции Windows 10 «Профессиональная» или «Корпоративная». Иначе в вашей системе попросту будет отсутствовать нужная оснастка.
-
Откройте «Редактор локальных групповых политик» любым доступным способом. Проще всего это сделать через окно «Выполнить». Для этого сначала нажмите комбинацию клавиш Win + R, а затем введите приведенную ниже команду и кликните по кнопке «ОК».
gpedit.msc
Читайте также: Все способы запуска «Редактора локальных групповых политик» в Windows 10
-
После появления целевого окна, воспользовавшись древовидной структурой каталогов в левой части интерфейса, перейдите по представленному ниже пути.
«Конфигурация пользователя» → «Административные шаблоны» → «Компоненты Windows» → «Проводник» - В основной части окна найдите файл под названием «Отключить отображение эскизов и отображать только значки» и откройте его двойным нажатием левой кнопки мыши.
- В появившемся меню свойств установите переключатель в положение «Отключено», после чего сохраните изменения, щелкнув по кнопке «Применить», а затем «ОК».
После этого эскизы изображений в файловом менеджере должны появиться. Проверьте это, перейдя в каталог с фотографиями.
Способ 5: Сброс кэша эскизов
Если ни один из вышеперечисленных способов не помог в решении поставленной задачи, есть вероятность, что виной тому ошибки в кэше эскизов. В таком случае его необходимо сбросить, а делается это через специальную утилиту.
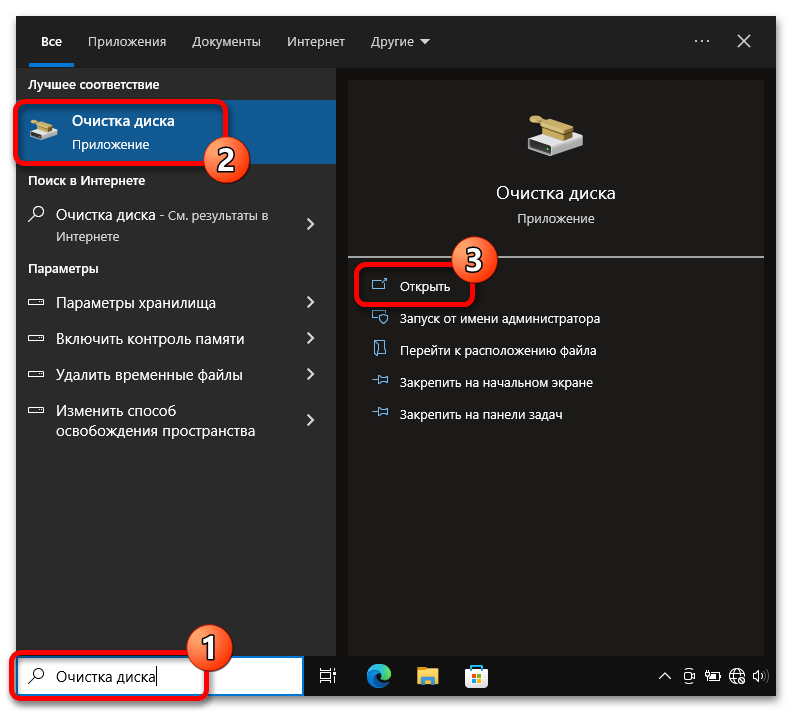
- Откройте приложение «Очистка диска». Воспользуйтесь для этого поисковым запросом. Установите курсор в соответствующее поле на панели задач, введите «Очистка диска», а затем в результатах кликните по одноименному пункту.
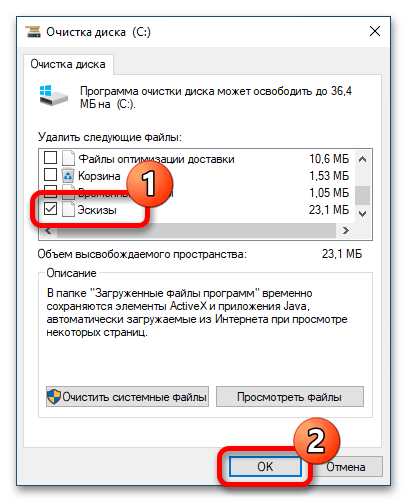
- Дождитесь завершения процесса анализа дискового пространства, после чего в списке «Удалить следующие файлы» поставьте отметку напротив пункта «Эскизы» и нажмите по кнопке «ОК».
- Подтвердите выполнение поставленной задачи, кликнув во всплывающем окне по кнопке «Удалить файлы».
После этого запустится процесс очистки кэша эскизов. Дождитесь его завершения, а затем проверьте результат в файловом менеджере. Если ничего не изменилось, повторно воспользуйтесь одним из ранее приведенных способов.
Наша группа в TelegramПолезные советы и помощь
Showcasing thumbnails in Windows 10 is a vital component for visualizing files at a glance. With the growing number of digital media files, having the ability to view thumbnails can greatly enhance efficiency and organization on your computer. Gone are the days of scrolling through long lists of file names. Instead, you can easily navigate through folders, searching for the perfect image or document that catches your eye. So, how exactly can you enable thumbnail display in Windows 10?
Fortunately, enabling thumbnails in Windows 10 is a straightforward process. By default, Windows 10 should already display thumbnails for most file types; however, there might be instances where the thumbnails are not visible or only generic icons appear. To overcome this inconvenience, you can follow a few simple steps to ensure that the thumbnail view is active and fully functional. By doing so, you’ll be able to quickly identify files based on their visual representation, saving you valuable time and enhancing your overall Windows 10 experience.
Displaying thumbnails in Windows 10 is a simple task that can enhance your browsing experience. Here’s how:
- Open an Explorer window by pressing Win + E.
- Click on the «View» tab in the top menu.
- Select «Options» on the right side to open the Folder Options window.
- In the Folder Options window, go to the «View» tab.
- Check the box next to «Always show icons, never thumbnails.»
- Click «Apply» and then «OK» to save the changes.

Why Are Thumbnails Important in Windows 10?
Thumbnails provide a visual preview of files, allowing users to quickly identify and locate the content they are looking for. In Windows 10, thumbnails play a crucial role in enhancing the user experience and improving productivity. Whether it’s browsing through image galleries, organizing files in folders, or searching for specific documents, having thumbnails visible can save valuable time and effort. If you’re wondering how to show thumbnails in Windows 10, we’ve got you covered. In this article, we’ll explore different methods and settings to enable thumbnails and make the most out of this handy feature.
Method 1: Enable Thumbnails in Folder Options
The first method to show thumbnails in Windows 10 involves enabling this feature in the Folder Options settings. Here’s how you can do it:
- Open File Explorer by pressing the Windows key + E on your keyboard.
- Click on the «View» tab at the top of the File Explorer window.
- In the «Layout» group, click on the «Options» button.
- A new «Folder Options» window will appear. Go to the «View» tab within this window.
- Scroll down the list of advanced settings until you find the checkbox that says «Always show icons, never thumbnails.»
- Make sure this checkbox is unchecked. If it’s checked, click on it to remove the checkmark.
- Click «Apply» and then «OK» to save the changes.
Once you have completed these steps, you should now be able to see thumbnails for supported file types in Windows 10. However, keep in mind that certain file formats might still display icons instead of thumbnails.
Why Thumbnails May Not Be Showing
If you followed the above steps and still cannot see thumbnails in Windows 10, there might be a few reasons behind this issue:
- Unsupported file formats: Windows 10 displays thumbnails for a wide range of file types, but there are certain formats that might not be compatible.
- File size: Extremely large files might not generate thumbnails due to system limitations.
- Corrupted thumbnail cache: Sometimes, the thumbnail cache can become corrupted, causing thumbnails to not appear. In such cases, clearing the cache can help resolve the issue.
If you are facing any of these issues, don’t worry. We’ll cover how to address them in the upcoming sections to ensure that thumbnails are visible for all supported files in Windows 10.
Method 2: Check File Type Settings
In some cases, Windows 10 may not be set to display thumbnails for certain file types by default. To check and adjust these settings, follow these steps:
- Open File Explorer and navigate to the folder that contains the files for which you want to enable thumbnails.
- Click on the «View» tab at the top of the File Explorer window.
- In the «Layout» group, click on the «Options» button.
- In the «Folder Options» window, go to the «View» tab.
- Scroll down the list of advanced settings until you find the checkbox that says «Hide extensions for known file types.»
- Make sure this checkbox is unchecked. If it’s checked, click on it to remove the checkmark.
- Click «Apply» and then «OK» to save the changes.
By following these steps, you will enable Windows 10 to display thumbnails for a broader range of file types. This can be particularly helpful if you’re working with files that have unconventional extensions.
Adjusting Individual File Type Settings
If you still encounter issues with specific file types not showing thumbnails, you can adjust the individual settings for those formats. Here’s how:
- Locate a file of the specific type you want to adjust.
- Right-click on the file and select «Properties.»
- In the «General» tab of the Properties window, click on the «Change» button next to «Opens with.»
- A new window will appear, displaying a list of applications.
- Select an application from the list or click on «More apps» if the desired application is not listed.
- Click «OK» to save the changes.
By changing the default application associated with a specific file type, you might be able to enable thumbnails for unsupported formats or resolve any issues preventing thumbnails from appearing.
Method 3: Adjust Thumbnail Cache Settings
If you’ve followed the previous methods and still encounter missing or incorrect thumbnails in Windows 10, it might be due to a corrupted thumbnail cache. The thumbnail cache is a collection of stored thumbnail images that Windows uses to quickly display previews. Here’s how you can clear and reset the thumbnail cache:
- Open File Explorer and navigate to the following location:
C:\Users\%USERNAME%\AppData\Local\Microsoft\Windows\Explorer(replace%USERNAME%with your actual username). - Locate and select all the files with names starting with «thumbcache_» (e.g.,
thumbcache_16.db,thumbcache_32.db, etc.). - Right-click on the selected files and choose «Delete.»
- A confirmation window will appear. Click on «Yes» to confirm the deletion.
- Once the files are deleted, empty the Recycle Bin to permanently remove them.
- Restart your computer to allow Windows 10 to rebuild the thumbnail cache.
After performing these steps, Windows 10 will generate new thumbnail cache files, which should resolve any issues related to corrupted or incorrect thumbnails.
Method 4: Update Graphics Drivers
In some cases, outdated or incompatible graphics drivers can cause issues with thumbnail generation in Windows 10. To ensure that your drivers are up to date, follow these steps:
- Press the Windows key + X on your keyboard and select «Device Manager» from the menu that appears.
- In the Device Manager window, expand the «Display adapters» category.
- Right-click on the graphics driver listed under «Display adapters» and select «Update driver.»
- Choose the option to search automatically for updated driver software.
- If Windows finds any updates, follow the on-screen instructions to install them.
- Once the updates are installed, restart your computer.
Updating your graphics drivers can help resolve compatibility issues and ensure that Windows 10 can generate thumbnails correctly for various file formats.
Other Tips and Considerations
In addition to the methods mentioned above, here are a few more tips and considerations to keep in mind when dealing with thumbnails in Windows 10:
Optimizing Performance
In some cases, the process of generating thumbnails for numerous files can slow down system performance. If you find that your computer is experiencing performance issues due to thumbnails, you can adjust some settings to optimize performance:
- Open File Explorer and go to the «View» tab.
- In the «Layout» group, click on the «Options» button to open the Folder Options window.
- Under the «View» tab, go to the «Advanced settings» section.
- Scroll down until you find the checkbox that says «Show preview handlers in preview pane.»
- Uncheck this box and click «Apply» and then «OK» to save the changes.
Thumbnail Size and Display
By default, Windows 10 displays thumbnails in medium size, but you can adjust this setting according to your preference. Here’s how:
- Open File Explorer and go to the «View» tab.
- In the «Layout» group, click on the «Options» button to open the Folder Options window.
- Under the «View» tab, go to the «Advanced settings» section.
- Scroll down until you find the checkbox that says «Always show icons, never thumbnails.»
- Next to this checkbox, you will find a slider labeled «Icon size.»
- Move the slider to the desired size, such as small or large, and click «Apply» and then «OK» to save the changes.
Third-Party Thumbnail Viewers
If you require advanced thumbnail viewing options or need support for specific file types, you can explore third-party thumbnail viewer applications. These applications often provide additional features and customization options to enhance the thumbnail viewing experience.
In Conclusion
Showing thumbnails in Windows 10 can significantly improve productivity and ease file navigation. By enabling thumbnails, adjusting settings, and addressing any issues that may arise, you can ensure that you have a seamless visual browsing experience.

How to Display Thumbnails in Windows 10
Thumbnails are a convenient way to preview the content of files without opening them. In Windows 10, you can easily display thumbnails for various types of files such as documents, images, and videos. Here’s how to do it:
Key Takeaways — How to Show Thumbnails in Windows 10
- Thumbnails in Windows 10 show preview images of files and documents.
- In File Explorer, go to the «View» tab and select «Large icons» or «Extra-large icons» to enable thumbnails.
- If thumbnails are not showing, ensure that the «Always show icons, never thumbnails» option is unchecked.
- Update your graphics drivers from the manufacturer’s website to fix thumbnail display issues.
- Clear the thumbnail cache using Disk Cleanup or through the command prompt to resolve thumbnail problems.
Frequently Asked Questions
In this section, we will provide answers to some frequently asked questions about how to show thumbnails in Windows 10.
1. How can I enable thumbnails in Windows 10?
To enable thumbnails in Windows 10, follow these steps:
Step 1: Open File Explorer by pressing the Windows key + E on your keyboard.
- Click on the «View» tab at the top of the File Explorer window.
- In the «Layout» section, click on the «Options» button.
- A Folder Options window will open. Click on the «View» tab.
- Scroll down and make sure the «Always show icons, never thumbnails» option is unchecked.
- Click the «Apply» button and then the «OK» button to save the changes.
2. Why are my thumbnails not showing in Windows 10?
If your thumbnails are not showing in Windows 10, it could be due to the following reasons:
Reason 1: The «Always show icons, never thumbnails» option is checked in the Folder Options settings.
Reason 2: The thumbnail cache is corrupted or has been deleted.
To fix these issues, follow the steps below:
Step 1: Open Folder Options by following the steps mentioned in the previous question.
Step 2: Ensure that the «Always show icons, never thumbnails» option is unchecked.
Step 3: Clear the thumbnail cache by following these steps:
- Open File Explorer and go to the following location: C:\Users\[Your Username]\AppData\Local\Microsoft\Windows\Explorer
- Delete all the files in this folder, including the hidden ones.
- Restart your computer for the changes to take effect.
3. How do I increase the size of thumbnails in Windows 10?
To increase the size of thumbnails in Windows 10, follow these steps:
Step 1: Open File Explorer by pressing the Windows key + E on your keyboard.
- Click on the «View» tab at the top of the File Explorer window.
- In the «Layout» section, click on the «Options» button.
- A Folder Options window will open. Click on the «View» tab.
- In the «Advanced settings» section, scroll down and check the «Always show icons, never thumbnails» option.
- Click the «Apply» button and then the «OK» button to save the changes.
4. Can I customize the appearance of thumbnails in Windows 10?
Yes, you can customize the appearance of thumbnails in Windows 10. Follow these steps:
Step 1: Open File Explorer by pressing the Windows key + E on your keyboard.
- Click on the «View» tab at the top of the File Explorer window.
- In the «Layout» section, click on the «Options» button.
- A Folder Options window will open. Click on the «View» tab.
- Under the «Folder views» section, click on the «Apply to Folders» button.
- Click the «Yes» button to confirm the changes.
5. How do I disable thumbnails in Windows 10?
To disable thumbnails in Windows 10, follow these steps:
Step 1: Open File Explorer by pressing the Windows key + E on your keyboard.
- Click on the «View» tab at the top of the File Explorer window.
- In the «Layout» section, click on the «Options» button.
- A Folder Options window will open. Click on the «View» tab.
- In the «Advanced settings» section, check the «Always show icons, never thumbnails» option.
- Click the «Apply» button and then the «OK» button to save the changes.
So there you have it, a simple guide to showing thumbnails in Windows 10. By following the steps outlined above, you can easily enable thumbnail previews for your images, videos, and documents in no time. With thumbnails, you can quickly identify and access your files without having to open them individually, saving you time and effort.
Remember, thumbnails offer a convenient way to preview the content of your files at a glance, making it easier to navigate and organize your documents. Whether you’re a professional who needs to quickly find and retrieve specific files or a casual user looking for a more visual browsing experience, thumbnails can greatly enhance your Windows 10 experience.
| Step | Description |
| 1 | Open File Explorer |
| 2 | Click on the «View» tab in the File Explorer menu |
| 3 | Select «Options» and then «Change folder and search options» |
‘I upgraded to Windows 10, and now half of my JPEGS will not show thumbnails. But if I right- click and open them with Windows Picture Viewer, I can see all of my images there. How can I fix this?’
A thumbnail is a smaller or miniature version of your image file. It is usually preferred to have a quick look at large-sized pictures stored in the folder that may otherwise take a long time to open.
But sometimes, you may not see thumbnails of your photos in the folders. Although the image file icons with names and file extensions appear, preview of the image would be missing. The problem is mostly reported in Windows 10.
Why you’re unable to preview some thumbnails in Windows 10?

Wrong thumbnails or no thumbnails could be a Windows OS bug or file systems error caused due to corruption in image files or drive.
Windows File Explorer settings to show thumbnails can get disabled and show image file icons without picture preview. Other than these, if thumbnail cache files get corrupt, then too, you won’t be able to preview pictures in File Explorer folders. It is also possible that your photos are corrupt due to which thumbnails are not visible in the folder.
However, Windows allows you to troubleshoot the problem. Here we bring the various methods to try in Windows 10 and fix the ‘picture thumbnails not showing’ issue.
Methods to fix picture thumbnails not showing
- Change File Explorer settings
- Restore File Explorer options to default
- Change Visual Effect Settings in Windows 10
- Use Disk Cleanup to delete thumbnail cache
- Use Command Prompt to remove thumbnail cache
- Run SFC scan
- Run the DISM Tool
- Use Stellar Repair for Photo
Method 1: Change File Explorer settings
If the Windows 10 File Explorer settings is somehow changed to show only file icons and not thumbnails, you won’t be able to preview pictures in folders.
Follow the below steps to disable this setting in File Explorer:
- In the search box, type File Explorer Options.
- Select File Explorer Options from the menu.
- In the File Explorer Options window, click on the View tab.
- Uncheck Always show icons, never thumbnails option.
- Click Apply.
- Click OK.
Check if this enabled thumbnails for pictures in Windows 10.
Method 2: Restore File Explorer options to default
Set the File Explorer Options to Default, so that the thumbnails again appear on your Windows 10 PC. To do so, follow the below steps:
- In the search box, type File Explorer Options.
- Select File Explorer Options from the menu.
- Click on the View tab.
- Click Restore Defaults button.
- Click Apply and OK.
Windows 10 image thumbnails not showing problem should resolve now.
Method 3: Change Visual Effect Settings of Windows 10
Check and change the visual effects settings of your Windows to show pictures thumbnails by following the below steps:
- In the search bar, type View advanced system settings.
- Select View advanced system settings.
- In the System Properties dialog box, click on the Advanced tab.
- Under Performance section, click Settings.
- In the Performance Options box, click on the Visual Effects tab.
- Under the Custom section, select the Save taskbar thumbnail previews and Show thumbnails instead of icons options.
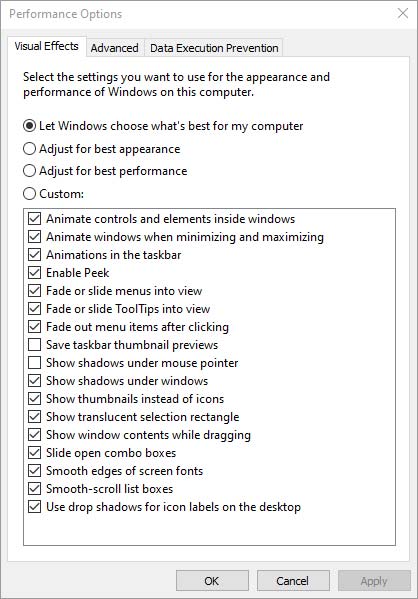
- Click OK to save the changes. Check the folders, if the photo thumbnails are showing or not.
Method 4: Use Disk Cleanup to delete thumbnail cache
For every photo on your computer, Windows 10 creates a cache file. Over time, the thumbnail cache piles up and sometimes get corrupt too. As a result, you are not able to view thumbnails or see wrong thumbnails of the photos in File Explorer folders. However, Windows 10 allows you to delete thumbnail cache and rebuild the thumbnail cache database. You can remove thumbnails cache by using Disk Cleanup tool and fix the ‘picture thumbnails not showing’ issue.
Follow the below steps to delete thumbnails cache using Disk Cleanup:
- Open File Explorer > This PC.
- Right-click on the C: drive.
- Select Properties.
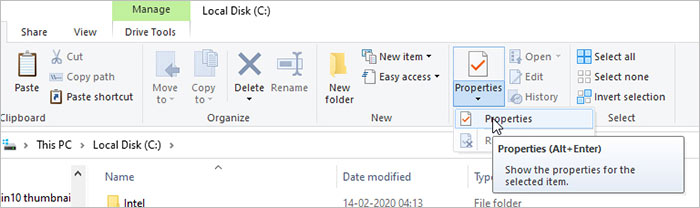
- Click on Disk Cleanup.
- In the Disk Cleanup box, check Thumbnails option. Uncheck the rest of the options.
- Click OK.
- Click Delete Files.
Method 5: Use Command Prompt to delete thumbnail cache
Alternatively, you can try command prompt to delete thumbnail cache on Windows 10 system by following the below steps:
- In the search box, type Command Prompt.
- Right-click on Command Prompt. Choose Run as administrator.
- In the Command Prompt, type the following three commands and hit Enter after each:
taskkill /f /im explorer.exe
del /f /s /q /a %LocalAppData%\Microsoft\Windows\Explorer\thumbcache_*.db
start explorer.exe
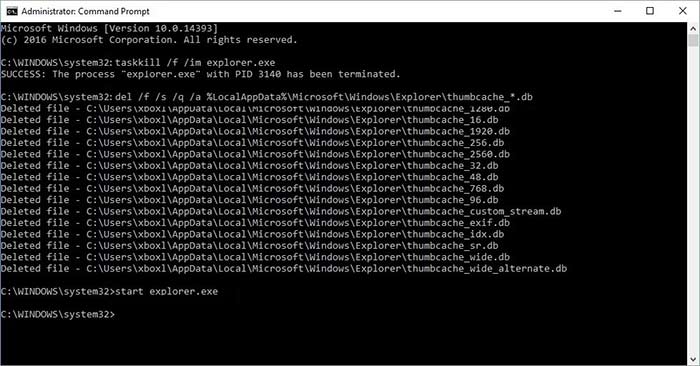
- Press Enter and close the Command Prompt window.
The thumbnail previews of JPEG, PG, TIFF, and other image files should be visible now in Windows 10.
Method 6: Run SFC scan
SFC scan is a system file checker that can fix any system file issues. If the picture thumbnails are not showing in Windows 10 due to system file error, runing SFC scan can resolve the issue.
Follow the below steps to run SFC on Windows 10:
- In the search box, type Command Prompt.
- Right-click on Command Prompt. Choose Run as administrator.
- In the Command Prompt, type sfc /scannow.
- Hit Enter. Wait until the scan process is complete.
Once the scan is completed, check if the ‘thumbnails not showing’ issue is fixed in Windows 10.
Method 7: Run the DISM Tool
If you continue to face image thumbnails issue after running the SFC scan, run the DISM Tool. DSIM can repair, if required, as well as update the system files fixing the Windows problem.
Follow the below steps to run DSIM Tool:
- In the search box, type Command Prompt.
- Right-click on Command Prompt. Choose Run as administrator.
- In the Command Prompt window, type the following two commands and hit Enter after each command:
DISM.exe /Online /Cleanup-image /Scanhealth
DISM.exe /Online /Cleanup-image /Restorehealth
- Type Exit and hit Enter. It may take a few minutes to finish the process. Don’t stop the process in between.
Method 8: Use Stellar Repair for Photo
Thumbnails are the smaller sized version of the original pictures. If image thumbnails are not showing up and you are not able to open the photos also, chances are, the image files have turned corrupt.
You can always recover your photos by repairing them with Stellar Repair for Photo software. Once the photos are repaired, their thumbnails would also show up in Windows 10.
Further, the software can also extract thumbnails of your images. You can repair and obtain thumbnails of JPEG/ JPG, TIFF, DNG, RAW, ARF, SR2, NEF, MxPEG, and SRF and other image file formats.
Steps to repair corrupt pictures using Stellar Repair for Photo
- Download and launch Stellar Repair for Photo on PC or Mac.
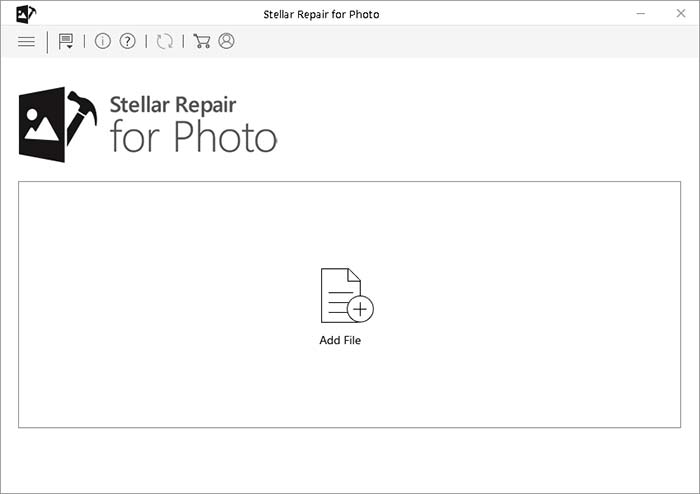
- Click Add File to add corrupt photos.
- Click Repair.
- Preview the repaired photos and their thumbnails. Click Save Repaired Files.

Wrapping Up
This post shares 8 methods to resolve thumbnails issue on your Windows 10 PC. As you may not be aware of the cause of the problem, it’s better to try each, and one should fix picture thumbnail not showing on your system.
Do share with our readers, which method worked in your case, in the comments box below.
Was this article helpful?
YES18
NO
how to show thumbnails in windows 10
Struggling to see thumbnails for your images or videos in Windows 10? It’s actually quite simple to fix. By tweaking a few settings, you can ensure that thumbnails appear, making it easier to preview your files without opening them. Follow the steps below to get those thumbnails visible again!
This guide will walk you through the necessary steps to ensure that thumbnails are displayed for your files in Windows 10.
Step 1: Open File Explorer
Open File Explorer by clicking the folder icon in the taskbar or pressing Windows + E.
File Explorer is the hub for managing your files and folders in Windows. This is the starting point for accessing the settings needed to show thumbnails.
Step 2: Open Folder Options
In File Explorer, click on the «View» tab at the top, then click on «Options» on the far right, and select «Change folder and search options.»
This will open the Folder Options dialog box, where you can modify various settings related to how files and folders are displayed.
Step 3: Go to the View Tab
In the Folder Options dialog, click on the «View» tab.
The View tab contains settings that control how files and folders appear in File Explorer. This is where you’ll find the option to show thumbnails.
Step 4: Disable «Always show icons, never thumbnails»
Under «Advanced settings,» scroll down and uncheck the box next to «Always show icons, never thumbnails.» Then click «Apply,» and «OK.»
Disabling this option ensures that thumbnails are displayed instead of generic icons, making it easier to preview files visually.
Step 5: Clear Thumbnail Cache
Open Disk Cleanup by typing «Disk Cleanup» in the search bar and selecting the app. Choose your main drive (usually C:) and check «Thumbnails.» Click «OK» to clear the cache.
Clearing the thumbnail cache can resolve issues with corrupted thumbnails, ensuring that they regenerate correctly.
After completing these actions, you should see thumbnails for your files in File Explorer.
Tips for How to Show Thumbnails in Windows 10
- Ensure File Types Support Thumbnails: Not all file types support thumbnail previews. Make sure the files you want to see thumbnails for are compatible.
- Use Large Icons View: Switching to «Large icons» or «Extra large icons» view in File Explorer can make thumbnails more visible and useful.
- Keep Your System Updated: Sometimes, system updates include fixes for thumbnail issues. Ensure your Windows 10 is up-to-date.
- Use a Third-Party Tool: If Windows settings don’t help, third-party tools like Icaros can enable thumbnails for more file types.
- Check for System File Corruption: Use the System File Checker tool (sfc /scannow) to fix any corrupt system files that might be affecting thumbnails.
Frequently Asked Questions
Why can’t I see thumbnails for my files in Windows 10?
You likely have the «Always show icons, never thumbnails» option enabled. Follow the steps above to disable it.
How do I get thumbnails to show up for all file types?
Not all file types support thumbnails natively. Using third-party software like Icaros can add thumbnail support for more file types.
Can I make thumbnails larger?
Yes, you can switch to «Large icons» or «Extra large icons» view in File Explorer for bigger thumbnails.
What if clearing the thumbnail cache doesn’t work?
Try restarting your computer or using the System File Checker tool to fix any underlying issues.
Are there alternatives to Windows built-in thumbnail generator?
Yes, third-party software like Icaros or SageThumbs can provide thumbnail previews for a wider range of file types.
Summary
- Open File Explorer.
- Open Folder Options.
- Go to the View Tab.
- Disable «Always show icons, never thumbnails.»
- Clear Thumbnail Cache.
Conclusion
Getting thumbnails to show up in Windows 10 can make managing your files a whole lot easier. By following the simple steps outlined above, you’ll be able to see previews of your images, videos, and other files right in File Explorer.
This can save you tons of time and hassle, especially if you’re dealing with a large number of files. Plus, with the additional tips and answers to common questions, you now have a comprehensive guide to troubleshoot and optimize your thumbnail settings.
So go ahead, dive into your Folder Options, tweak those settings, and enjoy a more visual and user-friendly experience with Windows 10. For further reading, you can check out articles on advanced File Explorer tips or third-party tools that enhance thumbnail previews even more. Happy file browsing!
Matt Jacobs has been working as an IT consultant for small businesses since receiving his Master’s degree in 2003. While he still does some consulting work, his primary focus now is on creating technology support content for SupportYourTech.com.
His work can be found on many websites and focuses on topics such as Microsoft Office, Apple devices, Android devices, Photoshop, and more.