Changing the shortcut icon in Windows 10 is simpler than you might think. The process involves right-clicking the shortcut, accessing the properties menu, and selecting a new icon file. This quick change can help you personalize your desktop and make frequently-used programs easier to find. Follow these steps to effortlessly refresh your Windows 10 experience by spicing up your icons!
Changing the shortcut icon in Windows 10 allows you to customize your desktop experience. Whether you’re bored of the same old icons or want to make your shortcuts pop, these easy steps will guide you through the process.
Step 1: Right-click the Shortcut
Find the shortcut on your desktop and right-click it.
When you right-click, a context menu will appear. This is where you start the customization process. Make sure you select the shortcut icon and not the original program or file.
Step 2: Select ‘Properties’
Choose ‘Properties’ from the context menu.
The ‘Properties’ option is usually at the bottom of the menu. Clicking it opens a new window with several tabs, each offering different settings related to your shortcut.
Step 3: Navigate to ‘Shortcut’ Tab
In the Properties window, go to the ‘Shortcut’ tab.
You’ll see several tabs in the properties window, but the ‘Shortcut’ tab is the one you need. It contains options specific to shortcut settings, including icons.
Step 4: Click ‘Change Icon’
Look for the ‘Change Icon’ button in the Shortcut tab and click it.
This button is usually near the bottom of the window. Clicking it will open a list of available icons or let you browse for your own, allowing you to select a fresh look for your shortcut.
Step 5: Choose or Upload an Icon
Pick an icon from the list or upload your own by clicking ‘Browse.’
You can choose from the default icons provided by Windows or upload a custom icon file. Custom icons must be in .ico format, so ensure your file is compatible before selecting it.
After completing these steps, your shortcut icon will change to the one you selected. This change not only updates the icon on your desktop but will also reflect in any other location where the shortcut is saved.
Tips for Changing Shortcut Icon in Windows 10
- Make sure your custom icons are in .ico format for compatibility.
- Back up your original shortcuts in case you want to revert changes.
- Regularly update your icons to keep your desktop looking fresh.
- Use straightforward and recognizable icons for quicker identification.
- Consider categorizing your shortcuts with consistent icon themes for better organization.
Frequently Asked Questions
Can I change the icon of any shortcut?
Yes, you can change the icon of any shortcut, but not the main application icon.
Do I need special software to change icons?
No, changing icons doesn’t require additional software.
What format should custom icons be in?
Custom icons should be in .ico format.
Will changing a shortcut icon affect the original program?
No, it only affects the shortcut, not the original program or its functionality.
Can I revert to the original icon if I don’t like the new one?
Yes, simply follow the same steps and select the original icon from the list.
Summary
- Right-click the shortcut.
- Select ‘Properties.’
- Navigate to ‘Shortcut’ tab.
- Click ‘Change Icon.’
- Choose or upload an icon.
Conclusion
Changing the shortcut icon in Windows 10 is a fantastic way to add a personal touch to your desktop. Icons are like little signs that guide you to what you need, so why not make them more fun? Whether you’re someone who loves a splash of creativity or just wants an easier way to find your apps, customizing your icons is the way to go. Plus, it only takes a few clicks!
This small tweak doesn’t just change how your desktop looks—it can also change how you interact with your computer. Anything that makes you smile or puts a bit of spring in your step when you boot up your computer is worth doing. So go ahead, dive into those properties, and play around with different icons. Your desktop, and your mood, might thank you for it!
And if you’re curious about other ways to enhance your Windows 10 experience, there are countless tweaks and customizations out there just waiting to be explored. Personalizing your digital space helps make technology work for you, forming a unique partnership that supports whatever you do next. Happy customizing!
Matt Jacobs has been working as an IT consultant for small businesses since receiving his Master’s degree in 2003. While he still does some consulting work, his primary focus now is on creating technology support content for SupportYourTech.com.
His work can be found on many websites and focuses on topics such as Microsoft Office, Apple devices, Android devices, Photoshop, and more.
Sign in to your How-To Geek account
Icons were invented as a quick way to visually identify information on a computer, but sometimes a Windows 10 shortcut icon is so generic that it doesn’t feel useful. In that case, Windows makes it easy to customize the icon. Here’s how to do it.
First, locate the shortcut with the icon you’d like to change in File Explorer or on your Desktop. Right-click the shortcut, and select «Properties.»
In Properties, make sure you’re on the Shortcut tab for an application shortcut, then click the «Change Icon» button.
(If the shortcut points to a web page instead of an application, look in the «Web Document» tab, then click the «Change Icon» button.)
A «Change Icon» window will pop up containing a field of icons that you can use with the shortcut. By default, these come from a Windows system file called «imageres.dll.»
If you’d like to use a different icon than the ones listed by default, you can click «Browse» and select either an EXE file, a DLL file, or an ICO file. (You can use any image you like—you just have to convert it to ICO format first.) Once the file is loaded, you will see the possible icons you can use in the box below.
Whether you’re using the default selection or a custom file, select one of the icons, and click «OK.»
In the Properties window, you will notice that the icon has changed to the one you selected. Click «OK» to close Properties and to save the settings.
Congratulations—your shortcut has a brand new icon! Feel free to customize any shortcut icon you’d like. It’s a great way to add personality to your Windows installation.
In both Windows 10 and Windows 11, you can change any shortcut icon, whether it’s a regular one linking to an app, file, folder, or web page or one of the standard desktop icons. This comes in handy if you dislike the default icon of an app or you want to add a personal touch to your Windows computer or device. Changing the icons of certain shortcuts, especially the ones with boring, generic icons, such as files, folders, and web pages, can also help you find them faster. This tutorial illustrates how to change icons on Windows 10 and Windows 11, replacing them with others more to your liking:
First things first: Find icons for your shortcuts
The icons used for your shortcuts in Windows can be stored in several file types, that use the following extensions:
- ICO — the best-known file format used for icons in Windows operating systems. It can only store one icon.
- EXE — icons can be embedded into the executable files of an app or program. An executable file can store one or more icons.
- DLL — sets of icons can also be embedded into DLL (Dynamic-link library) files. A DLL can store one or more icons. Windows uses DLL files to store most of its icons. To learn the location of the default icons, read Windows 10 icons. Where are they located? In which files and folders?
Only some EXE and DLL files store icons, depending on how they were designed. However, ICO files always contain an icon. Keep in mind that Microsoft recommends using an icon with a size of at least 256×256 pixels, and if the icons that come with Windows don’t fulfill your needs, you can always download others. To get you started, feel free to check out these 7 sites where you can download free desktop icons for Windows. If you want to create your own icons, read 2 ways to convert PNG, SVG, JPG files to ICO files in Windows.
How to change the icon of a shortcut to a file, folder, app, or program in Windows 11 or Windows 10
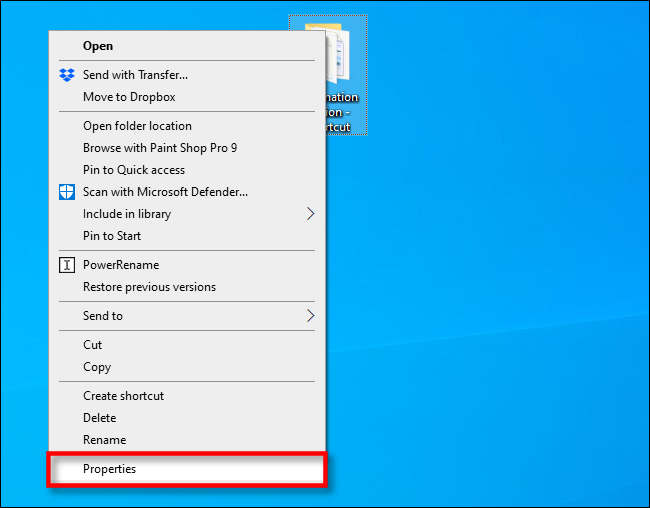
Changing the icon of any file, folder, app, or program works the same way in both Windows 10 and Windows 11. This section illustrates changing the icon of a file’s shortcut, but the process is the same for folders, apps, or programs. After creating your shortcut or finding the one you want to modify, right-click or press-and-hold on it. Then, in its contextual menu, click or tap on Properties. Please note that, in Windows 10, the Properties entry is located at the bottom of the right-click menu instead.
TIP: Alternatively, you can also use the keyboard shortcut Alt + Enter to open the Properties window.
Open Properties from the shortcut’s contextual menu
The Properties window should now open in the Shortcut tab. Click or tap on the Change Icon button.
Press on Change Icon
This opens the Change Icon window, which, in our case, displays all the icons found in one of the Windows DLL files. You can now select a different icon from the ones available or change the path in the “Look for icons in this file” box. One way to change it is to type in the path to another file and then press Enter on your keyboard to see its icons. However, when it comes to downloaded icons, we found it easier to click or tap on Browse.
You can Browse to find the file for the icon you want
Next, navigate to the file that stores the icon you want for your shortcut, select it, and then click or tap on Open.
Select your file and press Open
If the file you opened has several icons to choose from, select the one you want and then click or tap on OK.
Select the icon and press OK
In the Shortcut tab, you can see the new icon replacing the old one.
Confirm your choice by pressing either OK or Apply at the bottom of the window.
Click or tap on OK or Apply
The shortcut now proudly displays the new icon you selected.
Your shortcut displays the new icon
How to change the icon of a shortcut to a web page in Windows 10 and Windows 11
By default, all the shortcuts to web pages use an icon similar to that of your default web browser. However, if you frequently use multiple webpage shortcuts, this can become confusing in the long run, so we recommend changing them. The steps are the same for both Windows 10 and Windows 11. Select the shortcut and press Alt + Enter on your keyboard. Alternatively, you can right-click or press-and-hold on the shortcut, and then click or tap on Properties from its contextual menu.
Press Properties in the contextual menu
In the Web Document tab, press the Change Icon button.
Click or tap on Change Icon
This opens the Change Icon window, where you can select a different icon from the list at the bottom or change the file in the “Look for icons in this file” field. You can change the file by inserting in a new path in this field and pressing Enter on your keyboard.
You can insert the path to the file with the icon you want
You can also click or tap on Browse, navigate to and select the file containing the new icon.
Then, press Open.
Find and open the file storing your icon
If there are more available icons in the file, select the one you want and then click or tap on OK to close the Change Icon window.
Select an icon if you have more options and then press OK
Then, press OK or Apply to confirm your choice in Properties.
Confirm your choice
The web page shortcut now displays the icon you chose.
The icon for your shortcut is changed
How to change the icon of a standard Windows shortcut
Windows has a predefined set of shortcuts, like the Recycle Bin. To learn more about them, you can check out our tutorial on How to add or remove desktop icons (shortcuts) in Windows.
If you want to change the icon displayed by one of these shortcuts, you first need to access the “Desktop Icon Settings” window. The steps to get there differ slightly for Windows 11 and Windows 10. However, to begin, right-click or press-and-hold on an empty area on your desktop, no matter which operating system you’re using, and then click or tap on Personalize.
Access Personalize
In Windows 11, access the Themes section from the right side of the window.
Click or tap on Themes from the Personalization tab in Windows 11
Then, scroll down to the Related settings section, and click or tap on “Desktop icon settings” to open the window with the same name required for the next step.
Access Desktop icon settings
If you’re using Windows 10, in the Personalization settings window, select Themes from the left sidebar. Then, on the right side of the window, scroll down and click or tap on the “Desktop icon settings” link from the Related Settings section.
Click or tap on Desktop icon settings
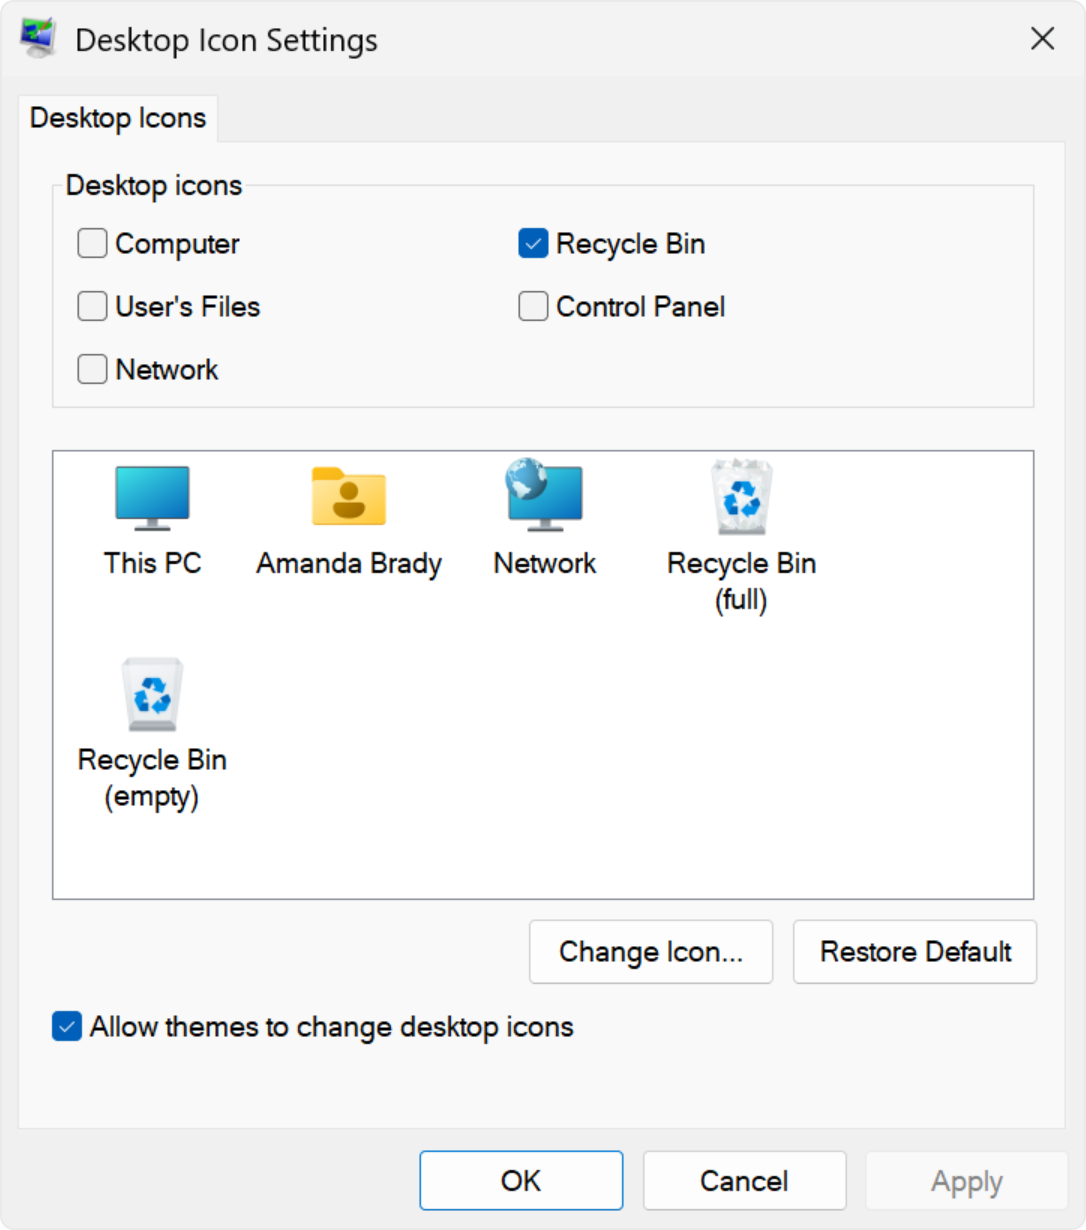
On both systems, clicking or tapping on “Desktop icon settings” opens the same window, which you can then use to change any of the icons displayed in it.
Change any icon shown in the highlighted area
Select the icon you want to change and then press the Change Icon button.
Click or tap on Change Icon
In the Change Icon window, select one of the available icons. If none of them are to your liking, you can also change the path under “Look for icons in this file” to select an icon stored in a different file. Type in a new path manually, and then hit Enter on your keyboard, or click or tap on Browse to navigate to it.
Select an icon or look for one in another file
If you chose to browse, find the file that contains your icon, select it, and click or tap on Open.
Open the file containing the icon you want
Select the icon you want if more are available, and then click or tap OK.
Press OK to use the selected icon
Now, in the “Desktop Icon Settings” window, you can see that your icon replaced the old one.
NOTE: If you want to prevent any accidental changes to the icons used by default shortcuts, as well as preserve your custom icons, uncheck the box next to the “Allow themes to change desktop icons” box at the bottom.
Click or tap on either OK or Apply when you are happy with your choices, and the new icon is displayed on your desktop.
Confirm your changes
TIP: If you want to revert to the default icons displayed by Windows for its standard shortcuts, read How to restore the desktop icons in Windows 10 and Windows 11.
The Control Panel icon is not displayed among the others, but that does not mean you can’t change it. First, make sure to select the box next to its entry from the “Desktop Icons Settings” window above to show the shortcut on your desktop. Then, right-click or press-and-hold on the desktop icon and click or tap on Create Shortcut.
Create a shortcut for the Control Panel
Once you have the Control Panel shortcut on your desktop, head on to its Properties to change its icon. You can use the same procedure illustrated in this tutorial for changing icons that point to a file, folder, app, or program. You don’t need the original Control Panel desktop shortcut anymore, so you can remove it.
Start changing the icon by opening the Shortcut Properties
TIP: You can also change the icon for a removable drive. To learn more, read: How to change a drive’s name and icon in Windows.
Which shortcut icons do you want to change?
Changing the icons for your shortcuts can be both useful and aesthetically pleasing. Before you close this page, we are curious to know which shortcut icon you wanted to replace. Did you feel like your desktop icons needed a makeover, or was it just one icon that was getting on your nerves? Let us know in a comment below.
Applies ToWindows 11 Windows 10
Support for Windows 10 will end in October 2025
After October 14, 2025, Microsoft will no longer provide free software updates from Windows Update, technical assistance, or security fixes for Windows 10. Your PC will still work, but we recommend moving to Windows 11.
Learn more
Your desktop is the first thing you encounter when you sign in to Windows, and having it organized to your liking can significantly enhance your productivity and overall experience. This article describes how to customize the default desktop icons, add new shortcuts, adjust their size to suit your preferences, and show or hide all icons as needed.
Customize the default desktop icons
By default, Windows includes the Recycle Bin icon on the desktop. Essential icons that you can customize include:
-
This PC: Provides access to the computer’s drives and connected devices
-
Recycle Bin: Where deleted files are temporarily stored
-
Network: Allows you to view and connect to network resources
-
User’s Files: A shortcut to your personal folders
Additional shortcuts can be added to suit individual preferences and enhance productivity.
To customize the default desktop icons:
-
In the Settings app on your Windows device, select Personalization > Themes or use the following shortcut:
Themes
-
Select Desktop icon settings
-
Select the icons you would like to have on your desktop, then select OK
Note: The option Allow themes to change desktop icons allows or prevents themes from changing the icons used for common desktop shortcuts such as This PC, User’s Files, Network, and Recycle Bin. By default, themes are allowed to change these icons. However, if you have customized these icons to your preference, you might not want them to be altered whenever you change your theme.
Add shortcuts to your desktop
By placing frequently used applications, files, and folders directly on your desktop, you can access them quickly without navigating through multiple menus or folders. This can save time and reduce the effort needed to perform routine tasks.
To add shortcuts to your desktop, you can use one of these options:
-
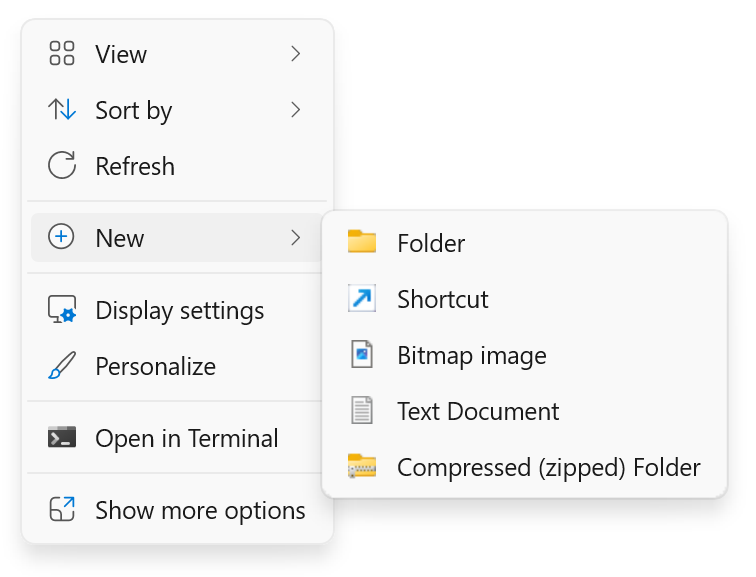
Right-click on an empty area of the desktop
-
Select New > Shortcut
-
Follow the prompts to create a shortcut to a specific file, folder, or web page
-
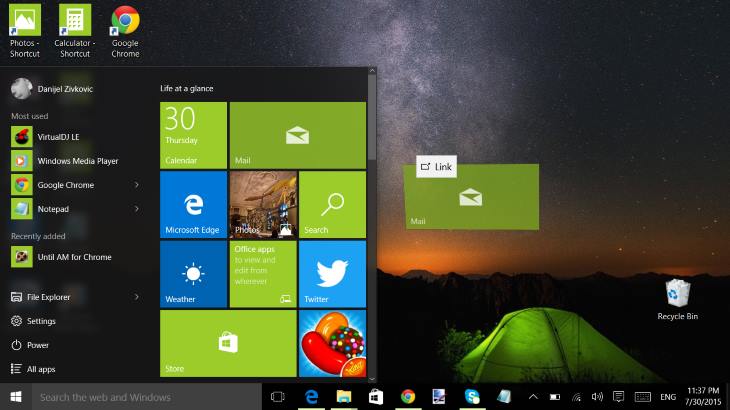
Select Start and select All to display a list of all installed applications
-
Scroll through the list to find the app for which you want to create a shortcut
-
Drag and drop the app you want to create a shortcut for to the desktop
-
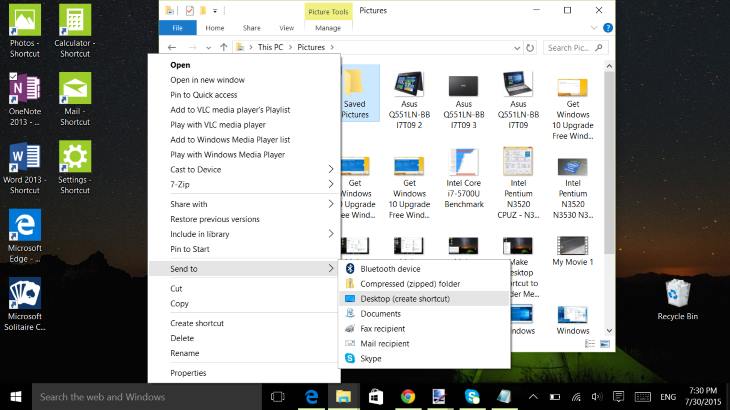
Navigate to the file or folder you want to add
-
Right-click on the file or folder and select Show more options > Send to > Desktop (create shortcut)
-
Open your web browser and navigate to the web page you want to add
-
Click and drag the padlock icon (next to the URL) to your desktop
Resize the desktop icons
Resizing desktop icons can be useful for improving accessibility and organization. For example, if you have a high-resolution monitor, the default icon size might appear too small, making it difficult to identify and click on the icons. By increasing the icon size, you can make them more visible and easier to interact with. Conversely, if you have many icons on your desktop and want to fit more on the screen without scrolling, reducing the icon size can help you manage your workspace more efficiently.
-
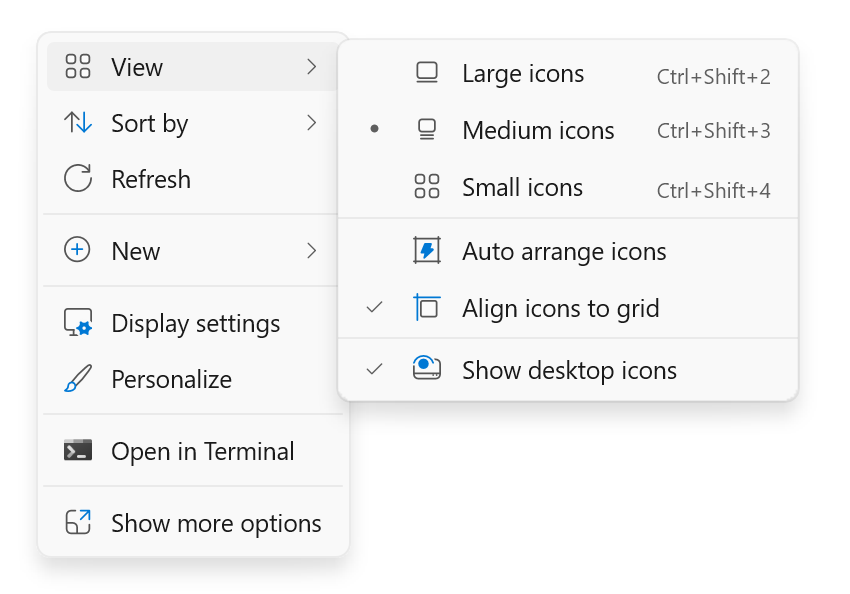
Right-click on an empty area of the desktop
-
Select View and then choose between Large icons, Medium icons, or Small icons to adjust their size.
Tip: You can also use the scroll wheel on your mouse to resize desktop icons. On the desktop, press and hold Ctrl while you scroll the wheel to make icons larger or smaller.
Show or hide all desktop icons
Hiding desktop icons can be useful in various scenarios. For instance, if you’re giving a presentation or sharing your screen during a meeting, hiding desktop icons can help create a cleaner and more professional appearance. It can also be beneficial if you want to focus on a specific task without the distraction of numerous icons cluttering your desktop.
-
Right-click on an empty area of the desktop
-
Select View, and then uncheck Show desktop icons. This will temporarily hide all icons, and you can easily show them again by rechecking the same option.
Tip: If you hide your desktop icons and need to access the desktop, you can do so through File Explorer. Simply open File Explorer , and select Desktop in the navigation pane.
Need more help?
Want more options?
Explore subscription benefits, browse training courses, learn how to secure your device, and more.