
Starting with Windows 10 build 15002, you can capture a screen region to the clipboard. Windows 10 Creators Update comes with a new feature which allows you to take a screenshot of a selected part of the screen. This can be done with just a hotkey.
To take a screenshot of a screen region in Windows 10, press Win + Shift + S keys together on the keyboard. The mouse cursor will turn into a cross sign.
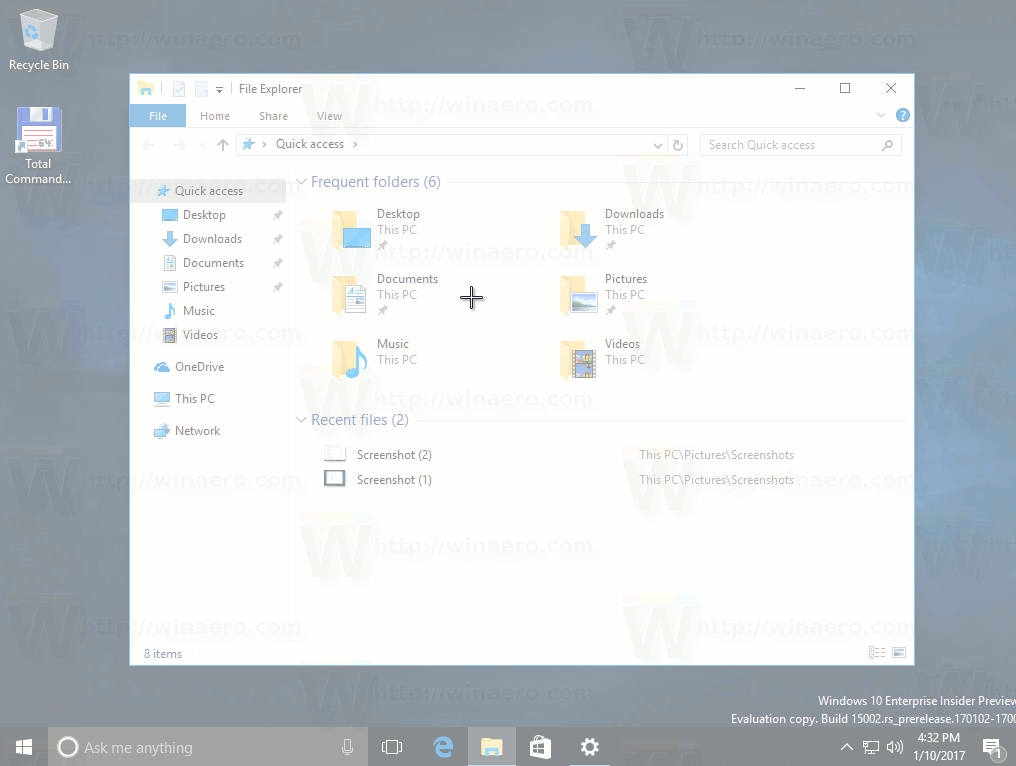
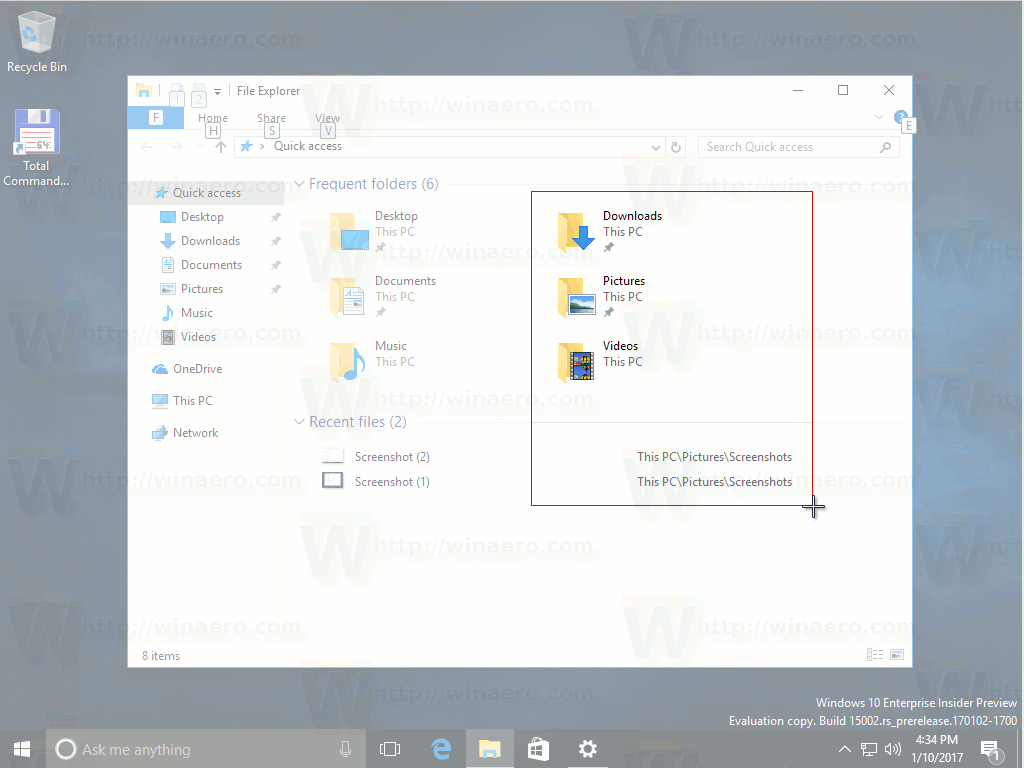
Select the area you want to capture and its screenshot will be taken and stored in the clipboard.
After you capture the screen region using the built-in feature of Windows 10, its contents will be stored in the clipboard. The operating system will not prompt you to save it to a file or open it in a program. Instead, you can open any app which supports image editing and paste your screenshot there.
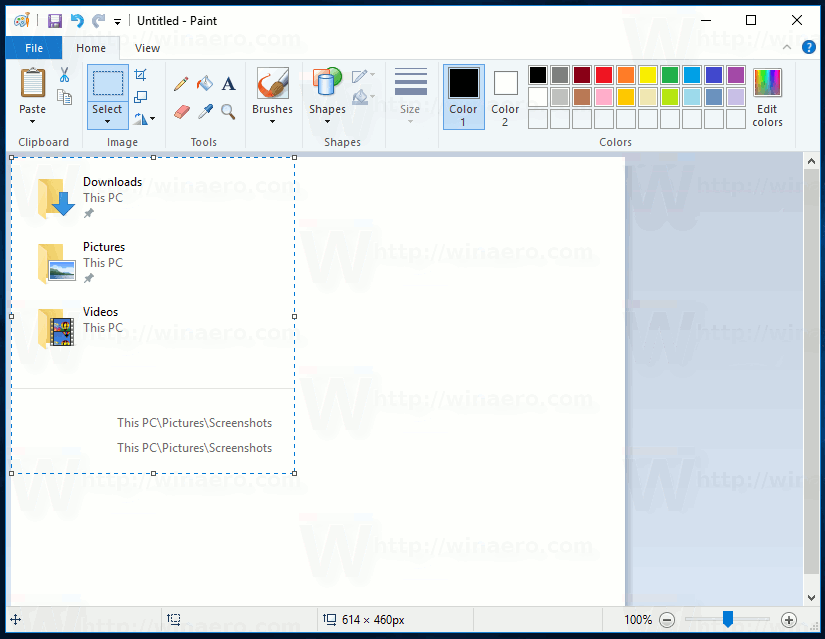
For example, I can paste my screenshot of the selected region in Paint:
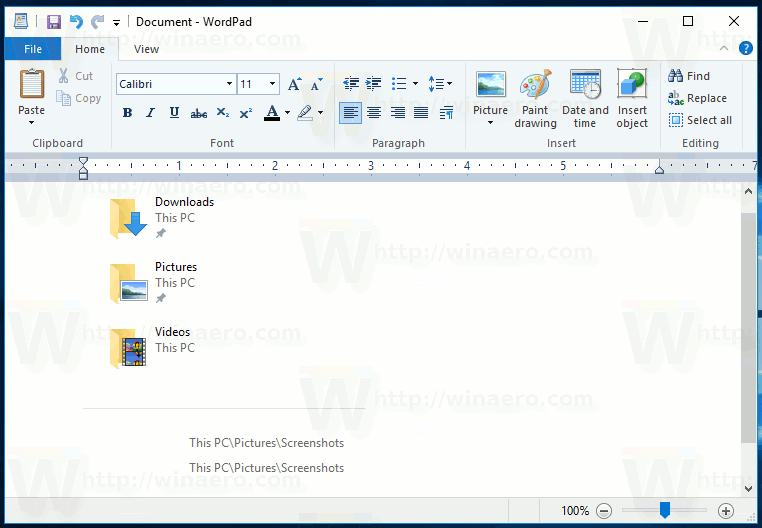
Or you can paste it into a WordPad document, Microsoft Word or any other modern word processor.
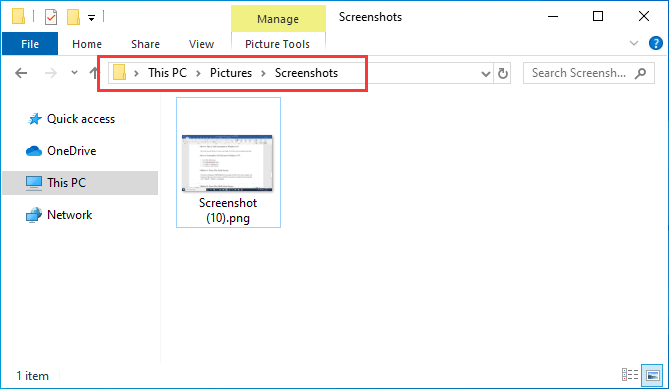
The original screenshot feature was implemented in Windows 95. In Windows 8, an enhanced screenshot feature was implemented which automatically saved it to a file by pressing Win + Print Screen. The entire screen’s contents will be captured in a file stored at %userprofile%\Pictures\Screenshots. During this operation, the screen will be dimmed for half a second to give visual feedback of the screenshot being taken. Every screenshot will saved as a *.PNG file and named ‘Screenshot (#).png’ where # indicates the screenshot index.
Tip: See How to reset screenshot index number in Windows 10.
So, Windows 10 offers you several ways to take a screenshot without using third party tools.
- The classic PrintScreen feature since Windows 95. If you press PrintScreen on your keyboard, the entire screen’s contents will be copied to the clipboard, but not saved to a file.
- Alt + PrintScreen shortcut key will capture a screenshot of only the active window to the clipboard.
- Pressing Win + Print Screen will capture the entire screen and save it to a file in the %userprofile%\Pictures\Screenshots folder.
- Pressing Win + Shift + S will allow you to capture a selected region of the screen to the clipboard.
- Using the Snipping Tool which was also updated in Windows 10.
I wish Windows 10 would get the ability to save the captured screen region directly to a file, like Win + Print Screen does. Considering that Windows 10 build 15002 is a preview build, future releases might allow users to do that. The behavior of this feature can be improved in the final version of Windows 10 Creators Update. Now we just have to wait till April 2017 when it will be finalized.
Support us
Winaero greatly relies on your support. You can help the site keep bringing you interesting and useful content and software by using these options:
If you like this article, please share it using the buttons below. It won’t take a lot from you, but it will help us grow. Thanks for your support!
-
Home
-
News
- How to Take a Full and Partial Screenshot in Windows 10?
By Stella | Follow |
Last Updated
For some reason, you may need to take a full or partial screenshot on your Windows 10 computer. You can just use the Windows built-in tools or keyboard shortcuts to do this work and it is very simple. In this post, MiniTool Software will show you some methods that are suitable for you.
Taking a screenshot of your Windows screen is a common operation when using your computer. For example, you may want to take a full or partial screenshot in Windows 10 and then share it with your friend you are chatting with. Of course, there are some other situations in which you want to capture screenshots in Windows 10.
Some of you may don’t know how to do this work. Don’t worry, we will tell you how to do it using different methods.
How to Take a Partial Screenshot in Windows?
In this part, we will show you how to perform a Windows 10 partial screenshot using four methods. You can just select your preferred one to do this job.
How to Screenshot a Specific Area in Windows 10?
- Use the Print Screen Key
- Press Win+Shift+S
- Use Windows Snipping Tool
- Use Windows Snip & Sketch
Method 1: Use the Print Screen Key
There is a Print Screen key on your keyboard. Just like the name of the key, it is used to print the current screen of your computer. If you are using a wired keyboard, it is usually on the top-right side of the keyboard. If you are using a laptop, you can find it on the top line or the bottom line of the keyboard. The Print Screen can be shown as Print Screen or PrtSc.
How to screenshot a specific area in Windows 10? It is very easy:
- Press the Print Screen Key and you will see a small menu on the top middle side of your computer screen.
- Select the area you want to capture. The screenshot will be saved to the clipboard. Of course, you can click one of the icons in the menu according to your need to take a screenshot.
- Open an application like Paint or Word and paste the screenshot to it.
- Edit the screenshot or save it to a suitable location.
Method 2: Press Win+Shift+S
Pressing Win+Shift+S is equal to pressing the Print Screen key. It also calls out the small menu and you can then select the section you want to take on your computer screen. We will not repeat the steps here.
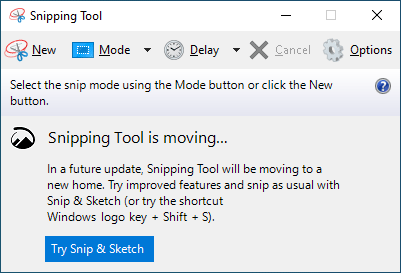
Method 3: Use Windows Snipping Tool
Windows Snipping Tool is a Windows snap-in tool. It has more features than the Print Screen key.
- Use Windows search to search for snipping tool and select the first result to open it.
- Click New.
- Choose the area you want to screenshot.
- The screenshot will show in the tool. You can use this tool to annotate the screenshot. You can also use the features in this tool to make up the screenshot.
- Go to File > Save As to choose a suitable location to save it.
Method 4: Use Windows Snip & Sketch
Windows Snip & Sketch is another choice for you to take a partial screenshot in Windows 10. It is also a Windows snap-in tool.
- Use Windows Search to search for snip & sketch and select the first result to open it.
- Click New and then select the area you want to capture.
- The screenshot will be opened in the Snipping Tool.
- Click the Save As button to save the screenshot on your computer.

How to Take a Full Screenshot in Windows 10?
Take a full screen in Windows 10 is also very simple. We will show you four methods in this part.
How to Screenshot a Full Screen in Windows 10?
- Press Win+Print Screen
- Press Win+Shift+Print Screen
- Use Windows Snipping Tool
- Use Windows Snip & Sketch
Method 1: Press Win+Print Screen
The shortcut combination of Win+Print Screen can capture the full screen of your computer. your computer will flash once after your press Alt+Print Screen and the screenshot will be automatically saved to This PC > Pictures > Screenshots.
Method 2: Press Win+Shift+Print Screen
You can also press Win+Shift+Print to take a full screen. But this time, you need to paste the screenshot to Paint or Word and then save it.
Method 3: Use Windows Snipping Tool
Windows Snipping Tool can also be used to take full screenshots in Windows 10. You can call it out and then select the whole screen to capture. After that, you can also use this tool to edit the image according to your requirements.
Method 4: Use Windows Snip & Sketch
Likewise, you can use Windows Snip & Sketch to capture the full screen in Windows 10. You need to use your mouse to select the full screen to capture after you open the tool. If needed, you can use this tool to edit the image.
Bottom Line
Now, you should know how to take a full or partial screenshot in Windows 10. If you delete your important screenshots by mistake, you can use a free file recovery tool, MiniTool Power Data Recovery, to restore them.
MiniTool Power Data Recovery FreeClick to Download100%Clean & Safe
If you encounter issues when capturing your computer screen, you can let us know in the comments. We will reply to you as soon as possible.
About The Author
Position: Columnist
Stella has been working in MiniTool Software as an English Editor for more than 8 years. Her articles mainly cover the fields of data recovery including storage media data recovery, phone data recovery, and photo recovery, videos download, partition management, and video & audio format conversions.
Procedures and Shortcut to Take Selected Area Screenshot on Windows 10 with Steps. – Do you often capture screenshots using default tools on Windows 10? If so, then there is good news as Microsoft rolled down a new improvement through which you can directly capture a specific part of your screen. And you can perform so important work using just a hotkey.
Simply press the key combinations of Win + Shift + S and you are all set to Take Selected Area Screenshot on Windows 10. This method becomes possible because of the Build 15002, which combines OneNote feature to this OS Version.
Well, after snapping the specific region, you need to paste the content in either of the image editing tools. In addition, there is also an improvement in the Snipping Tool which makes it possible to create a shortcut for the same task. Let us now proceed to the steps and shortcuts now.
How to Take Selected Area Screenshot on Windows 10
Step 1 – First of all, press the combinations of Windows logo + Shift + S keys. This will at once turn the entire screen into dim white color.
Step 2 – Now, you will see the mouse cursor into a cross sign in at the middle of the screen.
Step 3 – Next, with the help of your mouse simply select the region whose screenshot you wish to take. This will take selected area screenshot and moreover, the content will get saved on a clipboard.
Note – Windows will not prompt to save the screenshot, however, by default, the content will be accumulated in the clipboard. For transformation of the screenshot into an image with required image format, you will have to take the support of certain image editing tool, for instance, Paint.
If you want the Old MS Paint then follow – How to Get Old MS Paint on Windows 10 Remove Annoying 3D Preview
Step 4 – Moving on, paste the captured region into an image editing tool. For example, launch WordPad or Paint app and use Ctrl + V keys to paste the content on the canvas.
Step 5 – Now, gather the image in any supportable format by following File => Save as => PNG (or other) on your preferable location.
Create Shortcut to Take Selected Area Screenshot on Windows 10
If you always Take Selected Area Screenshot on Windows 10, then creating a shortcut for the same will make the task much easier. Well, all credits to Windows 10 Build 15002 Important Improvements that made it possible enough to create a shortcut in this regard.
In this recent build, the modified Snipping Tool and supports a new command line switch /clip. When you include this switch in the Snipping Tool shortcut command, it directly opens the region capture mode.
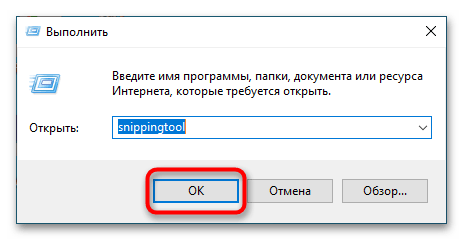
Step 1 – While you stay in the desktop, perform a right-click on some blank space.Navigate to New option on the context menu and Shortcut on the Submenu to open.
Step 2 – On the Create Shortcut wizard, paste the below command line. To move ahead, select Next.
snippingtool.exe /clip
Step 3 – To proceed further, give any name of your choice for the shortcut, such as – Take Selected Area Screenshot.
Step 4 – Finally, select Finish button.
For easily accessing, you can pin the shortcut to the taskbar and to give a personal touch to the shortcut, you can use a different icon.
Conclusion
We are expecting that there will be more improvements in the future builds where it might allow users to directly save the screenshot into some file. So, the behavior of this feature can be improved in the final version of Windows 10 Creator Update.
Want to take screenshot of selected area in Windows 10 laptop or desktop? Learn how to take screenshot in Windows 10 using Windows + Shift + S shortcut keys.
Most of us know how to take a screenshot on Windows 10 but do you know how to take screenshot of selected area in Windows 10 laptop or desktop?
In order to take a screenshot on Windows 10 PC, the majority of users use some very common screen capturing ways such as Print Screen keyboard shortcut (PrtScn), Alt + PrtScn keyboard shortcut, Windows + PrtScn keyboard shortcut, or the screenshot utility like Snipping Tool etc.
Even some Windows users prefer to use third-party screenshot tools and screen capture extensions in order to take a full page screenshot and adding things like annotations, comments, blur sensitive info, and many more.

(Disclosure: This post contains affiliate links and images. I earn advertising/referral fees if you make a purchase by clicking them. There is no extra cost to you. See our full disclosure here. )
But when it comes to capturing a screenshot of a certain area or taking selected area screenshots on Windows 10 operating system, these methods aren’t appropriate at all.
The good news is, with the new update of Windows 10 there is no need for any third-party screenshot software or tools to take a screenshot on PC. Now you can use the system-wide Windows 10 keyboard shortcut Windows + Shift + S which is designed to take the screenshot of a specific area on your Windows 10 computer.
As this is a new feature, so many of you guys might be wondering how to take a screenshot of a selected area on Windows 10 after the update?
To make it easy for you all guys, here we are going to explain each everything in details regarding capturing selected area in Windows 10 system.
In order to use this newly launched keyboard shortcut for Windows 10 screenshot, you need to have at least Windows 10 Creators Update (build 15063) or later versions of Windows installed on your computer.
To take a screenshot of a specific area in Windows 10, press the combination of Windows + Shift + S shortcut keys together and then you will see a blurred overlay on your screen. Now use your mouse to drag or select the area which you want to take screenshot of.

Once the desired area is selected it will be copied automatically on the clipboard and then you can paste it in any image editor such as Paint and save the screenshot on your computer.

This is somewhat similar to the Print Screen keyboard shortcut option. However, you get the ability to select custom area according to your wish which will save a lot your time because now you won’t have to waste your time in cropping and editing the screenshot to get it in the required shape.
Microsoft introduced a screenshot utility called Snipping Tool with Windows 7 operating system which you will find in Windows 10 too. Snipping Tool has similar functionality to Windows + Shift + S shortcut keys. If you use Windows + Shift + S keyboard shortcut to take screenshot of selected area in Windows 10 when compared to Snipping tool, it saves your time as you don’t need to open any application and just use the keyboard shortcuts.
You can use the keyboard shortcut Windows + Shift + F to not only take the screenshot on your Windows 10 computer but on few Microsoft applications as well. Microsoft OneNote (the digital note-taking app for your devices) is one of the programs which come pre-installed on Windows machines also supports this shortcut. In case you want to take a screenshot in Windows 10 using OneNote, you can use Windows + Shift + S shortcut.
Windows + Shift + F for Windows 10 (New Version)
If you are using Windows 10 version 1803 then you will get more advanced features with this keyboard shortcut. As this is a major update, Microsoft has added many new features and did improvements to the existing ones.
A new Screen Snip feature has been added to the Windows 10 operating system to quickly snip and share a screenshot. Even, you can create a desktop shortcut to open it directly if you want.
Using the Windows + Shift + S shortcut keys on the newer version of Windows 10 will copy the image on the selected clipboard but now you get an option to share the screenshot using the share options too.
Addition to this, you will get an options bar which gives you the ability to choose between clipping options such as the rectangular clip, freeform clip, and the full screen.

Once you have selected the clipping option as per your choice, a notification “Snip saved to clipboard” gets triggered so that you can annotate screenshot you just took. All you have to do is click on the notification and you will be able to annotate your screenshot.

Thus, you can see how simple is to use Windows + Shift + S to take a screenshot of a selected area in Windows 10 operating system.
In case, you are unable to use this screenshot capturing feature on your system then you need to check for the Windows 10 build you are using. If you are using an older version or Windows 10, update your machine as then only you will get to know the Windows + Shift + S Windows 10 Screen Snip feature.
Conclusion
We hope that now you know how to use Windows + Shift + S to take screenshot of selected area in Windows 10 PC. If you are using the latest version of Windows 10 then you can take screenshot according to your wish and copy it directly to the clipboard. It doesn’t matter whether you want to capture a rectangle shape screenshot, snip a freeform area, or take a full-screen capture, you can have the modern snipping experience in every possible way.
If you have any kind of queries regarding how to take a screenshot of a specific area in Windows 10 PC or how to take screenshot in Windows 10 using Windows + Shift + S then do let us know using the comments section below.
You may also be interested in checking out:
- Top 17 Best Free Photoshop Alternative and Photo Editing Software
- How to Move a Window that is Off Screen in Windows 10 PC
- How to Change Lock Screen Timeout Period in Windows 10
- Top 16 Best Free Webcam Recording Software for Windows 10
- How to Take a Screenshot on Microsoft Lumia 535
- Top 15 Best Screen Recorder Apps for iPhone and Android
- Top 5 Best Free Photo Editing Software for Windows 10 / 8 / 7
Как сделать скриншот выделенной области в Windows 10
Все способы:
- Способ 1: Инструмент «Ножницы»
- Способ 2: Инструмент «Фрагмент экрана»
- Способ 3: Сторонние приложения
- Вопросы и ответы: 0
Способ 1: Инструмент «Ножницы»
В Windows 10 имеется встроенная программа «Ножницы», позволяющая создавать скриншоты выделенных областей как прямоугольной, так и произвольной формы.
- Чтобы запустить приложение, нажмите комбинацию клавиш Win + R и выполните в открывшемся диалоговом окне команду
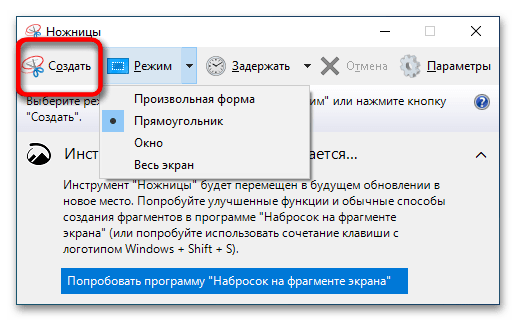
snippingtool. Также программу можно запустить через меню кнопки «Пуск», по запросу «ножницы». - Выберите на панели инструментов нужный вам режим захвата, после чего нажмите кнопку «Создать».
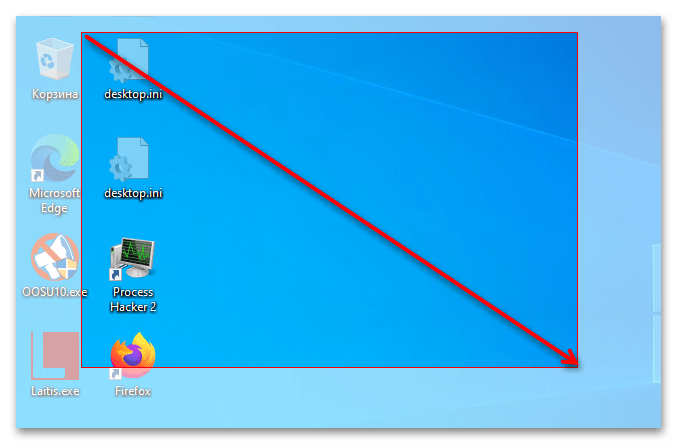
- Удерживая левую клавишу мыши, выделите участок залитого полупрозрачной маской экрана, снимок которого желаете создать, и отпустите клавишу.
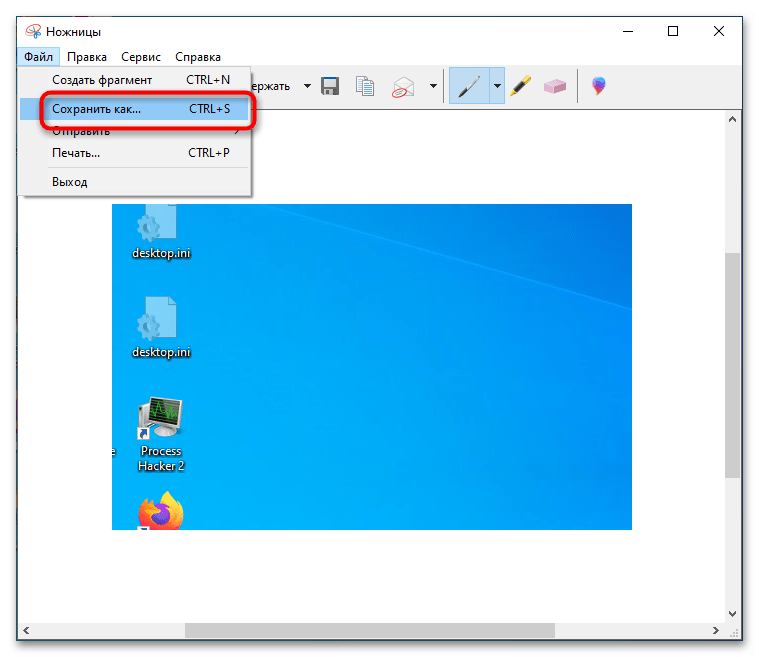
- Созданный скриншот будет передан во встроенный редактор «Ножниц», чтобы его сохранить, выберите в меню «Файл» → «Сохранить как» или нажмите комбинацию клавиш Ctrl + S.
Способ 2: Инструмент «Фрагмент экрана»
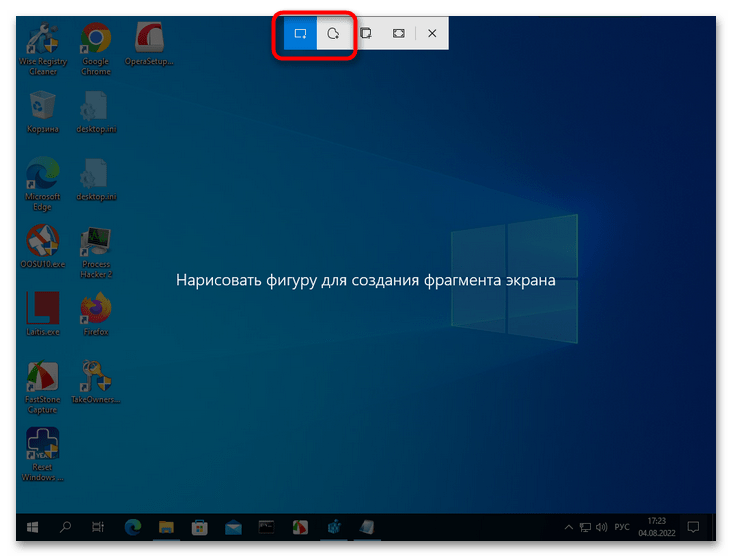
В Windows 10 1809 и новее для создания скриншотов выделенной области можно использовать новый инструмент «Фрагмент экрана», во многом похожий на «Ножницы».
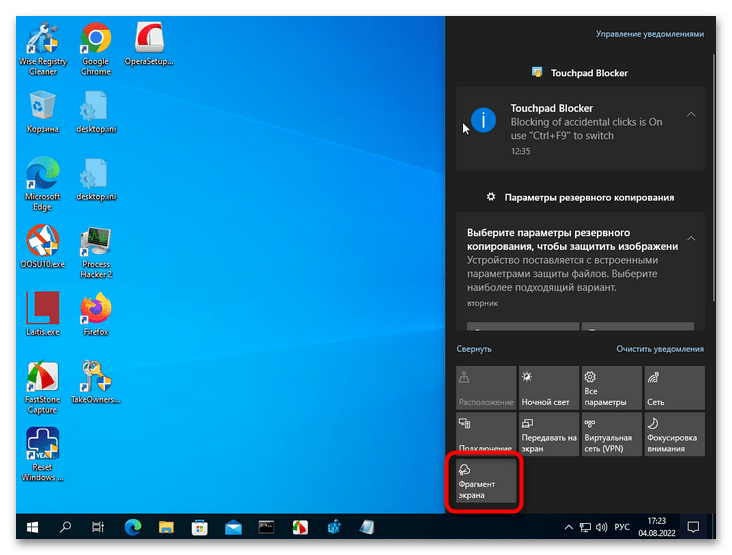
- Чтобы запустить инструмент, откройте область уведомлений и нажмите плитку «Фрагмент экрана». Также вы можете воспользоваться назначенной по умолчанию комбинацией клавиш Win + Shift + S.
- При этом экран будет залит полупрозрачной маской, а курсор превратится в крестик. Если необходимо, выберите режим выделения на панели у верхней границы экрана.
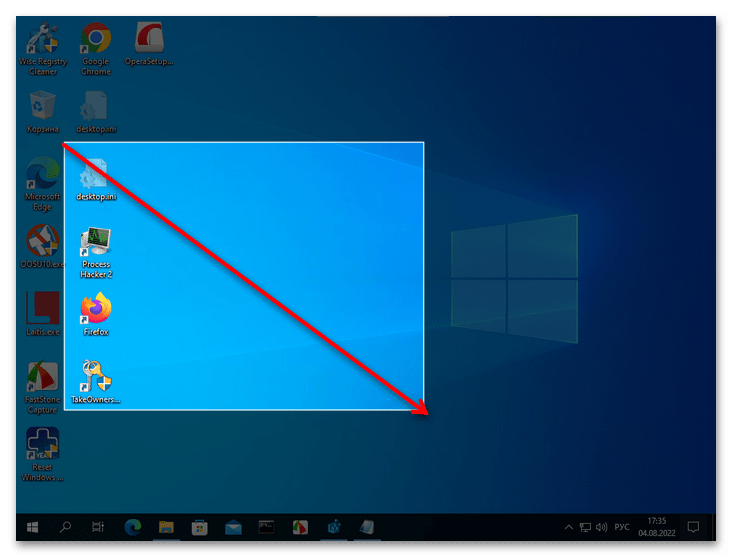
- Удерживая зажатой левую кнопку мыши, выделите нужный вам участок экрана и отпустите кнопку.
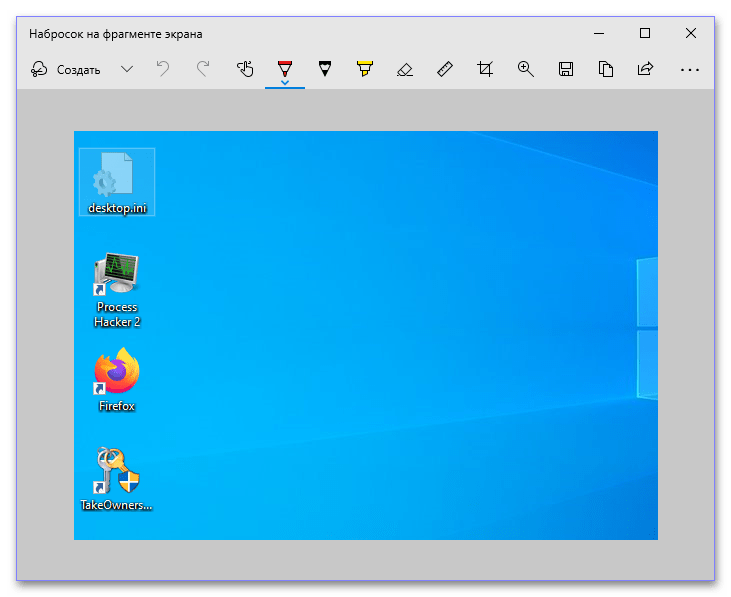
Созданный скриншот будет сохранен в буфер обмена, из которого вы затем сможете вставить его в другое приложение. Если же кликнуть по всплывающему уведомлению о создании снимка, скриншот откроется в штатном приложении «Набросок на фрагменте экрана».
Способ 3: Сторонние приложения
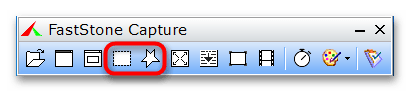
Более широкие возможности создания скриншотов обеспечивают сторонние программы. Одним из наилучших приложений для создания экранных снимков является FastStone Capture.
- Запустите программу и выберите на панели нужный вам режим захвата. Для создания снимков выделенной области подойдут эти два режима:
- «Rectangular Region» — выделенная прямоугольная область. Можно вызвать также нажатием комбинации клавиш Ctrl + PrtSc.
- «Freehand Region» — выделенная произвольная область. Для вызова инструмента можно использовать комбинацию клавиш Ctrl + Shrft + PrtSc.
Существуют также и другие программы-скриншотеры, поддерживающие создание снимков выделенной области экрана.
Следует также отметить, что создавать скриншоты выделенной области экрана умеют актуальные версии таких браузеров как Google Chrome, Vivaldi, Opera и Mozilla Firefox, правда, только внутри собственных окон.
Наша группа в TelegramПолезные советы и помощь