
Обычно сброс сетевых настроек в Windows это последнее средство, которое стоит попробовать для решения сложных проблем с доступом к локальной сети или Интернету. При этом на компьютере сбрасываются настройки сетевых адаптеров, настройки стека TCP/IP до стандартных настроек в чистой Windows, удаляются и переустанавливаются все сетевые адаптеры компьютера. В этой статье мы рассмотрим особенности сброса сетевых настроек в Windows из графического интерфейса и с помощью командной строки.
Прежде чем прибегать к сбросу сетевых настроек, убедитесь, что вы попробовали все стандартные средства диагностики работы с сетью: проверили настройки IP, работу маршрутизатора/роутера/провайдера, обновили драйвера сетевых адаптеров, перезагружали компьютер, воспользовались встроенным Windows Network Troubleshooter (команда
msdt.exe /id NetworkDiagnosticsNetworkAdapter
) и т.д. Если ни один инструментов не помог исправить сетевую проблему, можно попробовать сбросить сетевые настройки.
Содержание:
- Сохраните текущие сетевые настройки Windows
- Сброс сетевых настроек из панели управления Windows
- Сброс сетевых настроек из командной строки Windows
Сохраните текущие сетевые настройки Windows
При сбросе сети в Windows будут потеряны все настройки, которые вы задали вручную: IP адреса, DNS сервера, статические маршруты, настройки сетевых драйверов, очищены сохраненные Wi-Fi сети и т.д. Поэтому перед сбросом важно сохранить текущие настройки.
Выведите список сетевых адаптеров:
Get-NetAdapter|select name,InterfaceIndex,InterfaceDescription,InterfaceOperationalStatus,MediaConnectionState,DriverInformation|ft

Для всех подключенных сетевых адаптеров проверьте, получают ли они настройки автоматически (через DHCP) или вручную:
Get-NetIPInterface -InterfaceIndex 7

Если для интерфейса значение
Dhcp=Disabled
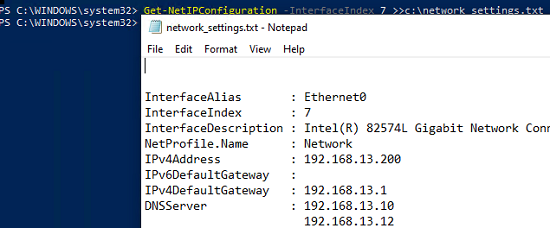
, значит для адаптера настройки IP заданы вручную и вам нужно сохранить текущие настройки в файл:
Get-NetIPConfiguration -InterfaceIndex 7 >>c:\network_settings.txt
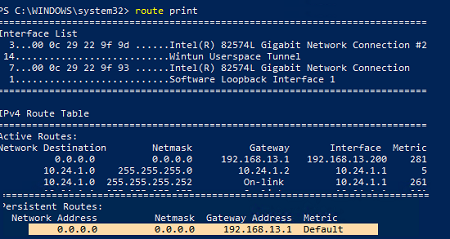
Выведите и запишите все статические маршруты в таблице маршрутизации (из секции Persistent Routes):
Route print
С помощью PowerShell выведите список VPN подключений, запишите их настройки:
Get-VpnConnection
В моем случае настройки сохраненных VPN подключений не были сброшены. Также не был удален виртуальный адаптер OpenVPN Wintun (адаптер для подключения к OpenVPN серверу).
Выведите WLAN профили и сохраните настройки беспроводных сетей в файл:
netsh wlan show profile
netsh wlan export profile name="Xiaomi_20F5" key=clear folder=c:\ps
Сохраните настройки Winsock:
netsh winsock show catalog > c:\winsock-backup.txt
После сброса сети сохраненная информация поможет вам восстановить все сетевые настройки, заданные вручную.
Сброс сетевых настроек из панели управления Windows
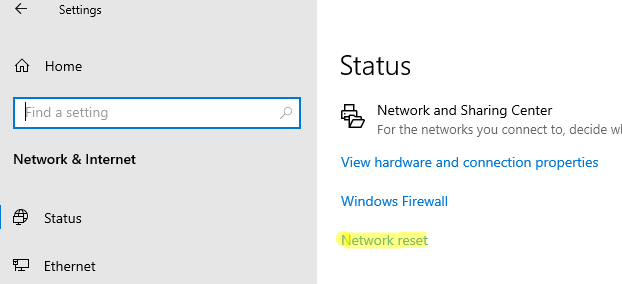
В Windows 10 (1607+), Windows 11 и Windows Server 2019/2022 можно сбросить сетевые настройки из панели Параметры (Settings). Перейдите в раздел Settings -> Network (или выполните команду быстрого доступа к ms-settings: ms-settings:network). Нажмите кнопку Network reset -> Reset now.
Подтвердите сброс сетевых настроек. Windows очистит все сетевые настройки и удалит сетевые карты (сетевые адаптеры не будут отображаться в Панели Управления). Настройки сети будут сброшены до заводских. Windows автоматически перезагрузится через 5 минут.
После загрузки Windows обнаружит все подключенные сетевые адаптеры и устанвит драйвера. Останется настроить параметры сетевых подключение и проверить, исправлена ли проблема.
Сброс сетевых настроек из командной строки Windows
Все те же действия, которая выполнила процедура сброса сети из панели Settings можно выполнить из командной строки.
Сбросьте кэш DNS:
ipconfig /flushdns
Сбросьте настройки WinSock:
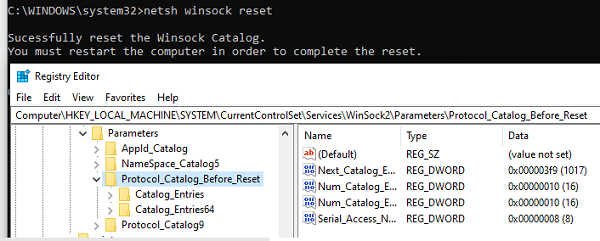
netsh winsock reset
Sucessfully reset the Winsock Catalog.
You must restart the computer in order to complete the reset.
Команда сбрасывает настройки в ветке реестра HKEY_LOCAL_MACHINE\SYSTEM\CurrentControlSet\Services\WinSock2\Parameters . При этом старые настройки сохраняются в ветку Protocol_Catalog_Before_Reset.
Сброс настроек стека TCP/IP:
netsh int ip reset
Для сброса настроек TCP/IPv6:
netsh int ipv6 reset
Resetting Compartment Forwarding, OK!
Resetting Compartment, OK!
Resetting Control Protocol, OK!
Resetting Echo Sequence Request, OK!
Resetting Global, OK!
Resetting Interface, OK!
Resetting Anycast Address, OK!
Resetting Multicast Address, OK!
Resetting Unicast Address, OK!
 Resetting Neighbor, OK!
Resetting Path, OK!
Resetting Potential, OK!
Resetting Prefix Policy, OK!
Resetting Proxy Neighbor, OK!
Resetting Route, OK!
Resetting Site Prefix, OK!
Resetting Subinterface, OK!
Resetting Wakeup Pattern, OK!
Resetting Resolve Neighbor, OK!
Resetting , OK!
Restart the computer to complete this action.
Сбрасываются настройки в ветках реестра HKLM\SYSTEM\CurrentControlSet\Services\Tcpip\Parameters и \SYSTEM\CurrentControlSet\Services\DHCP\Parameters.
Удалите все сетевые адаптеры:
netcfg -d
Successfully removed all MUX Objects.
Removing device "Intel(R) 82574L Gigabit Network Connection"
Removing device "WAN Miniport (PPPOE)"
Skipping the removal of "Wintun Userspace Tunnel"
Removing device "WAN Miniport (PPTP)"
Removing device "WAN Miniport (IKEv2)"
Check to see if the "Microsoft Kernel Debug Network Adapter" bindings should be reset
"Microsoft Kernel Debug Network Adapter" binding check complete
Removing device "WAN Miniport (Network Monitor)"
Removing device "WAN Miniport (IP)"
Removing device "WAN Miniport (SSTP)"
Removing device "WAN Miniport (IPv6)"
Removing device "WAN Miniport (L2TP)"
Please reboot the computer...
Сброс всех правил Windows Defender Firewall:
netsh advfirewall reset
В PowerShell также есть отдельная команда для сброса расширенных настроек конкретного сетевого адаптера. Сначала вы можете получить текущие настройки адаптера:
Get-NetAdapterAdvancedProperty -Name Ethernet0|ft -AutoSize
Name DisplayName DisplayValue RegistryKeyword RegistryValue
---- ----------- ------------ --------------- -------------
Ethernet0 Flow Control Rx & Tx Enabled *FlowControl {3}
Ethernet0 Interrupt Moderation Enabled *InterruptModeration {1}
Ethernet0 IPv4 Checksum Offload Rx & Tx Enabled *IPChecksumOffloadIPv4 {3}
Ethernet0 Jumbo Packet Disabled *JumboPacket {1514}
Ethernet0 Large Send Offload V2 (IPv4) Enabled *LsoV2IPv4 {1}
Ethernet0 Large Send Offload V2 (IPv6) Enabled *LsoV2IPv6 {1}
Ethernet0 Maximum Number of RSS Queues 2 Queues *NumRssQueues {2}
Ethernet0 Packet Priority & VLAN Packet Priority & VLAN Enabled *PriorityVLANTag {3}
Ethernet0 Receive Buffers 256 *ReceiveBuffers {256}
Ethernet0 Receive Side Scaling Enabled *RSS {1}
Ethernet0 Speed & Duplex Auto Negotiation *SpeedDuplex {0}
Ethernet0 TCP Checksum Offload (IPv4) Rx & Tx Enabled *TCPChecksumOffloadIPv4 {3}
Ethernet0 TCP Checksum Offload (IPv6) Rx & Tx Enabled *TCPChecksumOffloadIPv6 {3}
Ethernet0 Transmit Buffers 512 *TransmitBuffers {512}
Ethernet0 UDP Checksum Offload (IPv4) Rx & Tx Enabled *UDPChecksumOffloadIPv4 {3}
Ethernet0 UDP Checksum Offload (IPv6) Rx & Tx Enabled *UDPChecksumOffloadIPv6 {3}
Ethernet0 Adaptive Inter-Frame Spacing Disabled AdaptiveIFS {0}
Ethernet0 Interrupt Moderation Rate Adaptive ITR {65535}
Ethernet0 Log Link State Event Enabled LogLinkStateEvent {51}
Ethernet0 Gigabit Master Slave Mode Auto Detect MasterSlave {0}
Ethernet0 Locally Administered Address -- NetworkAddress {--}
Ethernet0 Wait for Link Auto Detect WaitAutoNegComplete {2}
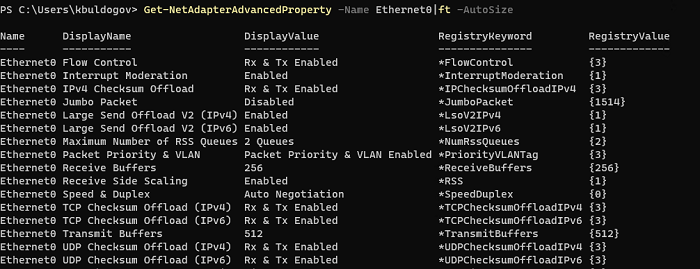
Здесь можно вывести настройки Jumbo Packet, VLAN, настройки буферов и т.д.
Для сброса этих параметров, выполните:
Reset-NetAdapterAdvancedProperty -Name Ethernet0
Перезагрузите компьютер и задайте все сетевые настройки заново. Если компьютер настроен на автоматическое получение IP адреса и настроек сети от DHCP сервера, ничего дополнительно настраивать не придется.
Learning how to reset Windows 10 network settings is one of the most effective troubleshooting methods for resolving network problems. It allows users to restore default network configurations, thus removing problematic settings that might be causing connection issues.
This article provides a step-by-step tutorial on how to reset network settings in Windows 10, aiming to help users understand the benefits of resetting network configurations, identify common scenarios when a reset is necessary, and ensure they can carry out the process safely and effectively. By following this guide, users can resolve issues such as connectivity problems, network adapter malfunctions, and network configuration errors. Additionally, it covers precautions to take before performing a reset and post-reset steps to restore functionality.
💻 Strengthen device security. Minimize complexity. Experience NinjaOne.
→ Learn more here.
What does resetting network settings mean?
Network settings in Windows 10 encompass various configurations that define how the system connects and communicates over networks. These include Wi-Fi configurations, network adapters, and TCP/IP settings, which all work together to enable internet and local network access.
When you reset network settings, the following occurs:
- Wi-Fi configurations: All saved Wi-Fi networks are erased.
- Network adapters: Network adapters are reset to default configurations.
- TCP/IP stack: The system clears out any custom network configurations, such as DNS settings or static IP addresses.
This process differs from adjusting individual settings in that it clears all network configurations at once, reverting the system to its default state. Resetting is typically a more comprehensive solution for persistent issues that cannot be resolved through simpler methods.
Common scenarios when you might need to reset network settings
Resetting network settings can help resolve a variety of issues, especially when traditional troubleshooting steps fail. One of the most common scenarios involves connectivity problems, such as being unable to connect to a Wi-Fi network, or experiencing unusually slow internet speeds despite a strong signal. In such cases, resetting network configurations removes any corrupted or misconfigured settings that might be causing these issues. Another frequent situation involves network adapters and drivers. An adapter may occasionally become unresponsive or a driver may malfunction, resulting in network disruptions. Resetting the network can help reinitialize the adapter and ensure it is using the proper default settings.
Network configuration conflicts, such as IP address duplication or misassigned static IPs, are another area where resetting the network settings is effective. These issues can often arise in environments with multiple devices, leading to conflicts that a reset can clear up. This is not uncommon when using Docker, Virtualbox, or other virtualization systems, or apps like software firewalls or VPNs.
Finally, after removing malware from a system, resetting network settings is often a prudent step. Some forms of malware tamper with network configurations to maintain persistence, and a reset ensures that any residual changes made by the malware are fully removed, restoring the system to a clean state.
Precautions before resetting network settings
Before initiating a network reset, it’s important to take a few key precautions. For those using more advanced setups, such as custom IP configurations or VPNs, backing up these network settings is essential. Many users overlook the fact that a reset will remove all custom network settings, leaving them without the necessary details to reconnect to their networks without trouble.
Additionally, any critical data that depends on the network, such as cloud-synced files, should be saved locally before proceeding. Losing access to the internet or internal network during the reset could disrupt file syncing or data transfers, leading to potential data loss or inconsistencies. Lastly, don’t forget to make a note of your Wi-Fi passwords and VPN credentials. Since these will be cleared in the process, having them on hand ensures a smoother reconnection once the network reset is complete.
Step-by-step guide to resetting network settings in Windows 10
Resetting network settings can be done through several methods, each catering to different levels of technical expertise. Although the most straightforward way to reset network settings is through the Windows 10 Settings app, users comfortable with command-line tools might find that Command Prompt offers a more granular method of resetting specific network components, with PowerShell offering other ways to reset network settings and providing more control for advanced users. Each method allows users to choose the level of detail and control they need, from simple resets to more advanced adjustments.
Here’s how to reset your network settings step by step:
Method 1: Using the Settings app
- Open the Settings app by pressing Win + I.
- Navigate to Network & Internet, then go to the Status tab.
- Scroll and select Network reset.
- Confirm the reset when prompted. Your system will restart, and all network configurations will be cleared.
Method 2: Using Command Prompt
As an administrator, open Command Prompt by right-clicking the Start menu, then selecting Command Prompt (Admin).
- Enter these commands in sequence:
- netsh int ip reset (resets TCP/IP stack)
- netsh winsock reset (resets Winsock catalog)
- ipconfig /release and ipconfig /renew (releases and renews IP addresses)
- Restart the system after running these commands to apply the changes.
Method 3: Using PowerShell
- Open PowerShell as an admin.
- Run the command Reset-NetAdapter -Name “Adapter Name” to reset a specific network adapter.
- If needed, restart the computer for changes to take effect.
Post-reset actions
Once the reset is complete, you’ll need to re-establish your network connections. The most immediate step is to reconnect to Wi-Fi networks. Since all saved Wi-Fi networks are cleared during the reset, you’ll have to manually re-enter your Wi-Fi passwords to reconnect to the internet. This can be time-consuming if you have multiple networks saved, so keeping these passwords accessible will streamline the process. Next, you’ll need to reconfigure any VPNs or custom network settings. This is especially critical for users who rely on VPNs for remote work or secure connections. Having a backup of these settings, as suggested earlier, will make this process easier.
Additionally, it’s advisable to check for network driver updates at this stage. Outdated drivers may have been part of the original issue, and updating them can prevent future problems. You can do this by going to Device Manager, right-clicking your network adapter, and clicking Update driver. Finally, test the network connection to ensure the reset resolved the issue. Run a speed test or attempt to connect to various websites to verify that the network is stable and functioning correctly.
Troubleshooting if network reset doesn’t solve the problem
If a network reset doesn’t resolve the issue, there are a number of additional troubleshooting steps that can be taken. Start by checking for Windows updates. Network issues can sometimes stem from outdated system software, and installing the latest updates can resolve compatibility or performance problems. If updates don’t fix the issue, try using Windows’ built-in troubleshooter. This tool can automatically detect and resolve common network problems that may not have been fixed by the reset. To access the troubleshooter, go to Settings > Update & Security > Troubleshoot, then select Internet Connections.
In some cases, the problem may be hardware-related. If the network adapter is malfunctioning, or if there’s a fault with the router or cabling, a reset won’t solve the problem. Verifying that these devices are working is crucial in determining the root cause of the issue. To test whether the issue is Windows- or hardware related, consider testing your hardware with another operating system. Using live USB boot tools like Ventoy lets you easily turn a spare USB flash drive into a multi-OS live boot USB disk by simply copying your bootable ISO files to your flash drive – Windows install/repair ISOs supported.
If none of these steps work, it may be time to seek professional IT assistance. Persistent network issues could be symptoms of a larger underlying problem that requires specialized diagnostics.
Will resetting network settings delete my personal data?
Network settings resets will not delete your personal files or applications, nor the rest of your operating system data. Only network-related settings, such as saved Wi-Fi connections and VPN configurations, are affected.
Can resetting network settings solve all network problems?
While resetting network settings can resolve many common issues, it won’t fix hardware faults, ISP-related problems, or issues that require more advanced diagnostics. It’s a great first step, but not a cure-all.
How often should I reset my network settings?
There’s no need to reset network settings regularly. It should be used only as a troubleshooting step when you’re facing persistent network issues that aren’t resolved by simpler fixes.
Are there risks to resetting network settings?
There’s little to no risk to the system, but users may lose custom network configurations such as VPNs and/or virtual network device settings created by Docker or Virtualbox. For this reason, always back up important network settings before performing a reset.
From reset to resilience
Resetting network settings in Windows 10 is a powerful tool for resolving a wide range of network issues, from connectivity problems to misconfigured adapters. By following the outlined steps and taking the necessary precautions, users can restore their network settings to default and solve persistent problems that may be hindering their network performance.
Maintaining a stable and functional network environment is key to ensuring productivity, security, and smooth communication within any system or organization.
103
103 people found this article helpful
Go to your Network and Internet Settings to remove and reinstall all network adapters installed on your Windows PC
What to Know
- To reset network settings, go to Start menu > Settings > Network and Internet > Status > Network Reset.
- If you have a VPN or a proxy server, it may need to be reconfigured following the reset.
- Resetting network settings removes and reinstalls every network adapter installed on your system.
This article explains how to reset your network settings in Windows 10.
How to Reset Network Settings in Windows 11
How to Reset Windows 10 Network Settings
Using the network reset utility in Windows 10 is fairly simple.
-
Go to Start menu > Settings, then select Network and Internet.
-
In the left navigation pane, select Status to make sure you’re viewing the network status window. Then scroll down until you see the Network Reset link.
-
Click the Network Reset link and review the Network Reset information message. When you’re prepared to network your reset settings, select Reset now.
-
Select Yes in the network reset confirmation window. This will initiate the reset process and restart your computer.
-
You will get a warning when the computer’s about to reboot. You should have plenty of time to save your work and close out all applications.
-
When the computer restarts, you’ll notice that your network connection isn’t active. This is because your network card reset and released its previous connection. Just select the network icon, pick the network you want to reconnect to, and choose Connect.
-
If your TCP/IP settings are set to automatically detect, your network connection should detect the appropriate network settings and connect to the internet without any problems.
Fixing Any Remaining Settings
If you configured a VPN client or other network software before the network reset, you may need to reconfigure them to get them working again.
Fixing this software is as simple as opening the VPN software and entering your IP and other settings like you did when you originally installed the software.
If you were connecting to a corporate network using a proxy server, you may need to reconfigure your proxy server settings.
-
Select the Start menu and type Internet Options. Select Internet Options.
-
In the Internet Options window, select the Connections tab.
-
Select the LAN settings button, and in the LAN Settings window, select Use a proxy server for your LAN. In the Address field, type the address for your corporate LAN proxy server. Select OK on both windows to accept the changes.
If you don’t know the correct proxy server settings, contact your IT help desk to ask for the correct network address and port of your proxy server.
-
You may need to restart your computer for the changes to take effect, and your network card to reconnect to your corporate network.
What Does a Windows 10 Network Reset Do?
Resetting network settings in Windows 10 should be a last resort. When you initiate a network reset, it removes and reinstalls every network adapter currently installed on your system.
The Network Reset Utility was originally introduced by Microsoft after the Windows 10 Anniversary Update build (version 1607) so people could quickly resolve network problems caused by the update. The utility still remains to help people fix network connection issues.
The network reset utility also sets every networking component on your system back to the original factory settings. The components that get reset are as follows:
- Winsock: This is an interface for applications that handles input and output requests to the internet.
- TCP/IP: This stands for Transmission Control Protocol/Internet Protocol, and allows all network devices on your computer to communicate over the internet.
If you’ve customized any of these settings from their defaults, you’ll need to note those settings because performing a network reset will remove any custom settings.
However, most people have all of these components set to automatically detect, so in most cases you won’t see any issues after a network reset.
The Best Cable Modem/Router Combos
FAQ
-
To change a network from public to private on wireless, select the Wi-Fi icon, then select Properties > Network profile > Private. For a wired connection, right-click the Ethernet icon, then Open Network & Internet settings > Properties > Network profile > Private.
-
To turn network discovery on or off, go to Settings > Network & Internet > Network and Sharing Center > Change advanced sharing settings.
Thanks for letting us know!
Get the Latest Tech News Delivered Every Day
Subscribe
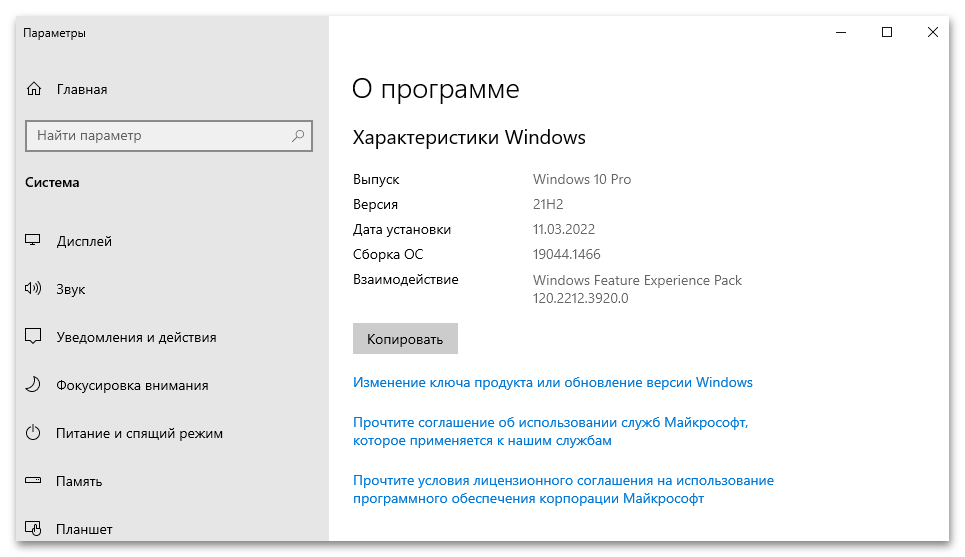
Важно! Все действия, представленные в статье, выполняются на примере Windows 10 версии 21H2 (19044.1466). Другие сборки операционной системы могут немного отличаться в плане визуального оформления и месторасположения некоторых элементов интерфейса, но каждый описанный дальше способ все равно остается актуальным. Узнать версию установленной на компьютере ОС можно в свойствах, что подробно описано в другой статье на нашем сайте.
Подробнее: Как посмотреть характеристики компьютера на Windows 10
Способ 1: Параметры системы
Самый простой метод восстановления настроек сетевого адаптера предполагает выполнение некоторых действий в параметрах системы. Для этого потребуется сделать следующее:
-
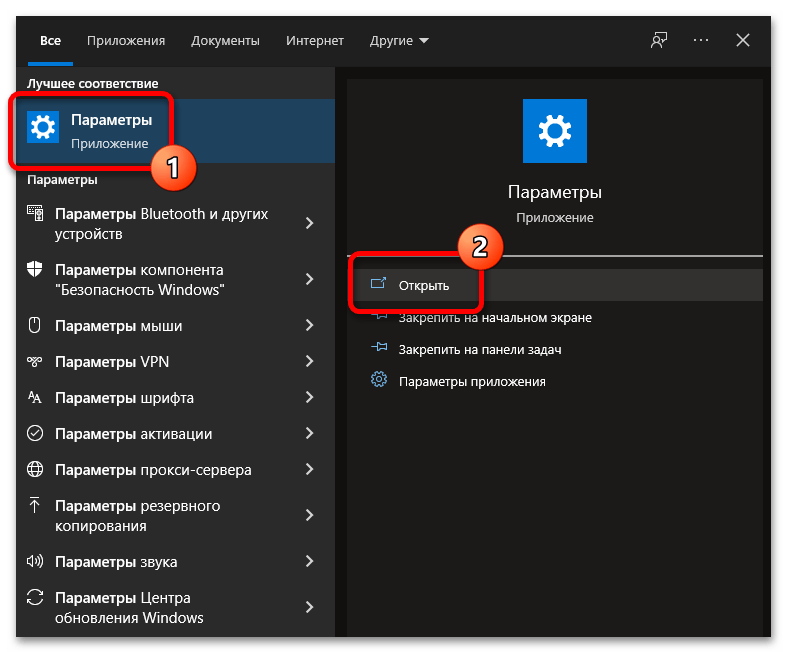
Откройте окно настроек, воспользовавшись любым удобным способом. Сделать это можно посредством поискового запроса. Следует кликнуть по соответствующей области на панели задач и ввести запрос
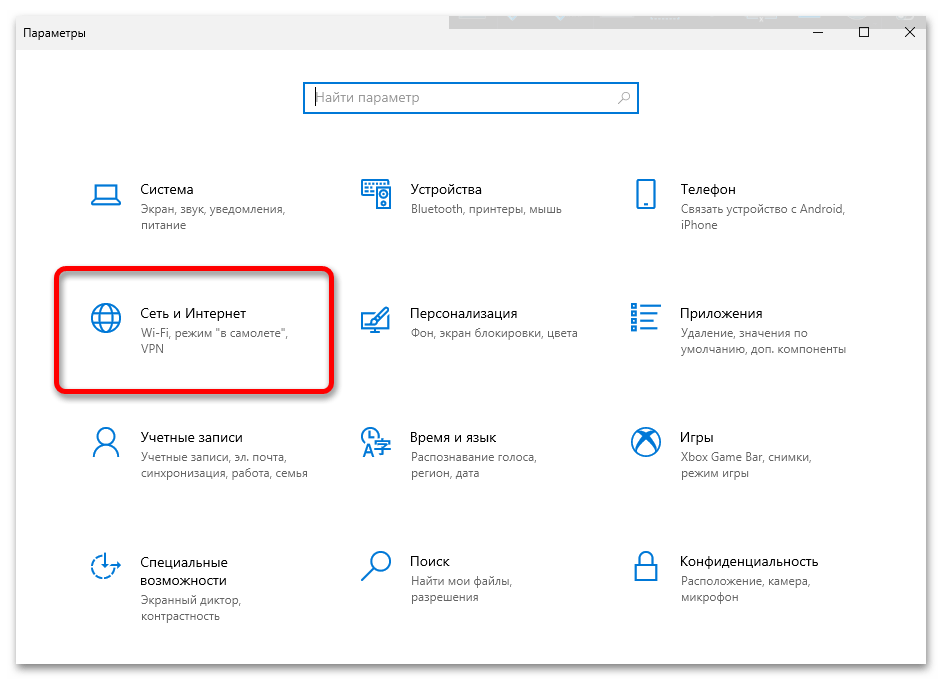
«Параметры», после чего кликнуть в результатах по одноименному пункту. - В открывшемся окне перейдите в раздел «Сеть и интернет».
- Находясь на вкладке «Состояние», опуститесь по странице вниз и щелкните по пункту «Сброс сети».
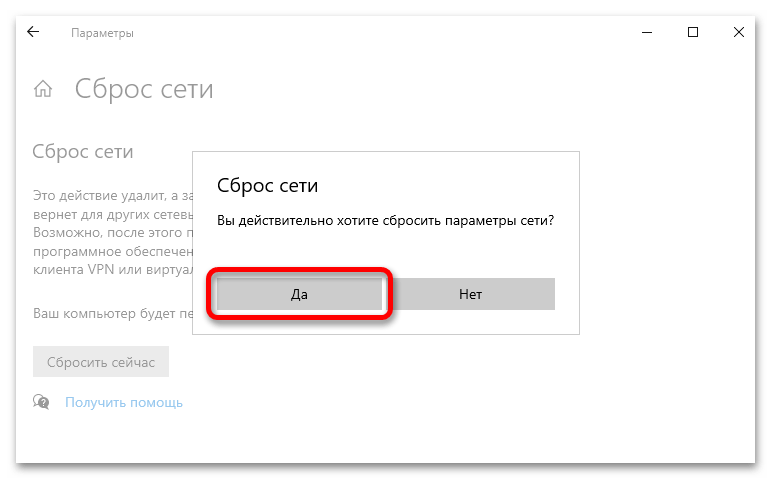
- В новом открывшемся меню подтвердите действие, кликнув по кнопке «Сбросить сейчас».
- Во всплывающем диалоговом окне ответьте на вопрос утвердительно, чтобы завершить процесс отката параметров сети до заводских настроек.


После выполнения описанных действий компьютер необходимо перезапустить, чтобы изменения вступили в силу. Система сделает это автоматически, установив соответствующий таймер на 5 минут.
Читайте также: Как настроить интернет на компьютере с Windows 10
Способ 2: «Командная строка»
Если произвести сброс сетевых параметров путем изменения системных настроек с графическим интерфейсом не получается, можно воспользоваться специальными консольными командами, инициализацию которых следует производить в окне «Командной строки».
-
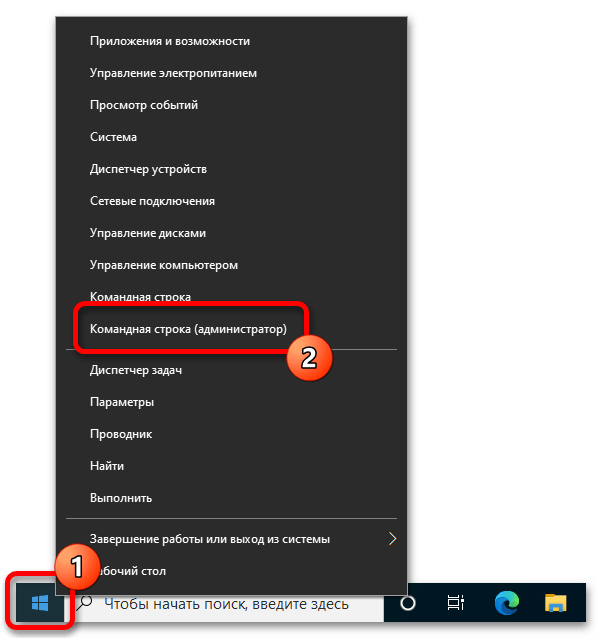
Откройте окно консоли от имени администратора. Сделать это можно через контекстное меню кнопки «Пуск». Щелкните по ней правой кнопкой мыши и выберите пункт «Командная строка (администратор)».

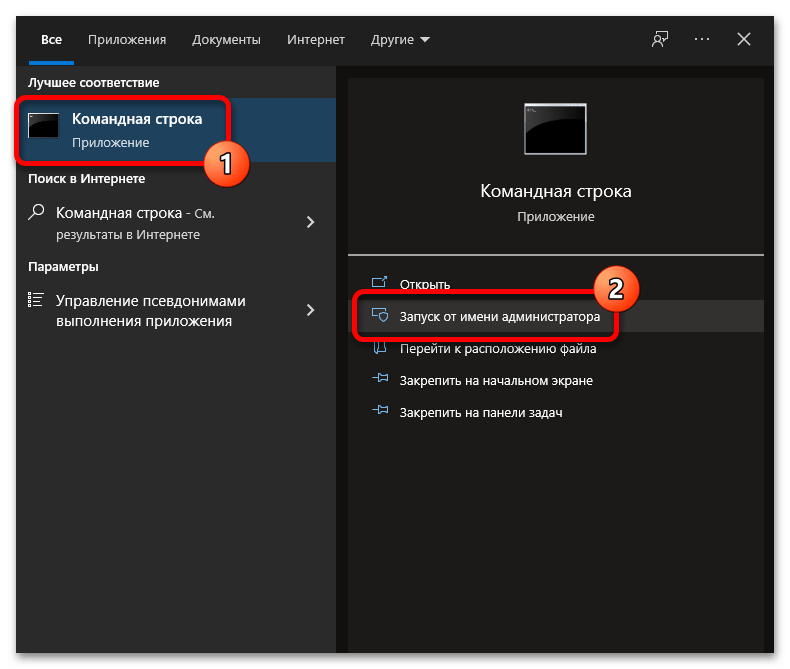
В качестве альтернативы можно воспользоваться другими способами запуска консоли, рассмотренными в отдельной статье на нашем сайте.
Подробнее: Как запустить «Командную строку» от имени администратора в Windows 10
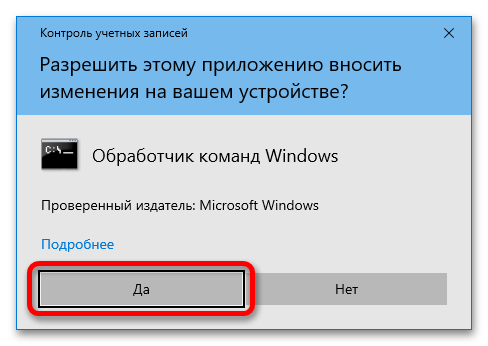
- В появившемся диалоговом окне подтвердите запуск, щелкнув по кнопке «Да».
-
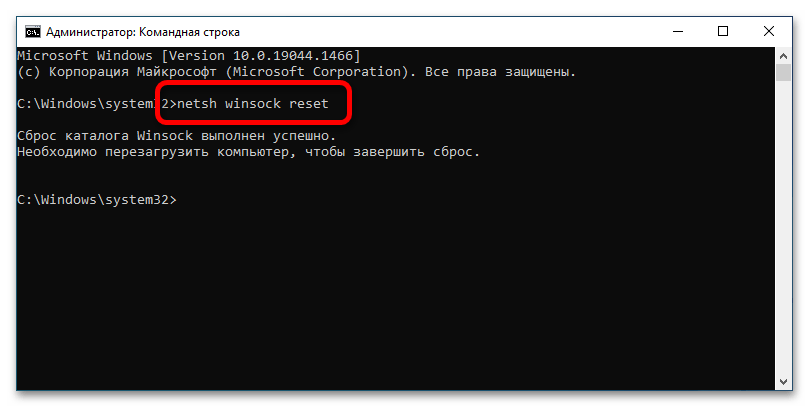
Перезапустите службу, отвечающую за взаимодействие всех сетевых экранов, введя нижеприведенную команду и нажав клавишу Enter:
netsh winsock reset -
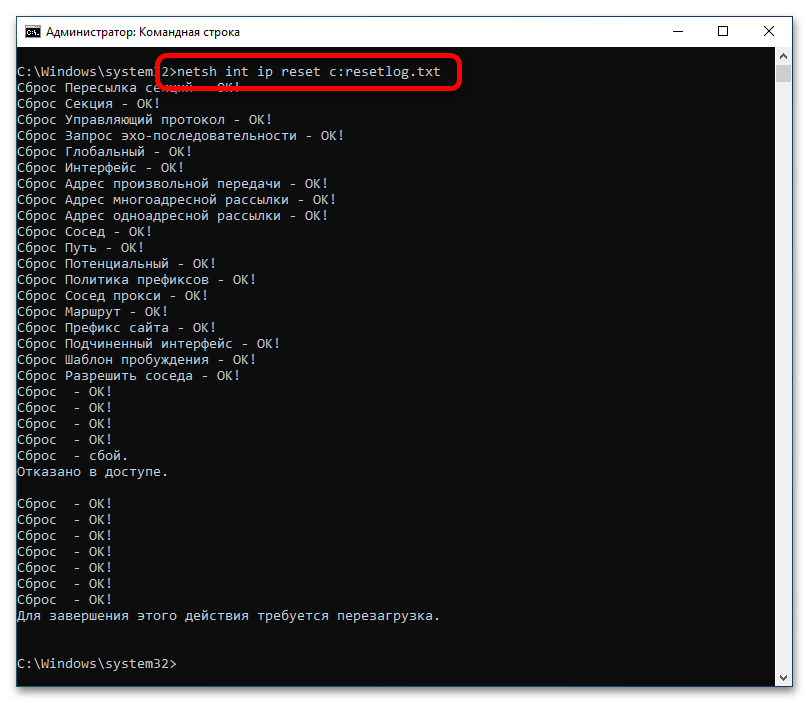
Удалите, а затем восстановите работу протоколов TCP/IP, которые отвечают за корректную обработку пакетов данных, переданных по интернету. Делается это посредством следующей команды:
netsh int ip reset c:resetlog.txt -
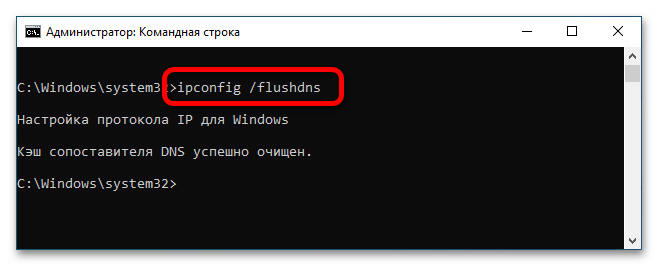
Очистите сетевой кэш с помощью представленной ниже команды с последующим нажатием по клавише Enter:
ipconfig /flushdns
Все параметры сети будут сброшены до изначальных, останется только перезапустить компьютер, чтобы изменения вступили в силу.
Читайте также: Что делать, если пропал Wi-Fi на ноутбуке с Windows 10
Способ 3: Переустановка драйвера
Если описанные ранее способы сброса сети не помогли, проблема может наблюдаться непосредственно в драйвере сетевой карты. В таком случае потребуется переустановить это программное обеспечение. Выполняется это посредством полного удаления с последующей повторной инсталляцией.
Важно! Перед выполнением инструкции обязательно скачайте на компьютер все драйверы сетевых устройств, так как после их удаления соединение с интернетом пропадет и сделать этого не получится. В отдельной статье на нашем сайте есть подробное руководство, в котором поэтапно описаны все необходимые для этого действия.
Подробнее: Поиск драйверов по ID оборудования
-
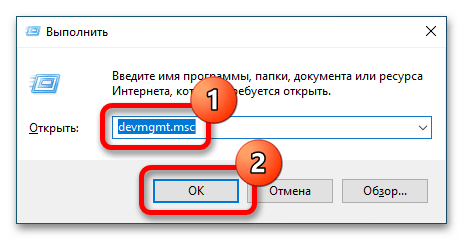
Запустите «Диспетчер устройств» любым доступным способом. В качестве примера будет использован интерпретатор «Командной сроки». Вызовите окно «Выполнить» с помощью сочетания горячих клавиш Win + R, после чего введите в единственное доступное поле значение
devmgmt.mscи нажмите «ОК».
Это не единственный метод открытия «Диспетчера устройств» в Windows 10. Если воспользоваться им не получилось, ознакомьтесь с тематической статьей на нашем сайте.
Подробнее: Все способы запуска «Диспетчера устройств» в Windows 10
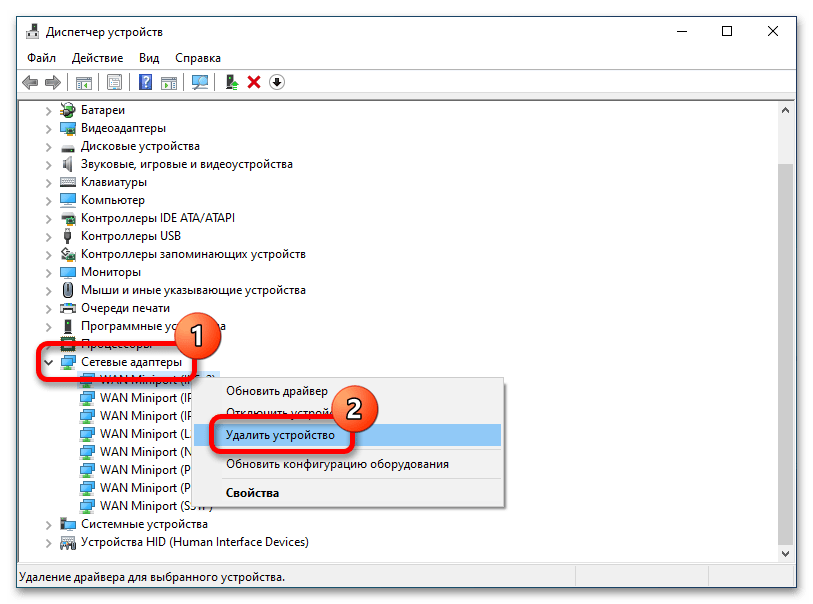
- В открывшемся окне разверните ветку «Сетевые адаптеры» и кликните правой кнопкой мыши по первому названию в списке. В контекстном меню выберите опцию «Удалить устройство».
- В появившемся диалоговом окне подтвердите это действие, щелкнув по кнопке «Удалить». После завершения процедуры проделайте такие же действия со всеми оставшимися устройствами из списка.
- Перезапустите компьютер, а после повторного старта системы откройте папку, в которую предварительно загрузили другие драйверы всех сетевых адаптеров. Поочередно выполните их установку, следуя инструкциям на экране.

После выполнения всех описанных действий рекомендуется повторно перезапустить ПК, чтобы операционная система зарегистрировала новые компоненты.
Наша группа в TelegramПолезные советы и помощь
Resetting network settings on Windows 10 can be a handy solution when you’re facing connectivity issues, like a persistently laggy internet connection or weird Wi-Fi problems. This process will revert your network settings to their default state, erasing any custom configurations like Wi-Fi passwords, VPN settings, and so on. Essentially, it’s like hitting a refresh button for your network, and oftentimes, that’s exactly what you need to get things back on track.
Following these steps will reset your network settings to their original state, which can help resolve various connectivity problems.
Step 1: Open the Settings App
Click the Start menu and select the gear icon to open the Settings app.
The Settings app is your go-to place for modifying most aspects of your system. Think of it like the central control panel for your computer.
Step 2: Go to Network & Internet
In the Settings app, find and click on “Network & Internet.”
This section is where all your network-related settings are housed. It’s like the nerve center for your internet connection and network configurations.
Step 3: Access the Status Tab
In the left-hand menu, make sure you are in the “Status” tab.
The Status tab gives you a quick overview of your current network status and any issues that might be lingering. It’s like the dashboard for your network health.
Step 4: Click on Network Reset
Scroll down to find the “Network reset” link and click on it.
This option is your magic button for resetting all network adapters. Clicking this is like sweeping away all the cobwebs in your network-related settings.
Step 5: Confirm the Reset
Click “Reset now” and confirm your choice when prompted.
Once you confirm, Windows will do its thing. The system will automatically restart, which is like giving your computer a quick nap so it can wake up refreshed.
After completing these steps, your computer will restart, and your network settings will be reset to their default state. This means you’ll have to reconnect to your Wi-Fi networks and re-enter any custom network configurations. If you use VPNs or proxies, you’ll need to set those up again as well.
Tips for Resetting Network Settings on Windows 10
- Backup Important Settings: Write down Wi-Fi passwords and VPN settings before resetting.
- Check for Updates: Ensure your Windows is up-to-date to avoid any post-reset issues.
- Restart Devices: If problems persist, restart your modem or router.
- Network Troubleshooter: Use Windows’ built-in troubleshooter for additional help.
- Reconfigure Manually: After the reset, manually configure any custom settings you had before.
Frequently Asked Questions
Why should I reset my network settings?
Resetting network settings can resolve connectivity issues and restore your internet connection to a functional state.
Will I lose any data by resetting network settings?
No, you won’t lose personal data, but you will lose saved Wi-Fi passwords and VPN configurations.
How often should I reset my network settings?
It’s not something you should do regularly; only reset when you’re experiencing persistent network issues.
Can resetting network settings fix slow internet?
Yes, it can resolve various issues that might be causing slow internet, like corrupted settings or conflicts.
Is resetting network settings safe?
Yes, it’s a safe process as long as you know your Wi-Fi passwords and other important configurations to re-enter later.
Summary
- Open the Settings app.
- Go to Network & Internet.
- Access the Status tab.
- Click on Network Reset.
- Confirm the Reset.
Conclusion
Resetting network settings on Windows 10 is a straightforward and effective way to tackle various connectivity issues. Think of it as a fresh start for your network connections. After the reset, remember to jot down crucial information like Wi-Fi passwords and VPN settings, as these will need to be re-entered. Armed with the knowledge of how to perform this reset and why it’s beneficial, you’re now better equipped to handle any pesky network issues that come your way.
If you’re still facing problems after trying this reset, you might want to explore more specific troubleshooting steps, like checking your hardware or even consulting a professional. But for many, this simple reset can be a real lifesaver, akin to turning a stubborn light bulb that’s flickering on and off until it shines bright once again.
Remember, technology should work for you, not against you. So, don’t hesitate to hit that reset button when things get tangled up in the wires of connectivity chaos. Resetting your network settings might just be the magic wand you need to bring your internet back to life.
Matt Jacobs has been working as an IT consultant for small businesses since receiving his Master’s degree in 2003. While he still does some consulting work, his primary focus now is on creating technology support content for SupportYourTech.com.
His work can be found on many websites and focuses on topics such as Microsoft Office, Apple devices, Android devices, Photoshop, and more.