
It is already evident that Registry Editor is the optimum tool for manipulating system configuration. By tweaking registry, you can fix the issues on a Windows system or can modify a functionality according to your requirement. Today, in this article, I’ll show you the another instance of tweaking registry by loading and unloading hive.
Introduction : Load Or Unload Hive In Registry Editor
Before knowing the way to loading and unloading hive, let us know what actually these terms are. When you open the registry database using REGEDIT command, the computer represents you the configuration information of system for active users. Unfortunately, the information for passive users isn’t available. So by loading hive, we can load the information of passive users too in the database so that we can fix the issues (if any) with these profiles. This is most helpful when you have many profiles on same system and trouble faced on particular profiles.
By unloading hive, we can unload the information for passive users which we have loaded recently, obviously an inverse operation of loading hive.
How To Load Or Unload Hive In Registry Editor
Registry Disclaimer: The further steps will involve registry manipulation. Making mistakes while manipulating registry could affect your system adversely. So be careful while editing registry entries and create a System Restore point first.
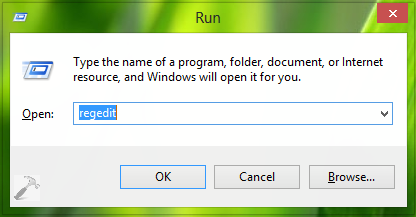
1. Press + R and put regedit in Run dialog box to open Registry Editor (if you’re not familiar with Registry Editor, then click here). Click OK.
2. In the right pane of the Registry Editor window so appears, either select HKEY_USERS or HKEY_LOCAL_MACHINE, because these two are the only branches which you can use to load or unload hive. After selecting the branch, click File and pick Load Hive.
3. Since we’re loading the hive to make manipulation to passive user account, in the Load Hive window, go to C:\Users\USER NAME (where USER NAME is essentially the passive account user name). Input File name as ntuser.dat and hit Enter key.
4. Now in the following box, type the passive user account name and click OK.
This will load the hive and new subkey under selected branch will be created with user name. Thus the passive user configuration information has been loaded to registry database and you can make manipulations to it. So far, we’re done with loading hive.
5. To unload the hive, highlight the subkey created in above step and click File, pick Unload Hive option.
6. Finally, make affirmation to following prompt to unload hive:
Hope you enjoyed the tip and find it useful! Go here if you cannot load hive due to “The process cannot access the file because it is being used by another process” error.
RELATED ARTICLES
Successfully Tested On: Windows XP Professional SP3, Windows 7 Enterprise SP1, Windows 8 Enterprise, Windows 8.1 Enterprise, Windows 10 Enterprise versions 1507 – 2004, Windows 10 Long-Term Servicing Branch (LTSB) versions 1507 & 1607, Windows 10 Long-Term Servicing Channel (LTSC) versions 2015 – 2019
I have sometimes found myself in situations where I need to edit the Windows registry of an OS that I am not booted from (maybe the operating system won’t boot/is corrupted/needs to be changed without being booted to). It is possible to load up OS registry hives from any environment that can run Regedit, such as Win RE or PE, and it is easy to do.
Get into Regedit
First we’ll need to get into the registry editor. Two ways to do this are using Windows RE (Recovery Environment) and Windows PE (Preinstallation Environment). I’ll give examples for both.
Using Win RE
Computers will vary on how to boot into RE. For Windows 7 and below, press F8 while booting then choose Repair My Computer from the Advanced Boot Options menu.
For Windows 8 and above, things are trickier. If Windows is loading then the computer can be restarted while holding the Shift key. Otherwise there may be a hardware recovery boot key configured by the OEM (maybe F5 or a different function key).
Once RE boots, enter an admin password if prompted to (if you don’t have an admin password, check out the Using PE steps below). Then navigate through the menu to launch a command prompt.
For Windows 8+, that’s Troubleshoot > Command Prompt:

For Windows 7, pick Command Prompt:

Once the command prompt opens type regedit and press enter to launch the registry editor.
Using Win PE
Windows PE can be accessed by booting to a Windows installer environment, such as a Windows installation disk or USB drive. One advantage of PE is there won’t be a prompt for admin credentials. The Windows Media Creation Tool is an easy and Microsoft-supported way to create a bootable Windows installer.
Once booted from install media, instead of beginning the install wizard press Shift + F10 to launch a command prompt. Then type regedit and press enter to launch the registry editor.
Load the Registry Hive
From the Registry Editor, highlight the HKEY_LOCAL_MACHINE key. Then from the top menu select File > Load Hive.
Open the support file that is associated with the hive that is needed. See the following table for which files are associated with which hives:
| Support File | Registry Hive |
| %windir%\System32\config\SYSTEM | HKEY_LOCAL_MACHINE \SYSTEM |
| %windir%\System32\config\SOFTWARE | HKEY_LOCAL_MACHINE \SOFWWARE |
| %windir%\System32\config\DEFAULT | HKEY_USERS \.Default |
| %UserProfile%\NTUSER.DAT | HKEY_CURRENT_USER |
When prompted to enter a name enter temp (or anything will work) and click OK. Expand the HKEY_LOCAL_MACHINE key and the new temp key loaded there. Temp can be expanded and any needed registry changes can be made at this point:

IMPORTANT: Don’t forget to follow the below steps to unload the hive or else some weird stuff can happen!
Unload the Registry Hive
Once finished editing, unload the hive by first highlighting the temp key. Then from the top menu select File > Unload Hive. If this step is forgotten there is potential for problems to occur, especially when loading the affected operating system, so make habit of unloading.
Have you ever tried to load a hive in Regedit, only to find that the option is greyed out? If so, you’re not alone. This is a common problem that can be caused by a variety of factors. In this article, we’ll take a look at some of the most common causes of this issue and how to fix them. We’ll also provide some tips on how to avoid this problem in the future.
What is a hive?
Before we can talk about how to fix the issue of a greyed-out load hive option in Regedit, it’s important to understand what a hive is. A hive is a file that contains the registry settings for a specific part of your system. For example, there are hives for the operating system, the user profile, and the software installed on your computer.
Why is the load hive option greyed out?
There are a few reasons why the load hive option might be greyed out in Regedit. Here are some of the most common:
- You don’t have the correct permissions. In order to load a hive, you need to have administrator privileges. If you don’t have these privileges, the load hive option will be greyed out.
- The hive file is corrupted. If the hive file is corrupted, it won’t be able to be loaded. This can happen if the file is damaged or if it’s been deleted.
- The hive file is in the wrong location. The hive file needs to be located in the correct location in order to be loaded. If the file is in the wrong location, the load hive option will be greyed out.
How to fix the issue
If the load hive option is greyed out in Regedit, there are a few things you can try to fix the problem. Here are some of the most common solutions:
- Check your permissions. Make sure that you have administrator privileges. If you don’t have these privileges, you won’t be able to load a hive.
- Repair the hive file. If the hive file is corrupted, you can try to repair it using a registry repair tool.
- Move the hive file to the correct location. Make sure that the hive file is located in the correct location. If the file is in the wrong location, the load hive option will be greyed out.
Column 1 Column 2 Column 3 Title Description Link How to Fix Regedit Load Hive Greyed Out This article provides 5 solutions to fix the Regedit Load Hive greyed out issue. https://www.easeus.com/file-recovery/regedit-load-hive-greyed-out.html Why is Regedit Load Hive Greyed Out This article explains why Regedit Load Hive is greyed out and how to fix it. https://www.thewindowsclub.com/regedit-load-hive-greyed-out How to Load Hive in Regedit This article provides step-by-step instructions on how to load a hive in Regedit. https://www.howtogeek.com/howto/windows-vista/load-hive-in-regedit-to-edit-system-registry-files/ Regedit Load Hive Greyed Out is a common problem that can occur when you try to open the Registry Editor on a Windows computer. When this issue occurs, the “Load Hive” button in the Registry Editor will be greyed out, and you will not be able to load any hive files into the Registry Editor.
There are a number of different causes of Regedit Load Hive Greyed Out, including:
- Corrupted registry files: If the registry files on your computer are corrupted, it can prevent you from loading any hive files into the Registry Editor.
- Permissions issues: If you do not have the correct permissions to access the Registry Editor, you may not be able to load any hive files.
- Virus or malware infection: A virus or malware infection can also cause Regedit Load Hive Greyed Out.
If you are experiencing Regedit Load Hive Greyed Out, there are a few things you can try to fix the issue.
- Try restarting your computer: Sometimes, a simple restart can fix this issue.
- Run a registry cleaner: A registry cleaner can help to clean up any corrupt registry files that may be causing the problem.
- Reassign permissions to the Registry Editor: You can try reassigning permissions to the Registry Editor to see if that fixes the issue.
- Run a virus or malware scan: If you suspect that a virus or malware infection is causing the problem, you can run a virus or malware scan to try to remove the infection.
If you have tried all of these steps and you are still experiencing Regedit Load Hive Greyed Out, you may need to contact a professional for help.
Causes of Regedit Load Hive Greyed Out
There are a number of different causes of Regedit Load Hive Greyed Out, including:
- Corrupted registry files: If the registry files on your computer are corrupted, it can prevent you from loading any hive files into the Registry Editor. This can happen if you have a virus or malware infection, or if you accidentally delete or modify a registry file.
- Permissions issues: If you do not have the correct permissions to access the Registry Editor, you may not be able to load any hive files. This can happen if you are not an administrator on your computer, or if you have changed the permissions on the Registry Editor.
- Virus or malware infection: A virus or malware infection can also cause Regedit Load Hive Greyed Out. This can happen if the virus or malware modifies the Registry Editor or prevents you from accessing it.
If you are experiencing Regedit Load Hive Greyed Out, there are a few things you can try to fix the issue.
- Try restarting your computer: Sometimes, a simple restart can fix this issue.
- Run a registry cleaner: A registry cleaner can help to clean up any corrupt registry files that may be causing the problem.
- Reassign permissions to the Registry Editor: You can try reassigning permissions to the Registry Editor to see if that fixes the issue.
- Run a virus or malware scan: If you suspect that a virus or malware infection is causing the problem, you can run a virus or malware scan to try to remove the infection.
If you have tried all of these steps and you are still experiencing Regedit Load Hive Greyed Out, you may need to contact a professional for help.
How to Fix Regedit Load Hive Greyed Out
The Registry Editor is a powerful tool that allows you to manage the Windows registry. However, if the “Load Hive” option is greyed out, you won’t be able to load a hive file into the registry. This can prevent you from making changes to the registry, which can lead to problems with your computer.
There are a few different ways to fix the Regedit Load Hive greyed out issue. Here are two methods that you can try:
**Method 1: Run Regedit as an administrator**
1. Open the Start menu and search for “regedit”.
2. Right-click on the “Regedit” result and select “Run as administrator”.
3. In the Registry Editor, navigate to the following key:* **HKEY_LOCAL_MACHINE\SYSTEM\CurrentControlSet\Services\RegSvc**
4. Double-click on the “ImagePath” value and change the value data to the following:
* **C:\Windows\System32\regsvc.exe**
5. Click “OK” and close the Registry Editor.
**Method 2: Use the System File Checker tool**
The System File Checker (SFC) tool can help you fix corrupted system files that may be causing the Regedit Load Hive greyed out issue. To use the SFC tool, follow these steps:
1. Open the Start menu and search for “cmd”.
2. Right-click on the “cmd” result and select “Run as administrator”.
3. In the Command Prompt window, type the following command and press Enter:* **sfc /scannow**
4. The SFC tool will scan your computer for corrupted system files and attempt to repair them.
5. Once the scan is complete, restart your computer and try to open Regedit again.
If the Regedit Load Hive greyed out issue is still occurring, you may need to create a new Windows registry hive file. To do this, follow these steps:
1. Open the Start menu and search for “regedit”.
2. Right-click on the “Regedit” result and select “Run as administrator”.
3. In the Registry Editor, navigate to the following key:* **HKEY_LOCAL_MACHINE\SOFTWARE\Microsoft\Windows NT\CurrentVersion\SystemRoot**
4. Right-click on the “SystemRoot” key and select “New” > “Key”.
5. Name the new key “System32”.
6. Right-click on the “System32” key and select “New” > “Key”.
7. Name the new key “Config”.
8. Right-click on the “Config” key and select “New” > “Key”.
9. Name the new key “SOFTWARE”.
10. Right-click on the “SOFTWARE” key and select “New” > “Key”.
11. Name the new key “Microsoft”.
12. Right-click on the “Microsoft” key and select “New” > “Key”.
13. Name the new key “Windows NT”.
14. Right-click on the “Windows NT” key and select “New” > “Key”.
15. Name the new key “CurrentVersion”.
16. Right-click on the “CurrentVersion” key and select “New” > “Key”.
17. Name the new key “Software”.
18. Right-click on the “Software” key and select “New” > “Key”.
19. Name the new key “Microsoft”.
20. Right-click on the “Microsoft” key and select “New” > “Key”.
21. Name the new key “Windows”.
22. Right-click on the “Windows” key and select “New” > “Key”.
23. Name the new key “CurrentVersion”.
24. Right-click on the “CurrentVersion” key and select “New” > “Key”.
25. Name the new key “Run”.
26. Double-click on the “Run” value and change the value data to the following:- regedit.exe
27. Click “OK” and close the Registry Editor.
28. Restart your computer and try to open Regedit again.
If the Regedit Load Hive greyed out issue is still occurring, you may need to contact Microsoft support
Q: What does it mean when the “Load Hive” button is greyed out in Regedit?
A: The “Load Hive” button is greyed out when you do not have the correct permissions to access the hive file. To enable the button, you must either be an administrator or have been granted specific permissions to access the hive file.
Q: How do I enable the “Load Hive” button if I am an administrator?
A: To enable the “Load Hive” button if you are an administrator, follow these steps:
1. Open Regedit.
2. Navigate to the following key:HKEY_LOCAL_MACHINE\SOFTWARE\Microsoft\Windows NT\CurrentVersion\Image File Execution Options
3. Right-click on the regedit.exe key and select Permissions.
4. In the Permissions dialog box, click the Add button.
5. In the Enter the object names to select dialog box, type Everyone and click OK.
6. In the Permissions dialog box, click the Allow check box next to the Read permission.
7. Click OK to close the Permissions dialog box.
8. Close Regedit.Q: How do I enable the “Load Hive” button if I have been granted specific permissions to access the hive file?
A: To enable the “Load Hive” button if you have been granted specific permissions to access the hive file, follow these steps:
1. Open Regedit.
2. Navigate to the following key:HKEY_LOCAL_MACHINE\SOFTWARE\Microsoft\Windows NT\CurrentVersion\Image File Execution Options
3. Right-click on the regedit.exe key and select Permissions.
4. In the Permissions dialog box, click the Advanced button.
5. In the Advanced Security Settings dialog box, click the Owner tab.
6. In the Owner section, click the Change button.
7. In the Select User or Group dialog box, type YOUR_USERNAME and click OK.
8. In the Advanced Security Settings dialog box, click the Permissions tab.
9. In the Permissions section, click the Add button.
10. In the Enter the object names to select dialog box, type Everyone and click OK.
11. In the Permissions dialog box, click the Allow check box next to the Read permission.
12. Click OK to close the Advanced Security Settings dialog box.
13. Click OK to close the Permissions dialog box.
14. Close Regedit.Q: What are some common reasons why the “Load Hive” button might be greyed out?
A: There are a few common reasons why the “Load Hive” button might be greyed out:
- You do not have the correct permissions to access the hive file.
- The hive file is not located in the correct location.
- The hive file is corrupted.
Q: How can I troubleshoot the issue if the “Load Hive” button is still greyed out after following the above steps?
A: If the “Load Hive” button is still greyed out after following the above steps, you can try the following troubleshooting steps:
1. Verify that you are using the correct permissions to access the hive file.
2. Check the location of the hive file to make sure it is in the correct location.
3. Try to repair the hive file using a tool like RegScanner.
4. If all else fails, you can try creating a new hive file and copying the contents of the old hive file into the new hive file.In this blog post, we have discussed the issue of the regedit load hive greyed out error. We have provided a detailed explanation of the cause of this error and the steps that you can take to resolve it. We hope that this information has been helpful and that you are now able to successfully load hives in regedit.
Here are some key takeaways from this blog post:
- The regedit load hive greyed out error is caused by a missing or corrupt hive file.
- You can resolve this error by reinstalling the hive file or by repairing the registry.
- If you are unable to resolve the error yourself, you can contact Microsoft Support for assistance.
Author Profile
-
Hatch, established in 2011 by Marcus Greenwood, has evolved significantly over the years. Marcus, a seasoned developer, brought a rich background in developing both B2B and consumer software for a diverse range of organizations, including hedge funds and web agencies.
Originally, Hatch was designed to seamlessly merge content management with social networking. We observed that social functionalities were often an afterthought in CMS-driven websites and set out to change that. Hatch was built to be inherently social, ensuring a fully integrated experience for users.
Now, Hatch embarks on a new chapter. While our past was rooted in bridging technical gaps and fostering open-source collaboration, our present and future are focused on unraveling mysteries and answering a myriad of questions. We have expanded our horizons to cover an extensive array of topics and inquiries, delving into the unknown and the unexplored.
Latest entries
Introduction
When working with the Windows Registry Editor (Regedit), you may encounter a situation where the «Load Hive» option is grayed out, preventing you from loading the HKEY_LOCAL_MACHINE hive from another installation of Windows. This can be frustrating, especially when you need to access specific registry keys for troubleshooting or maintenance purposes. In this article, we will explore the possible causes of the «Load Hive» option being grayed out and provide step-by-step solutions to resolve the issue.
Understanding the Load Hive Option
The «Load Hive» option in Regedit allows you to load a registry hive from a different location, such as a backup or a different installation of Windows. This feature is useful for various purposes, including:
- Troubleshooting: Loading a registry hive from a different installation can help you identify and resolve issues that are specific to a particular system configuration.
- Maintenance: Loading a registry hive from a different installation can allow you to make changes to the registry without affecting the current system configuration.
- Backup and recovery: Loading a registry hive from a backup can help you recover from a system failure or corruption.
Causes of the Load Hive Option Being Grayed Out
There are several reasons why the «Load Hive» option may be grayed out in Regedit. Some of the possible causes include:
- Registry hive is not in the correct format: The registry hive must be in the correct format, which is a binary file with a
.hiveextension. - Registry hive is not from the same architecture: The registry hive must be from the same architecture as the current system, such as 32-bit or 64-bit.
- Registry hive is not from the same Windows version: The registry hive must be from the same Windows version as the current system.
- Regedit is not running with administrator privileges: Regedit must be running with administrator privileges to load a registry hive.
- Registry hive is corrupted or damaged: The registry hive may be corrupted or damaged, preventing it from being loaded.
Solutions to Resolve the Load Hive Option Being Grayed Out
Solution 1: Run Regedit with Administrator Privileges
To resolve the issue, you can try running Regedit with administrator privileges. To do this:
- Right-click on the Regedit icon and select Run as administrator.
- Click on Yes to confirm that you want to run Regedit with administrator privileges.
Solution 2: Check the Registry Hive Format
To ensure that the registry hive is in the correct format, you can check the file extension. The registry hive must have a .hive extension.
- Open the registry hive file in a text editor, such as Notepad.
- Check the file extension to ensure that it is
.hive.
Solution 3: Check the Registry Hive Architecture
To ensure that the registry hive is from the same architecture as the current system, you can check the file properties.
- Right-click on the registry hive file and select Properties.
- Check the file properties to ensure that it is from the same architecture as the system.
Solution 4: Check the Registry Hive Windows Version
To ensure that the registry hive is from the same Windows version as the current system, you can check the file properties.
- Right-click on the registry hive file and select Properties.
- Check the file properties to ensure that it is from the same Windows version as the current system.
Solution 5: Check the Registry Hive for Corruption or Damage
To ensure that the registry hive is not corrupted or damaged, you can try loading it into Regedit and then saving it to a new location.
- Open Regedit and navigate to the File menu.
- Click on Load Hive and select the registry hive file.
- Save the loaded registry hive to a new location.
Solution 6: Use the Regedit /E Option
If none of the above solutions work, you can try using the Regedit /E option to load the registry hive.
- Open a command prompt as an administrator.
- Type the following command and press Enter:
regedit /e <filename>.reg <filename>.hive - Load the resulting
.regfile into Regedit.
Conclusion
Frequently Asked Questions
Q: What is the Load Hive option in Regedit?
A: The Load Hive option in Regedit allows you to load a registry hive from a different location, such as a backup or a different installation of Windows.
Q: Why is the Load Hive option grayed out in Regedit?
A: The Load Hive option may be grayed out due to various reasons, including:
- Registry hive is not in the correct format
- Registry hive is not from the same architecture
- Registry hive is not from the same Windows version
- Regedit is not running with administrator privileges
- Registry hive is corrupted or damaged
Q: How do I resolve the Load Hive option being grayed out?
A: To resolve the issue, you can try the following solutions:
- Run Regedit with administrator privileges
- Check the registry hive format
- Check the registry hive architecture
- Check the registry hive Windows version
- Check the registry hive for corruption or damage
- Use the Regedit /E option
Q: What is the correct format for a registry hive?
A: The registry hive must be in the correct format, which is a binary file with a .hive extension.
Q: How do I check the registry hive format?
A: To check the registry hive format, you can open the file in a text editor, such as Notepad, and check the file extension.
Q: What is the correct architecture for a registry hive?
A: The registry hive must be from the same architecture as the current system, such as 32-bit or 64-bit.
Q: How do I check the registry hive architecture?
A: To check the registry hive architecture, you can right-click on the file and select Properties, and then check the file properties.
Q: What is the correct Windows version for a registry hive?
A: The registry hive must be from the same Windows version as the current system.
Q: How do I check the registry hive Windows version?
A: To check the registry hive Windows version, you can right-click on the file and select Properties, and then check the file properties.
Q: How do I check the registry hive for corruption or damage?
A: To check the registry hive for corruption or damage, you can try loading it into Regedit and then saving it to a new location.
Q: What is the Regedit /E option?
A: The Regedit /E option allows you to export the registry hive to a .reg file, which can then be loaded into Regedit.
Q: How do I use the Regedit /E option?
A: To use the Regedit /E option, you can open a command prompt as an administrator, type the following command and press Enter: regedit /e <filename>.reg <filename>.hive, and then load the resulting .reg file into Regedit.
Additional Tips and Tricks
Tip 1: Always run Regedit with administrator privileges
Running Regedit with administrator privileges can help resolve issues with the Load Hive option being grayed out.
Tip 2: Check the registry hive format, architecture, and Windows version before attempting to load it
Checking the registry hive format, architecture, and Windows can help ensure that the hive is compatible with the current system.
Tip 3: Use the Regedit /E option as a last resort
Using the Regedit /E option can be a last resort when other solutions do not work.
Conclusion
The Load Hive option being grayed out in Regedit can be frustrating, especially when you need to access specific registry keys for troubleshooting or maintenance purposes. By understanding the possible causes of the issue and following the step-by-step solutions outlined in this article, you should be able to resolve the issue and load the HKEY_LOCAL_MACHINE hive from another installation of Windows. Remember to always run Regedit with administrator privileges and to check the registry hive format, architecture, and Windows version before attempting to load it.
04 Apr 2021 — tsp
Last update 04 Apr 2021

9 mins
Disclaimer: The steps described in this article do not reflect how Microsoft
has thought on should use their operating system. You should make a backup — really.
One usually does such stuff only in case the alternative would be total loss of the
given machine or in case on wants to play around a little. So as usual: Make backups.
And if you haven’t had some up until now learn your lesson. And in the best case
just switch to a more user friendly and robust system such as FreeBSD
or Linux.
Disclaimer 2: This article might be loaded with a decent amount of sarcasm since it
emerged late at night after many hours of getting a single machine back up running
by an author that already had a somewhat negative bias towards this operating system.
What’s this article about?
So we all know this situation — you have a Windows machine that makes troubles — again.
And as usual there is no easy way to recover from an error so the usual suggestion
is just reinstall it or move back to a system restore point. But what specific
problem is this blog post about?
In case you have a damaged registry hive file (in my case it has been the SOFTWARE
hive) the machine might crash during boot just raising an BAD_SYSTEM_CONFIG_INFO
error. This is in many cases caused by a damaged hive file in the system
configuration contained in \Windows\system32\config\. Currently there are
- COMPONENTS (
HKEY_LOCAL_MACHINE\COMPONENTS) - DEFAULT (
HKEY_USERS\.DEFAULT) - DRIVERS
- ELAM
- SAM (
HKEY_LOCAL_MACHINE\SAM) - SECURITY (
HKEY_LOCAL_MACHINE\SECURITY) - SOFTWARE (
HKEY_LOCAL_MACHINE\SOFTWARE) - SYSTEM (
HKEY_LOCAL_MACHINE\SYSTEM) - Different NTUSER.dat files (
HKEY_USERSsub hierarchies)
These correspond to the different registry subkeys as mentions above. Back in the
days up to early Windows 10 versions Windows made a periodic backup of the registry
into the RegBack folder to allow easy recovery — I have to say I wouldn’t really
call this recovery since copying an old version might lead to data loss but it was
an easy solution — from such errors. This has been disabled to reduce the disk footprint
of Windows even more
but can be re-enabled by setting a registry key at HKLM\System\CurrentControlSet\Control\Session Manager\Configuration Manager\EnablePeriodicBackup
to DWORD:1 anyways but as usual you discover such changes when it’s too
late. The currently encouraged method to restore the system is to use a system restore
point and roll back the configuration of the machine to a previous known state.
Unfortunately there was no such point present on the machine I had the problem
on. Also utilities such as dism do not work when they’re unable to gain
access to the registry.
So I had to use another approach:
- Boot from a recovery disk
- Copy the hive file to another machine
- Use a forensic tool to dump all readable content of the hive file (as it turned
out there was nothing unreadable) into a reg file - Copy that dump back to the damaged machine
- Create an empty hive file using a simple hack
- Import the reg file from within the Windows RE environment
Just took about a day to get to this solution — on any other decent operating
system one could’ve just copied a set of the base executable over the existing
system and continue running in a few minutes or rewrite the few damaged configuration
files — but not so for windows, but that’s what one’s used to on user friendly windows.
How to gain access
First one has to gain access to the current machine. Since there is no way to get
something like a boot loader prompt or a shell in case the system configuration store
isn’t readable one has to use the installation medium. Since this is not shipped
currently on has to download the Windows 10 ISO,
burn it on a double layer DVD and finally boot from this disk.
Then one can simply select computer repair options on the installation menu and
is ready to go. It’s a good idea to let auto repair try to repair the current
Windows installation though since sometimes there are some really basic problems
like a damaged BCD or some invalid references inside the boot configuration — or
a simple chkdsk that’s required to get the system up and running.
If nothing works it’s a good idea to first try the usual sfc and dism
commands that one knows might help (adjust the c: — which is my boot
partition — and d: — which is my system partition — paths according to
your system):
sfc /offbootdir=c:\ /offwindir=d:\ /scannow
One might also try to fix the MBR, the bootsector and the BCD. In this case I
assume that the EFI partition has been assigned the drive letter F by using
the usual diskpart commands (list vol, sel vol N, assign letter=F)
bootrec /fixmbr
bootrec /fixboot
bootrec /scanos
bcdboot d:\windows /f ALL /s F:
Now one might also use dism to restore system files. This utility usually
should be used with active internet connectivity since it tries to fetch components
from the windows update site. One might also add a different source but that’s
way more cumbersome than simply specifying the path of the installation disk (one
usually has to have a wim or esd file such as the one contained on
custom created recovery disks — if one has done this instead of using a generic
installation medium one can supply the location using the /Source:x:\sources\install.wim
parameter). I personally don’t know how to get a wim file at a later stage
for a system one hasn’t built a recovery disk for.
dism /Image:d:\ /Cleanup-Image /CheckHealth /ScratchDir:d:\scratch\
dism /Image:d:\ /Cleanup-Image /ScanHealth /ScratchDir:d:\scratch\
dism /Image:d:\ /Cleanup-Image /RestoreHealth /ScratchDir:d:\scratch\
So that’s all pretty well known and basic stuff — now what’s this blog post about?
Basically it might happen that dism fails with an error 1009 and complain
inside it’s log that a registry hive could not be loaded. It’s a good idea to verify
this by trying to import the hive file inside regedit — simply select
your HKEY_LOCAL_MACHINE node and then execute the Load structure
command selecting the specific file inside \Windows\system32\config\ and
specifying any name such as TEST. If it gets loaded correctly your problem
is a different one. In case the load fails it’s exactly what this short article
is about.
First try to restore a periodic backup
In any case — first check if the RegBack folder only contains 0 byte files.
If this is the case you’ve got bad luck. In case files are actually present, have
a size larger than zero and are somewhat recent it’s a good idea to simply try
to copy them into the config parent folder and try a reboot. Many times this
solves the problem.
Extracting hive content
In any other case the next step is to get the files of the machine. I personally
used the ftp tool to do this. First one has to disable the firewall:
Then one can launch ftp
open 192.0.2.1
binary
put SOFTWARE
quit
This allowed me to upload the current hive file onto a different (FreeBSD)
machine.
To extract hive content I used some forensic tools — in this case the RegRipper.
On FreeBSD it’s available in the security/regripper package and easily
installable using pkg install regripper. This suite is a collection of
tools that’s usually used during forensic investigations on Windows machines — it
allows to search for information inside copied hive files, allows one to dump
information and pretty efficiently look for specific data. Basically all I did
was to use regexport.pl ~/SOFTWARE -r to dump the information from
the hive into the ASCII registry format.
regexport.pl ~/SOFTWARE -r > software.reg
If everything works out this should provide a pretty complete dump of the registry
content of the given hive — in my case of HKEY_LOCAL_MACHINE\Software.
Re-importing
The next step is re-importing. Again I used the ftp utility to copy data
back onto the windows machine
open 192.0.2.1
get software.reg
quit
The last step was to import the data back into the local registry. Since direct
access is not possible and the hive file is still inaccessible I just copied
the SOFTWARE hive from the Windows RE environment
copy x:\windows\system32\config\SOFTWARE d:\windows\system32\config\
Then I started regedit and added this as substructure into HKEY_LOCAL_MACHINE
directly under the Software2 key. Now I deleted all child keys contained
inside this substructure. The last step before importing was to edit the
ASCII dump software.reg and replace all HKEY_LOCAL_MACHINE\Software
occurrences with HKEY_LOCAL_MACHINE\Software2. Then I simply ran the
import function from regedit to load the dump again.
After that a final reboot turned out to work somewhat — after the known hours
long black boot screen period that chkdsk triggered anyways (another one of
the really user friendly status message hiding features since it seems to be way
more intuitive to stare on a black screen for multiple hours than to actually see a
message about the current progress of any error checking and recovery operation …).
At least tools like dism now worked as before.
Note: Note that of course this removes any security information attached to
the registry keys.
As it turned out the system required another run of
dism /Image:d: /Cleanup-image /RestoreHealth /ScratchDir:d:\scratch\
Which now leads to the end of this blog article but not to the end of the recovery
of the machine (since DISM now complained with the well known 0x800f081f).
Just to note that again: Life is really way easier with a solid and well designed
Unixoid operating system such as FreeBSD,
Linux, Solaris
or even Android …
This article is tagged:
- Computer
- Windows
- Administration